display JEEP RENEGADE 2018 Owner handbook (in English)
[x] Cancel search | Manufacturer: JEEP, Model Year: 2018, Model line: RENEGADE, Model: JEEP RENEGADE 2018Pages: 356, PDF Size: 6.11 MB
Page 335 of 356
private conversations.
The mobile phone audio is transmitted
through the car audio system; the system
automatically mutes the system audio
when the Phone function is used.
NOTE To consult the list of mobile
phones and supported functions, visit the
www.driveuconnect.eu website
Pairing a mobile phone
Proceed as follows:
activate theBluetooth®function on
the mobile phone;
press the “Phone” button on the
display; if no phone is paired with the
system yet, the display shows a
dedicated screen;
select “Yes” to start the pairing
procedure, then search for the
Uconnect™device on the mobile phone
(if "No" is selected, the Phone main
screen is displayed);
search for available devices on the
Bluetooth®mobile phone. Press the
“Settings” button on the mobile phone
and then pressBluetooth®to make sure
that it is enabled. After activating the
mobile phone, start searching for
Bluetooth®connections;
during the pairing stage a screen is
displayed showing the progress of the
operation;
when the pairing procedure is
completed successfully, a screen is
displayed: answer “Yes” to the question
to pair the mobile phone as favourite (the
mobile phone will have priority over all
other mobile phones to be paired
subsequently). If no other devices are
paired, the system will consider the first
associated device as favourite.
NOTE To ensure proper operation after
updating the phone software, it is
recommended to remove the phone from
the list of devices linked to the radio,
delete the previous system pairing also
from the list ofBluetooth®devices on the
phone and make a new pairing.
Making a phone call
A call can be made by:
redialling a previously dialled phone
number;
dialling a phone number using the
keypad on the display;
dialling a phone number using a voice
command;
recalling a phone number from
Favourites;
recalling a phone number from the
phonebook on the mobile phone;
recalling a phone number from Recent
Calls;
displaying a phone number from a text
message.NOTE: the operations described above
are accessible only if supported by the
cell phone in use.
Text message reader
The system can read the messages
received by the mobile phone. To use this
function the mobile phone must support
the SMS exchange function through
Bluetooth®.
If this function is not supported by the
phone, the corresponding "Text" button is
deactivated (greyed out).
When you receive a text message, the
display will show a screen with the
options “Listen”, “Call” or “Ignore”.
Press the "Text Message" graphic button
to access the list of text messages
received by the mobile phone (the list
displays a maximum of 60 messages
received).
NOTE On some mobile phones, to make
the SMS voice reading function
available, the SMS notification option on
the phone must be enabled; this option
is usually available on the phone, in the
Bluetooth®connections menu for a
device registered asUconnect™. After
enabling this function on your phone, you
need to disconnect and reconnect the
phone using theUconnect™system to
effect enabling.
333
Page 336 of 356
IMPORTANT Some mobile phones may
not take the SMS delivery confirmation
settings into account when interfacing
withUconnect™. If a text message is
sent via theUconnect™system, the
driver could face an additional cost,
without any warning, due to the text
message delivery confirmation request
sent by the phone. For any problems
related to the above, contact your
telephone service provider.
SMS message options
Default SMS messages are stored in the
system memory and can be sent to
answer a received message or as a new
message.
Ye sNoOkayI can't talk right nowCall meI'll call you laterI'm on my wayThanksI'll be lateStuck in trafficStart without meWhere are you?Are you there yet?I need directionsI'm lostSee you later
I will be 5 (or 10, 15, 20, 25, 30, 45,
60) (*) minutes late
See you in 5 (or 10, 15, 20, 25, 30,
45, 60) (*) minutes
(*) Only use the numbers listed,
otherwise the system will not take the
message.
NOTE For details on how to send an SMS
using the voice commands, refer to the
dedicated paragraph.
Browsing text messages
(where provided)
Use the
/steering wheel controls
to view and manage the last 10 text
messages received on the instrument
panel display. To use this function the
mobile phone must support the SMS
exchange function throughBluetooth®.
Select “Phone” on the instrument panel
menu and then select “Text message
reader” using the
/steering wheel
controls. The "SMS Reader" submenu
allows you to view and read the last
10 text messages.
Browsing favourites
(where provided)
Use the
/steering wheel controls
to display your favourite numbers on the
instrument panel and manage them. To
use this function, the mobile phone must
support exchanging information viaBluetooth®and the favourite numbers
must have been saved previously as such
in theUconnect™system.
Use the
/steering wheel controls
to select “Phone” on the instrument
panel Setup Menu. If the phone is
connected, select the "Favourite
numbers" option: the "Favourite
numbers" submenu enables you to view
and select the favourite number.
If the "Phone" option is selected with the
phone not connected, the list of favourite
numbers cannot be viewed.
334
MULTIMEDIA
Page 337 of 356
Uconnect™ MODE
Press the “App” button on the display to
access the radio menu containing all the
system application functions.
The menu is purely indicative and
includes the following items:
“Driver heating” (where provided)“Passenger heating” (where provided)“Apple CarPlay” (where provided)“Android Auto” (where provided)“Protection management”“Heated steering wheel”“Radio”“Media”“Climate control”“Controls”“Nav”"Phone""Settings"“Audio settings”
Uconnect™ LIVE SERVICES(where fitted)
Press the “Apps” button to access the
Uconnect™LIVEapplications.
If there is aUconnect™icon, the system
is set up for connected services and lets
you use the applications directly from the
radio, for a more efficient and advanced
use of the car. The application functions
are present according to the vehicle
configuration and to the market.
To useUconnect™LIVEservices,download theUconnect™LIVEapp to your
compatible smartphone from the “App
Store” or “Google play”, making sure
that data connection is enabled, register
using theUconnect™LIVEapp on
www.driveuconnect.eu or on
www.jeep-official.it and start the
Uconnect™LIVEapp on the smartphone
and enter your credentials. For more
information relating to the services
available on the market, consult the
www.driveucoinnect.eu site.
First access to the vehicle
After starting theUconnect™LIVEapp
and entering your credentials, to access
theUconnect™LIVEapp services in the
car, you needBluetooth®pairing between
your smart phone and the system as
described in the "Registering your cell
phone" chapter. The list of supported
mobile phones is available on
www.driveuconnect.eu
Once pairing is complete, press the
Uconnect™icon on the screen to access
the connected services.
A dedicated message will appear on the
display when the activation process has
been completed. In the case of services
that require a personal profile, you can
connect your own account through the
Uconnect™LIVEApp or in the reserved
area on the www.driveuconnect.eu site.The presence of the application my:Car
does not replace the information
described in the car's Use and
Maintenance Handbook.
User not connected
If you do not perform theBluetooth®
pairing, when you press theUconnect™
button, the system menu shows the icons
disabled, with the exception of
eco:Drive™. Further information about
theeco:Drive™functions is available in
the dedicated chapter.
Setting up the Uconnect™ LIVE services
with the aid of the Uconnect™ system
Using theUconnect™system menu
dedicated toUconnect™LIVEservices,
you can access the “Settings” section by
pressing the
icon. In this section you
can check the system options and
change them according to your
preferences.
System updating
The driver will be informed with a
message on the display if there is an
update available for theUconnect™
system while theUconnect™LIVEservices
are being used.
335
Page 338 of 356
App Uconnect™ LIVE
TheUconnect™LIVEapp must be
installed on your smartphone to access
the connected services on the car. This
can be used to manage your profile and
customise yourUconnect™LIVE
experience.
The App can be downloaded from: the
"App Store" or "Google play". For safety
reasons, the App cannot be accessed
when the phone is paired with the radio.
Personal details (e-mail and password)
are required to access the
Uconnect™LIVEradio services, therefore
your personal account is protected and
can only be accessed by the real user.
Connected services that can be accessed
on the vehicle
Theeco:Drive™and my:Car applications
were developed to improve your driving
experience and are available in all
markets where theUconnect™LIVE
services can be accessed.Jeep Skills
The Jeep Skill application monitors the
inclination of the car, the position of the
wheels and if they are slipping, and
displays it on theUconnect™system in
real time. This offers greater direct
control and driving awareness so that you
can discover the supplied power and
torque in real time, while handling
difficult routes, or just when you want a
“challenge” in town
It provides detailed information on
acceleration and braking: you can also
display “G force”, battery charge status,
braking distance at the current speed as
well as other car and driving parameters.
For more information on your driving
behaviour, trip data can be accessed
outside the vehicle using the
Uconnect™LIVEapp.
IMPORTANT The Jeep Skills
application is intended for
entertainment purposes only. Drive
safely and responsibly.
Press the buttons on the display to
access the following sections:eco:Drive™
Theeco:Drive™application displays your
driving behaviour in real time, to help
you achieve a more efficient driving style
as far as consumption and emissions are
concerned.
In addition, you can also save the data
on a USB key or, thanks to the
Uconnect™LIVEapp, process the data on
your own computer using theeco:Drive™
desktop application available at
www.jeep-official.it or
www.driveuconnect.eu.
Evaluation of the driving style is linked to
four indexes that monitor the following
parameters: acceleration/deceleration/
gear shift/speed.
336
MULTIMEDIA
Page 339 of 356
eco:Drive™ display
Press theeco:Drive™button to interact
with the function. A screen will be
displayed showing the 4 indices
described above. These indices are grey
until the system has enough data to
evaluate the driving style.
Once sufficient data are available, the
indices will have 5 colours depending on
the evaluation: dark green (very good),
light green, yellow, orange and red (very
bad).
In case of prolonged stops, the screen
will show the average indexes obtained
up to that moment (the "Average Index")
to later start recolouring the indexes in
real time when the car starts moving
again.
Trip data storage and transfer
The trip data can be stored in the system
memory and transferred through a
properly configured USB memory stick or
by theUconnect™LIVE App. This allows
you to display the history of the collected
data, showing the complete analysis of
the trip data and of your driving style. For
further information visit the
www.driveuconnect.eu website
IMPORTANT Do not remove the USB
memory stick nor unpair the
smartphone and theUconnect™LIVEApp before the system has downloaded
the data, since these could be lost.
During the transfer of data to the
devices, messages may appear on the
radio display to guide the user
correctly through the operation; follow
these instructions. These messages are
viewed only on the starter device in
STOP position and when a delay is set
in turning off the system. The data are
automatically transferred to the
devices when the engine is switched
off. Transferred data will be deleted
from the system memory in this
manner. You can choose to store the
trip data or not, by pressing the
"Settings" button and setting the
storage activation and USB or Cloud
transfer modes.
When the USB key memory is full, the
radio screen will show messages to that
effect.
When theeco:Drive™data is not
transferred to the USB flash drive for a
long time, theUconnect™LIVEsystem
internal memory may fill up. In this case,
follow the instructions provided by the
messages on theUconnect™screen.my:Car
my:Car allows you to keep the condition
of your car always under control.
The my:Car application is capable of
detecting malfunctioning in real time and
lets the driver know about the expiry of
maintenance coupons,
To interact with the application, press the
graphic button "my:Car": on the screen
there is a section "care:Index" where all
the detailed information on the car's
status will be shown. Pressing the
graphic button "Active signalling" you can
see (if there are any) the details of the
fault detected on the car which has
caused a warning light to go on.
The car status can be viewed on both the
www.driveuconnect.eu and via the
Uconnect™LIVEapp.
337
Page 340 of 356
Apple CarPlay and Android Auto
(where provided)
The Apple CarPlay and Android Auto
applications allow you to use your
smartphone in the car safely and
intuitively. To enable them, connect a
compatible smartphone to the car's USB
and the phone's contents will be
automatically shown on theUconnect™
system display.
To check the compatibility of your
smartphone, see the indications on the
websites:
https://www.android.com/intl/it_it/auto/
and http://www.apple.com/it/ios/carplay/.
If the smartphone is connected correctly
to the car via the USB port, the Apple
CarPlay or Android Auto icon will be
displayed in place of the
button in
the main menu.Apple CarPlay App Setup
Apple CarPlay is compatible with the
iPhone 5 or more recent models, with the
iOS 7.1 operating system or later
versions. Before using Apple CarPlay,
enable Siri from "Settings" > "General" >
"Siri" on the smartphone.
To use Apple CarPlay, the smartphone
must be connected to the car by means
of a USB cable.
Android Auto APP Setup
Before use, download the Android Auto
application to your smartphone from
Google Play Store.
The application is compatible with
Android 5.0 (Lollipop) and later versions.
To use Android Auto, the smartphone
must be connected to the car by means
of a USB cable.
On the first connection, you will have to
perform the setup procedure that appears
on the smartphone. You can only perform
this procedure with the vehicle
stationary.
Once connected to the USB port, the
Android Auto application establishes a
parallelBluetooth®connection.
Interaction
After the setup procedure, on connecting
your smartphone to the car's USB port,
the application will run automatically ontheUconnect™system.
Apple CarPlay: to interact with Apple
CarPlay, press thebutton on the
steering wheel (long press) and use the
TUNE SCROLL / BROWSE ENTER
button/knob to select and confirm, or
press the “Home” button (long press) on
the Apple CarPlay display.
Android Auto: to interact with Android
Auto, press thebutton on the steering
wheel (long press) and use theTUNE
SCROLL / BROWSE ENTERbutton/knob to
select and confirm, or press the “Home”
button (long press) on the Android Auto
display.
Navigation
If the system “Nav” mode is already
active, or when a device is connected to
the car with a navigation session in
progress, theUconnect™display shows a
pop-up alert allowing you to choose
between system navigation or navigation
using the smartphone.
The selection can be changed at any
time by accessing the chosen navigation
system and setting a new destination.
“AutoShow smartphone display on
connection" setting
Using theUconnect™system settings,
you can decide to view the smartphone
screen on theUconnect™system display
as soon as the smartphone is connected
338
MULTIMEDIA
Page 341 of 356
to the car via the USB port.
When this function is set, each time a
connection is made via USB, the Apple
CarPlay or Android Auto apps will run
automatically on theUconnect™system
display.
The "AutoShow smartphone display on
connection" item can be found in the
"Display" submenu. The function is
enabled by default.
Exiting the Android Auto and Apple CarPlay
apps
To end the Apple CarPlay or Android Auto
session, physically disconnect the
smartphone from the car's USB port.
SETTINGS
Press thebutton to open the
"Settings" menu.
NOTE The menu items displayed vary
according to the versions.
Indicatively, the menu includes the
following items:
KeysenseLanguageDisplayUnits (where provided)VoiceTime & DateCamera (rear camera) (where provided)Safety/Driving assistance (where
provided)
Mirrors & screen wipers (where
provided)
Brakes (where provided)Lights (where provided)Doors & LocksAuto-On Comfort (where provided)Engine Off OptionsAudioTelephone/BluetoothRadio SetupReset
NAVIGATION MODE
IMPORTANT Navigation maps are
pre-loaded on the system, therefore no
external support is needed.
Map Update
NOTE To update the navigation maps,
contact a Jeep Dealership.
To activate the main navigation menu,
press the "Nav" graphic button on the
front panel, then press one of the
following graphic buttons on the screen:
“Where to?”: searches or navigates to
the destination;
“Map view”: displays the map;“Home”: use this to set a home
address and program a route there;
“Work”: use this to set a work address
and program a route there;
“Information”: displays all navigation
information;
“Emergency”: searches for Hospitals
or Police Stations near the destination. It
is also possible to view your current
position on the display and save, in
"Favourites", the location of the Hospitals
or Police Stations.
“Settings”: use this to access the
Navigation “Settings” menu.
Map view
Press the "View Map" button in the
Navigation Main Menu to display the
map relative to the current position.
When the display shows the map, the
following options are available:
“Menu”: press this button to return to
the main Navigation Menu;
“Zoom in +/Zoom out –”: press the
“Zoom in +” or “ Zoom out –” button to
change the size of the map (it is not
possible to zoom in on minor roads);
“Arrival Time/Estimated Time to
Destination/Distance” (only during
navigation): press this button at the top
right of the display to view one of the
following options: "Time of Arrival",
"Estimated Time to Destination",
"Distance".
“Turn List” (only during navigation):
press the list of turns along the route at
the top middle of the display. Select a
turn through the following options: “Map
view” or “Avoid Street”.
“Options”: press this button to
339
Page 342 of 356
display the map display options.
Information
Press the "Information" button in the
Navigation Main Menu to select from the
following information: “Traffic”,
“Weather”, “Where am I?”, “Onboard
Computer”, “Country Info”, “Speed
Cameras” (where provided), “Live
services off”.
Emergency
Press the "Emergency" button in the
main Navigation Menu to select one of
the following options for searching for
and navigating towards a destination:
“Hospital”: press this button to set a
trip to a hospital near the destination;
“Police”: press this button to set a
trip to a police station near the
destination;
“Fire Brigade”: press this button to
set a trip to a fire station near the
destination.
VOICE COMMANDS
For the functions controlled with voice
commands, see the description of the
Uconnect™5” LIVE system.
MOPAR® CONNECT
(where provided)
These services let you keep your vehicle
under control at all times and receive
assistance in the event of accident, theft
or breakdown.
To have these services, install the
Mopar®ConnectDevice on your vehicle
from the country (list available on the
www.driveuconnect.eu website) and
request activation by following the
instructions received at the email
address given when your vehicle was
handed over to you.
To use the connected services, you must
download theUconnect™LIVEApp or
access the www.driveuconnect.eu portal.
You can find all the details about the
services in theMopar®Connectsection of
the www.driveuconnect.eu portal.PRIVACY MODE
Privacy mode lets you disable the “Find
car”, “Notify Area” and “Notify Speed”
services, which allow registered
customers to locate their cars, for a fixed
time.
IMPORTANT Vehicle position tracing
remains active for the assistance
services, where provided, in the event
of accident or vehicle theft, but is not
visible to the customer.
PRIVACY MODE activation procedure
Proceed as follows:
take note of the total odometer
reading;
make sure that the instrument panel is
off;
Send the following text message to
+393424112613: “PRIVACY
ZFA3340000P123456 12532). You can
find the chassis number in the
registration document;
before starting the engine, wait to
receive the text message confirming that
Privacy mode has been activated and
indicating when it expires.
When you have received the
confirmation, you can start your trip in
the knowledge that the vehicle will not
340
MULTIMEDIA
Page 351 of 356
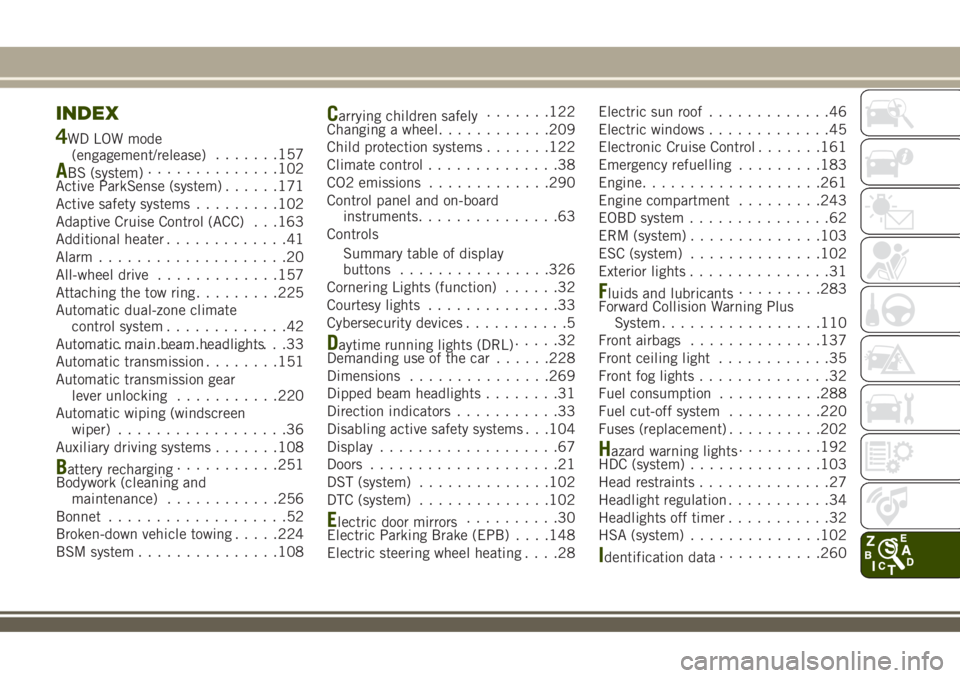
INDEX
4WD LOW mode
(engagement/release).......157
ABS (system)..............102
Active ParkSense (system)......171
Active safety systems.........102
Adaptive Cruise Control (ACC) . . .163
Additional heater.............41
Alarm....................20
All-wheel drive.............157
Attaching the tow ring.........225
Automatic dual-zone climate
control system.............42
Automatic main beam headlights......................33
Automatic transmission........151
Automatic transmission gear
lever unlocking...........220
Automatic wiping (windscreen
wiper)..................36
Auxiliary driving systems.......108
Battery recharging...........251
Bodywork (cleaning and
maintenance)............256
Bonnet...................52
Broken-down vehicle towing.....224
BSM system...............108
Carrying children safely.......122
Changing a wheel............209
Child protection systems.......122
Climate control..............38
CO2 emissions.............290
Control panel and on-board
instruments...............63
Controls
Summary table of display
buttons................326
Cornering Lights (function)......32
Courtesy lights..............33
Cybersecurity devices...........5
Daytime running lights (DRL).....32
Demanding use of the car......228
Dimensions...............269
Dipped beam headlights........31
Direction indicators...........33
Disabling active safety systems . . .104
Display...................67
Doors....................21
DST (system)..............102
DTC (system)..............102
Electric door mirrors..........30
Electric Parking Brake (EPB). . . .148
Electric steering wheel heating....28Electric sun roof.............46
Electric windows.............45
Electronic Cruise Control.......161
Emergency refuelling.........183
Engine...................261
Engine compartment.........243
EOBD system...............62
ERM (system)..............103
ESC (system)..............102
Exterior lights...............31
Fluids and lubricants.........283
Forward Collision Warning Plus
System.................110
Front airbags..............137
Front ceiling light............35
Front fog lights..............32
Fuel consumption...........288
Fuel cut-off system..........220
Fuses (replacement)..........202
Hazard warning lights.........192
HDC (system)..............103
Head restraints..............27
Headlight regulation...........34
Headlights off timer...........32
HSA (system)..............102
Identification data...........260
Page 352 of 356
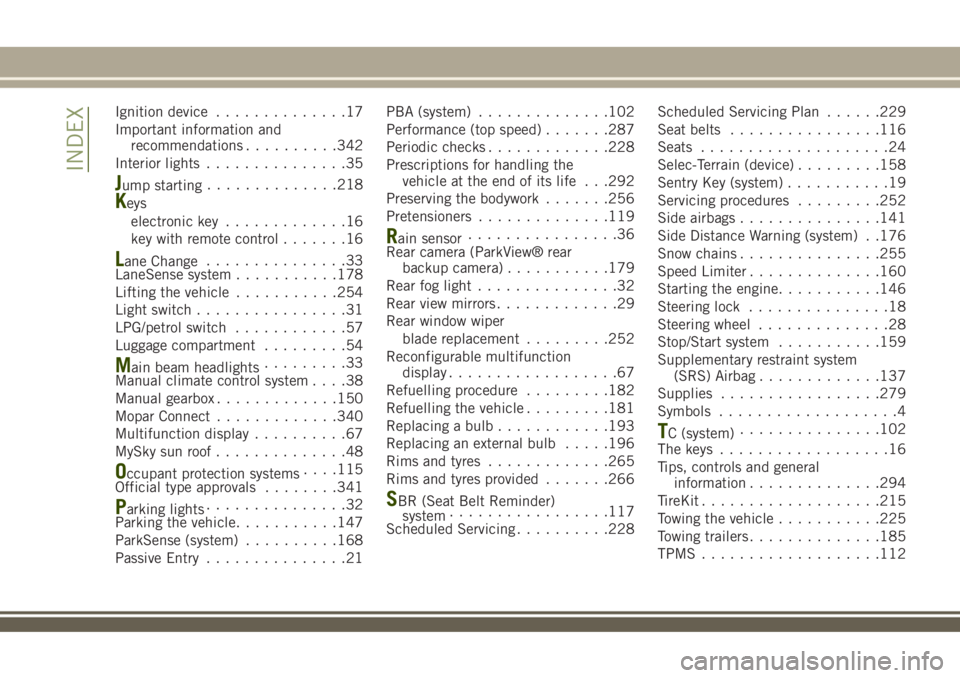
Ignition device..............17
Important information and
recommendations..........342
Interior lights...............35
Jump starting..............218
Keys
electronic key.............16
key with remote control.......16
Lane Change...............33
LaneSense system...........178
Lifting the vehicle...........254
Light switch................31
LPG/petrol switch............57
Luggage compartment.........54
Main beam headlights.........33
Manual climate control system....38
Manual gearbox.............150
Mopar Connect.............340
Multifunction display..........67
MySky sun roof..............48
Occupant protection systems. . . .115
Official type approvals........341
Parking lights...............32
Parking the vehicle...........147
ParkSense (system)..........168
Passive Entry...............21PBA (system)..............102
Performance (top speed).......287
Periodic checks.............228
Prescriptions for handling the
vehicle at the end of its life . . .292
Preserving the bodywork.......256
Pretensioners..............119
Rain sensor................36
Rear camera (ParkView® rear
backup camera)...........179
Rear fog light...............32
Rear view mirrors.............29
Rear window wiper
blade replacement.........252
Reconfigurable multifunction
display..................67
Refuelling procedure.........182
Refuelling the vehicle.........181
Replacing a bulb............193
Replacing an external bulb.....196
Rims and tyres.............265
Rims and tyres provided.......266
SBR (Seat Belt Reminder)
system.................117
Scheduled Servicing..........228Scheduled Servicing Plan......229
Seat belts................116
Seats....................24
Selec-Terrain (device).........158
Sentry Key (system)...........19
Servicing procedures.........252
Side airbags...............141
Side Distance Warning (system) . .176
Snow chains...............255
Speed Limiter..............160
Starting the engine...........146
Steering lock...............18
Steering wheel..............28
Stop/Start system...........159
Supplementary restraint system
(SRS) Airbag.............137
Supplies.................279
Symbols...................4
TC (system)...............102
The keys..................16
Tips, controls and general
information..............294
TireKit...................215
Towing the vehicle...........225
Towing trailers..............185
TPMS...................112
INDEX