stop start JEEP RENEGADE 2018 Owner handbook (in English)
[x] Cancel search | Manufacturer: JEEP, Model Year: 2018, Model line: RENEGADE, Model: JEEP RENEGADE 2018Pages: 356, PDF Size: 6.11 MB
Page 84 of 356
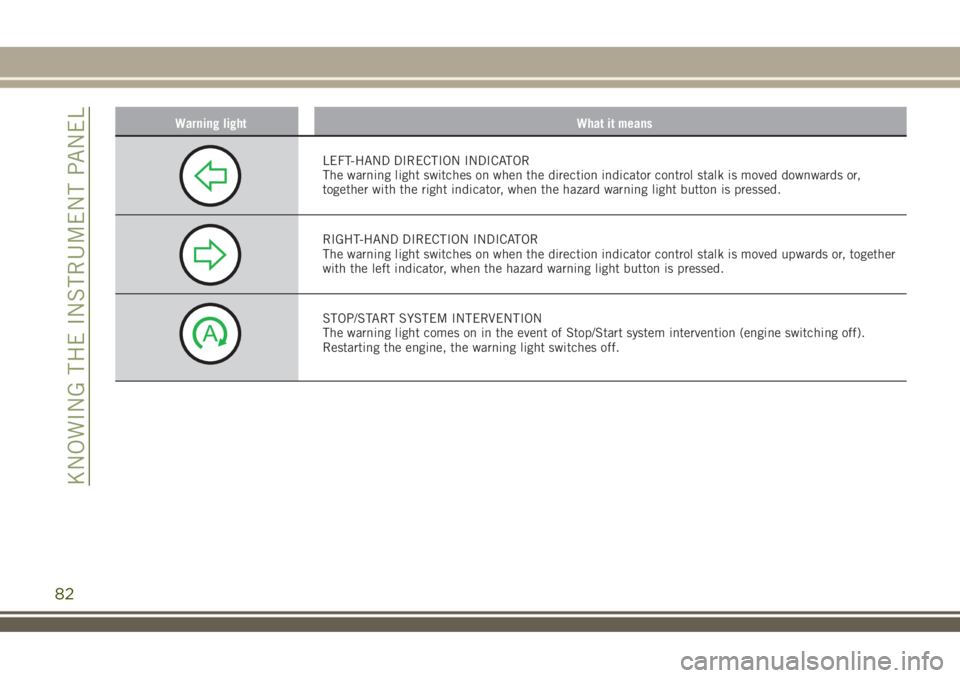
Warning light What it means
LEFT-HAND DIRECTION INDICATOR
The warning light switches on when the direction indicator control stalk is moved downwards or,
together with the right indicator, when the hazard warning light button is pressed.
RIGHT-HAND DIRECTION INDICATOR
The warning light switches on when the direction indicator control stalk is moved upwards or, together
with the left indicator, when the hazard warning light button is pressed.
STOP/START SYSTEM INTERVENTION
The warning light comes on in the event of Stop/Start system intervention (engine switching off).
Restarting the engine, the warning light switches off.
82
KNOWING THE INSTRUMENT PANEL
Page 90 of 356
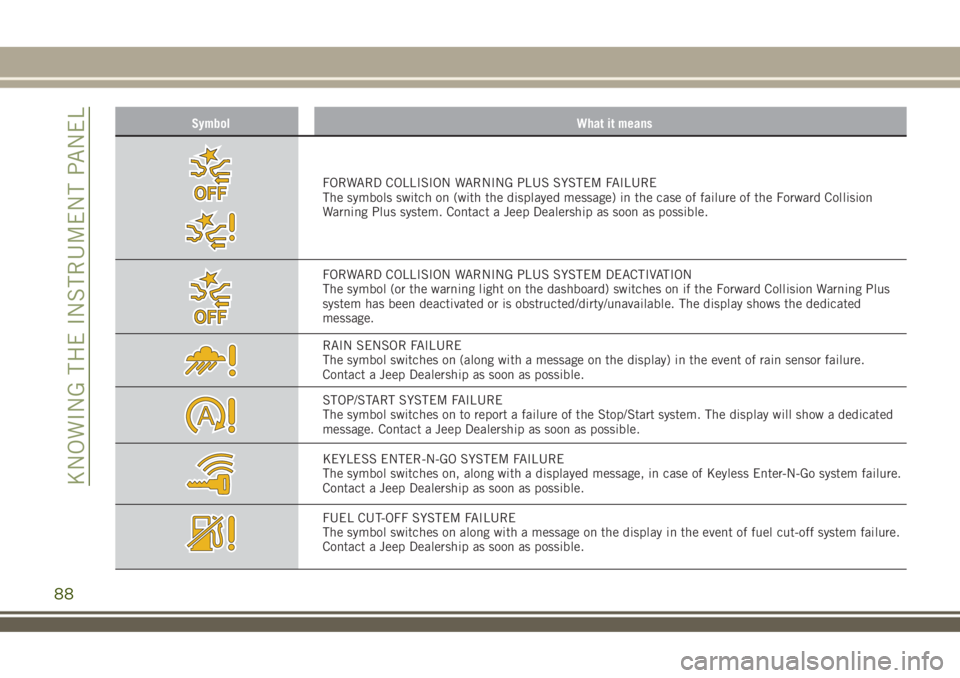
Symbol What it means
FORWARD COLLISION WARNING PLUS SYSTEM FAILURE
The symbols switch on (with the displayed message) in the case of failure of the Forward Collision
Warning Plus system. Contact a Jeep Dealership as soon as possible.
FORWARD COLLISION WARNING PLUS SYSTEM DEACTIVATION
The symbol (or the warning light on the dashboard) switches on if the Forward Collision Warning Plus
system has been deactivated or is obstructed/dirty/unavailable. The display shows the dedicated
message.
RAIN SENSOR FAILURE
The symbol switches on (along with a message on the display) in the event of rain sensor failure.
Contact a Jeep Dealership as soon as possible.
STOP/START SYSTEM FAILURE
The symbol switches on to report a failure of the Stop/Start system. The display will show a dedicated
message. Contact a Jeep Dealership as soon as possible.
KEYLESS ENTER-N-GO SYSTEM FAILURE
The symbol switches on, along with a displayed message, in case of Keyless Enter-N-Go system failure.
Contact a Jeep Dealership as soon as possible.
FUEL CUT-OFF SYSTEM FAILURE
The symbol switches on along with a message on the display in the event of fuel cut-off system failure.
Contact a Jeep Dealership as soon as possible.
88
KNOWING THE INSTRUMENT PANEL
Page 104 of 356
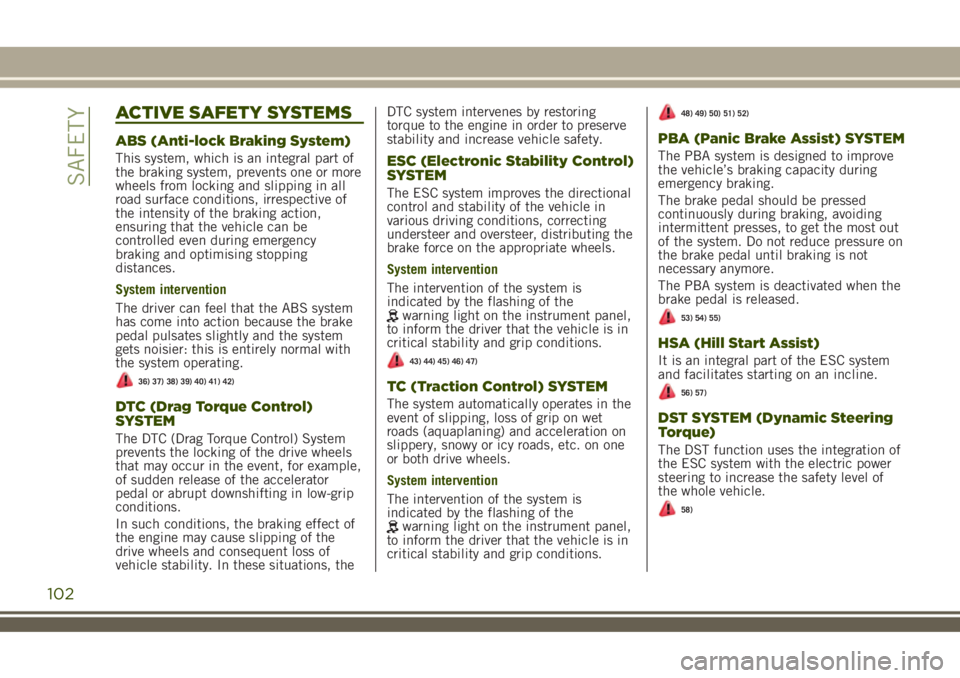
ACTIVE SAFETY SYSTEMS
ABS (Anti-lock Braking System)
This system, which is an integral part of
the braking system, prevents one or more
wheels from locking and slipping in all
road surface conditions, irrespective of
the intensity of the braking action,
ensuring that the vehicle can be
controlled even during emergency
braking and optimising stopping
distances.
System intervention
The driver can feel that the ABS system
has come into action because the brake
pedal pulsates slightly and the system
gets noisier: this is entirely normal with
the system operating.
36) 37) 38) 39) 40) 41) 42)
DTC (Drag Torque Control)
SYSTEM
The DTC (Drag Torque Control) System
prevents the locking of the drive wheels
that may occur in the event, for example,
of sudden release of the accelerator
pedal or abrupt downshifting in low-grip
conditions.
In such conditions, the braking effect of
the engine may cause slipping of the
drive wheels and consequent loss of
vehicle stability. In these situations, theDTC system intervenes by restoring
torque to the engine in order to preserve
stability and increase vehicle safety.
ESC (Electronic Stability Control)
SYSTEM
The ESC system improves the directional
control and stability of the vehicle in
various driving conditions, correcting
understeer and oversteer, distributing the
brake force on the appropriate wheels.
System intervention
The intervention of the system is
indicated by the flashing of the
warning light on the instrument panel,
to inform the driver that the vehicle is in
critical stability and grip conditions.
43) 44) 45) 46) 47)
TC (Traction Control) SYSTEM
The system automatically operates in the
event of slipping, loss of grip on wet
roads (aquaplaning) and acceleration on
slippery, snowy or icy roads, etc. on one
or both drive wheels.
System intervention
The intervention of the system is
indicated by the flashing of the
warning light on the instrument panel,
to inform the driver that the vehicle is in
critical stability and grip conditions.
48) 49) 50) 51) 52)
PBA (Panic Brake Assist) SYSTEM
The PBA system is designed to improve
the vehicle’s braking capacity during
emergency braking.
The brake pedal should be pressed
continuously during braking, avoiding
intermittent presses, to get the most out
of the system. Do not reduce pressure on
the brake pedal until braking is not
necessary anymore.
The PBA system is deactivated when the
brake pedal is released.
53) 54) 55)
HSA (Hill Start Assist)
It is an integral part of the ESC system
and facilitates starting on an incline.
56) 57)
DST SYSTEM (Dynamic Steering
Torque)
The DST function uses the integration of
the ESC system with the electric power
steering to increase the safety level of
the whole vehicle.
58)
102
SAFETY
Page 112 of 356
an obstacle has been detected is
activated, an acoustic warning is emitted
as well. When the acoustic warning is
emitted, theUconnect™volume is
lowered.
"Blind spot alert" function deactivation:
When the system is deactivated ("Blind
spot alert" mode at "OFF"), the BSM or
RCP systems will not emit neither
acoustic nor visual warnings. The BSM
system will store the operating mode
running when the engine was switched
off: each time the engine is started, the
operating mode stored previously will be
recalled and used.
FORWARD COLLISION WARNING
PLUS SYSTEM
69) 70) 71) 72)
33) 34) 35) 36) 37) 38) 39) 40) 41)
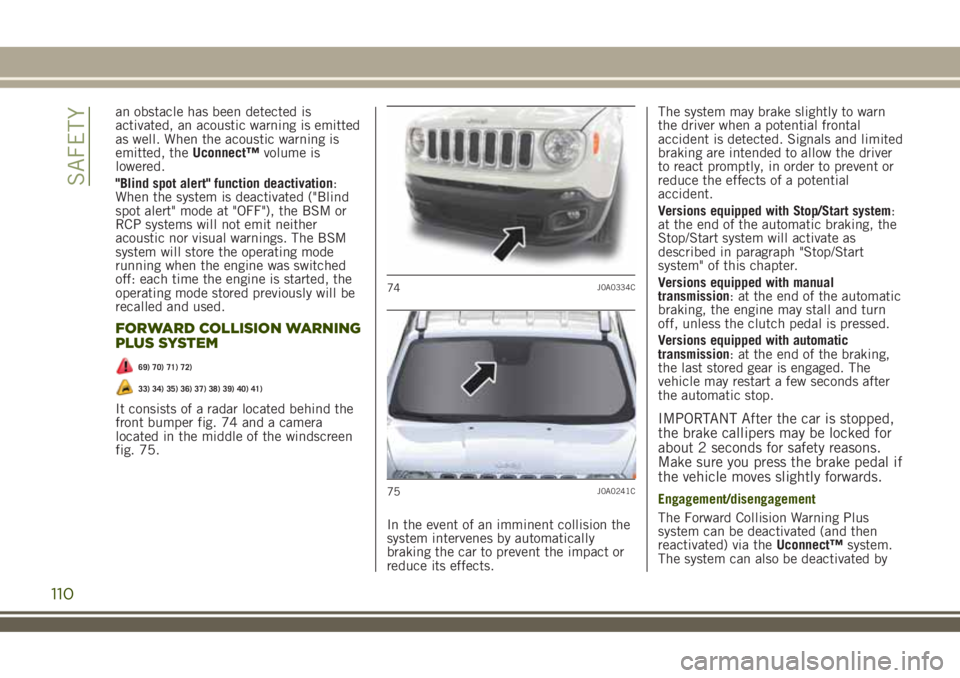
It consists of a radar located behind the
front bumper fig. 74 and a camera
located in the middle of the windscreen
fig. 75.
In the event of an imminent collision the
system intervenes by automatically
braking the car to prevent the impact or
reduce its effects.The system may brake slightly to warn
the driver when a potential frontal
accident is detected. Signals and limited
braking are intended to allow the driver
to react promptly, in order to prevent or
reduce the effects of a potential
accident.
Versions equipped with Stop/Start system:
at the end of the automatic braking, the
Stop/Start system will activate as
described in paragraph "Stop/Start
system" of this chapter.
Versions equipped with manual
transmission: at the end of the automatic
braking, the engine may stall and turn
off, unless the clutch pedal is pressed.
Versions equipped with automatic
transmission: at the end of the braking,
the last stored gear is engaged. The
vehicle may restart a few seconds after
the automatic stop.IMPORTANT After the car is stopped,
the brake callipers may be locked for
about 2 seconds for safety reasons.
Make sure you press the brake pedal if
the vehicle moves slightly forwards.
Engagement/disengagement
The Forward Collision Warning Plus
system can be deactivated (and then
reactivated) via theUconnect™system.
The system can also be deactivated by
74J0A0334C
75J0A0241C
110
SAFETY
Page 115 of 356
sealants may damage the Tyre Pressure
Monitoring System sensor. If
aftermarket tyre sealant has been
used, it is recommended to go to a
Jeep Dealership to have the sensors
checked. After checking or adjusting
the tyre pressure, always refit the valve
cap to prevent humidity and dirt from
entering. They could damage the Tyre
Pressure Monitoring System sensor.
NOTE Some external factors (e.g.
external temperature, etc...) could affect
the information reported on the
instrument panel by the TPMS.
The tyre inflation pressure and the “low
pressure” reporting threshold could
change depending on the environmental
conditions.
TPMS check message
If a system failure is present, the
warning light flashes for about
75 seconds and then stays on solid. An
acoustic signal is also emitted.
TPMS deactivation
The TPMS can be deactivated by
replacing the wheels equipped with
TPMS with others that are not (e.g. when
replacing the wheel assemblies in
winter), if the country of purchase allows
it. Then drive the vehicle for at least
20 minutes at a speed higher than about25 km/h. The TPMS will emit an
acoustic warning, the
warning light
will flash for about 75 seconds, then will
stay on constantly and the instrument
panel will display the "Tyre pressure not
available" message with some dashes (–
–) instead of the pressure values.
The next time the engine is started, the
system will not emit any acoustic signal
and the display will not show the
message "Tyre pressure not available",
but the dashes (– –) will be still
displayed instead of the pressure value.
Operating example
Supposing that the prescribed cold
inflation pressure (i.e. vehicle stationary
for at least 3 hours) is 2.3 bar, if the
ambient temperature is 20°C and the
detected tyre pressure is 1.95 bar, a
temperature reduction of −7°C results in
a decrease in tyre pressure, bringing it to
approximately 1.65 bar. This pressure is
sufficiently low to activate the
warning
light.
Heating of tyres due to driving the
vehicle may increase tyre pressure up to
approximately 1.95 bar, but the
warning light will stay on. In this
situation, the warning light will switch off
only after the tyres are inflated to the
prescribed cold pressure value for the
car.
WARNING
68)The system is an aid for vehicle
driving, it DOES NOT warn the driver
about incoming vehicles outside of the
detection areas. The driver must always
maintain a sufficient level of attention to
the traffic and road conditions and for
controlling the trajectory of the vehicle.
69)The system is an aid for the driver,
who must always pay full attention while
driving. The responsibility always rests
with the driver, who must take into
account the traffic conditions in order to
drive in complete safety. The driver must
always maintain a safe distance from the
vehicle in front.
70)If the driver depresses the brake pedal
fully or carries out a fast steering during
system operation, the automatic braking
function may stop (e.g. to allow a possible
manoeuvre to avoid the obstacle).
71)The system intervenes on vehicles
travelling in the same lane. People,
animals and things (e.g. pushchairs) are
not taken into consideration.
113
Page 147 of 356
STARTING AND DRIVING
Let’s get to the "heart" of the vehicle:
seeing how you can exploit all of its
potential to the full.
We’ll look at how to drive it safely in any
situation, so that it can be a welcome
companion, with our comfort and our
wallets in mind.STARTING THE ENGINE........146
PARKING THE VEHICLE........147
ELECTRIC PARKING BRAKE (EPB) .148
MANUAL GEARBOX...........150
AUTOMATIC TRANSMISSION.....151
TWIN CLUTCH TRANSMISSION . . .154
FOUR WHEEL DRIVE - JEEP ACTIVE
DRIVE (4WD) and JEEP ACTIVE DRIVE
LOW (4WD LOW).............157
SELEC-TERRAIN.............158
STOP/START SYSTEM.........159
SPEED LIMITER.............160
ELECTRONIC CRUISE CONTROL . . .161
ADAPTIVE CRUISE CONTROL (ACC) .163
PARKSENSE SYSTEM.........168
ACTIVE PARKSENSE SYSTEM. . . .171
SIDE DISTANCE WARNING
SYSTEM..................176
LANESENSE SYSTEM (lane crossing
warning)..................178
REAR CAMERA (PARKVIEW® REAR
BACKUP CAMERA)...........179
REFUELLING THE VEHICLE.....181
TOWING TRAILERS...........185
145
Page 148 of 356
STARTING THE ENGINE
116) 117) 118)44) 45) 46) 47)
Before starting the engine, adjust the
seat, the interior rear view mirrors, the
door mirrors and fasten the seat belt
correctly.
Never press the accelerator pedal for
starting the engine.
If necessary, messages indicating the
starting procedure can be shown on the
display.
LPG versions
The engine always starts up on petrol
independently of the previously selected
mode.
There must therefore always be some
petrol in the tank to protect the petrol
pump and to guarantee temporary
switching from Methane or LPG to petrol
operation, if high performance is
required.
PROCEDURE FOR VERSIONS
WITH MANUAL GEARBOX
Proceed as follows:engage the electric parking brake and
place the gear lever in neutral;
bring the ignition device to MAR. On
Diesel versions, waning lightlights upin the instrument panel: wait for the
warning light to switch off;
fully depress the clutch pedal without
touching the accelerator;
turn the ignition device to AVV and
release it as soon as the engine starts;
if the engine does not start within
10 seconds, bring the ignition device
back to STOP and wait for
10-15 seconds before repeating the
starting procedure.
PROCEDURE FOR VERSIONS
WITH AUTOMATIC
TRANSMISSION
Proceed as follows:engage the electric parking brake and
place the gear lever to P (Park) or N
(Neutral);
fully depress the brake pedal without
touching the accelerator;
place the ignition device to AVV;if the engine does not start, bring the
ignition device back to STOP and wait for
10-15 seconds before repeating the
starting procedure.
IMPORTANT If, with the ignition
device at MAR, thesymbol on the
instrument panel stays on together
with warning light
, turn the
ignition device to STOP and then back
to MAR. If the warning light (or thesymbol on the display) remains on, try
with the other keys provided with the
vehicle. Contact a Jeep Dealership if
the engine still does not start.
ENGINE STARTING FAILURE
Starting the engine with electronic key
battery (Keyless Enter-N-Go) run down or
flat
If the ignition device does not respond
when the relevant button is pressed the
electronic key battery might be run down
or flat. Therefore, the system does not
detect the presence of the electronic key
on board the vehicle and displays a
dedicated message.
In this case, rest the rounded edge of the
electronic key (the side opposite the
metal insert) on the ignition device and
press the button by the electronic key.
The ignition device is thus activated and
the engine can be started.
STOPPING THE ENGINE
Proceed as follows:park the car in a position that is not
dangerous for oncoming traffic; engage a
gear (versions with manual gearbox) or
position the gear lever to P (Parking)
(versions with automatic transmission);
turn the ignition device to STOP with
the engine idling.
146
STARTING AND DRIVING
Page 149 of 356
Cars equipped with electronic key (Keyless
Enter-N-Go):at a car speed over 8 km/h
(5 mph) it is possible to switch the
engine off, also with automatic
transmission lever in a position other
than P (Parking). To switch off the engine
in this situation, hold down the ignition
device button for a while or press it
3 times in a row within a few seconds. In
this case the engine will stop and the
ignition device will switch to MAR.
WARNING
116)It is dangerous to run the engine in
enclosed areas. The engine takes in
oxygen and releases carbon dioxide,
carbon monoxide and other toxic gases.
117)The brake servo is not active until
the engine is started, so you would need
to apply much more force than usual to
the brake pedal.
118)Do not start the engine by pushing,
towing or driving downhill. These
manoeuvres may damage the catalytic
converter.
IMPORTANT
44)We recommend that during the initial
period, or during the first 1600 km
(1000 miles), you do not drive to full car
performance (e.g. excessive acceleration,
long journeys at top speed, sharp braking,
etc.).
45)When the engine is switched off never
leave the ignition device in the MAR
position to prevent useless current
absorption from draining the battery.
46)A quick burst on the accelerator before
turning off the engine serves absolutely no
practical purpose; it wastes fuel and is
damaging for the engine.
47)Warning light
will flash after
starting or during prolonged cranking to
indicate a fault with the glow plug heating
system. If the engine starts, the vehicle
can be regularly used, but a Jeep
Dealership must be contacted as soon as
possible.
PARKING THE VEHICLE
Always remove the ignition key when
leaving the car.
When parking and leaving the car,
proceed as follows:
engage a gear (1st gear if facing uphill
or reverse if facing downhill) and leave
the wheels turned;
stop the engine and engage the
handbrake.
Block the wheels with a wedge or a stone
if the car is parked on a steep slope.
On versions equipped with automatic
transmission or dual clutch automatic
transmission, wait for the letter P to be
displayed before releasing the brake
pedal.
IMPORTANT NEVER leave the car with
the gearbox in neutral (or, on versions
equipped with automatic transmission
or dual clutch automatic transmission,
before putting the shift lever in the P
position).
147
Page 150 of 356
ELECTRIC PARKING BRAKE
(EPB)
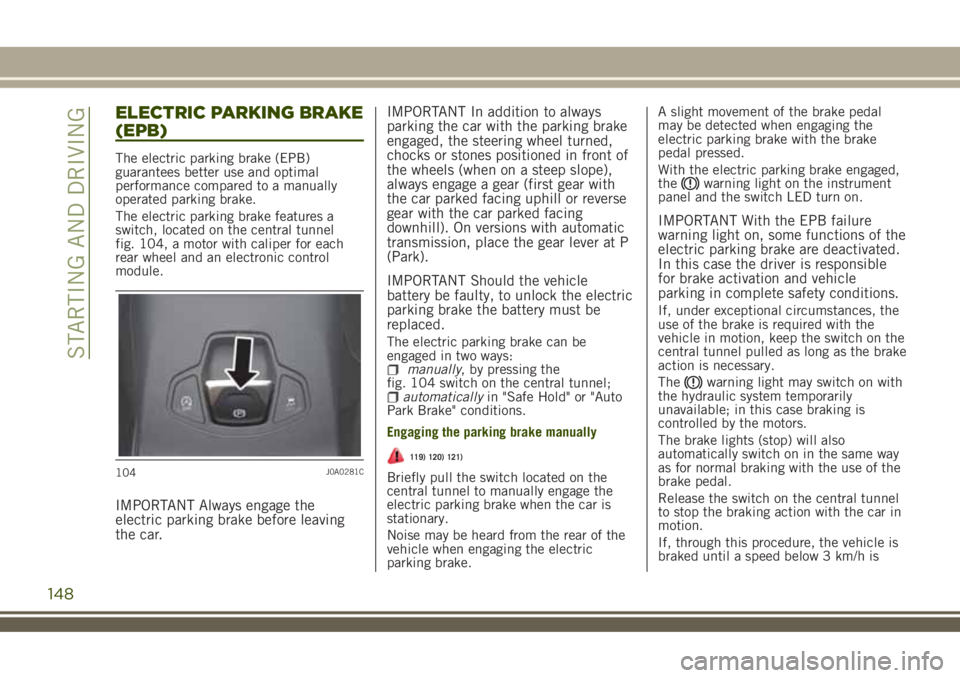
The electric parking brake (EPB)
guarantees better use and optimal
performance compared to a manually
operated parking brake.
The electric parking brake features a
switch, located on the central tunnel
fig. 104, a motor with caliper for each
rear wheel and an electronic control
module.
IMPORTANT Always engage the
electric parking brake before leaving
the car.IMPORTANT In addition to always
parking the car with the parking brake
engaged, the steering wheel turned,
chocks or stones positioned in front of
the wheels (when on a steep slope),
always engage a gear (first gear with
the car parked facing uphill or reverse
gear with the car parked facing
downhill). On versions with automatic
transmission, place the gear lever at P
(Park).
IMPORTANT Should the vehicle
battery be faulty, to unlock the electric
parking brake the battery must be
replaced.
The electric parking brake can be
engaged in two ways:
manually, by pressing the
fig. 104 switch on the central tunnel;
automaticallyin "Safe Hold" or "Auto
Park Brake" conditions.
Engaging the parking brake manually
119) 120) 121)
Briefly pull the switch located on the
central tunnel to manually engage the
electric parking brake when the car is
stationary.
Noise may be heard from the rear of the
vehicle when engaging the electric
parking brake.A slight movement of the brake pedal
may be detected when engaging the
electric parking brake with the brake
pedal pressed.
With the electric parking brake engaged,
the
warning light on the instrument
panel and the switch LED turn on.
IMPORTANT With the EPB failure
warning light on, some functions of the
electric parking brake are deactivated.
In this case the driver is responsible
for brake activation and vehicle
parking in complete safety conditions.
If, under exceptional circumstances, the
use of the brake is required with the
vehicle in motion, keep the switch on the
central tunnel pulled as long as the brake
action is necessary.
The
warning light may switch on with
the hydraulic system temporarily
unavailable; in this case braking is
controlled by the motors.
The brake lights (stop) will also
automatically switch on in the same way
as for normal braking with the use of the
brake pedal.
Release the switch on the central tunnel
to stop the braking action with the car in
motion.
If, through this procedure, the vehicle is
braked until a speed below 3 km/h is
104J0A0281C
148
STARTING AND DRIVING
Page 152 of 356
SAFE HOLD
It is a safety function that automatically
engages the electric parking brake in the
event of a dangerous condition for the
vehicle.
If:
the vehicle speed is below 3 km/h;the gear lever is not at P (Park)
(versions with automatic transmission);
the driver's seat belt is not fastened;the driver side door is open;no attempted operation of the brake
pedal or the accelerator pedal, or, in
versions with manual gearbox, the clutch
pedal is detected;
the parking brake engages automatically
to prevent the vehicle movement.
The Safe Hold function can be
temporarily disabled by pressing the
switch located on the central tunnel and
the brake pedal at the same time, with
the vehicle stationary and the driver side
door open.
Once disabled, the function will activate
again when the vehicle speed reaches
20 km/h or the ignition device is moved
to STOP and then to MAR.
WARNING
119)In the case of parking manoeuvres on
roads on a gradient, the front wheels must
be steered towards the pavement (when
parking downhill), or in the opposite
direction if the vehicle is parked uphill.
Block the wheels with a wedge or a stone
if the car is parked on a steep slope.
120)Never leave children unattended in
the car. Always remove the key from the
ignition when leaving the car and take it
with you.
121)The electric parking brake must
always be engaged when leaving the
vehicle.
MANUAL GEARBOX
122)48)
To engage the gears, press the clutch
pedal fully and put the gear lever into the
required position (the diagram for gear
engagement is shown on the knob ).
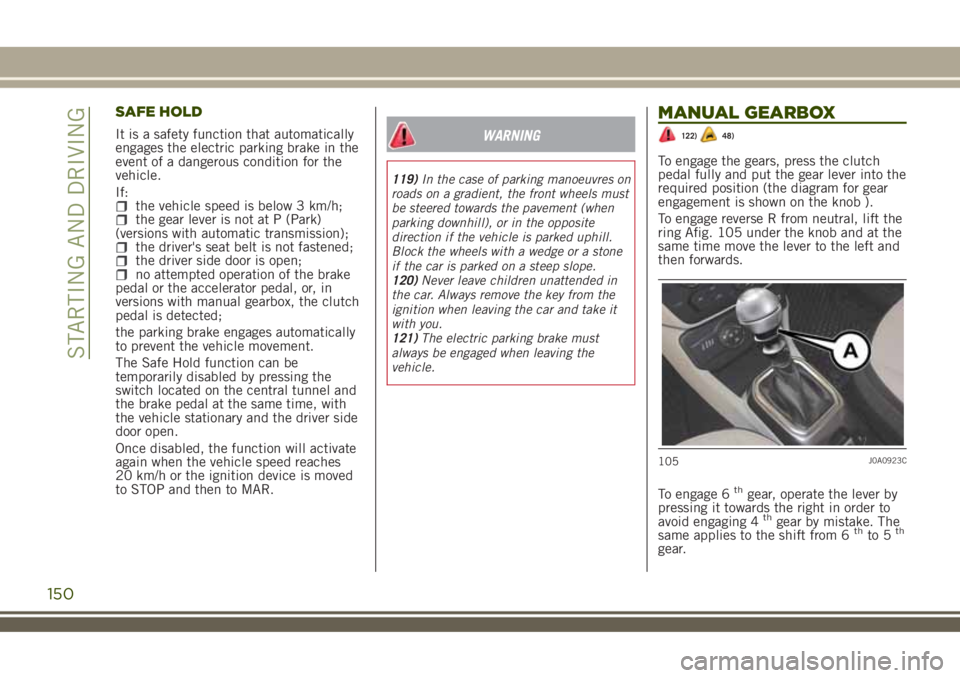
To engage reverse R from neutral, lift the
ring Afig. 105 under the knob and at the
same time move the lever to the left and
then forwards.
To engage 6
thgear, operate the lever by
pressing it towards the right in order to
avoid engaging 4
thgear by mistake. The
same applies to the shift from 6thto 5th
gear.
105J0A0923C
150
STARTING AND DRIVING