electrical JEEP WAGONEER 2023 Owners Manual
[x] Cancel search | Manufacturer: JEEP, Model Year: 2023, Model line: WAGONEER, Model: JEEP WAGONEER 2023Pages: 396, PDF Size: 15.17 MB
Page 2 of 396

WARNING: Operating, servicing and maintaining a passenger vehicle or off-highway
motor vehicle can expose you to chemicals including engine exhaust, carbon monoxide,
phthalates, and lead, which are known to the State of California to cause cancer and
birth defects or other reproductive harm. To minimize exposure, avoid breathing exhaust,
do not idle the engine except as necessary, service your vehicle in a well-ventilated area and wear
gloves or wash your hands frequently when servicing your vehicle. For more information go to
www.P65Warnings.ca.gov/passenger-vehicle.
This Owner ’s Manual illustrates and describes the operation of features and equipment that are either standard or optional on this vehicle. This manual may also
include a description of features and equipment that are no longer available or were not ordered on this vehicle. Please disregard any features and equipment
described in this manual that are not on this vehicle. FCA US LLC reserves the right to make changes in design and specifications, and/or make additions to or
improvements to its products without imposing any obligation upon itself to install them on products previously manufactured.
With respect to any vehicles sold in Canada, the name FCA US LLC shall be deemed to be deleted and the name FCA Canada Inc. used in substitution therefore.
This Owner ’s Manual is intended to familiarize you with the important features of your vehicle. Your most up-to-date Owner ’s Manual, Radio Instruction Manual and
Warranty Booklet can be found by visiting the website on the back cover. The driver ’s primary responsibility is the safe operation of the vehicle. Driving while distracted can result in loss of vehicle control, resulting in an accident and
personal injury. FCA US LLC strongly recommends that the driver use extreme caution when using any device or feature that may take their attention off the road.
Use of any electrical devices, such as cellular telephones, computers, portable radios, vehicle navigation or other devices by the driver while the vehicle is moving
is dangerous and could lead to a serious accident. Texting while driving is also dangerous and should never be done while the vehicle is moving. If you find yourself
unable to devote your full attention to vehicle operation, pull off the road to a safe location and stop your vehicle. Some states or provinces prohibit the use of
cellular telephones or texting while driving. It is always the driver ’s responsibility to comply with all local laws.
This Owner ’s Manual has been prepared to help you get acquainted with your new Wagoneer vehicle and to provide a convenient reference source for common
questions.
Not all features shown in this manual may apply to your vehicle. For additional information, visit
mopar.com/om (USA), owners.mopar.ca (Canada) or your local
Chrysler, Dodge, Jeep®, or Ram dealer.
U.S. Residents: If you are the first registered retail owner of your vehicle, you may obtain a complimentary printed copy of the Warranty Booklet by
calling 1-833-667-4825 or by contacting your dealer. Replacement kits can be purchased by visiting www.techauthority.com.
Canadian Residents: If you are the first registered retail owner of your vehicle, you may obtain a complimentary printed copy of the Warranty Booklet or purchase
a replacement kit by calling 1-800-387-1143 or by contacting your dealer.
DRIVING AND ALCOHOL
Drunk driving is one of the most frequent causes of accidents. Your driving ability can be seriously impaired with blood alcohol levels far below the legal
minimum. If you are drinking, don’t drive. Ride with a designated non-drinking driver, call a cab, a rideshare, a friend or use public transportation.
WARNING
Driving after drinking can lead to an accident. Your perceptions are less sharp, your reflexes are slower and your judgment is impaired when you have been
drinking. Never drink and then drive.
FCA US LLC reserves the right to modify the terms or discontinue the Roadside Assistance Program at any time. The Roadside Assistance Program is subject to restrictions and conditions of use, that are
determined solely by FCA US LLC.
ROADSIDE ASSISTANCE
24 HOURS, 7 DAYS A WEEK AT YOUR SERVICE. CALL 1-833-667-4825 (USA)
CALL 1-800-363-4869 (CANADA)
SERVICES: Flat Tire Service, Out Of Gas/Fuel Delivery, Battery Jump Assistance, Lockout Service and Towing Service
Please see the Customer Assistance chapter in this Owner ’s Manual for further information.
Page 5 of 396
3
EXTERIOR LIGHTS ..............................................................57Headlight Switch ........................................................ 57
Multifunction Lever ..................................................... 58
Daytime Running Lights (DRLs) ................................. 58
High/Low Beam Switch .............................................. 58
Automatic High Beams — If Equipped ....................... 58
Flash-To-Pass ............................................................ 58
Automatic Headlights ................................................ 58
Parking Lights And Panel Lights................................. 59
Headlights On Automatically With Wipers ................. 59
Headlight Illumination On Approach .......................... 59
Headlight Delay ........................................................... 59
Lights-On Reminder .................................................... 59
Fog Lights .................................................................... 60
Turn Signals................................................................. 60
Lane Change Assist — If Equipped............................. 60
Battery Saver ............................................................... 60
INTERIOR LIGHTS ...............................................................60 Courtesy Lights............................................................ 60
Illuminated Entry — If Equipped ................................. 62
WINDSHIELD WIPERS AND WASHERS ........................... 62 Windshield Wiper Operation....................................... 62
Rain Sensing Wipers — If Equipped .......................... 63
Rear Wiper And Washer ............................................ 64
Windshield Wiper De-Icer — If Equipped ................... 64
CLIMATE CONTROLS ..........................................................64 Automatic Climate Control Descriptions And
Functions ..................................................................... 64
Automatic Temperature Control (ATC) ....................... 71
Climate Voice Recognition.......................................... 71
Operating Tips ............................................................ 71 INTERIOR STORAGE AND EQUIPMENT ............................ 73
Storage ......................................................................... 73
Center Console Cooler —
If Equipped ................................................................... 75
Center Console Safe — If Equipped ............................ 75
Sun Screens — If Equipped ......................................... 76
USB/AUX Control ......................................................... 76
Electrical Power Outlets ..............................................79
Power Inverter ............................................................. 80
Wireless Charging Pad — If Equipped......................... 81
WINDOWS .......................................................................... 82 Power Window Controls............................................... 82
Wind Buffeting ............................................................ 83
Radio Signal Devices On Windshield —
If Equipped ................................................................... 83
POWER SUNROOF — IF EQUIPPED................................... 83 Tri-Pane Power Sunroof............................................... 83
HOOD.................................................................................... 85 Opening The Hood .......................................................85
Closing The Hood ......................................................... 86
LIFTGATE .............................................................................. 86 To Unlock/Open The Liftgate ......................................86
To Lock/Close The Liftgate ......................................... 86
Adjustable Power Liftgate Height ............................... 87
Hands-Free Liftgate .................................................... 87
Cargo Area Features ................................................... 89
ROOF LUGGAGE RACK — IF EQUIPPED ........................... 91 Installing The Crossbars ..............................................91
Removing The Crossbars ............................................ 95GETTING TO KNOW YOUR
INSTRUMENT PANEL
BASE INSTRUMENT CLUSTER .......................................... 96 Instrument Cluster Descriptions ................................ 97
PREMIUM INSTRUMENT CLUSTER .................................. 98 Instrument Cluster Descriptions ................................ 99
INSTRUMENT CLUSTER DISPLAY ..................................... 99 Location And Controls ................................................. 99
Engine Oil Life Reset ................................................ 101
Display And Messages .............................................. 102Instrument Cluster Display Menu Items ................. 104Head Up Display (HUD) — If Equipped ..................... 106
Battery Saver On/Battery Saver Mode
Message — Electrical Load Reduction
Actions (If Equipped) ................................................ 107
WARNING LIGHTS AND MESSAGES ..............................108 Red Warning Lights ................................................... 109
Yellow Warning Lights ............................................... 111Yellow Indicator Lights .............................................. 114Green Indicator Lights............................................... 115White Indicator Lights ............................................... 116Blue Indicator Lights ................................................. 117
Gray Indicator Lights ................................................. 117
ONBOARD DIAGNOSTIC SYSTEM — OBD II ................... 117 Onboard Diagnostic System
(OBD II) Cybersecurity ............................................... 118
EMISSIONS INSPECTION AND MAINTENANCE
PROGRAMS ......................................................................118
23_WS_OM_EN_USC_t.book Page 3
Page 23 of 396
GETTING TO KNOW YOUR VEHICLE21
(Continued)
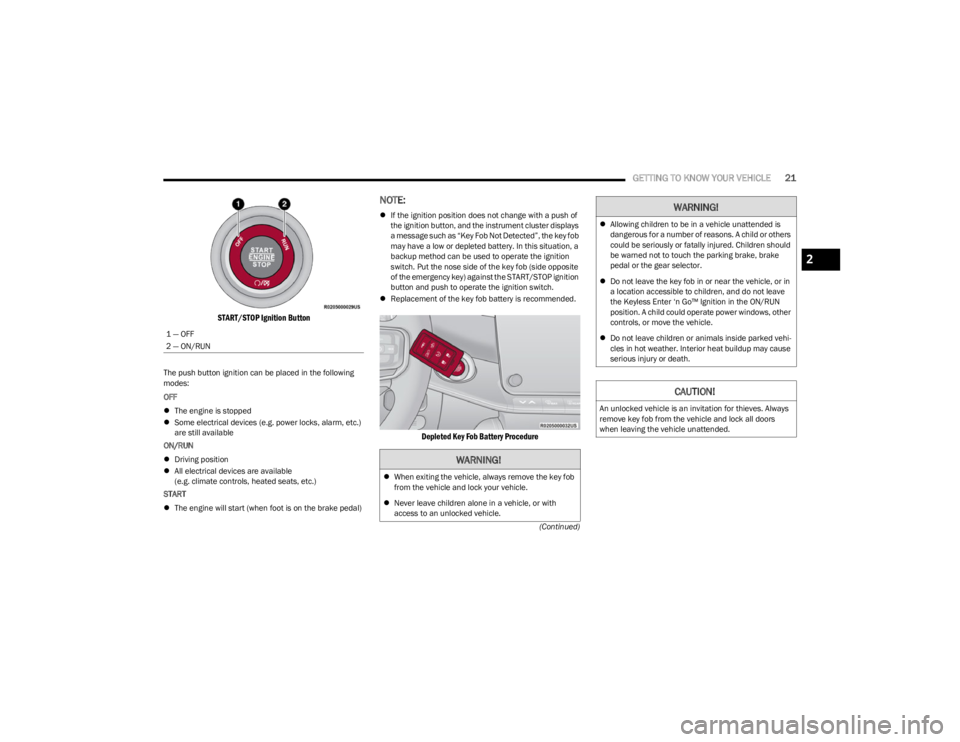
START/STOP Ignition Button
The push button ignition can be placed in the following
modes:
OFF
The engine is stopped
Some electrical devices (e.g. power locks, alarm, etc.)
are still available
ON/RUN
Driving position
All electrical devices are available
(e.g. climate controls, heated seats, etc.)
START
The engine will start (when foot is on the brake pedal)
NOTE:
If the ignition position does not change with a push of
the ignition button, and the instrument cluster displays
a message such as “Key Fob Not Detected”, the key fob
may have a low or depleted battery. In this situation, a
backup method can be used to operate the ignition
switch. Put the nose side of the key fob (side opposite
of the emergency key) against the START/STOP ignition
button and push to operate the ignition switch.
Replacement of the key fob battery is recommended.
Depleted Key Fob Battery Procedure
1 — OFF
2 — ON/RUN
WARNING!
When exiting the vehicle, always remove the key fob
from the vehicle and lock your vehicle.
Never leave children alone in a vehicle, or with
access to an unlocked vehicle.
Allowing children to be in a vehicle unattended is
dangerous for a number of reasons. A child or others
could be seriously or fatally injured. Children should
be warned not to touch the parking brake, brake
pedal or the gear selector.
Do not leave the key fob in or near the vehicle, or in
a location accessible to children, and do not leave
the Keyless Enter ‘n Go™ Ignition in the ON/RUN
position. A child could operate power windows, other
controls, or move the vehicle.
Do not leave children or animals inside parked vehi -
cles in hot weather. Interior heat buildup may cause
serious injury or death.
CAUTION!
An unlocked vehicle is an invitation for thieves. Always
remove key fob from the vehicle and lock all doors
when leaving the vehicle unattended.
WARNING!
2
23_WS_OM_EN_USC_t.book Page 21
Page 73 of 396
GETTING TO KNOW YOUR VEHICLE71
REAR CLIMATE CONTROL OFF
To turn the rear climate controls off, push the
OFF button below the rear climate control
display, or if equipped, press and release the
OFF button on the Rear Comfort And
Convenience Display touchscreen, near the blower
buttons.
AUTOMATIC TEMPERATURE CONTROL
(ATC)
Automatic Operation
1. Push the AUTO button on the front climate control
display, and the word “AUTO” will illuminate along
with two temperatures for the driver and front
passenger. The system will then automatically
regulate the amount of airflow.
2. Adjust the temperature you would like the system to maintain, by adjusting the driver, passenger, and rear
temperatures. Once the desired temperature is
displayed, the system will achieve, and automatically
maintain, that comfort level.
3. When the system is set up for your comfort level, it is not necessary to change the settings. You will
experience the greatest efficiency by simply allowing
the system to function automatically.
NOTE:It is not necessary to move the temperature settings. The
system automatically adjusts the temperature, mode, and
fan speed to provide comfort as quickly as possible. To provide you with maximum comfort in the automatic
mode during cold start-ups, the blower fan will remain on
low until the engine warms up. The fan will engage
immediately if the Defrost mode is selected, or by
changing the front blower setting.
Manual Operation Override
This system offers a full complement of manual override
features. The AUTO symbol in the front climate control
display will no longer be illuminated when the system is
being used in the manual mode.
NOTE:The system will not automatically sense the presence of
fog, mist or ice on the windshield. Defrost mode must be
manually selected to clear the windshield and side glass.
CLIMATE VOICE RECOGNITION
Adjust vehicle temperatures hands-free and keep
everyone comfortable while you keep moving ahead (If
vehicle is equipped with climate control).
Push the VR/Phone button . After the beep, say one of
the following commands:
“Set the driver temperature to 70 degrees”
“Set the passenger temperature to 70 degrees”
Did You Know: Voice Command for Climate may only be
used to adjust the interior temperature of your vehicle.
Voice Command will not work to adjust the heated seats
or steering wheel if equipped.
OPERATING TIPS
Refer to the chart at the end of this section for suggested
control settings for various weather conditions.
Summer Operation
The engine cooling system must be protected with a
high-quality antifreeze coolant to provide proper corrosion
protection and to protect against engine overheating. OAT
coolant (conforming to MS.90032) is recommended.
Winter Operation
To ensure the best possible heater and defroster
performance, make sure the engine cooling system is
functioning properly and the proper amount, type, and
concentration of coolant is used. Use of the Air
Recirculation mode during Winter months is not
recommended, because it may cause window fogging.
Vacation/Storage
For information on maintaining the Climate Control system
when the vehicle is being stored for an extended period of
time, see
Úpage 368.
CAUTION!
Interior air enters the Rear Climate Control system
through an intake grille, located in the right side trim
panel behind the third row seats. The heater outlets are
located in the right side trim panel, just behind the rear
doors. Do not block or place objects directly in front of
the inlet grille or heater outlets. The electrical system
could overload causing damage to the blower motor.
2
23_WS_OM_EN_USC_t.book Page 71
Page 81 of 396
GETTING TO KNOW YOUR VEHICLE79
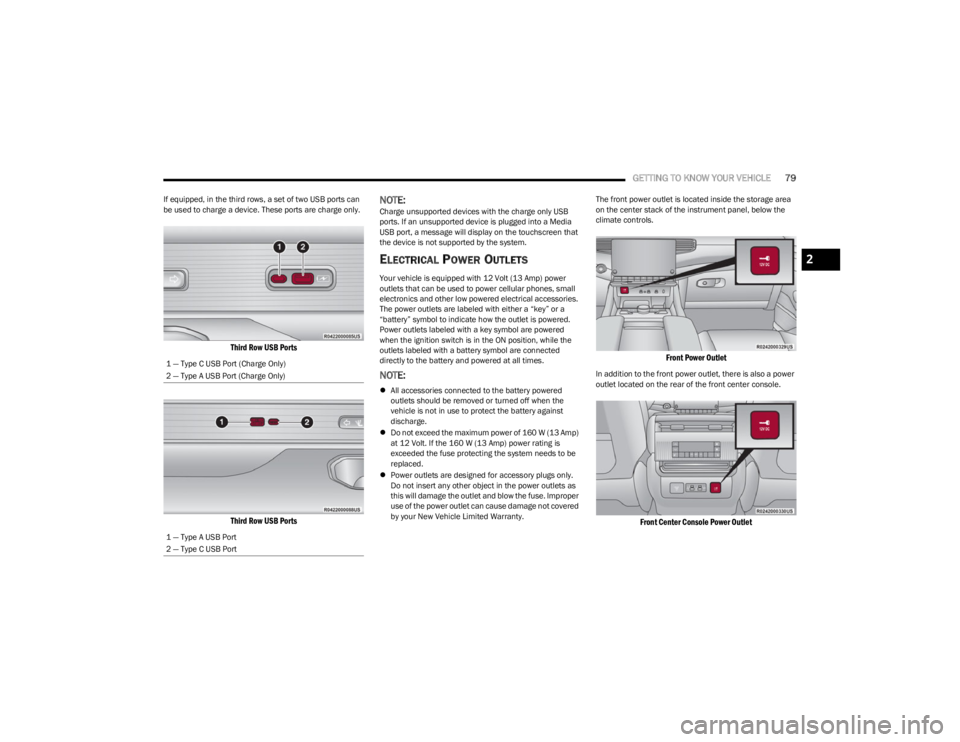
If equipped, in the third rows, a set of two USB ports can
be used to charge a device. These ports are charge only.
Third Row USB Ports
Third Row USB Ports
NOTE:Charge unsupported devices with the charge only USB
ports. If an unsupported device is plugged into a Media
USB port, a message will display on the touchscreen that
the device is not supported by the system.
ELECTRICAL POWER OUTLETS
Your vehicle is equipped with 12 Volt (13 Amp) power
outlets that can be used to power cellular phones, small
electronics and other low powered electrical accessories.
The power outlets are labeled with either a “key” or a
“battery” symbol to indicate how the outlet is powered.
Power outlets labeled with a key symbol are powered
when the ignition switch is in the ON position, while the
outlets labeled with a battery symbol are connected
directly to the battery and powered at all times.
NOTE:
All accessories connected to the battery powered
outlets should be removed or turned off when the
vehicle is not in use to protect the battery against
discharge.
Do not exceed the maximum power of 160 W (13 Amp)
at 12 Volt. If the 160 W (13 Amp) power rating is
exceeded the fuse protecting the system needs to be
replaced.
Power outlets are designed for accessory plugs only.
Do not insert any other object in the power outlets as
this will damage the outlet and blow the fuse. Improper
use of the power outlet can cause damage not covered
by your New Vehicle Limited Warranty. The front power outlet is located inside the storage area
on the center stack of the instrument panel, below the
climate controls.
Front Power Outlet
In addition to the front power outlet, there is also a power
outlet located on the rear of the front center console.
Front Center Console Power Outlet
1 — Type C USB Port (Charge Only)
2 — Type A USB Port (Charge Only)
1 — Type A USB Port
2 — Type C USB Port
2
23_WS_OM_EN_USC_t.book Page 79
Page 82 of 396
80GETTING TO KNOW YOUR VEHICLE
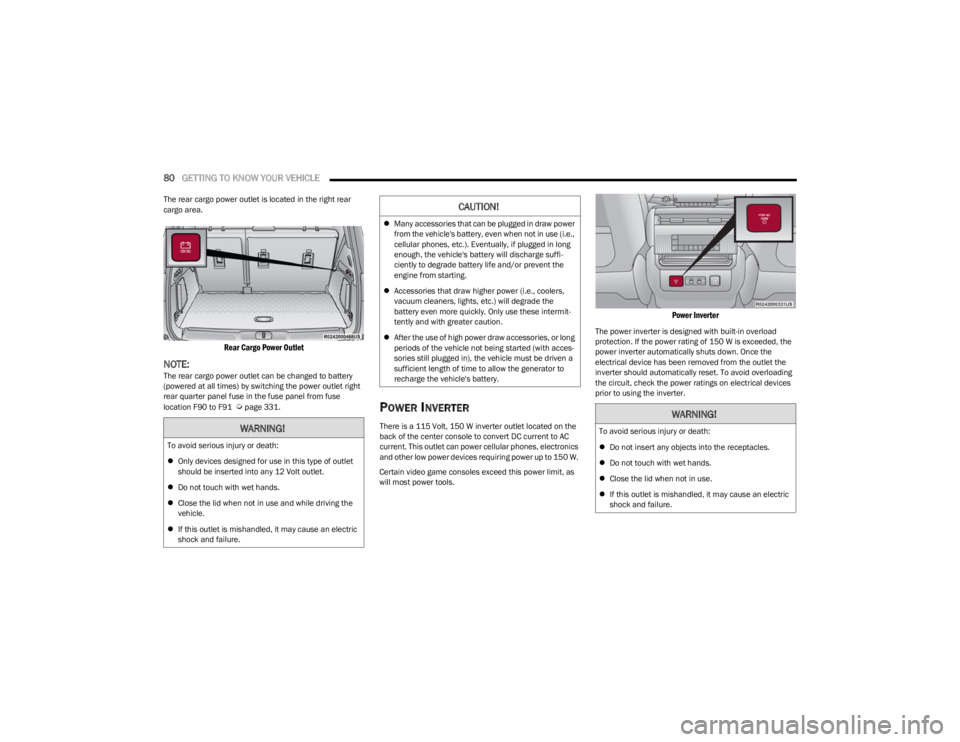
The rear cargo power outlet is located in the right rear
cargo area.
Rear Cargo Power Outlet
NOTE:The rear cargo power outlet can be changed to battery
(powered at all times) by switching the power outlet right
rear quarter panel fuse in the fuse panel from fuse
location F90 to F91
Úpage 331.POWER INVERTER
There is a 115 Volt, 150 W inverter outlet located on the
back of the center console to convert DC current to AC
current. This outlet can power cellular phones, electronics
and other low power devices requiring power up to 150 W.
Certain video game consoles exceed this power limit, as
will most power tools.
Power Inverter
The power inverter is designed with built-in overload
protection. If the power rating of 150 W is exceeded, the
power inverter automatically shuts down. Once the
electrical device has been removed from the outlet the
inverter should automatically reset. To avoid overloading
the circuit, check the power ratings on electrical devices
prior to using the inverter.
WARNING!
To avoid serious injury or death:
Only devices designed for use in this type of outlet
should be inserted into any 12 Volt outlet.
Do not touch with wet hands.
Close the lid when not in use and while driving the
vehicle.
If this outlet is mishandled, it may cause an electric
shock and failure.
CAUTION!
Many accessories that can be plugged in draw power
from the vehicle's battery, even when not in use (i.e.,
cellular phones, etc.). Eventually, if plugged in long
enough, the vehicle's battery will discharge suffi -
ciently to degrade battery life and/or prevent the
engine from starting.
Accessories that draw higher power (i.e., coolers,
vacuum cleaners, lights, etc.) will degrade the
battery even more quickly. Only use these intermit -
tently and with greater caution.
After the use of high power draw accessories, or long
periods of the vehicle not being started (with acces -
sories still plugged in), the vehicle must be driven a
sufficient length of time to allow the generator to
recharge the vehicle's battery.
WARNING!
To avoid serious injury or death:
Do not insert any objects into the receptacles.
Do not touch with wet hands.
Close the lid when not in use.
If this outlet is mishandled, it may cause an electric
shock and failure.
23_WS_OM_EN_USC_t.book Page 80
Page 109 of 396
GETTING TO KNOW YOUR INSTRUMENT PANEL107
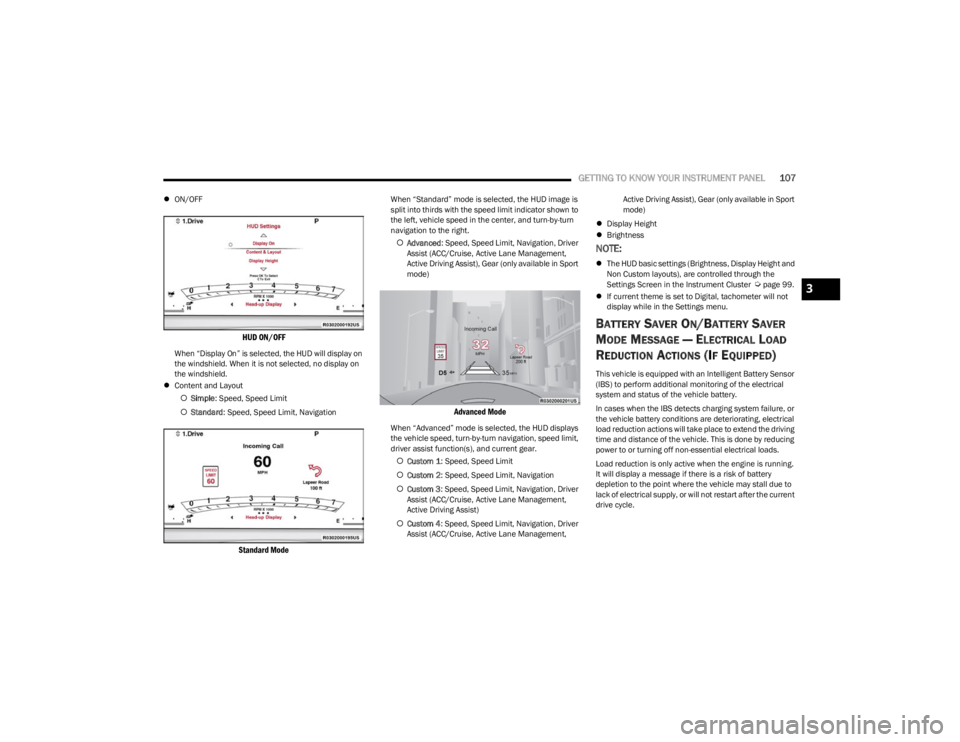
ON/OFF
HUD ON/OFF
When “Display On” is selected, the HUD will display on
the windshield. When it is not selected, no display on
the windshield.
Content and Layout
Simple : Speed, Speed Limit
Standard : Speed, Speed Limit, Navigation
Standard Mode
When “Standard” mode is selected, the HUD image is
split into thirds with the speed limit indicator shown to
the left, vehicle speed in the center, and turn-by-turn
navigation to the right.
Advanced : Speed, Speed Limit, Navigation, Driver
Assist (ACC/Cruise, Active Lane Management,
Active Driving Assist), Gear (only available in Sport
mode)
Advanced Mode
When “Advanced” mode is selected, the HUD displays
the vehicle speed, turn-by-turn navigation, speed limit,
driver assist function(s), and current gear.
Custom 1 : Speed, Speed Limit
Custom 2 : Speed, Speed Limit, Navigation
Custom 3 : Speed, Speed Limit, Navigation, Driver
Assist (ACC/Cruise, Active Lane Management,
Active Driving Assist)
Custom 4 : Speed, Speed Limit, Navigation, Driver
Assist (ACC/Cruise, Active Lane Management, Active Driving Assist), Gear (only available in Sport
mode)
Display Height
Brightness
NOTE:
The HUD basic settings (Brightness, Display Height and
Non Custom layouts), are controlled through the
Settings Screen in the Instrument Cluster
Úpage 99.
If current theme is set to Digital, tachometer will not
display while in the Settings menu.
BATTERY SAVER ON/BATTERY SAVER
M
ODE MESSAGE — ELECTRICAL LOAD
R
EDUCTION ACTIONS (IF EQUIPPED)
This vehicle is equipped with an Intelligent Battery Sensor
(IBS) to perform additional monitoring of the electrical
system and status of the vehicle battery.
In cases when the IBS detects charging system failure, or
the vehicle battery conditions are deteriorating, electrical
load reduction actions will take place to extend the driving
time and distance of the vehicle. This is done by reducing
power to or turning off non-essential electrical loads.
Load reduction is only active when the engine is running.
It will display a message if there is a risk of battery
depletion to the point where the vehicle may stall due to
lack of electrical supply, or will not restart after the current
drive cycle.
3
23_WS_OM_EN_USC_t.book Page 107
Page 110 of 396
108GETTING TO KNOW YOUR INSTRUMENT PANEL
When load reduction is activated, the message “Battery
Saver On” or “Battery Saver Mode” will appear in the
instrument cluster.
These messages indicate the vehicle battery has a low
state of charge and continues to lose electrical charge at
a rate that the charging system cannot sustain.
NOTE:
The charging system is independent from load reduc -
tion. The charging system performs a diagnostic on the
charging system continuously.
If the Battery Charge Warning Light is on it may indicate
a problem with the charging system
Úpage 109.
The electrical loads that may be switched off (if equipped),
and vehicle functions which can be affected by load
reduction:
Heated Seat/Vented Seats/Heated Wheel
Rear Defroster And Heated Mirrors
HVAC System
115 Volt AC Power Inverter System
Audio and Telematics System
Loss of the battery charge may indicate one or more of the
following conditions:
The charging system cannot deliver enough electrical
power to the vehicle system because the electrical
loads are larger than the capability of the charging
system. The charging system is still functioning
properly.
Turning on all possible vehicle electrical loads (e.g.
HVAC to max settings, exterior and interior lights, over -
loaded power outlets +12 Volt, 115 Volt AC, USB ports)
during certain driving conditions (city driving, towing,
frequent stopping, etc.).
Installing options like additional lights, upfitter elec -
trical accessories, audio systems, alarms and similar
devices.
Unusual driving cycles (short trips separated by long
parking periods).
The vehicle was parked for an extended period of time
(weeks, months).
The battery was recently replaced and was not charged
completely.
The battery was discharged by an electrical load left on
when the vehicle was parked.
The battery was used for an extended period with the
engine not running to supply radio, lights, chargers,
+12 Volt portable appliances like vacuum cleaners,
game consoles and similar devices.
What to do when an electrical load reduction action
message is present (“Battery Saver On” or “Battery Saver
Mode”)
During a trip:
Reduce power to unnecessary loads if possible:
Turn off redundant lights (interior or exterior)
Check what may be plugged in to power outlets
+12 Volt, 115 Volt AC, USB ports
Check HVAC settings (blower, temperature)
Check the audio settings (volume) After a trip:
Check if any aftermarket equipment was installed
(additional lights, upfitter electrical accessories, audio
systems, alarms) and review specifications if any (load
and Ignition Off Draw currents).
Evaluate the latest driving cycles (distance, driving
time and parking time).
The vehicle should have service performed if the
message is still present during consecutive trips, and if
the evaluation and driving pattern of the vehicle did not
help to identify the cause.WARNING LIGHTS AND MESSAGES
The warning/indicator lights will illuminate in the
instrument panel together with a dedicated message and/
or acoustic signal when applicable. These indications are
indicative and precautionary and as such must not be
considered as exhaustive and/or alternative to the
information contained in the Owner’s Manual, which you
are advised to read carefully in all cases. Always refer to
the information in this chapter in the event of a failure
indication. All active telltales will display first if applicable.
The system check menu may appear different based upon
equipment options and current vehicle status. Some
telltales are optional and may not appear.
23_WS_OM_EN_USC_t.book Page 108
Page 111 of 396
GETTING TO KNOW YOUR INSTRUMENT PANEL109
RED WARNING LIGHTS
Air Bag Warning Light
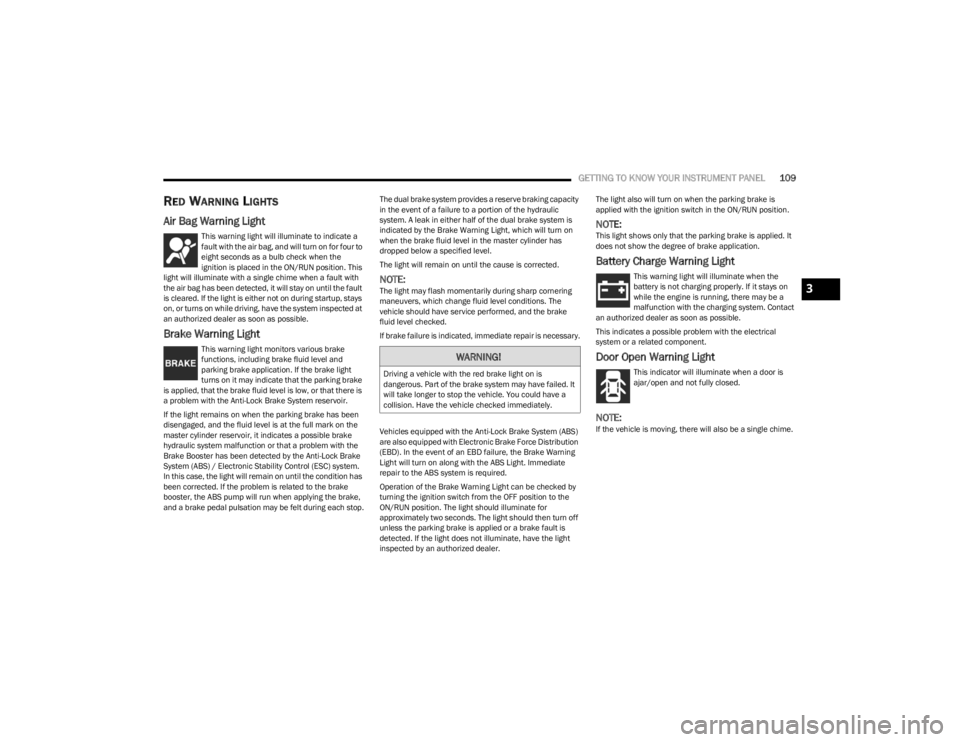
This warning light will illuminate to indicate a
fault with the air bag, and will turn on for four to
eight seconds as a bulb check when the
ignition is placed in the ON/RUN position. This
light will illuminate with a single chime when a fault with
the air bag has been detected, it will stay on until the fault
is cleared. If the light is either not on during startup, stays
on, or turns on while driving, have the system inspected at
an authorized dealer as soon as possible.
Brake Warning Light
This warning light monitors various brake
functions, including brake fluid level and
parking brake application. If the brake light
turns on it may indicate that the parking brake
is applied, that the brake fluid level is low, or that there is
a problem with the Anti-Lock Brake System reservoir.
If the light remains on when the parking brake has been
disengaged, and the fluid level is at the full mark on the
master cylinder reservoir, it indicates a possible brake
hydraulic system malfunction or that a problem with the
Brake Booster has been detected by the Anti-Lock Brake
System (ABS) / Electronic Stability Control (ESC) system.
In this case, the light will remain on until the condition has
been corrected. If the problem is related to the brake
booster, the ABS pump will run when applying the brake,
and a brake pedal pulsation may be felt during each stop. The dual brake system provides a reserve braking capacity
in the event of a failure to a portion of the hydraulic
system. A leak in either half of the dual brake system is
indicated by the Brake Warning Light, which will turn on
when the brake fluid level in the master cylinder has
dropped below a specified level.
The light will remain on until the cause is corrected.
NOTE:The light may flash momentarily during sharp cornering
maneuvers, which change fluid level conditions. The
vehicle should have service performed, and the brake
fluid level checked.
If brake failure is indicated, immediate repair is necessary.
Vehicles equipped with the Anti-Lock Brake System (ABS)
are also equipped with Electronic Brake Force Distribution
(EBD). In the event of an EBD failure, the Brake Warning
Light will turn on along with the ABS Light. Immediate
repair to the ABS system is required.
Operation of the Brake Warning Light can be checked by
turning the ignition switch from the OFF position to the
ON/RUN position. The light should illuminate for
approximately two seconds. The light should then turn off
unless the parking brake is applied or a brake fault is
detected. If the light does not illuminate, have the light
inspected by an authorized dealer.The light also will turn on when the parking brake is
applied with the ignition switch in the ON/RUN position.
NOTE:This light shows only that the parking brake is applied. It
does not show the degree of brake application.
Battery Charge Warning Light
This warning light will illuminate when the
battery is not charging properly. If it stays on
while the engine is running, there may be a
malfunction with the charging system. Contact
an authorized dealer as soon as possible.
This indicates a possible problem with the electrical
system or a related component.
Door Open Warning Light
This indicator will illuminate when a door is
ajar/open and not fully closed.
NOTE:If the vehicle is moving, there will also be a single chime.
WARNING!
Driving a vehicle with the red brake light on is
dangerous. Part of the brake system may have failed. It
will take longer to stop the vehicle. You could have a
collision. Have the vehicle checked immediately.
3
23_WS_OM_EN_USC_t.book Page 109
Page 124 of 396
122STARTING AND OPERATING
COLD WEATHER OPERATION
(B
ELOW –22°F OR −30°C)
To ensure reliable starting at these temperatures, use of
an externally powered electric engine block heater
(available from an authorized dealer) is recommended.
AFTER STARTING
The idle speed is controlled automatically, and it will
decrease as the engine warms up.
TURBOCHARGER “COOL DOWN” —
3.0L E
NGINE ONLY
The 3.0L engine is equipped with an after-run pump to
cool the turbocharger after the engine is shut off.
Depending on the type of driving and the amount of cargo,
the pump will run for up to 20 minutes after the engine
has been shut off to circulate coolant through the
turbocharger. Although the pump is rubber-mounted for
quiet operation, it is normal to hear it running during this
time.
ENGINE BLOCK HEATER — IF EQUIPPED
The engine block heater warms the engine, and permits
quicker starts in cold weather. Connect the cord to a
standard 110-115 Volt AC electrical outlet with a
grounded, three-wire extension cord.
The engine block heater must be plugged in at least one
hour to have an adequate warming effect on the engine. The engine block heater cord is coiled and strapped right
behind the engine air cleaner filter assembly from the
manufacturer.
ENGINE BREAK-IN RECOMMENDATIONS
An initial break-in period is recommended for the
powertrain (engine, transmission, axle, etc.) in your
vehicle. Adhering to the following guidelines will contribute
to improved longevity, fuel economy, and performance.
Drive moderately during the first 100 miles (160 km).
After that, for the first 500 miles (800 km), avoid long
periods at constant speed. Varying speed, engine RPM,
and throttle position is desirable.
Avoid high performance, severe off-road, and towing for
the first 500 miles (800 km).
NOTE:A new engine may consume some oil during its first few
thousand miles (km) of operation. This should be
considered a normal part of the break-in and not inter -
preted as a problem. For engines not equipped with an oil
level sensor, please check your oil level frequently during
the break-in period. Add manufacturer-approved oil as
required
Úpage 376.
PARKING BRAKE
ELECTRIC PARK BRAKE (EPB)
Your vehicle is equipped with an EPB that offers simple
operation, and some additional features that make the
parking brake more convenient and useful.
The parking brake is primarily intended to prevent the
vehicle from rolling while parked. Before leaving the
vehicle, make sure that the parking brake is applied. Also,
be certain to leave the transmission in PARK.
You can engage the parking brake in two ways:
Manually, by applying the EPB switch.
Automatically, by enabling the Auto Park Brake feature
in the customer programmable features section of the
Uconnect settings.
WARNING!
Remember to disconnect the engine block heater cord
before driving. Damage to the 110-115 Volt electrical
cord could cause electrocution.
CAUTION!
Never use Non-Detergent Oil or Straight Mineral Oil in
the engine or damage may result. ONLY USE OILS THAT
ARE API APPROVED
Úpage 376.
23_WS_OM_EN_USC_t.book Page 122