JEEP WRANGLER 2023 Owners Manual
Manufacturer: JEEP, Model Year: 2023, Model line: WRANGLER, Model: JEEP WRANGLER 2023Pages: 396, PDF Size: 25.15 MB
Page 101 of 396
GETTING TO KNOW YOUR VEHICLE99
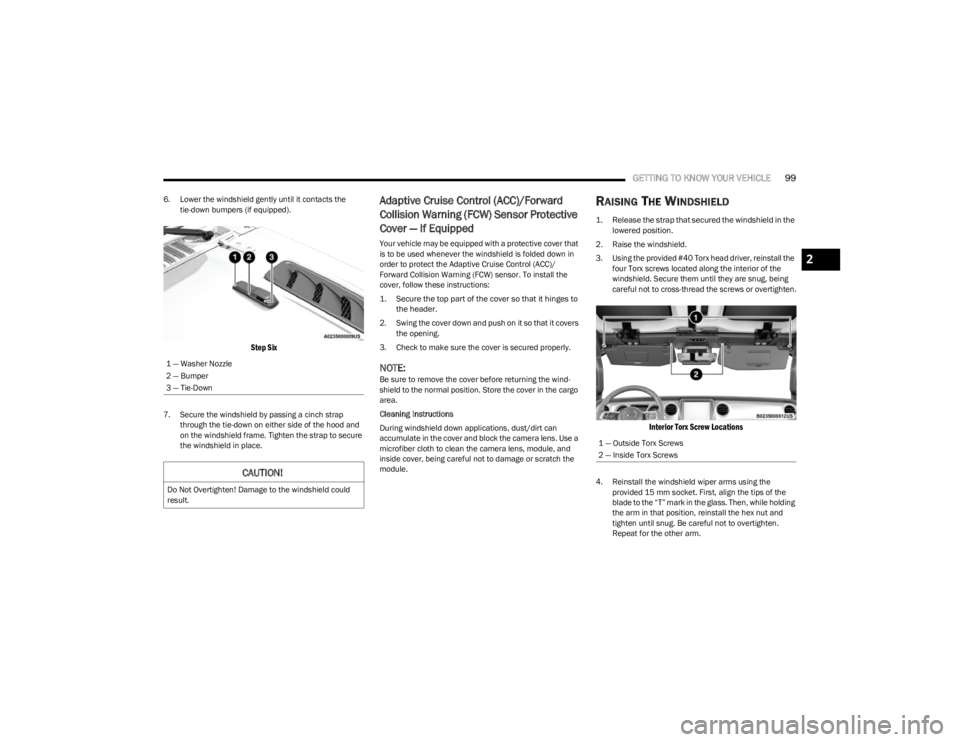
6. Lower the windshield gently until it contacts the
tie-down bumpers (if equipped).
Step Six
7. Secure the windshield by passing a cinch strap through the tie-down on either side of the hood and
on the windshield frame. Tighten the strap to secure
the windshield in place.
Adaptive Cruise Control (ACC)/Forward
Collision Warning (FCW) Sensor Protective
Cover — If Equipped
Your vehicle may be equipped with a protective cover that
is to be used whenever the windshield is folded down in
order to protect the Adaptive Cruise Control (ACC)/
Forward Collision Warning (FCW) sensor. To install the
cover, follow these instructions:
1. Secure the top part of the cover so that it hinges to the header.
2. Swing the cover down and push on it so that it covers the opening.
3. Check to make sure the cover is secured properly.
NOTE:Be sure to remove the cover before returning the wind -
shield to the normal position. Store the cover in the cargo
area.
Cleaning Instructions
During windshield down applications, dust/dirt can
accumulate in the cover and block the camera lens. Use a
microfiber cloth to clean the camera lens, module, and
inside cover, being careful not to damage or scratch the
module.
RAISING THE WINDSHIELD
1. Release the strap that secured the windshield in the lowered position.
2. Raise the windshield.
3. Using the provided #40 Torx head driver, reinstall the four Torx screws located along the interior of the
windshield. Secure them until they are snug, being
careful not to cross-thread the screws or overtighten.
Interior Torx Screw Locations
4. Reinstall the windshield wiper arms using the provided 15 mm socket. First, align the tips of the
blade to the “T” mark in the glass. Then, while holding
the arm in that position, reinstall the hex nut and
tighten until snug. Be careful not to overtighten.
Repeat for the other arm.
1 — Washer Nozzle
2 — Bumper
3 — Tie-DownCAUTION!
Do Not Overtighten! Damage to the windshield could
result.
1 — Outside Torx Screws
2 — Inside Torx Screws
2
23_JL_OM_EN_USC_t.book Page 99
Page 102 of 396
100GETTING TO KNOW YOUR VEHICLE
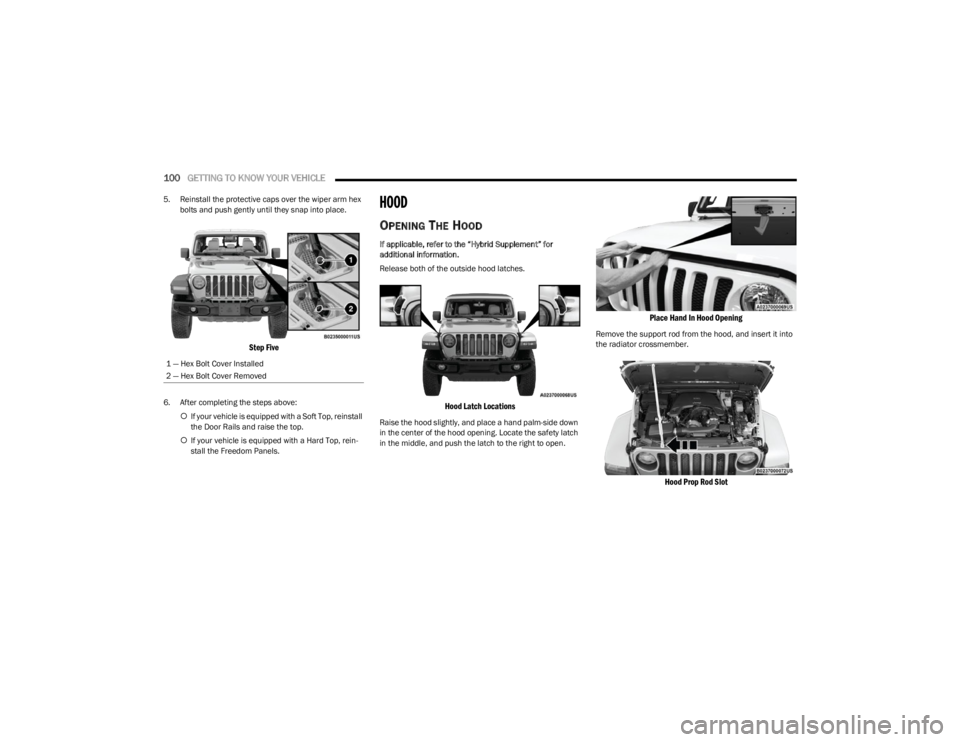
5. Reinstall the protective caps over the wiper arm hex
bolts and push gently until they snap into place.
Step Five
6. After completing the steps above:
If your vehicle is equipped with a Soft Top, reinstall
the Door Rails and raise the top.
If your vehicle is equipped with a Hard Top, rein -
stall the Freedom Panels.
HOOD
OPENING THE HOOD
If applicable, refer to the “Hybrid Supplement” for
additional information.
Release both of the outside hood latches.
Hood Latch Locations
Raise the hood slightly, and place a hand palm-side down
in the center of the hood opening. Locate the safety latch
in the middle, and push the latch to the right to open.
Place Hand In Hood Opening
Remove the support rod from the hood, and insert it into
the radiator crossmember.
Hood Prop Rod Slot
1 — Hex Bolt Cover Installed
2 — Hex Bolt Cover Removed
23_JL_OM_EN_USC_t.book Page 100
Page 103 of 396
GETTING TO KNOW YOUR VEHICLE101
NOTE:
Vehicle must be at a stop and the gear selector must
be in PARK.
You may have to push down slightly on the hood before
pushing the safety latch.
While lifting the hood, use both hands.
Before lifting the hood, check that the wiper arms are
not in motion and not in the lifted position.
CLOSING THE HOOD
If applicable, refer to the “Hybrid Supplement” for
additional information.
To close the hood, remove the support rod from the slot
and replace it on the hood panel retaining clip. Lower the
hood slowly. Secure both of the hood latches.
REAR SWING GATE
The rear swing gate can be unlocked by using one of the
following methods:
Mechanical key (with mechanical lock — if equipped)
Remote Keyless Entry key fob (if equipped)
Power door unlock switch on the front doors (if
equipped)
Passive Entry swing gate handle (if equipped)
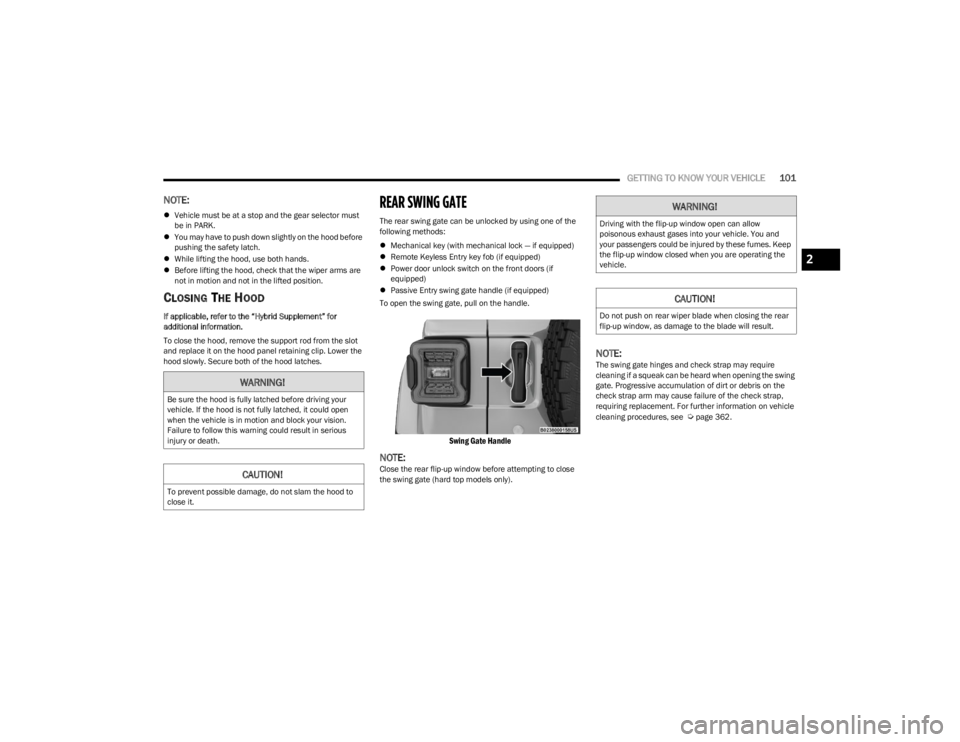
To open the swing gate, pull on the handle.
Swing Gate Handle
NOTE:Close the rear flip-up window before attempting to close
the swing gate (hard top models only).
NOTE:The swing gate hinges and check strap may require
cleaning if a squeak can be heard when opening the swing
gate. Progressive accumulation of dirt or debris on the
check strap arm may cause failure of the check strap,
requiring replacement. For further information on vehicle
cleaning procedures, see
Úpage 362.
WARNING!
Be sure the hood is fully latched before driving your
vehicle. If the hood is not fully latched, it could open
when the vehicle is in motion and block your vision.
Failure to follow this warning could result in serious
injury or death.
CAUTION!
To prevent possible damage, do not slam the hood to
close it.
WARNING!
Driving with the flip-up window open can allow
poisonous exhaust gases into your vehicle. You and
your passengers could be injured by these fumes. Keep
the flip-up window closed when you are operating the
vehicle.
CAUTION!
Do not push on rear wiper blade when closing the rear
flip-up window, as damage to the blade will result.
2
23_JL_OM_EN_USC_t.book Page 101
Page 104 of 396
102GETTING TO KNOW YOUR VEHICLE
CARGO AREA FEATURES
Cargo Tie-Down Hooks And Loops
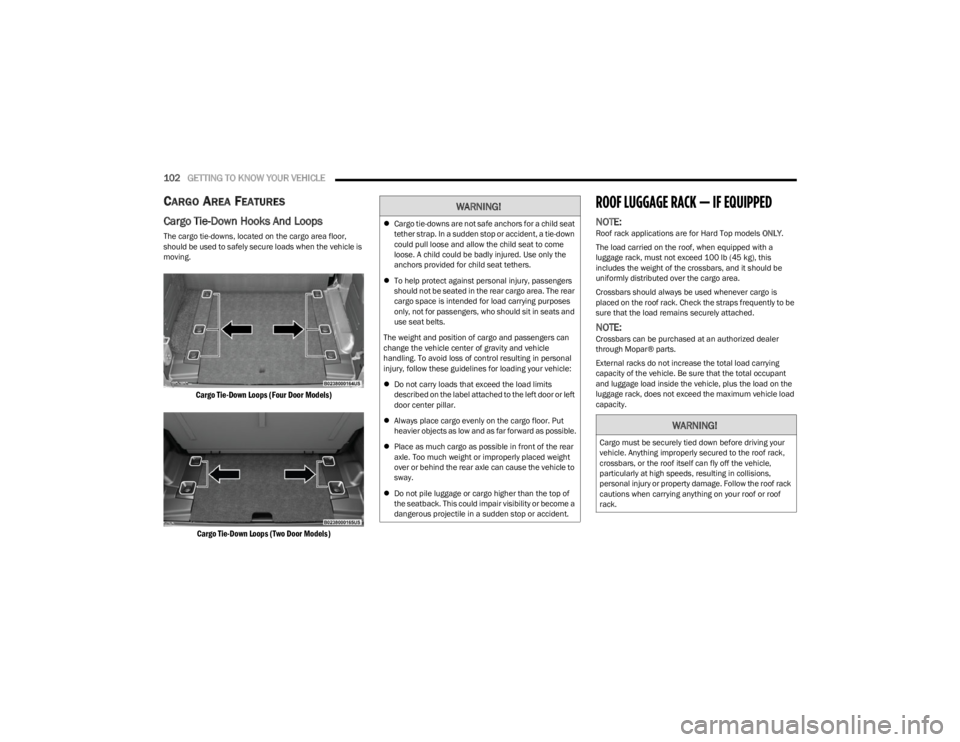
The cargo tie-downs, located on the cargo area floor,
should be used to safely secure loads when the vehicle is
moving.
Cargo Tie-Down Loops (Four Door Models)
Cargo Tie-Down Loops (Two Door Models)
ROOF LUGGAGE RACK — IF EQUIPPED
NOTE:Roof rack applications are for Hard Top models ONLY.
The load carried on the roof, when equipped with a
luggage rack, must not exceed 100 lb (45 kg), this
includes the weight of the crossbars, and it should be
uniformly distributed over the cargo area.
Crossbars should always be used whenever cargo is
placed on the roof rack. Check the straps frequently to be
sure that the load remains securely attached.
NOTE:Crossbars can be purchased at an authorized dealer
through Mopar® parts.
External racks do not increase the total load carrying
capacity of the vehicle. Be sure that the total occupant
and luggage load inside the vehicle, plus the load on the
luggage rack, does not exceed the maximum vehicle load
capacity.
WARNING!
Cargo tie-downs are not safe anchors for a child seat
tether strap. In a sudden stop or accident, a tie-down
could pull loose and allow the child seat to come
loose. A child could be badly injured. Use only the
anchors provided for child seat tethers.
To help protect against personal injury, passengers
should not be seated in the rear cargo area. The rear
cargo space is intended for load carrying purposes
only, not for passengers, who should sit in seats and
use seat belts.
The weight and position of cargo and passengers can
change the vehicle center of gravity and vehicle
handling. To avoid loss of control resulting in personal
injury, follow these guidelines for loading your vehicle:
Do not carry loads that exceed the load limits
described on the label attached to the left door or left
door center pillar.
Always place cargo evenly on the cargo floor. Put
heavier objects as low and as far forward as possible.
Place as much cargo as possible in front of the rear
axle. Too much weight or improperly placed weight
over or behind the rear axle can cause the vehicle to
sway.
Do not pile luggage or cargo higher than the top of
the seatback. This could impair visibility or become a
dangerous projectile in a sudden stop or accident.
WARNING!
Cargo must be securely tied down before driving your
vehicle. Anything improperly secured to the roof rack,
crossbars, or the roof itself can fly off the vehicle,
particularly at high speeds, resulting in collisions,
personal injury or property damage. Follow the roof rack
cautions when carrying anything on your roof or roof
rack.
23_JL_OM_EN_USC_t.book Page 102
Page 105 of 396

GETTING TO KNOW YOUR VEHICLE103
CAUTION!
To avoid damage to the roof rack and vehicle, do not
exceed the maximum roof rack load capacity. Always
distribute heavy loads as evenly as possible and
appropriately secure the load and any protective
layer placed between the load and the roof surface.
Long loads, which extend over the windshield, should
be secured to both the front and rear of the vehicle.
Place a blanket or other protection between the
surface of the roof and the load.
Travel at reduced speeds and turn corners carefully
when carrying large or heavy loads on the roof rack.
Wind forces, due to natural causes or nearby truck
traffic, can add sudden upward lift. It is recom -
mended to not carry large flat loads, such as wood
panels or surfboards, which may result in damage to
the cargo or your vehicle.
Load should always be secured to crossbars first,
with tie down loops used as additional securing
points if needed. Tie loops are intended as supple -
mentary tie down points only. Do not use ratcheting
mechanisms with the tie loops. Check the straps
frequently to be sure that the load remains securely
attached.
2
23_JL_OM_EN_USC_t.book Page 103
Page 106 of 396
104
GETTING TO KNOW YOUR INSTRUMENT PANEL
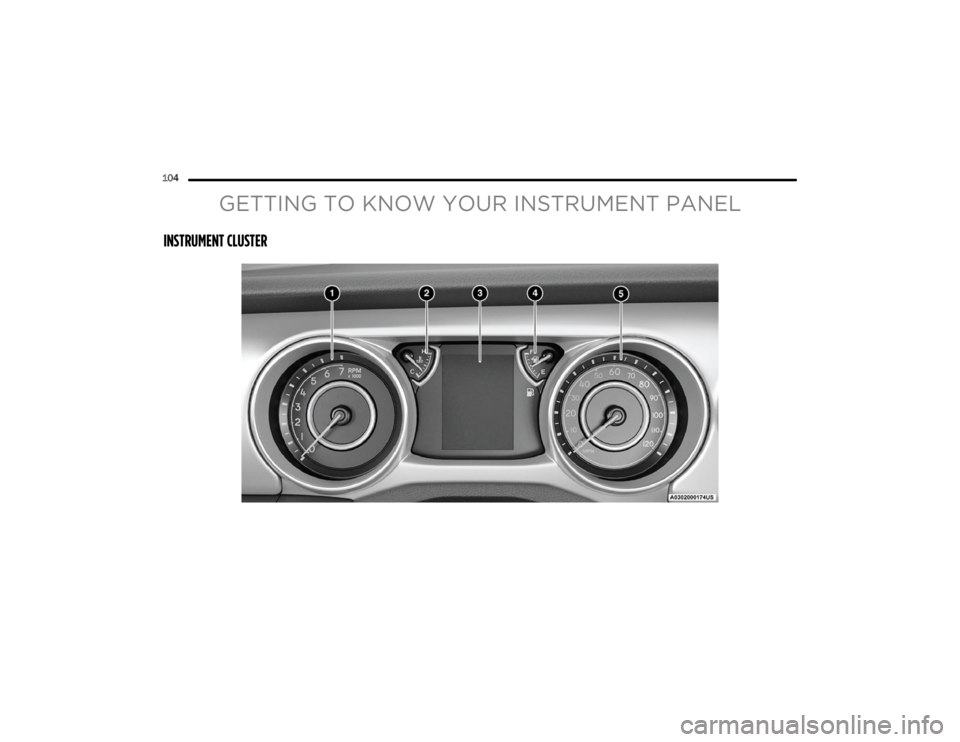
INSTRUMENT CLUSTER
23_JL_OM_EN_USC_t.book Page 104
Page 107 of 396
GETTING TO KNOW YOUR INSTRUMENT PANEL105
3
23_JL_OM_EN_USC_t.book Page 105
Page 108 of 396
106GETTING TO KNOW YOUR INSTRUMENT PANEL
23_JL_OM_EN_USC_t.book Page 106
Page 109 of 396
GETTING TO KNOW YOUR INSTRUMENT PANEL107
3
23_JL_OM_EN_USC_t.book Page 107
Page 110 of 396
108GETTING TO KNOW YOUR INSTRUMENT PANEL
Use this QR code to access your digital
experience.
INSTRUMENT CLUSTER DESCRIPTIONS
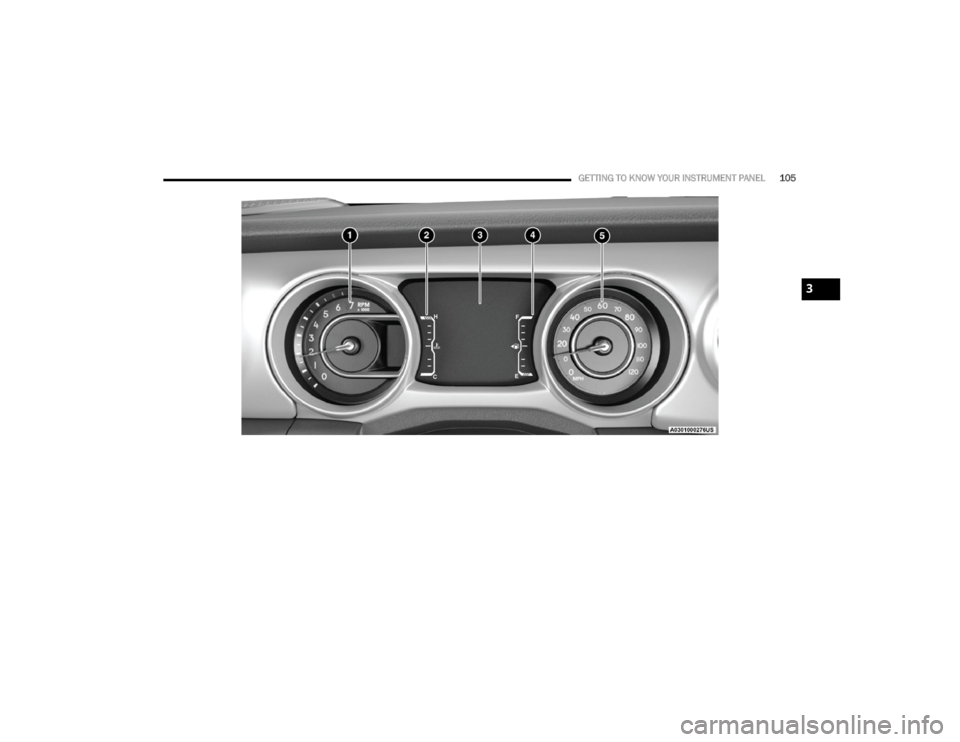
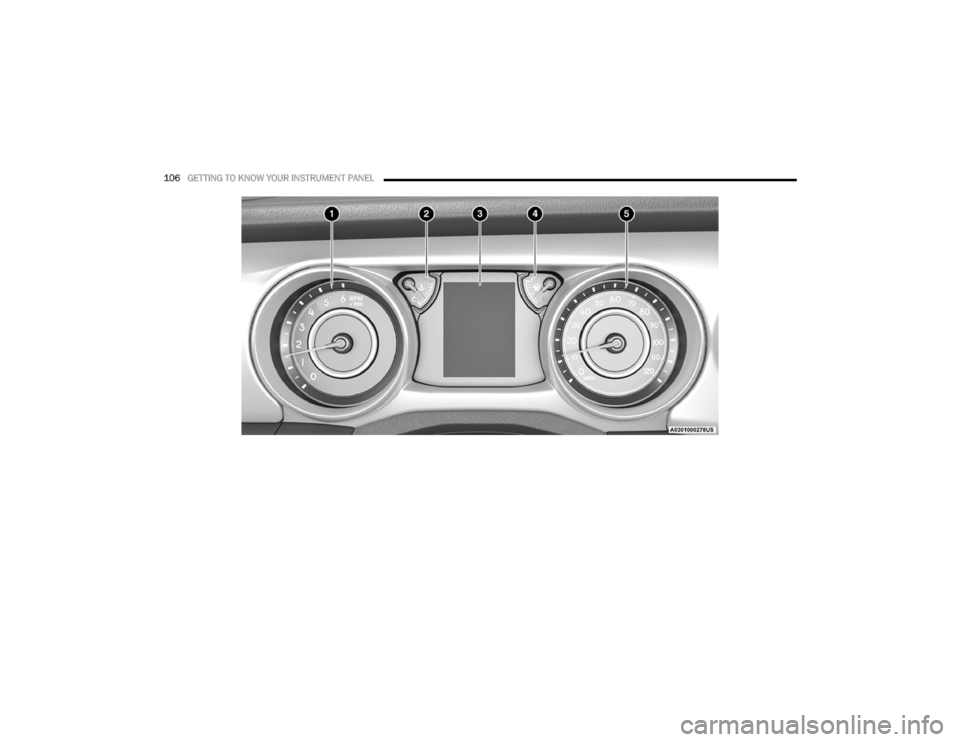
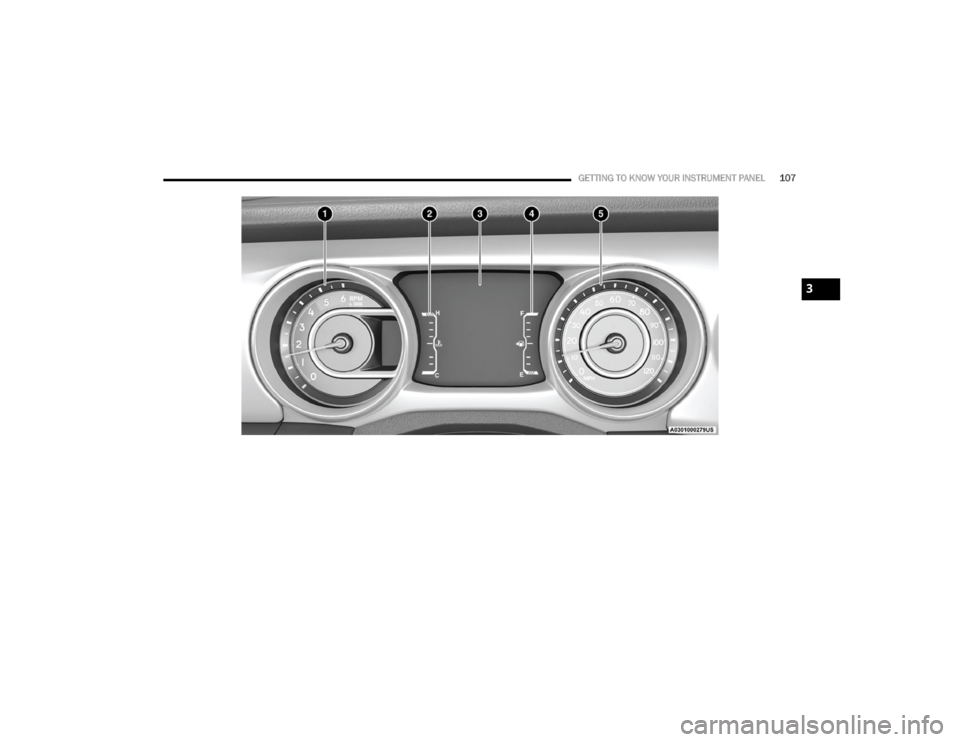
1.
Tachometer
Indicates the engine speed in revolutions per
minute (RPM x 1000).
2. Temperature Gauge
The temperature gauge shows engine coolant
temperature. Any reading within the normal range
indicates that the engine cooling system is oper -
ating satisfactorily.
The pointer will likely indicate a higher tempera -
ture when driving in hot weather, up mountain
grades, or when towing a trailer. It should not be
allowed to exceed the upper limits of the normal
operating range. 3.
Instrument Cluster Display
The instrument cluster display features a driver
interactive display
Úpage 108. 4.
Fuel Gauge
The pointer shows the level of fuel in the fuel tank
when the ignition switch is in the ON/RUN posi -
tion.
The fuel pump symbol points to the side
of the vehicle where the fuel filler door is
located.
5. Speedometer
Indicates vehicle speed.
INSTRUMENT CLUSTER DISPLAY
Your vehicle will be equipped with an instrument cluster
display, which offers useful information to the driver. With
the ignition in the OFF mode, opening/closing of a door will
activate the display for viewing, and display the total miles,
or kilometers, in the odometer. Your instrument cluster
display is designed to display important information about
your vehicle’s systems and features. Using a driver
interactive display located on the instrument panel, your
instrument cluster display can show you how systems are
working and give you warnings when they aren’t. The
steering wheel mounted controls allow you to scroll
through and enter the main menus and submenus. You
can access the specific information you want and make
selections and adjustments.CAUTION!
Do not operate the engine with the tachometer pointer
in the red area. Engine damage will occur.
WARNING!
A hot engine cooling system is dangerous. You or others
could be badly burned by steam or boiling coolant. It is
recommended to call an authorized dealer for service if
your vehicle overheats.
CAUTION!
Driving with a hot engine cooling system could damage
your vehicle. If the temperature gauge reads “H” pull
over and stop the vehicle. Idle the vehicle with the air
conditioner turned off until the pointer drops back into
the normal range. If the pointer remains on the “H”,
turn the engine off immediately and call an authorized
dealer for service.
23_JL_OM_EN_USC_t.book Page 108