stop start JEEP WRANGLER UNLIMITED 2021 Owner handbook (in English)
[x] Cancel search | Manufacturer: JEEP, Model Year: 2021, Model line: WRANGLER UNLIMITED, Model: JEEP WRANGLER UNLIMITED 2021Pages: 330, PDF Size: 9.16 MB
Page 152 of 330
STARTING AND OPERATING
150
In the event that additional traction is
required, the transfer case 4H and 4L posi-
tions can be used to lock the front and rear
driveshafts together, forcing the front and
rear wheels to rotate at the same speed. The
4H and 4L positions are intended for loose,
slippery road surfaces only and not intended
for normal driving. Driving in the 4H and 4L
positions on hard-surfaced roads will cause
increased tire wear and damage to the drive -
line components. Refer to ŌĆ£Shifting Proce -
duresŌĆØ in this section for further information
on shifting into 4H or 4L.
The instrument cluster alerts the driver that
the vehicle is in four-wheel drive, and the
front and rear driveshafts are locked
together. The light will illuminate when the
transfer case is shifted into the 4H position.
When operating your vehicle in 4L, the
engine speed will be approximately three
times (four times for Rubicon models) that of
the 2H or 4H positions at a given road speed.
Take care not to overspeed the engine.
Proper operation of four-wheel drive vehicles
depends on tires of equal size, type, and
circumference on each wheel. Any difference
will adversely affect shifting and cause
damage to the transfer case. Because four-wheel drive provides improved
traction, there is a tendency to exceed safe
turning and stopping speeds. Do not go
faster than road conditions permit.
Shifting Procedures
2H To 4H Auto Or 4H Auto To 2H
Shifting between 2H and 4H Auto can be
made with the vehicle stopped or in motion.
The preferred shifting speed would be 0 to
45 mph (72 km/h). With the vehicle in
motion, the transfer case will engage/disen
-
gage faster if you momentarily release the
accelerator pedal after completing the shift.
Do not accelerate while shifting the transfer
case. Apply a constant force when shifting
the transfer case lever.
2H/4H Auto To 4H Part Time Or 4H Part Time To
2H/4H Auto
Shifting between 2H/4H AUTO to 4H PART
TIME can be made with the vehicle stopped
or in motion. The preferred shifting speed
would be 0 to 45 mph (72 km/h). With the
vehicle in motion, the transfer case will
engage/disengage faster if you momentarily
release the accelerator pedal after
completing the shift. Do not accelerate while shifting the transfer case. Apply a constant
force when shifting the transfer case lever.
NOTE:
’ü»Do not attempt to make a shift while only
the front or rear wheels are spinning. The
front and rear driveshaft speeds must be
equal for the shift to take place. Shifting
while only the front or rear wheels are
spinning can cause damage to the transfer
case.
’ü»Delayed shifts out of four-wheel drive may
be experienced due to uneven tire wear,
low or uneven tire pressures, excessive
vehicle loading, or cold temperatures.
’ü»Shifting effort will increase with speed,
this is normal.
During cold weather, you may experience
increased effort in shifting until the transfer
case fluid warms up. This is normal.
4H Part Time/4H Auto To 4L Or 4L To 4H Part Time/
4H Auto
With the vehicle rolling at 2 to 3 mph (3 to
5 km/h), shift the transmission into
NEUTRAL (N). While the vehicle is coasting
at 2 to 3 mph (3 to 5 km/h), shift the
transfer case lever firmly to the desired posi -
2020_JEEP_JL_WRANGLER_UG_RHD_UK.book Page 150
Page 155 of 330
153
NOTE:
The stabilizer/sway bar may be torque locked
due to left and right suspension height
differences. This condition is due to driving
surface differences or vehicle loading. In
order for the stabilizer/sway bar to discon-
nect/reconnect, the right and left halves of
the bar must be aligned. This alignment may
require that the vehicle be driven onto level
ground or rocked from side to side.
To return to on-road mode, push the SWAY
BAR switch again.
STOP/START SYSTEM ŌĆö
AUTOMATIC TRANSMISSION
(IF EQUIPPED)
The Stop/Start function is developed to
reduce fuel consumption. The system will
stop the engine automatically during a
vehicle stop if the required conditions are
met. Releasing the brake pedal or pressing
the accelerator pedal will automatically
re-start the engine.
Engine Stop/Start (ESS) vehicles have been
upgraded with a heavy duty starter,
enhanced battery, and other upgraded
engine parts, to handle the additional engine
starts.
NOTE:
It is recommended that the Stop/Start
System be disabled during off-road use. Secondary Battery
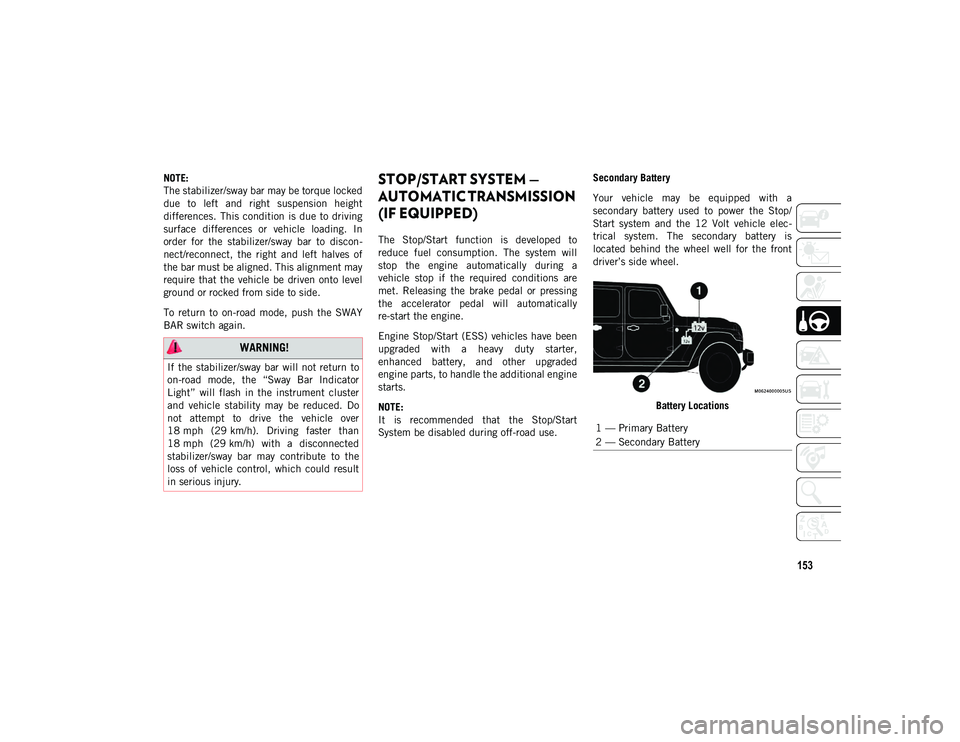
Your vehicle may be equipped with a
secondary battery used to power the Stop/
Start system and the 12 Volt vehicle elec
-
trical system. The secondary battery is
located behind the wheel well for the front
driverŌĆÖs side wheel.
Battery Locations
WARNING!
If the stabilizer/sway bar will not return to
on-road mode, the ŌĆ£Sway Bar Indicator
LightŌĆØ will flash in the instrument cluster
and vehicle stability may be reduced. Do
not attempt to drive the vehicle over
18 mph (29 km/h). Driving faster than
18 mph (29 km/h) with a disconnected
stabilizer/sway bar may contribute to the
loss of vehicle control, which could result
in serious injury.
1 ŌĆö Primary Battery
2 ŌĆö Secondary Battery
2020_JEEP_JL_WRANGLER_UG_RHD_UK.book Page 153
Page 156 of 330

STARTING AND OPERATING
154
Automatic Mode
The Stop/Start feature is enabled
after every normal customer engine
start. At that time, the system will
go into STOP/START READY and if
all other conditions are met, can go into a
STOP/START AUTOSTOP ACTIVE
ŌĆ£AutostopŌĆØ mode.
To Activate The Autostop Mode, The Following
Must Occur:
’ü»The system must be in STOP/START
READY state. A STOP/START READY
message will be displayed in the instru -
ment cluster display within the Stop/Start
section. Refer to ŌĆ£Instrument ClusterŌĆØ in
ŌĆ£Getting To Know Your Instrument PanelŌĆØ
in your OwnerŌĆÖs Manual for further infor -
mation.
’ü»The vehicle must be completely stopped.
’ü»The shifter must be in a forward gear and
the brake pedal depressed.
The engine will shut down, the tachometer
will move to the zero position and the Stop/
Start telltale will illuminate indicating you
are in Autostop. Customer settings will be
maintained upon return to an engine running
condition. Refer to the ŌĆ£Stop/Start SystemŌĆØ in the
ŌĆ£Starting And OperatingŌĆØ section located in
your OwnerŌĆÖs Manual for further information.
Possible Reasons The Engine Does Not
Autostop
Prior to engine shut down, the system will
check many safety and comfort conditions to
see if they are fulfilled. Detailed information
about the operation of the Stop/Start system
may be viewed in the instrument cluster
display Stop/Start Screen. In the following
situations, the engine will not stop:
’ü»DriverŌĆÖs seat belt is not buckled.
’ü»DriverŌĆÖs door is not closed.
’ü»Battery temperature is too warm or cold.
’ü»Battery charge is low.
’ü»The vehicle is on a steep grade.
’ü»Cabin heating or cooling is in process and
an acceptable cabin temperature has not
been achieved.
’ü»HVAC is set to full defrost mode at a high
blower speed.
’ü»HVAC set to MAX A/C.
’ü»Engine has not reached normal operating
temperature.
’ü»Engine temperature too high.
’ü»The transmission is not in a forward gear.
’ü»Hood is open.
’ü»Transfer case is in 4L or Neutral.
’ü»Brake pedal is not pressed with sufficient
pressure.
Other Factors Which Can Inhibit Autostop
Include:
’ü»Accelerator pedal input.
’ü»Vehicle speed threshold not achieved from
previous auto-stop.
’ü»Steering angle beyond threshold. (ESS
Models Only)
’ü»ACC is on and speed is set.
’ü»Vehicle is at high altitude.
’ü»System fault present.
It may be possible for the vehicle to be driven
several times without the Stop/Start system
going into a STOP/START READY state
under more extreme conditions of the items
listed above.
2020_JEEP_JL_WRANGLER_UG_RHD_UK.book Page 154
Page 157 of 330
155
To Start The Engine While In Autostop
Mode
While in a forward gear, the engine will start
when the brake pedal is released or the
throttle pedal is depressed. The transmission
will automatically re-engage upon engine
restart.
Conditions That Will Cause The Engine To Start
Automatically While In Autostop Mode:
’ü»The transmission selector is moved out of
DRIVE.
’ü»To maintain cabin temperature comfort.
’ü»Actual cabin temperature is significantly
different than temperature set on Auto
HVAC.
’ü»HVAC is set to full defrost mode.
’ü»HVAC system temperature or fan speed is
manually adjusted.
’ü»Battery voltage drops too low.
’ü»Low brake vacuum (e.g. after several brake
pedal applications).
’ü»Stop/Start OFF switch is pushed.
’ü»A Stop/Start system error occurs.
’ü»STOP/START AUTO STOP ACTIVE time
exceeds 5 minutes.
’ü»4WD system is put into 4L or Neutral
mode.
’ü»Steering wheel is turned beyond
threshold. (ESS Models Only)
To Manually Turn Off The Stop/Start
System
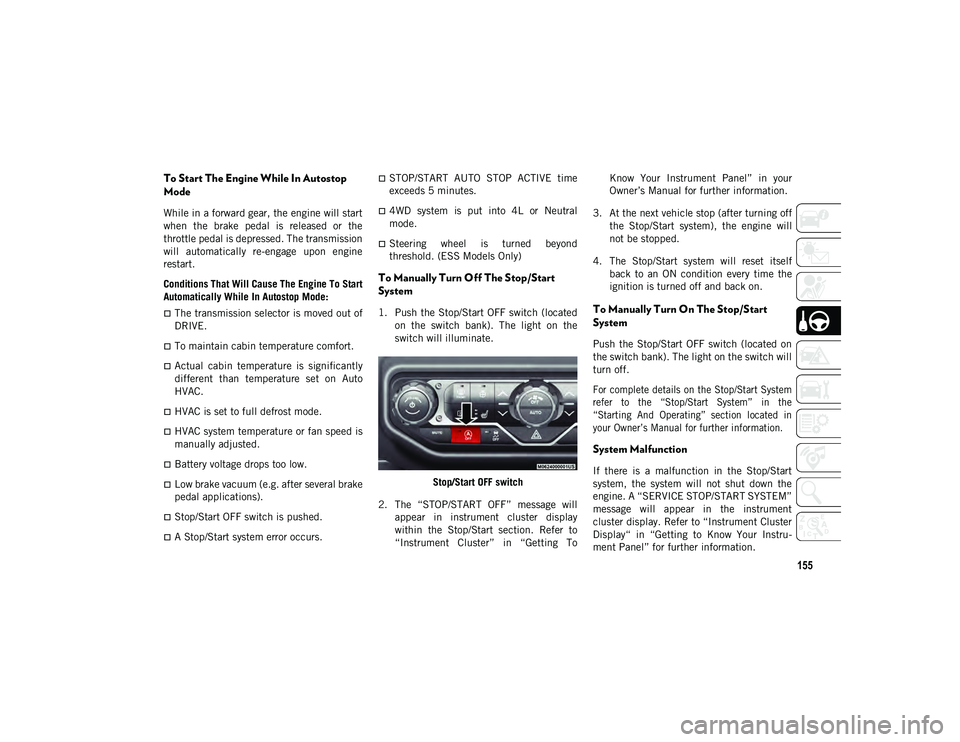
1. Push the Stop/Start OFF switch (located
on the switch bank). The light on the
switch will illuminate.
Stop/Start OFF switch
2. The ŌĆ£STOP/START OFFŌĆØ message will appear in instrument cluster display
within the Stop/Start section. Refer to
ŌĆ£Instrument ClusterŌĆØ in ŌĆ£Getting To Know Your Instrument PanelŌĆØ in your
OwnerŌĆÖs Manual for further information.
3. At the next vehicle stop (after turning off the Stop/Start system), the engine will
not be stopped.
4. The Stop/Start system will reset itself back to an ON condition every time the
ignition is turned off and back on.To Manually Turn On The Stop/Start
System
Push the Stop/Start OFF switch (located on
the switch bank). The light on the switch will
turn off.
For complete details on the Stop/Start System
refer to the ŌĆ£Stop/Start SystemŌĆØ in the
ŌĆ£Starting And OperatingŌĆØ section located in
your OwnerŌĆÖs Manual for further information.
System Malfunction
If there is a malfunction in the Stop/Start
system, the system will not shut down the
engine. A ŌĆ£SERVICE STOP/START SYSTEMŌĆØ
message will appear in the instrument
cluster display. Refer to ŌĆ£Instrument Cluster
DisplayŌĆ£ in ŌĆ£Getting to Know Your Instru -
ment PanelŌĆØ for further information.
2020_JEEP_JL_WRANGLER_UG_RHD_UK.book Page 155
Page 158 of 330
STARTING AND OPERATING
156
If the ŌĆ£SERVICE STOP/START SYSTEMŌĆØ
message appears in the instrument cluster
display, have the system checked by an
authorized dealer.
ACTIVE SPEED LIMITER ŌĆö IF
EQUIPPED
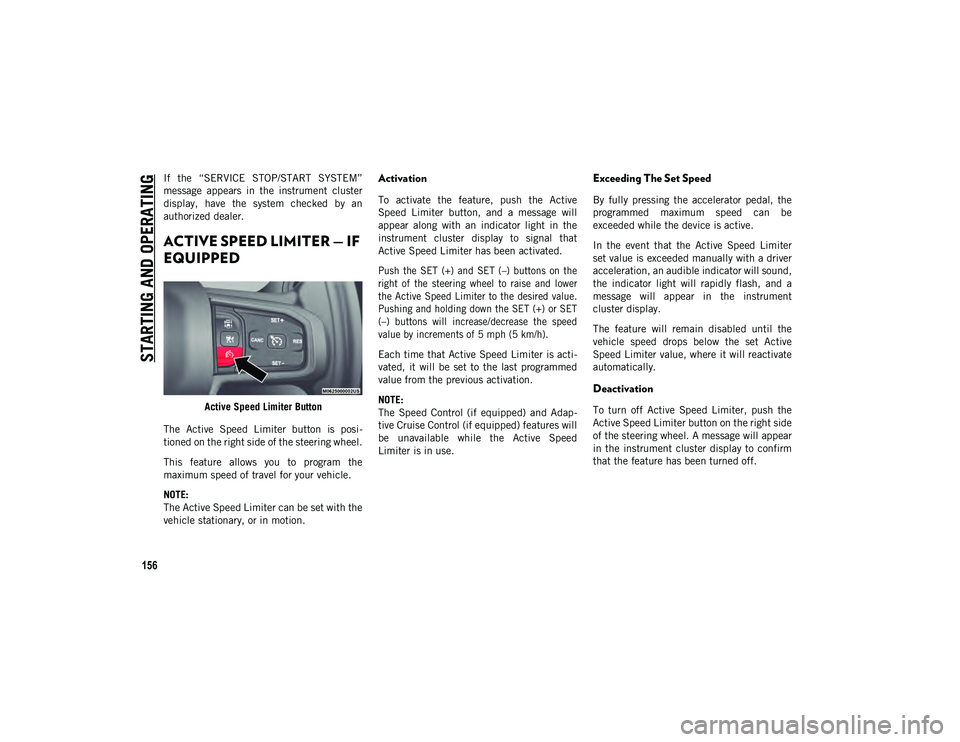
Active Speed Limiter Button
The Active Speed Limiter button is posi -
tioned on the right side of the steering wheel.
This feature allows you to program the
maximum speed of travel for your vehicle.
NOTE:
The Active Speed Limiter can be set with the
vehicle stationary, or in motion.
Activation
To activate the feature, push the Active
Speed Limiter button, and a message will
appear along with an indicator light in the
instrument cluster display to signal that
Active Speed Limiter has been activated.
Push the SET (+) and SET (ŌĆō) buttons on the
right of the steering wheel to raise and lower
the Active Speed Limiter to the desired value.
Pushing and holding down the SET (+) or SET
(ŌĆō) buttons will increase/decrease the speed
value by increments of 5 mph (5 km/h).
Each time that Active Speed Limiter is acti -
vated, it will be set to the last programmed
value from the previous activation.
NOTE:
The Speed Control (if equipped) and Adap -
tive Cruise Control (if equipped) features will
be unavailable while the Active Speed
Limiter is in use.
Exceeding The Set Speed
By fully pressing the accelerator pedal, the
programmed maximum speed can be
exceeded while the device is active.
In the event that the Active Speed Limiter
set value is exceeded manually with a driver
acceleration, an audible indicator will sound,
the indicator light will rapidly flash, and a
message will appear in the instrument
cluster display.
The feature will remain disabled until the
vehicle speed drops below the set Active
Speed Limiter value, where it will reactivate
automatically.
Deactivation
To turn off Active Speed Limiter, push the
Active Speed Limiter button on the right side
of the steering wheel. A message will appear
in the instrument cluster display to confirm
that the feature has been turned off.
2020_JEEP_JL_WRANGLER_UG_RHD_UK.book Page 156
Page 162 of 330
STARTING AND OPERATING
160
Metric Speed (km/h)
’ü»Pushing the SET (+) button once will
result in a 1 km/h increase in set speed.
Each subsequent tap of the button results
in an increase of 1 km/h.
’ü»If the button is continually pushed, the set
speed will continue to increase in 10 km/
h increments until the button is released.
The increase in set speed is reflected in
the instrument cluster display.
To Decrease Speed
While ACC is set, the set speed can be
decreased by pushing the SET (-) button.
The driver's preferred units can be selected
through the instrument panel settings. Refer
to ŌĆ£Getting To Know Your Instrument PanelŌĆØ
in the OwnerŌĆÖs Manual for more information.
The speed increment shown is dependent on
the chosen speed unit of U.S. (mph) or
Metric (km/h):
U.S. Speed (mph)
’ü»Pushing the SET (-) button once will result
in a 1 mph decrease in set speed. Each
subsequent tap of the button results in a
decrease of 1 mph.
’ü»If the button is continually pushed, the set
speed will continue to decrease in 5 mph
decrements until the button is released.
The decrease in set speed is reflected in
the instrument cluster display.
Metric Speed (km/h)
’ü»Pushing the SET (-) button once will result
in a 1 km/h decrease in set speed. Each
subsequent tap of the button results in a
decrease of 1 km/h.
’ü»If the button is continually pushed, the set
speed will continue to decrease in 10 km/
h decrements until the button is released.
The decrease in set speed is reflected in
the instrument cluster display.
NOTE:
’ü»When you override and push the SET (+)
button or SET (-) buttons, the new set
speed will be the current speed of the
vehicle.
’ü»When you use the SET (-) button to decel -
erate, if the engineŌĆÖs braking power does
not slow the vehicle sufficiently to reach
the set speed, the brake system will auto-
matically slow the vehicle.
’ü»The ACC system applies the brake down to
a full stop when following a target vehicle.
If an ACC host vehicle follows a target
vehicle to a standstill, the host vehicle will
release the vehicle brakes two seconds
after coming to a full stop.
’ü»The ACC system maintains set speed when
driving uphill and downhill. However, a
slight speed change on moderate hills is
normal. In addition, downshifting may
occur while climbing uphill or descending
downhill. This is normal operation and
necessary to maintain set speed. When
driving uphill and downhill, the ACC
system will cancel if the braking tempera-
ture exceeds normal range (overheated).
Setting The Following Distance In ACC
The specified following distance for ACC can
be set by varying the distance setting
between four bars (longest), three bars
(long), two bars (medium) and one bar
(short). Using this distance setting and the
vehicle speed, ACC calculates and sets the
distance to the vehicle ahead. This distance
setting displays in the instrument cluster
display.
2020_JEEP_JL_WRANGLER_UG_RHD_UK.book Page 160
Page 170 of 330
STARTING AND OPERATING
168
Manual Activation Of The Rear View Camera
1. Press the ŌĆ£ControlsŌĆØ button located onthe bottom of the Uconnect display.
2. Press the ŌĆ£Backup CameraŌĆØ button to turn the Rear View Camera system on.
When the vehicle is shifted out of REVERSE
(with Camera delay turned off), the rear
Camera mode is exited and the previous
screen appears again.
When the vehicle is shifted out of REVERSE
(with Camera delay turned on), the rear
Camera image will be displayed for up to 10
seconds unless the vehicle speed exceeds
8 mph (13 km/h), the transmission is shifted
into PARK, the ignition is placed in the OFF
position, or the touchscreen button ŌĆ£XŌĆØ to
disable display of the Rear View Camera
image is pressed.
Whenever the Rear View Camera image is
activated through the ŌĆ£Backup CameraŌĆØ
button in the ŌĆ£ControlsŌĆØ menu, and the
vehicle speed is greater than, or equal to,
8 mph (13 km/h), a display timer for the
image is initiated. The image will continue to
be displayed until the display timer exceeds
10 seconds. NOTE:
’ü»If the vehicle speed remains below 8 mph
(13 km/h), the Rear View Camera image
will be displayed continuously until deac-
tivated via the touchscreen button ŌĆ£XŌĆØ,
the transmission is shifted into PARK, or
the ignition is placed in the OFF position.
’ü»The touchscreen button ŌĆ£XŌĆØ to disable
display of the camera image is made avail
-
able ONLY when the vehicle is not in
REVERSE.
When enabled, active guide lines are overlaid
on the image to illustrate the width of the
vehicle and its projected backup path based
on the steering wheel position. A dashed
center line overlay indicates the center of the
vehicle to assist with parking or aligning to a
hitch/receiver.
When enabled, fixed guide lines are overlaid
on the image to illustrate the width of the
vehicle.
Different colored zones indicate the distance
to the rear of the vehicle. NOTE:
If snow, ice, mud, or any foreign substance
builds up on the camera lens, clean the lens,
rinse with water, and dry with a soft cloth. Do
not cover the lens.
WARNING!
Drivers must be careful when backing up
even when using the ParkView Rear Back
Up Camera. Always check carefully behind
your vehicle, and be sure to check for
pedestrians, animals, other vehicles,
obstructions, or blind spots before backing
up. You are responsible for the safety of
your surroundings and must continue to
pay attention while backing up. Failure to
do so can result in serious injury or death.
CAUTION!
’ü»To avoid vehicle damage, ParkView
should only be used as a parking aid. The
ParkView camera is unable to view every
obstacle or object in your drive path.
’ü»To avoid vehicle damage, the vehicle
must be driven slowly when using
ParkView to be able to stop in time when
an obstacle is seen. It is recommended
that the driver look frequently over his/
her shoulder when using ParkView.
2020_JEEP_JL_WRANGLER_UG_RHD_UK.book Page 168
Page 174 of 330
STARTING AND OPERATING
172
AdBlue® (UREA) Storage
AdBlue® (UREA) is considered a very stable
product with a long shelf life. If AdBlue®
(UREA) is kept in temperatures between 10┬░
and 90┬░F (-12┬░ and 32┬░C), it will last a
minimum of one year.
AdBlue® (UREA) is subject to freezing at the
lowest temperatures. For example, AdBlue®
(UREA) may freeze at temperatures at or
below 12┬░F (-11┬░C). The system has been
designed to operate in this environment.
NOTE:
When working with AdBlue® (UREA), it is
important to know that:
’ü»Any containers or parts that come into
contact with AdBlue® (UREA) must be
AdBlue® (UREA) compatible (plastic or
stainless steel). Copper, brass, aluminum,
iron or non-stainless steel should be
avoided as they are subject to corrosion by
AdBlue® (UREA).
’ü»If AdBlue┬« (UREA) is spilled, it should be
wiped up completely.
Adding AdBlue® (UREA)
Preliminary Conditions
AdBlue® (UREA) freezes at temperatures
lower than 12┬░F (-11┬░C). If the car stands for
a long time at this temperature refilling
could be difficult. For this reason, it is
advised to park the vehicle in a garage and/
or heated environment and wait for the urea
to return to liquid state before topping up.
Proceed as follows:
’ü»Park the car on flat ground and stop the
engine by placing the ignition to the OFF
position.
’ü»Open the fuel door, undo and remove the
cap (blue) from the AdBlue® (UREA)
filler.
Refilling With Nozzles
You can fill up at any AdBlue® (UREA)
distributor.
Proceed as follows:
’ü»Insert the AdBlue┬« (UREA) nozzle in the
filler, start refilling and stop refilling at the
first shut-off (the shut-off indicates that the AdBlue® (UREA) tank is full). Do not
proceed with the refilling, to prevent
spillage of AdBlue® (UREA).
’ü»Extract the nozzle.
Refilling With Containers
Proceed as follows:
’ü»Check the expiration date.
’ü»Read the advice for use on the label before
pouring the content of the bottle into the
AdBlue® (UREA) tank.
’ü»If systems which cannot be screwed in
(e.g. tanks) are used for refilling, after the
indication appears on the instrument
panel display refer to ŌĆ£Warning lights And
MessagesŌĆØ in the ŌĆ£Getting To Know Your
Instrument PanelŌĆØ for further information,
fill the AdBlue® (UREA) tank with no
more than 2 Gallons (8 liters).
’ü»If containers which can be screwed to the
filler are used, the reservoir is full when
the AdBlue® (UREA) level in the
container stops pouring out. Do not
proceed further.
2020_JEEP_JL_WRANGLER_UG_RHD_UK.book Page 172
Page 179 of 330
177
Shifting Into NEUTRAL (N)
Use the following procedure to prepare your
vehicle for recreational towing:1. Bring the vehicle to a complete stop on
level ground.
2. Press and hold the brake pedal.
3. Shift the transmission into NEUTRAL.
4. Turn the engine off.
5. Shift the transfer case lever into NEUTRAL (N).
6. Start the engine.
7. Shift the transmission into REVERSE.
8. Release the brake pedal for five seconds and ensure that there is no vehicle move -
ment.
9. Repeat steps seven and eight with the transmission in DRIVE.
10. Turn the engine OFF and leave the igni -
tion in the unlocked ACC position.
11. Firmly apply the parking brake.’ü»Before recreational towing, perform the
procedure outlined under ŌĆ£Shifting Into
NEUTRAL (N)ŌĆØ to be certain that the
transfer case is fully in NEUTRAL (N).
Otherwise, internal damage will result.
’ü»Towing this vehicle in violation of the
above requirements can cause severe
transmission and/or transfer case
damage. Damage from improper towing
is not covered under the New Vehicle
Limited Warranty.
’ü»Do not use a bumper-mounted clamp-on
tow bar on your vehicle. The bumper face
bar will be damaged.
CAUTION! (Continued)
WARNING!
You or others could be injured or killed if
you leave the vehicle unattended with the
transfer case in the NEUTRAL (N) position
without first fully engaging the parking
brake. The transfer case NEUTRAL (N)
position disengages both the front and rear
driveshafts from the powertrain, and will
allow the vehicle to roll, even if the
automatic transmission is in PARK. The
parking brake should always be applied
when the driver is not in the vehicle.
CAUTION!
It is necessary to follow these steps to be
certain that the transfer case is fully in
NEUTRAL (N) before recreational towing
to prevent damage to internal parts.
2020_JEEP_JL_WRANGLER_UG_RHD_UK.book Page 177
Page 180 of 330
STARTING AND OPERATING
178
12. Shift the transmission into PARK (NOT inNEUTRAL).
13. Attach the vehicle to the tow vehicle using a suitable tow bar.
14. Release the parking brake.
15. Disconnect the negative battery cable, and secure it away from the negative
battery post.Shifting Out of NEUTRAL (N)
Use the following procedure to prepare your
vehicle for normal usage.
1. Bring the vehicle to a complete stop,leaving it connected to the tow vehicle.
2. Firmly apply the parking brake.
3. Reconnect the negative battery cable.
4. Start the engine.
5. Press and hold the brake pedal.
6. Shift the transmission into NEUTRAL.
7. Turn the engine OFF.
8. Shift the transfer case lever to the desired position.
NOTE:
When shifting the transfer case out of
NEUTRAL (N), the engine should remain Off
to avoid gear clash. 9. Shift the transmission into PARK.
10. Release the brake pedal.
11. Disconnect vehicle from the tow vehicle.
12. Start the engine.
13. Press and hold the brake pedal.
14. Release the parking brake.
15. Shift the transmission into gear, release
the brake pedal, and check that the
vehicle operates normally.
CAUTION!
Damage to the transmission may occur if
the transmission is shifted into PARK with
the transfer case in NEUTRAL (N) and the
engine running. With the transfer case in
NEUTRAL (N) ensure that the engine is
OFF before shifting the transmission into
PARK.
2020_JEEP_JL_WRANGLER_UG_RHD_UK.book Page 178