KIA CARNIVAL 2007 Workshop Manual
CARNIVAL 2007
KIA
KIA
https://www.carmanualsonline.info/img/2/57045/w960_57045-0.png
KIA CARNIVAL 2007 Workshop Manual
Trending: washer fluid, Radio wiring, open hood, 2.9 diesel, length, turn signal bulb, glove box
Page 151 of 1575
2007 > 2.7L V6 GASOLINE >
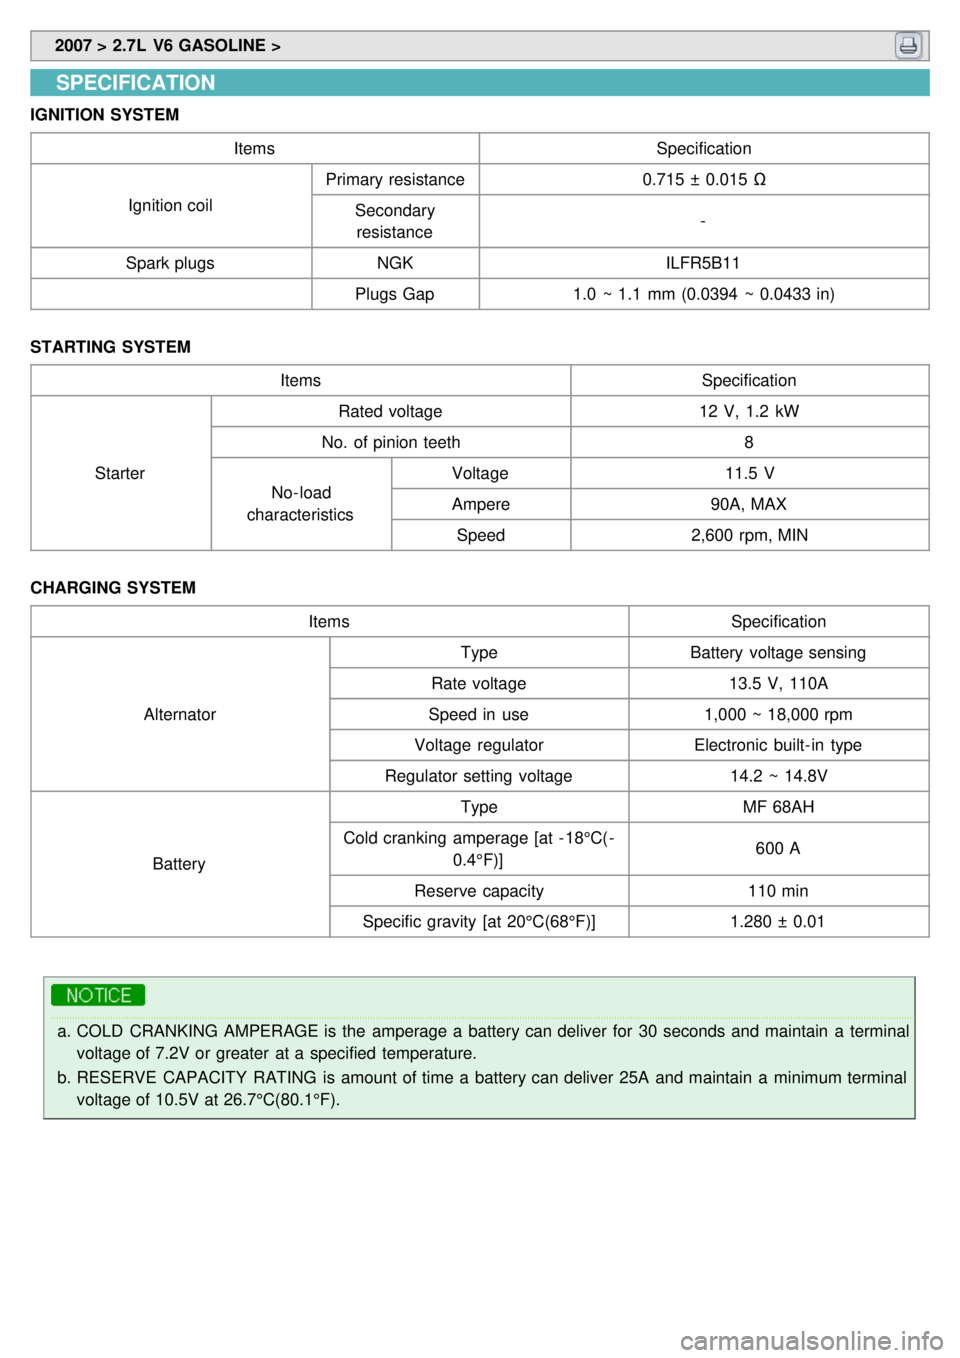
SPECIFICATION
IGNITION SYSTEM
Items Specification
Ignition coil Primary resistance
0.715 ± 0.015 Ω
Secondary resistance -
Spark plugs NGK ILFR5B11
Plugs Gap 1.0 ~ 1.1 mm (0.0394 ~ 0.0433 in)
STARTING SYSTEM Items Specification
Starter Rated voltage
12 V, 1.2 kW
No. of pinion teeth 8
No- load
characteristics Voltage
11.5 V
Ampere 90A, MAX
Speed 2,600 rpm, MIN
CHARGING SYSTEM Items Specification
Alternator Type
Battery voltage sensing
Rate voltage 13.5 V, 110A
Speed in use 1,000 ~ 18,000 rpm
Voltage regulator Electronic built- in type
Regulator setting voltage 14.2 ~ 14.8V
Battery Type
MF 68AH
Cold cranking amperage [at - 18°C(- 0.4°F)] 600 A
Reserve capacity 110 min
Specific gravity [at 20°C(68°F)] 1.280 ± 0.01
a.COLD CRANKING AMPERAGE is the amperage a battery can deliver for 30 seconds and maintain a terminal
voltage of 7.2V or greater at a specified temperature.
b. RESERVE CAPACITY RATING is amount of time a battery can deliver 25A and maintain a minimum terminal
voltage of 10.5V at 26.7°C(80.1°F).
Page 152 of 1575
Page 153 of 1575
2007 > 2.7L V6 GASOLINE >
DESCRITION
Ignition timing is controlled by the electronic control ignition timing system. The standard reference ignition timing data
for the engine operating conditions are preprogrammed in the memory of the ECM (Engine Control Module).
The engine operating conditions (speed, load, warm- up condition, etc.) are detected by the various sensors. Based on
these sensor signals and the ignition timing data, signals to interrupt the primary current are sent to the ECM. The
ignition coil is activated, and timing is controlled.
Page 154 of 1575
2007 > 2.7L V6 GASOLINE >
REMOVAL
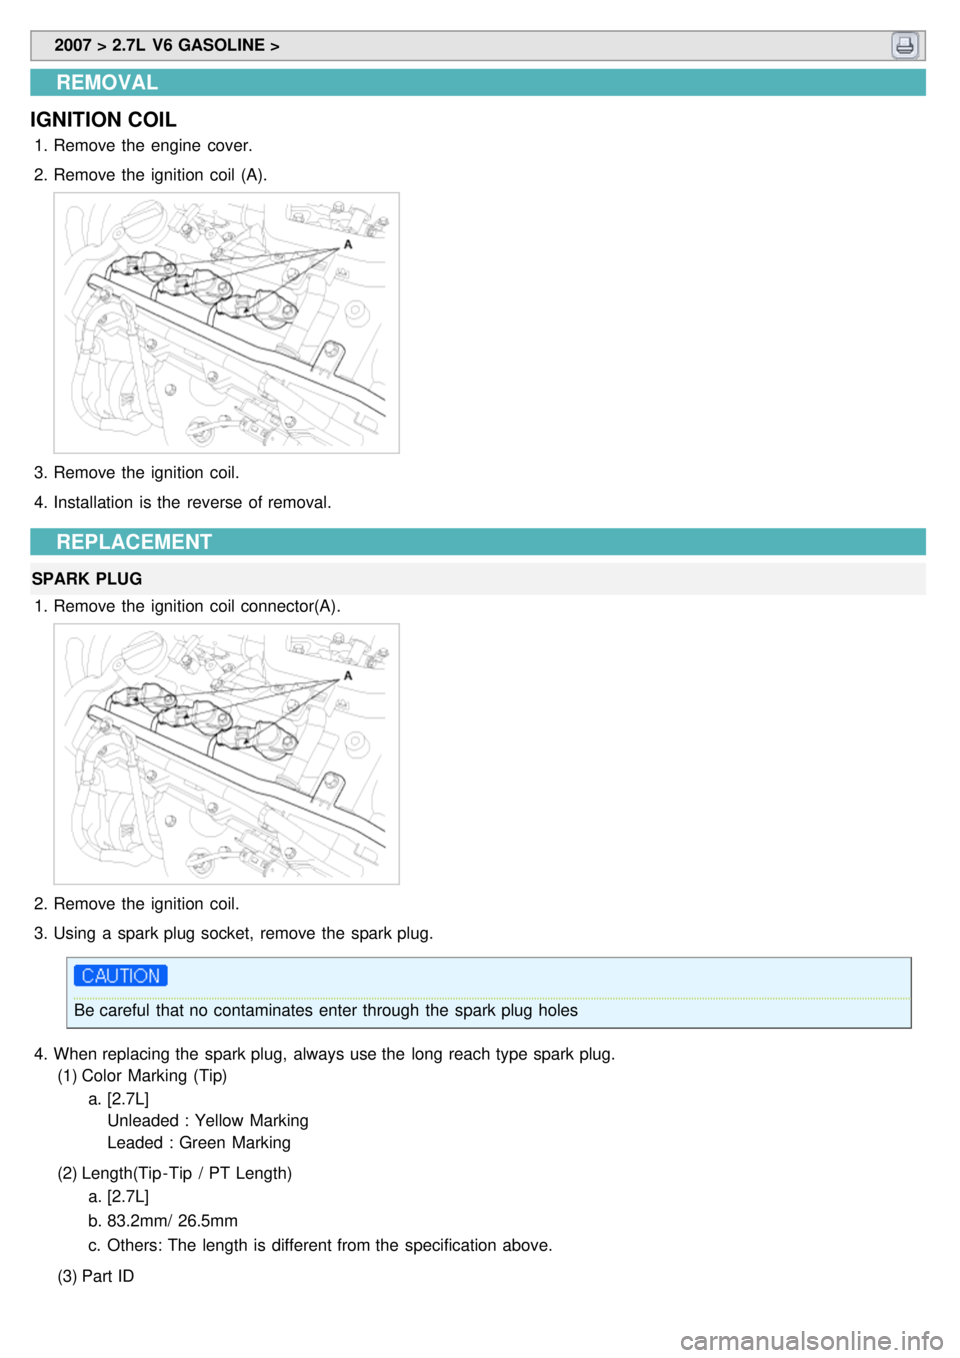
IGNITION COIL
1. Remove the engine cover.
2. Remove the ignition coil (A).
3.Remove the ignition coil.
4. Installation is the reverse of removal.
REPLACEMENT
SPARK PLUG
1. Remove the ignition coil connector(A).
2.Remove the ignition coil.
3. Using a spark plug socket, remove the spark plug.
Be careful that no contaminates enter through the spark plug holes
4. When replacing the spark plug, always use the long reach type spark plug.
(1) Color Marking (Tip)
a. [2.7L]
Unleaded : Yellow Marking
Leaded : Green Marking
(2) Length(Tip - Tip / PT Length)
a. [2.7L]
b. 83.2mm/ 26.5mm
c. Others: The length is different from the specification above.
(3) Part ID
Page 155 of 1575
a.[U2.7]
L nleaded : ILFR5B11
Leaded : LFR5A
ON-VEHICLE INSPECTION
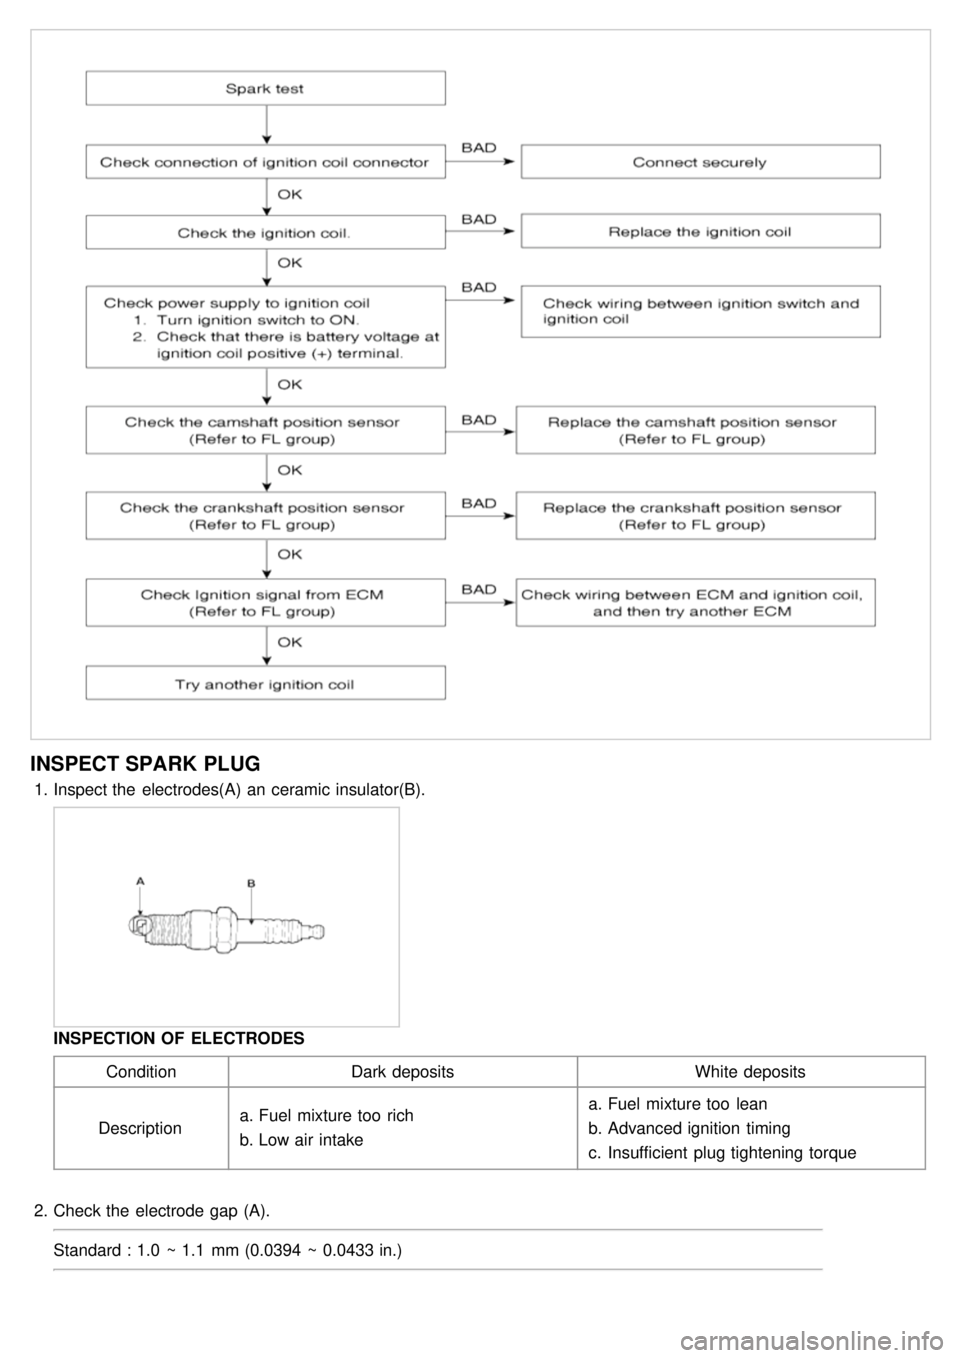
SPARK TEST
1. Remove the ignition coil connector(A).
Disconnect the iguition coil connector while pulling up tre connector lock.
2. Remove the ignition coil.
3. Using a spark plug socket, remove the spark plug.
4. Install the spark plug to the ignition coil.
5. Ground the spark plug to the engine.
6.Check is spark occurs while engine is being cranked.
To prevent fuel being injected from injectors while the engine is being cranked, remove the fuel pump(A) relay
from the fuse box.
Crank the engine for no more than 5 ~ 10 seconds.
7. Inspect all the spark plugs.
8. Using a spark plug socket, install the spark plug.
9. Install the ignition coil.
10. Reconnect the ignition coil connector.
Page 156 of 1575
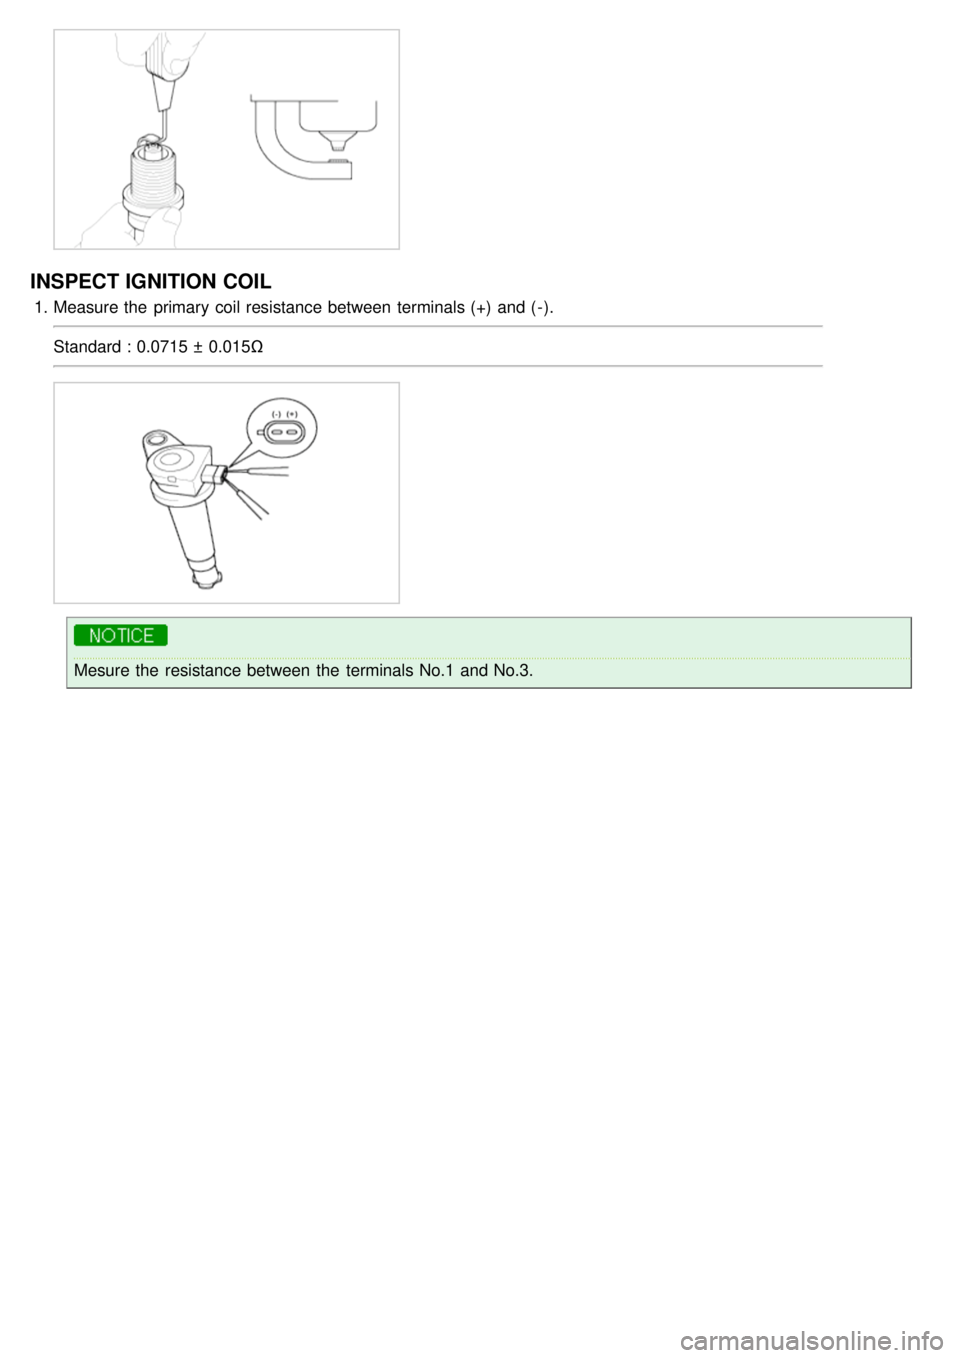
INSPECT SPARK PLUG
1.Inspect the electrodes(A) an ceramic insulator(B).
INSPECTION OF ELECTRODES
Condition Dark deposits White deposits
Description a.
Fuel mixture too rich
b. Low air intake a.
Fuel mixture too lean
b. Advanced ignition timing
c. Insufficient plug tightening torque
2. Check the electrode gap (A).
Standard : 1.0 ~ 1.1 mm (0.0394 ~ 0.0433 in.)
Page 157 of 1575
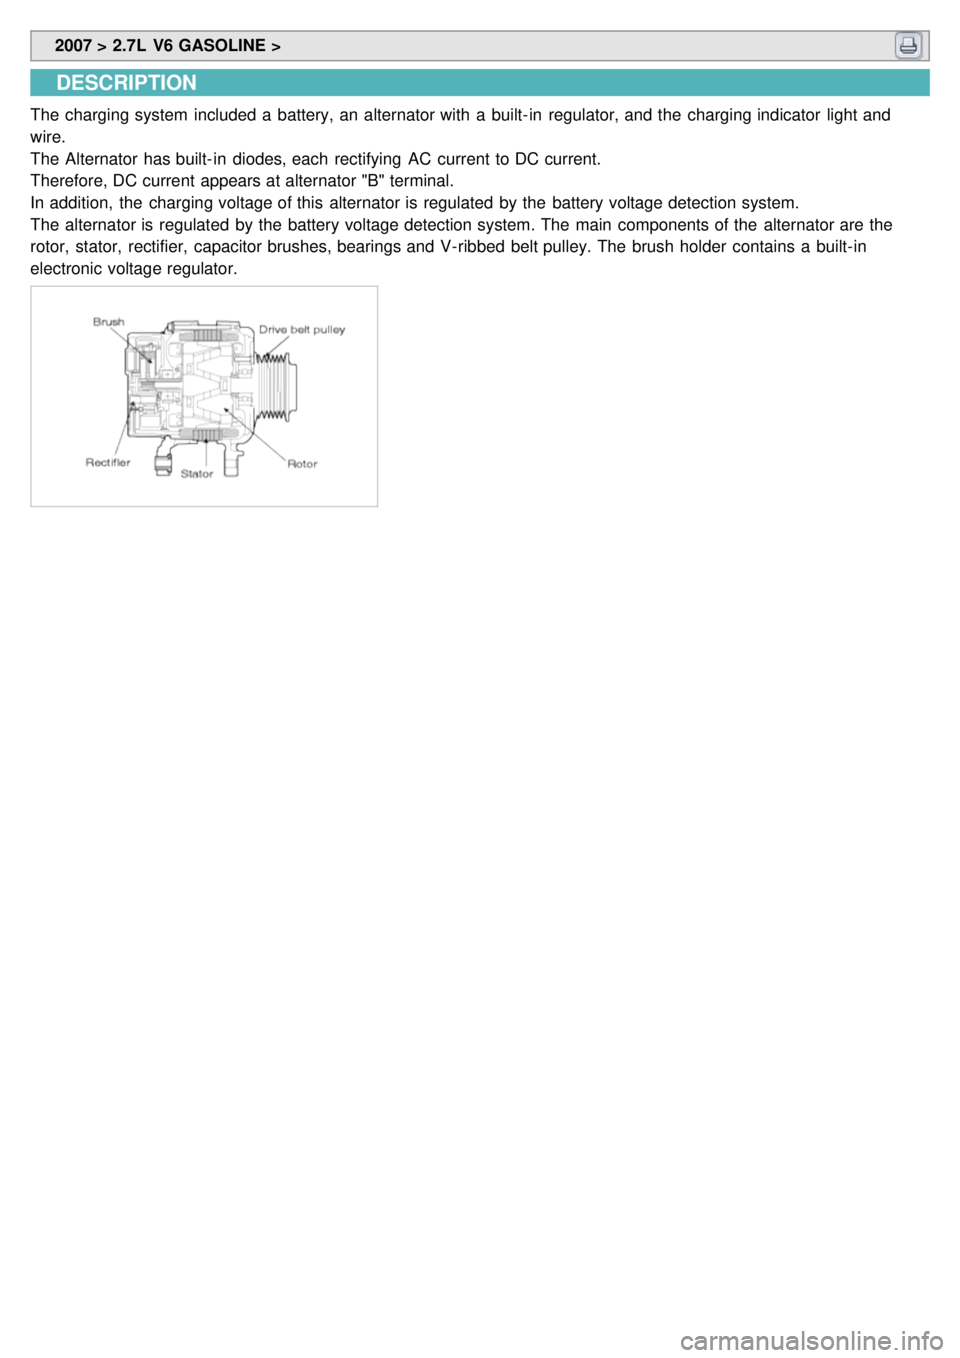
INSPECT IGNITION COIL
1.Measure the primary coil resistance between terminals (+) and ( - ).
Standard : 0.0715 ± 0.015Ω
Mesure the resistance between the terminals No.1 and No.3.
Page 158 of 1575
Page 159 of 1575
2007 > 2.7L V6 GASOLINE >
DESCRIPTION
The charging system included a battery, an alternator with a built- in regulator, and the charging indicator light and
wire.
The Alternator has built- in diodes, each rectifying AC current to DC current.
Therefore, DC current appears at alternator "B" terminal.
In addition, the charging voltage of this alternator is regulated by the battery voltage detection system.
The alternator is regulated by the battery voltage detection system. The main components of the alternator are the
rotor, stator, rectifier, capacitor brushes, bearings and V- ribbed belt pulley. The brush holder contains a built- in
electronic voltage regulator.
Page 160 of 1575
2007 > 2.7L V6 GASOLINE >
ON-VEHICLE INPECTION
a.Check that the battery cables are connected to the correct terminals.
b. Disconnect the battery cables when the battery is given a quick charge.
c. Never disconnect the battery while the engine is running.
CHECK BATTERY VOLTAGE
1.If 20 minutes have not passed since the engine was stopped, turn the ignition switch ON and turn on the electrical
system (headlamp, blower motor, rear defogger etc.) for 60 seconds to remove the surface charge.
2. Turn the ignition switch OFF and turn off the electrical systems.
3. Measure the battery voltage between the negative ( - ) and positive (+) terminals of the battery.
Standard voltage : 12.5 ~ 12.9V at 20°C(68°F)
If the voltage is less than specification, charge the battery.
CHECK THE BATTERY TERMINALS AND FUSES
1.Check that the battery terminals are not loose or corroded.
2. Check the fuses for continuity.
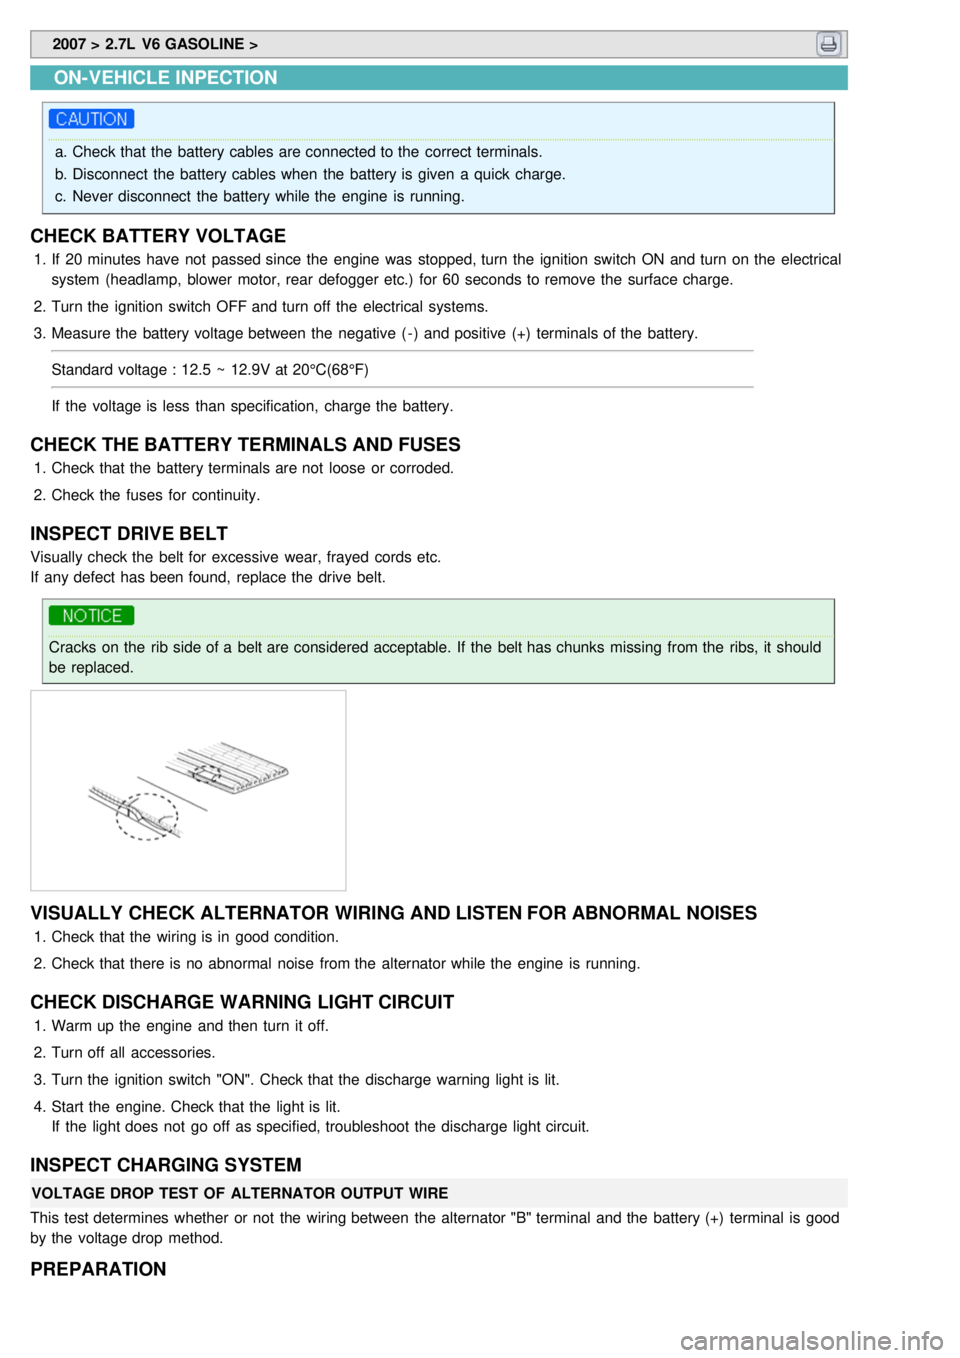
INSPECT DRIVE BELT
Visually check the belt for excessive wear, frayed cords etc.
If any defect has been found, replace the drive belt.
Cracks on the rib side of a belt are considered acceptable. If the belt has chunks missing from the ribs, it should
be replaced.
VISUALLY CHECK ALTERNATOR WIRING AND LISTEN FOR ABNORMAL NOISES
1.Check that the wiring is in good condition.
2. Check that there is no abnormal noise from the alternator while the engine is running.
CHECK DISCHARGE WARNING LIGHT CIRCUIT
1.Warm up the engine and then turn it off.
2. Turn off all accessories.
3. Turn the ignition switch "ON". Check that the discharge warning light is lit.
4. Start the engine. Check that the light is lit.
If the light does not go off as specified, troubleshoot the discharge light circuit.
INSPECT CHARGING SYSTEM
VOLTAGE DROP TEST OF ALTERNATOR OUTPUT WIRE
This test determines whether or not the wiring between the alternator "B" terminal and the battery (+) terminal is good
by the voltage drop method.
PREPARATION
Trending: climate control, engine oil, dimensions, engine overheat, brake sensor, gearbox, wheel alignment


![KIA CARNIVAL 2007 Workshop Manual a.[U2.7]
L nleaded : ILFR5B11
Leaded : LFR5A
ON-VEHICLE INSPECTION
SPARK TEST
1. Remove the ignition coil connector(A).
Disconnect the iguition coil connector while pulling up tre connector KIA CARNIVAL 2007 Workshop Manual a.[U2.7]
L nleaded : ILFR5B11
Leaded : LFR5A
ON-VEHICLE INSPECTION
SPARK TEST
1. Remove the ignition coil connector(A).
Disconnect the iguition coil connector while pulling up tre connector](/img/2/57045/w960_57045-154.png)
