KIA Optima 2006 2.G Owner's Manual
Manufacturer: KIA, Model Year: 2006, Model line: Optima, Model: KIA Optima 2006 2.GPages: 225, PDF Size: 3.77 MB
Page 191 of 225
7-15
Check the condition and connections of
all cooling system hoses and heater
hoses. Replace any swollen or
deteriorated hoses.
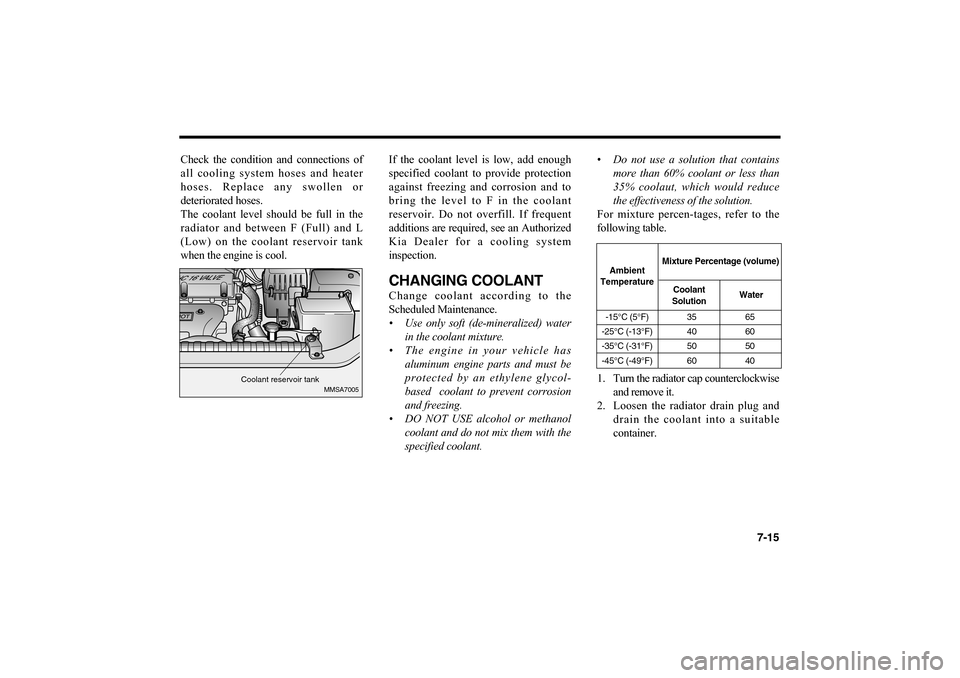
The coolant level should be full in the
radiator and between F (Full) and L
(Low) on the coolant reservoir tank
when the engine is cool.If the coolant level is low, add enough
specified coolant to provide protection
against freezing and corrosion and to
bring the level to F in the coolant
reservoir. Do not overfill. If frequent
additions are required, see an Authorized
Kia Dealer for a cooling system
inspection.
CHANGING COOLANTChange coolant according to the
Scheduled Maintenance.
• Use only soft (de-mineralized) water
in the coolant mixture.
• The engine in your vehicle has
aluminum engine parts and must be
protected by an ethylene glycol-
based coolant to prevent corrosion
and freezing.
• DO NOT USE alcohol or methanol
coolant and do not mix them with the
specified coolant.•Do not use a solution that contains
more than 60% coolant or less than
35% coolaut, which would reduce
the effectiveness of the solution.
For mixture percen-tages, refer to the
following table.
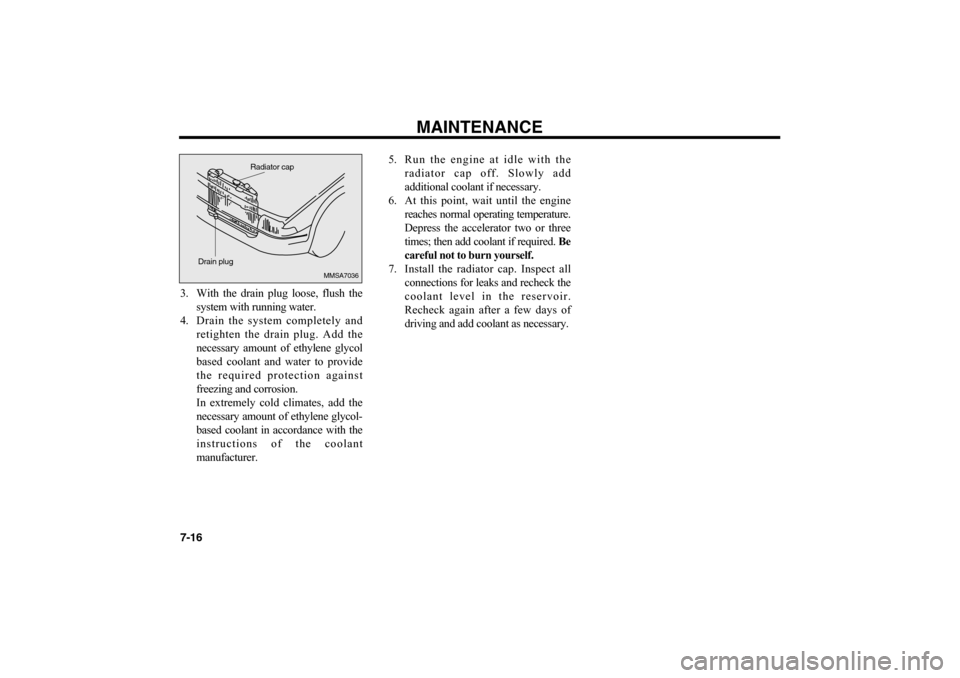
1. Turn the radiator cap counterclockwise
and remove it.
2. Loosen the radiator drain plug and
drain the coolant into a suitable
container.
MMSA7005
Coolant reservoir tank
-15°C (5°F) 35 65
-25°C (-13°F) 40 60
-35°C (-31°F) 50 50
-45°C (-49°F) 60 40Ambient
TemperatureMixture Percentage (volume)
Coolant
SolutionWater
MS-CNA-Eng 7.QXD 7/25/2005 5:09 PM Page 15
Page 192 of 225
MAINTENANCE
7-163. With the drain plug loose, flush the
system with running water.
4. Drain the system completely and
retighten the drain plug. Add the
necessary amount of ethylene glycol
based coolant and water to provide
the required protection against
freezing and corrosion.
In extremely cold climates, add the
necessary amount of ethylene glycol-
based coolant in accordance with the
instructions of the coolant
manufacturer.5. Run the engine at idle with the
radiator cap off. Slowly add
additional coolant if necessary.
6. At this point, wait until the engine
reaches normal operating temperature.
Depress the accelerator two or three
times; then add coolant if required. Be
careful not to burn yourself.
7. Install the radiator cap. Inspect all
connections for leaks and recheck the
coolant level in the reservoir.
Recheck again after a few days of
driving and add coolant as necessary.
MMSA7036
Drain plugRadiator cap
MS-CNA-Eng 7.QXD 7/25/2005 5:09 PM Page 16
Page 193 of 225
7-17
BRAKES AND CLUTCHCHECKING BRAKE/CLUTCH
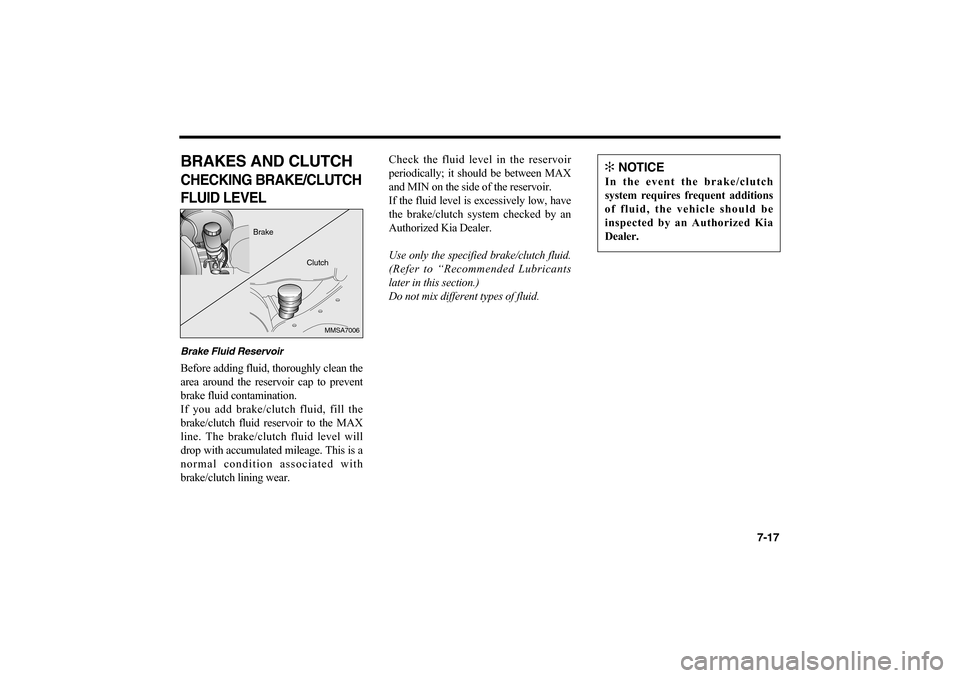
FLUID LEVELBrake Fluid ReservoirBefore adding fluid, thoroughly clean the
area around the reservoir cap to prevent
brake fluid contamination.
If you add brake/clutch fluid, fill the
brake/clutch fluid reservoir to the MAX
line. The brake/clutch fluid level will
drop with accumulated mileage. This is a
normal condition associated with
brake/clutch lining wear.Check the fluid level in the reservoir
periodically; it should be between MAX
and MIN on the side of the reservoir.
If the fluid level is excessively low, have
the brake/clutch system checked by an
Authorized Kia Dealer.
Use only the specified brake/clutch fluid.
(Refer to “Recommended Lubricants
later in this section.)
Do not mix different types of fluid.
MMSA7006
Brake
Clutch
✻
NOTICE
In the event the brake/clutch
system requires frequent additions
of fluid, the vehicle should be
inspected by an Authorized Kia
Dealer.
MS-CNA-Eng 7.QXD 7/25/2005 5:09 PM Page 17
Page 194 of 225
MAINTENANCE
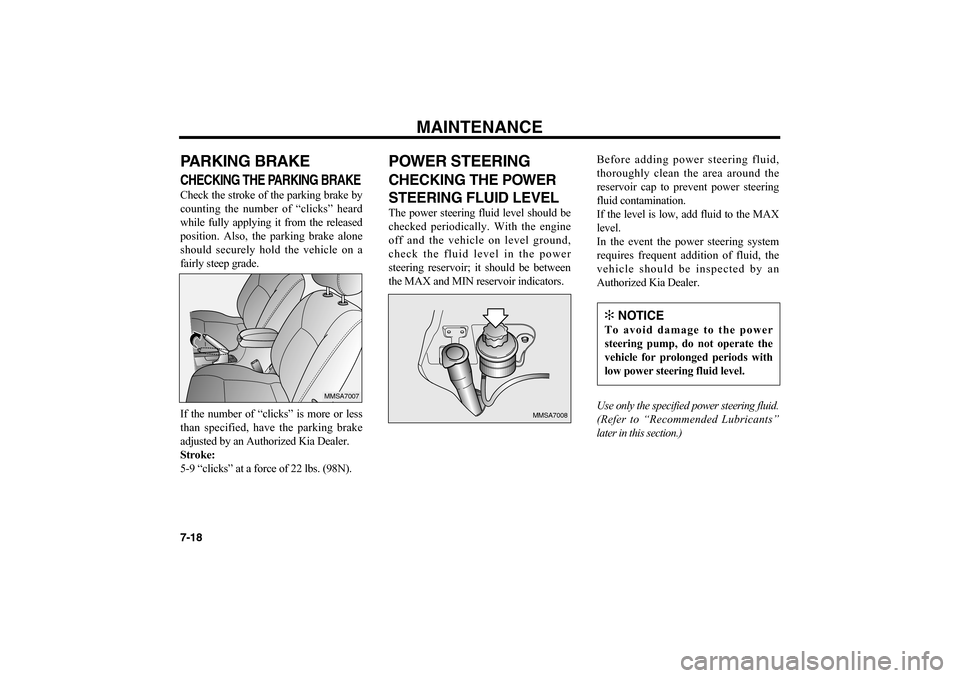
7-18PARKING BRAKECHECKING THE PARKING BRAKECheck the stroke of the parking brake by
counting the number of “clicks” heard
while fully applying it from the released
position. Also, the parking brake alone
should securely hold the vehicle on a
fairly steep grade.
If the number of “clicks” is more or less
than specified, have the parking brake
adjusted by an Authorized Kia Dealer.
Stroke:
5-9 “clicks” at a force of 22 lbs. (98N).
POWER STEERINGCHECKING THE POWER
STEERING FLUID LEVELThe power steering fluid level should be
checked periodically. With the engine
off and the vehicle on level ground,
check the fluid level in the power
steering reservoir; it should be between
the MAX and MIN reservoir indicators.Before adding power steering fluid,
thoroughly clean the area around the
reservoir cap to prevent power steering
fluid contamination.
If the level is low, add fluid to the MAX
level.
In the event the power steering system
requires frequent addition of fluid, the
vehicle should be inspected by an
Authorized Kia Dealer.
Use only the specified power steering fluid.
(Refer to “Recommended Lubricants”
later in this section.)
MMSA7007
MMSA7008
✻
NOTICE
To avoid damage to the power
steering pump, do not operate the
vehicle for prolonged periods with
low power steering fluid level.
MS-CNA-Eng 7.QXD 7/25/2005 5:09 PM Page 18
Page 195 of 225
7-19
AUTOMATIC TRANSAXLECHECKING THE
AUTOMATIC TRANSAXLE
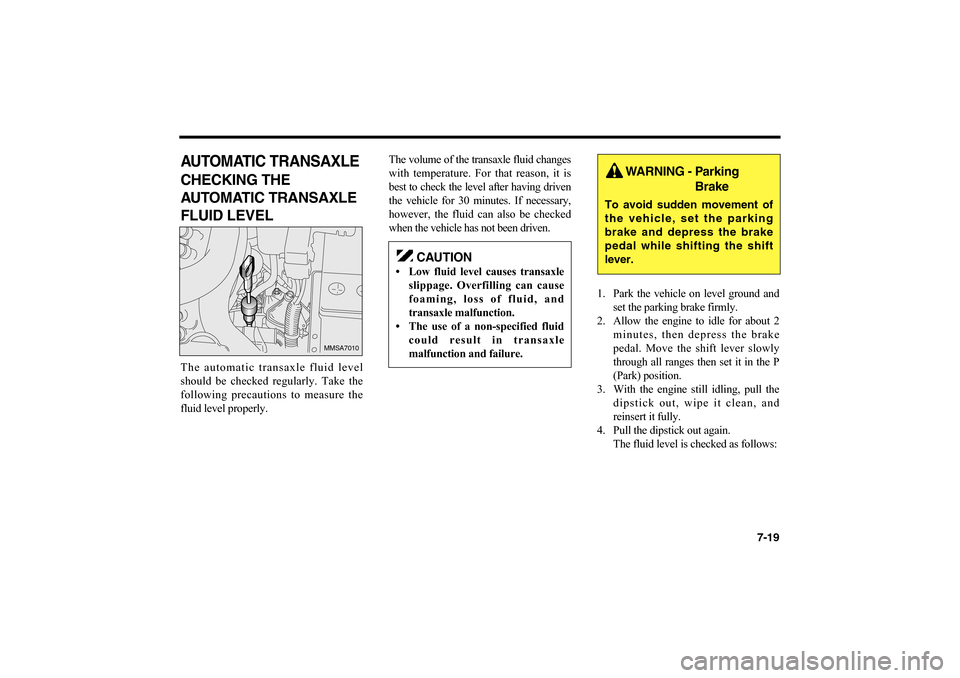
FLUID LEVELThe automatic transaxle fluid level
should be checked regularly. Take the
following precautions to measure the
fluid level properly.The volume of the transaxle fluid changes
with temperature. For that reason, it is
best to check the level after having driven
the vehicle for 30 minutes. If necessary,
however, the fluid can also be checked
when the vehicle has not been driven.
1. Park the vehicle on level ground and
set the parking brake firmly.
2. Allow the engine to idle for about 2
minutes, then depress the brake
pedal. Move the shift lever slowly
through all ranges then set it in the P
(Park) position.
3. With the engine still idling, pull the
dipstick out, wipe it clean, and
reinsert it fully.
4. Pull the dipstick out again.
The fluid level is checked as follows:
MMSA7010
CAUTION
• Low fluid level causes transaxle
slippage. Overfilling can cause
foaming, loss of fluid, and
transaxle malfunction.
• The use of a non-specified fluid
could result in transaxle
malfunction and failure.
WARNING - Parking
Brake
To avoid sudden movement of
the vehicle, set the parking
brake and depress the brake
pedal while shifting the shift
lever.
MS-CNA-Eng 7.QXD 7/25/2005 5:09 PM Page 19
Page 196 of 225
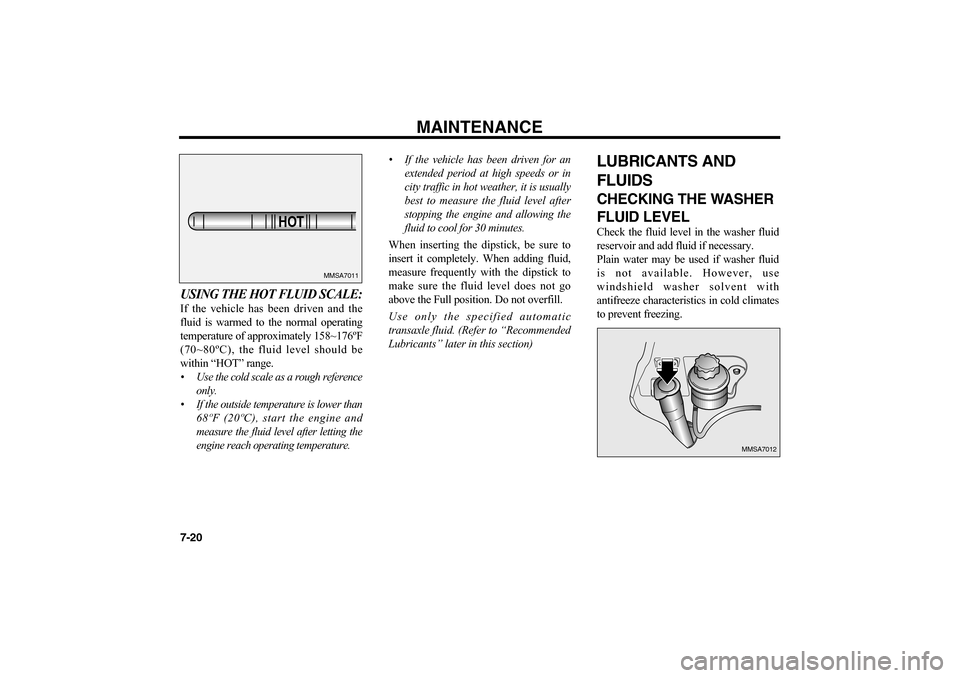
USING THE HOT FLUID SCALE:If the vehicle has been driven and the
fluid is warmed to the normal operating
temperature of approximately 158~176ºF
(70~80ºC), the fluid level should be
within “HOT” range.
• Use the cold scale as a rough reference
only.
• If the outside temperature is lower than
68ºF (20ºC), start the engine and
measure the fluid level after letting the
engine reach operating temperature.• If the vehicle has been driven for an
extended period at high speeds or in
city traffic in hot weather, it is usually
best to measure the fluid level after
stopping the engine and allowing the
fluid to cool for 30 minutes.
When inserting the dipstick, be sure to
insert it completely. When adding fluid,
measure frequently with the dipstick to
make sure the fluid level does not go
above the Full position. Do not overfill.
Use only the specified automatic
transaxle fluid. (Refer to “Recommended
Lubricants” later in this section)
LUBRICANTS AND
FLUIDSCHECKING THE WASHER
FLUID LEVELCheck the fluid level in the washer fluid
reservoir and add fluid if necessary.
Plain water may be used if washer fluid
is not available. However, use
windshield washer solvent with
antifreeze characteristics in cold climates
to prevent freezing.
MAINTENANCE
7-20
HOT
MMSA7011
MMSA7012
MS-CNA-Eng 7.QXD 7/25/2005 5:09 PM Page 20
Page 197 of 225
7-21
BODY LUBRICATIONAll moving points of the body, such as
doors, hood hinges and locks, should be
lubricated each time the engine oil is
changed.
Use a non-freezing lubricant on locks
during cold weather.
Make sure the engine hood secondary
latch keeps the hood from opening when
the primary latch is released.
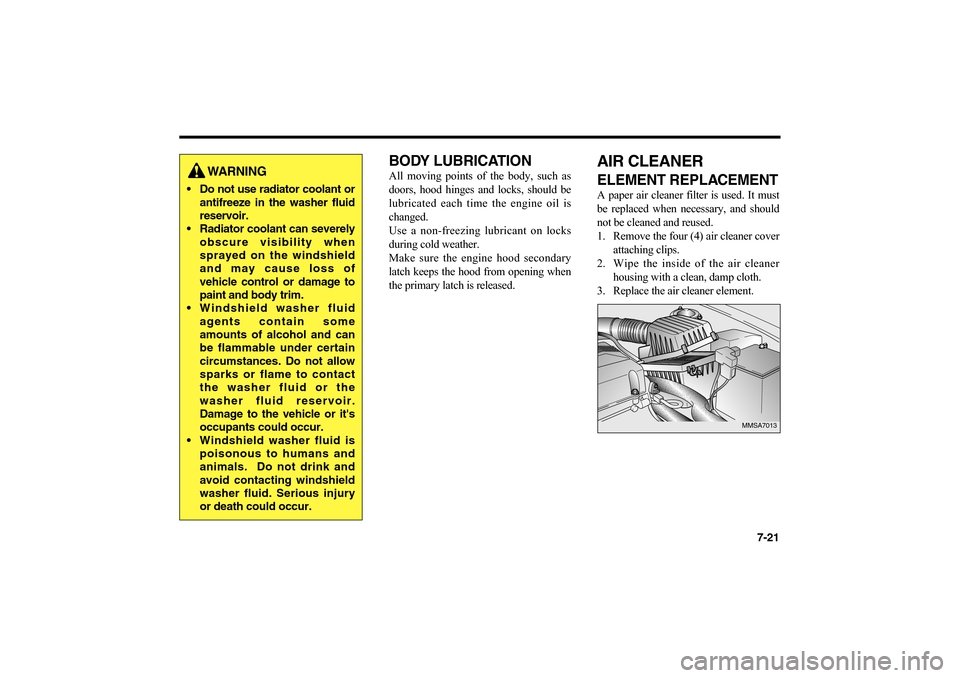
AIR CLEANERELEMENT REPLACEMENTA paper air cleaner filter is used. It must
be replaced when necessary, and should
not be cleaned and reused.
1. Remove the four (4) air cleaner cover
attaching clips.
2. Wipe the inside of the air cleaner
housing with a clean, damp cloth.
3. Replace the air cleaner element.
MMSA7013
WARNING
Do not use radiator coolant or
antifreeze in the washer fluid
reservoir.
Radiator coolant can severely
obscure visibility when
sprayed on the windshield
and may cause loss of
vehicle control or damage to
paint and body trim.
Windshield washer fluid
agents contain some
amounts of alcohol and can
be flammable under certain
circumstances. Do not allow
sparks or flame to contact
the washer fluid or the
washer fluid reservoir.
Damage to the vehicle or it's
occupants could occur.
Windshield washer fluid is
poisonous to humans and
animals. Do not drink and
avoid contacting windshield
washer fluid. Serious injury
or death could occur.
MS-CNA-Eng 7.QXD 7/25/2005 5:09 PM Page 21
Page 198 of 225
4. Re-install in the reverse order of removal.
Replace the element according to the
Scheduled Maintenance.
If the vehicle is operated in extremely
dusty or sandy areas, replace the
element more often than at the usual
recommended intervals.
WIPER BLADESWIPER BLADE
MAINTENANCEContamination of either the windshield
or the wiper blades with foreign matter
can reduce the effectiveness of the
windshield wipers. Common sources of
contamination are insects, tree sap, and
hot wax treatments used by some
commercial car washes. If the blades are
not wiping properly, clean both the
window and the blades with a good
cleaner or mild detergent, and
thoroughly rinse with clear water.
WINDSHIELD WIPER BLADE
REPLACEMENTWhen the wipers no longer clean
adequately, the wiper blades may be worn
or cracked, requiring replacement.
MAINTENANCE
7-22
CAUTION
• Do not drive with the air cleaner
removed; this will result in
excessive engine wear.
• Driving without an air cleaner
encourages backfiring, which
could cause a fire in the engine
compartment.
✻
NOTICE
Commercial hot waxes applied by
automatic car washes have been
known to make the windshield
difficult to clean.
✻
NOTICE
To prevent damage to the wiper
blades, do not use gasoline,
kerosene, paint thinner, or other
solvents on or near them.✻
NOTICE
To prevent damage to the wiper
arms or other components, do not
attempt to move the wipers
manually.
MS-CNA-Eng 7.QXD 7/25/2005 5:09 PM Page 22
Page 199 of 225
7-23
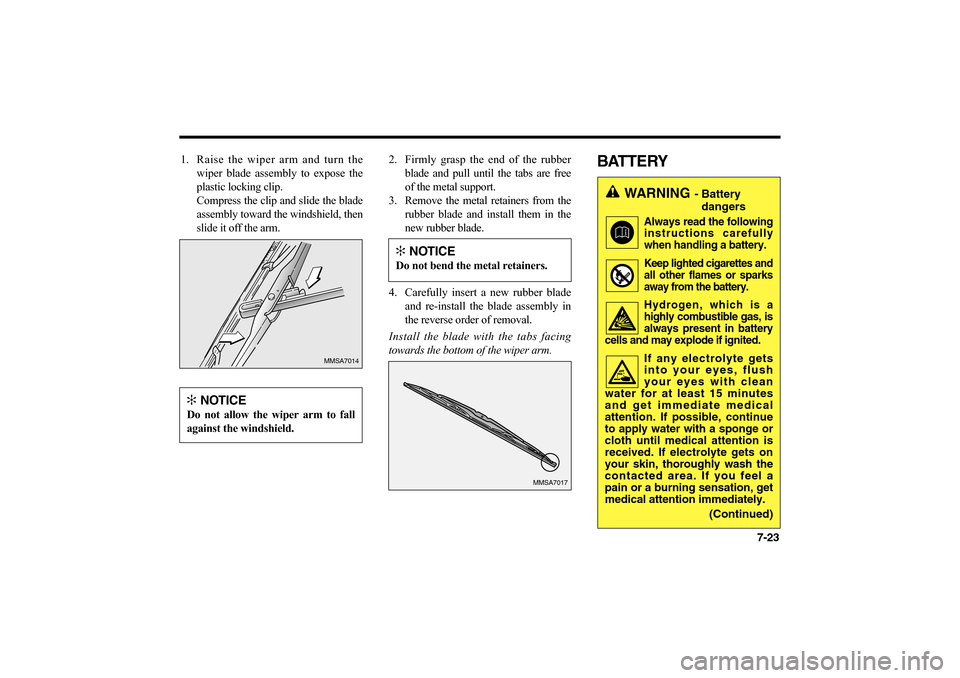
1. Raise the wiper arm and turn the
wiper blade assembly to expose the
plastic locking clip.
Compress the clip and slide the blade
assembly toward the windshield, then
slide it off the arm.2. Firmly grasp the end of the rubber
blade and pull until the tabs are free
of the metal support.
3. Remove the metal retainers from the
rubber blade and install them in the
new rubber blade.
4. Carefully insert a new rubber blade
and re-install the blade assembly in
the reverse order of removal.
Install the blade with the tabs facing
towards the bottom of the wiper arm.
BATTERY
MMSA7014
MMSA7017
✻
NOTICE
Do not allow the wiper arm to fall
against the windshield.
✻
NOTICE
Do not bend the metal retainers.
WARNING
- Battery
dangers
Always read the following
instructions carefully
when handling a battery.Keep lighted cigarettes and
all other flames or sparks
away from the battery.Hydrogen, which is a
highly combustible gas, is
always present in battery
cells and may explode if ignited.If any electrolyte gets
into your eyes, flush
your eyes with clean
water for at least 15 minutes
and get immediate medical
attention. If possible, continue
to apply water with a sponge or
cloth until medical attention is
received. If electrolyte gets on
your skin, thoroughly wash the
contacted area. If you feel a
pain or a burning sensation, get
medical attention immediately.
(Continued)
MS-CNA-Eng 7.QXD 7/25/2005 5:09 PM Page 23
Page 200 of 225
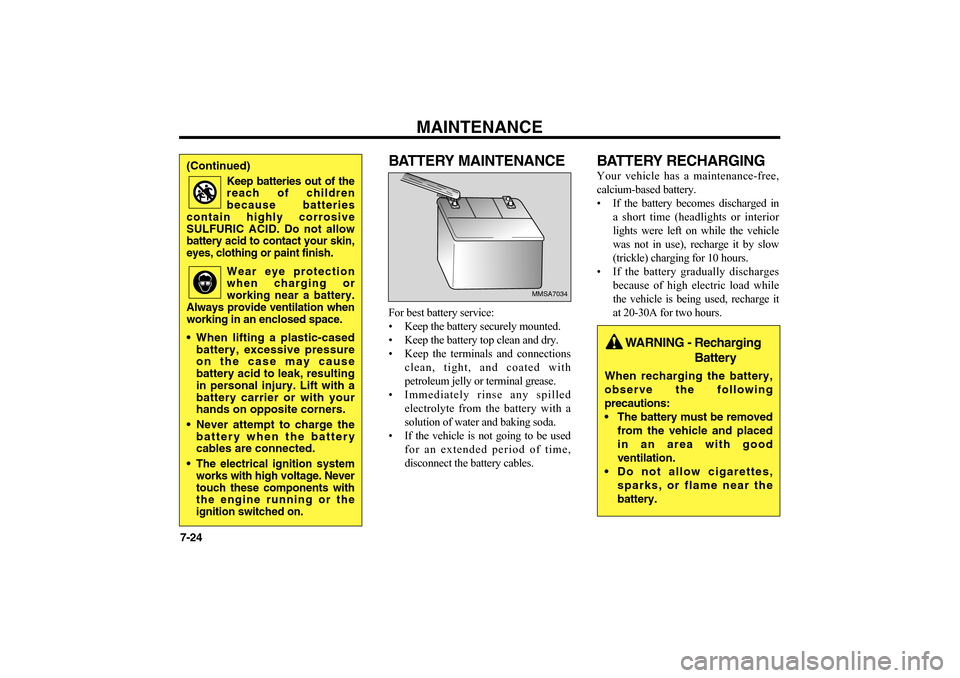
BATTERY MAINTENANCEFor best battery service:
• Keep the battery securely mounted.
• Keep the battery top clean and dry.
• Keep the terminals and connections
clean, tight, and coated with
petroleum jelly or terminal grease.
• Immediately rinse any spilled
electrolyte from the battery with a
solution of water and baking soda.
• If the vehicle is not going to be used
for an extended period of time,
disconnect the battery cables.
BATTERY RECHARGINGYour vehicle has a maintenance-free,
calcium-based battery.
• If the battery becomes discharged in
a short time (headlights or interior
lights were left on while the vehicle
was not in use), recharge it by slow
(trickle) charging for 10 hours.
• If the battery gradually discharges
because of high electric load while
the vehicle is being used, recharge it
at 20-30A for two hours.
MAINTENANCE
7-24
MMSA7034
(Continued)
Keep batteries out of the
reach of children
because batteries
contain highly corrosive
SULFURIC ACID. Do not allow
battery acid to contact your skin,
eyes, clothing or paint finish.
Wear eye protection
when charging or
working near a battery.
Always provide ventilation when
working in an enclosed space.
When lifting a plastic-cased
battery, excessive pressure
on the case may cause
battery acid to leak, resulting
in personal injury. Lift with a
battery carrier or with your
hands on opposite corners.
Never attempt to charge the
battery when the battery
cables are connected.
The electrical ignition system
works with high voltage. Never
touch these components with
the engine running or the
ignition switched on.
WARNING - Recharging
Battery
When recharging the battery,
observe the following
precautions:
The battery must be removed
from the vehicle and placed
in an area with good
ventilation.
Do not allow cigarettes,
sparks, or flame near the
battery.
MS-CNA-Eng 7.QXD 7/25/2005 5:09 PM Page 24