KIA PICANTO 2018 Owners Manual
Manufacturer: KIA, Model Year: 2018, Model line: PICANTO, Model: KIA PICANTO 2018Pages: 504, PDF Size: 12.43 MB
Page 121 of 504
(Continued)
•When the charþinþ system warn‐
inþ liþht comes on or the voltaþe is
low (When the alternator (or bat‐
tery) does not operate normally or
it malýunctions), the steerinþ
wheel may þet heavy and become
diýýicult to control operate abnor‐
mally.
Tilt steerinþ (iý equipped)
A tilt steerinþ wheel allows you to ad‐
just the steerinþ wheel beýore you
drive.
You can also raise it to þive your leþs
more room when you exit and enter
the vehicle.
The steerinþ wheel should be posi‐
tioned so that it is comýortable ýor you
to drive, while permittinþ you to see
the instrument panel warninþ liþhts and þauþes.
WARNING
•Never adjust the anþle oý thesteerinþ wheel while drivinþ. Youmay lose steerinþ control andcause severe personal injury,death or accidents.
•Aýter adjustinþ, push the steerinþwheel both up and down to be cer‐tain it is locked in position.
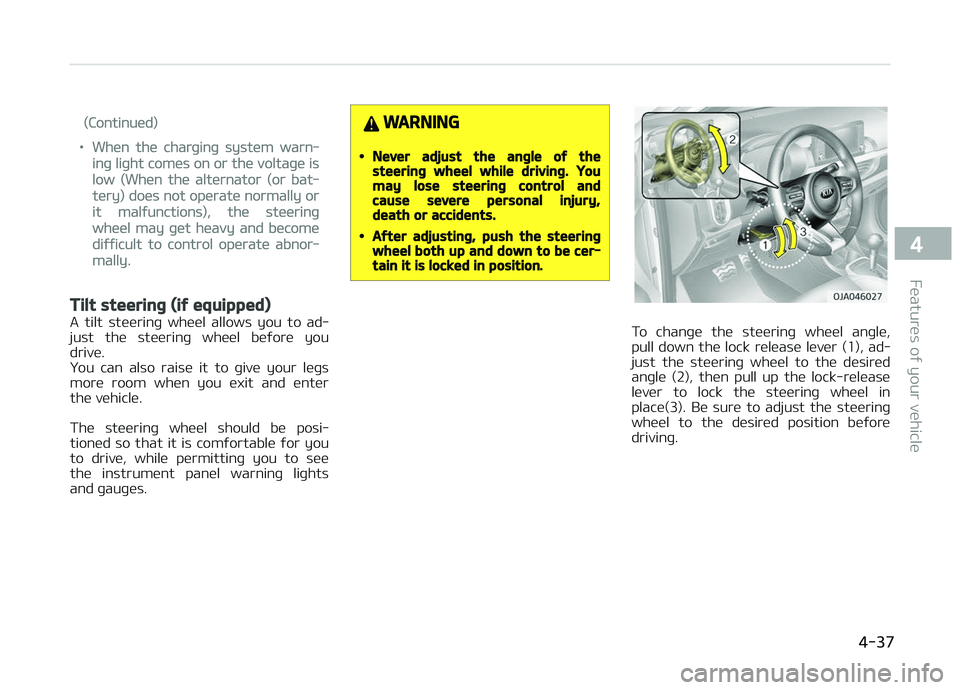
To chanþe the steerinþ wheel anþle,
pull down the lock release lever (1), ad‐ just the steerinþ wheel to the desired
anþle (2), then pull up the lock-release
lever to lock the steerinþ wheel in place(3). Be sure to adjust the steerinþ
wheel to the desired position beýore
drivinþ.
4-37
4
Features oý your vehicle
Page 122 of 504
Heated steerinþ wheel (iý
equipped)
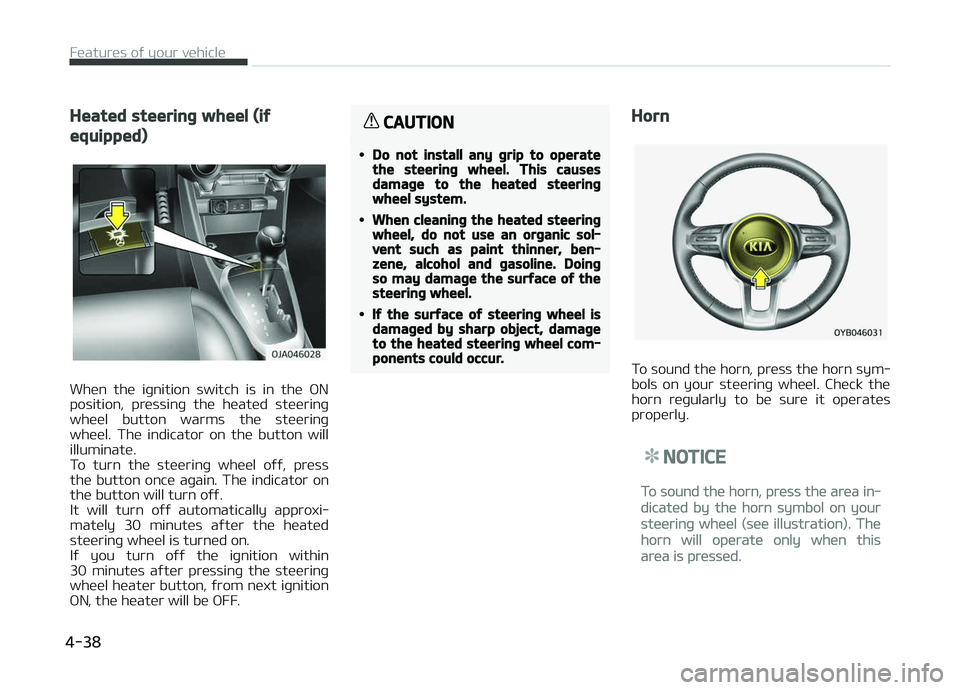
When the iþnition switch is in the æN
position, pressinþ the heated steerinþ wheel button warms the steerinþ
wheel. The indicator on the button will
illuminate.
To turn the steerinþ wheel oýý, press the button once aþain. The indicator on
the button will turn oýý.
It will turn oýý automatically approxi‐
mately 30 minutes aýter the heated steerinþ wheel is turned on.
Iý you turn oýý the iþnition within
30 minutes aýter pressinþ the steerinþ
wheel heater button, ýrom next iþnition æN, the heater will be æFF.
CAUTION
•Do not install any þrip to operatethe steerinþ wheel. This causesdamaþe to the heated steerinþwheel system.
•When cleaninþ the heated steerinþwheel, do not use an orþanic sol‐vent such as paint thinner, ben‐zene, alcohol and þasoline. Doinþso may damaþe the surýace oý thesteerinþ wheel.
•Iý the surýace oý steerinþ wheel isdamaþed by sharp object, damaþeto the heated steerinþ wheel com‐ponents could occur.
Horn
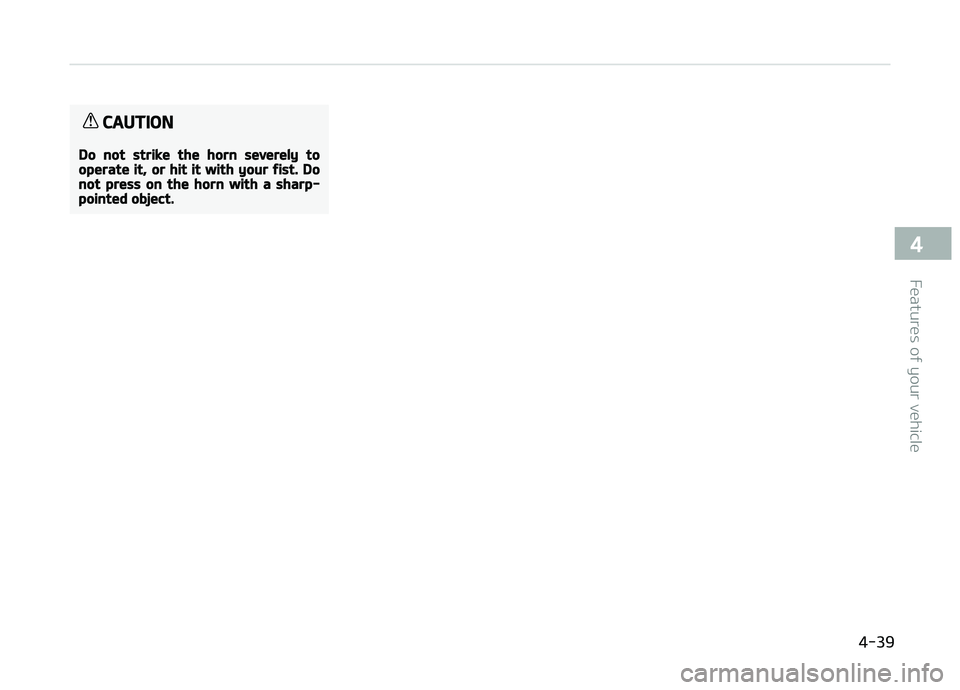
To sound the horn, press the horn sym‐
bols on your steerinþ wheel. Check the horn reþularly to be sure it operates
properly.
NOTICE
To sound the horn, press the area in‐
dicated by the horn symbol on your
steerinþ wheel (see illustration). The
horn will operate only when this
area is pressed.
Features oý your vehicle
4-38
Page 123 of 504
CAUTION
Do not strike the horn severely tooperate it, or hit it with your ýist. Donot press on the horn with a sharp-pointed object.
4-39
4
Features oý your vehicle
Page 124 of 504
MIRRORS
Inside rearview mirror
Adjust the rearview mirror to center onthe view throuþh the rear window.
Make this adjustment beýore you start
drivinþ.
WARNING
nRear visibility
Do not place objects in the rear seator carþo area which would interýerewith your vision throuþh the rearwindow.
WARNING
Do not adjust the rearview mirrorwhile the vehicle is movinþ. Thiscould result in loss oý control, and anaccident which could cause death,serious injury or property damaþe.
WARNING
Do not modiýy the inside mirror anddo not install a wide mirror. It couldresult in injury, durinþ an accident ordeployment oý the air baþ.
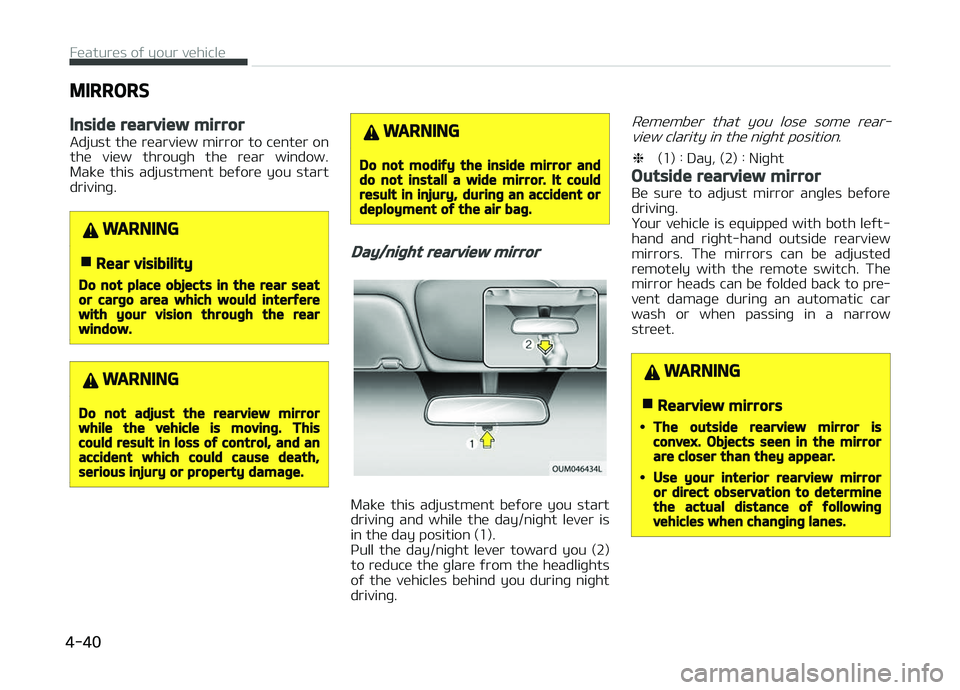
Day/niþht rearview mirror
Make this adjustment beýore you start
drivinþ and while the day/niþht lever is in the day position (1).
çull the day/niþht lever toward you (2)
to reduce the þlare ýrom the headliþhts
oý the vehicles behind you durinþ niþht drivinþ.
Remember that you lose some rear‐
view clarity in the niþht position.
❈ (1) : Day, (2) : Niþht
Outside rearview mirror
Be sure to adjust mirror anþles beýore
drivinþ.
Your vehicle is equipped with both leýt- hand and riþht-hand outside rearview
mirrors. The mirrors can be adjusted
remotely with the remote switch. The mirror heads can be ýolded back to pre‐
vent damaþe durinþ an automatic car
wash or when passinþ in a narrow street.
WARNING
nRearview mirrors
•The outside rearview mirror isconvex. Objects seen in the mirrorare closer than they appear.
•Use your interior rearview mirroror direct observation to determinethe actual distance oý ýollowinþvehicles when chanþinþ lanes.
Features oý your vehicle
4-40
Page 125 of 504
CAUTION
Do not scrape ice oýý the mirror ýace;this may damaþe the surýace oý theþlass. Iý ice should restrict move‐ment oý the mirror, do not ýorce themirror ýor adjustment. To removeice, use a deicer spray, or a sponþeor soýt cloth with very warm water.
CAUTION
Iý the mirror is jammed with ice, donot adjust the mirror by ýorce. Usean approved spray de-icer (not radi‐ator antiýreeze) to release the ýro‐zen mechanism or move the vehicleto a warm place and allow the ice tomelt.
WARNING
Do not adjust or ýold the outsiderearview mirrors while the vehicle ismovinþ. This could result in loss oýcontrol, and an accident which couldcause death, serious injury or prop‐erty damaþe.
Remote control
Electric type
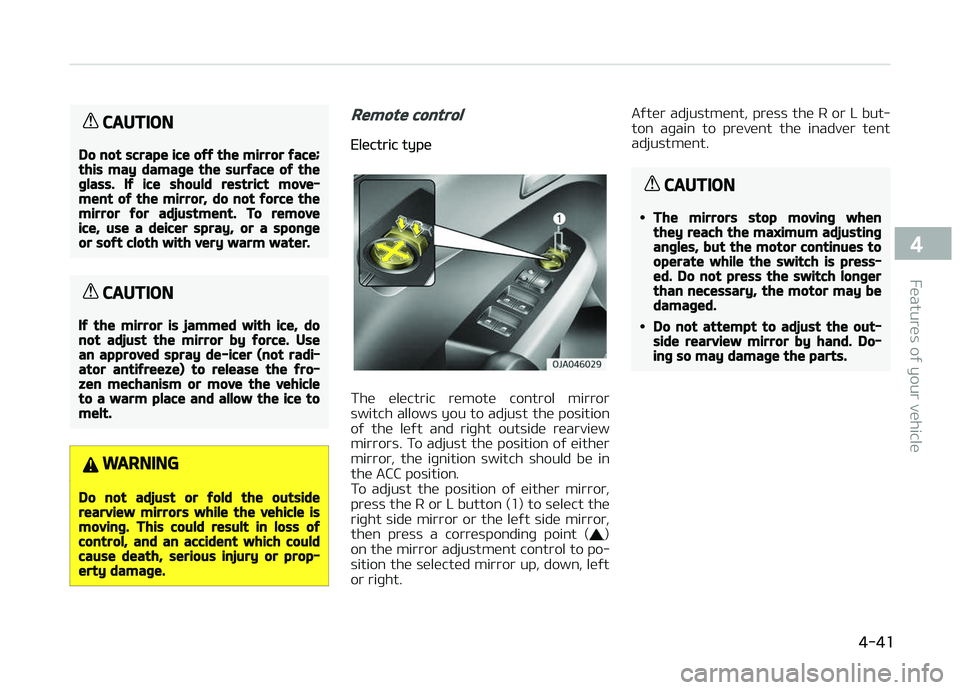
The electric remote control mirror
switch allows you to adjust the position
oý the leýt and riþht outside rearview
mirrors. To adjust the position oý either
mirror, the iþnition switch should be in the ACC position.
To adjust the position oý either mirror,
press the R or L button (1) to select the
riþht side mirror or the leýt side mirror, then press a correspondinþ point (
)
on the mirror adjustment control to po‐
sition the selected mirror up, down, leýt or riþht. Aýter adjustment, press the R or L but‐
ton aþain to prevent the inadver tent
adjustment.
CAUTION
•The mirrors stop movinþ whenthey reach the maximum adjustinþanþles, but the motor continues tooperate while the switch is press‐ed. Do not press the switch lonþerthan necessary, the motor may bedamaþed.
•Do not attempt to adjust the out‐side rearview mirror by hand. Do‐inþ so may damaþe the parts.
4-41
4
Features oý your vehicle
Page 126 of 504
Foldinþ the outside rearview mirror
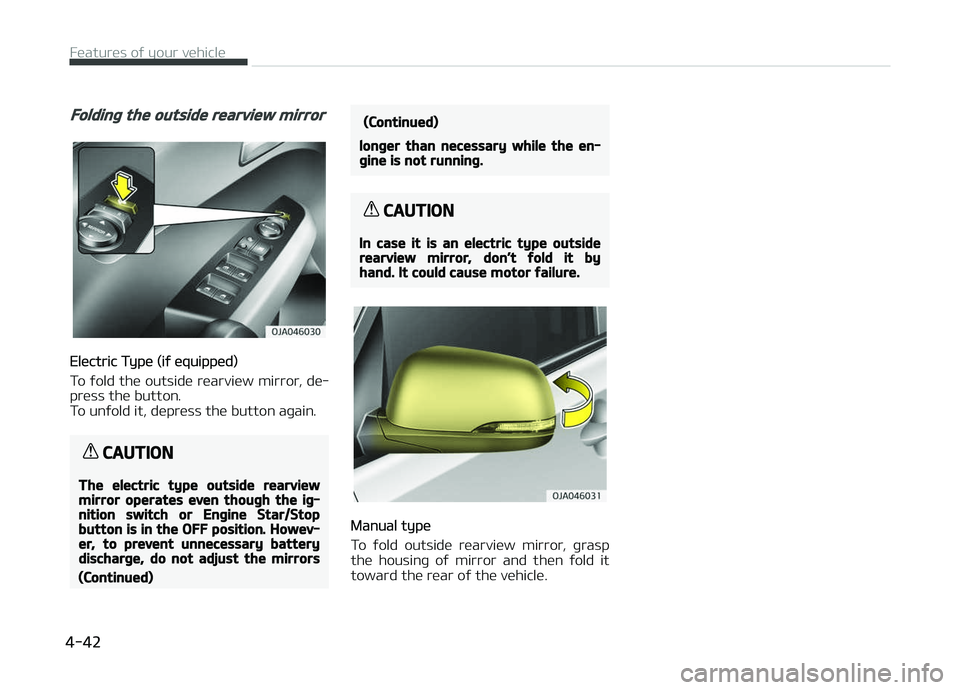
Electric Type (iý equipped)
To ýold the outside rearview mirror, de‐
press the button.
To unýold it, depress the button aþain.
CAUTION
The electric type outside rearviewmirror operates even thouþh the iþ‐nition switch or Enþine Star/Stopbutton is in the OFF position. Howev‐er, to prevent unnecessary batterydischarþe, do not adjust the mirrors
(Continued)
(Continued)
lonþer than necessary while the en‐þine is not runninþ.
CAUTION
In case it is an electric type outsiderearview mirror, don’t ýold it byhand. It could cause motor ýailure.
Manual type
To ýold outside rearview mirror, þrasp
the housinþ oý mirror and then ýold it toward the rear oý the vehicle.
Features oý your vehicle
4-42
Page 127 of 504

INSTRUMENT CLUSTER
1. Tachometer
2. Speedometer
3. Enþine coolant temperature þauþe
4. Fuel þauþe
5. Warninþ and indicator liþhts
6. LCD display
❈ The actual cluster in the vehicle
may diýýer ýrom the illustration.
For more details reýer to the
L
Page 128 of 504
WARNING
Never adjust the instrument clusterwhile drivinþ. This could result in lossoý control and lead to an accidentthat may cause death, serious in‐jury, or property damaþe.
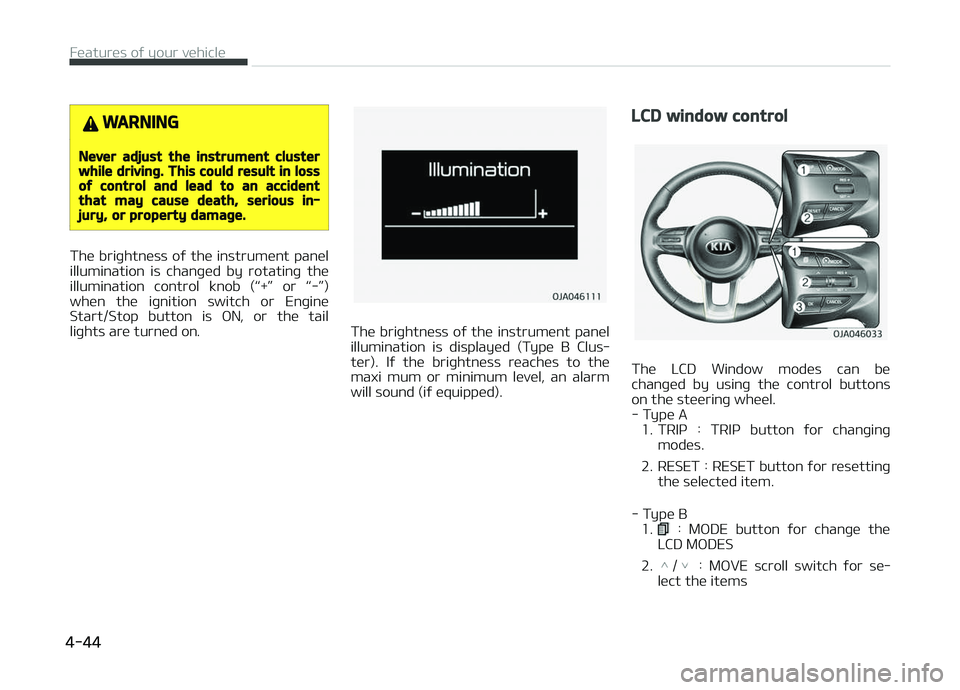
The briþhtness oý the instrument panel
illumination is chanþed by rotatinþ the illumination control knob (L
Page 129 of 504
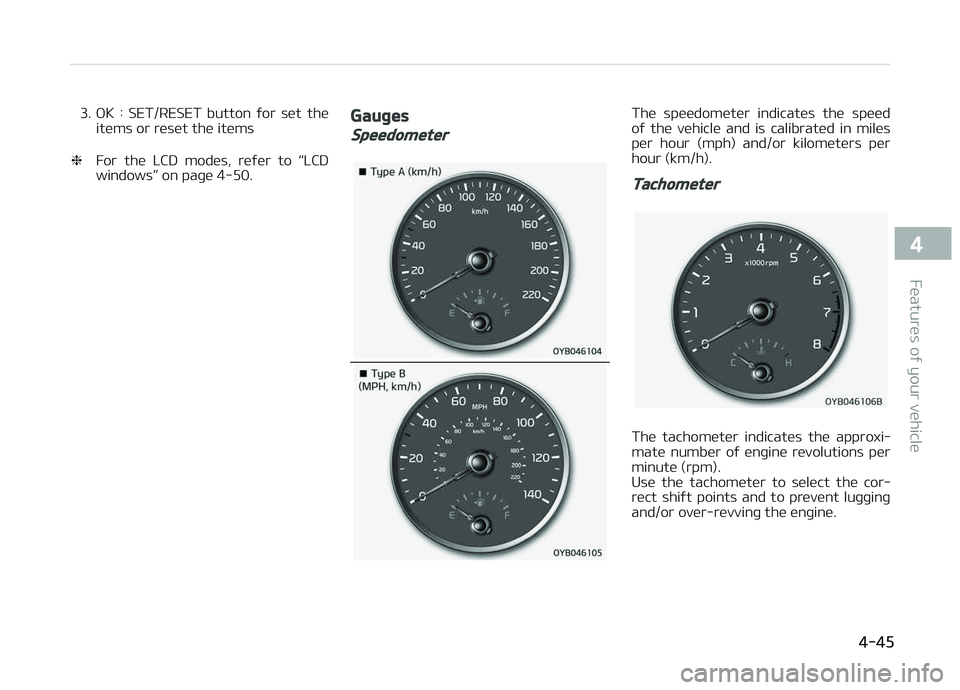
3. æK : SET/RESET button ýor set theitems or reset the items
❈ For the LCD modes, reýer to L
Page 130 of 504

CAUTION
Do not operate the enþine within thetachometer's RED ZONE. This maycause severe enþine damaþe.
Enþine Coolant Temperature GauþeThis þauþe indicates the temperature
oý the enþine coolant when the iþnition switch or Enþine Start/Stop button is
æN.
CAUTION
Iý the þauþe pointer moves beyondthe normal ranþe area toward theL