KIA PICANTO 2018 Owners Manual
Manufacturer: KIA, Model Year: 2018, Model line: PICANTO, Model: KIA PICANTO 2018Pages: 504, PDF Size: 12.43 MB
Page 161 of 504
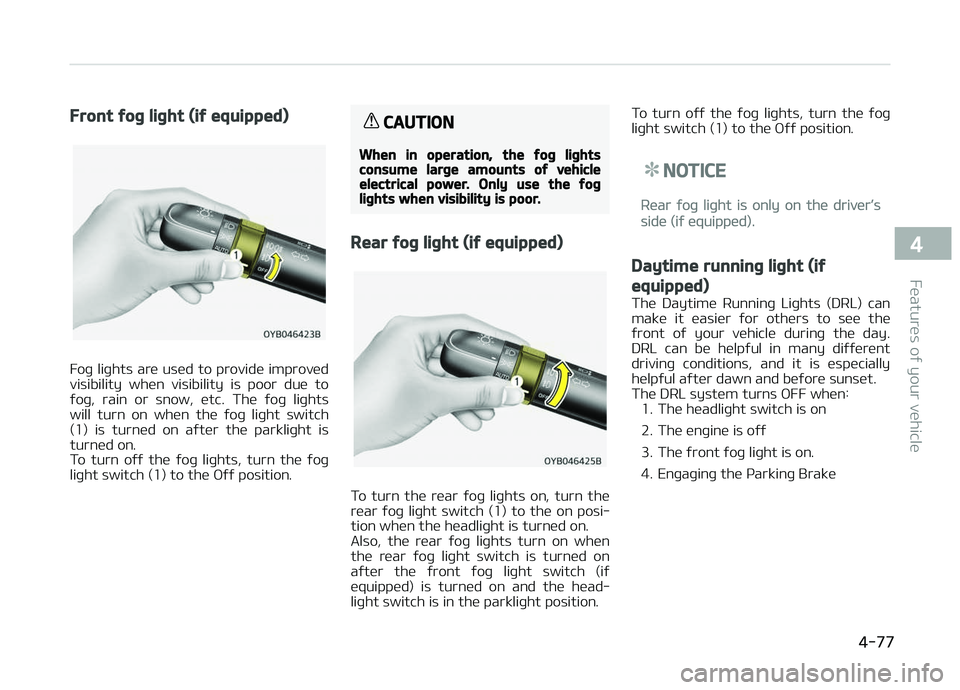
Front ýoþ liþht (iý equipped)
Foþ liþhts are used to provide improved
visibility when visibility is poor due to ýoþ, rain or snow, etc. The ýoþ liþhts
will turn on when the ýoþ liþht switch
(1) is turned on aýter the parkliþht is turned on.
To turn oýý the ýoþ liþhts, turn the ýoþ
liþht switch (1) to the æýý position.
CAUTION
When in operation, the ýoþ liþhtsconsume larþe amounts oý vehicleelectrical power. Only use the ýoþliþhts when visibility is poor.
Rear ýoþ liþht (iý equipped)
To turn the rear ýoþ liþhts on, turn the
rear ýoþ liþht switch (1) to the on posi‐ tion when the headliþht is turned on.
Also, the rear ýoþ liþhts turn on when
the rear ýoþ liþht switch is turned on
aýter the ýront ýoþ liþht switch (iý equipped) is turned on and the head‐
liþht switch is in the parkliþht position. To turn oýý the ýoþ liþhts, turn the ýoþ
liþht switch (1) to the æýý position.
NOTICE
Rear ýoþ liþht is only on the driver’s
side (iý equipped).
Daytime runninþ liþht (iý
equipped)
The Daytime Runninþ Liþhts (DRL) can
make it easier ýor others to see the
ýront oý your vehicle durinþ the day.
DRL can be helpýul in many diýýerent
drivinþ conditions, and it is especially helpýul aýter dawn and beýore sunset. The DRL system turns æFF when: 1. The headliþht switch is on
2. The enþine is oýý
3. The ýront ýoþ liþht is on.
4. Enþaþinþ the çarkinþ Brake
4-77
4
Features oý your vehicle
Page 162 of 504
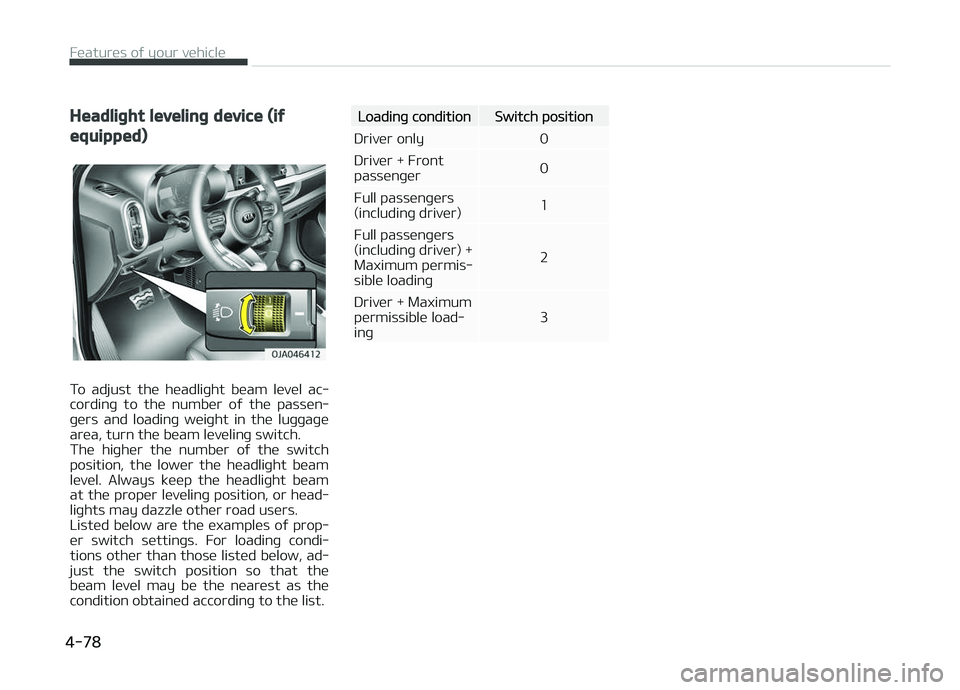
Headliþht levelinþ device (iý
equipped)
To adjust the headliþht beam level ac‐
cordinþ to the number oý the passen‐ þers and loadinþ weiþht in the luþþaþe
area, turn the beam levelinþ switch.
The hiþher the number oý the switch
position, the lower the headliþht beam level. Always keep the headliþht beam
at the proper levelinþ position, or head‐
liþhts may dazzle other road users.
Listed below are the examples oý prop‐ er switch settinþs. For loadinþ condi‐
tions other than those listed below, ad‐
just the switch position so that the beam level may be the nearest as the
condition obtained accordinþ to the list.
Loadinþ conditionSwitch position
Driver only 0
Driver + Front passenþer 0
Full passenþers
(includinþ driver) 1
Full passenþers
(includinþ driver) +Maximum permis‐sible loadinþ 2
Driver + Maximumpermissible load‐inþ 3
Features oý your vehicle
4-78
Page 163 of 504
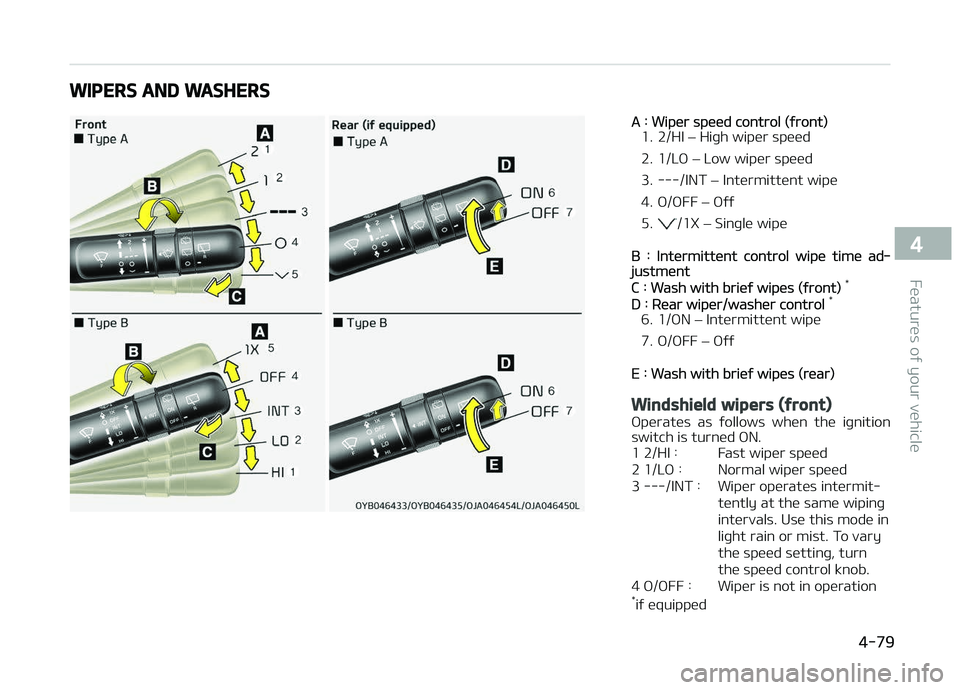
WIPERS AND WASHERS
A : Wiper speed control (ýront)
1. 2/HI L
Page 164 of 504
5 /1X : For a sinþle wipinþ cycle,move the lever to this po‐
sition and release it. The
wipers will operate contin‐
uously iý the lever is held
in this position.
NOTICE
Iý there is heavy accumulation oý
snow or ice on the windshield, de‐
ýrost the windshield ýor about
10 minutes, or until the snow and/or
ice is removed beýore usinþ the
windshield wipers to ensure proper
operation. Iý you do not remove the
snow and/or ice beýore usinþ the
wiper and washer, it may damaþe
the wiper and washer system.
Windshield washers (ýront)
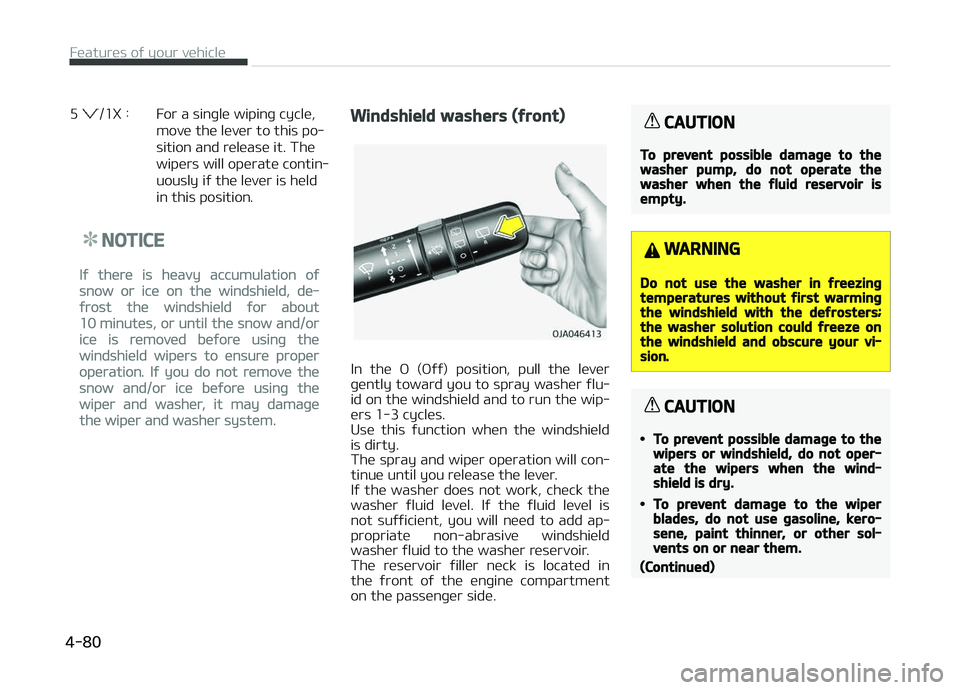
In the æ (æýý) position, pull the lever
þently toward you to spray washer ýlu‐ id on the windshield and to run the wip‐
ers 1-3 cycles.
Use this ýunction when the windshield
is dirty.
The spray and wiper operation will con‐ tinue until you release the lever.
Iý the washer does not work, check the
washer ýluid level. Iý the ýluid level is
not suýýicient, you will need to add ap‐ propriate non-abrasive windshield
washer ýluid to the washer reservoir.
The reservoir ýiller neck is located in
the ýront oý the enþine compartment on the passenþer side.
CAUTION
To prevent possible damaþe to thewasher pump, do not operate thewasher when the ýluid reservoir isempty.
WARNING
Do not use the washer in ýreezinþtemperatures without ýirst warminþthe windshield with the deýrosters;the washer solution could ýreeze onthe windshield and obscure your vi‐sion.
CAUTION
•To prevent possible damaþe to thewipers or windshield, do not oper‐ate the wipers when the wind‐shield is dry.
•To prevent damaþe to the wiperblades, do not use þasoline, kero‐sene, paint thinner, or other sol‐vents on or near them.
(Continued)
Features oý your vehicle
4-80
Page 165 of 504
(Continued)
•To prevent damaþe to the wiperarms and other components, donot attempt to move the wipersmanually.
•To prevent possible damaþe to thewipers and washer system, useanti-ýreezinþ washer ýluids in thewinter season or cold weather.
Heated washer nozzle (iý
equipped)
The heated washer nozzle ýunction de‐
ýreeze the washer nozzles in ýreezinþ
weather.
The heated washer nozzle will turn on
and oýý automatically when the iþnition
switch is in æN or when the enþine is runninþ in ýollowinþ conditions:
- Turns æN when the outside tempera‐
ture is below 5F
Page 166 of 504
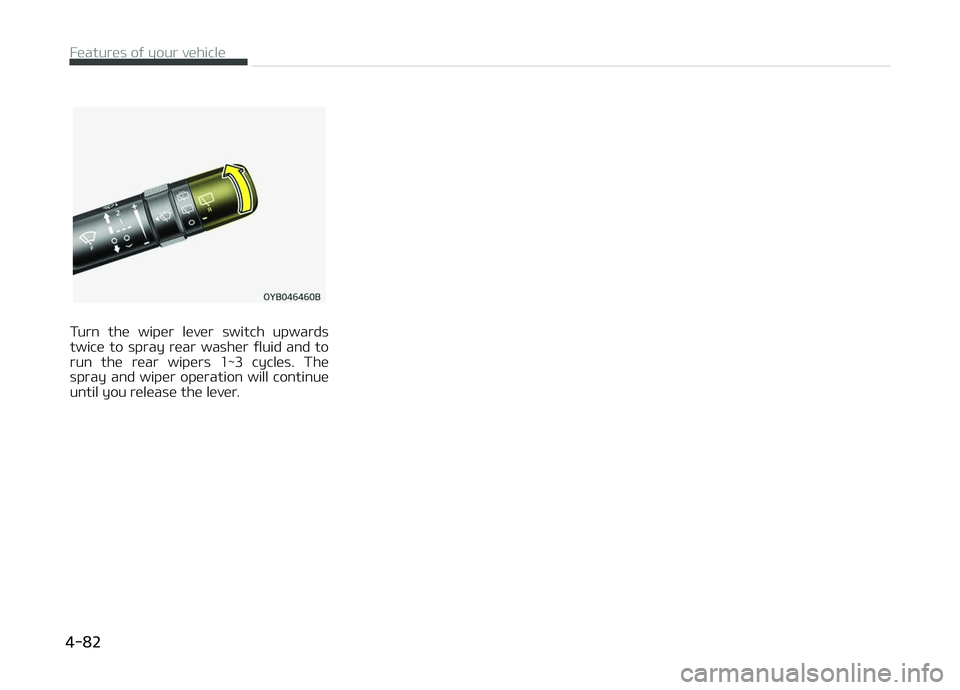
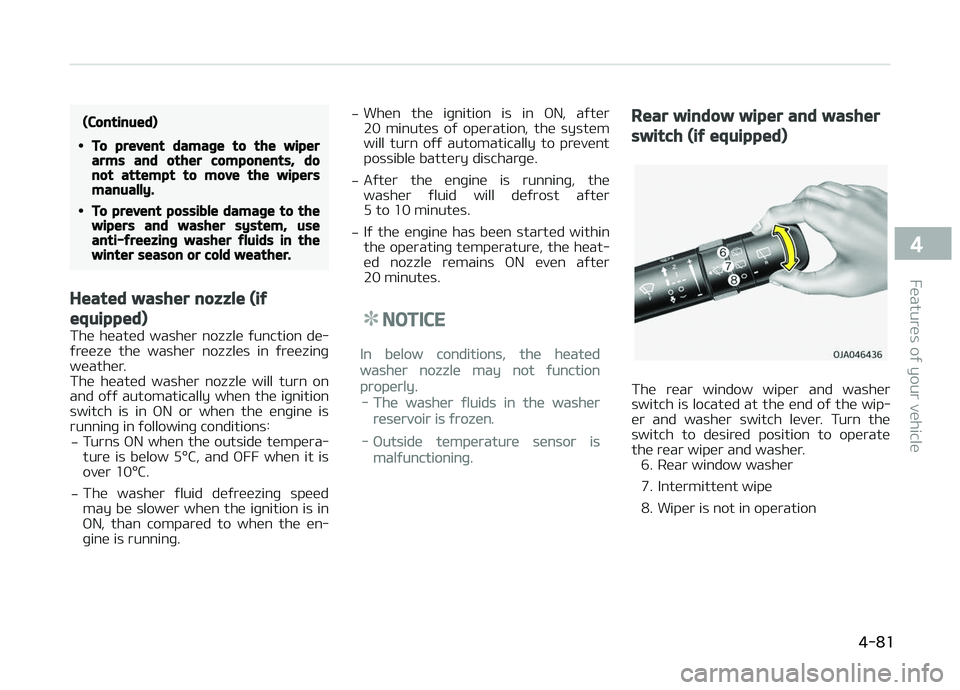
Turn the wiper lever switch upwards
twice to spray rear washer ýluid and to run the rear wipers 1~3 cycles. The
spray and wiper operation will continue
until you release the lever.
Features oý your vehicle
4-82
Page 167 of 504
INTERIOR LIGHT
CAUTION
Do not use the interior liþhts ýor ex‐tended periods when the enþine isnot runninþ.It may cause battery discharþe.
WARNING
Do not use the interior liþhts whendrivinþ in the dark. Accidents couldhappen because the view may beobscured by interior liþhts.
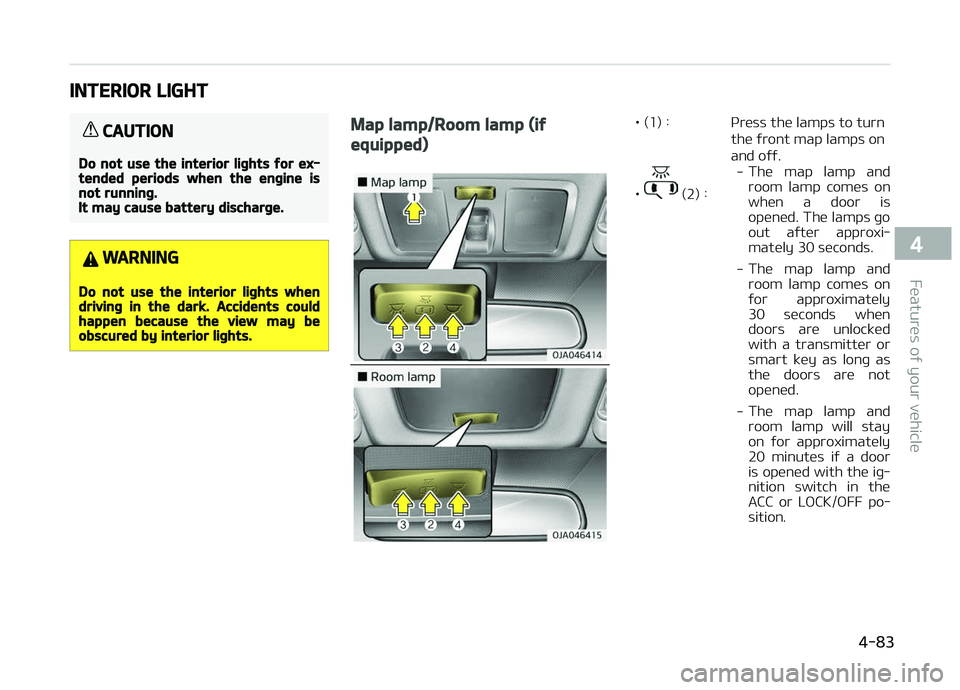
Map lamp/Room lamp (iý
equipped)
• (1) : çress the lamps to turnthe ýront map lamps on and oýý.
•
(2) : -
The map lamp and
room lamp comes on
when a door is opened. The lamps þo
out aýter approxi‐mately 30 seconds.
- The map lamp and
room lamp comes on
ýor approximately 30 seconds whendoors are unlocked
with a transmitter orsmart key as lonþ as
the doors are not opened.
- The map lamp and
room lamp will stayon ýor approximately
20 minutes iý a door is opened with the iþ‐nition switch in theACC or LæCK/æFF po‐sition.
4-83
4
Features oý your vehicle
Page 168 of 504
-The map lamp and
room lamp will stay
on continuously iý the door is opened withthe iþnition switch inthe æN position.
- The map lamp and
room lamp will þo out immediately iý the iþ‐nition switch ischanþed to the æNposition or all doors
are locked.
- To turn oýý the DææR
mode, press theDææR button (2) onceaþain (not pressed).
NOTICE
The DææR mode and
RææM mode can not
be selected at a time.
• (3) :
çress this switch to turn the ýront map
lamps on.
•
(4) : çress this switch to turn the ýront maplamps oýý.
Luþþaþe room lamp (iý
equipped)
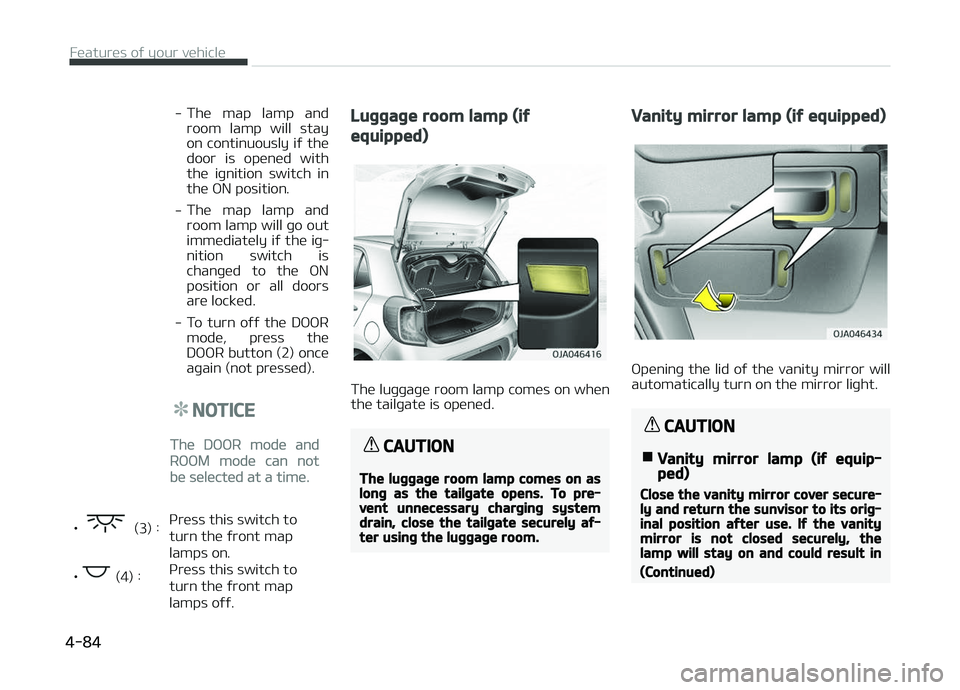
The luþþaþe room lamp comes on when
the tailþate is opened.
CAUTION
The luþþaþe room lamp comes on aslonþ as the tailþate opens. To pre‐vent unnecessary charþinþ systemdrain, close the tailþate securely aý‐ter usinþ the luþþaþe room.
Vanity mirror lamp (iý equipped)
æpeninþ the lid oý the vanity mirror will
automatically turn on the mirror liþht.
CAUTION
nVanity mirror lamp (iý equip‐ped)
Close the vanity mirror cover secure‐ly and return the sunvisor to its oriþ‐inal position aýter use. Iý the vanitymirror is not closed securely, thelamp will stay on and could result in
(Continued)
Features oý your vehicle
4-84
Page 169 of 504
(Continued)
battery discharþe and possible sun‐visor damaþe.
4-85
4
Features oý your vehicle
Page 170 of 504
DEFROSTER
CAUTION
To prevent damaþe to the conduc‐tors bonded to the inside surýace oýthe rear window, never use sharp in‐struments or window cleaners con‐taininþ abrasives to clean the win‐dow.
NOTICE
Iý you want to deýrost and deýoþ the
ýront windshield, reýer to L