engine KIA Sorento 2006 1.G Owner's Manual
[x] Cancel search | Manufacturer: KIA, Model Year: 2006, Model line: Sorento, Model: KIA Sorento 2006 1.GPages: 312, PDF Size: 5.21 MB
Page 6 of 312
VEHICLE HANDLING
INSTRUCTIONSAs with other vehicles of this type,
failure to operate this vehicle correct-
ly may result in loss of control, an
accident or vehicle rollover. Specific
design characteristics (higher ground
clearance, track, etc.) give this vehi-
cle a higher center of gravity than
ordinary cars. They are not designed
for cornering at the same speeds as
conventional 2-wheel drive vehicles.
Avoid sharp turns or abrupt maneu-
vers. Again, failure to operate this
vehicle correctly may result in loss of
control, an accident or vehicle
rollover. Be sure to read the “on-
pavement’’ and “off-road’’ driving
guidelines, Section 5 in this manual.
VEHICLE BREAK-IN
PROCESSNo special break-in period is needed.
By following a few simple precautions
for the first 600 miles (1 000 km) you
may add to the performance, econo-
my and life of your vehicle.
Do not race the engine.
Do not maintain a single speed for
long periods of time, either fast or
slow. Varying engine speed is
needed to properly break in the
engine.
Avoid hard stops, except in emer-
gencies, to allow the brakes to seat
properly.
Avoid full-throttle starts.
INTRODUCTION
1-3
BL-ENG (CAN)-1.qxd 8/8/2005 10:42 AM Page 3
Page 12 of 312
IMMOBILIZER SYSTEM -
FOR GASOLINE ENGINE
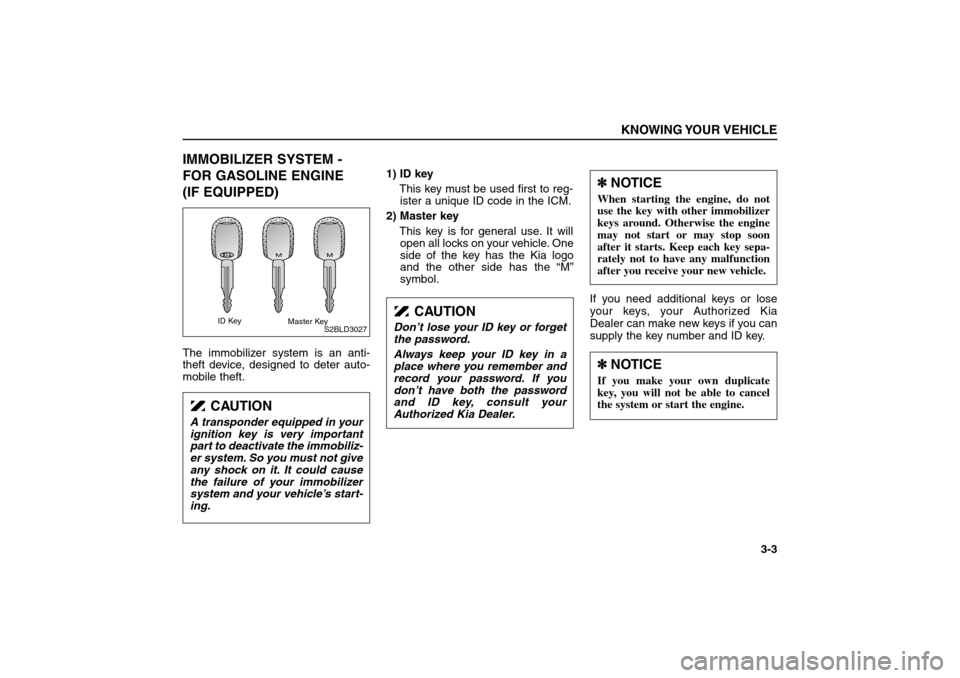
(IF EQUIPPED)The immobilizer system is an anti-
theft device, designed to deter auto-
mobile theft.1) ID key
This key must be used first to reg-
ister a unique ID code in the ICM.
2) Master key
This key is for general use. It will
open all locks on your vehicle. One
side of the key has the Kia logo
and the other side has the “M”
symbol.
If you need additional keys or lose
your keys, your Authorized Kia
Dealer can make new keys if you can
supply the key number and ID key.
KNOWING YOUR VEHICLE
3-3
M
M
CAUTION
Don’t lose your ID key or forget
the password.
Always keep your ID key in a
place where you remember and
record your password. If you
don’t have both the password
and ID key, consult your
Authorized Kia Dealer.
CAUTION
A transponder equipped in your
ignition key is very important
part to deactivate the immobiliz-
er system. So you must not give
any shock on it. It could cause
the failure of your immobilizer
system and your vehicle’s start-
ing.
S2BLD3027
✽ ✽
NOTICEIf you make your own duplicate
key, you will not be able to cancel
the system or start the engine.✽ ✽
NOTICEWhen starting the engine, do not
use the key with other immobilizer
keys around. Otherwise the engine
may not start or may stop soon
after it starts. Keep each key sepa-
rately not to have any malfunction
after you receive your new vehicle.
ID Key
Master Key
BL-ENG (CAN)-3.qxd 7/28/05 5:52 PM Page 3
Page 13 of 312
Limp home (override) procedure
When you turn the ignition key to the
ON position, if the IMMO indicator
remains on continuously after blink-
ing 6 times, the transponder installed
in the ignition key is out of order. You
cannot start the engine without using
the limp home procedure. To start the
engine, you have to input your pass-
word using the ignition switch.The following procedure shows how
to input a sample password of “2345.”
1. Turn the ignition key to the ON
position. The IMMO indicator will
blink 6 times and remain on indi-
cating the beginning of the limp
home procedure.
2. Turn the ignition key to the ACC
position.
3. To enter the first digit (in this exam-
ple “2”), turn the ignition key to the
ON and ACC position twice. Wait 3
seconds but not more than 10 sec-
onds, and perform the same pro-
cedure for the next digits (for
example, for “3”, turn the ignition to
ON and ACC 3 times).
4. If all of the digits have been input
successfully, you have to start the
engine within 10 seconds. If you
attempt to start the engine after 10
seconds, the engine will not start
and you will have to input your
password again.After performing the limp home pro-
cedure, you have to see an author-
ized Kia dealer immediately to
inspect and repair your ignition key or
immobilizer system.KNOWING YOUR VEHICLE3-4
CAUTION
If you cannot start your engine
in spite of the limp home proce-
dure, have your vehicle towed
by an authorized Kia dealer for
inspection and necessary
repairs.
CAUTION
Do not change, alter or adjust
the immobilizer system at your
discretion. It could cause the
malfunction of your immobilizer
system. A malfunction resulting
from the changing, altering
and/or adjusting by persons
other than an authorized Kia
dealer will not be covered by
the Kia Warranty.
BL-ENG (CAN)-3.qxd 7/28/05 5:52 PM Page 4
Page 60 of 312
The "PASSENGER AIRBAG OFF"
indicator illuminates after the igni-
tion key is turned to the "ON" posi-
tion or after the engine is started. If
the front passenger seat is unoccu-
pied or is occupied by very small
person, or is occupied by someone
who is improperly seated, the
"PASSENGER AIRBAG OFF" indi-
cator will remain illuminated. If the
front passenger seat is occupied by
someone of adult size and body
shape, the "PASSENGER AIRBAG
OFF" indicator will turn off after 6
seconds.
If the "PASSENGER AIRBAG OFF"
indicator illuminates, the front pas-
senger airbag will not deploy in
either a side or frontal collision.
If the "PASSENGER AIRBAG OFF"
indicator is not illuminated, the front
passenger airbag may deploy in
frontal collision.
KNOWING YOUR VEHICLE
3-51
CAUTION
If the "PASSENGER AIRBAG OFF" indicator illuminates or blinks con-
tinuously when a person of adult size sits in the front passenger's
seat , it could be because that person isn't sitting properly in the
seat.If this happens, turn the vehicle off, make sure the seat back is
not reclined, have the passenger center on the seat cushion, with legs
comfortably extended, and the safety belt properly positioned. Restart
the vehicle and have the person remain in this position long enough
to allow the system to detect the person and activate the passenger
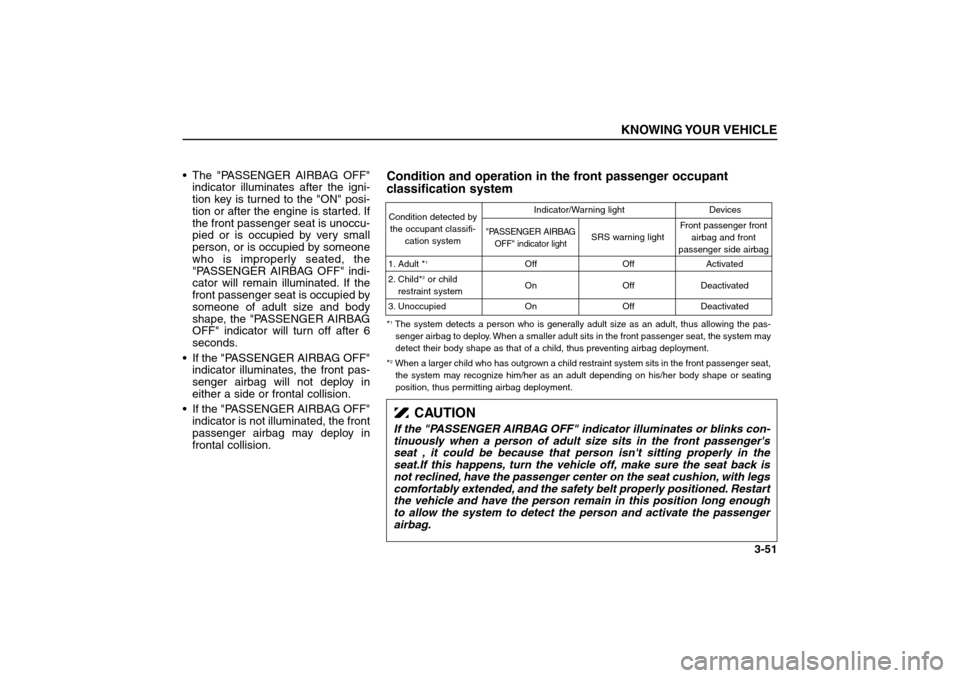
airbag.Condition and operation in the front passenger occupant
classification systemCondition detected by
the occupant classifi-
cation system
1. Adult *
1
2. Child*
2or child
restraint system
3. Unoccupied Off
On
OnOff
Off
OffActivated
Deactivated
Deactivated
"PASSENGER AIRBAG
OFF" indicator light
SRS warning lightFront passenger front
airbag and front
passenger side airbag Indicator/Warning light Devices
*1The system detects a person who is generally adult size as an adult, thus allowing the pas-
senger airbag to deploy. When a smaller adult sits in the front passenger seat, the system may
detect their body shape as that of a child, thus preventing airbag deployment.
*2When a larger child who has outgrown a child restraint system sits in the front passenger seat,
the system may recognize him/her as an adult depending on his/her body shape or seating
position, thus permitting airbag deployment.
BL-ENG (CAN)-3.qxd 7/28/05 5:52 PM Page 51
Page 73 of 312
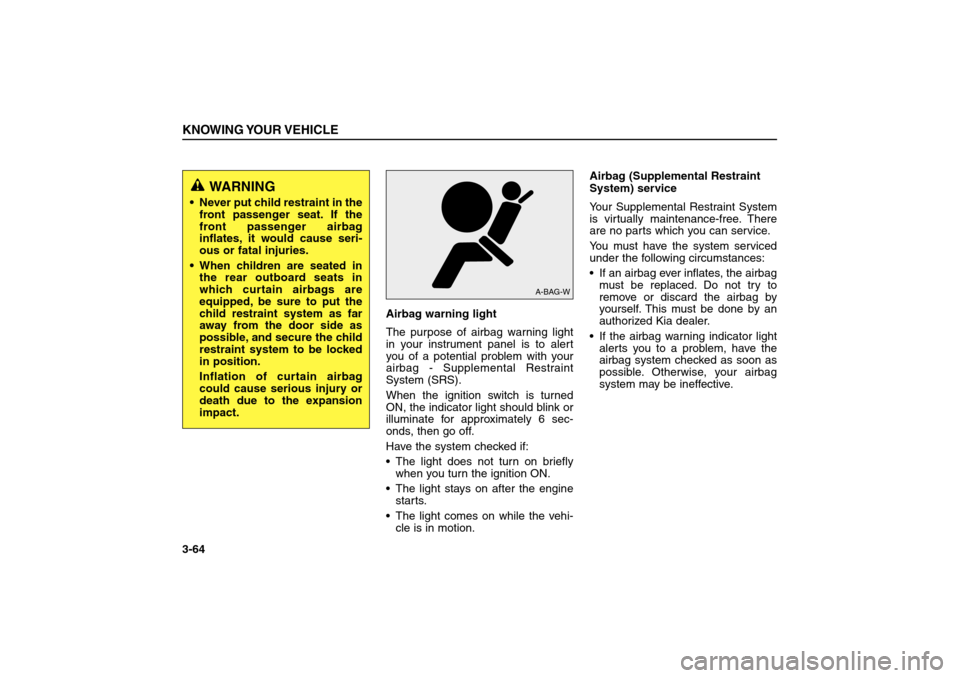
Airbag warning light
The purpose of airbag warning light
in your instrument panel is to alert
you of a potential problem with your
airbag - Supplemental Restraint
System (SRS).
When the ignition switch is turned
ON, the indicator light should blink or
illuminate for approximately 6 sec-
onds, then go off.
Have the system checked if:
The light does not turn on briefly
when you turn the ignition ON.
The light stays on after the engine
starts.
The light comes on while the vehi-
cle is in motion.Airbag (Supplemental Restraint
System) service
Your Supplemental Restraint System
is virtually maintenance-free. There
are no parts which you can service.
You must have the system serviced
under the following circumstances:
If an airbag ever inflates, the airbag
must be replaced. Do not try to
remove or discard the airbag by
yourself. This must be done by an
authorized Kia dealer.
If the airbag warning indicator light
alerts you to a problem, have the
airbag system checked as soon as
possible. Otherwise, your airbag
system may be ineffective.
KNOWING YOUR VEHICLE3-64
A-BAG-W
WARNING
Never put child restraint in the
front passenger seat. If the
front passenger airbag
inflates, it would cause seri-
ous or fatal injuries.
When children are seated in
the rear outboard seats in
which curtain airbags are
equipped, be sure to put the
child restraint system as far
away from the door side as
possible, and secure the child
restraint system to be locked
in position.
Inflation of curtain airbag
could cause serious injury or
death due to the expansion
impact.
BL-ENG (CAN)-3.qxd 7/28/05 5:52 PM Page 64
Page 79 of 312
Closing the Hood:
Check the area under the hood to
make certain all filler caps are in
place and that all loose items have
been removed.
Lower the hood then push down to
properly lock in place.
Check to make sure the hood is
closed.
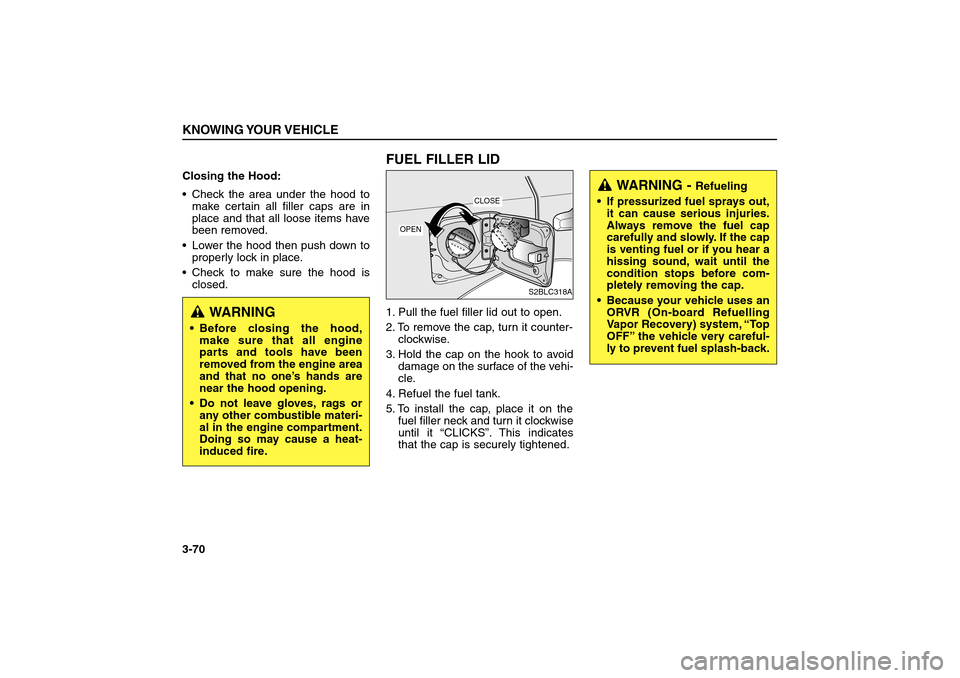
FUEL FILLER LID1. Pull the fuel filler lid out to open.
2. To remove the cap, turn it counter-
clockwise.
3. Hold the cap on the hook to avoid
damage on the surface of the vehi-
cle.
4. Refuel the fuel tank.
5. To install the cap, place it on the
fuel filler neck and turn it clockwise
until it “CLICKS”. This indicates
that the cap is securely tightened.
KNOWING YOUR VEHICLE3-70
WARNING -
Refueling
If pressurized fuel sprays out,
it can cause serious injuries.
Always remove the fuel cap
carefully and slowly. If the cap
is venting fuel or if you hear a
hissing sound, wait until the
condition stops before com-
pletely removing the cap.
Because your vehicle uses an
ORVR (On-board Refuelling
Vapor Recovery) system,“To p
OFF”the vehicle very careful-
ly to prevent fuel splash-back.
S2BLC318A
OPEN
CLOSE
WARNING
Before closing the hood,
make sure that all engine
parts and tools have been
removed from the engine area
and that no one’s hands are
near the hood opening.
Do not leave gloves, rags or
any other combustible materi-
al in the engine compartment.
Doing so may cause a heat-
induced fire.
BL-ENG (CAN)-3.qxd 7/28/05 5:52 PM Page 70
Page 80 of 312
KNOWING YOUR VEHICLE
3-71
WARNING
Automotive fuels are flamma-
ble/explosive materials. When
refueling, please note the fol-
lowing guidelines carefully.
Failure to follow these guide-
lines may result in severe per-
sonal injury, severe burns or
death by fire or explosion.
Before refueling always note
the location of the Emergency
Gasoline Shut-Off, if available,
at the gas station facility.
Before touching the fuel noz-
zle or fuel filler cap, you
should eliminate potentially
dangerous static electricity
discharge by touching anoth-
er metal part of the front of the
vehicle, a safe distance away
from the fuel filler neck, noz-
zle, or other gas source.
(Continued)
(Continued)
Do not get back into a vehicle
once you have begun refuel-
ing. Do not touch, rub or slide
against any item or fabric
(polyester, satin, nylon, etc.)
capable of producing static
electricity. Static electricity
discharge can ignite fuel
vapors resulting in explosion.
If you must re-enter the vehi-
cle, you should once again
eliminate potentially danger-
ous static electricity dis-
charge by touching a metal
part of the vehicle, away from
the fuel filler neck, nozzle or
other gasoline source.
When using a portable fuel
container be sure to place the
container on the ground prior
to refueling. Static electricity
discharge from the container
can ignite fuel vapors causing a
fire. Once refueling has begun,
contact with the vehicle should
be maintained until the filling is
complete. Use only portable
fuel containers designed to
carry and store gasoline.
(Continued)
(Continued)
Do not use cellular phones
around a gas station or while
refueling any vehicle. Electric
current and/or electronic
interference from cellular
phones can potentially ignite
fuel vapors causing a fire. If
you must use your cellular
phone use it in a place away
from the gas station.
When refueling always shut
the engine off. Sparks pro-
duced by electrical compo-
nents related to the engine
can ignite fuel vapors causing
a fire. Always insure that the
engine is OFF before and dur-
ing refueling. Once refueling
is complete, check to make
sure the fuel filler cap and
door are securely closed,
before starting the engine.
(Continued)
BL-ENG (CAN)-3.qxd 7/28/05 5:52 PM Page 71
Page 81 of 312
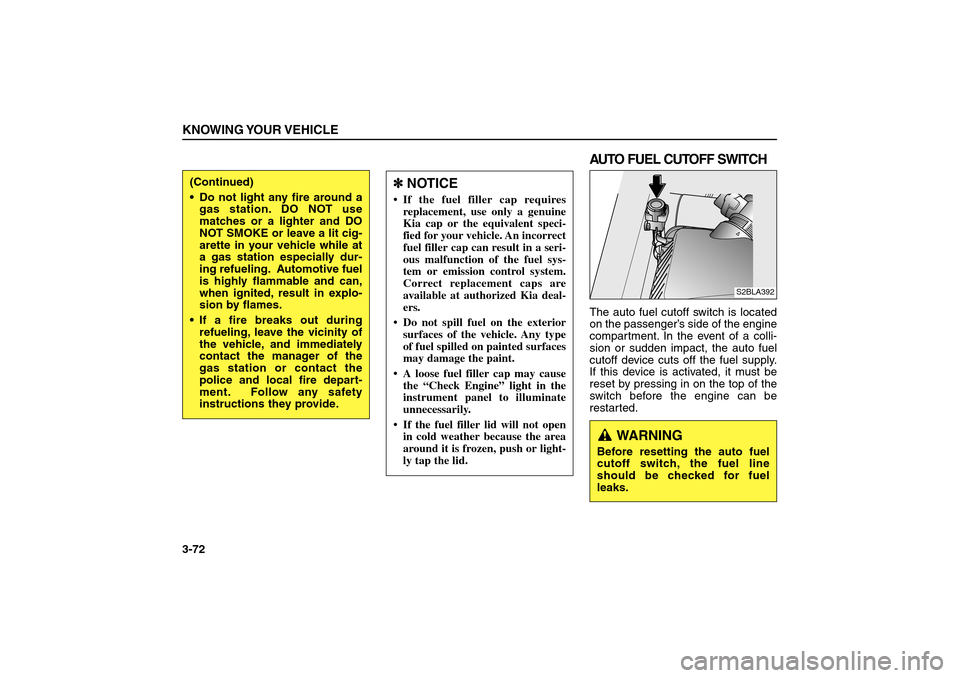
AUTO FUEL CUTOFF SWITCHThe auto fuel cutoff switch is located
on the passenger’s side of the engine
compartment. In the event of a colli-
sion or sudden impact, the auto fuel
cutoff device cuts off the fuel supply.
If this device is activated, it must be
reset by pressing in on the top of the
switch before the engine can be
restarted.
KNOWING YOUR VEHICLE3-72
S2BLA392
WARNING
Before resetting the auto fuel
cutoff switch, the fuel line
should be checked for fuel
leaks.
✽ ✽
NOTICE If the fuel filler cap requires
replacement, use only a genuine
Kia cap or the equivalent speci-
fied for your vehicle. An incorrect
fuel filler cap can result in a seri-
ous malfunction of the fuel sys-
tem or emission control system.
Correct replacement caps are
available at authorized Kia deal-
ers.
Do not spill fuel on the exterior
surfaces of the vehicle. Any type
of fuel spilled on painted surfaces
may damage the paint.
A loose fuel filler cap may cause
the “Check Engine” light in the
instrument panel to illuminate
unnecessarily.
If the fuel filler lid will not open
in cold weather because the area
around it is frozen, push or light-
ly tap the lid.
(Continued)
Do not light any fire around a
gas station. DO NOT use
matches or a lighter and DO
NOT SMOKE or leave a lit cig-
arette in your vehicle while at
a gas station especially dur-
ing refueling. Automotive fuel
is highly flammable and can,
when ignited, result in explo-
sion by flames.
If a fire breaks out during
refueling, leave the vicinity of
the vehicle, and immediately
contact the manager of the
gas station or contact the
police and local fire depart-
ment. Follow any safety
instructions they provide.
BL-ENG (CAN)-3.qxd 7/28/05 5:52 PM Page 72
Page 91 of 312
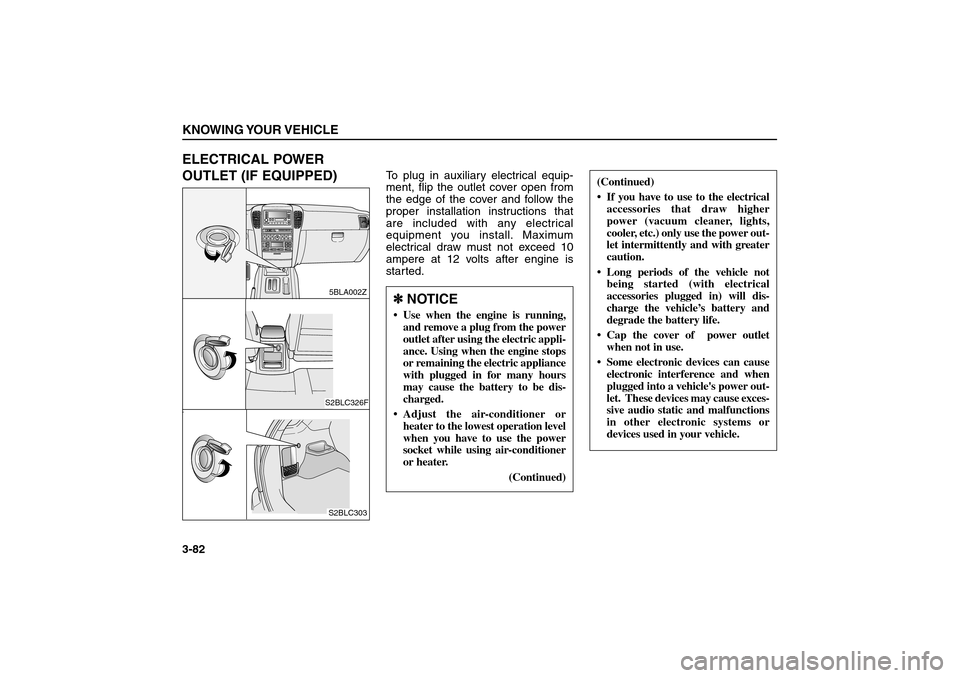
ELECTRICAL POWER
OUTLET (IF EQUIPPED)
To plug in auxiliary electrical equip-
ment, flip the outlet cover open from
the edge of the cover and follow the
proper installation instructions that
are included with any electrical
equipment you install. Maximum
electrical draw must not exceed 10
ampere at 12 volts after engine is
started.
KNOWING YOUR VEHICLE3-82
P
R
N
D2LH
M
5BLA002ZS2BLC326FS2BLC303
(Continued)
If you have to use to the electrical
accessories that draw higher
power (vacuum cleaner, lights,
cooler, etc.) only use the power out-
let intermittently and with greater
caution.
Long periods of the vehicle not
being started (with electrical
accessories plugged in) will dis-
charge the vehicle’s battery and
degrade the battery life.
Cap the cover of power outlet
when not in use.
Some electronic devices can cause
electronic interference and when
plugged into a vehicle's power out-
let. These devices may cause exces-
sive audio static and malfunctions
in other electronic systems or
devices used in your vehicle.
✽ ✽
NOTICE Use when the engine is running,
and remove a plug from the power
outlet after using the electric appli-
ance. Using when the engine stops
or remaining the electric appliance
with plugged in for many hours
may cause the battery to be dis-
charged.
Adjust the air-conditioner or
heater to the lowest operation level
when you have to use the power
socket while using air-conditioner
or heater.
(Continued)
BL-ENG (CAN)-3.qxd 7/28/05 5:52 PM Page 82
Page 99 of 312
4-1
DRIVING YOUR VEHICLEIgnition Switch . . . . . . . . . . . . . . . . . . . . . . . . . . . . . . . . . . . . 4-2
Starting the Gasoline Engine . . . . . . . . . . . . . . . . . . . . . . . . 4-4
Manual Transmission . . . . . . . . . . . . . . . . . . . . . . . . . . . . . . . 4-7
Automatic Transmission . . . . . . . . . . . . . . . . . . . . . . . . . . . . 4-9
Four Wheel Drive(4WD) . . . . . . . . . . . . . . . . . . . . . . . . . . . . 4-20
Limited Slip Differential . . . . . . . . . . . . . . . . . . . . . . . . . . . . 4-30
Brake System . . . . . . . . . . . . . . . . . . . . . . . . . . . . . . . . . . . . 4-30
Power Steering . . . . . . . . . . . . . . . . . . . . . . . . . . . . . . . . . . . 4-37
Cruise Control . . . . . . . . . . . . . . . . . . . . . . . . . . . . . . . . . . . 4-38
Instrument Cluster . . . . . . . . . . . . . . . . . . . . . . . . . . . . . . . 4-41
Gauges . . . . . . . . . . . . . . . . . . . . . . . . . . . . . . . . . . . . . . . . . 4-43
Warnings and Indicators . . . . . . . . . . . . . . . . . . . . . . . . . . . 4-45
Multi-Meter . . . . . . . . . . . . . . . . . . . . . . . . . . . . . . . . . . . . . . 4-52
Lighting . . . . . . . . . . . . . . . . . . . . . . . . . . . . . . . . . . . . . . . . 4-58
Wipers and Washers . . . . . . . . . . . . . . . . . . . . . . . . . . . . . . 4-62
Defroster . . . . . . . . . . . . . . . . . . . . . . . . . . . . . . . . . . . . . . . . 4-65
Hazard Warning Flasher . . . . . . . . . . . . . . . . . . . . . . . . . . . . 4-66
Interior Features . . . . . . . . . . . . . . . . . . . . . . . . . . . . . . . . . . 4-67
Manual Climate Control System . . . . . . . . . . . . . . . . . . . . . 4-71
Automatic Climate Control System . . . . . . . . . . . . . . . . . . . 4-79
Windshield Defrosting and Defogging (Manual type) . . . . . 4-86
Windshield Defrosting and Defogging (Automatic type) . . 4-88
4
BL-ENG (CAN)-4.qxd 7/28/05 5:55 PM Page 1