key KIA SORENTO 2014 Navigation System Quick Reference Guide
[x] Cancel search | Manufacturer: KIA, Model Year: 2014, Model line: SORENTO, Model: KIA SORENTO 2014Pages: 236, PDF Size: 7.61 MB
Page 180 of 236
7-2
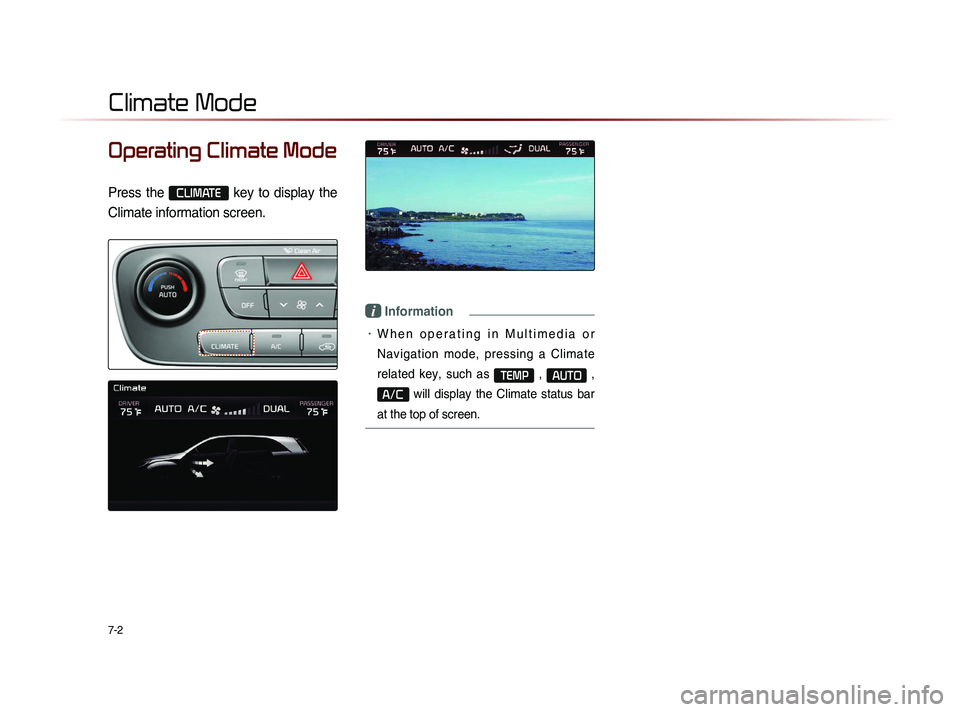
Operating Climate Mode
Press the CLIMATE
key to display the
Climate information screen.
i Information
• W h e n o p e r a t i n g i n M u l t i m e d i a o r
Navigation mode, pressing a Climate
related key, such as
TEMP , AUTO ,
A/C will display the Climate status bar
at the top of screen.
Climate Mode
Page 182 of 236
7-4
Basic Operation
Controlling Driver/Passenger
Temperature Simultaneously
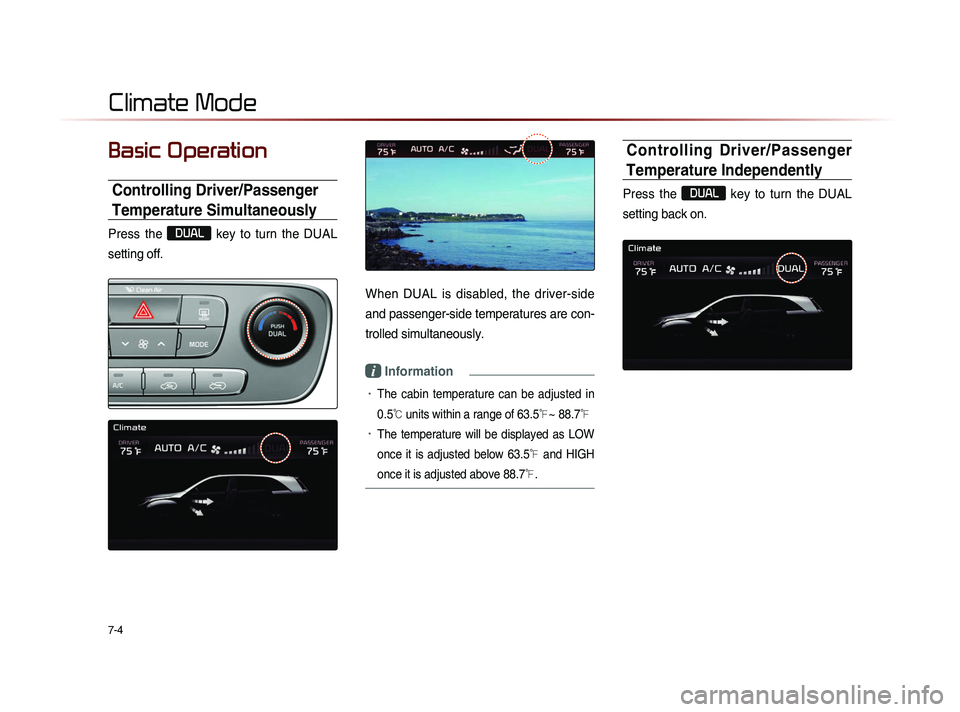
Press the
DUAL
key to turn the DUAL
setting off.
When DUAL is disabled, the driver-side
and passenger-side temperatures are con-
trolled simultaneously.
i Information
• The cabin temperature can be adjusted in
0.5
℃ units within a range of 63.5℉~ 88.7℉
• The temperature will be displayed as LOW
once it is adjusted below 63.5
℉ and HIGH
once it is adjusted above 88.7
℉.
Controlling Driver/Passenger
Temperature Independently
Press the
DUAL
key to turn the DUAL
setting back on.
Climate Mode
Page 183 of 236
Climate Mode
Other Features l
7-5
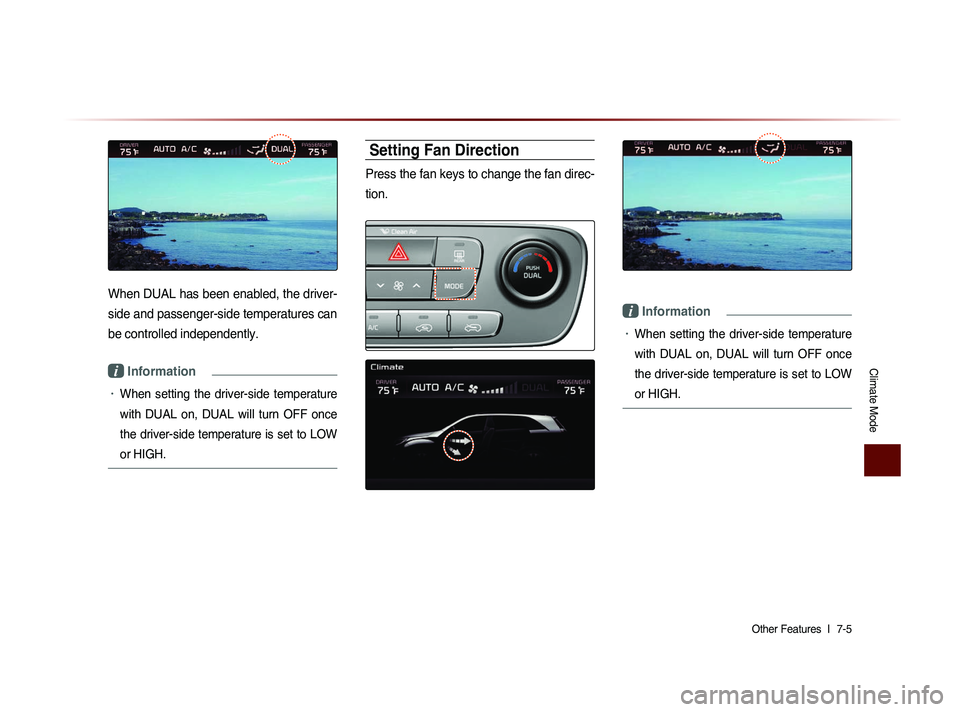
When DUAL has been enabled, the driver-
side and passenger-side temperatures can
be controlled independently.
i Information
• When setting the driver-side temperature
with DUAL on, DUAL will turn OFF once
the driver-side temperature is set to LOW
or HIGH.
Setting Fan Direction
Press the fan keys to change the fan direc-
tion.
i Information
• When setting the driver-side temperature
with DUAL on, DUAL will turn OFF once
the driver-side temperature is set to LOW
or HIGH.
Page 185 of 236
Rear Camera
Other Features l
7-7
About Rear Detection
Camera
• This system has been equipped with a
rear camera for user safety by allowing a
wider rear range of vision.
• The rear camera will operate automati-
cally when the ignition KEY is turned ON
and the transmission lever is set to R.
The rear camera will automatically stop
operating when set to a different lever.
Operating sequence of the Rear
Camera
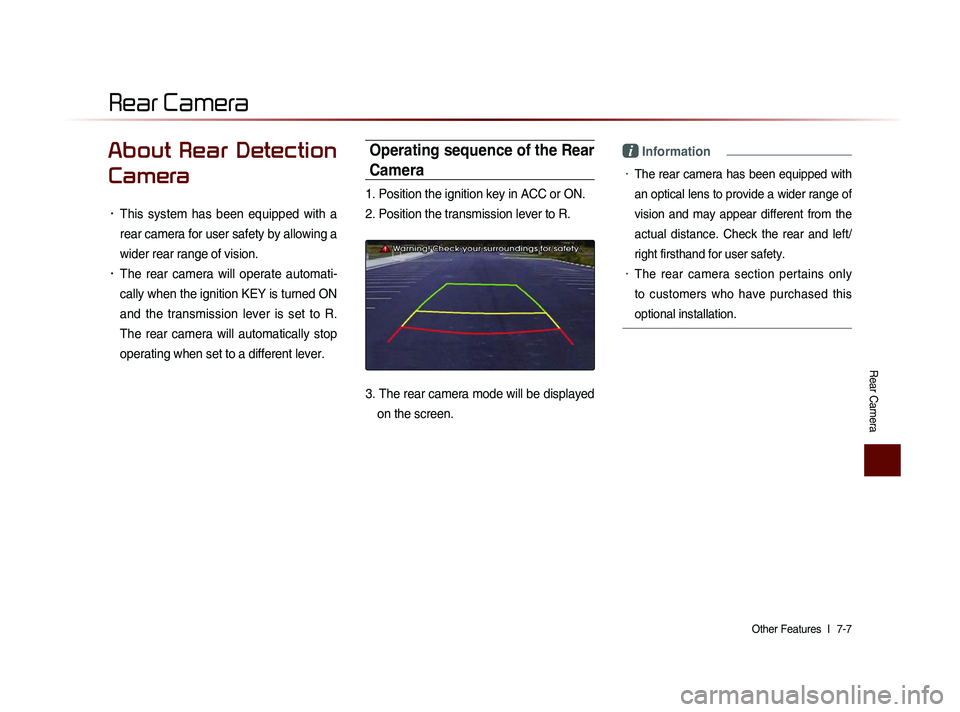
1. Position the ignition key in ACC or ON.
2. Position the transmission lever to R.
3. The rear camera mode will be displayed
on the screen.
i Information
• The rear camera has been equipped with
an optical lens to provide a wider range of
vision and may appear different from the
actual distance. Check the rear and left/
right firsthand for user safety.
• The rear camera section pertains only
to customers who have purchased this
optional installation.
Rear Camera
Page 188 of 236
8-2
Using Setup
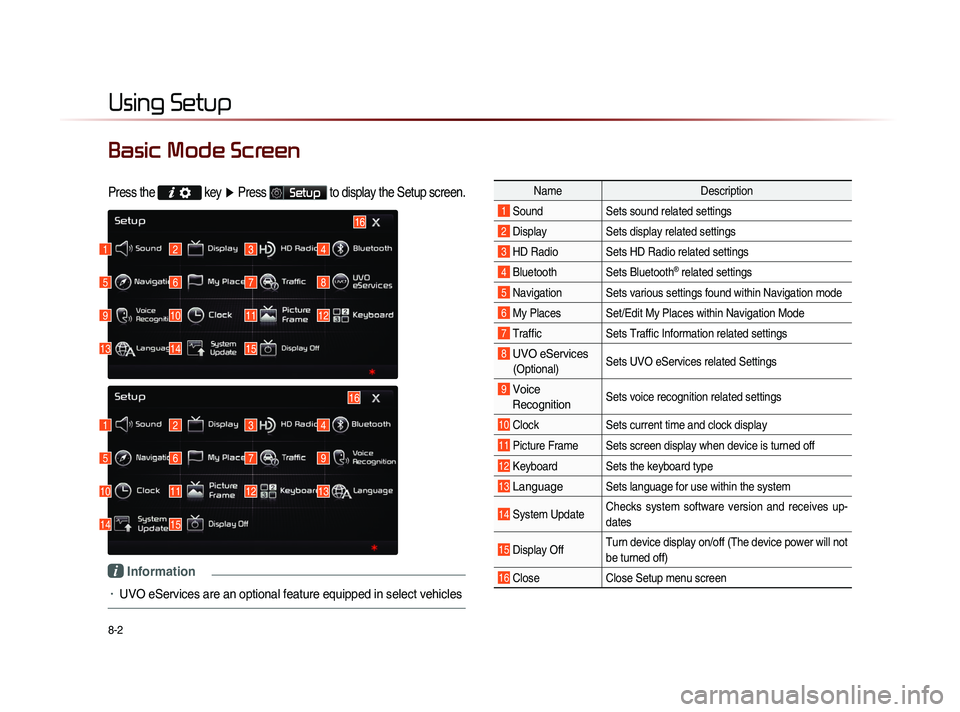
Basic Mode Screen
Press the key
▶ Press Setup to display the Setup screen.
Name Description
1 Sound Sets sound related settings
2 Display Sets display related settings
3 HD Radio Sets HD Radio related settings
4 Bluetooth Sets Bluetooth® related settings
5 Navigation Sets various settings found within Navigation mode
6 My Places Set/Edit My Places within Navigation Mode
7 Traffic Sets Traffic Information related settings
8 UVO eServices
(Optional)Sets UVO eServices related Settings
9 Voice
Recognition Sets voice recognition related settings
10 Clock Sets current time and clock display
11 Picture Frame Sets screen display when device is turned off
12 Keyboard Sets the keyboard type
13 Language Sets language for use within the system
14 System Update Checks system software version and receives up-
dates
15 Display Off Turn device display on/off (The device power will not
be turned off)
16 Close
Close Setup menu screen
1
1
5
5
9
10
13
14
2
2
6
6
10
11
14
15
3
3
7
7
11
12
4
4
8
9
12
13
16
15
16
i Information
• UVO eServices are an optional feature equipped in select vehicles
Page 189 of 236
Using Setup
Setup l
8-3
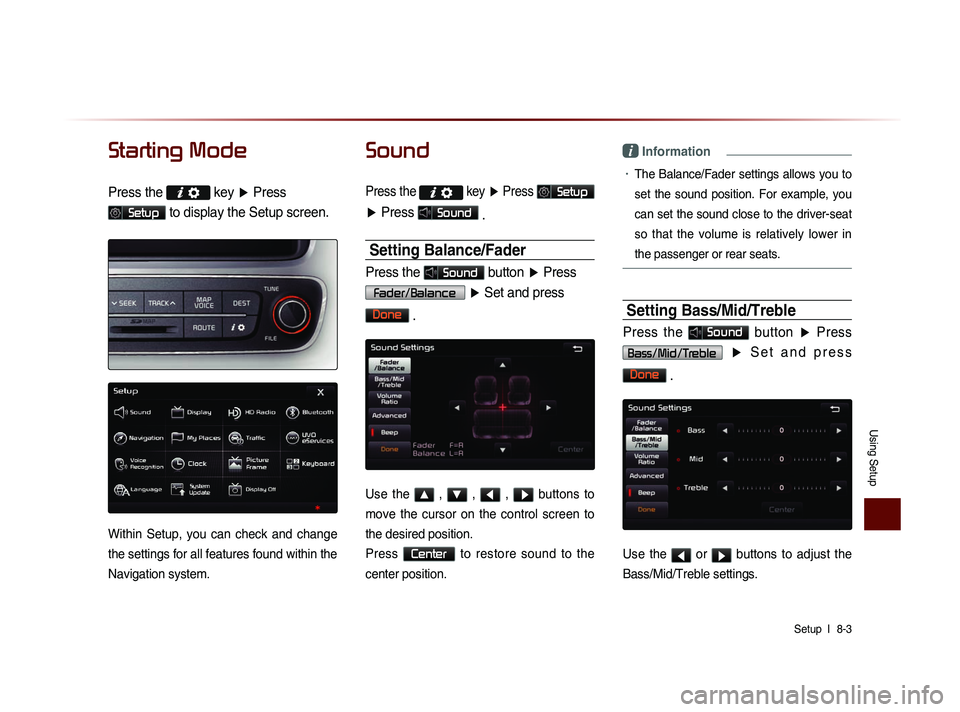
Starting Mode
Press the key
▶ Press
Setup to display the Setup screen.
Within Setup, you can check and change
the settings for all features found within the
Navigation system.
Sound
Press the
key ▶ Press Setup
▶ Press Sound
.
Setting Balance/Fader
Press the Sound button ▶ Press
Fader/Balance
▶ Set and press
Done
.
Use the ▲ , ▼ , ◀ , ▶ buttons to
move the cursor on the control screen to
the desired position.
Press
Center to restore sound to the
center position.
i Information
• The Balance/Fader settings allows you to
set the sound position. For example, you
can set the sound close to the driver-seat
so that the volume is relatively lower in
the passenger or rear seats.
Setting Bass/Mid/Treble
Press the Sound button ▶ Press
Bass/Mid/Treble ▶ S e t a n d p r e s s
Done
.
Use the ◀ or ▶ buttons to adjust the
Bass/Mid/Treble settings.
Page 191 of 236
Using Setup
Setup l
8-5
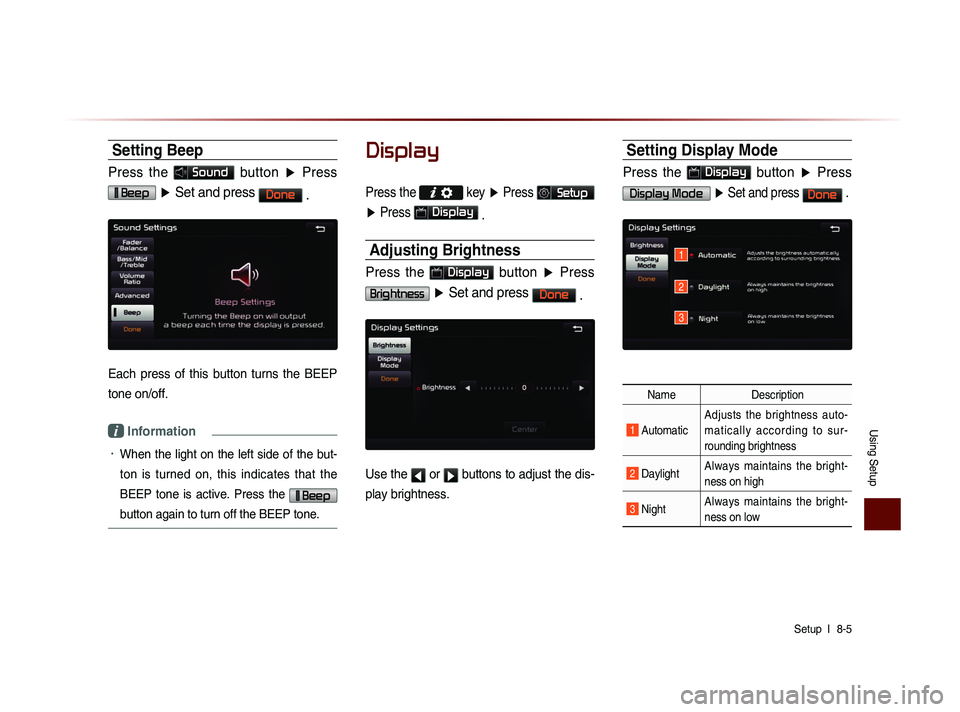
Setting Beep
Press the Sound button ▶ Press
Beep ▶ Set and press Done
.
Each press of this button turns the BEEP
tone on/off.
i Information
• When the light on the left side of the but-
ton is turned on, this indicates that the
BEEP tone is active. Press the
Beep
button again to turn off the BEEP tone.
Display
Press the
key ▶ Press Setup
▶ Press
Display
.
Adjusting Brightness
Press the Display button ▶ Press
Brightness ▶ Set and press Done
.
Use the ◀ or ▶ buttons to adjust the dis-
play brightness.
Setting Display Mode
Press the Display button ▶ Press
Display Mode ▶ Set and press Done .
Name Description
1 Automatic Adjusts the brightness auto-
m a t i c a l l y a c c o r d i n g t o s u r -
rounding brightness
2 Daylight
Always maintains the bright-
ness on high
3 Night Always maintains the bright-
ness on low
1
2
3
Page 192 of 236
8-6
Using Setup
i Information
• When set to Automatic, the screen bright-
n e s s a n d c o l o r w i l l a u t o m a t i c a l l y b e
adjusted according to the surrounding
brightness.
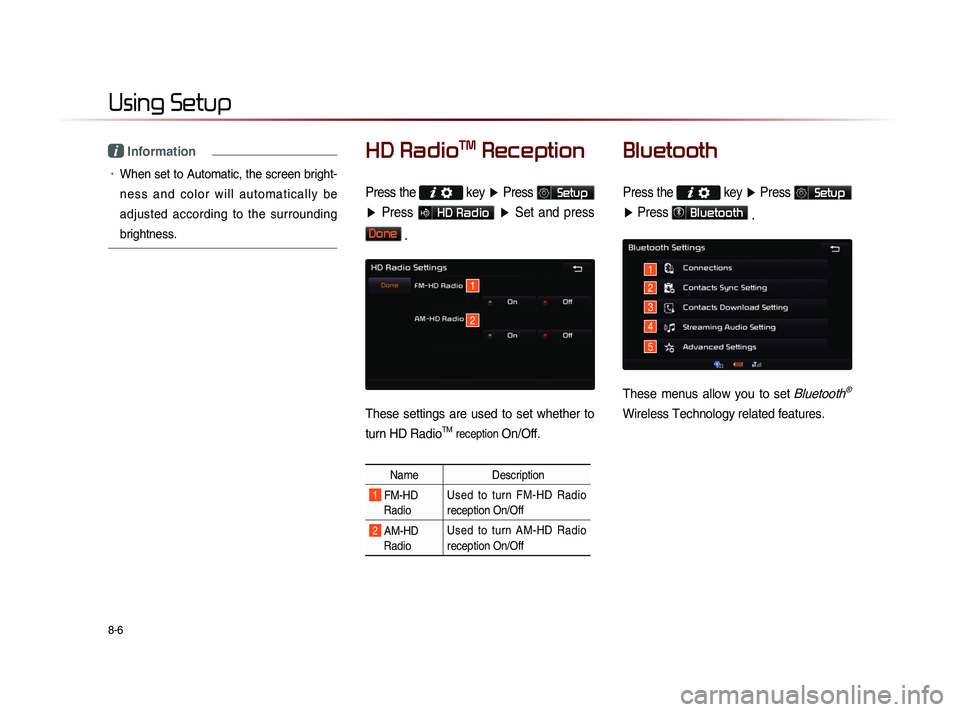
HD RadioTM Reception
Press the
key ▶ Press Setup
▶ Press
HD Radio ▶ Set and press
Done .
These settings are used to set whether to
turn HD Radio
TM reception On/Off.
Name Description
1 FM-HD
Radio Used to turn FM-HD Radio
reception On/Off
2 AM-HD
Radio Used to turn AM-HD Radio
reception On/Off
Bluetooth
Press the
key ▶ Press Setup
▶ Press
Bluetooth
.
These menus allow you to set Bluetooth®
Wireless Technology related features.
1
2
3
4
5
1
2
Page 195 of 236
Using Setup
Setup l
8-9
Name Description
1 Change
Passkey Changes the passkey used to
authenticate Bluetooth® device
2 Device
Information Searches car Bluetooth® de-
vice information and change
device name
3 Delete All Favorites Deletes all favorites of con-
nected Bluetooth® device
4 Delete All
Call History Deletes all call history of con-
nected Bluetooth® device
5 Restore Factory
Settings Restores Bluetooth® factory
state settings
Advanced Settings allow you to control
additional
Bluetooth® Wireless Technology
related settings. For safety, first park the
vehicle in a safe location to operate these
features.
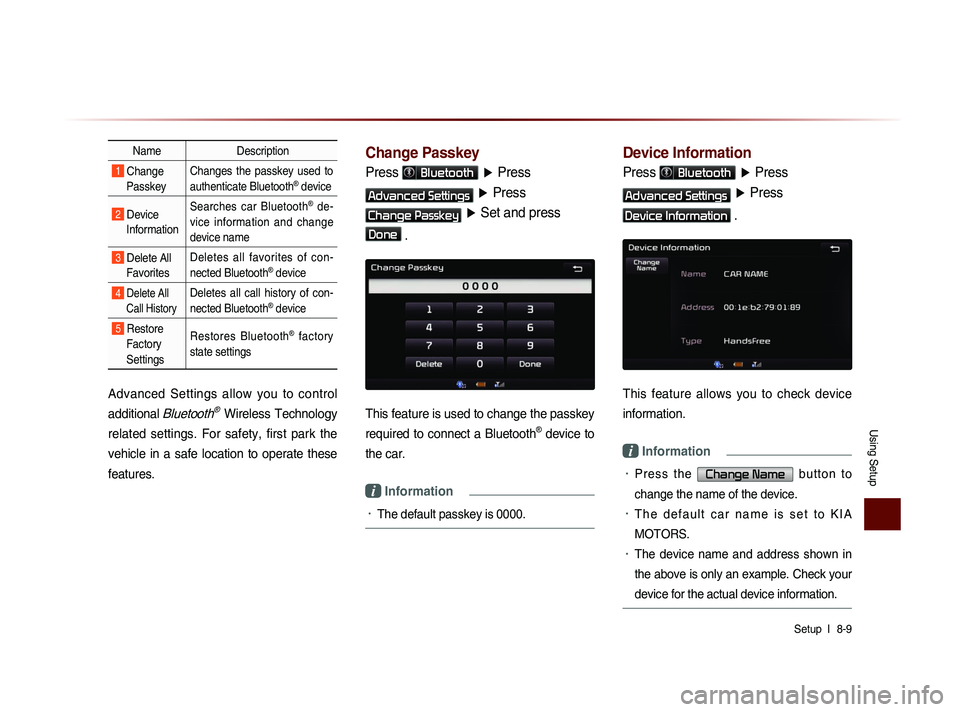
Change Passkey
Press Bluetooth ▶ Press
Advanced Settings ▶ Press
Change Passkey ▶ Set and press
Done .
This feature is used to change the passkey
required to connect a Bluetooth
® device to
the car.
i Information
• The default passkey is 0000.
Device Information
Press Bluetooth ▶ Press
Advanced Settings ▶ Press
Device Information .
This feature allows you to check device
information.
i Information
• P r e s s t h e Change Name b u t t o n t o
change the name of the device.
• T h e d e f a u l t c a r n a m e i s s e t t o K I A
MOTORS.
• The device name and address shown in
the above is only an example. Check your
device for the actual device information.
Page 197 of 236
Using Setup
Setup l
8-11
Navigation
Press the key ▶ Press Setup
▶ Press
Navigation
.
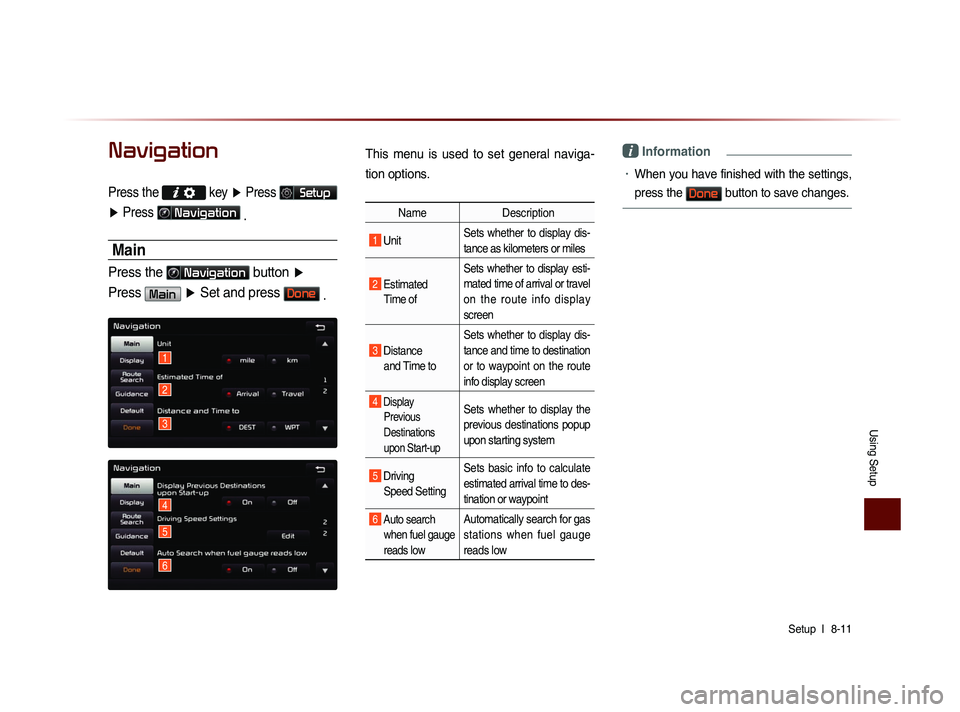
Main
Press the Navigation button ▶
Press
Main ▶ Set and press Done .
This menu is used to set general naviga-
tion options.
Name Description
1 Unit Sets whether to display dis-
tance as kilometers or miles
2 Estimated
Time of Sets whether to display esti-
mated time of arrival or travel
on the route info display
screen
3 Distance
and Time to Sets whether to display dis-
tance and time to destination
or to waypoint on the route
info display screen
4 Display
Previous
Destinations
upon Start-up Sets whether to display the
previous destinations popup
upon starting system
5 Driving Speed Setting Sets basic info to calculate
estimated arrival time to des-
tination or waypoint
6 Auto search
when fuel gauge
reads lowAutomatically search for gas
stations when fuel gauge
reads low
i Information
• When you have finished with the settings,
press the
Done button to save changes.
1
2
3
4
5
6