battery Lancia Delta 2010 Owner handbook (in English)
[x] Cancel search | Manufacturer: LANCIA, Model Year: 2010, Model line: Delta, Model: Lancia Delta 2010Pages: 276, PDF Size: 5.31 MB
Page 86 of 276

GETTING TO KNOW YOUR CAR85
1
IMPORTANT If the battery is disconnected or the pro-
tection fuse blows, the door opening/closing mechanism
must be reinitialised as follows:
❍close all the doors;
❍press button
Áon the key or door locking/unlocking
button
≈on the dashboard;
❍press button
Ëon the key or door locking/unlocking
button
≈on the dashboard.
If the child lock was engaged and the previ-
ously described locking procedure carried
out, operating the internal handle will not
open the door but will only realign the door lock
knob. To open the door, the outside handle must be
used. The door central locking/unlocking button
≈is not disabled by the engagement of the emer-
gency lock.
ELECTRIC WINDOWS
These operate when the ignition key is turned to MAR and
for about 2 minutes after turning the key to STOP or re-
moving it.
The control buttons are located in the door panels (the
driver-side door panel can be used to operate all the win-
dows).
There is may be anti-crush safety device which starts
working when the front windows are closing.
CONTROLS fig. 54
A. opening/closing left-hand front window; “continuous
automatic” operation during window opening/closing
stage;
B. opening/closing right-hand front window; continu-
ous automatic operation during window open-
ing/closing stage;
C. enabling/disabling of rear door electric window con-
trols;
D. opening/closing left-hand rear window (for ver-
sions/markets, where provided); continuous automat-
ic operation during window opening/closing stage;
E. opening/closing right-hand rear window (for ver-
sions/markets, where provided); “continuous auto-
matic” operation during window opening/closing stage.
001-142 Delta 3ed gb 30-11-2009 11:22 Pagina 85
Page 89 of 276

88GETTING TO KNOW YOUR CAR
Electric window system initialisation
The safety system must be re-initialised after disconnect-
ing the battery or if the relevant protection fuse is blown.
Initialisation procedure:
❍fully close the window to be initialised manually;
❍after the window has reached the upper end of travel,
hold the up button pressed for at least one second.
IMPORTANT Where provided, following the disconnec-
tion of the power supply (replacing or disconnecting the
battery or replacing the protection fuse for the electric win-
dows control units), the automatic setting for the electric
windows must be reset.The reset operation should be carried out with the doors
closed according to the following procedure:
1. completely lower the driver-side window and keep the
button pressed for at least 3 seconds once the end of
travel position has been reached;
2. completely raise the driver-side window and keep the
button pressed for at least 3 seconds once the end of
travel position has been reached;
3. repeat stages 1 and 2 for the passenger-side window
4. check that the initialisation has taken place correctly
by checking the automatic operation of the windows.
IMPORTANT With central locking on, operating the in-
ternal handle of one of the doors will unlock all the doors.
If there is no power (blown fuse, battery disconnected,
etc.) the doors can still be locked manually. As in this case
the automatic window opening function is not available,
to open or close the door with the window closed, apply
pressure to the window towards the vehicle interior, to aid
the passage of the window against the trim.
001-142 Delta 3ed gb 30-11-2009 11:22 Pagina 88
Page 92 of 276

GETTING TO KNOW YOUR CAR91
1
fig. 57L0E0048m
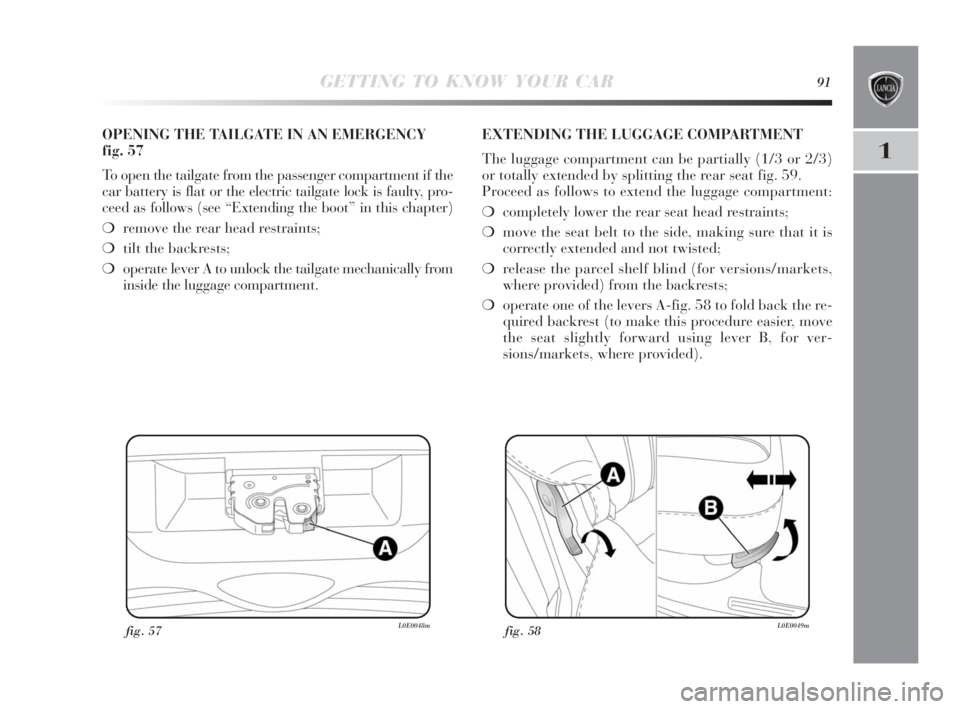
OPENING THE TAILGATE IN AN EMERGENCY
fig. 57
To open the tailgate from the passenger compartment if the
car battery is flat or the electric tailgate lock is faulty, pro-
ceed as follows (see “Extending the boot” in this chapter)
❍remove the rear head restraints;
❍tilt the backrests;
❍operate lever A to unlock the tailgate mechanically from
inside the luggage compartment.EXTENDING THE LUGGAGE COMPARTMENT
The luggage compartment can be partially (1/3 or 2/3)
or totally extended by splitting the rear seat fig. 59.
Proceed as follows to extend the luggage compartment:
❍completely lower the rear seat head restraints;
❍move the seat belt to the side, making sure that it is
correctly extended and not twisted;
❍release the parcel shelf blind (for versions/markets,
where provided) from the backrests;
❍operate one of the levers A-fig. 58 to fold back the re-
quired backrest (to make this procedure easier, move
the seat slightly forward using lever B, for ver-
sions/markets, where provided).
fig. 58L0E0049m
001-142 Delta 3ed gb 30-11-2009 11:22 Pagina 91
Page 131 of 276

130GETTING TO KNOW YOUR CAR
❍Ultrasound sources (e.g. pneumatic brakes on lorries
or pneumatic hammers) in the vicinity may affect the per-
formance of the sensors.
❍The sensors could detect an object that is not there
(echo disturbance) caused by mechanical disturbances, for
example: washing the car, rain, extreme wind conditions,
hail.
❍The sensors might not detect objects of a particular
shape or made from particular materials (very thin poles,
trailer beams, panels, nets, bushes, parking deterrents, rub-
bish bins, motor vehicles, etc.). Always take great care
check that the vehicle and its path are effectively compat-
ible with the parking area identified by the system.
❍The use of (one or more) tyres or wheels of a different
size to those at the time the vehicle was purchased could
affect the operation of the system.
❍If the battery is disconnected or very run down, before
the Magic Parking system is available it is necessary to dri-
ve a few hundred metres, not in a straight line, to initial-
ize the system.
❍If a trailer is fitted (with the plug correctly inserted) the
Magic Parking system will automatically be disabled.❍If the Magic Parking system is in the “search in
progress” mode, the system could incorrectly identify a
parking space and carry out the manoeuvre (e.g. by a junc-
tion, carriage track, roads crossing the direction of travel,
etc.)
❍In the case of parking manoeuvres on roads on a gra-
dient, the performance of the system could be inferior and
it may deactivate.
❍If a parking manoeuvre is being carried out between
two parked vehicles alongside the pavement, the Magic
Parking system may cause the vehicle to mount the pave-
ment.
❍Some manoeuvres at very tight bends may not be car-
ried out.
❍Take great care to ensure that conditions do not change
during the parking manoevure (e.g. if there are persons
and/or animals in the parking area, moving vehicles, etc.)
and intervene immediately if necessary.
❍During parking manoeuvres, pay special attention to
vehicles approaching from the opposite direction. Always
follow the Highway Code.
001-142 Delta 3ed gb 30-11-2009 11:22 Pagina 130
Page 138 of 276

GETTING TO KNOW YOUR CAR137
1
ACCESSORIES PURCHASED
BY THE OWNER
If, after buying the car, you decide to install electrical ac-
cessories that require a permanent electrical supply (alarm,
satellite antitheft system, etc.) or accessories that in any
case burden the electric supply, contact a Lancia Dealer-
ship. Their qualified personnel, besides being able to sug-
gest the most suitable devices from the Lineaccessori Lan-
cia, will also evaluate the overall electric uptake, check-
ing whether the car’s electrical system is able to withstand
the required load, or whether a more powerful battery
needs to be installed.
Fiat Auto S.p.A. authorises the installation of transceiv-
ing devices provided that they are installed according to
rules of good engineering practice in accordance with the
manufacturer’s instructions and at a specialised centre.
IMPORTANT Traffic police may not allow the car on the
road if devices have been fitted which modify the features
of the car. This may also invalidate the warranty if faults
occur that are either directly or indirectly related to the
installation of these devices. Fiat Group Automobiles S.p.A.
shall not be liable for damage caused by the installation
of accessories either not supplied or not recommended
by Fiat Group Automobiles S.p.A. and/or not installed in
compliance with the provided instructions. INSTALLING ELECTRICAL/ELECTRONIC
DEVICES
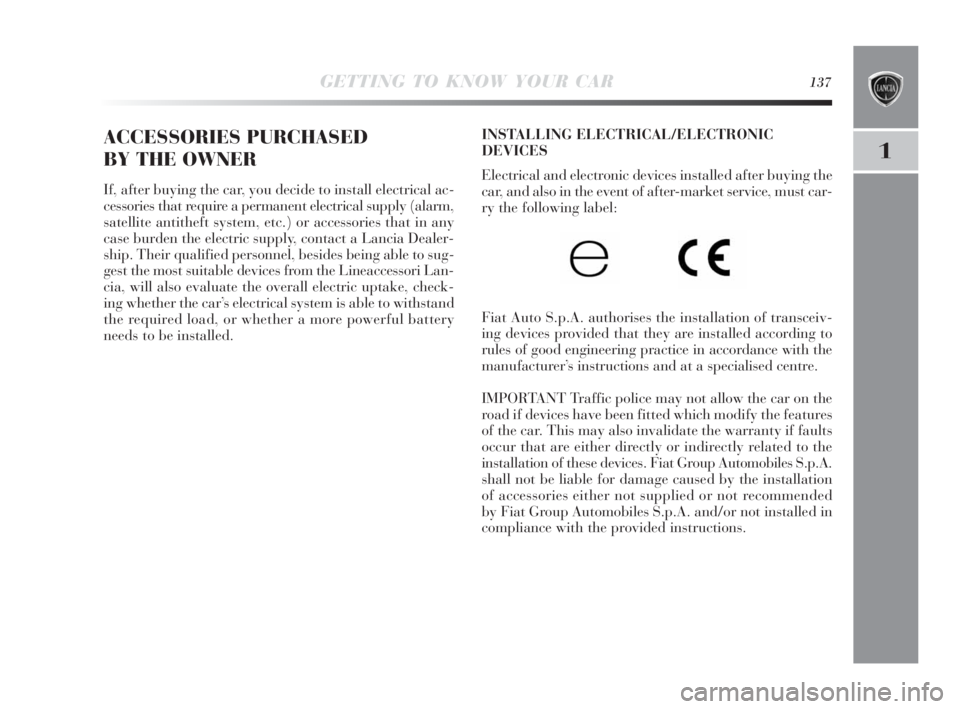
Electrical and electronic devices installed after buying the
car, and also in the event of after-market service, must car-
ry the following label:
001-142 Delta 3ed gb 30-11-2009 11:22 Pagina 137
Page 167 of 276

166STARTING UP AND DRIVING
STARTING THE ENGINE
The car is provided with an electronic engine lock device:
refer to “The Lancia CODE system” paragraph in chap-
ter “1” if you cannot start the engine.
The engine may be noisier during the first few seconds
of operation, particularly after a long period of inactivi-
ty. This does not impair functionality and reliability and
is typical of hydraulic tappets: the distribution system
selected for the petrol engine of your car in order to lim-
it the maintenance required.
In the first period of use, we recommend
avoiding excessive stress for the car (for in-
stance excessive accelerations, extended trav-
el at maximum speed, sudden braking etc.).
With engine off, do not leave the key in the ig-
nition switch on MAR to prevent draining the
battery.
Is is dangerous to let the engine run in en-
closed spaces. The engine depletes oxygen and
discharges carbon dioxide, carbon monoxide
and other toxic gases.
Remember that the brake servo and electric
power steering are not operational until the
engine has been started, therefore more effort
than usual is required on the brake pedal and steer-
ing wheel.
165-174 Delta 3ed gb 11-11-2009 12:10 Pagina 166
Page 170 of 276

STARTING UP AND DRIVING169
3
PARKING THE CAR
Proceed as follows:
❍stop the engine and engage the handbrake;
❍engage a gear (on a slope, engage first gear if the car
is faced uphill or reverse if it is faced downhill) and
leave the wheels steered.
If the car is parked on a steep slope, it is further advisable
to block the wheels with a wedge or stone.
Do not leave the ignition key on MAR to prevent drain-
ing the battery. Always remove the key when you leave the
car.
Never leave children unattended in the car. Always remove
the ignition key when leaving the car and take it out with
you.
fig. 1L0E0072m
USING THE MANUAL GEARBOX
To engage the gears, press the clutch pedal fully and shift
the gear lever into one of the required positions (the gear
diagram varies according to the different versions and is
shown on the knob or on the plate below the lever fig. 2).
To engage sixth gear, operate the lever by pressing it to-
wards the right in order to avoid engaging fourth gear by
mistake. Use the same action to pass from sixth to fifth
gear.
IMPORTANT Reverse may only be engaged when the car
is at a standstill. With the engine running, wait at least 2
seconds before engaging reverse gear with the clutch
pressed down to the floor in order to avoid damaging or
scraping the gears.
fig. 2L0E0073m
165-174 Delta 3ed gb 11-11-2009 12:10 Pagina 169
Page 175 of 276

174STARTING UP AND DRIVING
Keep your speed down when snow chains are
fitted. Do not exceed 50 km/h. Avoid potholes,
steps and pavements and avoid also driving
for long distances on roads not covered with snow
to avoid damaging the car and the roadbed.
SNOW CHAINS
The use of snow chains should be in compliance with lo-
cal regulations.
Snow chains may be applied only to the front wheel tyres
(drive wheels).
Check the tension of the chains after the first few metres
have been driven.
IMPORTANT The spare wheel cannot be fitted with snow
chains. If the front tyre has a puncture, replace a rear wheel
with the spare wheel and move the rear wheel to the front
axle. This way, having two standard size wheels on the
front axle, is it possible to fit the chains.
EXTENDED CAR INACTIVITY
If the car is to be left inactive for longer than a month, the
following precautions should be observed:
❍park the car in covered, dry and if possible well-ven-
tilated place;
❍engage a gear;
❍check that the handbrake is not engaged;
❍disconnect battery negative terminal and check the bat-
tery charge (see paragraph “Battery - Charge and elec-
trolyte level check” in chapter “5”);
❍clean and protect the painted parts of the vehicle with
protective wax;
❍clean and protect the shiny metal parts using special
compounds readily available;
❍sprinkle talcum powder on the rubber windscreen and
rear window wiper blades and lift them off the glass;
❍slightly open the windows;
❍cover the car with a fabric or perforated plastic sheet.
Do not use compact plastic sheets which do not allow
humidity to evaporate from the surface of the car;
❍inflate the tyres to a pressure of +0.5 bar above the
normal specified pressure and check the pressure at
regular intervals;
❍do not drain the engine cooling system.
165-174 Delta 3ed gb 11-11-2009 12:10 Pagina 174
Page 176 of 276

IN AN EMERGENCY175
4
In an emergency we recommend that you call the toll-free number found on the
Warranty Booklet. You can also connect to the site www.lancia.com
to search for the nearest Lancia Dealership point
Starting the engine .................................................................. 176
Fix&Go automatic quick tyre repair kit.................................... 177
Changing a wheel.................................................................... 185
Changing a bulb ...................................................................... 192
Changing an exterior bulb ....................................................... 196
Changing an interior bulb ....................................................... 201
Changing fuses ........................................................................ 205
Recharging the battery ............................................................ 213
Lifting the car ......................................................................... 213
Towing the car ........................................................................ 214
175-214 Delta 4ed gb 24-02-2010 14:36 Pagina 175
Page 177 of 276

176IN AN EMERGENCY
STARTING THE ENGINE
Go to a Lancia Dealership immediately if instrument pan-
el warning light
Yremains on constantly.
JUMP STARTING fig. 1
If the battery is flat, the engine may be started using an
auxiliary battery with the same capacity or a little high-
er than the flat one.
Proceed as follows to start the car:
❍connect the positive terminals (+ sign near the termi-
nal) of the two batteries with a jump lead;
❍with a second lead, connect the negative terminal –
of the auxiliary battery to an earth point E
on the en-
gine or the gearbox of the car to be started;
❍start the engine;
❍when engine has started, remove the cables by revers-
ing the sequence described for connection.
fig. 1L0E0074m
Never use a quick battery charger for an
emergency start: this could damage the elec-
tronic systems and the engine fuel feed and
ignition control units.
This starting procedure must be carried out
by expert personnel as incorrect manoeuvres
can cause electrical discharges of consider-
able intensity. Furthermore, battery fluid is poiso-
nous and corrosive: avoid contact with your skin
and eyes. Keep naked flames away from the battery.
No smoking. Do not cause sparks.
175-214 Delta 4ed gb 24-02-2010 14:36 Pagina 176