turbo LAND ROVER DISCOVERY 2002 Owner's Manual
[x] Cancel search | Manufacturer: LAND ROVER, Model Year: 2002, Model line: DISCOVERY, Model: LAND ROVER DISCOVERY 2002Pages: 1672, PDF Size: 46.1 MB
Page 398 of 1672

ENGINE MANAGEMENT SYSTEM - TD5
DESCRIPTION AND OPERATION 18-1-5
1Mass air flow sensor
2Ambient air pressure sensor
3Manifold absolute pressure/ inlet air
temperature sensor
4Engine coolant temperature sensor
5Crankshaft speed and position sensor
6Throttle position sensor
7Fuel temperature sensor
8Brake pedal switch
9Clutch switch
10High/ Low ratio switch
11Main relay
12Malfunction indicator lamp
13Fuel pump relay
14Glow plug warning lamp
15Glow plugs16Electronic unit injectors
17Turbocharger wastegate modulator
18EGR modulator
19Diagnostic connector
20Engine control module
21Cruise control master switch
22Cruise control SET+ switch
23Cruise control RES switch
24Air conditioning clutch relay
25Air conditioning cooling fan relay
26Electronic automatic transmission ECU
27Self levelling and anti-lock brakes ECU
28Instrument cluster
29Body control unit
Page 399 of 1672

ENGINE MANAGEMENT SYSTEM - TD5
18-1-6 DESCRIPTION AND OPERATION
Description
General
An engine control module (ECM) controls the five-cylinder direct injection diesel engine, and works on the drive by
wire principle. This means there is no throttle cable, the ECM controls the drivers needs via a signal from the Throttle
Position (TP) sensor on the throttle pedal.
The ECM is a full authoritative diesel specific microprocessor that also incorporates features for cruise control and air
conditioning control. In addition, the ECM supplies output control for the exhaust gas recirculation and turbocharger
boost pressure. The ECM has a self-diagnostic function, which is able to provide backup strategies for most sensor
failures.
The ECM processes information from the following input sources:
lMass air flow sensor.
lAmbient air pressure sensor.
lManifold absolute pressure/inlet air temperature sensor.
lEngine coolant temperature sensor.
lCrankshaft speed and position sensor.
lThrottle position sensor.
lFuel temperature sensor.
lAir conditioning request.
lAir conditioning fan request.
lBrake pedal switch.
lClutch switch.
lCruise control master switch.
lCruise control SET+ switch.
lCruise control RES switch.
lHigh/low ratio switch.
The input from the sensors constantly updates the ECM with the current operating condition of the engine. Once the
ECM has compared current information with stored information within its memory, it can make any adjustment it
requires to the operation of the engine via the following:
lAir conditioning clutch relay.
lAir conditioning cooling fan relay.
lElectronic vacuum regulator solenoid.
lMalfunction indicator lamp.
lFuel pump relay.
lGlow plug warning lamp.
lGlow plugs.
lFuel injectors.
lMain relay.
lTurbocharger wastegate modulator.
lTemperature gauge.
The ECM interfaces with the following:
lElectronic Automatic Transmission (EAT).
lSelf Levelling and Anti-lock Brakes System (SLABS).
lSerial communication link.
lInstrument cluster.
lBody Control Unit (BCU).
Page 401 of 1672

ENGINE MANAGEMENT SYSTEM - TD5
18-1-8 DESCRIPTION AND OPERATION
Input/Output
ECM inputs and outputs are detailed below:
Connector C0158
Pin No. Input/Output Function Signal type Value Interfaces
A1 Output Injector 5 Analogue 0
A2 Not used
A3 Output EGR modulator Digital 0-12
A4 Not used
A5 Input FT sensor earth 0 volts 0
A6 Input MAP sensor Analogue 0-5 volts
A7 Input ECT sensor Analogue 0-5 volts
A8 Sensor supply Sensor supply 5 volts 5 volts
A9 HT pin
A10 Input AAP sensor Analogue 0-5 volts
A11 Input MAF sensor Analogue 0-5 volts
A12 Not used
A13 Input CKP sensor positive Analogue
A14 Not used
A15 Input Sensor earth 5 0 volts 0 volts
A16 Input CKP sensor screened earth 0 volts 0 volts
A17 Input Sensor earth 6 0 volts 0 volts
A18 Input Sensor earth 3 0 volts 0 volts
A19 Input FT sensor Analogue 0-5 volts
A20 Input Sensor earth 2 0 volts 0 volts
A21 Output Turbocharger wastegate
modulatorDigital 0-12 volts
A22 Output Injector common 2 Analogue 0-85 volts
A23 Output Injector common 1 Analogue 0-85 volts
A24 Output Injector 4 Analogue 0 volts
A25 Output Injector 1 Analogue 0 volts
A26 Output Injector 2 Analogue 0 volts
A27 Output Injector 3 Analogue 0 volts
A28 Not used
A29 Output Glow plug relay Analogue 0-90 volts
A30 Input Sensor earth 4 0 volts 0 volts
A31 Not used
A32 Input/Output CAN negative Digital 2.5-5 volts EAT
A33 Input High/low ratio switch Digital 0-5 volts EAT, SLABS
A34 Input IAT sensor Analogue 0-5 volts
A35 Input/Output Can positive Digital 2.5-5 volts EAT
A36 Input CKP sensor negative 0 volts 0 volts
Page 403 of 1672

ENGINE MANAGEMENT SYSTEM - TD5
18-1-10 DESCRIPTION AND OPERATION
Mass Air Flow (MAF) sensor
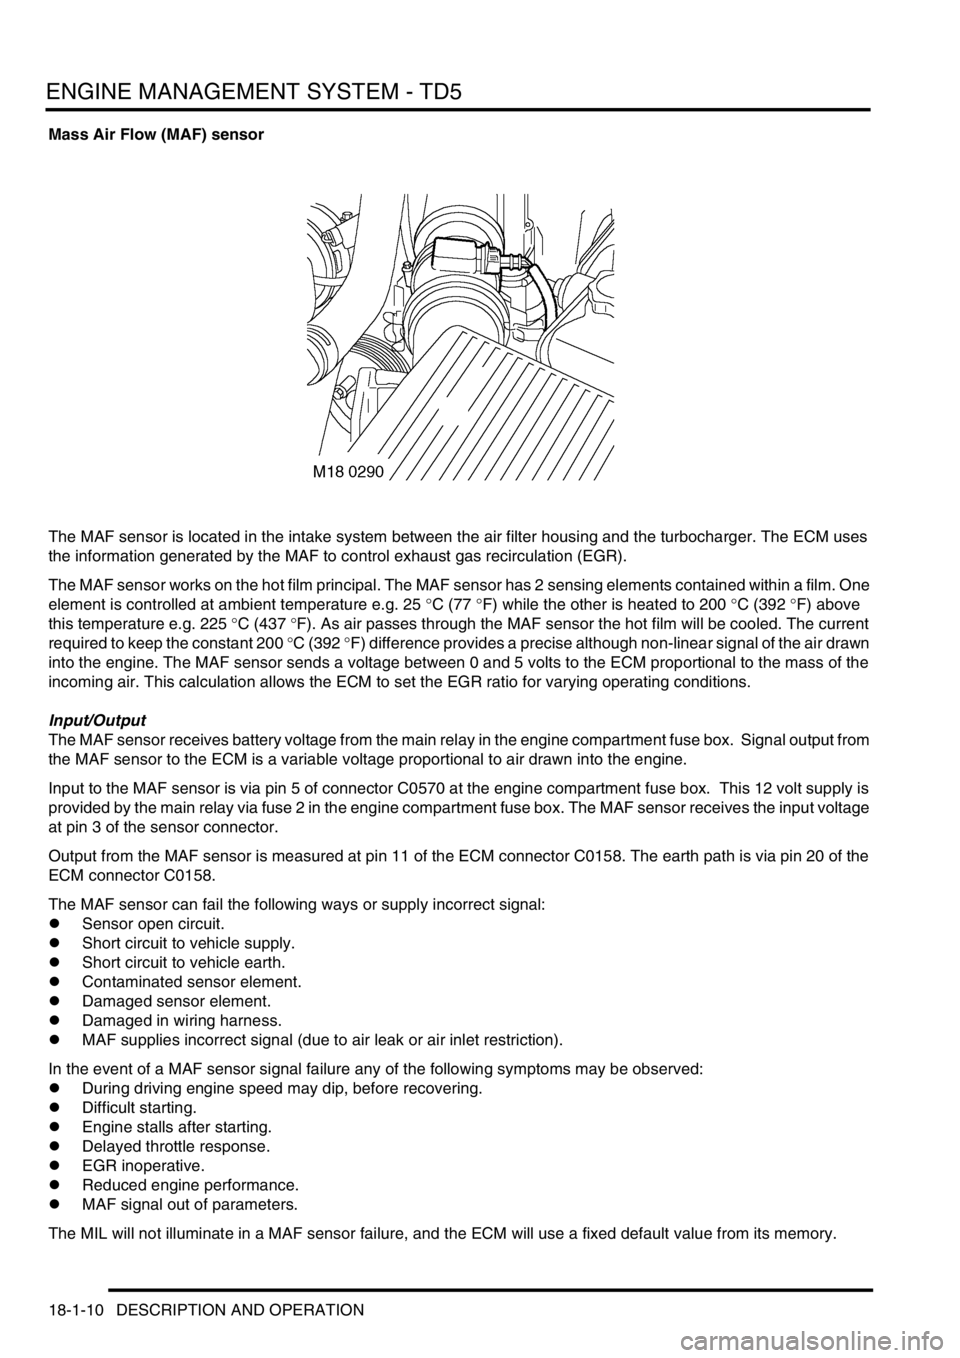
The MAF sensor is located in the intake system between the air filter housing and the turbocharger. The ECM uses
the information generated by the MAF to control exhaust gas recirculation (EGR).
The MAF sensor works on the hot film principal. The MAF sensor has 2 sensing elements contained within a film. One
element is controlled at ambient temperature e.g. 25
°C (77 °F) while the other is heated to 200 °C (392 °F) above
this temperature e.g. 225
°C (437 °F). As air passes through the MAF sensor the hot film will be cooled. The current
required to keep the constant 200
°C (392 °F) difference provides a precise although non-linear signal of the air drawn
into the engine. The MAF sensor sends a voltage between 0 and 5 volts to the ECM proportional to the mass of the
incoming air. This calculation allows the ECM to set the EGR ratio for varying operating conditions.
Input/Output
The MAF sensor receives battery voltage from the main relay in the engine compartment fuse box. Signal output from
the MAF sensor to the ECM is a variable voltage proportional to air drawn into the engine.
Input to the MAF sensor is via pin 5 of connector C0570 at the engine compartment fuse box. This 12 volt supply is
provided by the main relay via fuse 2 in the engine compartment fuse box. The MAF sensor receives the input voltage
at pin 3 of the sensor connector.
Output from the MAF sensor is measured at pin 11 of the ECM connector C0158. The earth path is via pin 20 of the
ECM connector C0158.
The MAF sensor can fail the following ways or supply incorrect signal:
lSensor open circuit.
lShort circuit to vehicle supply.
lShort circuit to vehicle earth.
lContaminated sensor element.
lDamaged sensor element.
lDamaged in wiring harness.
lMAF supplies incorrect signal (due to air leak or air inlet restriction).
In the event of a MAF sensor signal failure any of the following symptoms may be observed:
lDuring driving engine speed may dip, before recovering.
lDifficult starting.
lEngine stalls after starting.
lDelayed throttle response.
lEGR inoperative.
lReduced engine performance.
lMAF signal out of parameters.
The MIL will not illuminate in a MAF sensor failure, and the ECM will use a fixed default value from its memory.
Page 404 of 1672

ENGINE MANAGEMENT SYSTEM - TD5
DESCRIPTION AND OPERATION 18-1-11
Ambient Air Temperature and Pressure (AAP) sensor
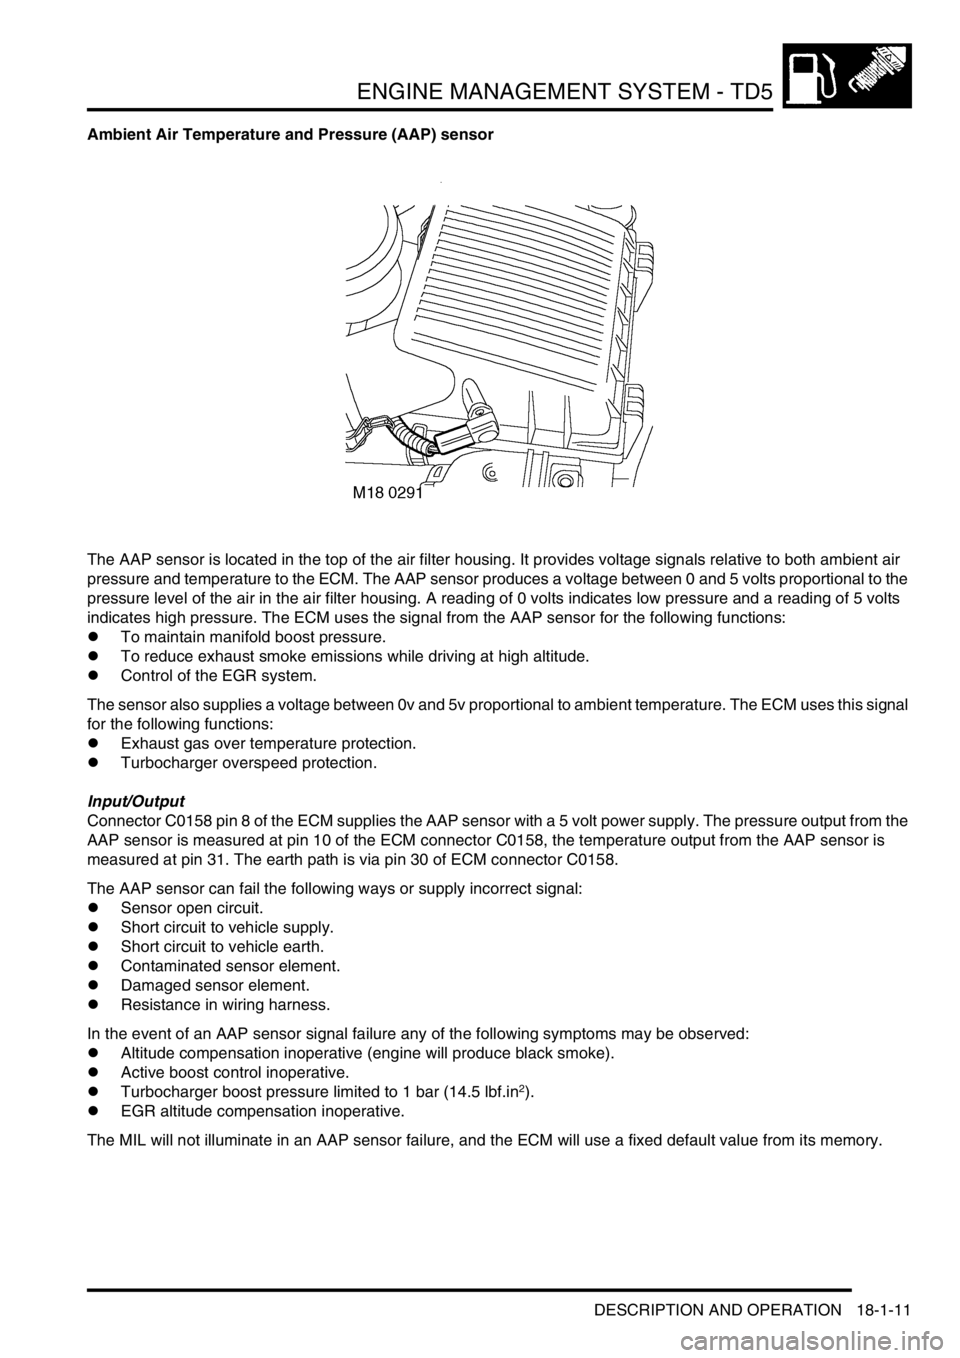
The AAP sensor is located in the top of the air filter housing. It provides voltage signals relative to both ambient air
pressure and temperature to the ECM. The AAP sensor produces a voltage between 0 and 5 volts proportional to the
pressure level of the air in the air filter housing. A reading of 0 volts indicates low pressure and a reading of 5 volts
indicates high pressure. The ECM uses the signal from the AAP sensor for the following functions:
lTo maintain manifold boost pressure.
lTo reduce exhaust smoke emissions while driving at high altitude.
lControl of the EGR system.
The sensor also supplies a voltage between 0v and 5v proportional to ambient temperature. The ECM uses this signal
for the following functions:
lExhaust gas over temperature protection.
lTurbocharger overspeed protection.
Input/Output
Connector C0158 pin 8 of the ECM supplies the AAP sensor with a 5 volt power supply. The pressure output from the
AAP sensor is measured at pin 10 of the ECM connector C0158, the temperature output from the AAP sensor is
measured at pin 31. The earth path is via pin 30 of ECM connector C0158.
The AAP sensor can fail the following ways or supply incorrect signal:
lSensor open circuit.
lShort circuit to vehicle supply.
lShort circuit to vehicle earth.
lContaminated sensor element.
lDamaged sensor element.
lResistance in wiring harness.
In the event of an AAP sensor signal failure any of the following symptoms may be observed:
lAltitude compensation inoperative (engine will produce black smoke).
lActive boost control inoperative.
lTurbocharger boost pressure limited to 1 bar (14.5 lbf.in
2).
lEGR altitude compensation inoperative.
The MIL will not illuminate in an AAP sensor failure, and the ECM will use a fixed default value from its memory.
Page 425 of 1672

ENGINE MANAGEMENT SYSTEM - TD5
18-1-32 DESCRIPTION AND OPERATION
Turbocharger
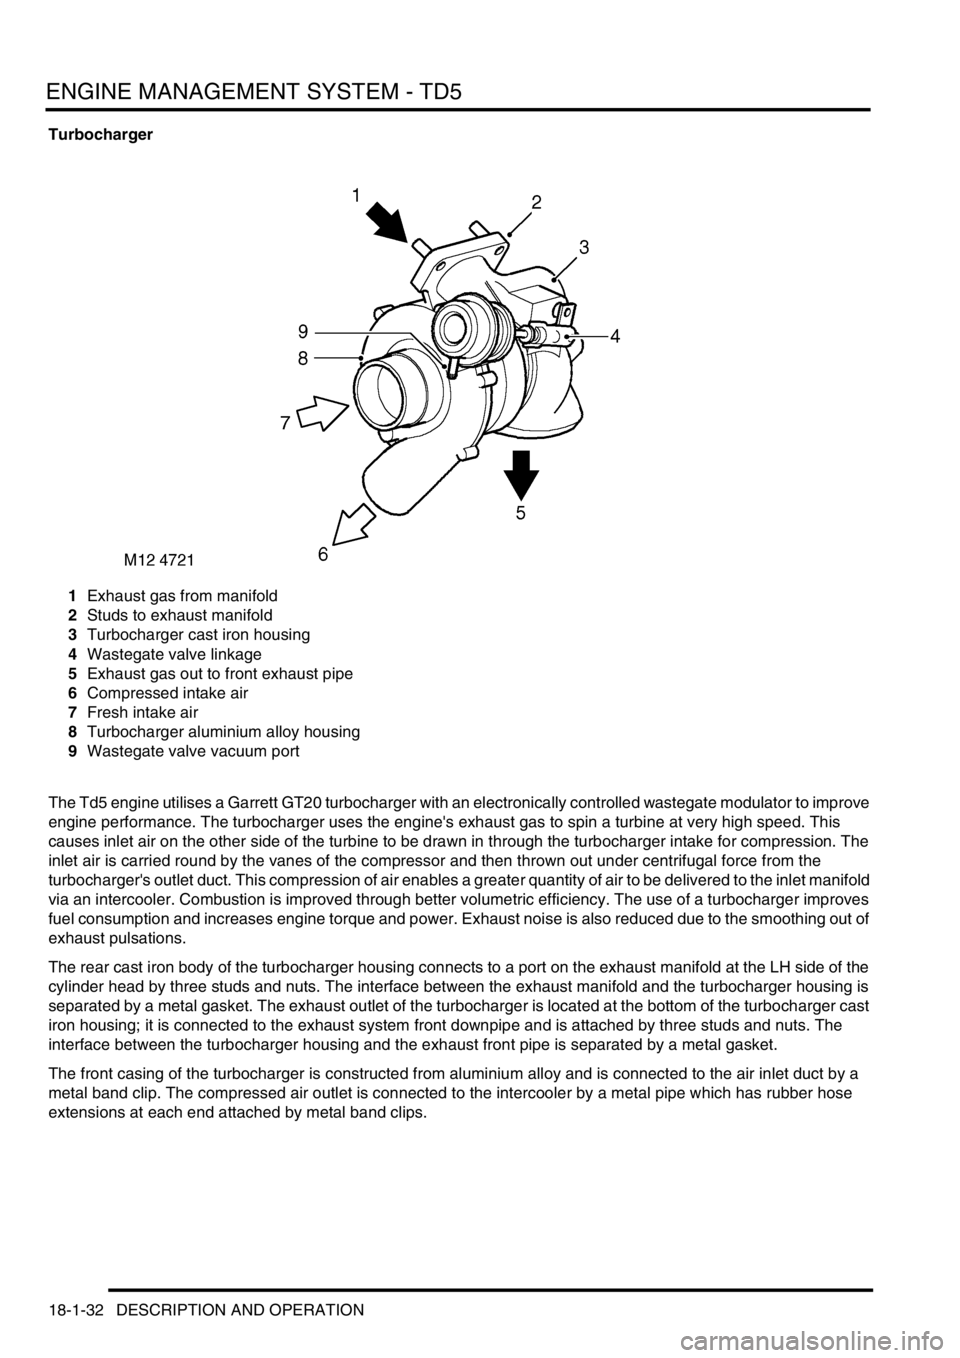
1Exhaust gas from manifold
2Studs to exhaust manifold
3Turbocharger cast iron housing
4Wastegate valve linkage
5Exhaust gas out to front exhaust pipe
6Compressed intake air
7Fresh intake air
8Turbocharger aluminium alloy housing
9Wastegate valve vacuum port
The Td5 engine utilises a Garrett GT20 turbocharger with an electronically controlled wastegate modulator to improve
engine performance. The turbocharger uses the engine's exhaust gas to spin a turbine at very high speed. This
causes inlet air on the other side of the turbine to be drawn in through the turbocharger intake for compression. The
inlet air is carried round by the vanes of the compressor and then thrown out under centrifugal force from the
turbocharger's outlet duct. This compression of air enables a greater quantity of air to be delivered to the inlet manifold
via an intercooler. Combustion is improved through better volumetric efficiency. The use of a turbocharger improves
fuel consumption and increases engine torque and power. Exhaust noise is also reduced due to the smoothing out of
exhaust pulsations.
The rear cast iron body of the turbocharger housing connects to a port on the exhaust manifold at the LH side of the
cylinder head by three studs and nuts. The interface between the exhaust manifold and the turbocharger housing is
separated by a metal gasket. The exhaust outlet of the turbocharger is located at the bottom of the turbocharger cast
iron housing; it is connected to the exhaust system front downpipe and is attached by three studs and nuts. The
interface between the turbocharger housing and the exhaust front pipe is separated by a metal gasket.
The front casing of the turbocharger is constructed from aluminium alloy and is connected to the air inlet duct by a
metal band clip. The compressed air outlet is connected to the intercooler by a metal pipe which has rubber hose
extensions at each end attached by metal band clips.
Page 426 of 1672

ENGINE MANAGEMENT SYSTEM - TD5
DESCRIPTION AND OPERATION 18-1-33
The turbocharger is exposed to extremely high operating temperatures (up to 1,000 °C (1832 °F)) because of the hot
exhaust gases and the high speed revolution of the turbine (up to 150,000 rev/min). In order to resist wear of the
turbine bearings a flow of lubrication oil is supplied from the engine lubrication system to keep the bearings cool. Oil
is supplied from a tapping at the front of the full-flow filter adaptor housing via a metal pipe with banjo connections.
Oil is returned to the sump via a metal pipe which connects to the cylinder block at a port below the turbocharger
assembly.
A heatshield is attached to the left hand side of the engine to protect adjacent components from the heat generated
at the turbocharger. The heatshield is attached to the engine by two bolts an additional bolt attaches the heatshield
to the turbocharger casting.
The engine control module controls the amount of boost pressure the engine receives by way of the turbocharger.
When full boost is reached a control signal is sent to the wastegate modulator, and a vacuum is applied to the
wastegate valve. The wastegate valve opens, bypassing some of the exhaust gas away from the turbine to be output
to the exhaust system.
The engine should be allowed to idle for 15 seconds following engine start up and before the engine is switched off
to protect the turbocharger by maintaining oil supply to the turbine bearings.
Intercooler
The intercooler is an air-to-air heat exchanger which lowers the intake air temperature to obtain a higher air density
for better combustion efficiency. The intercooler receives compressed air from the turbocharger via a metal pipe; it
cools the intake air via the intercooler matrix and delivers it to the intake manifold by means of a rubber hose which
connects between the intercooler outlet and the intake manifold outlet. The rubber hose is connected to ports at each
end by metal band clips.
+ COOLING SYSTEM - Td5, DESCRIPTION AND OPERATION, Description.
The intercooler is located at the front of the engine bay, forward of the radiator.
Page 427 of 1672

ENGINE MANAGEMENT SYSTEM - TD5
18-1-34 DESCRIPTION AND OPERATION
Turbocharger wastegate modulator
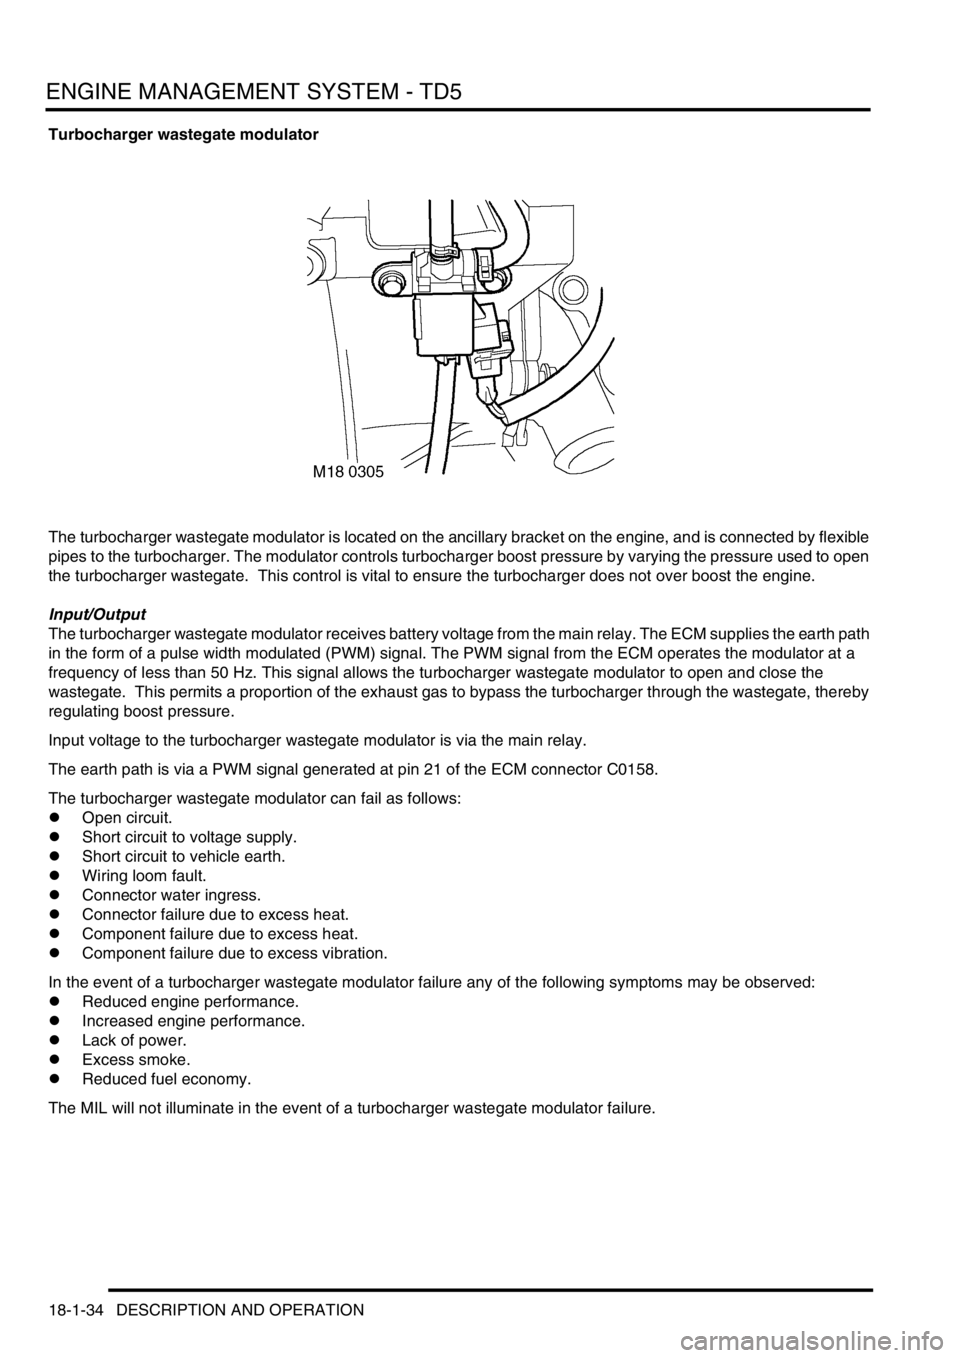
The turbocharger wastegate modulator is located on the ancillary bracket on the engine, and is connected by flexible
pipes to the turbocharger. The modulator controls turbocharger boost pressure by varying the pressure used to open
the turbocharger wastegate. This control is vital to ensure the turbocharger does not over boost the engine.
Input/Output
The turbocharger wastegate modulator receives battery voltage from the main relay. The ECM supplies the earth path
in the form of a pulse width modulated (PWM) signal. The PWM signal from the ECM operates the modulator at a
frequency of less than 50 Hz. This signal allows the turbocharger wastegate modulator to open and close the
wastegate. This permits a proportion of the exhaust gas to bypass the turbocharger through the wastegate, thereby
regulating boost pressure.
Input voltage to the turbocharger wastegate modulator is via the main relay.
The earth path is via a PWM signal generated at pin 21 of the ECM connector C0158.
The turbocharger wastegate modulator can fail as follows:
lOpen circuit.
lShort circuit to voltage supply.
lShort circuit to vehicle earth.
lWiring loom fault.
lConnector water ingress.
lConnector failure due to excess heat.
lComponent failure due to excess heat.
lComponent failure due to excess vibration.
In the event of a turbocharger wastegate modulator failure any of the following symptoms may be observed:
lReduced engine performance.
lIncreased engine performance.
lLack of power.
lExcess smoke.
lReduced fuel economy.
The MIL will not illuminate in the event of a turbocharger wastegate modulator failure.
Page 432 of 1672

ENGINE MANAGEMENT SYSTEM - TD5
DESCRIPTION AND OPERATION 18-1-39
With the ECM in a 'Secure' state, it will not function unless an alarm system is fitted to the vehicle. A 'Secure' ECM
cannot be configured into a 'No Code' ECM.
With the ECM in a 'No Code' state, it does not require an alarm system to be fitted to allow the engine to operate. If
the ECM senses that an alarm system is fitted it will not start. A 'No Code' ECM can be configured to a 'Secure' ECM
using TestBook. A 'Secure' ECM can not be configured to a 'No Code' state.
Setting up of the ECM immobilisation configurations can only be performed using TestBook.
If a vehicle stalls immediately after starting it is possible that it has been immobilised. This means either:
lThe ECM was configured as 'No Code' but the ECM is receiving a code at its alarm input pin.
lThe ECM received an incorrect code.
lThe ECM was expecting a security code but did not receive one at its alarm input pin.
Fuel delivery/injection control
The fuel delivery/injection control delivers a precise amount of finely atomised fuel to mix with the air in the
combustion chamber to create a controlled explosion.
To precisely control fuel delivery and control fuel injection, the following input conditions must be met:
lCKP information.
lInjection timing map information.
lFT information.
lECT information.
The ECM monitors the conditions required for optimum combustion of fuel in the cylinder from the various sensors
around the engine and then compares it against stored information. From this calculation the ECM can adjust the
quantity and timing of the fuel being delivered to the cylinder.
The ECM uses CKP information as follows:
lTo calculate engine speed.
lTo determine engine crankshaft position.
Engine speed and crankshaft position allows the ECM to determine fuel injection timing.
The ECM also uses ECT information and FT sensor information to allow optimum fuel delivery and injection control
for all engine coolant and fuel temperatures.
Turbocharger control
Turbocharger control is vital to ensure the turbocharger does not over boost the engine. Within the turbocharger is a
wastegate, which when operated by the turbocharger wastegate modulator will open and close a bypass valve
regulating boost pressure.
The turbocharger wastegate modulator, via the ECM, controls boost pressure under the following conditions:
lAcceleration.
lWide open throttle.
lIdle.
lOverrun.
The turbocharger wastegate modulator receives a battery voltage supply from the main relay. The ECM supplies the
earth path in the form of a pulse width modulation (PWM) signal. This signal allows the turbocharger wastegate
modulator to open and close the wastegate. A proportion of the exhaust gas can bypass the turbocharger through
the wastegate, regulating boost pressure.
Page 448 of 1672

ENGINE MANAGEMENT SYSTEM - TD5
REPAIRS 18-1-55
Turbocharger
$% 19.42.01
Remove
1.Remove 3 bolts and remove engine acoustic
cover.
2.Release fixings and remove battery cover.
3.Disconnect battery earth lead.
4.Remove cooling fan cover.
5.Remove 3 bolts and remove exhaust manifold
heat shield.
6.Release clip and disconnect breather hose
from camshaft cover.
7.Release clip and disconnect vacuum hose from
turbocharger wastegate.
8.Loosen clips and release air intake and outlet
hoses from turbocharger. 9.Remove turbocharger oil feed banjo bolt and
discard sealing washers.
10.Remove 2 bolts and release turbocharger oil
drain pipe and discard gasket.
11.Remove 3 nuts and release exhaust front pipe
from turbocharger and discard gasket.
12.Remove 3 nuts securing turbocharger to
exhaust manifold.
13. Remove turbocharger and discard gasket.
Refit
1.Clean turbocharger and exhaust manifold
mating faces.
2.Using a new gasket, fit turbocharger to exhaust
manifold and tighten nuts to 30 Nm (22 lbf.ft).
3.Using new gasket, align exhaust front pipe and
tighten nuts to 30 Nm (22 lbf.ft).
4.Using new gasket, align turbocharger drain
pipe and tighten bolts to 9 Nm (7 lbf.ft).
5.Fit banjo bolt to oil feed pipe using new sealing
washers and tighten to 25 Nm (18 lbf.ft)..
6.Position air hoses to turbocharger and tighten
clips.
7.Position and secure breather hose to camshaft
cover.
8.Position and secure vacuum hose to
turbocharger wastegate.
9.Position exhaust manifold heat shield and
tighten M6 bolts to 9 Nm (7 lbf.ft) and M8 bolt to
25 Nm (18 lbf.ft).
10.Fit fan cowl and secure fixings.
11.Fit acoustic cover and secure the fixings.
12.Connect battery earth lead.
13.Fit battery cover and secure fixings.