LAND ROVER DISCOVERY 2002 Service Manual
Manufacturer: LAND ROVER, Model Year: 2002, Model line: DISCOVERY, Model: LAND ROVER DISCOVERY 2002Pages: 1672, PDF Size: 46.1 MB
Page 41 of 1672
GENERAL INFORMATION
03-6
General Fitting Instructions
Component removal
Whenever possible, clean components and
surrounding area before removal.
lBlank off openings exposed by component
removal.
lImmediately seal fuel, oil or hydraulic lines when
apertures are exposed; use plastic caps or
plugs to prevent loss of fluid and ingress of dirt.
lClose the open ends of oilways exposed by
component removal with tapered hardwood
plugs or conspicuous plastic plugs.
lImmediately a component is removed, place it in
a suitable container; use a separate container
for each component and its associated parts.
lClean bench and provide marking materials,
labels and containers before dismantling a
component.
Dismantling
Observe scrupulous cleanliness when dismantling
components, particularly when brake, fuel or
hydraulic system parts are being worked on. A
particle of dirt or a cloth fragment could cause a
serious malfunction if trapped in these systems.
lBlow out all tapped holes, crevices, oilways and
fluid passages with an air line. Ensure that any
'O' rings used for sealing are correctly replaced
or renewed, if disturbed during the process.
lUse marking ink to identify mating parts and
ensure correct reassembly. Do not use a centre
punch or scriber to mark parts, they could
initiate cracks or distortion in marked
components.
lWire together mating parts where necessary to
prevent accidental interchange (e.g. roller
bearing components).
lWire labels on to all parts which are to be
renewed, and to parts requiring further
inspection before being passed for reassembly;
place these parts in separate containers from
those containing parts for rebuild.
lDo not discard a part due for renewal until after
comparing it with a new part, to ensure that its
correct replacement has been obtained.Cleaning components
Always use the recommended cleaning agent or
equivalent. Ensure that adequate ventilation is
provided when volatile degreasing agents are being
used. Do not use degreasing equipment for
components containing items which could be
damaged by the use of this process.
General inspection
All components should be inspected for wear or
damage before being reassembled.
lNever inspect a component for wear or
dimensional check unless it is absolutely clean;
a slight smear of grease can conceal an
incipient failure.
lWhen a component is to be checked
dimensionally against recommended values,
use the appropriate measuring equipment
(surface plates, micrometers, dial gauges etc.).
Ensure the measuring equipment is calibrated
and in good serviceable condition.
lReject a component if its dimensions are
outside the specified tolerances, or if it appears
to be damaged.
lA part may be refitted if its critical dimension is
exactly to its tolerance limit and it appears to be
in satisfactory condition. Use 'Plastigauge' 12
Type PG-1 for checking bearing surface
clearances.
Page 42 of 1672
GENERAL INFORMATION
03-7
Ball and Roller Bearings
General
When removing and installing bearings, ensure that
the following practices are observed to ensure
component serviceability.
lRemove all traces of lubricant from bearing
under inspection by cleaning with a suitable
degreasant; maintain absolute cleanliness
throughout operations.
lConduct a visual inspection for markings on
rolling elements, raceways, outer surface of
outer rings or inner surface of inner rings. Reject
any bearings found to be marked, since marking
in these areas indicates onset of wear.
lHold inner race of bearing between finger and
thumb of one hand and spin outer race to check
that it revolves absolutely smoothly. Repeat,
holding outer race and spinning inner race.
lRotate outer ring gently with a reciprocating
motion, while holding inner ring; feel for any
check or obstruction to rotation. Reject bearing
if action is not perfectly smooth.
lLubricate bearing with generous amounts of
lubricant appropriate to installation.
lInspect shaft and bearing housing for
discoloration or other markings which indicate
movement between bearing and seatings.
lEnsure that shaft and housing are clean and
free from burrs before fitting bearing.
lIf one bearing of a pair shows an imperfection, it
is advisable to replace both with new bearings;
an exception could be if the faulty bearing had
covered a low mileage, and it can be
established that damage is confined to only one
bearing.
lNever refit a ball or roller bearing without first
ensuring that it is in a fully serviceable condition.
lWhen hub bearings are removed or displaced,
new bearings must be fitted; do not attempt to
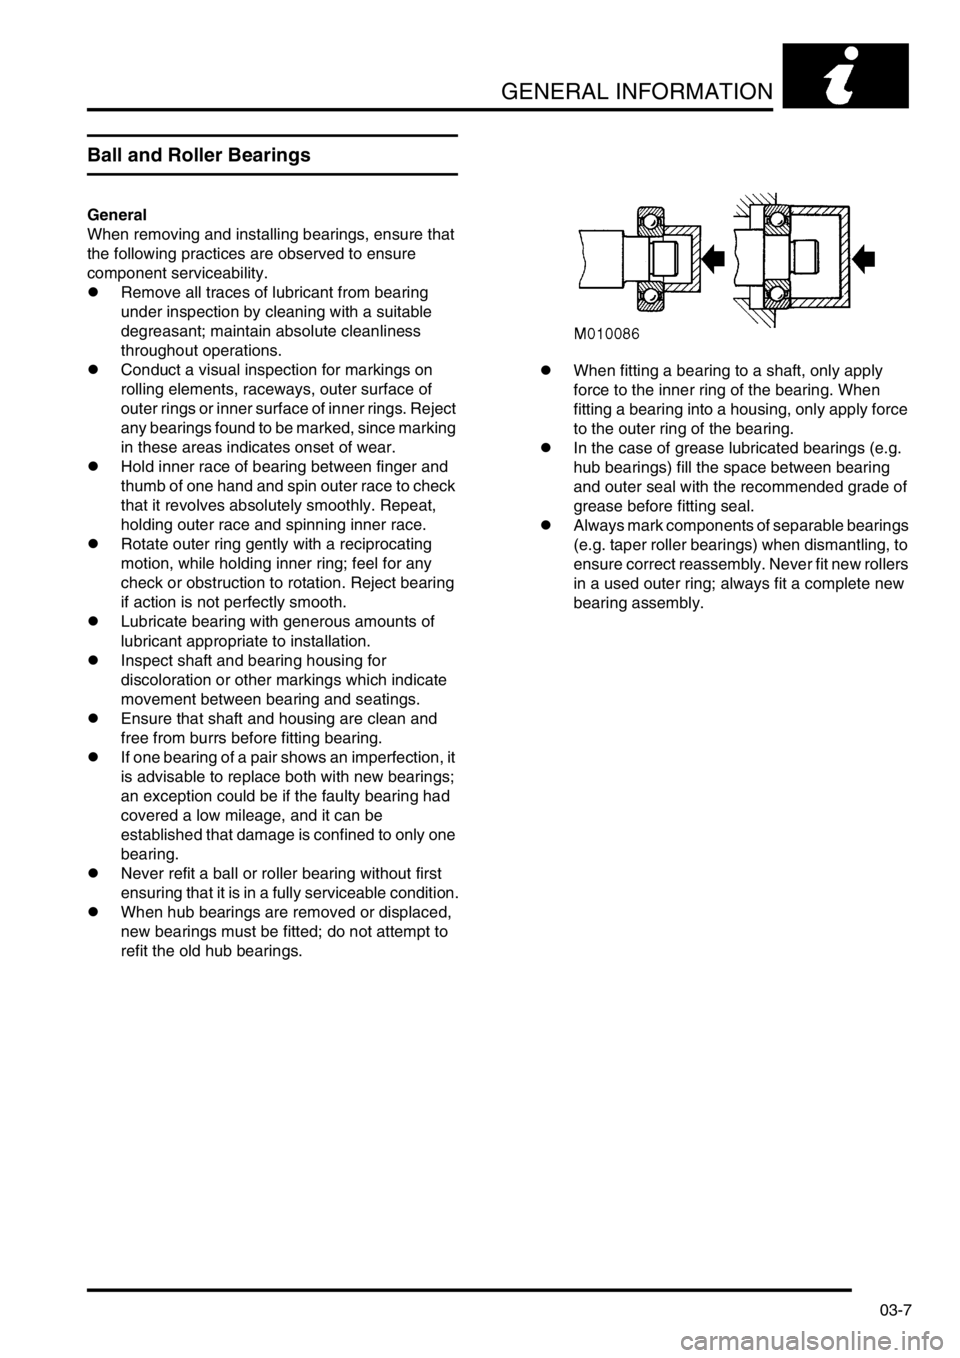
refit the old hub bearings.lWhen fitting a bearing to a shaft, only apply
force to the inner ring of the bearing. When
fitting a bearing into a housing, only apply force
to the outer ring of the bearing.
lIn the case of grease lubricated bearings (e.g.
hub bearings) fill the space between bearing
and outer seal with the recommended grade of
grease before fitting seal.
lAlways mark components of separable bearings
(e.g. taper roller bearings) when dismantling, to
ensure correct reassembly. Never fit new rollers
in a used outer ring; always fit a complete new
bearing assembly.
Page 43 of 1672
GENERAL INFORMATION
03-8
Oil Seals
General
Always renew oil seals which have been removed
from their working location (whether as an individual
component or as part of an assembly). NEVER use
a seal which has been improperly stored or handled,
such as hung on a hook or nail.
lCarefully examine seal before fitting to ensure
that it is clean and undamaged.
lEnsure the surface on which the new seal is to
run is free of burrs or scratches. Renew the
component if the original sealing surface cannot
be completely restored.
lProtect the seal from any surface which it has to
pass when being fitted. Use a protective sleeve
or tape to cover the relevant surface.
lLubricate the sealing lips with a recommended
lubricant before use to prevent damage during
initial use. On dual lipped seals, smear the area
between the lips with grease.
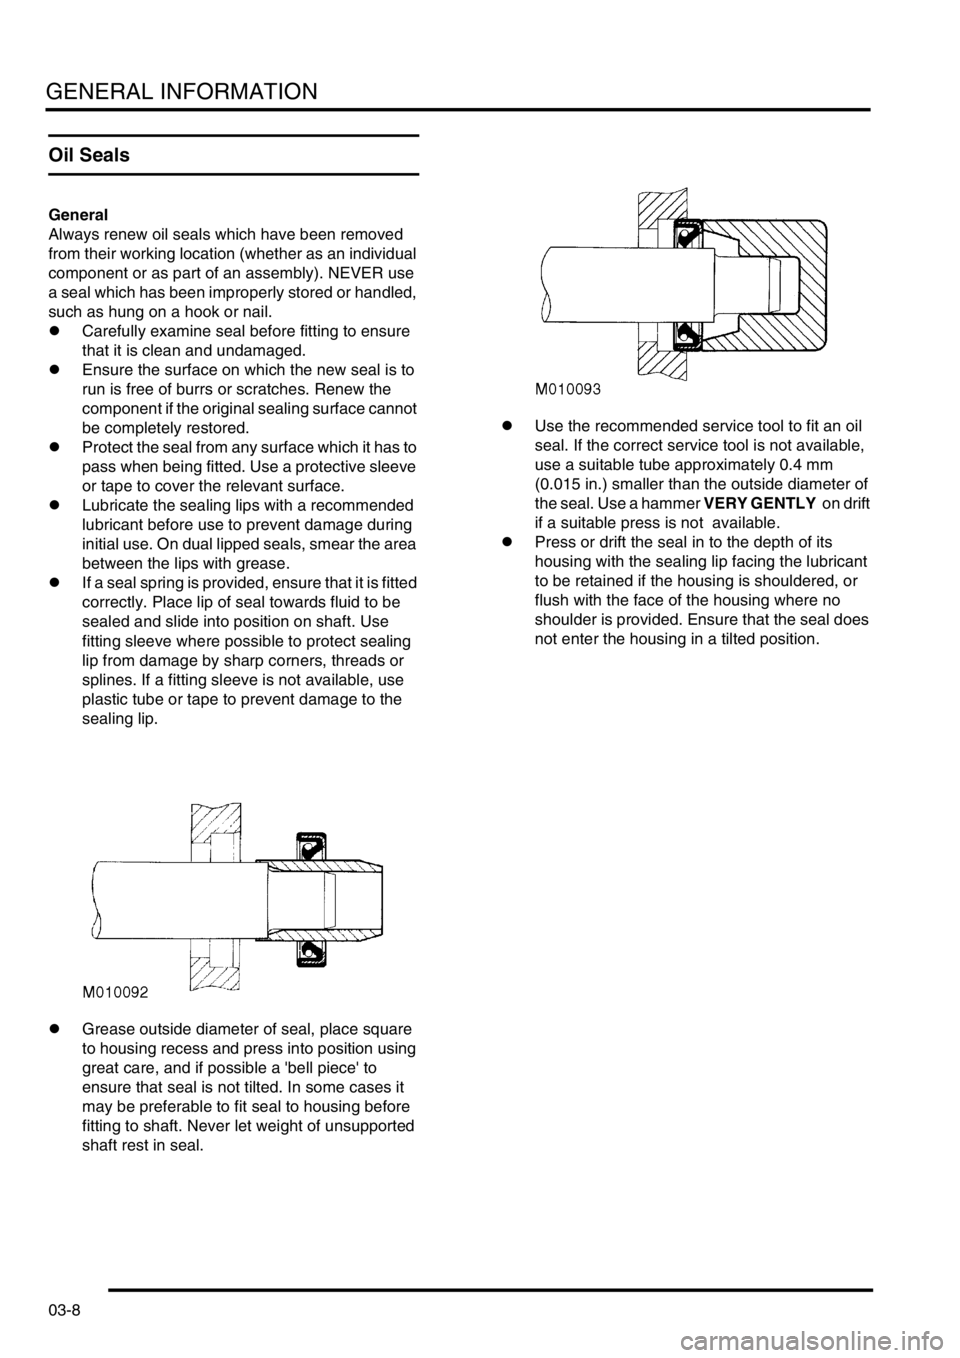
lIf a seal spring is provided, ensure that it is fitted
correctly. Place lip of seal towards fluid to be
sealed and slide into position on shaft. Use
fitting sleeve where possible to protect sealing
lip from damage by sharp corners, threads or
splines. If a fitting sleeve is not available, use
plastic tube or tape to prevent damage to the
sealing lip.
lGrease outside diameter of seal, place square
to housing recess and press into position using
great care, and if possible a 'bell piece' to
ensure that seal is not tilted. In some cases it
may be preferable to fit seal to housing before
fitting to shaft. Never let weight of unsupported
shaft rest in seal.lUse the recommended service tool to fit an oil
seal. If the correct service tool is not available,
use a suitable tube approximately 0.4 mm
(0.015 in.) smaller than the outside diameter of
the seal. Use a hammer VERY GENTLY on drift
if a suitable press is not available.
lPress or drift the seal in to the depth of its
housing with the sealing lip facing the lubricant
to be retained if the housing is shouldered, or
flush with the face of the housing where no
shoulder is provided. Ensure that the seal does
not enter the housing in a tilted position.
Page 44 of 1672
GENERAL INFORMATION
03-9
Joints and Joint Faces
General
Fit joints dry unless specified otherwise.
lAlways use the correct gaskets as specified.
lWhen jointing compound is used, apply in a thin
uniform film to metal surfaces; take care to
prevent jointing compound from entering
oilways, pipes or blind tapped holes.
lIf gaskets and/or jointing compound is
recommended for use; remove all traces of old
jointing material prior to reassembly. Do not use
a tool which will damage the joint faces and
smooth out any scratches or burrs using an oil
stone. Do not allow dirt or jointing material to
enter any tapped holes or enclosed parts.
lPrior to reassembly, blow through any pipes,
channels or crevices with compressed air.
Locking Devices
General
Always replace locking devices with one of the same
design.
Tab washers
Always release locking tabs and fit new locking
washers. Do not re-use locking tabs.
Locking nuts
Always use a backing spanner when loosening or
tightening locking nuts, brake and fuel pipe unions.
Roll pins
Always fit new roll pins of an interference fit in the
hole.
Circlips
Always fit new circlips of the correct size for the
groove.
Keys and keyways
Remove burrs from edges of keyways with a fine file
and clean thoroughly before attempting to refit key.
Clean and inspect key closely; keys are suitable for
refitting only if indistinguishable from new, as any
indentation may indicate the onset of wear.
Page 45 of 1672
GENERAL INFORMATION
03-10
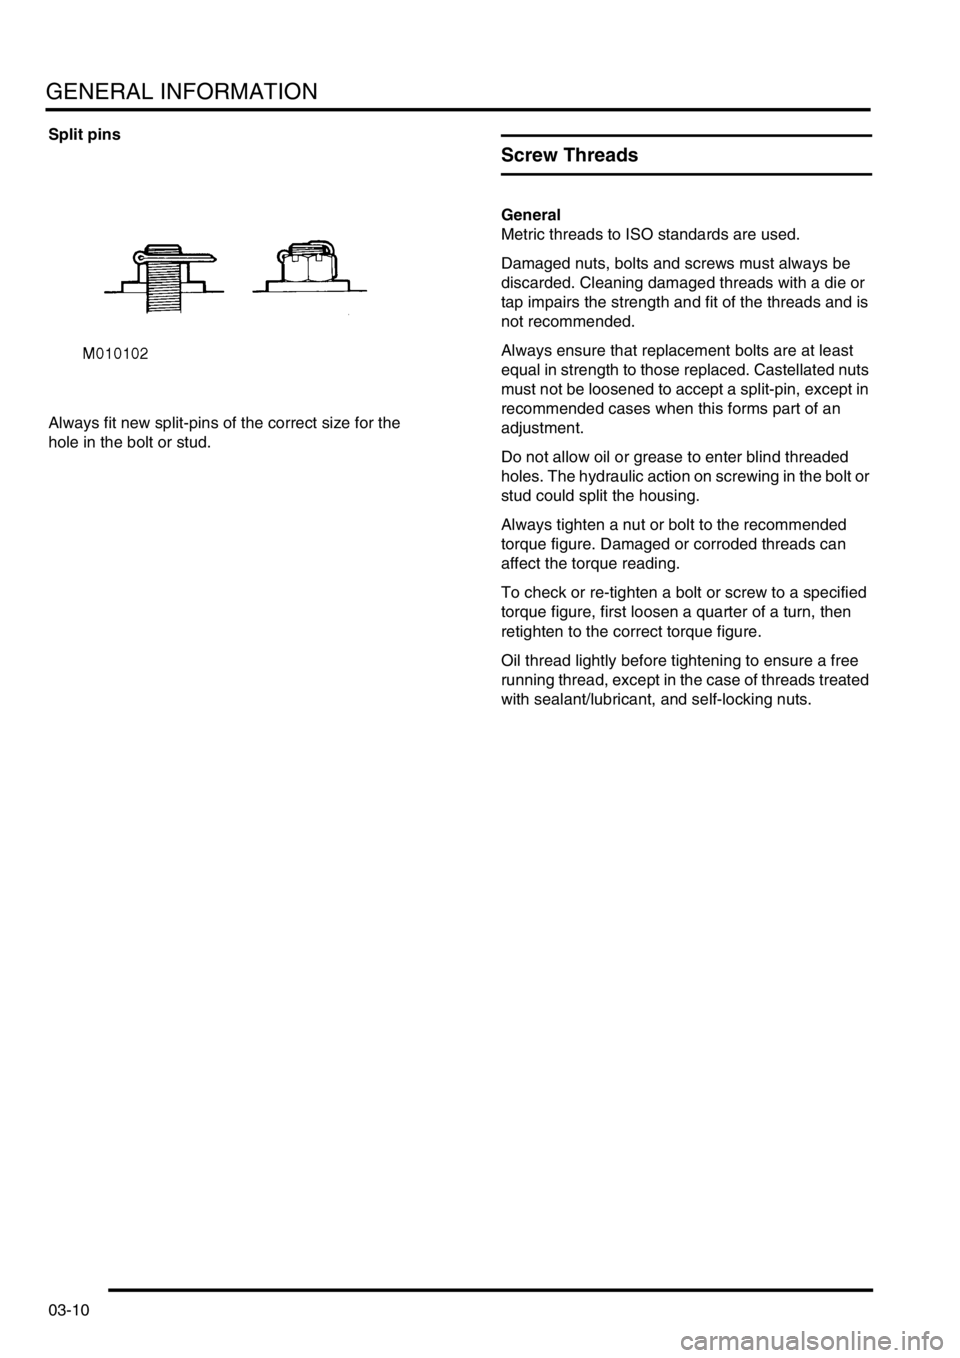
Split pins
Always fit new split-pins of the correct size for the
hole in the bolt or stud.
Screw Threads
General
Metric threads to ISO standards are used.
Damaged nuts, bolts and screws must always be
discarded. Cleaning damaged threads with a die or
tap impairs the strength and fit of the threads and is
not recommended.
Always ensure that replacement bolts are at least
equal in strength to those replaced. Castellated nuts
must not be loosened to accept a split-pin, except in
recommended cases when this forms part of an
adjustment.
Do not allow oil or grease to enter blind threaded
holes. The hydraulic action on screwing in the bolt or
stud could split the housing.
Always tighten a nut or bolt to the recommended
torque figure. Damaged or corroded threads can
affect the torque reading.
To check or re-tighten a bolt or screw to a specified
torque figure, first loosen a quarter of a turn, then
retighten to the correct torque figure.
Oil thread lightly before tightening to ensure a free
running thread, except in the case of threads treated
with sealant/lubricant, and self-locking nuts.
Page 46 of 1672
GENERAL INFORMATION
03-11
Bolt and Nut Identification
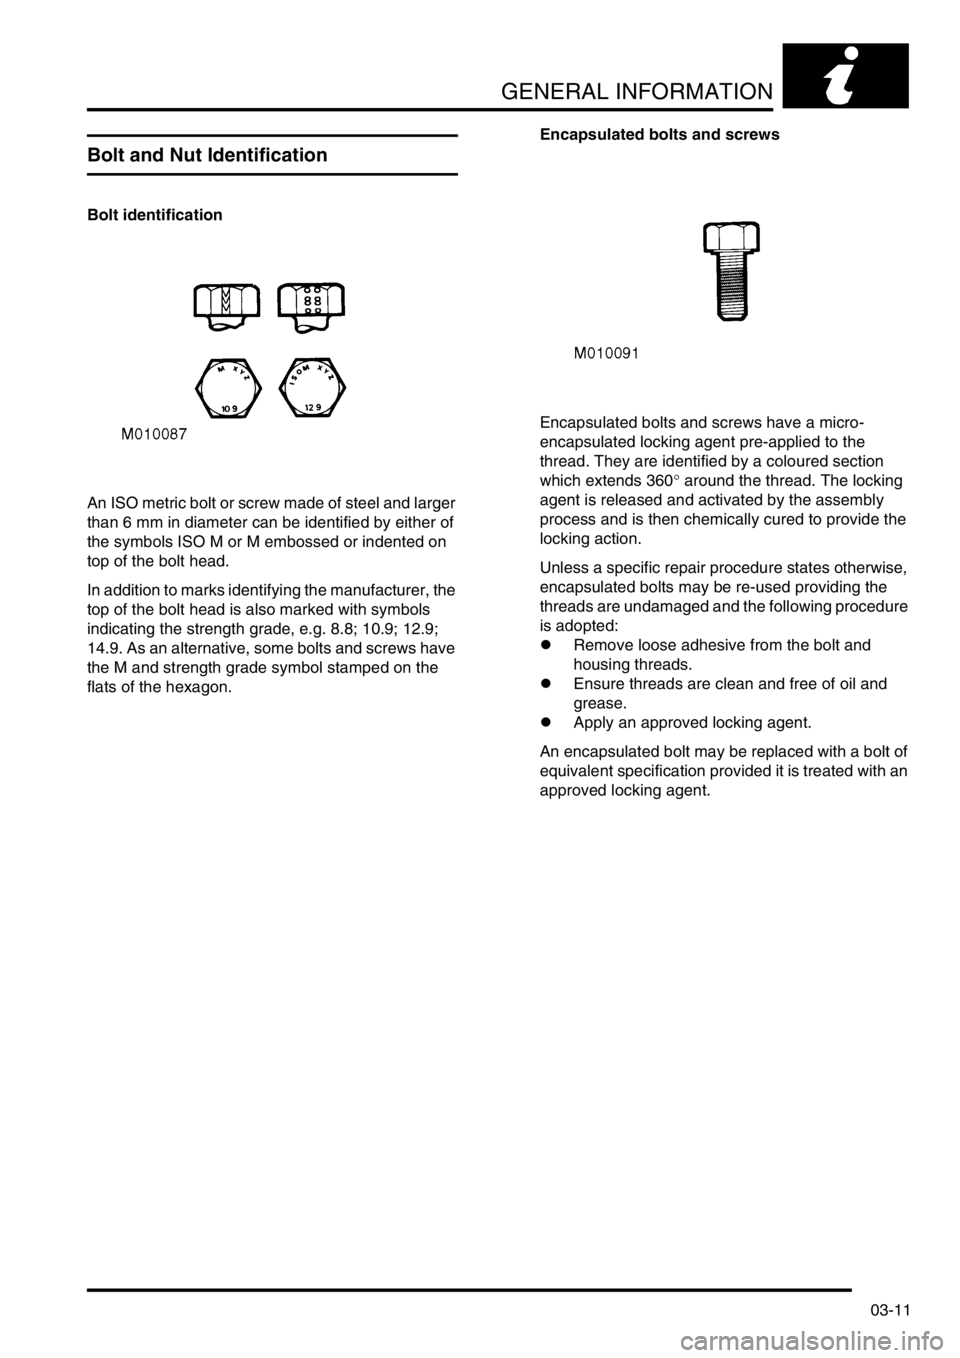
Bolt identification
An ISO metric bolt or screw made of steel and larger
than 6 mm in diameter can be identified by either of
the symbols ISO M or M embossed or indented on
top of the bolt head.
In addition to marks identifying the manufacturer, the
top of the bolt head is also marked with symbols
indicating the strength grade, e.g. 8.8; 10.9; 12.9;
14.9. As an alternative, some bolts and screws have
the M and strength grade symbol stamped on the
flats of the hexagon.Encapsulated bolts and screws
Encapsulated bolts and screws have a micro-
encapsulated locking agent pre-applied to the
thread. They are identified by a coloured section
which extends 360
° around the thread. The locking
agent is released and activated by the assembly
process and is then chemically cured to provide the
locking action.
Unless a specific repair procedure states otherwise,
encapsulated bolts may be re-used providing the
threads are undamaged and the following procedure
is adopted:
lRemove loose adhesive from the bolt and
housing threads.
lEnsure threads are clean and free of oil and
grease.
lApply an approved locking agent.
An encapsulated bolt may be replaced with a bolt of
equivalent specification provided it is treated with an
approved locking agent.
Page 47 of 1672
GENERAL INFORMATION
03-12
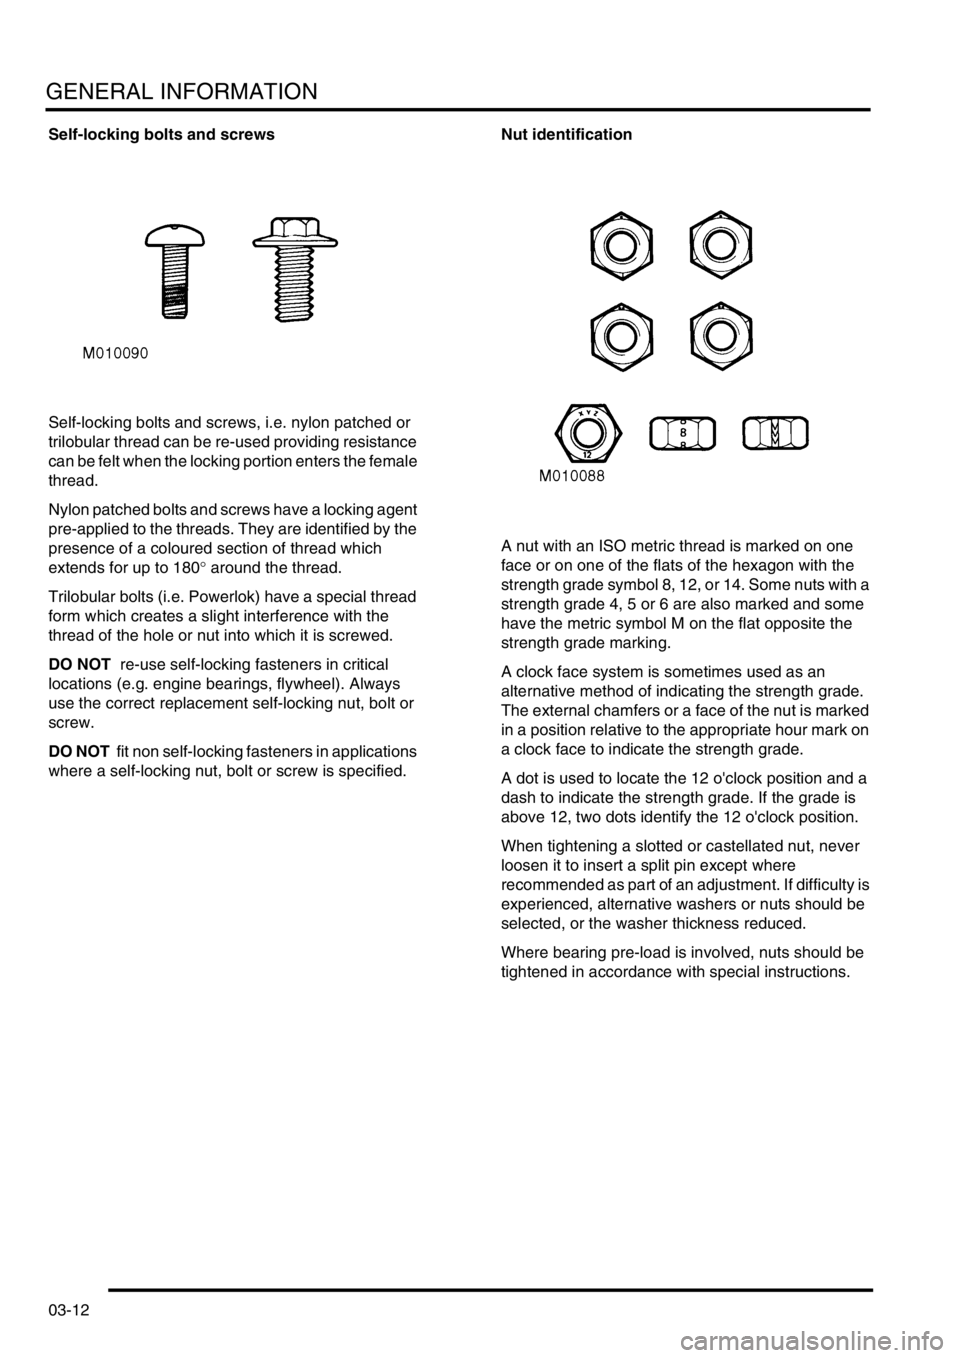
Self-locking bolts and screws
Self-locking bolts and screws, i.e. nylon patched or
trilobular thread can be re-used providing resistance
can be felt when the locking portion enters the female
thread.
Nylon patched bolts and screws have a locking agent
pre-applied to the threads. They are identified by the
presence of a coloured section of thread which
extends for up to 180
° around the thread.
Trilobular bolts (i.e. Powerlok) have a special thread
form which creates a slight interference with the
thread of the hole or nut into which it is screwed.
DO NOT re-use self-locking fasteners in critical
locations (e.g. engine bearings, flywheel). Always
use the correct replacement self-locking nut, bolt or
screw.
DO NOT fit non self-locking fasteners in applications
where a self-locking nut, bolt or screw is specified.Nut identification
A nut with an ISO metric thread is marked on one
face or on one of the flats of the hexagon with the
strength grade symbol 8, 12, or 14. Some nuts with a
strength grade 4, 5 or 6 are also marked and some
have the metric symbol M on the flat opposite the
strength grade marking.
A clock face system is sometimes used as an
alternative method of indicating the strength grade.
The external chamfers or a face of the nut is marked
in a position relative to the appropriate hour mark on
a clock face to indicate the strength grade.
A dot is used to locate the 12 o'clock position and a
dash to indicate the strength grade. If the grade is
above 12, two dots identify the 12 o'clock position.
When tightening a slotted or castellated nut, never
loosen it to insert a split pin except where
recommended as part of an adjustment. If difficulty is
experienced, alternative washers or nuts should be
selected, or the washer thickness reduced.
Where bearing pre-load is involved, nuts should be
tightened in accordance with special instructions.
Page 48 of 1672
GENERAL INFORMATION
03-13
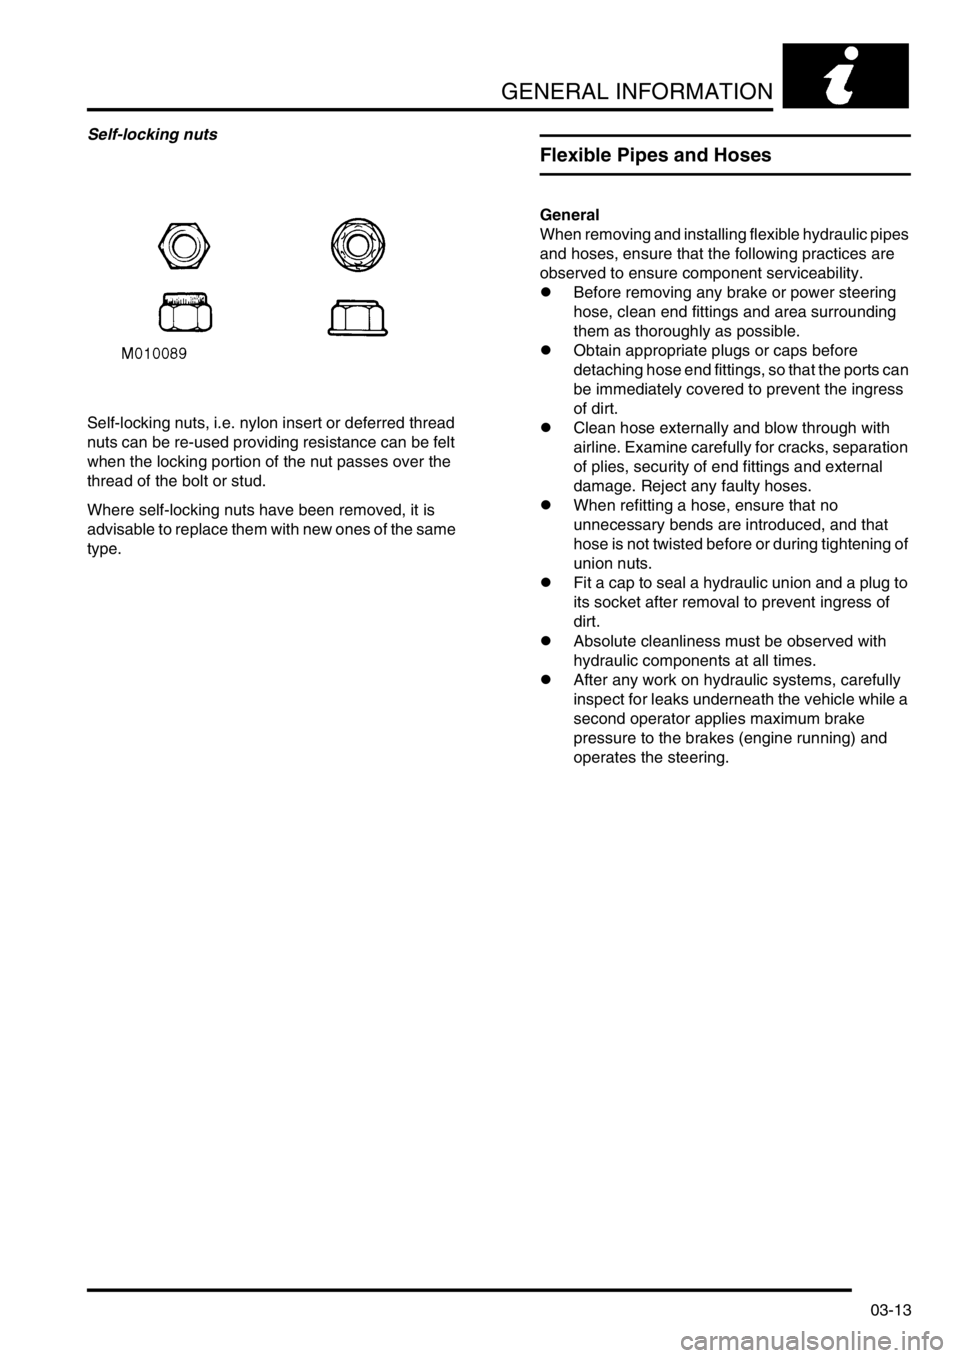
Self-locking nuts
Self-locking nuts, i.e. nylon insert or deferred thread
nuts can be re-used providing resistance can be felt
when the locking portion of the nut passes over the
thread of the bolt or stud.
Where self-locking nuts have been removed, it is
advisable to replace them with new ones of the same
type.
Flexible Pipes and Hoses
General
When removing and installing flexible hydraulic pipes
and hoses, ensure that the following practices are
observed to ensure component serviceability.
lBefore removing any brake or power steering
hose, clean end fittings and area surrounding
them as thoroughly as possible.
lObtain appropriate plugs or caps before
detaching hose end fittings, so that the ports can
be immediately covered to prevent the ingress
of dirt.
lClean hose externally and blow through with
airline. Examine carefully for cracks, separation
of plies, security of end fittings and external
damage. Reject any faulty hoses.
lWhen refitting a hose, ensure that no
unnecessary bends are introduced, and that
hose is not twisted before or during tightening of
union nuts.
lFit a cap to seal a hydraulic union and a plug to
its socket after removal to prevent ingress of
dirt.
lAbsolute cleanliness must be observed with
hydraulic components at all times.
lAfter any work on hydraulic systems, carefully
inspect for leaks underneath the vehicle while a
second operator applies maximum brake
pressure to the brakes (engine running) and
operates the steering.
Page 49 of 1672
GENERAL INFORMATION
03-14
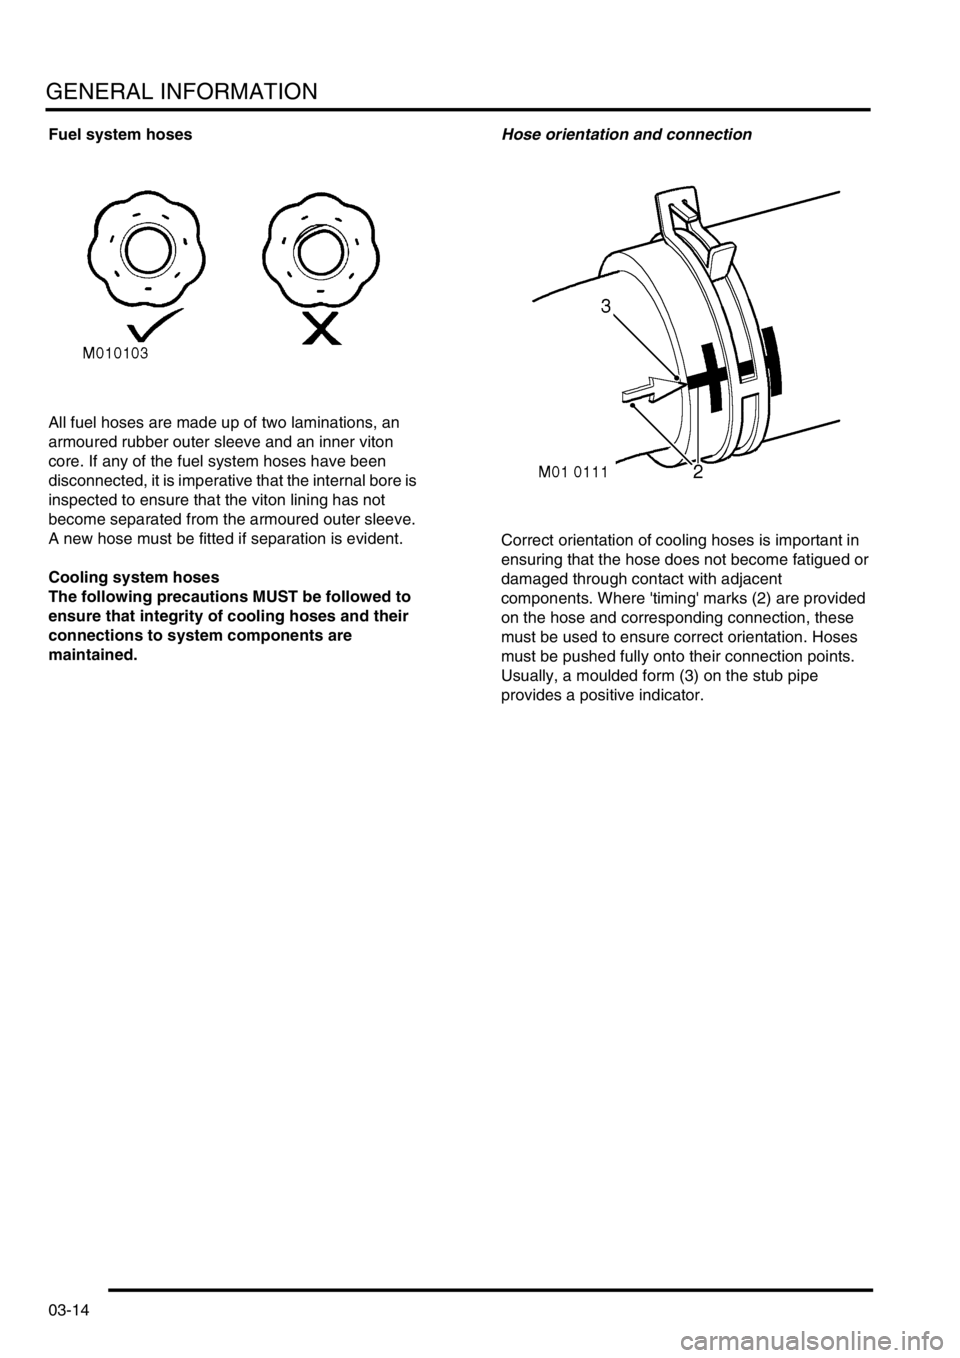
Fuel system hoses
All fuel hoses are made up of two laminations, an
armoured rubber outer sleeve and an inner viton
core. If any of the fuel system hoses have been
disconnected, it is imperative that the internal bore is
inspected to ensure that the viton lining has not
become separated from the armoured outer sleeve.
A new hose must be fitted if separation is evident.
Cooling system hoses
The following precautions MUST be followed to
ensure that integrity of cooling hoses and their
connections to system components are
maintained. Hose orientation and connection
Correct orientation of cooling hoses is important in
ensuring that the hose does not become fatigued or
damaged through contact with adjacent
components. Where 'timing' marks (2) are provided
on the hose and corresponding connection, these
must be used to ensure correct orientation. Hoses
must be pushed fully onto their connection points.
Usually, a moulded form (3) on the stub pipe
provides a positive indicator.
Page 50 of 1672
GENERAL INFORMATION
03-15
Hose clips
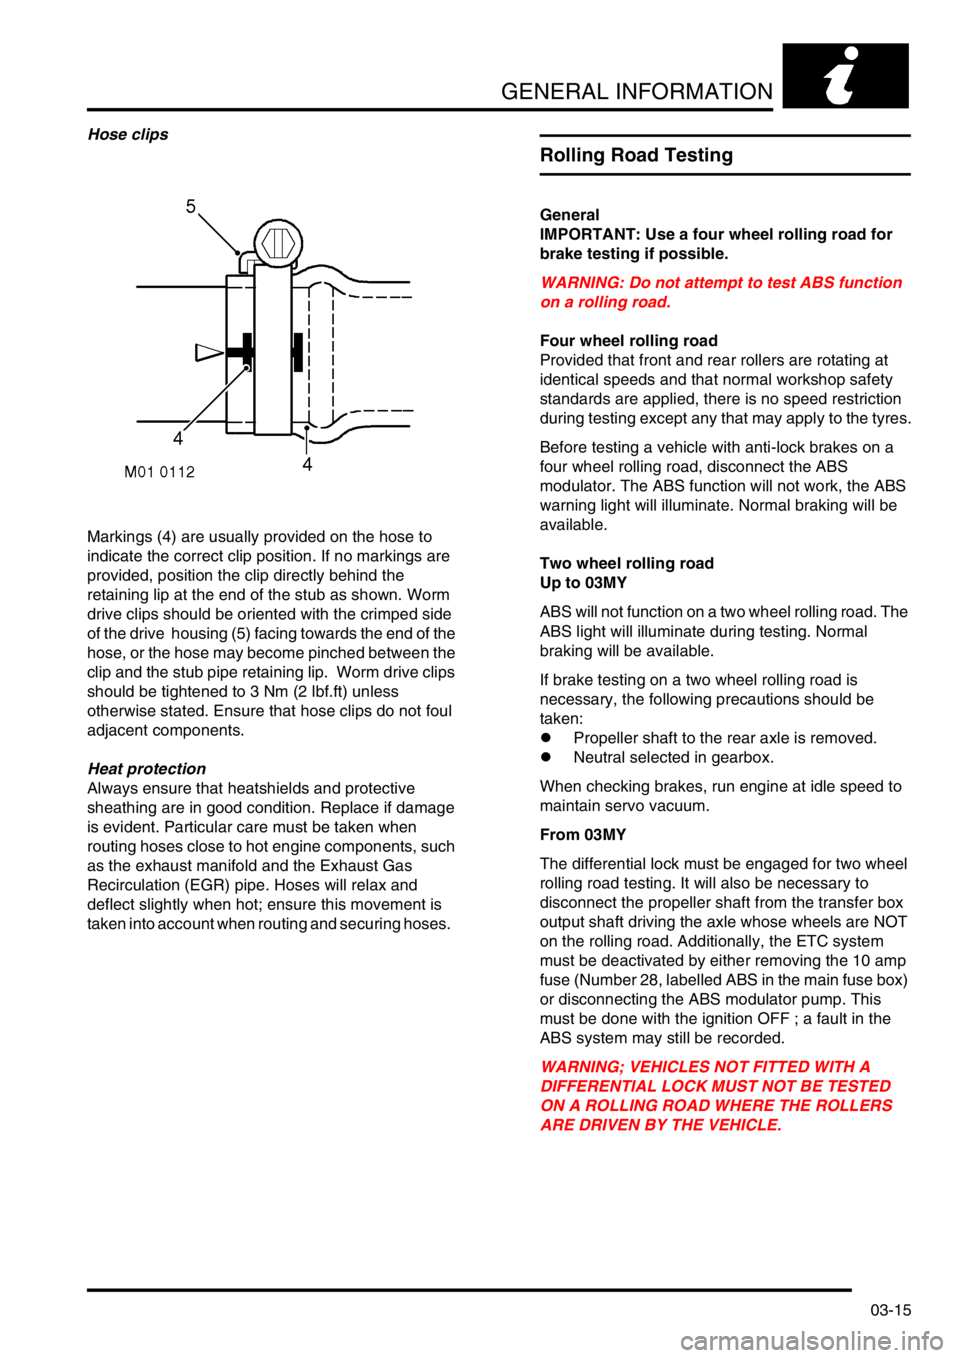
Markings (4) are usually provided on the hose to
indicate the correct clip position. If no markings are
provided, position the clip directly behind the
retaining lip at the end of the stub as shown. Worm
drive clips should be oriented with the crimped side
of the drive housing (5) facing towards the end of the
hose, or the hose may become pinched between the
clip and the stub pipe retaining lip. Worm drive clips
should be tightened to 3 Nm (2 lbf.ft) unless
otherwise stated. Ensure that hose clips do not foul
adjacent components.
Heat protection
Always ensure that heatshields and protective
sheathing are in good condition. Replace if damage
is evident. Particular care must be taken when
routing hoses close to hot engine components, such
as the exhaust manifold and the Exhaust Gas
Recirculation (EGR) pipe. Hoses will relax and
deflect slightly when hot; ensure this movement is
taken into account when routing and securing hoses.
Rolling Road Testing
General
IMPORTANT: Use a four wheel rolling road for
brake testing if possible.
WARNING: Do not attempt to test ABS function
on a rolling road.
Four wheel rolling road
Provided that front and rear rollers are rotating at
identical speeds and that normal workshop safety
standards are applied, there is no speed restriction
during testing except any that may apply to the tyres.
Before testing a vehicle with anti-lock brakes on a
four wheel rolling road, disconnect the ABS
modulator. The ABS function will not work, the ABS
warning light will illuminate. Normal braking will be
available.
Two wheel rolling road
Up to 03MY
ABS will not function on a two wheel rolling road. The
ABS light will illuminate during testing. Normal
braking will be available.
If brake testing on a two wheel rolling road is
necessary, the following precautions should be
taken:
lPropeller shaft to the rear axle is removed.
lNeutral selected in gearbox.
When checking brakes, run engine at idle speed to
maintain servo vacuum.
From 03MY
The differential lock must be engaged for two wheel
rolling road testing. It will also be necessary to
disconnect the propeller shaft from the transfer box
output shaft driving the axle whose wheels are NOT
on the rolling road. Additionally, the ETC system
must be deactivated by either removing the 10 amp
fuse (Number 28, labelled ABS in the main fuse box)
or disconnecting the ABS modulator pump. This
must be done with the ignition OFF ; a fault in the
ABS system may still be recorded.
WARNING; VEHICLES NOT FITTED WITH A
DIFFERENTIAL LOCK MUST NOT BE TESTED
ON A ROLLING ROAD WHERE THE ROLLERS
ARE DRIVEN BY THE VEHICLE.