LAND ROVER FRELANDER 2 2006 Repair Manual
FRELANDER 2 2006
LAND ROVER
LAND ROVER
https://www.carmanualsonline.info/img/64/57251/w960_57251-0.png
LAND ROVER FRELANDER 2 2006 Repair Manual
Trending: check oil, fuel pressure, spark plugs, length, wheel alignment, key battery, tailgate
Page 1251 of 3229
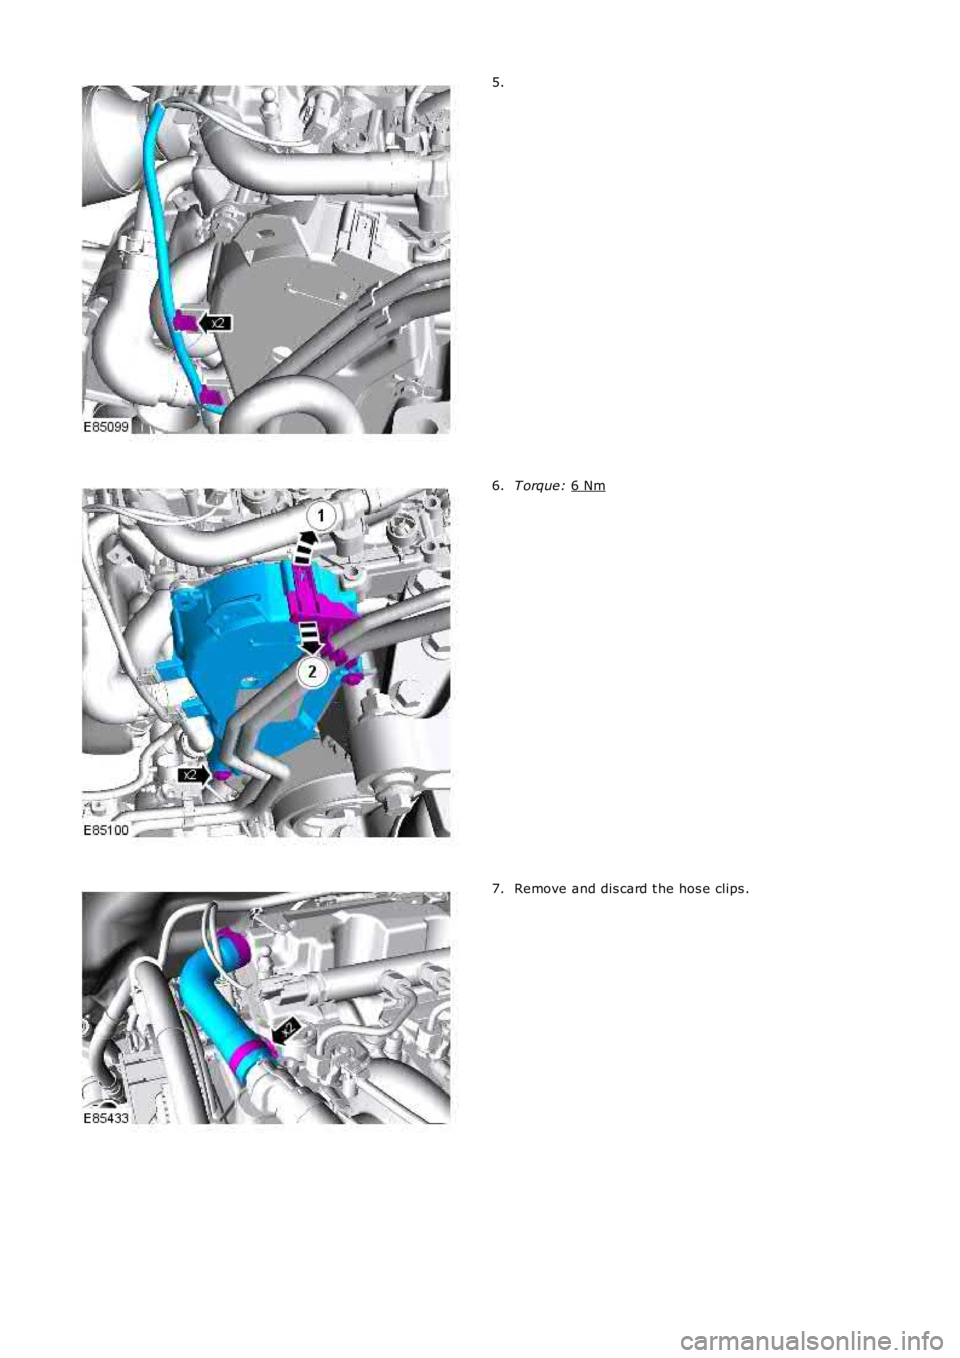
5.
T orque:
6 Nm 6.
Remove and dis card t he hos e clips .
7.
Page 1252 of 3229
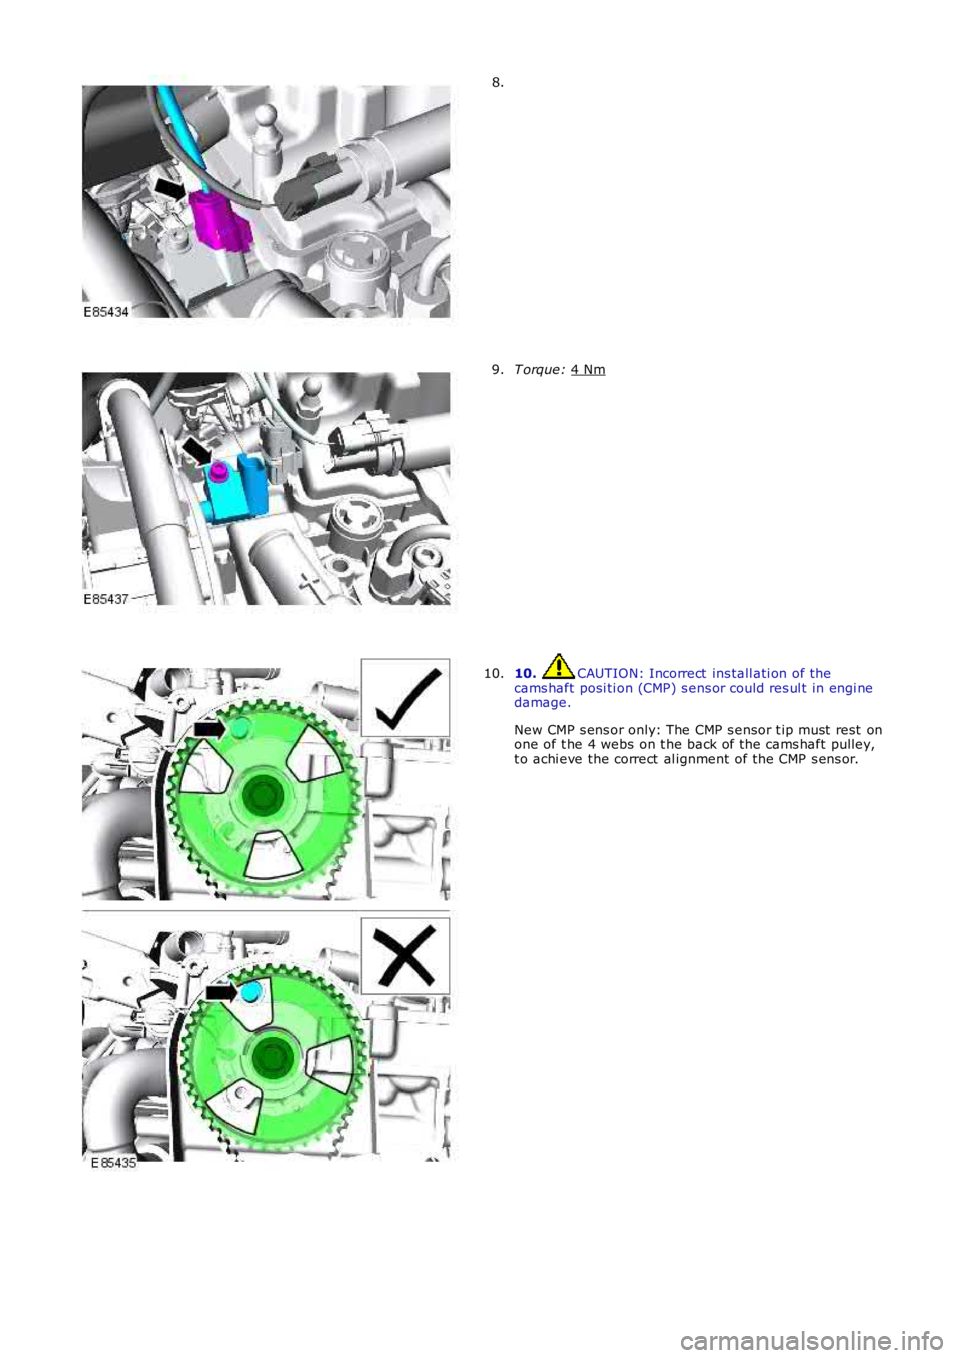
8.
T orque:
4 Nm 9.
10. CAUTION: Incorrect ins tall ati on of the
cams haft posi ti on (CMP) s ens or could res ul t in engi ne
damage.
New CMP s ens or only: The CMP s ensor t ip must rest on
one of t he 4 webs on t he back of t he cams haft pulley,
t o achi eve the correct al ignment of the CMP s ens or.
10.
Page 1253 of 3229
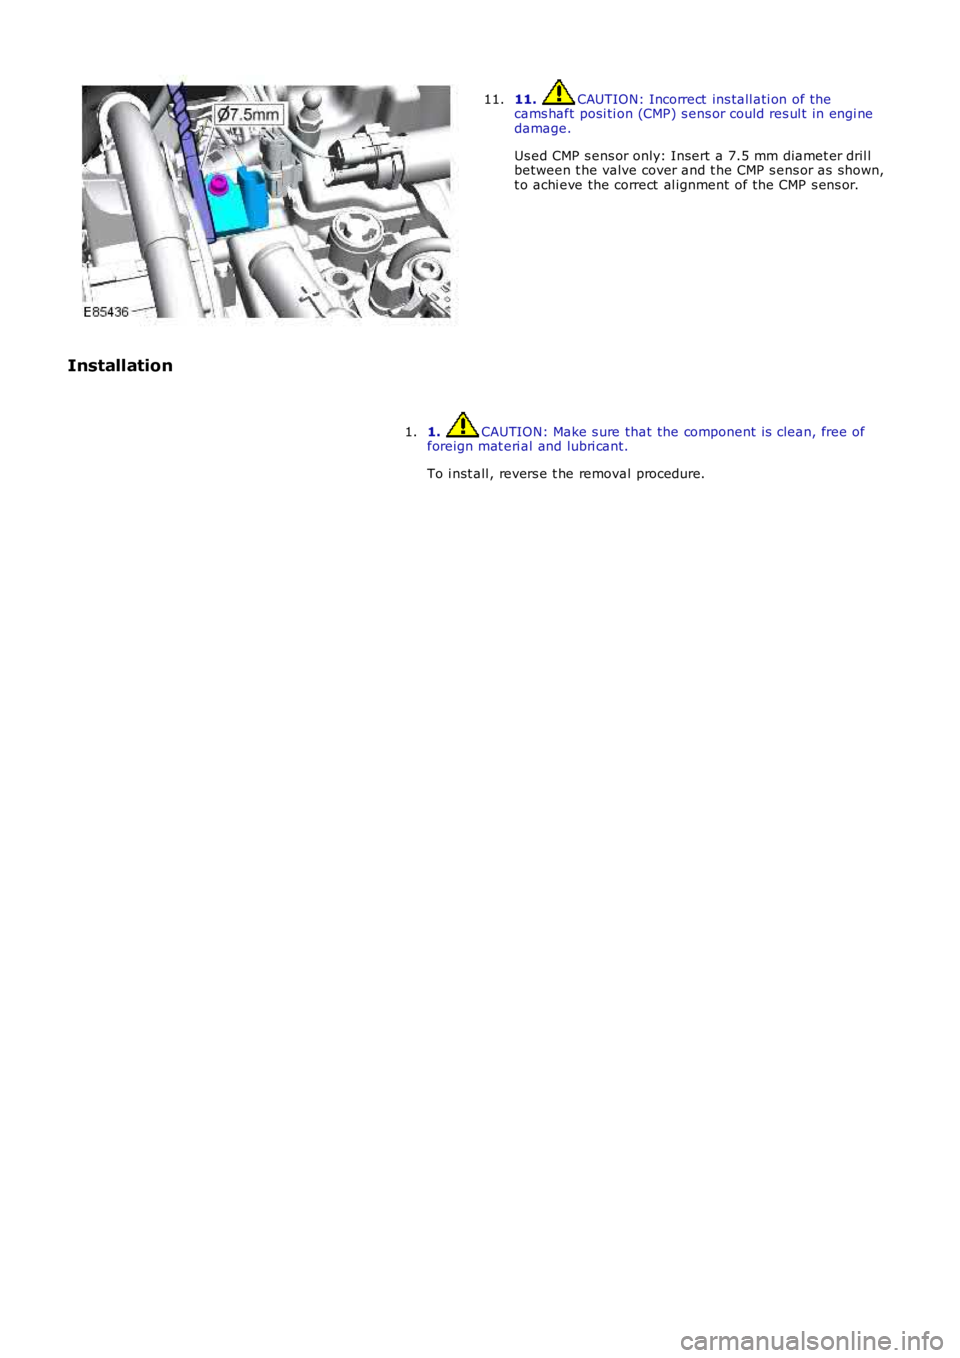
11. CAUTION: Incorrect ins tall ati on of thecams haft posi ti on (CMP) s ens or could res ul t in engi nedamage.
Us ed CMP s ens or only: Insert a 7.5 mm diamet er dril lbetween t he valve cover and t he CMP s ens or as shown,t o achi eve the correct al ignment of the CMP s ens or.
11.
Installation
1. CAUTION: Make s ure that the component is clean, free offoreign mat eri al and lubri cant.
To i nst all , revers e t he removal procedure.
1.
Page 1254 of 3229
Publi s hed: 11-May-2011
Electronic Engine Controls - TD4 2.2L Diesel - Crankshaft Position (CKP)
Sensor
Removal and Inst all ati on
Removal
• NOTE: Removal s t eps in t his procedure may cont ain i nst all ati on det ail s.
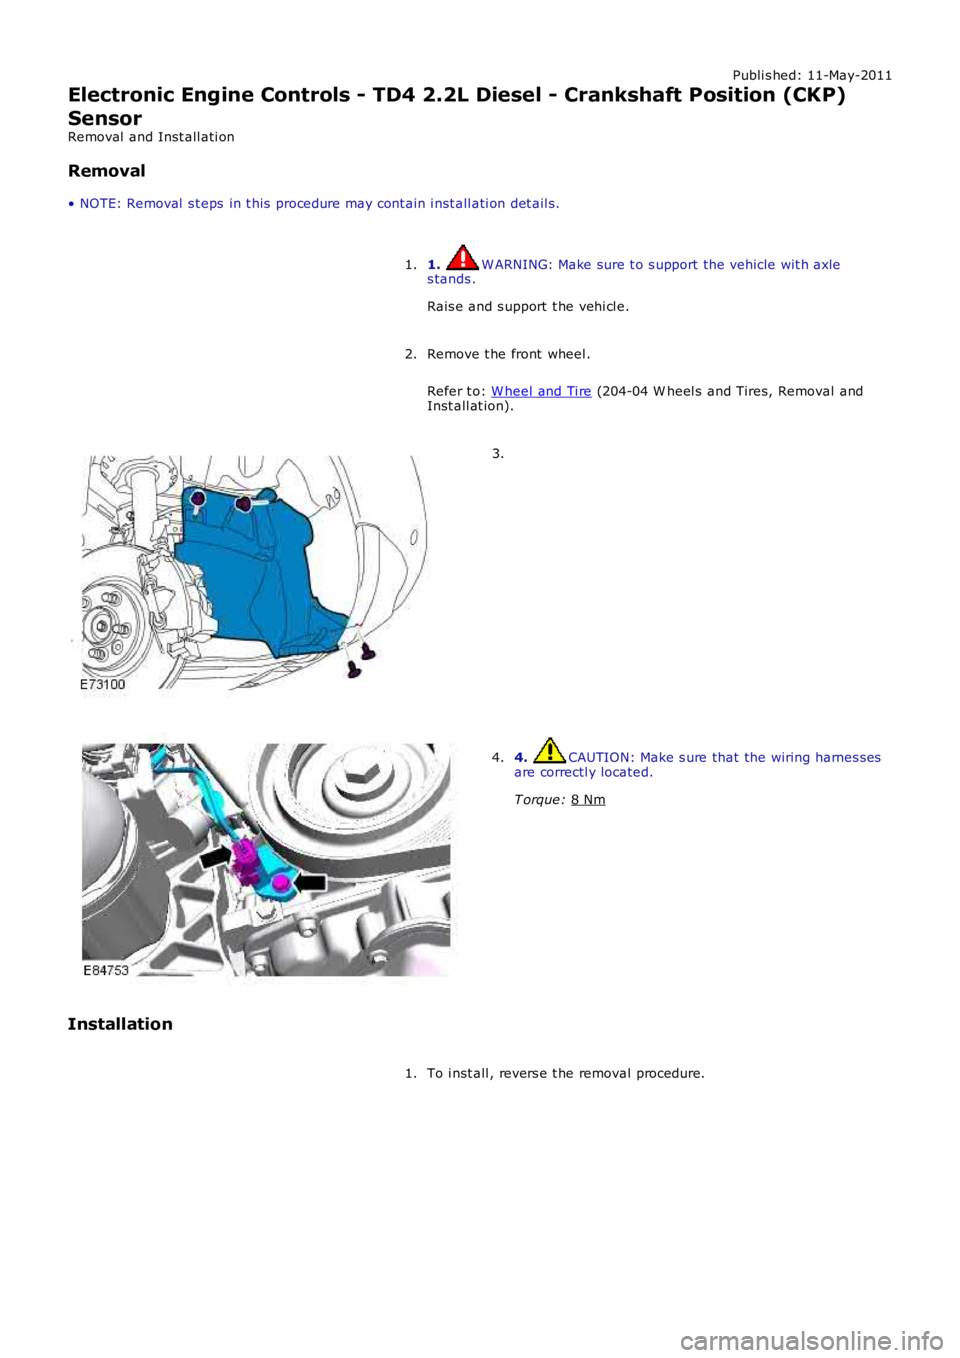
1. W ARNING: Make sure t o s upport the vehicle wit h axle
s tands .
Rais e and s upport t he vehi cl e.
1.
Remove t he front wheel .
Refer t o: W heel and Ti re (204-04 W heel s and Tires, Removal and
Inst all at ion).
2. 3.
4. CAUTION: Make s ure that the wiring harnes s es
are correctl y located.
T orque: 8 Nm 4.
Installation To i nst all , revers e t he removal procedure.
1.
Page 1255 of 3229
Publi s hed: 11-May-2011
Electronic Engine Controls - TD4 2.2L Diesel - Engine Coolant Temperature
(ECT) Sensor
Removal and Inst all ati on
Removal
Remove t he air cleaner as s embly.
Refer t o: Air Cleaner (303-12A Intake Ai r Dis tribut ion and Fil tering -I6 3.2L Pet rol, Removal and Ins t al lat ion).
1.
Remove t he engi ne cover.
Refer t o: Engi ne Cover - TD4 2.2L Dies el (501-05 Interior Tri m andOrnament ati on, Removal and Ins tal lat ion).
2.
Drai n t he cool ing s ys tem.
Refer t o: Cool ing Sys tem Drai ni ng, Fi lli ng and Bleeding (303-03BEngine Cooli ng - TD4 2.2L Di esel , General Procedures ).
3.
4. W ARNING: Do not work on or under a vehi cle s upported onl yby a jack. Al ways support t he vehi cl e on s afet y s tands .
Rais e and s upport t he vehi cl e.
4.
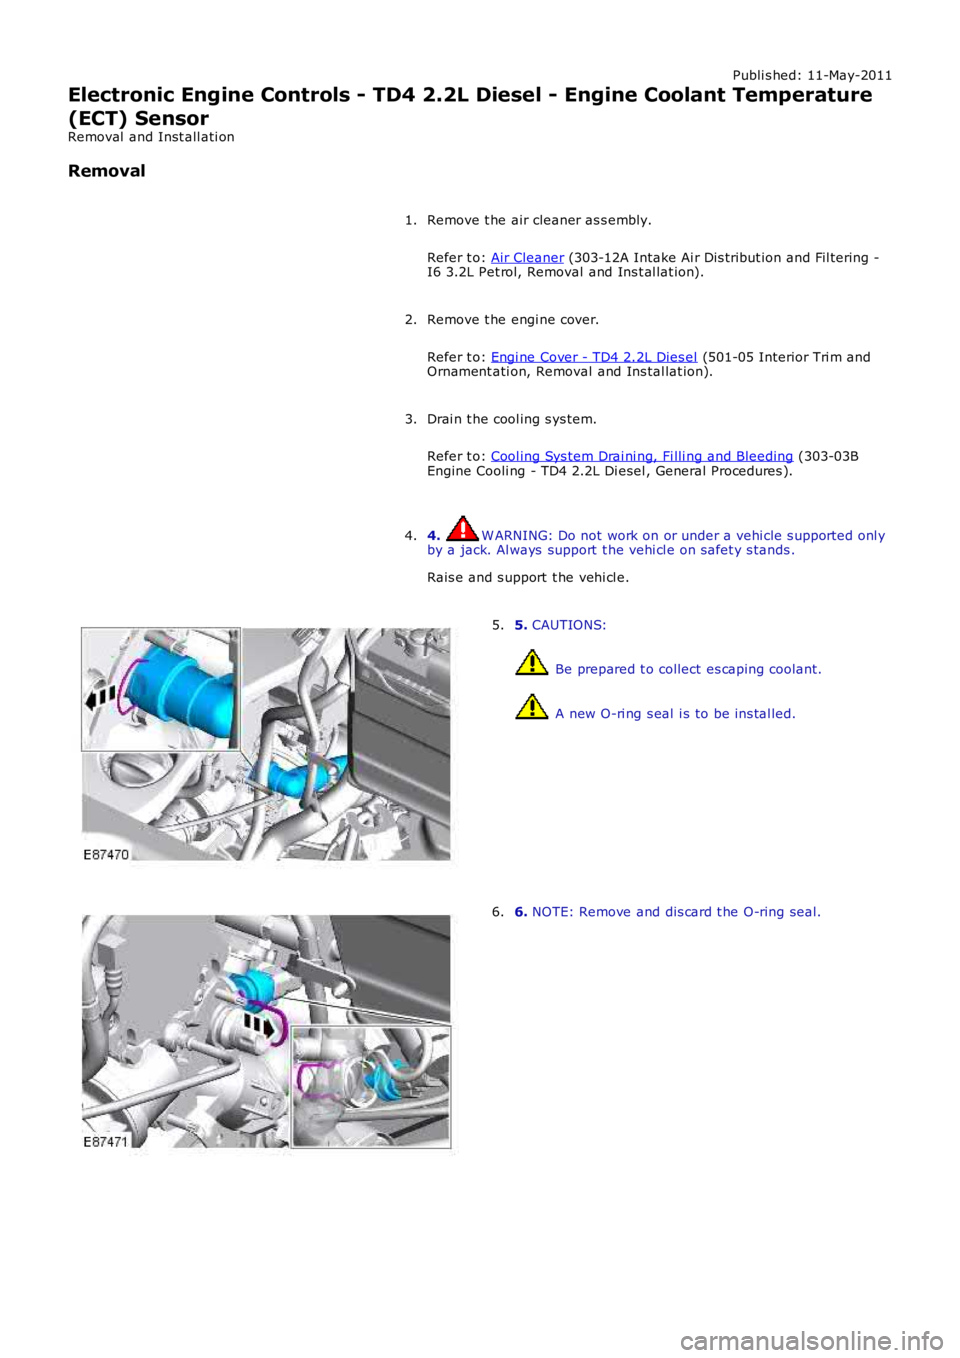
5. CAUTIONS:
Be prepared t o collect es caping coolant.
A new O-ri ng s eal i s to be ins tal led.
5.
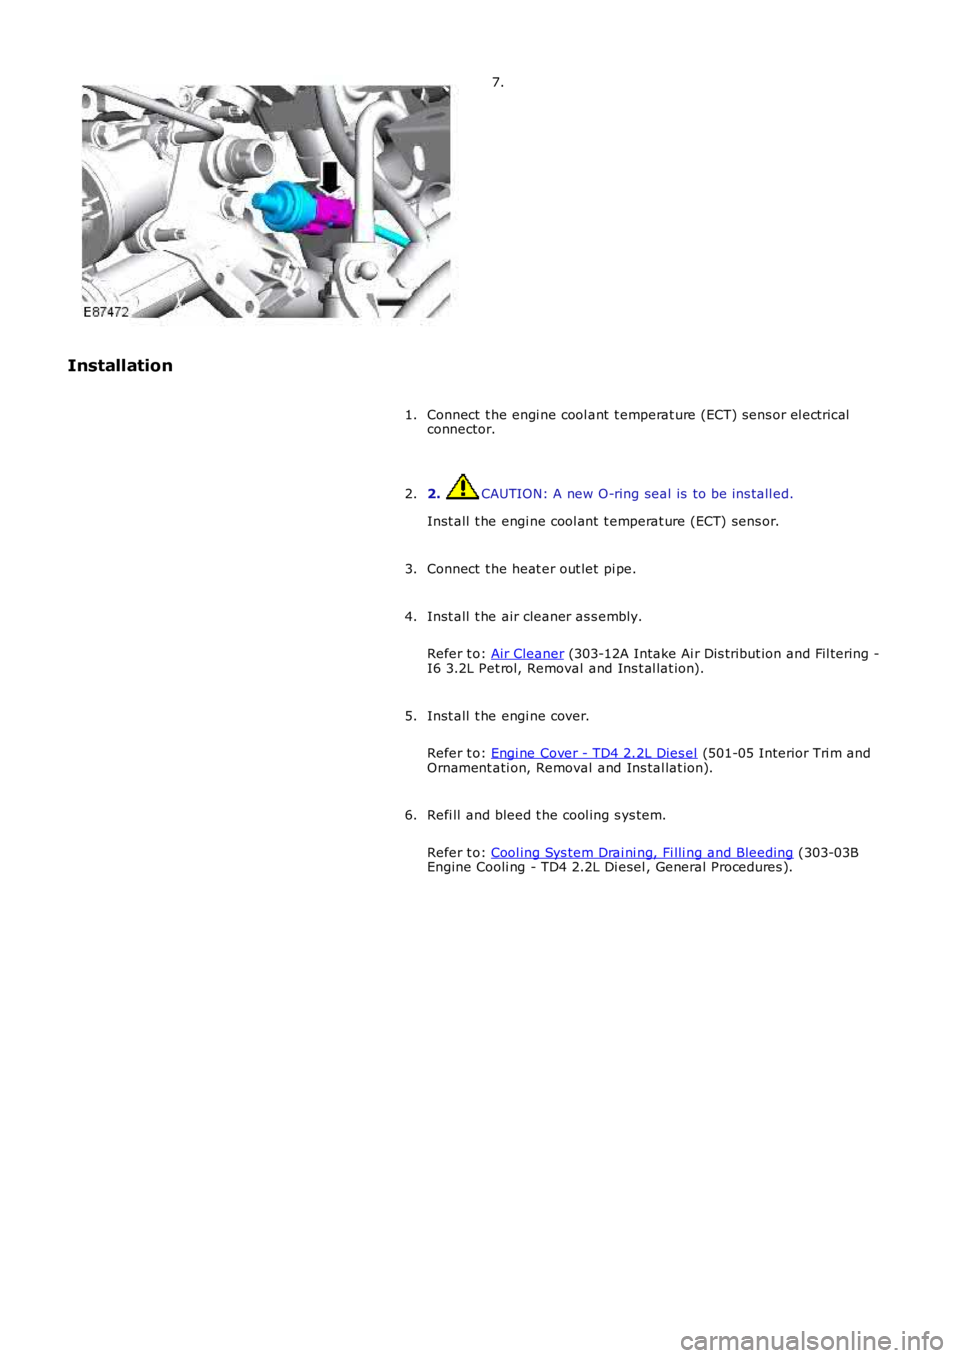
6. NOTE: Remove and dis card t he O-ring seal.6.
Page 1256 of 3229
7.
Installation
Connect t he engi ne cool ant t emperat ure (ECT) sens or el ect ri calconnector.1.
2. CAUTION: A new O-ring seal is to be ins tall ed.
Inst all t he engi ne cool ant t emperat ure (ECT) sens or.
2.
Connect t he heat er out let pi pe.3.
Inst all t he air cleaner as s embly.
Refer t o: Air Cleaner (303-12A Intake Ai r Dis tribut ion and Fil tering -I6 3.2L Pet rol, Removal and Ins t al lat ion).
4.
Inst all t he engi ne cover.
Refer t o: Engi ne Cover - TD4 2.2L Dies el (501-05 Interior Tri m andOrnament ati on, Removal and Ins tal lat ion).
5.
Refi ll and bleed t he cool ing s ys tem.
Refer t o: Cool ing Sys tem Drai ni ng, Fi lli ng and Bleeding (303-03BEngine Cooli ng - TD4 2.2L Di esel , General Procedures ).
6.
Page 1257 of 3229
Publi s hed: 11-May-2011
Electronic Engine Controls - TD4 2.2L Diesel - Manifold Absolute Pressure
(MAP) Sensor
Removal and Inst all ati on
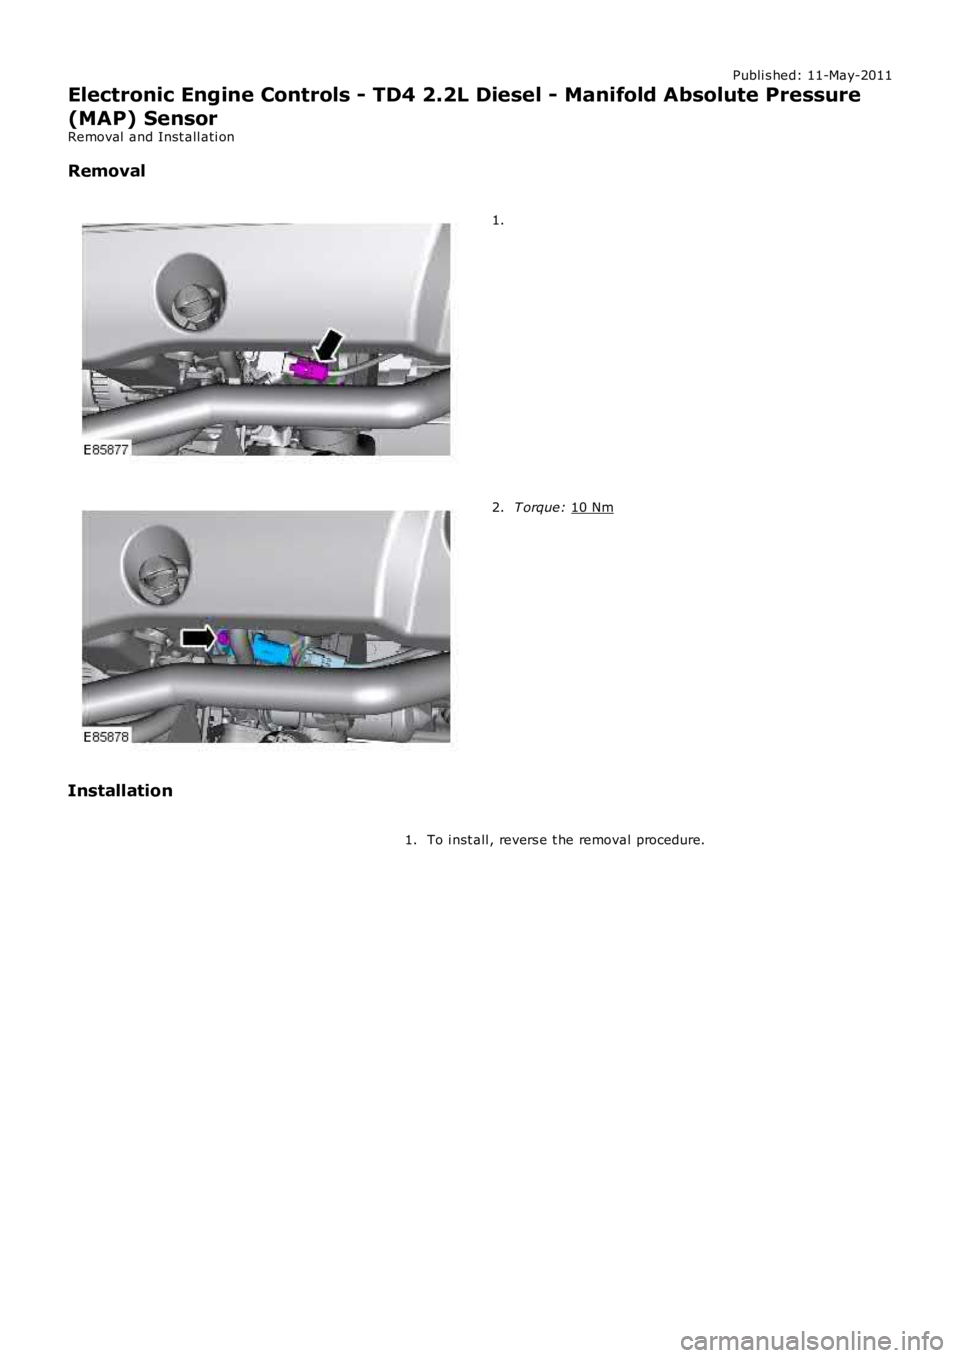
Removal 1.
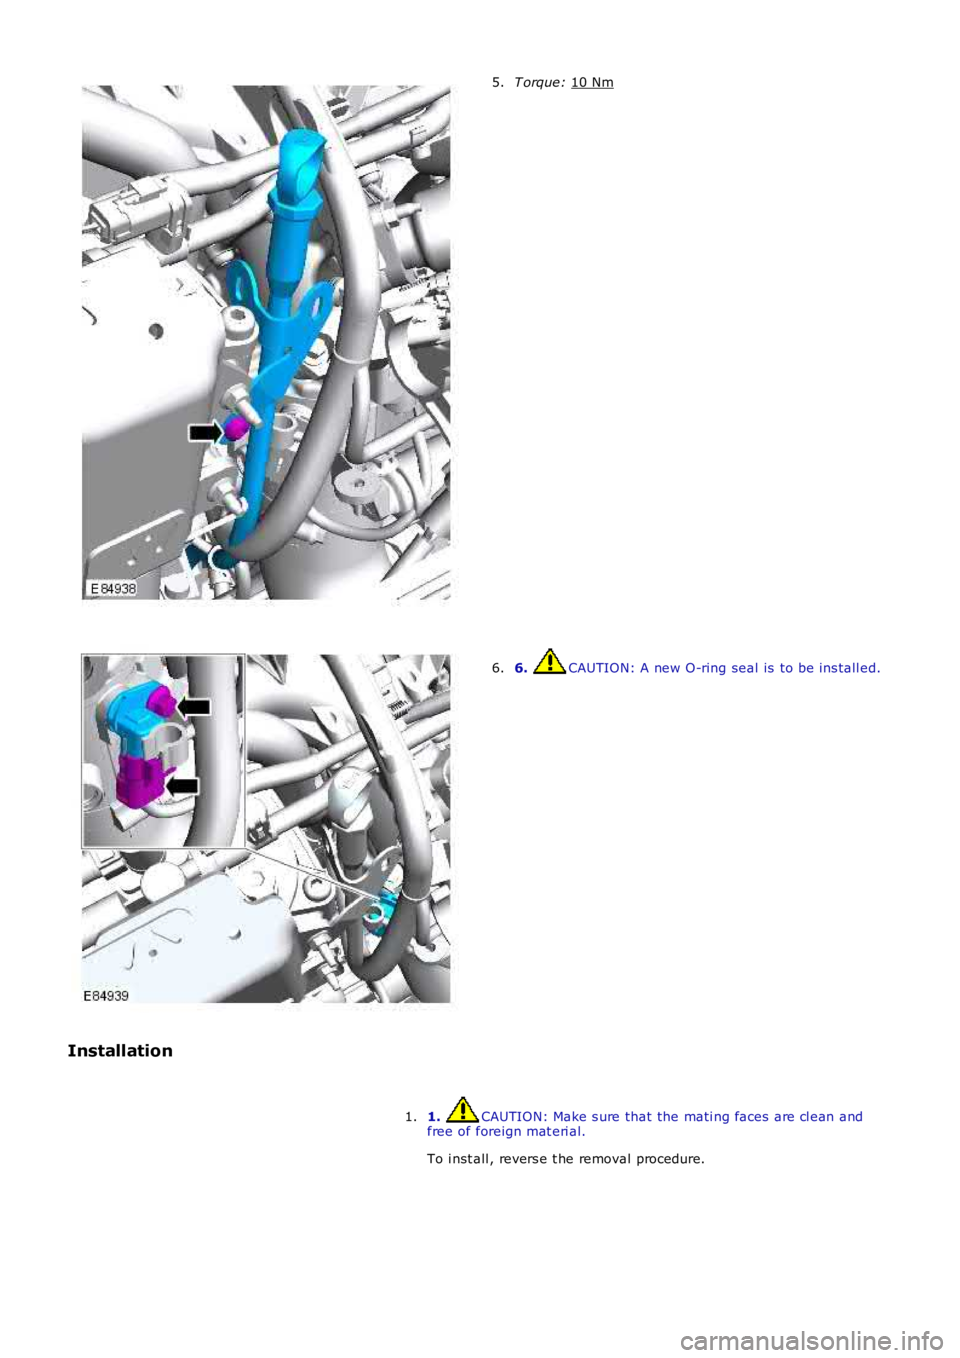
T orque:
10 Nm 2.
Installation To i nst all , revers e t he removal procedure.
1.
Page 1258 of 3229
Publi s hed: 11-May-2011
Electronic Engine Controls - TD4 2.2L Diesel - Intake Air Temperature (IAT)
Sensor
Removal and Inst all ati on
Removal
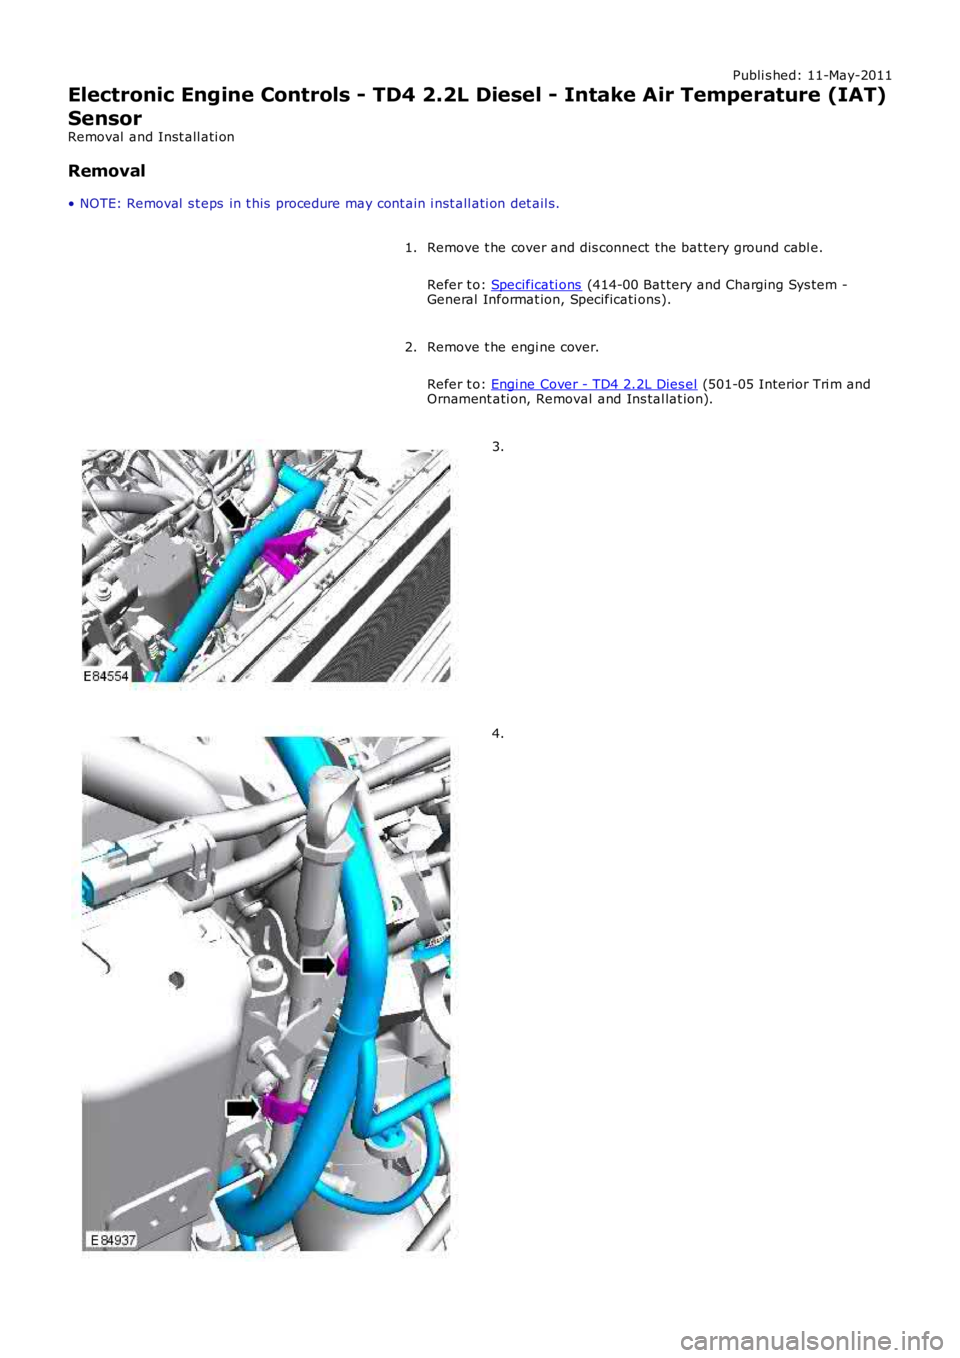
• NOTE: Removal s t eps in t his procedure may cont ain i nst all ati on det ail s.
Remove t he cover and dis connect the bat tery ground cabl e.
Refer t o: Specificati ons (414-00 Bat tery and Charging Sys tem -General Informat ion, Specificati ons).
1.
Remove t he engi ne cover.
Refer t o: Engi ne Cover - TD4 2.2L Dies el (501-05 Interior Tri m andOrnament ati on, Removal and Ins tal lat ion).
2.
3.
4.
Page 1259 of 3229
T orque:
10 Nm 5.
6. CAUTION: A new O-ring seal is to be ins tall ed.
6.
Installation 1. CAUTION: Make s ure that the mati ng faces are cl ean and
free of foreign mat eri al.
To i nst all , revers e t he removal procedure.
1.
Page 1260 of 3229
Publi s hed: 11-May-2011
Electronic Engine Controls - TD4 2.2L Diesel - Heated Oxygen Sensor
(HO2S)
Removal and Inst all ati on
Special T ool(s) 310-121
W rench, H02S
Removal W ARNING: Observe due care when worki ng near a hot exhaust s ys tem.
1. W ARNING: Do not work on or under a vehi cle s upported onl y
by a jack. Al ways support t he vehi cl e on s afet y s tands .
Rais e and s upport t he vehi cl e.
1.
Remove t he engi ne cover.
Refer t o: Engi ne Cover - TD4 2.2L Dies el (501-05 Interior Tri m and
Ornament ati on, Removal and Ins tal lat ion).
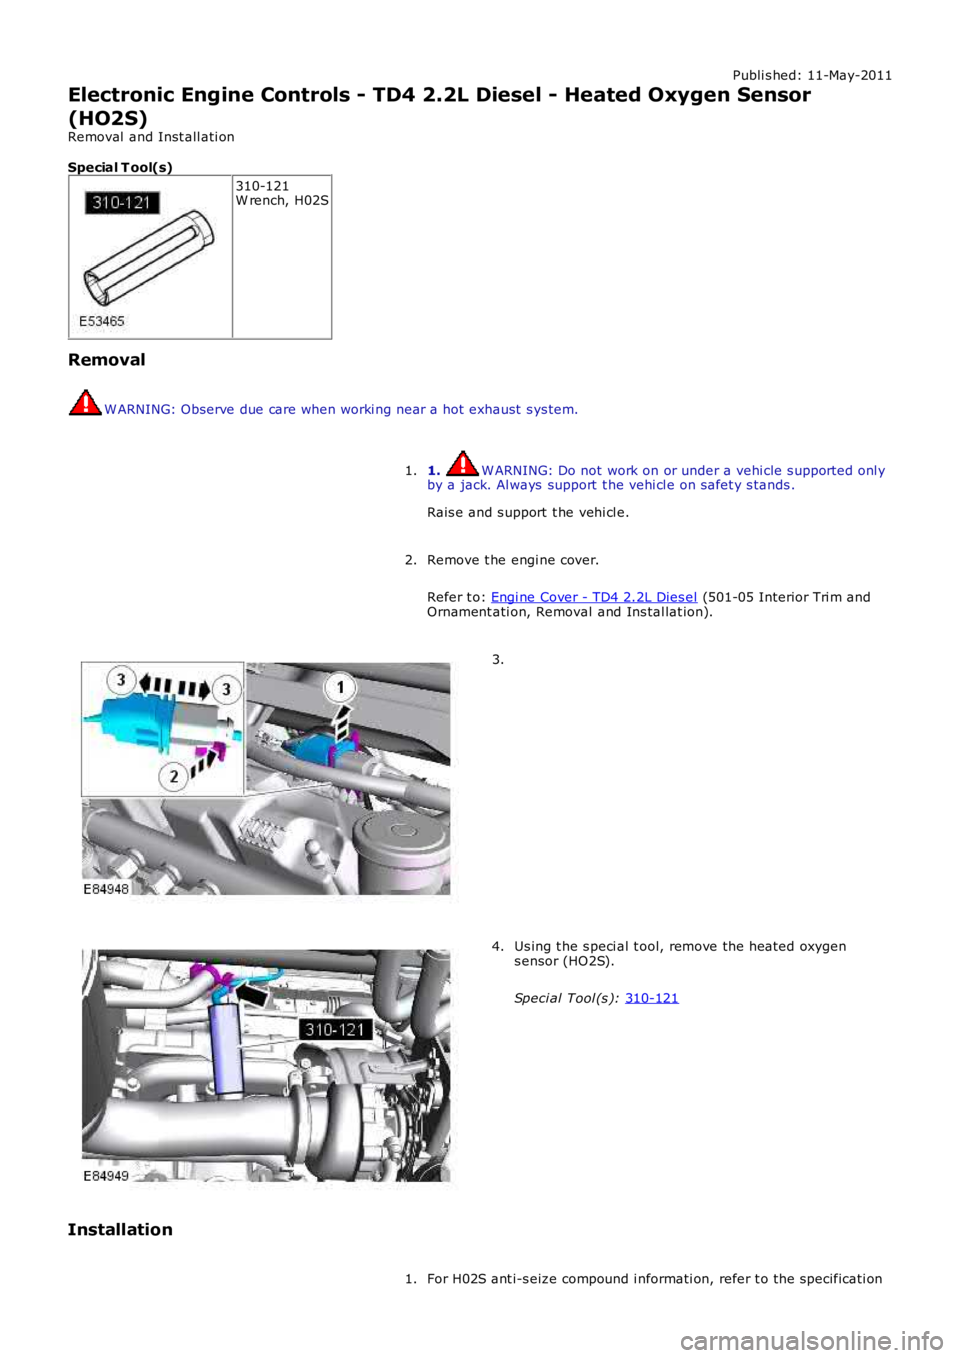
2. 3.
Us ing t he s peci al t ool, remove the heated oxygen
s ensor (HO2S).
Speci al Tool (s ): 310-121 4.
Installation For H02S ant i-s eize compound i nformati on, refer t o the specificati on
1.
Trending: maintenance, start stop button, airbag disable, interior lights, engine coolant, service interval reset, automatic transmission fluid
