LAND ROVER FRELANDER 2 2006 Repair Manual
Manufacturer: LAND ROVER, Model Year: 2006, Model line: FRELANDER 2, Model: LAND ROVER FRELANDER 2 2006Pages: 3229, PDF Size: 78.5 MB
Page 2841 of 3229

121
Transmission
R
High temperatures
In circumstances where engine and
transmission temperatures are raised to very
high levels, the gear change strategy will alter
to provide maximum cooling efficiency.
Transmission fault
In the unlikely event that a fault develops within
the transmission system, F will be displayed in
the gear position display and a warning
message will appear in the message centre. A
limited range of gears will be available, and you
should seek qualified as sistance immediately.
Page 2842 of 3229

Transmission
122
L
TECHNICAL SPECIFICATIONS
Transmission fluids and capacities
Transmission unit Fluid spec ification Fluid capacity
Automatic gearbox Esso JWS3309 7 litres (12.3 pints) Manual gearbox Castrol MTF 97309 1.9 litres (3.3 pints)
Power transfer unit Castrol BOT118 0.75 litres (1.3 pints) Haldex coupling STAT OIL SL01- 301 0.65 litres (1.1 pints)
Rear differential Castrol EPX 0.7 litres (1.2 pints)
Page 2843 of 3229
123
Brakes
R
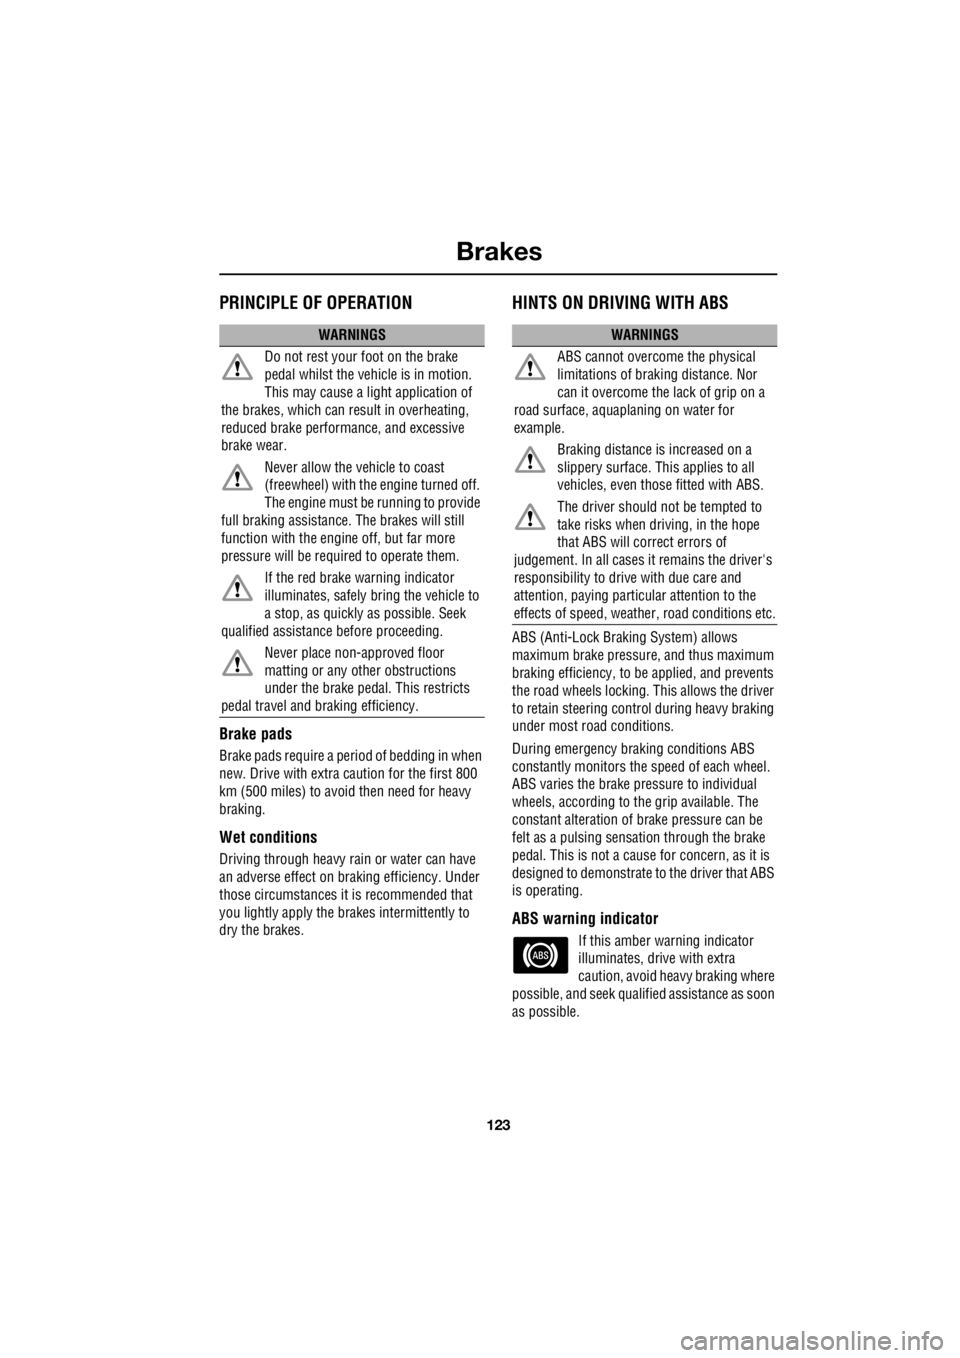
BrakesPRINCIPLE OF OPERATION
Brake pads
Brake pads require a period of bedding in when
new. Drive with extra caution for the first 800
km (500 miles) to avoi d then need for heavy
braking.
Wet conditions
Driving through heavy rain or water can have
an adverse effect on braking efficiency. Under
those circumstances it is recommended that
you lightly apply the brak es intermittently to
dry the brakes.
HINTS ON DRIVING WITH ABS
ABS (Anti-Lock Braki ng System) allows
maximum brake pressure, and thus maximum
braking efficiency, to be applied, and prevents
the road wheels locking. This allows the driver
to retain steering control during heavy braking
under most road conditions.
During emergency brak ing conditions ABS
constantly monitors the speed of each wheel.
ABS varies the brake pressure to individual
wheels, according to the grip available. The
constant alteration of brake pressure can be
felt as a pulsing sensat ion through the brake
pedal. This is not a cause for concern, as it is
designed to demonstrate to the driver that ABS
is operating.
ABS warning indicator
If this amber warning indicator
illuminates, driv e with extra
caution, avoid heavy braking where
possible, and seek qualified assistance as soon
as possible.
WARNINGS
Do not rest your foot on the brake
pedal whilst the vehicle is in motion.
This may cause a light application of
the brakes, which can re sult in overheating,
reduced brake performance, and excessive
brake wear.
Never allow the vehicle to coast
(freewheel) with the engine turned off.
The engine must be running to provide
full braking assistance. The brakes will still
function with the engine off, but far more
pressure will be required to operate them.
If the red brake warning indicator
illuminates, safely bring the vehicle to
a stop, as quickly as possible. Seek
qualified assistance before proceeding.
Never place non-approved floor
matting or any ot her obstructions
under the brake pedal. This restricts
pedal travel and braking efficiency.WARNINGS
ABS cannot overcome the physical
limitations of brak ing distance. Nor
can it overcome the lack of grip on a
road surface, aquaplaning on water for
example.
Braking distance is increased on a
slippery surface. This applies to all
vehicles, even those fitted with ABS.
The driver should not be tempted to
take risks when driving, in the hope
that ABS will correct errors of
judgement. In all cases it remains the driver's
responsibility to driv e with due care and
attention, paying partic ular attention to the
effects of speed, weather, road conditions etc.
Page 2844 of 3229

Brakes
124
L
ABS and off-road driving
ABS will operate when driving off-road,
however it may be unw ise to rely on it's
assistance under some conditions.
Stopping distances will be increased when
travelling over rough, or bumpy terrain.
Soft surfaces
On soft or deep surfaces such as powdery
snow, sand, or gravel, the braking distance
required will be increased. This is because the
natural action of a lock ed wheel (which cannot
happen when ABS is operating) is to form a
wedge of surface material in front of the wheel,
which reduces the stopping distance.
Steep slopes
If the vehicle is stationary on a steep, slippery
slope, it may begin to slide even with the
brakes applied. This is because without wheel
rotation the ABS cannot determine vehicle
movement.
To counteract this, briefl y release the brakes to
allow some wheel rota tion. Then re-apply the
brakes to allow ABS to gain control.
Emergency Brake Assist (EBA)
If the driver rapidly applies the brakes, EBA
automatically boosts the braking force to it's
maximum in order to bring the vehicle to a halt
as quickly as possible. If the driver applies the
brakes slowly, but condi tions mean that ABS
operates on the front wheels, EBA will increase
the braking force in order to apply ABS control
to the rear wheels.
EBA stops operating as soon as the brake pedal
is released.
A fault with the EBA system is
indicated by the red brake warning
indicator illuminating.
Electronic Brake Distribution (EBD)
EBD controls the balanc e of braking forces
supplied to the front and rear wheels, in order
to maintain maximum braking efficiency.
If the vehicle has a light load (only the driver in
the vehicle for example) the EBD will reduce the
braking force applied to the rear wheels. If the
vehicle is heavily laden then EBD will increase
the braking force to the rear wheels.
A fault with the EBD system is
indicated by the red brake warning
indicator illuminating.
PARKING BRAKE
Parking on a slope
Facing uphill
If the vehicle is parked facing uphill, select first
gear (manual gearbox), or Park (automatic
gearbox), and turn the steering wheel so that
the front wheels face away from the kerb.
Facing downhill
If the vehicle is parked facing downhill, select
reverse gear (manual gearbox), or Park
(automatic gearbox), and turn the steering
wheel so that the front wheels face towards the
kerb.
Page 2845 of 3229
125
Brakes
R
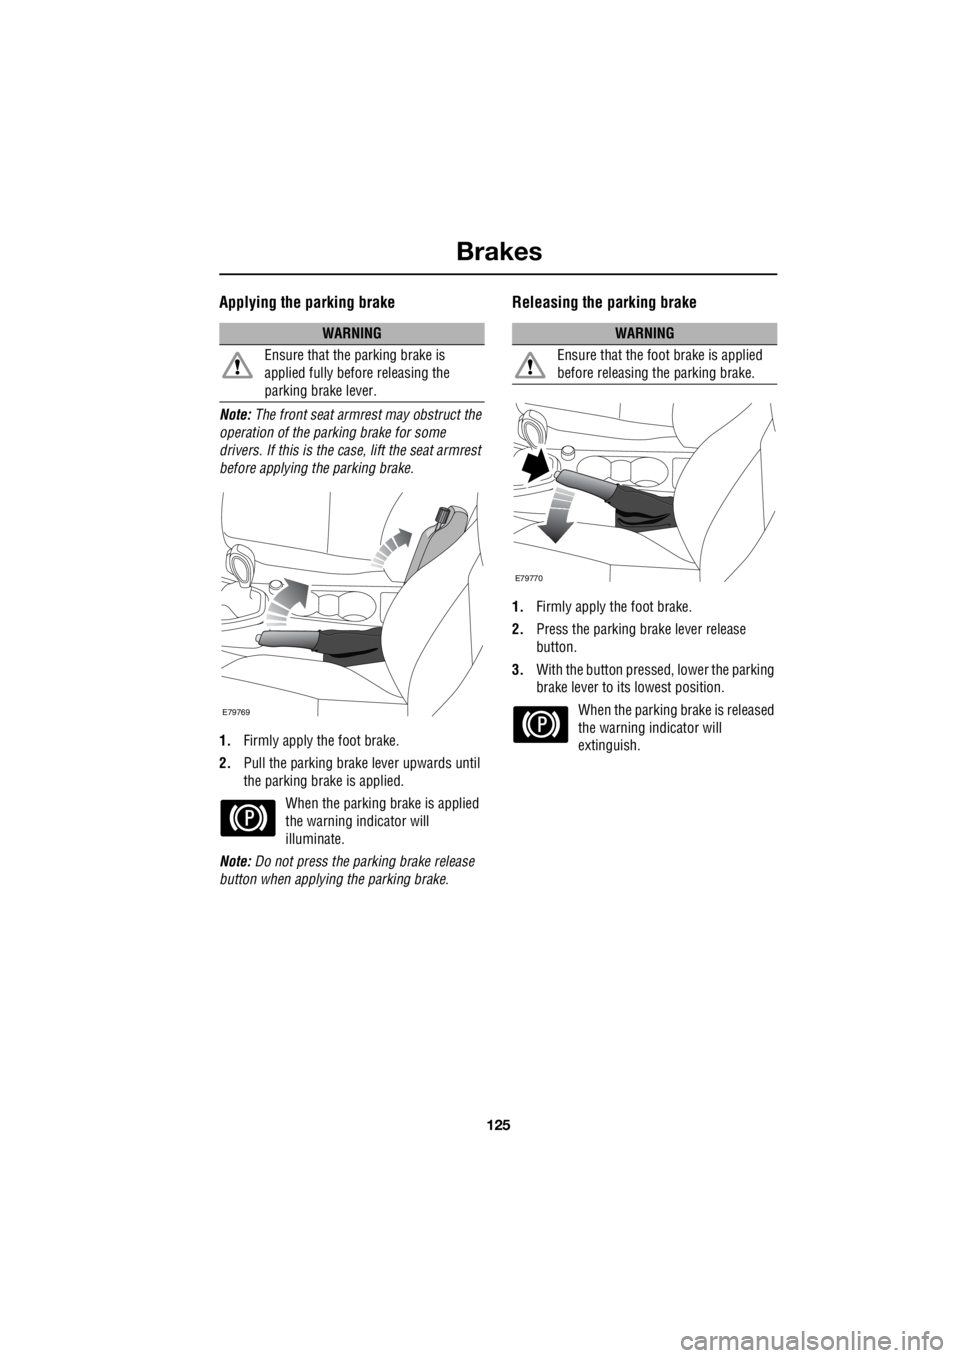
Applying the parking brake
Note: The front seat armrest may obstruct the
operation of the parking brake for some
drivers. If this is the case, lift the seat armrest
before applying the parking brake.
1. Firmly apply the foot brake.
2. Pull the parking brake lever upwards until
the parking brake is applied.
When the parking brake is applied
the warning indicator will
illuminate.
Note: Do not press the parking brake release
button when applying the parking brake.
Releasing the parking brake
1. Firmly apply th e foot brake.
2. Press the parking brake lever release
button.
3. With the button pressed, lower the parking
brake lever to its lowest position.
When the parking brake is released
the warning indicator will
extinguish.
WARNING
Ensure that the parking brake is
applied fully before releasing the
parking brake lever.
E79769
WARNING
Ensure that the foot brake is applied
before releasing the parking brake.
E79770
Page 2846 of 3229
Parking aid
126
L
Parking aidPRINCIPLE OF OPERATION
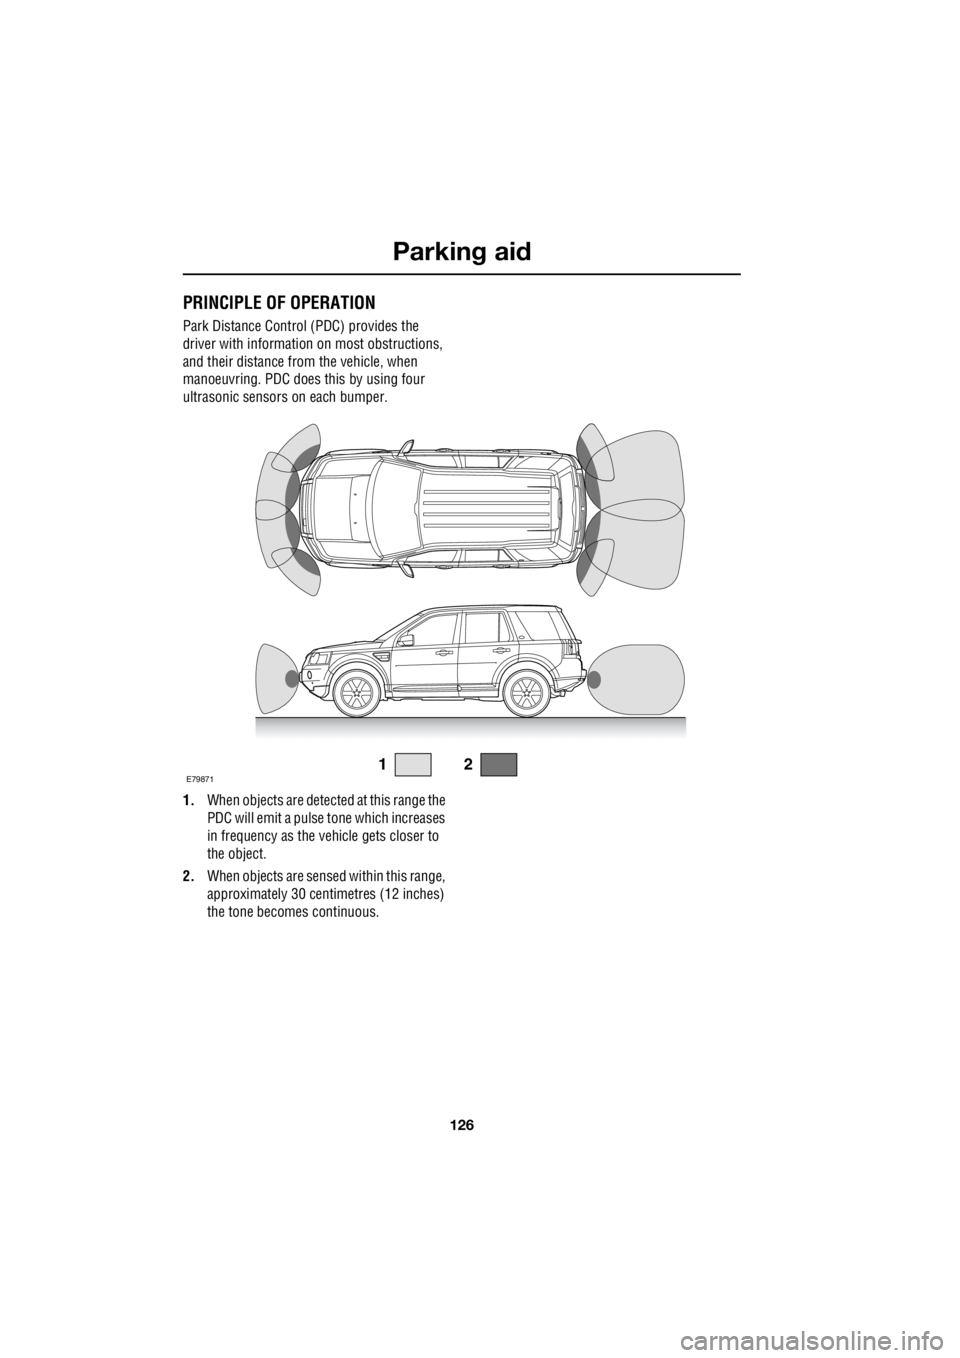
Park Distance Control (PDC) provides the
driver with informatio n on most obstructions,
and their distance from the vehicle, when
manoeuvring. PDC does this by using four
ultrasonic sensors on each bumper.
1. When objects are detected at this range the
PDC will emit a pulse tone which increases
in frequency as the vehicle gets closer to
the object.
2. When objects are sensed within this range,
approximately 30 cent imetres (12 inches)
the tone becomes continuous.
12E79871
Page 2847 of 3229
127
Parking aid
R
USING THE PARKING AID
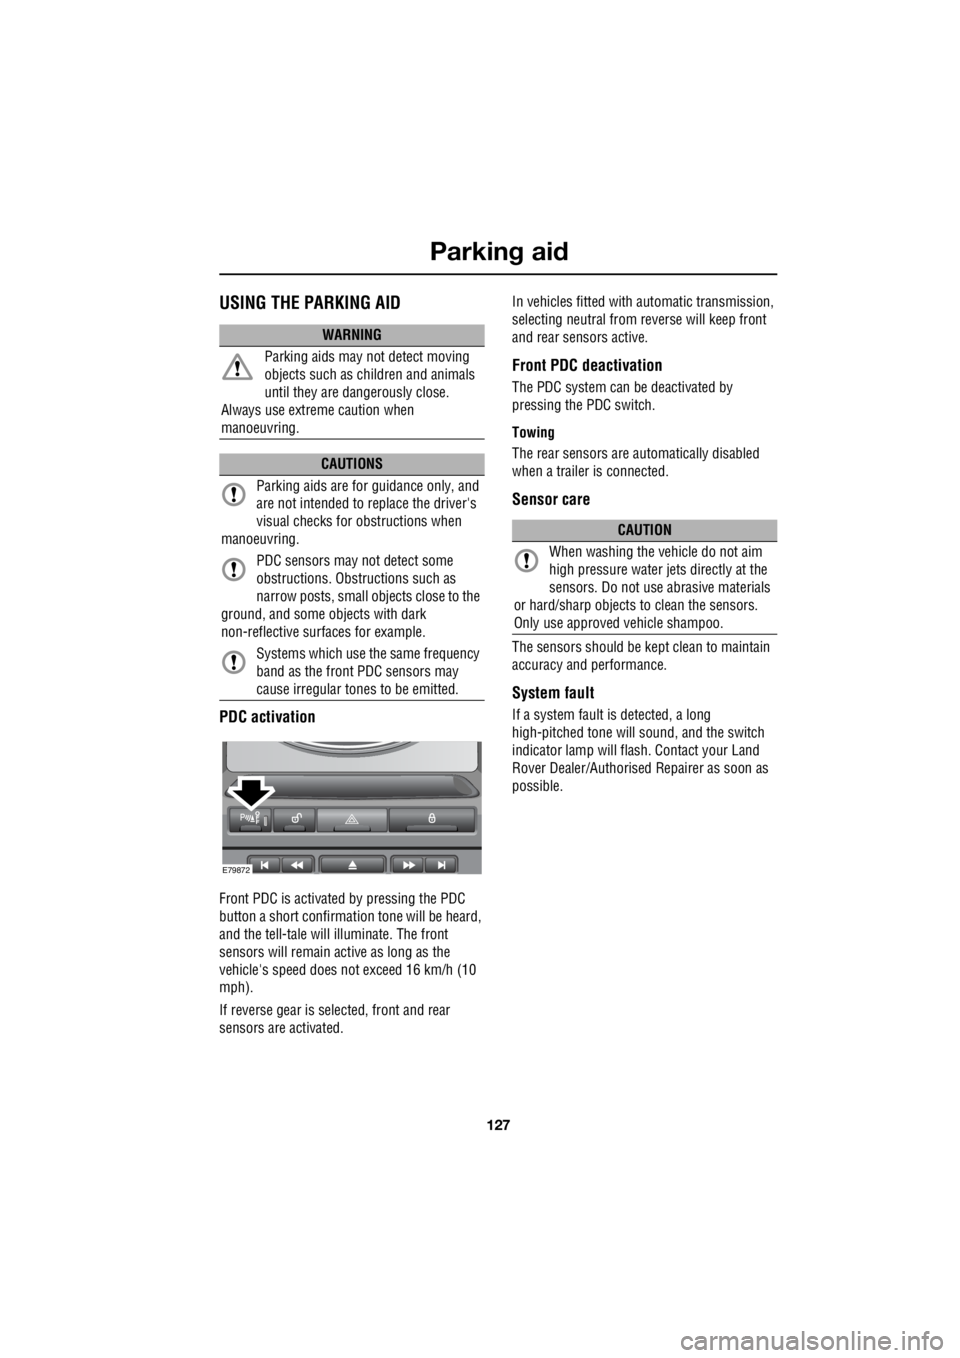
PDC activation
Front PDC is activate d by pressing the PDC
button a short confirmation tone will be heard,
and the tell-tale will illuminate. The front
sensors will remain active as long as the
vehicle's speed does not exceed 16 km/h (10
mph).
If reverse gear is selected, front and rear
sensors are activated. In vehicles fitted with automatic transmission,
selecting neutral from re verse will keep front
and rear sensors active.
Front PDC deactivation
The PDC system can be deactivated by
pressing the PDC switch.
Towing
The rear sensors are au tomatically disabled
when a trailer is connected.
Sensor care
The sensors should be ke pt clean to maintain
accuracy and performance.
System fault
If a system fault is detected, a long
high-pitched tone will sound, and the switch
indicator lamp will fl ash. Contact your Land
Rover Dealer/Authorised Repairer as soon as
possible.
WARNING
Parking aids may not detect moving
objects such as children and animals
until they are dangerously close.
Always use extreme caution when
manoeuvring.
CAUTIONS
Parking aids are for guidance only, and
are not intended to replace the driver's
visual checks for obstructions when
manoeuvring.
PDC sensors may not detect some
obstructions. Obstru ctions such as
narrow posts, small objects close to the
ground, and some objects with dark
non-reflective surfaces for example.
Systems which use the same frequency
band as the front PDC sensors may
cause irregular tones to be emitted.
E79872
CAUTION
When washing the vehicle do not aim
high pressure water je ts directly at the
sensors. Do not use abrasive materials
or hard/sharp objects to clean the sensors.
Only use approved vehicle shampoo.
Page 2848 of 3229

Driving hints
128
L
Driving hintsGENERAL DRIVING POINTS
Battery charging - red
Illuminates as a bulb check when
the ignition is turned on and
extinguishes once the engine is
running. If it remains on, or illuminates whilst
driving, a fault with the battery charging
system is indicated. Seek qualified assistance
urgently.
Low oil pressure - red
Illuminates as a bulb check when
the ignition is turned on and
extinguishes when the engine is
started. If the indicator remains on, flashes on
and off, or illuminates whilst driving, stop the
vehicle as soon as safety permits and switch
off the engine immediat ely. Seek qualified
assistance before driving. Always check the oil
level when this indicator illuminates.
REDUCED ENGINE PERFORMANCE
Engine management syst em (EMS) fault
Illuminates amber in the
instrument pack when the engine
management system detects a
serious fault - reduce d performance may be
experienced. Avoid high speeds and consult
your Land Rover Dealer/A uthorised Repairer as
soon as possible.
Check engine - petrol models only
Illuminates amber in the
instrument pack as a bulb and
system check when the starter
switch is turned on and extinguishes as soon
as the engine is starte d. Illumination at any
other time indicates that the emission
performance of the engine management
system is impaired - seek qualified assistance.
If the indicator flashes while driving,
immediately reduce e ngine power to avoid
catalytic converter damage.
RUNNING-IN
The engine, gearbox, tyre s, and brakes need
time to bed-in. During the first 800 km (500
miles) it is essential th at the vehicle is driven
with consideration for the running-in process.
During the running in period the following
advice should be followed.
• Limit the engine speed to a maximum of
3000 rpm, and the road speed to a
maximum of 110 km/h (68 mph).
• Do not use full accelerator pedal travel, and
use the gears to avoid over-revving or
labouring the engine.
• Do not use sport mode during the running
in period.
• Avoid rapid accelerati on or heavy braking
wherever possible.
• Ensure that servicing is carried out on
time, and follow any advice regarding use
in arduous conditions.
Note: The advice given for running in will aid
fuel economy, and s hould be adopted as
general driving practice even after the running
in period.
Page 2849 of 3229

129
Driving hints
R
ECONOMICAL DRIVING
There are two main factors which influence fuel
economy, the way the vehicle is driven, and
maintenance.
Driving tips for economy
• Avoid unnecessary jour neys, especially
short stop-start trips.
• Accelerate smoothly and gently from a
stand still.
• Use the gears to avoid labouring, or
over-revving the engine.
• Allow time to brake gently and smoothly.
• Be aware of traffic and road conditions
ahead, and take action in time to avoid
hard braking or acceleration.
• When stationary apply the park brake, and
select neutral.
• Turn off the air conditioning when not
needed.
Maintenance and fuel economy
Regular servicing by a Land Rover
Dealer/Approved repairer, along with regular
checks by the driver are essential for vehicle
longevity and fuel economy.
The condition of the engine (oils, filters, spark
plugs, settings etc) tyre pressures, and wheel
alignment, will all have a bearing on fuel
economy. For this reason it is essential that the
vehicle is checked regularly by the driver, and
serviced by an approved Land Rover
Dealer/Authorised Repairer at the correct
intervals.
Note: If you are in any doubt about the
maintenance requirement s, intervals, or
checks required, contact your Land Rover
Dealer/Authorised repairer for advice.
Page 2850 of 3229
Cruise control
130
L
Cruise controlPRINCIPLE OF OPERATION
Cruise control enables the driver to maintain a
constant road speed without using the
accelerator pedal. This is particularly useful for
motorway cruising, or for any journey where a
constant speed can be maintained for a lengthy
period.
USING CRUISE CONTROL
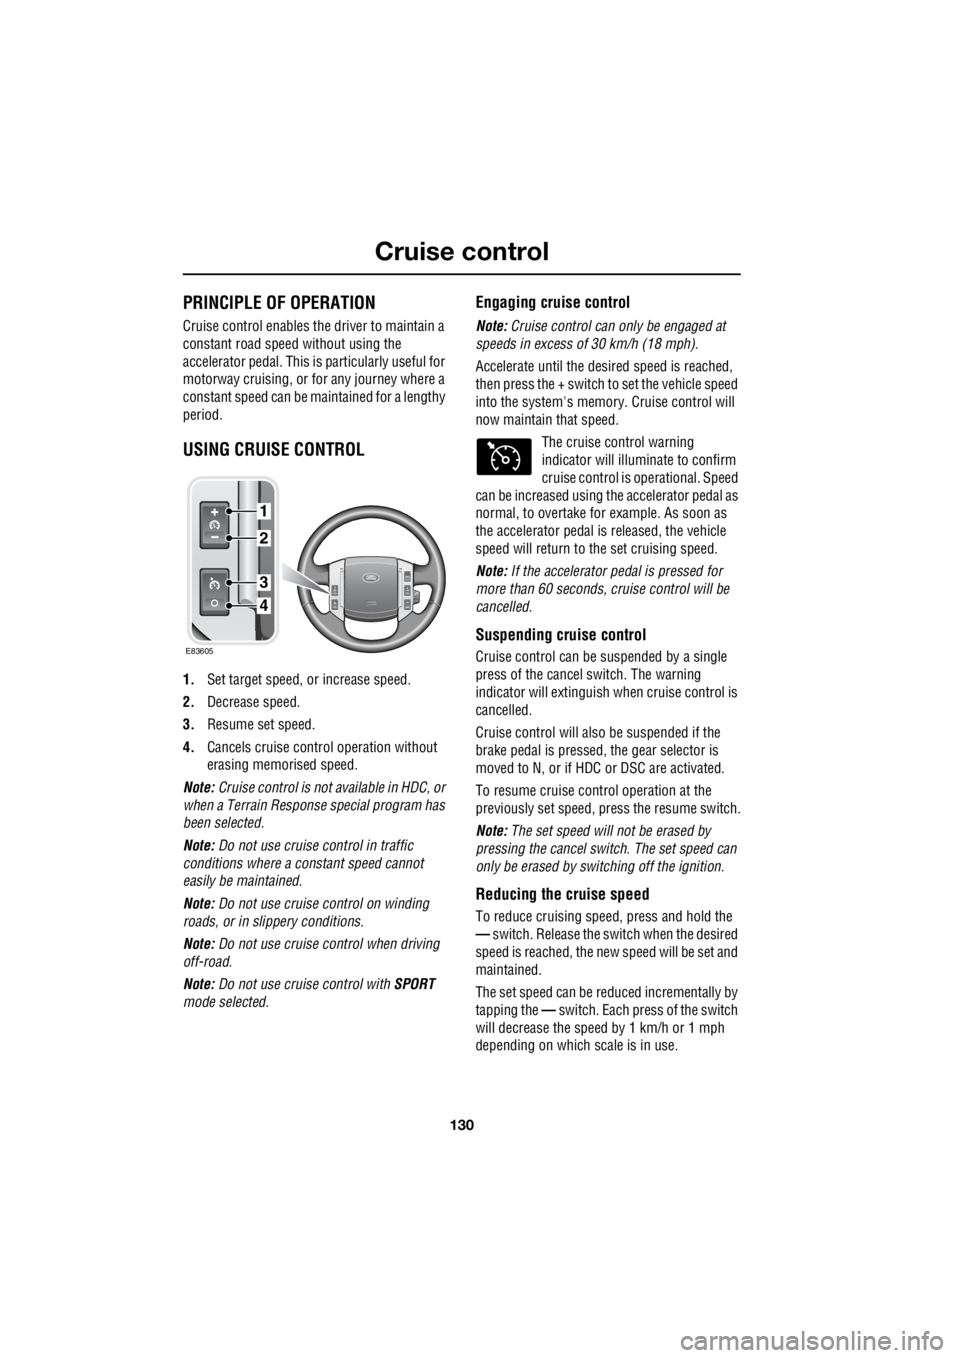
1. Set target speed, or increase speed.
2. Decrease speed.
3. Resume set speed.
4. Cancels cruise contro l operation without
erasing memorised speed.
Note: Cruise control is not available in HDC, or
when a Terrain Respons e special program has
been selected.
Note: Do not use cruise control in traffic
conditions where a constant speed cannot
easily be maintained.
Note: Do not use cruise control on winding
roads, or in slippery conditions.
Note: Do not use cruise control when driving
off-road.
Note: Do not use cruise control with SPORT
mode selected.
Engaging cruise control
Note: Cruise control can only be engaged at
speeds in excess of 30 km/h (18 mph).
Accelerate until the desired spee d is reached,
then press the + switch to set the vehicle speed
into the system's memory. Cruise control will
now maintain that speed.
The cruise control warning
indicator will illuminate to confirm
cruise control is operational. Speed
can be increased using th e accelerator pedal as
normal, to overtake fo r example. As soon as
the accelerator pedal is released, the vehicle
speed will return to the set cruising speed.
Note: If the accelerator pedal is pressed for
more than 60 seconds, cruise control will be
cancelled.
Suspending cruise control
Cruise control can be suspended by a single
press of the cancel switch. The warning
indicator will extinguish when cruise control is
cancelled.
Cruise control will also be suspended if the
brake pedal is pressed, the gear selector is
moved to N, or if HDC or DSC are activated.
To resume cruise cont rol operation at the
previously set speed, press the resume switch.
Note: The set speed will not be erased by
pressing the cancel switch. The set speed can
only be erased by switching off the ignition.
Reducing the cruise speed
To reduce cruising speed, press and hold the
— switch. Release the switch when the desired
speed is reached, the ne w speed will be set and
maintained.
The set speed can be reduced incrementally by
tapping the — switch. Each press of the switch
will decrease the spee d by 1 km/h or 1 mph
depending on which scale is in use.
1
E83605
2
3
4