Lexus ES300h 2015 Navigation Manual
ES300h 2015
Lexus
Lexus
https://www.carmanualsonline.info/img/36/12871/w960_12871-0.png
Lexus ES300h 2015 Navigation Manual
Trending: navigation system, change language, reset, display, sat nav, maintenance reset, pairing phone
Page 151 of 409
150
4. MEMORY POINTS
ES350/300h_Navi_OM33B43U_(U)14.06.23 09:44
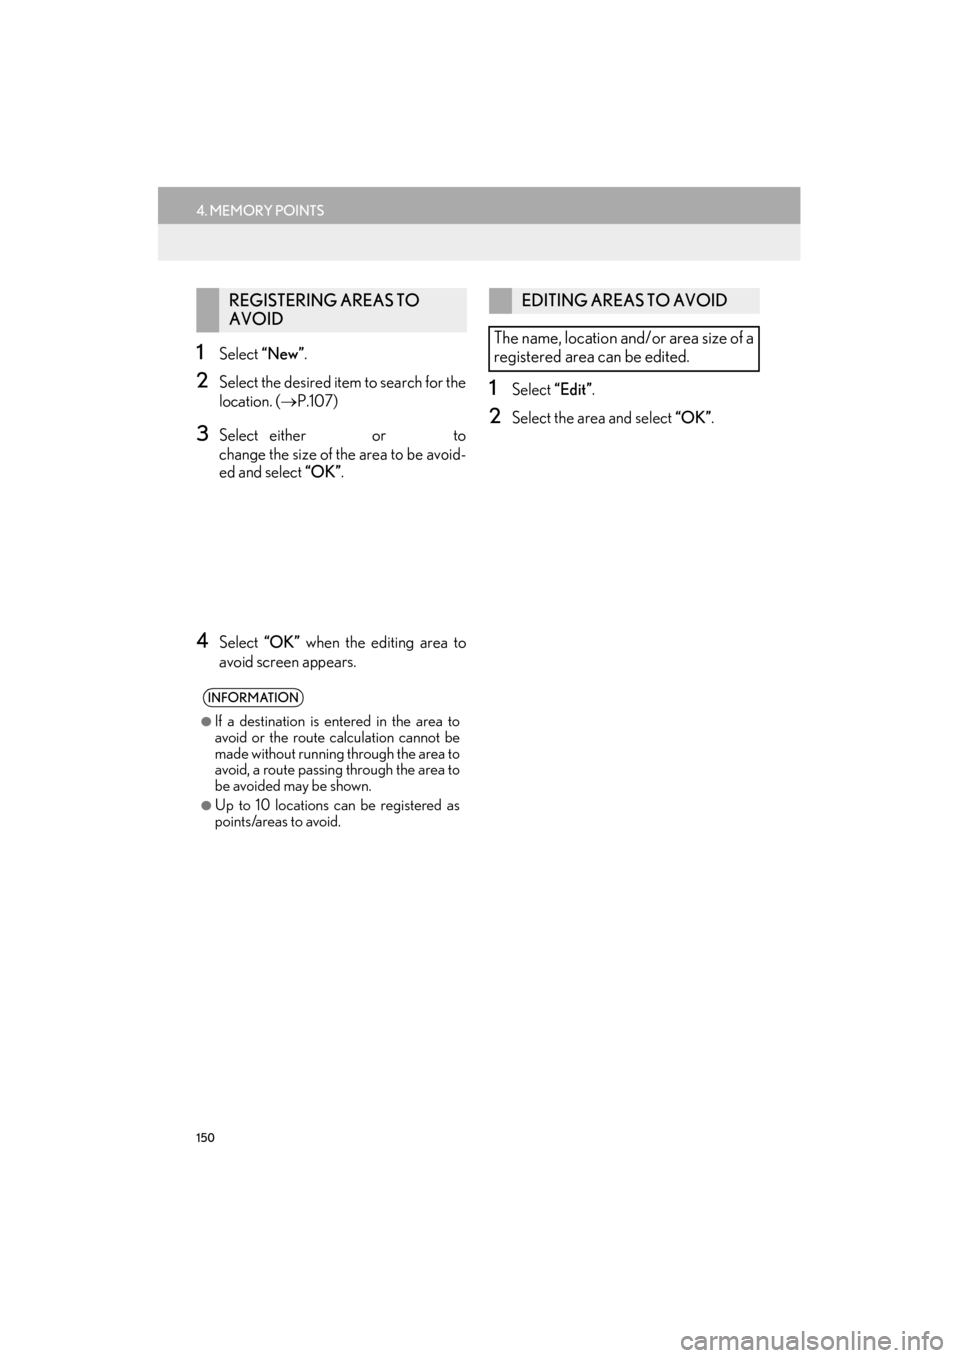
1Select “New” .
2Select the desired item to search for the
location. ( →P.107)
3Select either or to
change the size of the area to be avoid-
ed and select “OK”.
4Select “OK” when the editing area to
avoid screen appears.
1Select “Edit”.
2Select the area and select “OK”.
REGISTERING AREAS TO
AVOID
INFORMATION
●
If a destination is en tered in the area to
avoid or the route calculation cannot be
made without running through the area to
avoid, a route passing through the area to
be avoided may be shown.
●Up to 10 locations can be registered as
points/areas to avoid.
EDITING AREAS TO AVOID
The name, location and/or area size of a
registered area can be edited.
Page 152 of 409
151
4. MEMORY POINTS
ES350/300h_Navi_OM33B43U_(U)14.06.23 09:44
NAVIGATION SYSTEM
3
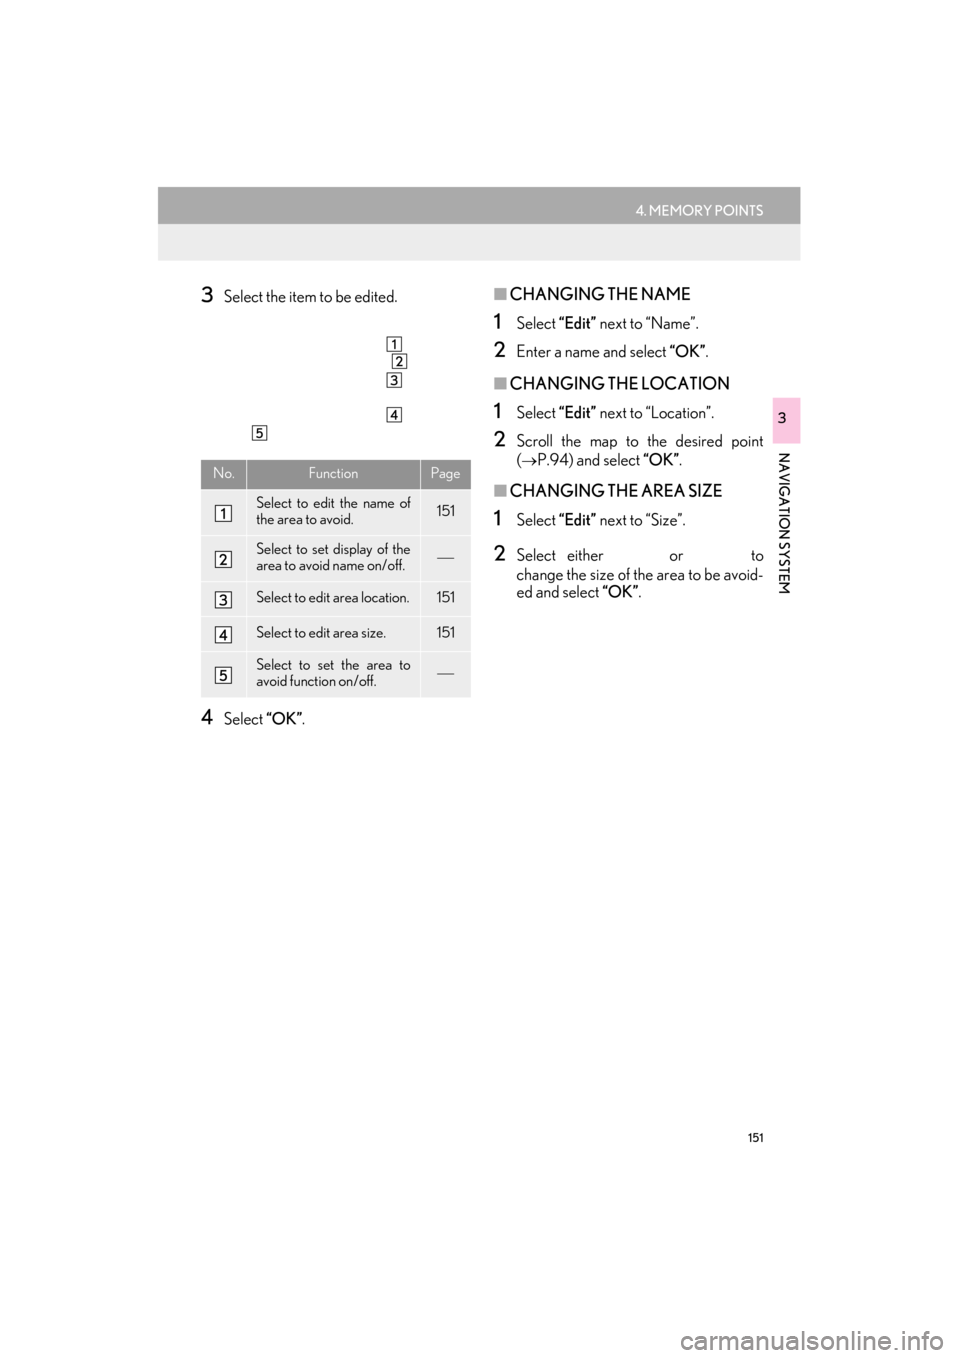
3Select the item to be edited.
4Select “OK”.
■CHANGING THE NAME
1Select “Edit” next to “Name”.
2Enter a name and select “OK”.
■CHANGING THE LOCATION
1Select “Edit” next to “Location”.
2Scroll the map to the desired point
(
→P.94) and select “OK” .
■CHANGING THE AREA SIZE
1Select “Edit” next to “Size”.
2Select either or to
change the size of the area to be avoid-
ed and select “OK”.
No.FunctionPage
Select to edit the name of
the area to avoid.151
Select to set display of the
area to avoid name on/off.
Select to edit area location.151
Select to edit area size.151
Select to set the area to
avoid function on/off.
Page 153 of 409
152
4. MEMORY POINTS
ES350/300h_Navi_OM33B43U_(U)14.06.23 09:44
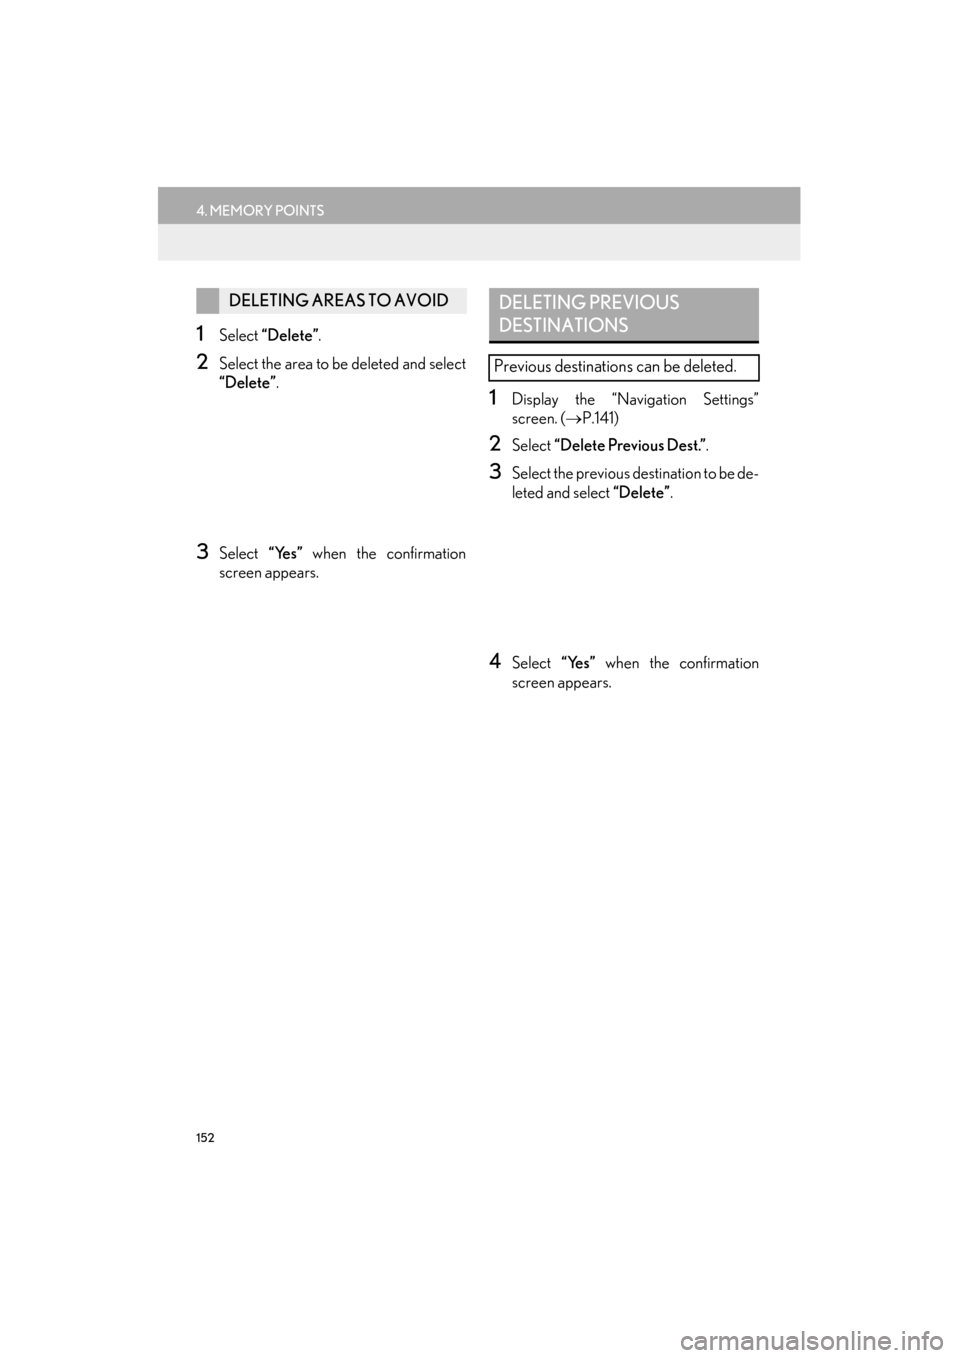
1Select “Delete” .
2Select the area to be deleted and select
“Delete” .
3Select “Yes” when the confirmation
screen appears.
1Display the “Navigation Settings”
screen. ( →P.141)
2Select “Delete Previous Dest.” .
3Select the previous destination to be de-
leted and select “Delete”.
4Select “Yes” when the confirmation
screen appears.
DELETING AREAS TO AVOIDDELETING PREVIOUS
DESTINATIONS
Previous destinations can be deleted.
Page 154 of 409
153
ES350/300h_Navi_OM33B43U_(U)14.06.23 09:44
NAVIGATION SYSTEM
3
5. SETUP
1. DETAILED NAVIGATION SETTINGS
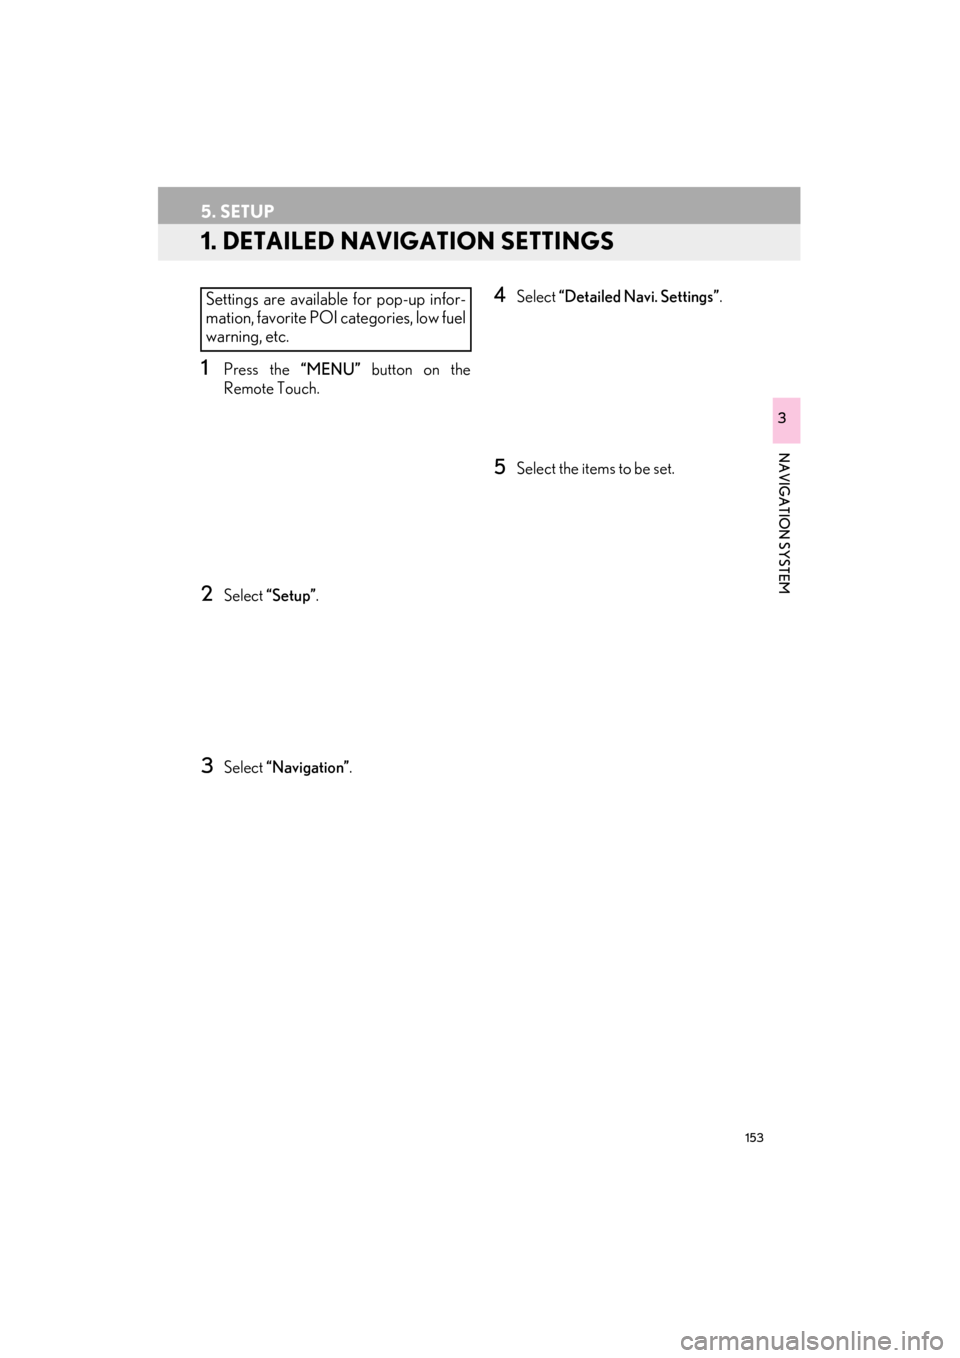
1Press the “MENU” button on the
Remote Touch.
2Select “Setup” .
3Select “Navigation” .
4Select “Detailed Navi. Settings” .
5Select the items to be set.
Settings are available for pop-up infor-
mation, favorite POI categories, low fuel
warning, etc.
Page 155 of 409
154
5. SETUP
ES350/300h_Navi_OM33B43U_(U)14.06.23 09:44
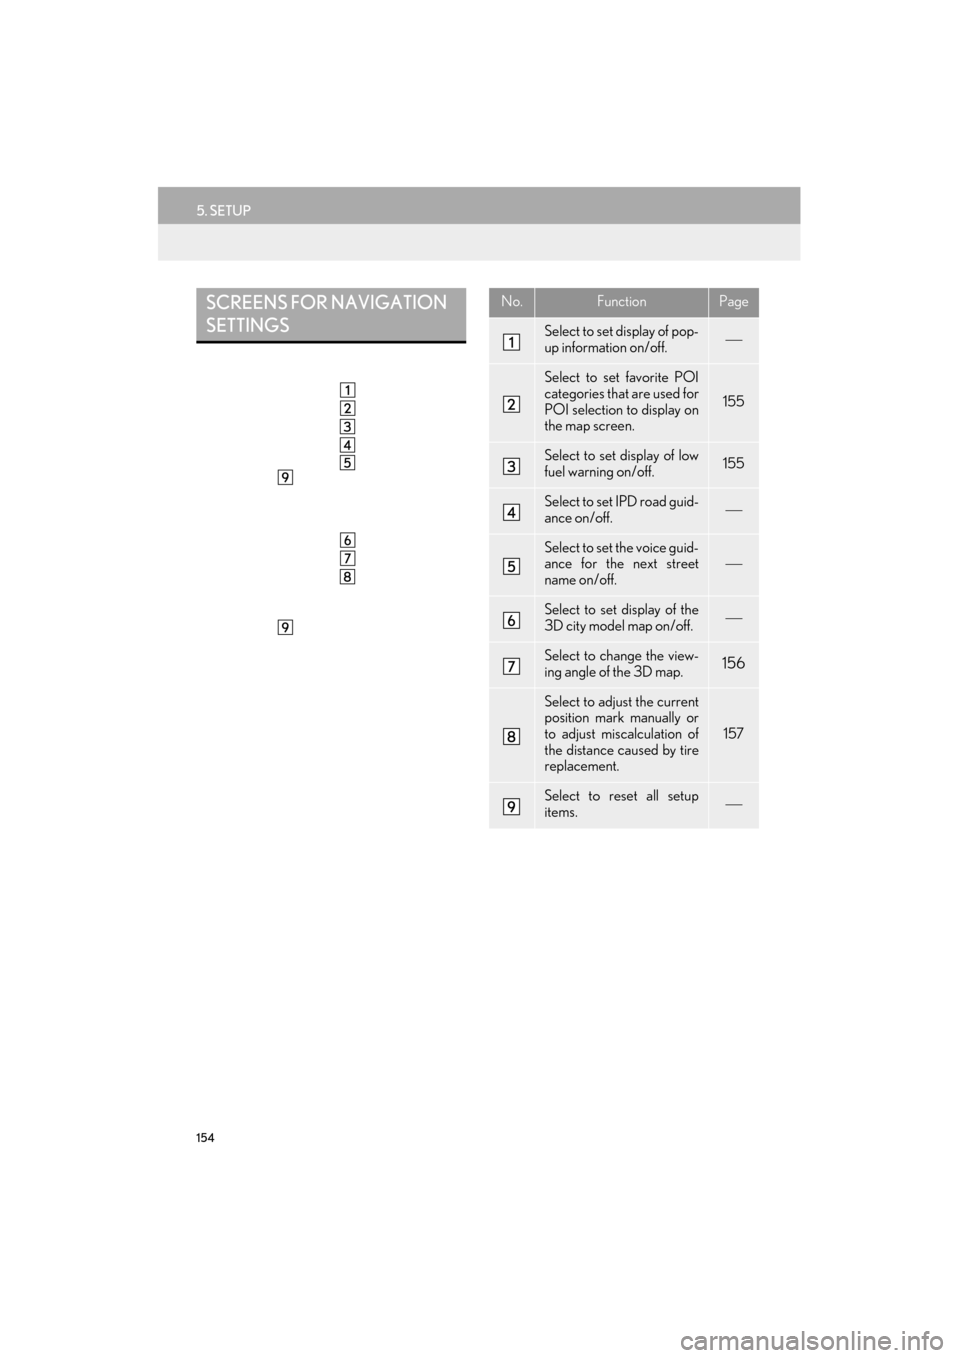
SCREENS FOR NAVIGATION
SETTINGSNo.FunctionPage
Select to set display of pop-
up information on/off.
Select to set favorite POI
categories that are used for
POI selection to display on
the map screen.
155
Select to set display of low
fuel warning on/off.155
Select to set IPD road guid-
ance on/off.
Select to set the voice guid-
ance for the next street
name on/off.
Select to set display of the
3D city model map on/off.
Select to change the view-
ing angle of the 3D map.156
Select to adjust the current
position mark manually or
to adjust miscalculation of
the distance caused by tire
replacement.
157
Select to reset all setup
items.
Page 156 of 409
155
5. SETUP
ES350/300h_Navi_OM33B43U_(U)14.06.23 09:44
NAVIGATION SYSTEM
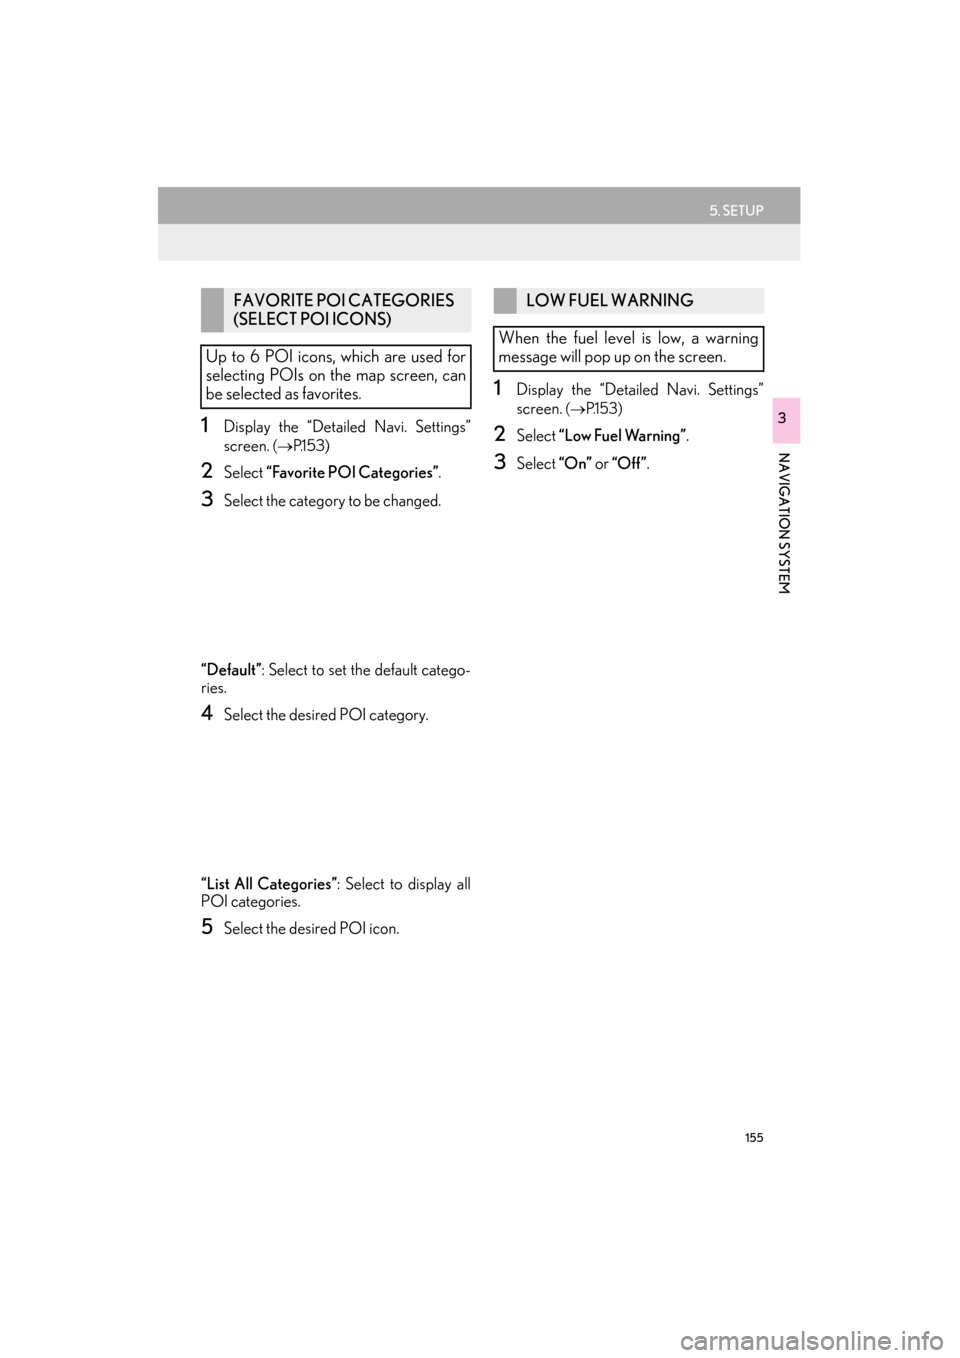
31Display the “Detailed Navi. Settings”
screen.
(→ P.1 5 3 )
2Select “Favorite POI Categories” .
3Select the category to be changed.
“Default” : Select to set the default catego-
ries.
4Select the desired POI category.
“List All Categories” : Select to display all
POI categories.
5Select the desired POI icon.
1Display the “Detailed Navi. Settings”
screen.
( → P.1 5 3 )
2Select “Low Fuel Warning” .
3Select “On” or “Off ” .
FAVORITE POI CATEGORIES
(SELECT POI ICONS)
Up to 6 POI icons, which are used for
selecting POIs on the map screen, can
be selected as favorites.LOW FUEL WARNING
When the fuel level is low, a warning
message will pop up on the screen.
Page 157 of 409
156
5. SETUP
ES350/300h_Navi_OM33B43U_(U)14.06.23 09:44
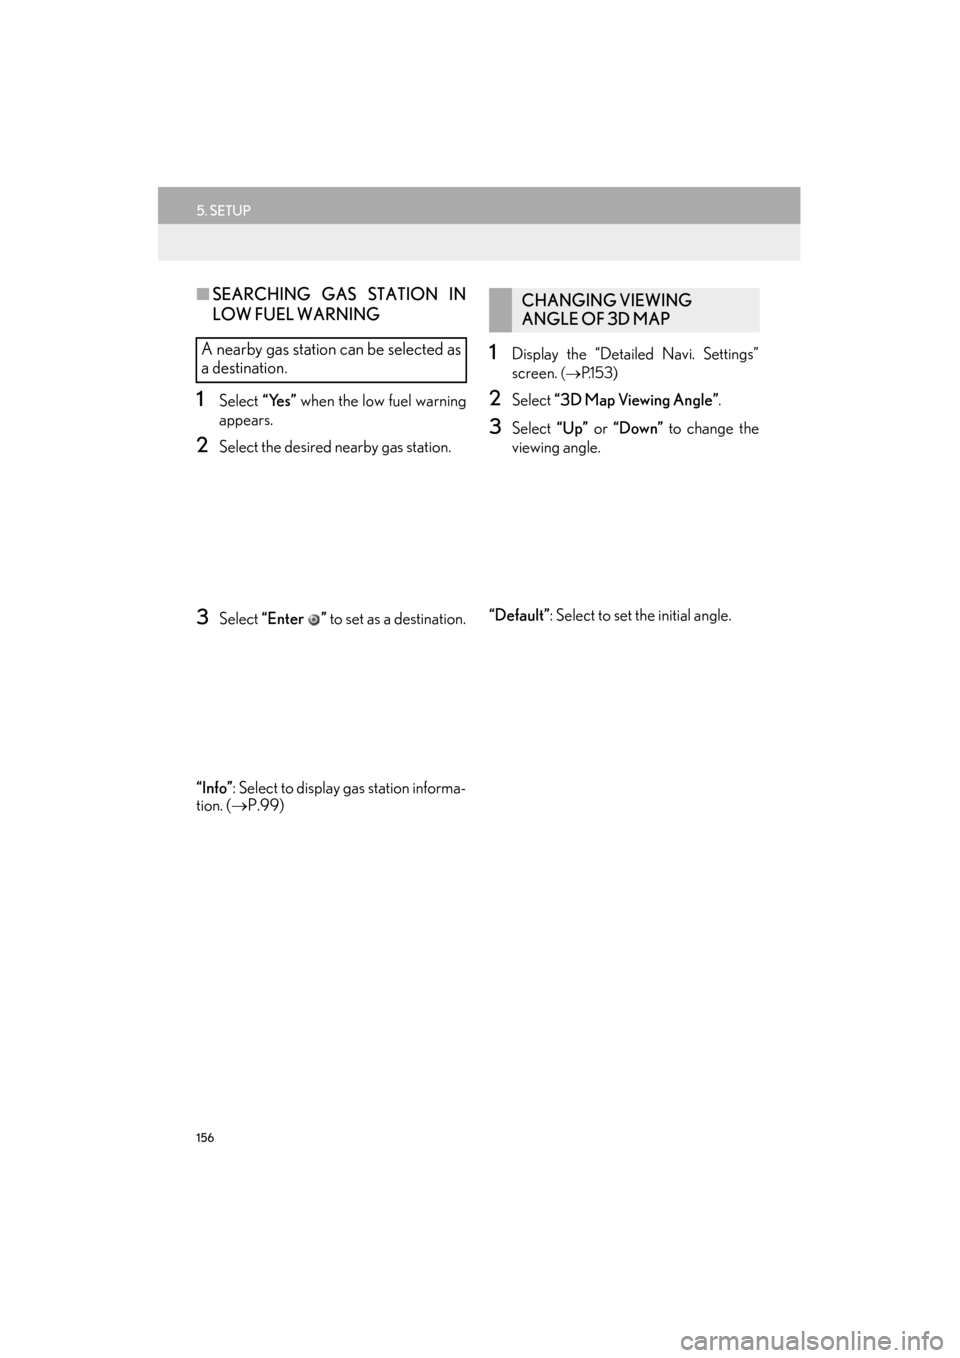
■SEARCHING GAS STATION IN
LOW FUEL WARNING
1Select “Yes” when the low fuel warning
appears.
2Select the desired nearby gas station.
3Select “Enter ” to set as a destination.
“Info” : Select to display gas station informa-
tion. ( →P.99)
1Display the “Detailed Navi. Settings”
screen.
(→ P.1 5 3 )
2Select “3D Map Viewing Angle” .
3Select “Up” or “Down” to change the
viewing angle.
“Default” : Select to set the initial angle.
A nearby gas station can be selected as
a destination.
CHANGING VIEWING
ANGLE OF 3D MAP
Page 158 of 409
157
5. SETUP
ES350/300h_Navi_OM33B43U_(U)14.06.23 09:44
NAVIGATION SYSTEM
3
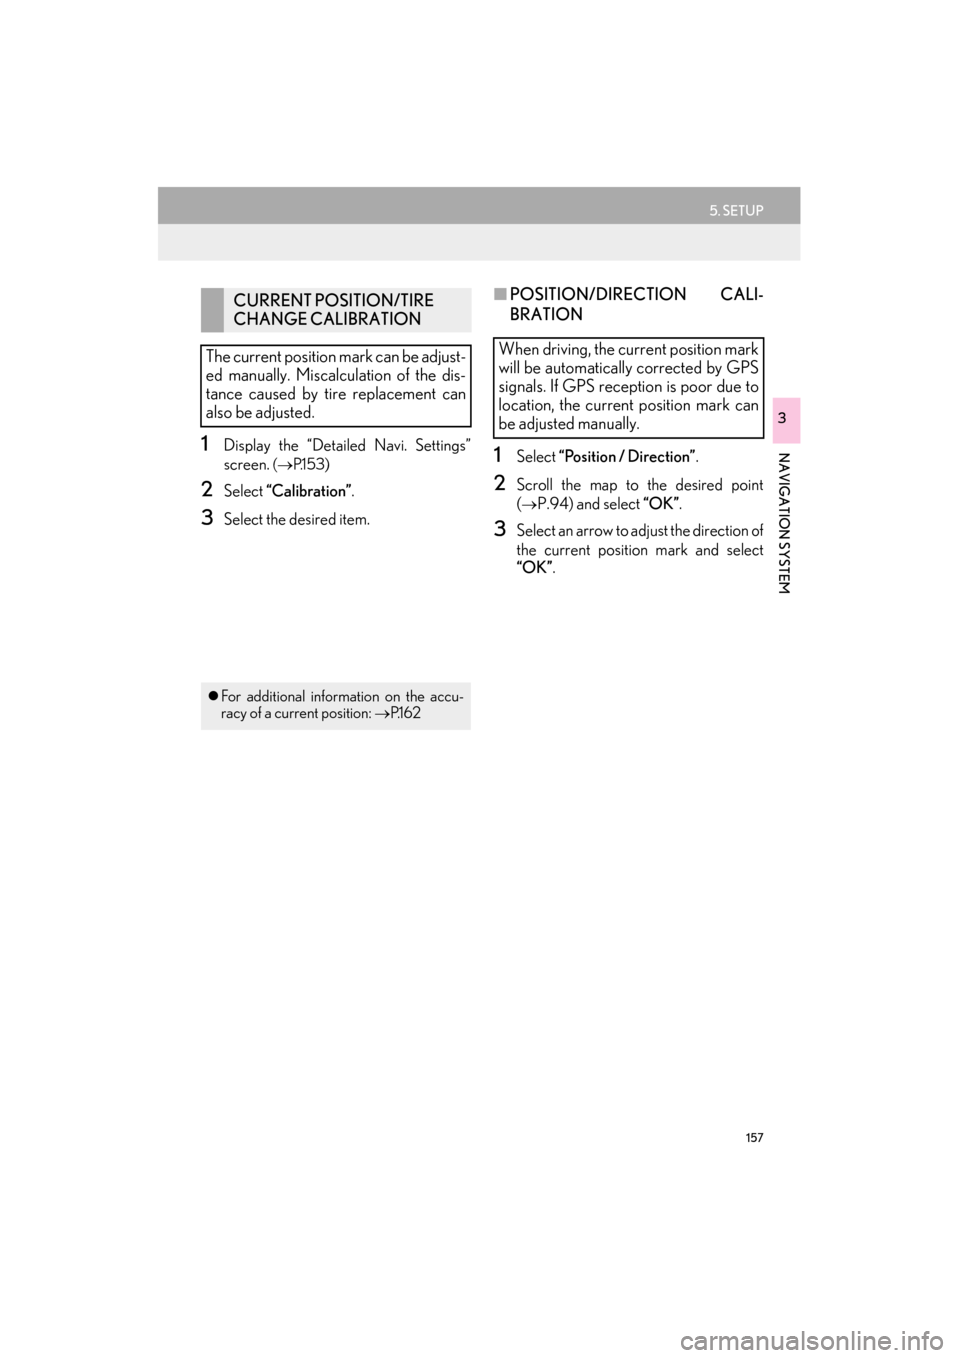
1Display the “Detailed Navi. Settings”
screen.
(→ P.1 5 3 )
2Select “Calibration” .
3Select the desired item.
■POSITION/DIRECTION CALI-
BRATION
1Select “Position / Direction” .
2Scroll the map to the desired point
(
→P.94) and select “OK” .
3Select an arrow to adjust the direction of
the current position mark and select
“OK”.
CURRENT POSITION/TIRE
CHANGE CALIBRATION
The current position mark can be adjust-
ed manually. Miscalculation of the dis-
tance caused by tire replacement can
also be adjusted.
�z For additional information on the accu-
racy of a current position: →P.1 6 2
When driving, the current position mark
will be automatically corrected by GPS
signals. If GPS reception is poor due to
location, the current position mark can
be adjusted manually.
Page 159 of 409
158
5. SETUP
ES350/300h_Navi_OM33B43U_(U)14.06.23 09:44
■TIRE CHANGE CALIBRATION
1Select “Tire Change” .
�zThe message appears and the quick dis-
tance calibration starts automatically.
The tire change calibration function will
be used when replacing the tires. This
function will adjust miscalculation
caused by the circumference difference
between the old and new tires.
INFORMATION
●
If this procedure is not performed when
the tires are replaced, the current posi-
tion mark may be incorrectly displayed.
Page 160 of 409
159
5. SETUP
ES350/300h_Navi_OM33B43U_(U)14.06.23 09:44
NAVIGATION SYSTEM
3
2. TRAFFIC SETTINGS
1Press the “MENU” button on the
Remote Touch.
2Select “Setup” .
3Select “Traffic” .
4Select the items to be set.
Traffic information such as traffic con-
gestion or traffic incident warnings can
be made available.
Trending: navigation update, audio, AUX, warning, remote start, power steering, reset
