Control actuator LEXUS LS430 2003 Factory Owners Manual
[x] Cancel search | Manufacturer: LEXUS, Model Year: 2003, Model line: LS430, Model: LEXUS LS430 2003Pages: 4500, PDF Size: 87.45 MB
Page 2787 of 4500
![LEXUS LS430 2003 Factory Owners Manual [OFF malfunction]
Both of the following conditions are met: OFF malfunctions (A) and (B)
OFF malfunction (A)
TYPICAL MALFUNCTION THRESHOLDS TABLE - OFF MALFUNCTION A
OFF malfunction (B)
TYPIC LEXUS LS430 2003 Factory Owners Manual [OFF malfunction]
Both of the following conditions are met: OFF malfunctions (A) and (B)
OFF malfunction (A)
TYPICAL MALFUNCTION THRESHOLDS TABLE - OFF MALFUNCTION A
OFF malfunction (B)
TYPIC](/img/36/57050/w960_57050-2786.png)
[OFF malfunction]
Both of the following conditions are met: OFF malfunctions (A) and (B)
OFF malfunction (A)
TYPICAL MALFUNCTION THRESHOLDS TABLE - OFF MALFUNCTION A
OFF malfunction (B)
TYPICAL MALFUNCTION THRESHOLDS TABLE - OFF MALFUNCTION B
[ON malfunction]
Both of the following conditions are met: ON malfunctions (A) and (B)
ON malfunction (A)
TYPICAL MALFUNCTION THRESHOLDS TABLE - ON MALFUNCTION A
ON malfunction (B)
TYPICAL MALFUNCTION THRESHOLDS TABLE - ON MALFUNCTION B
INSPECTION PROCEDURE
HINT:
Performing the ACTIVE TEST using the hand-held tester allows the relay, VSV, actuator and so on to operate
without parts removal. Performing the ACTIVE TEST as the first step of troubleshooting is one method to
shorten labor time.
It is possible to display the DATA LIST during the ACTIVE TEST.
a. Warm up the engine.
b. Turn the ignition switch off.
c. Connect the hand-held tester together with the CAN VIM (controller area network vehicle interface
module) to the DLC3.
Turbine speed/Output speed (NT/NO)1.23 or more and 1.48 or less (This means actual
gear is 3rd)
Turbine speed/Output speed (NT/NO)0.66 or more and 0.80 or less (This means actual
gear is 5th
Turbine speed/Output speed (NT/NO)0.50 or more and 0.64 or less (This means actual
gear is 6th)
Turbine speed/Output speed (NT/NO)0.50 or more and 0.64 or less (This means actual
gear is 6th)
Page 2795 of 4500
![LEXUS LS430 2003 Factory Owners Manual TYPICAL MALFUNCTION THRESHOLDS TABLE - OFF MALFUNCTION A
OFF malfunction (B)
TYPICAL MALFUNCTION THRESHOLDS TABLE - OFF MALFUNCTION B
[ON malfunction]
One of the following conditions is met: ON LEXUS LS430 2003 Factory Owners Manual TYPICAL MALFUNCTION THRESHOLDS TABLE - OFF MALFUNCTION A
OFF malfunction (B)
TYPICAL MALFUNCTION THRESHOLDS TABLE - OFF MALFUNCTION B
[ON malfunction]
One of the following conditions is met: ON](/img/36/57050/w960_57050-2794.png)
TYPICAL MALFUNCTION THRESHOLDS TABLE - OFF MALFUNCTION A
OFF malfunction (B)
TYPICAL MALFUNCTION THRESHOLDS TABLE - OFF MALFUNCTION B
[ON malfunction]
One of the following conditions is met: ON malfunctions (A), (B) and (C)
ON malfunction (A)
TYPICAL MALFUNCTION THRESHOLDS TABLE - ON MALFUNCTION A
ON malfunction (B)
TYPICAL MALFUNCTION THRESHOLDS TABLE - ON MALFUNCTION B
ON malfunction (C)
TYPICAL MALFUNCTION THRESHOLDS TABLE - ON MALFUNCTION C
INSPECTION PROCEDURE
HINT:
Performing the ACTIVE TEST using the hand-held tester allows the relay, VSV, actuator and so on to operate
without parts removal. Performing the ACTIVE TEST as the first step of troubleshooting is one method to
shorten labor time.
It is possible to display the DATA LIST during the ACTIVE TEST.
a. Warm up the engine.
b. Turn the ignition switch off.
c. Connect the han
d-held tester together with the CAN VIM (controller area network vehicle interface
Turbine speed/Output speed (NT/NO)0.93 or more and 1.07 or less (This means actual
gear is 3rd)
Turbine speed/Output speed (NT/NO)0.50 or more and 0.64 or less (This means actual
gear is 6th)
Turbine speed/Output speed (NT/NO)1.23 or more and 1.48 or less (This means actual
gear is 3rd)
Turbine speed - Output speed x 4th gear ratio (NT-
NO x 4th gear ratio)1,000 rpm or more
Turbine speed - Output speed x 5th gear ratio (NT-
NO x 5th gear ratio)1,000 rpm or more
Page 2804 of 4500
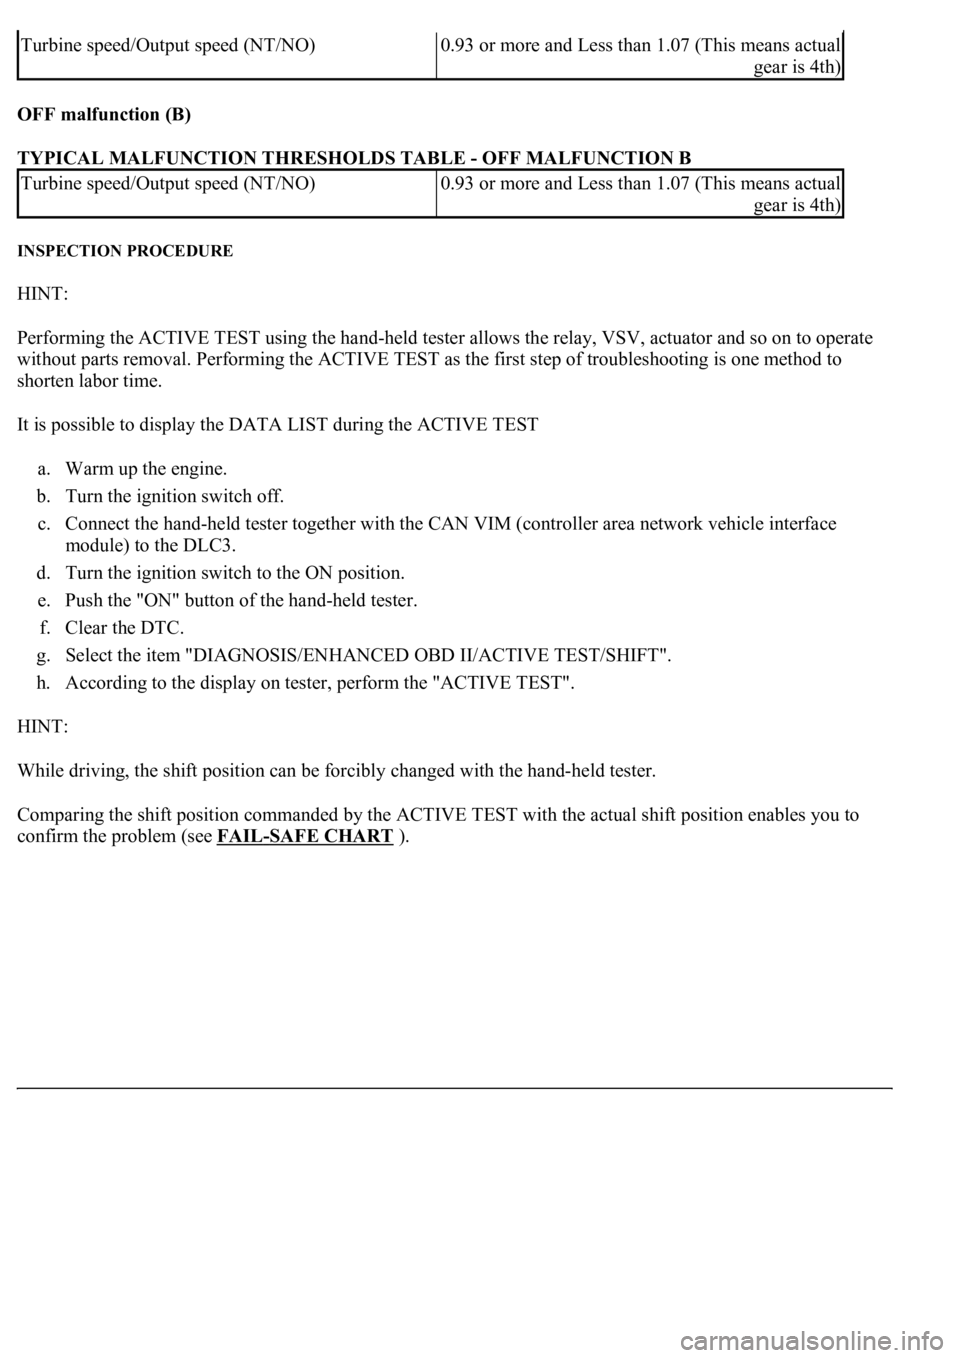
OFF malfunction (B)
TYPICAL MALFUNCTION THRESHOLDS TABLE - OFF MALFUNCTION B
INSPECTION PROCEDURE
HINT:
Performing the ACTIVE TEST using the hand-held tester allows the relay, VSV, actuator and so on to operate
without parts removal. Performing the ACTIVE TEST as the first step of troubleshooting is one method to
shorten labor time.
It is possible to display the DATA LIST during the ACTIVE TEST
a. Warm up the engine.
b. Turn the ignition switch off.
c. Connect the hand-held tester together with the CAN VIM (controller area network vehicle interface
module) to the DLC3.
d. Turn the ignition switch to the ON position.
e. Push the "ON" button of the hand-held tester.
f. Clear the DTC.
g. Select the item "DIAGNOSIS/ENHANCED OBD II/ACTIVE TEST/SHIFT".
h. According to the display on tester, perform the "ACTIVE TEST".
HINT:
While driving, the shift position can be forcibly changed with the hand-held tester.
Comparing the shift position commanded by the ACTIVE TEST with the actual shift position enables you to
confirm the problem (see FAIL
-SAFE CHART).
Turbine speed/Output speed (NT/NO)<00130011001c00160003005200550003005000520055004800030044005100470003002f00480056005600030057004b004400510003001400110013001a0003000b0037004b004c0056000300500048004400510056000300440046005700580044004f00
03[
gear is 4th)
Turbine speed/Output speed (NT/NO)<00130011001c00160003005200550003005000520055004800030044005100470003002f00480056005600030057004b004400510003001400110013001a0003000b0037004b004c0056000300500048004400510056000300440046005700580044004f00
03[
gear is 4th)
Page 2859 of 4500
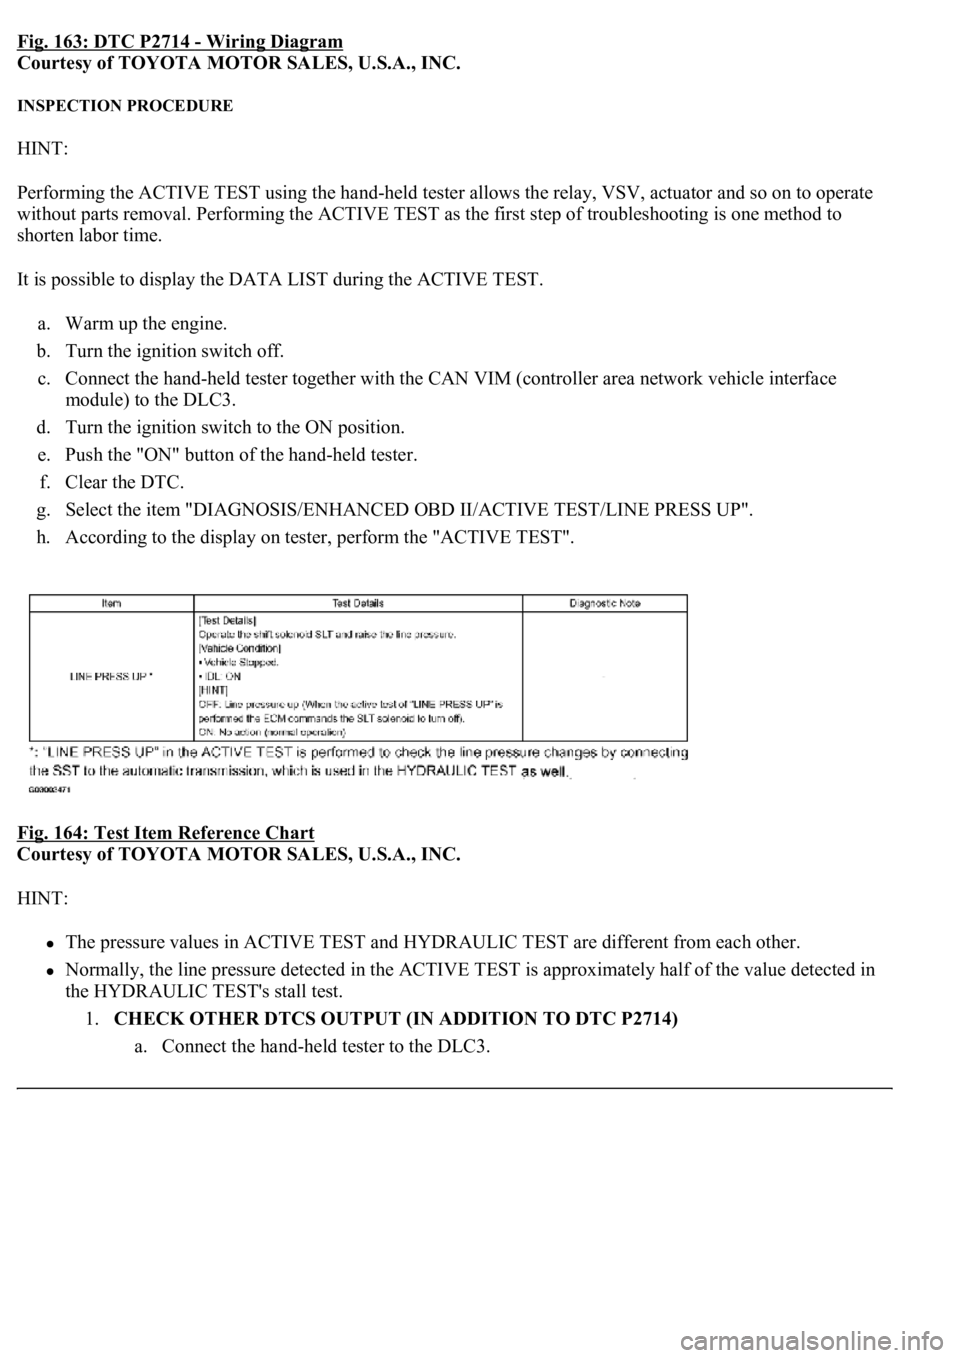
Fig. 163: DTC P2714 - Wiring Diagram
Courtesy of TOYOTA MOTOR SALES, U.S.A., INC.
INSPECTION PROCEDURE
HINT:
Performing the ACTIVE TEST using the hand-held tester allows the relay, VSV, actuator and so on to operate
without parts removal. Performing the ACTIVE TEST as the first step of troubleshooting is one method to
shorten labor time.
It is possible to display the DATA LIST during the ACTIVE TEST.
a. Warm up the engine.
b. Turn the ignition switch off.
c. Connect the hand-held tester together with the CAN VIM (controller area network vehicle interface
module) to the DLC3.
d. Turn the ignition switch to the ON position.
e. Push the "ON" button of the hand-held tester.
f. Clear the DTC.
g. Select the item "DIAGNOSIS/ENHANCED OBD II/ACTIVE TEST/LINE PRESS UP".
h. According to the display on tester, perform the "ACTIVE TEST".
Fig. 164: Test Item Reference Chart
Courtesy of TOYOTA MOTOR SALES, U.S.A., INC.
HINT:
The pressure values in ACTIVE TEST and HYDRAULIC TEST are different from each other.
Normally, the line pressure detected in the ACTIVE TEST is approximately half of the value detected in
the HYDRAULIC TEST's stall test.
1.CHECK OTHER DTCS OUTPUT (IN ADDITION TO DTC P2714)
a. Connect the han
d-held tester to the DLC3.
Page 2943 of 4500
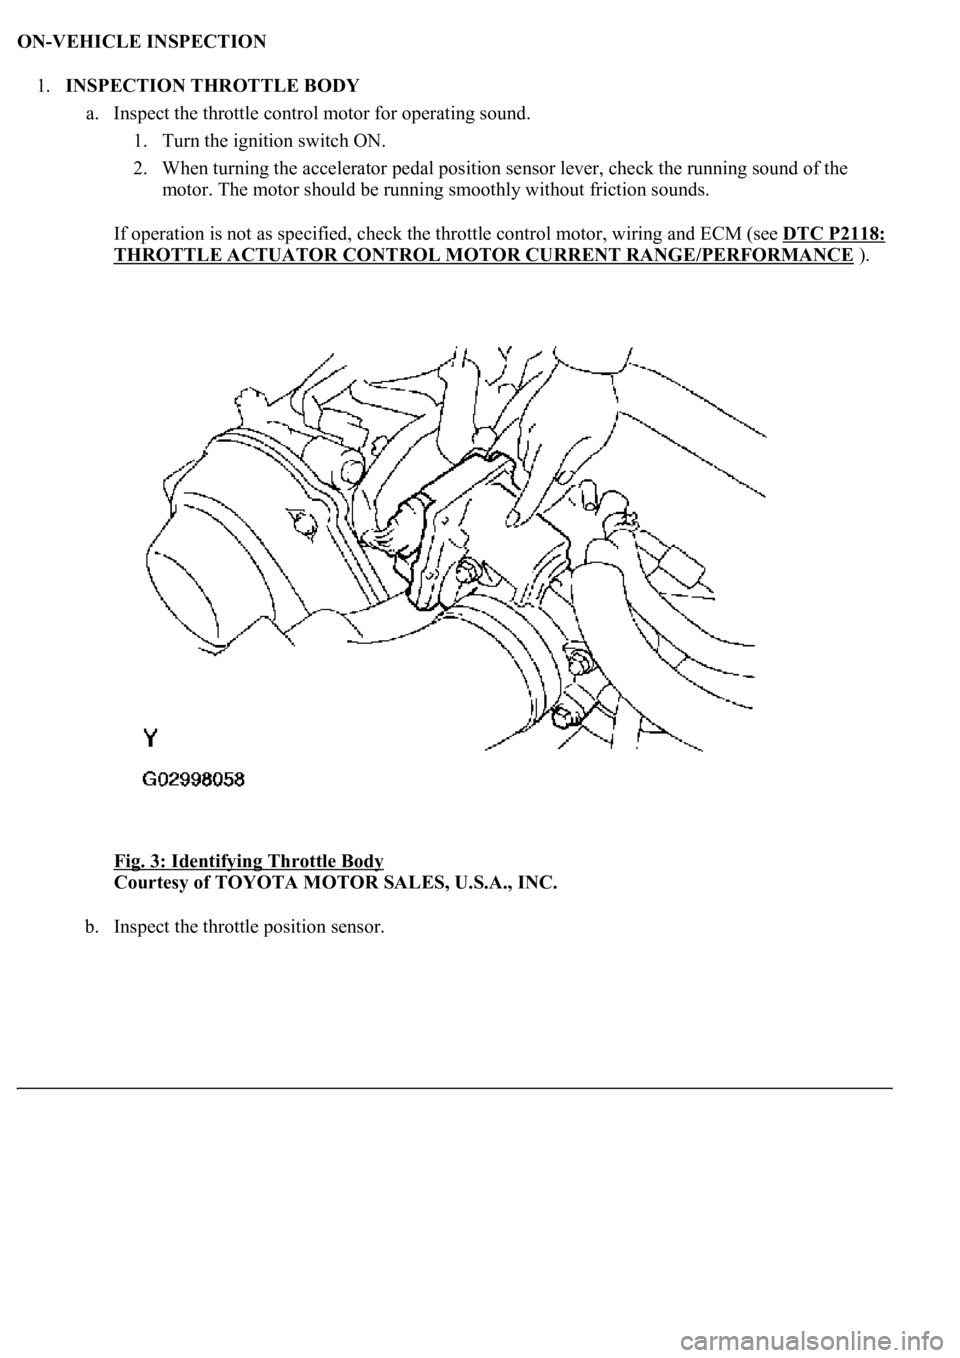
ON-VEHICLE INSPECTION
1.INSPECTION THROTTLE BODY
a. Inspect the throttle control motor for operating sound.
1. Turn the ignition switch ON.
2. When turning the accelerator pedal position sensor lever, check the running sound of the
motor. The motor should be running smoothly without friction sounds.
If operation is not as specified, check the throttle control motor, wiring and ECM (see DTC P2118:
THROTTLE ACTUATOR CONTROL MOTOR CURRENT RANGE/PERFORMANCE ).
Fig. 3: Identifying Throttle Body
Courtesy of TOYOTA MOTOR SALES, U.S.A., INC.
b. Inspect the throttle position sensor.
Page 3198 of 4500
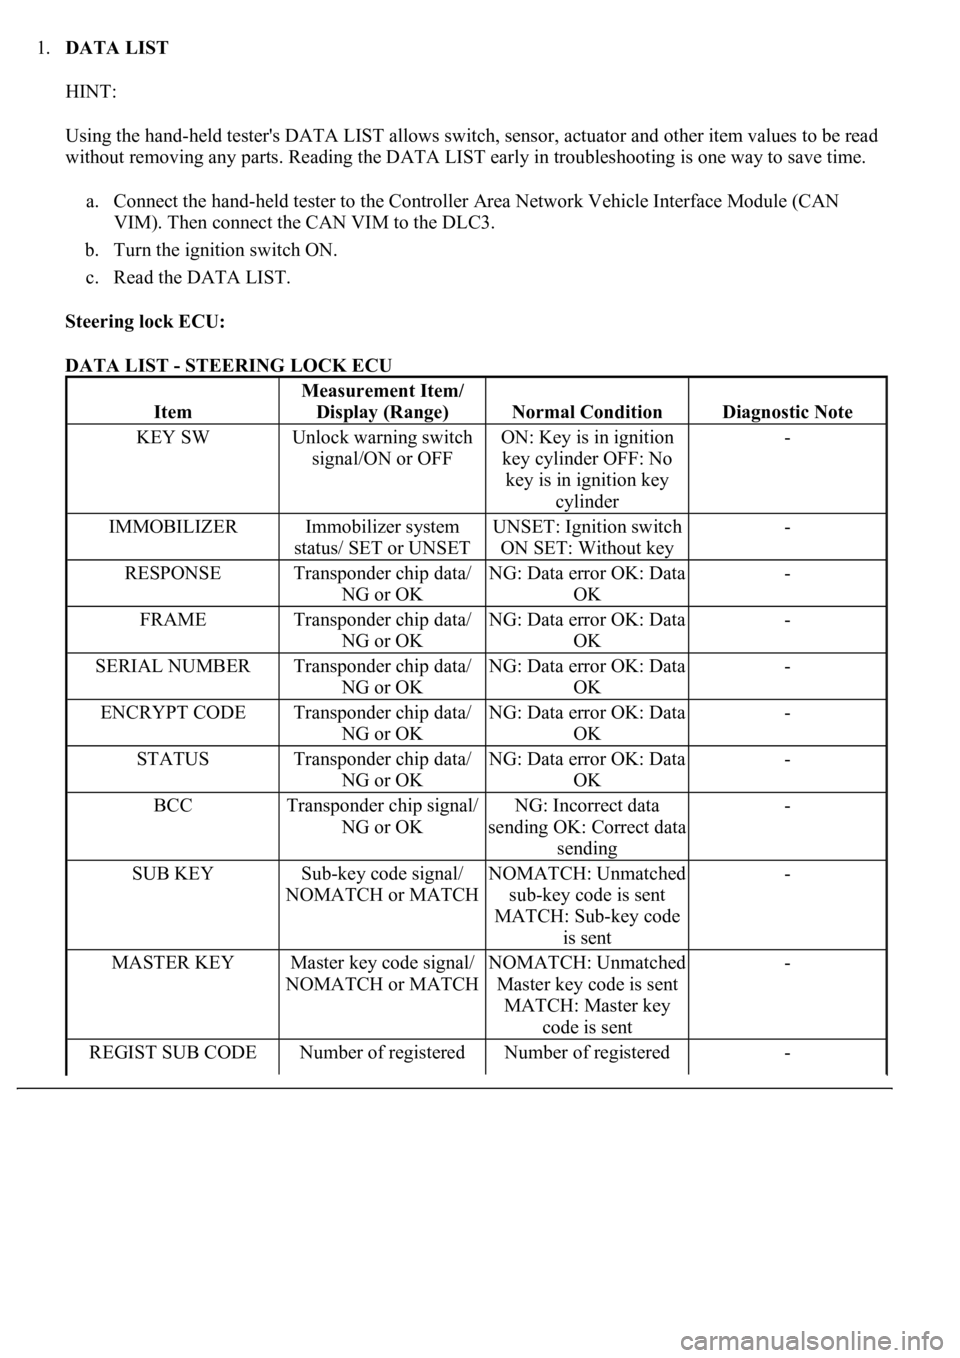
1.DATA LIST
HINT:
Using the hand-held tester's DATA LIST allows switch, sensor, actuator and other item values to be read
without removing any parts. Reading the DATA LIST early in troubleshooting is one way to save time.
a. Connect the hand-held tester to the Controller Area Network Vehicle Interface Module (CAN
VIM). Then connect the CAN VIM to the DLC3.
b. Turn the ignition switch ON.
c. Read the DATA LIST.
Steering lock ECU:
DATA LIST - STEERING LOCK ECU
Item
Measurement Item/
Display (Range)
Normal ConditionDiagnostic Note
KEY SWUnlock warning switch
signal/ON or OFFON: Key is in ignition
key cylinder OFF: No
key is in ignition key
cylinder-
IMMOBILIZERImmobilizer system
status/ SET or UNSETUNSET: Ignition switch
ON SET: Without key-
RESPONSETransponder chip data/
NG or OKNG: Data error OK: Data
OK-
FRAMETransponder chip data/
NG or OKNG: Data error OK: Data
OK-
SERIAL NUMBERTransponder chip data/
NG or OKNG: Data error OK: Data
OK-
ENCRYPT CODETransponder chip data/
NG or OKNG: Data error OK: Data
OK-
STATUSTransponder chip data/
NG or OKNG: Data error OK: Data
OK-
BCCTransponder chip signal/
NG or OKNG: Incorrect data
sending OK: Correct data
sending-
SUB KEYSub-key code signal/
NOMATCH or MATCHNOMATCH: Unmatched
sub-key code is sent
MATCH: Sub-key code
is sent-
MASTER KEYMaster key code signal/
NOMATCH or MATCHNOMATCH: Unmatched
Master key code is sent
MATCH: Master key
code is sent-
REGIST SUB CODENumber of registered Number of registered -
Page 3253 of 4500
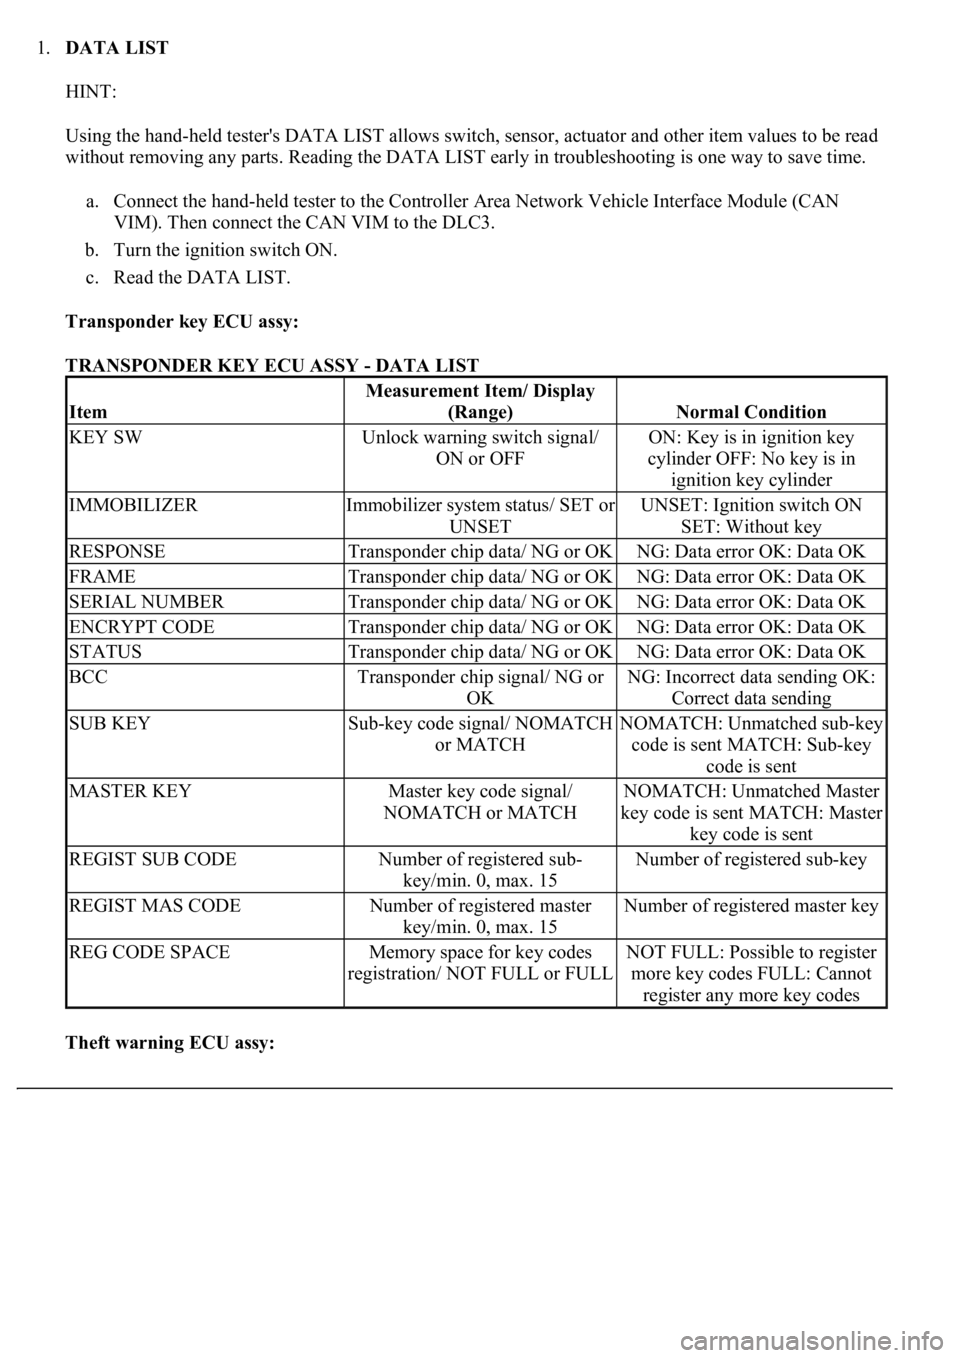
1.DATA LIST
HINT:
Using the hand-held tester's DATA LIST allows switch, sensor, actuator and other item values to be read
without removing any parts. Reading the DATA LIST early in troubleshooting is one way to save time.
a. Connect the hand-held tester to the Controller Area Network Vehicle Interface Module (CAN
VIM). Then connect the CAN VIM to the DLC3.
b. Turn the ignition switch ON.
c. Read the DATA LIST.
Transponder key ECU assy:
TRANSPONDER KEY ECU ASSY - DATA LIST
Theft warning ECU assy:
Item
Measurement Item/ Display
(Range)
Normal Condition
KEY SWUnlock warning switch signal/
ON or OFFON: Key is in ignition key
cylinder OFF: No key is in
ignition key cylinder
IMMOBILIZERImmobilizer system status/ SET or
UNSETUNSET: Ignition switch ON
SET: Without key
RESPONSETransponder chip data/ NG or OKNG: Data error OK: Data OK
FRAMETransponder chip data/ NG or OKNG: Data error OK: Data OK
SERIAL NUMBERTransponder chip data/ NG or OKNG: Data error OK: Data OK
ENCRYPT CODETransponder chip data/ NG or OKNG: Data error OK: Data OK
STATUSTransponder chip data/ NG or OKNG: Data error OK: Data OK
BCCTransponder chip signal/ NG or
OKNG: Incorrect data sending OK:
Correct data sending
SUB KEYSub-key code signal/ NOMATCH
or MATCHNOMATCH: Unmatched sub-key
code is sent MATCH: Sub-key
code is sent
MASTER KEYMaster key code signal/
NOMATCH or MATCHNOMATCH: Unmatched Master
key code is sent MATCH: Master
key code is sent
REGIST SUB CODENumber of registered sub-
key/min. 0, max. 15Number of registered sub-key
REGIST MAS CODENumber of registered master
key/min. 0, max. 15Number of registered master key
REG CODE SPACEMemory space for key codes
registration/ NOT FULL or FULLNOT FULL: Possible to register
more key codes FULL: Cannot
register any more key codes
Page 4009 of 4500
REPLACEMENT
HINT:
Use the same procedures for the RH side and LH side.
The procedures listed below are for the LH side.
1.REMOVE FRONT WHEELS
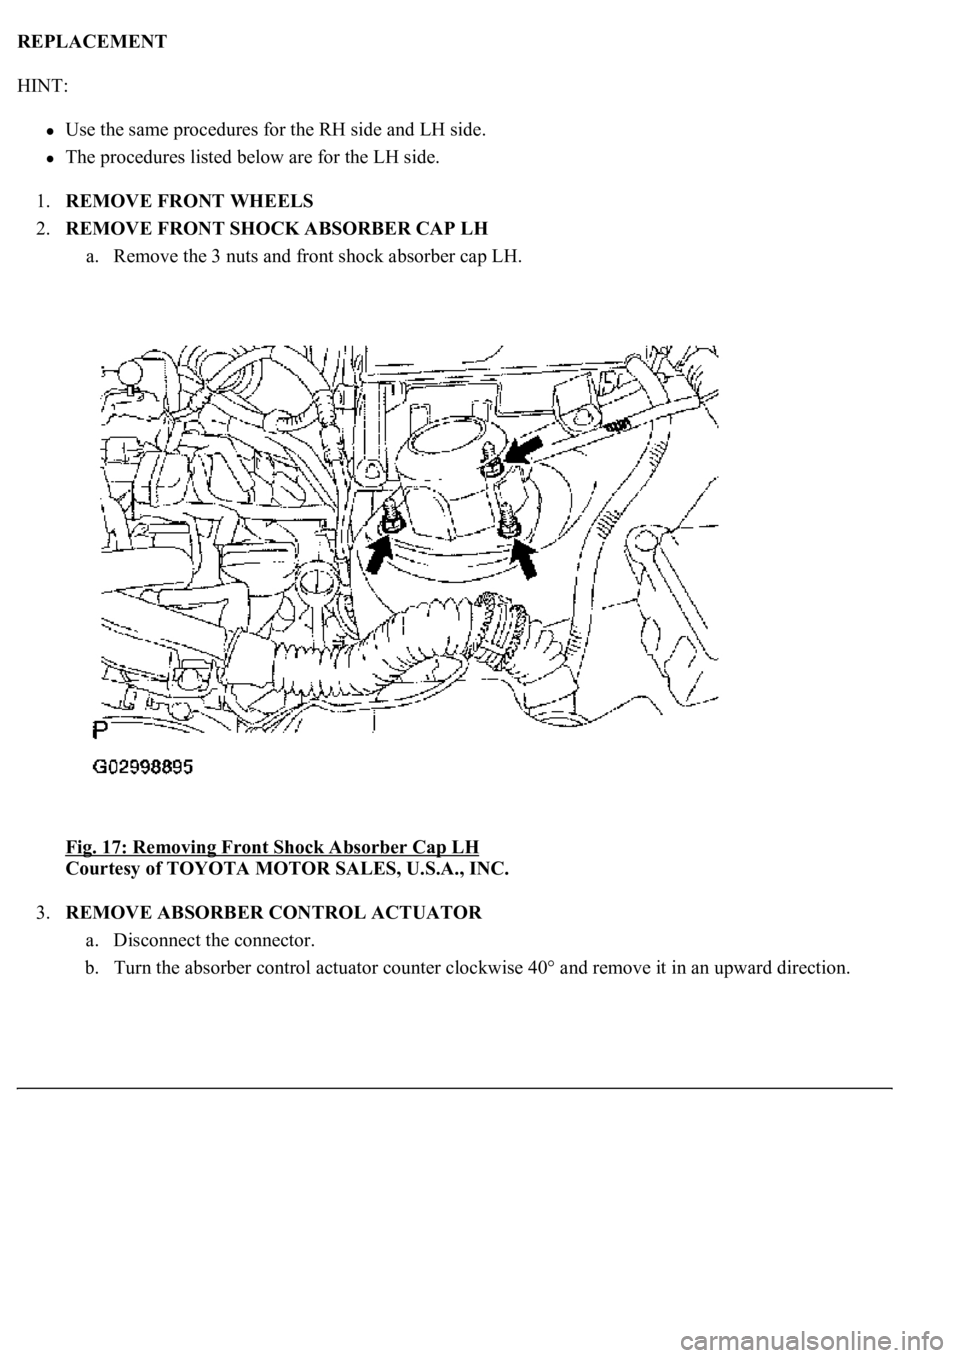
2.REMOVE FRONT SHOCK ABSORBER CAP LH
a. Remove the 3 nuts and front shock absorber cap LH.
Fig. 17: Removing Front Shock Absorber Cap LH
Courtesy of TOYOTA MOTOR SALES, U.S.A., INC.
3.REMOVE ABSORBER CONTROL ACTUATOR
a. Disconnect the connector.
b. Turn the absorber control actuator counter clockwise 40° and remove it in an upward direction.
Page 4010 of 4500
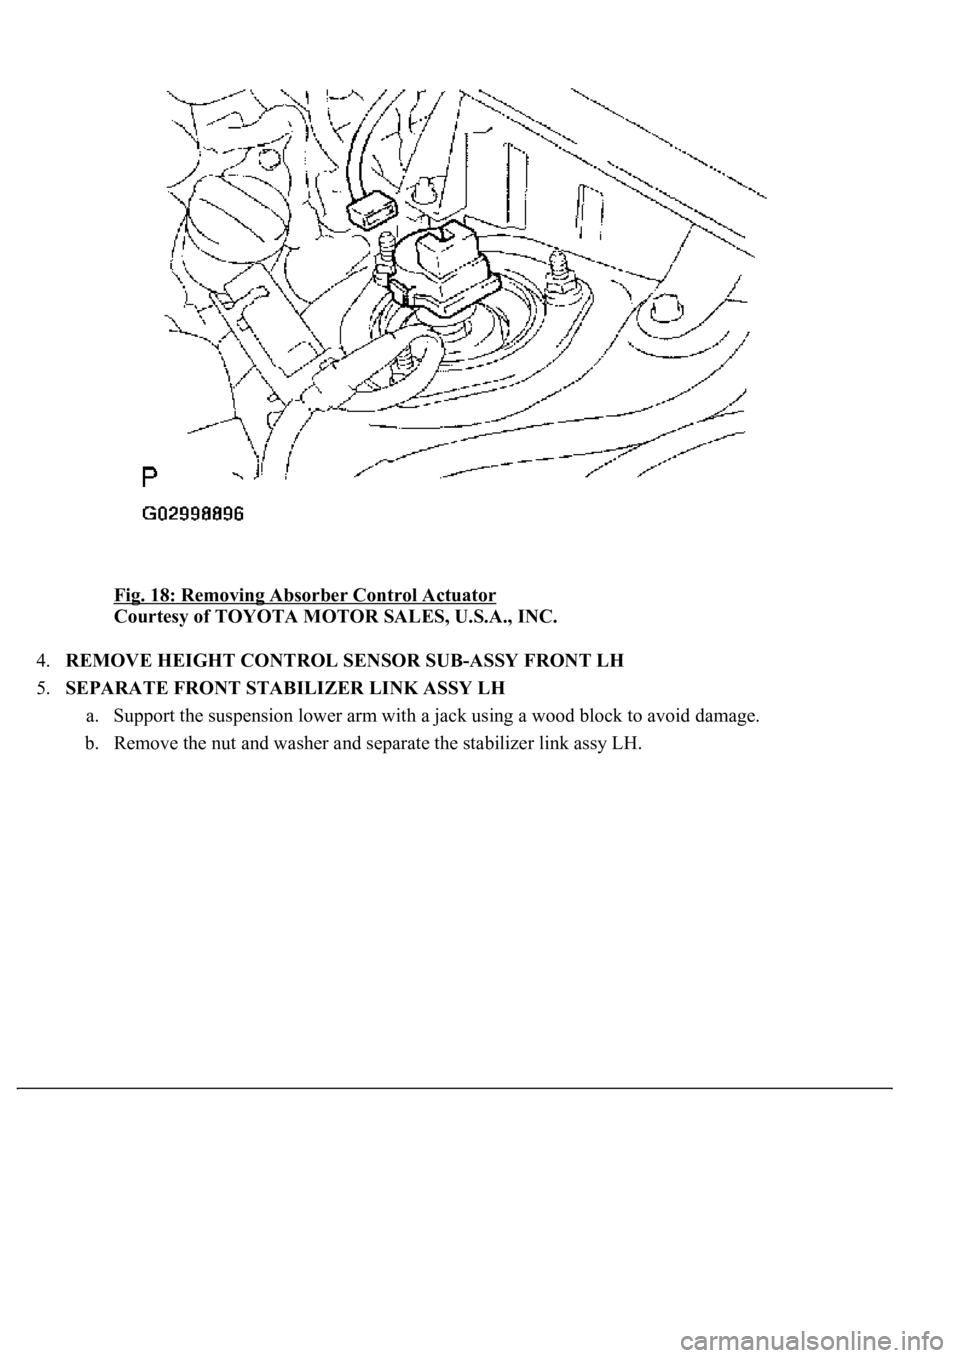
Fig. 18: Removing Absorber Control Actuator
Courtesy of TOYOTA MOTOR SALES, U.S.A., INC.
4.REMOVE HEIGHT CONTROL SENSOR SUB-ASSY FRONT LH
5.SEPARATE FRONT STABILIZER LINK ASSY LH
a. Support the suspension lower arm with a jack using a wood block to avoid damage.
b. Remove the nut and washer and separate the stabilizer link assy LH.
Page 4019 of 4500
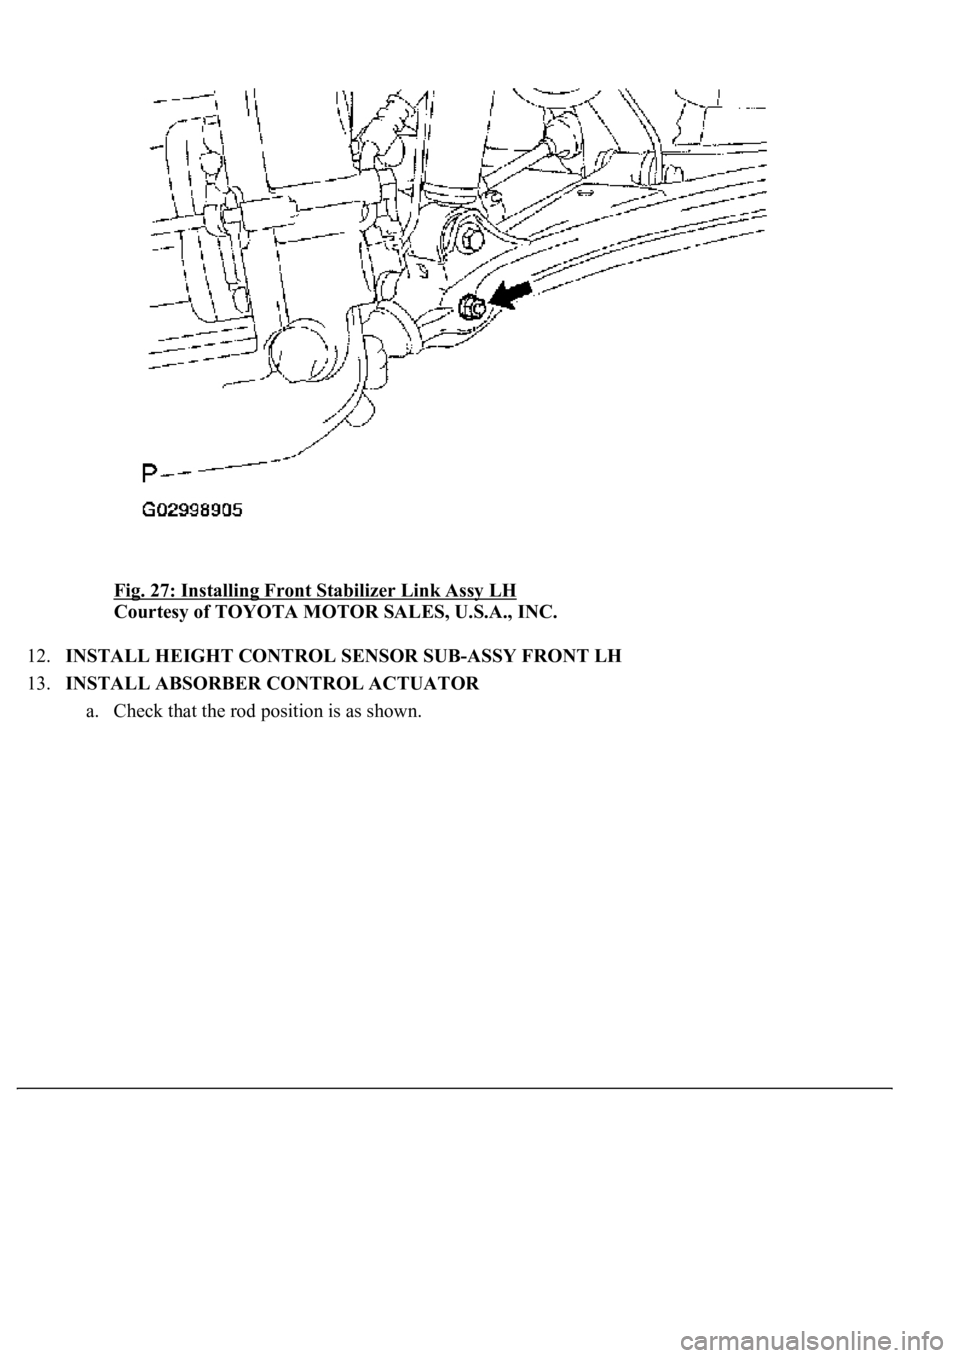
Fig. 27: Installing Front Stabilizer Link Assy LH
Courtesy of TOYOTA MOTOR SALES, U.S.A., INC.
12.INSTALL HEIGHT CONTROL SENSOR SUB-ASSY FRONT LH
13.INSTALL ABSORBER CONTROL ACTUATOR
a. Check that the rod position is as shown.