battery LEXUS LS430 2003 Factory Service Manual
[x] Cancel search | Manufacturer: LEXUS, Model Year: 2003, Model line: LS430, Model: LEXUS LS430 2003Pages: 4500, PDF Size: 87.45 MB
Page 550 of 4500
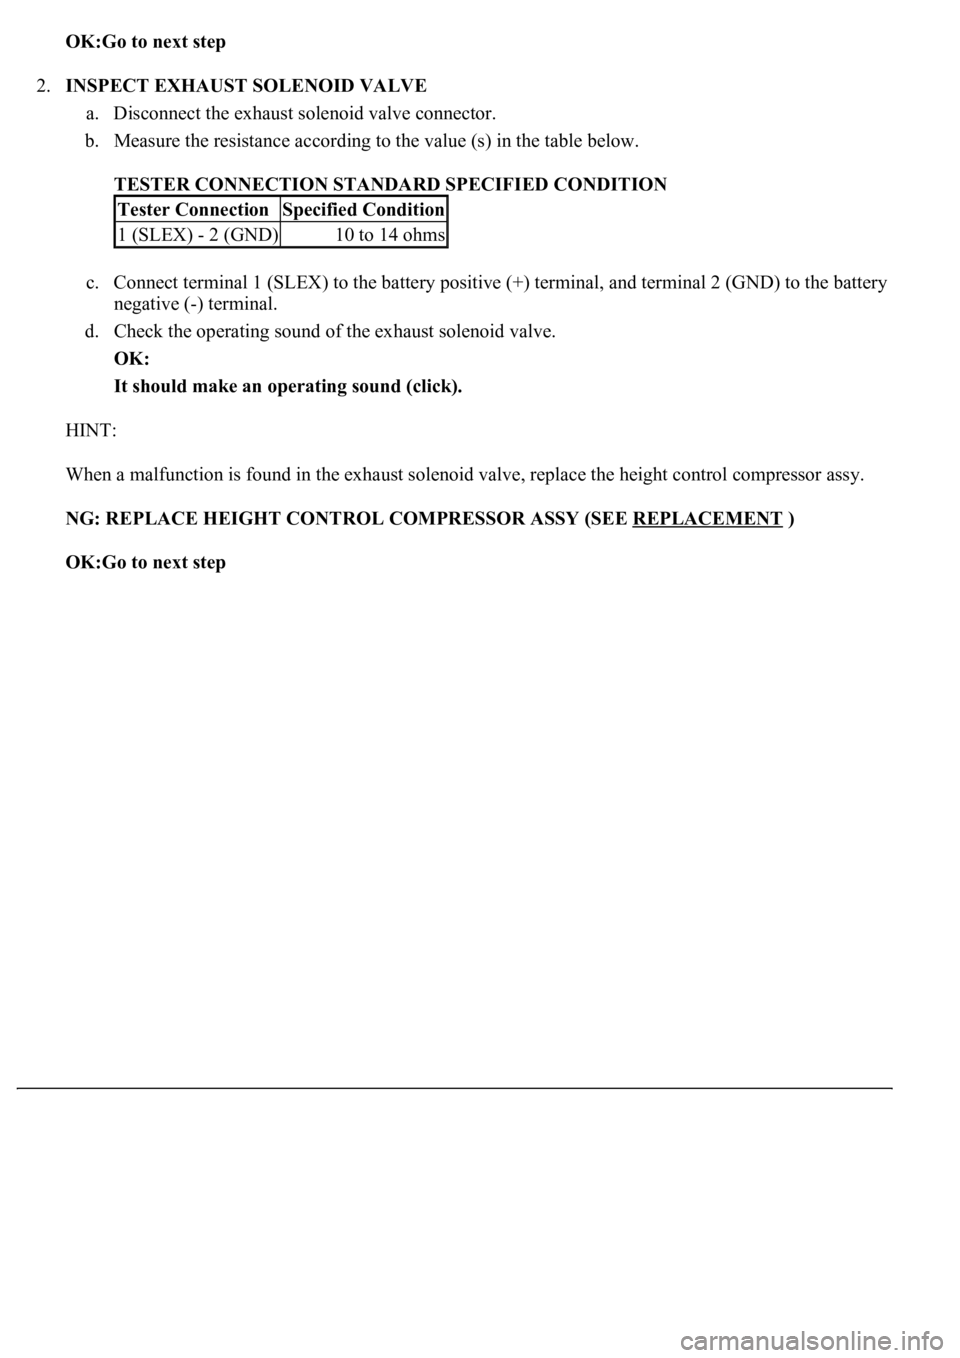
OK:Go to next step
2.INSPECT EXHAUST SOLENOID VALVE
a. Disconnect the exhaust solenoid valve connector.
b. Measure the resistance according to the value (s) in the table below.
TESTER CONNECTION STANDARD SPECIFIED CONDITION
c. Connect terminal 1 (SLEX) to the battery positive (+) terminal, and terminal 2 (GND) to the battery
negative (-) terminal.
d. Check the operating sound of the exhaust solenoid valve.
OK:
It should make an operating sound (click).
HINT:
When a malfunction is found in the exhaust solenoid valve, replace the height control compressor assy.
NG: REPLACE HEIGHT CONTROL COMPRESSOR ASSY (SEE REPLACEMENT
)
OK:Go to next step
Tester ConnectionSpecified Condition
1 (SLEX) - 2 (GND)10 to 14 ohms
Page 558 of 4500
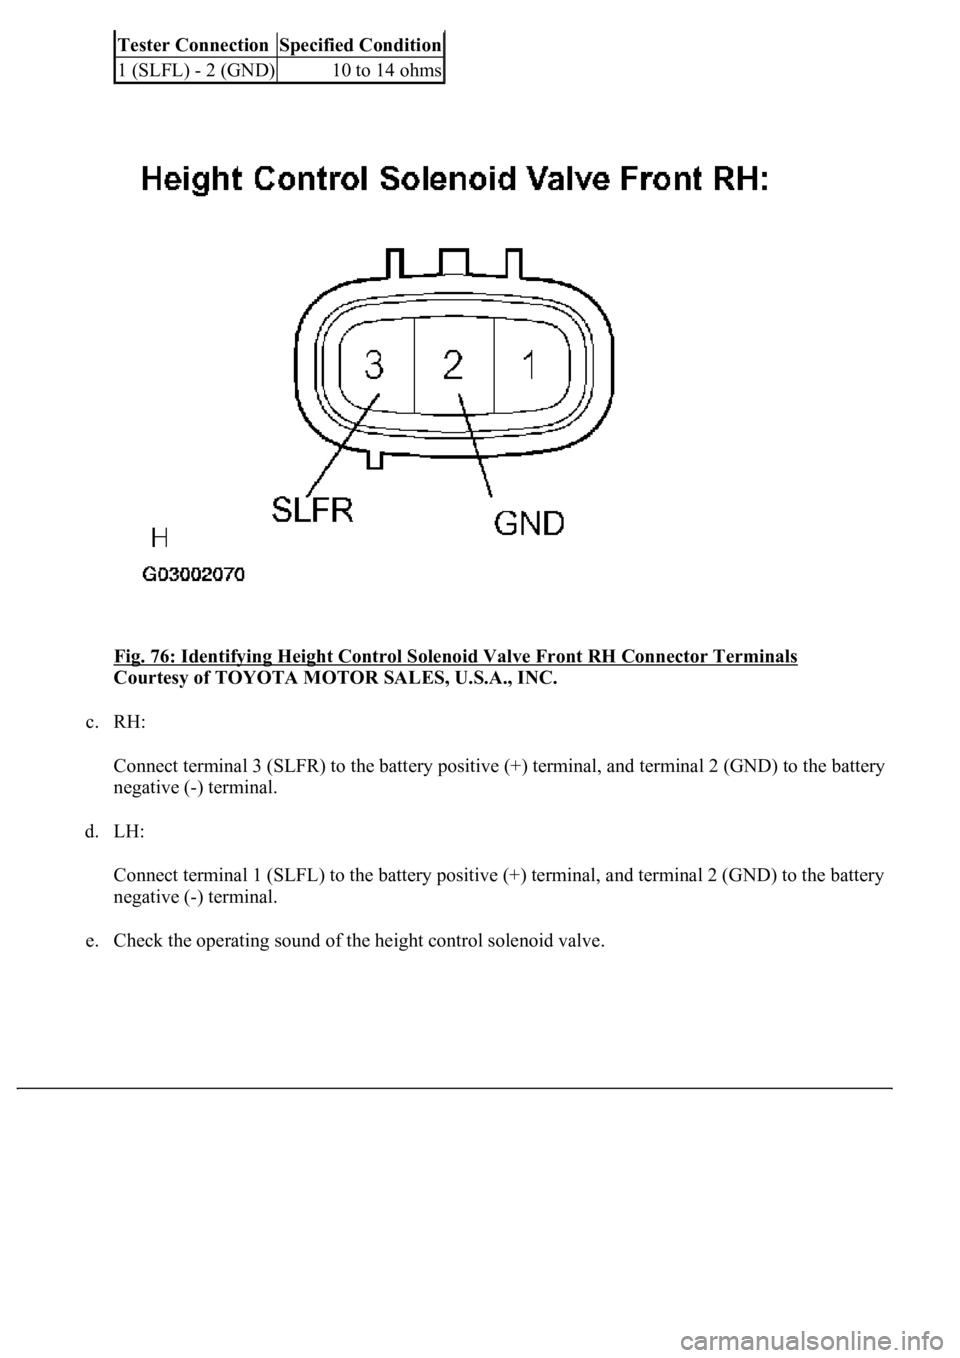
Fig. 76: Identifying Height Control Solenoid Valve Front RH Connector Terminals
Courtesy of TOYOTA MOTOR SALES, U.S.A., INC.
c. RH:
Connect terminal 3 (SLFR) to the battery positive (+) terminal, and terminal 2 (GND) to the battery
negative (-) terminal.
d. LH:
Connect terminal 1 (SLFL) to the battery positive (+) terminal, and terminal 2 (GND) to the battery
negative (-) terminal.
e. Check the operating sound of the height control solenoid valve.
Tester ConnectionSpecified Condition
1 (SLFL) - 2 (GND)10 to 14 ohms
Page 560 of 4500
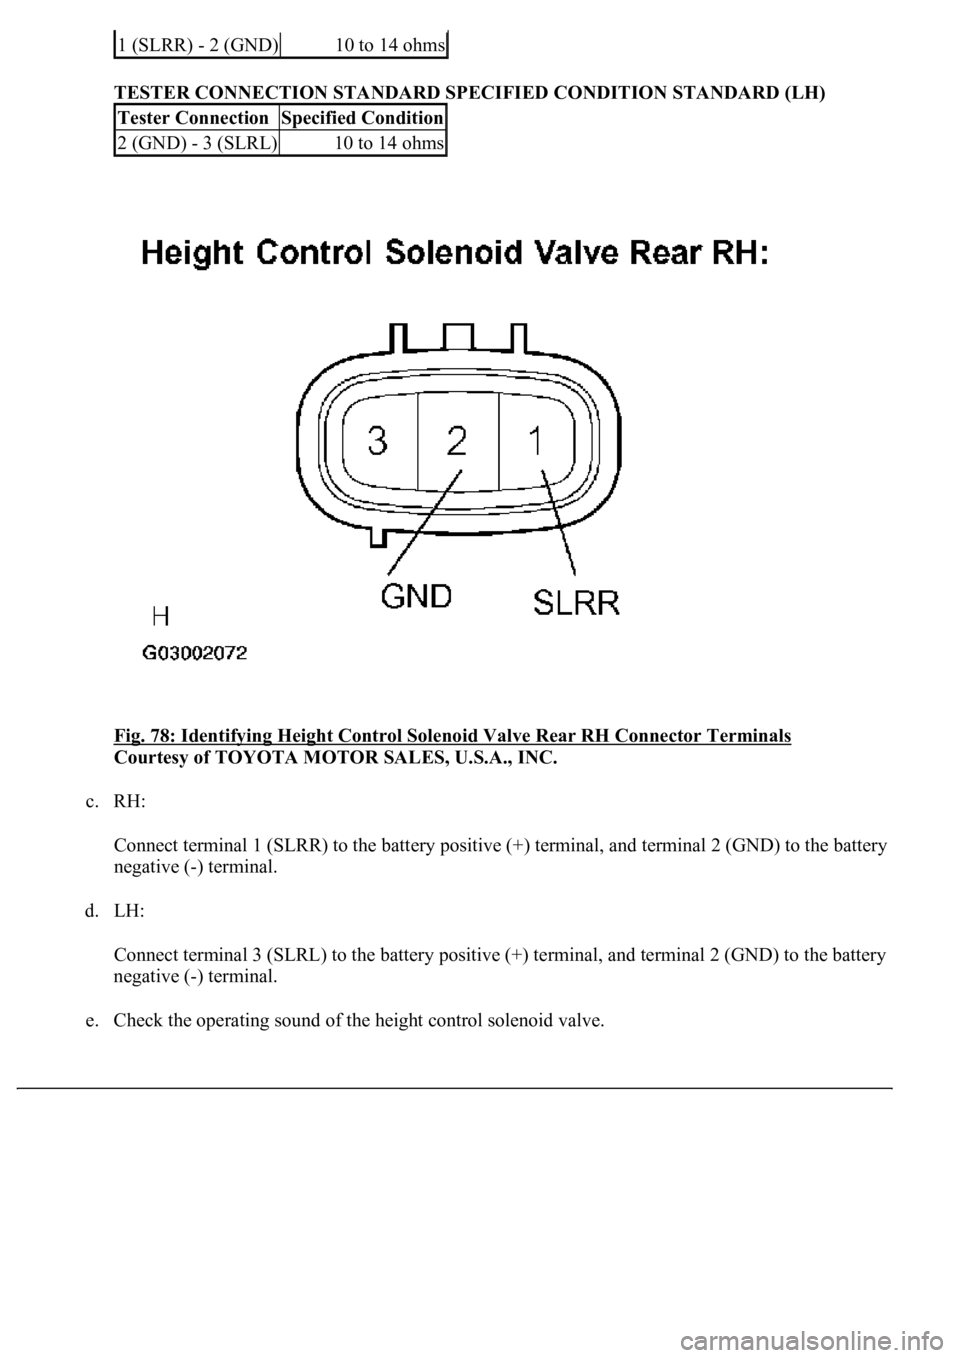
TESTER CONNECTION STANDARD SPECIFIED CONDITION STANDARD (LH)
Fig. 78: Identifying Height Control Solenoid Valve Rear RH Connector Terminals
Courtesy of TOYOTA MOTOR SALES, U.S.A., INC.
c. RH:
Connect terminal 1 (SLRR) to the battery positive (+) terminal, and terminal 2 (GND) to the battery
negative (-) terminal.
d. LH:
Connect terminal 3 (SLRL) to the battery positive (+) terminal, and terminal 2 (GND) to the battery
negative (-) terminal.
e. Check the operatin
g sound of the height control solenoid valve.
1 (SLRR) - 2 (GND)10 to 14 ohms
Tester ConnectionSpecified Condition
2 (GND) - 3 (SLRL)10 to 14 ohms
Page 568 of 4500
POWER SOURCE CIRCUIT ) is displayed, carry out the necessary inspection. If they are output at the
same time, carry out the necessary inspection for DTC C1774 first.
NG: REPAIR CIRCUIT INDICATED BY OUTPUT CODE
OK:Go to next step
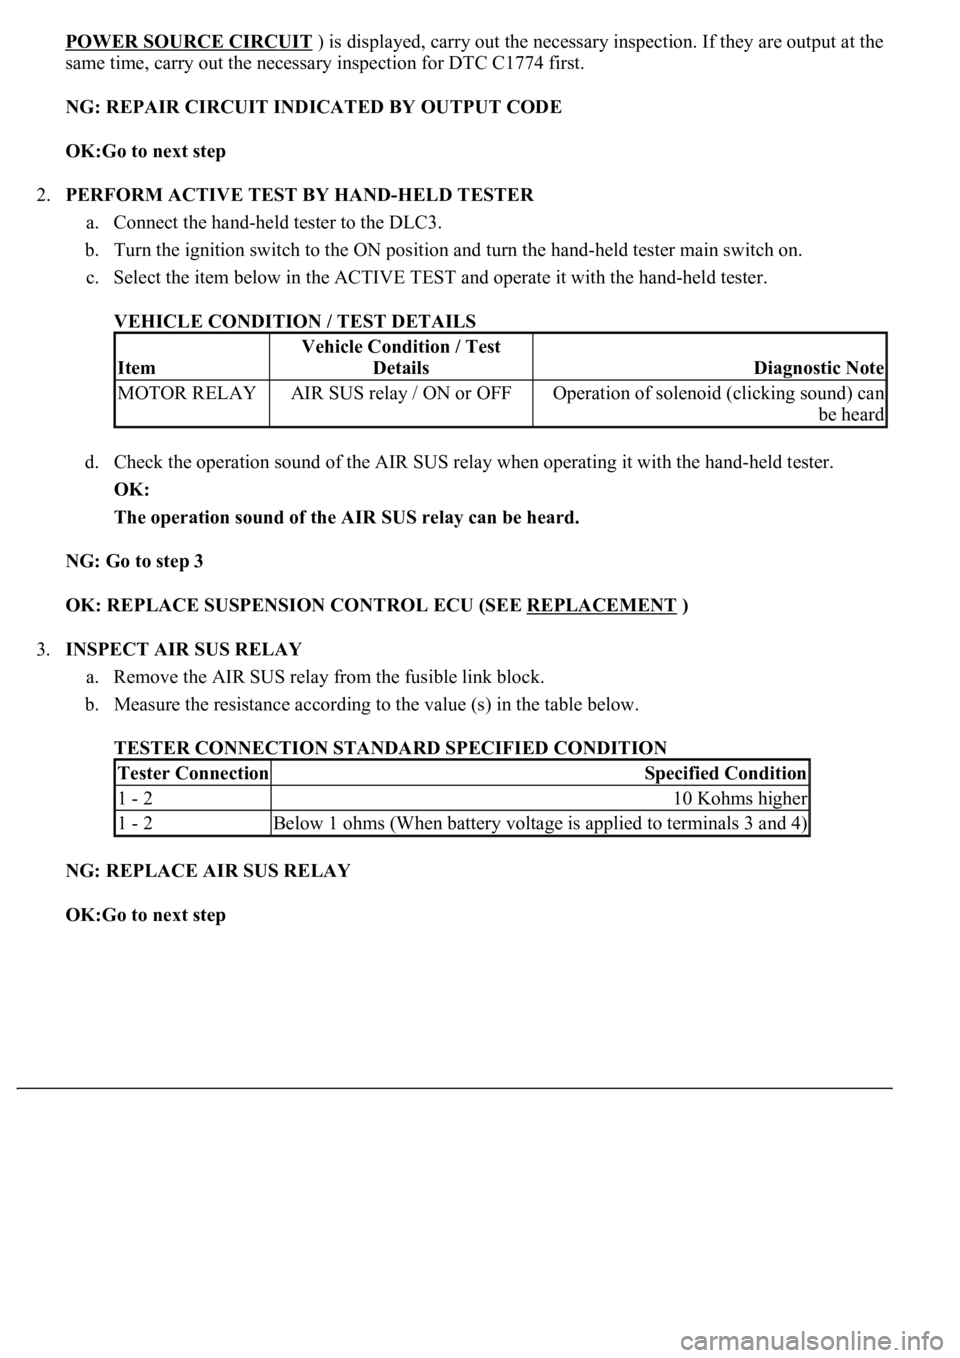
2.PERFORM ACTIVE TEST BY HAND-HELD TESTER
a. Connect the hand-held tester to the DLC3.
b. Turn the ignition switch to the ON position and turn the hand-held tester main switch on.
c. Select the item below in the ACTIVE TEST and operate it with the hand-held tester.
VEHICLE CONDITION / TEST DETAILS
d. Check the operation sound of the AIR SUS relay when operating it with the hand-held tester.
OK:
The operation sound of the AIR SUS relay can be heard.
NG: Go to step 3
OK: REPLACE SUSPENSION CONTROL ECU (SEE REPLACEMENT
)
3.INSPECT AIR SUS RELAY
a. Remove the AIR SUS relay from the fusible link block.
b. Measure the resistance according to the value (s) in the table below.
TESTER CONNECTION STANDARD SPECIFIED CONDITION
NG: REPLACE AIR SUS RELAY
OK:Go to next step
Item
Vehicle Condition / Test
Details
Diagnostic Note
MOTOR RELAYAIR SUS relay / ON or OFFOperation of solenoid (clicking sound) can
be heard
Tester ConnectionSpecified Condition
1 - 210 Kohms higher
1 - 2Below 1 ohms (When battery voltage is applied to terminals 3 and 4)
Page 572 of 4500
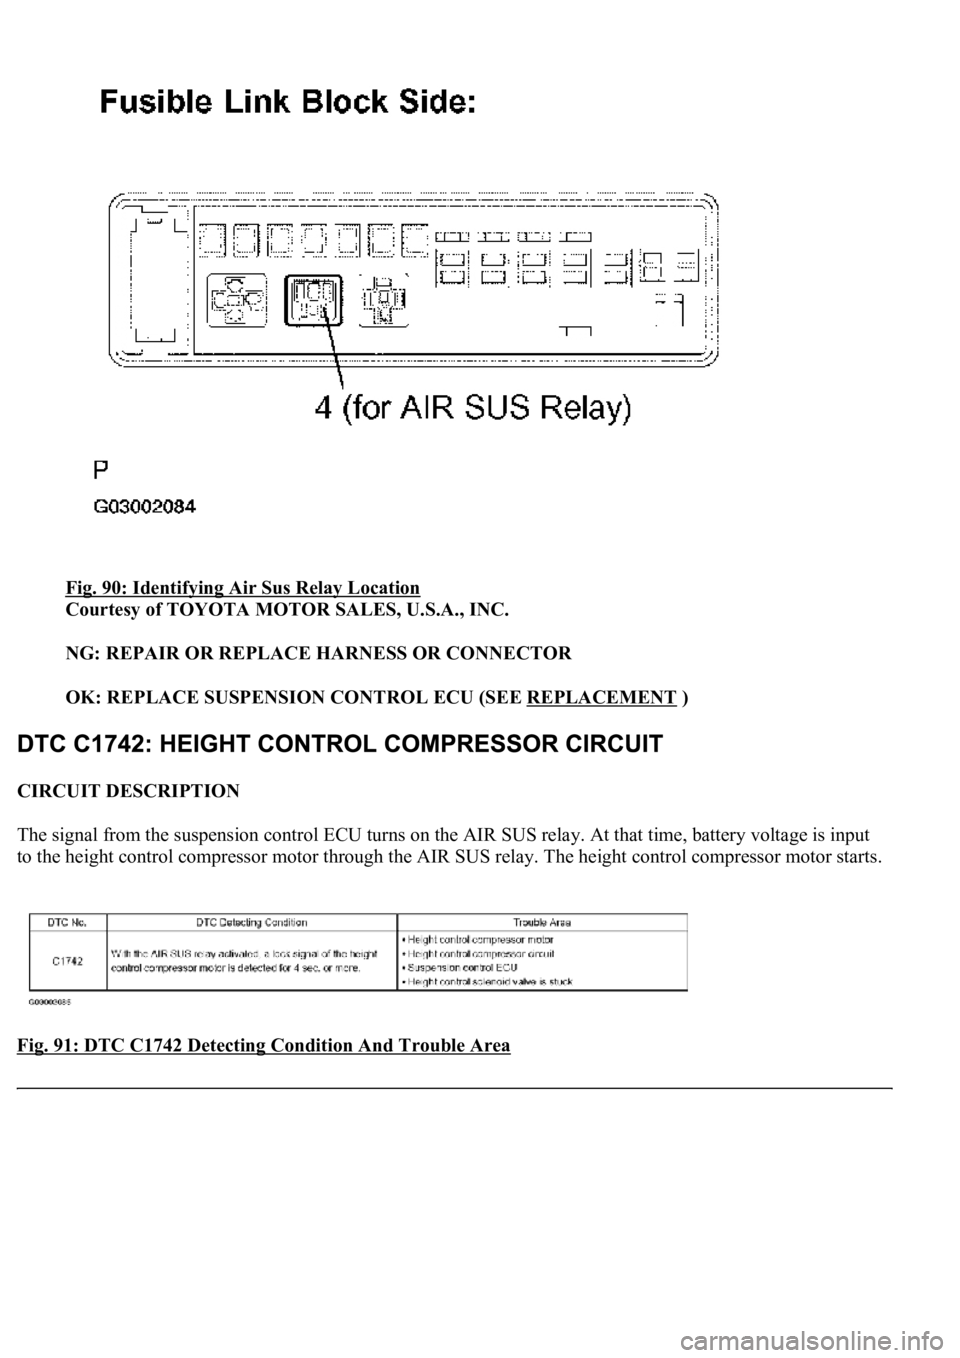
Fig. 90: Identifying Air Sus Relay Location
Courtesy of TOYOTA MOTOR SALES, U.S.A., INC.
NG: REPAIR OR REPLACE HARNESS OR CONNECTOR
OK: REPLACE SUSPENSION CONTROL ECU (SEE REPLACEMENT
)
CIRCUIT DESCRIPTION
The signal from the suspension control ECU turns on the AIR SUS relay. At that time, battery voltage is input
to the height control compressor motor through the AIR SUS relay. The height control compressor motor starts.
<0029004c004a00110003001c0014001d0003002700370026000300260014001a001700150003002700480057004800460057004c0051004a00030026005200510047004c0057004c005200510003002400510047000300370055005200580045004f004800
030024005500480044[
Page 574 of 4500
HINT:
If DTC C1741 (AIR SUS relay circuit) is displayed, carry out the inspection necessary (SEE DTC C1741
AIR SUS RELAY CIRCUIT ).
NG: REPAIR CIRCUIT INDICATED BY OUTPUT CODE
OK:Go to next step
2.INSPECT HEIGHT CONTROL COMPRESSOR MOTOR
a. Disconnect the height control compressor motor connector.
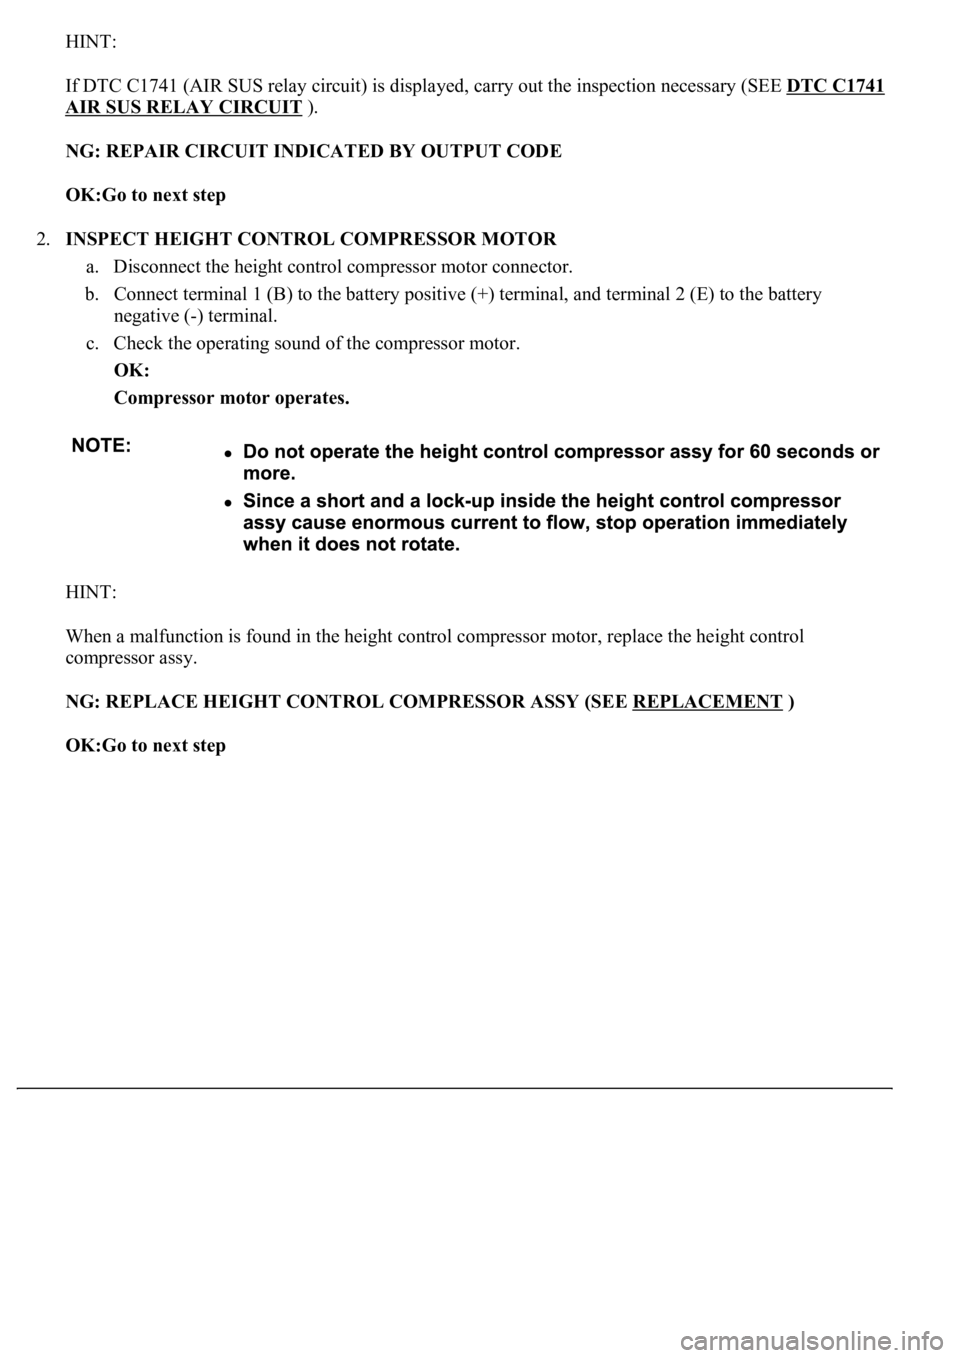
b. Connect terminal 1 (B) to the battery positive (+) terminal, and terminal 2 (E) to the battery
negative (-) terminal.
c. Check the operating sound of the compressor motor.
OK:
Compressor motor operates.
HINT:
When a malfunction is found in the height control compressor motor, replace the height control
compressor assy.
NG: REPLACE HEIGHT CONTROL COMPRESSOR ASSY (SEE REPLACEMENT
)
OK:Go to next step
Page 581 of 4500
d. Check the operation sound of the height control solenoid valve when the solenoid is turned on
through the ACTIVE TEST.
OK:
An operation sound is heard 1 second after the height control solenoid valve is turned on.
NG: Go to step 8
OK: Go to step 9
8.INSPECT HEIGHT CONTROL SOLENOID VALVE
HEIGHT CONTROL SOLENOID VALVE FRONT RH:
a. Disconnect the height control solenoid valve connector.
b. Connect terminal 3 (SLFR) to the battery positive (+) terminal, and terminal 2 (GND) to the battery
negative (-) terminal.
c. Check the operating sound of the height control solenoid valve.
OK:
It should make an operating sound (click).
after turning it ONcan be heard
Page 582 of 4500
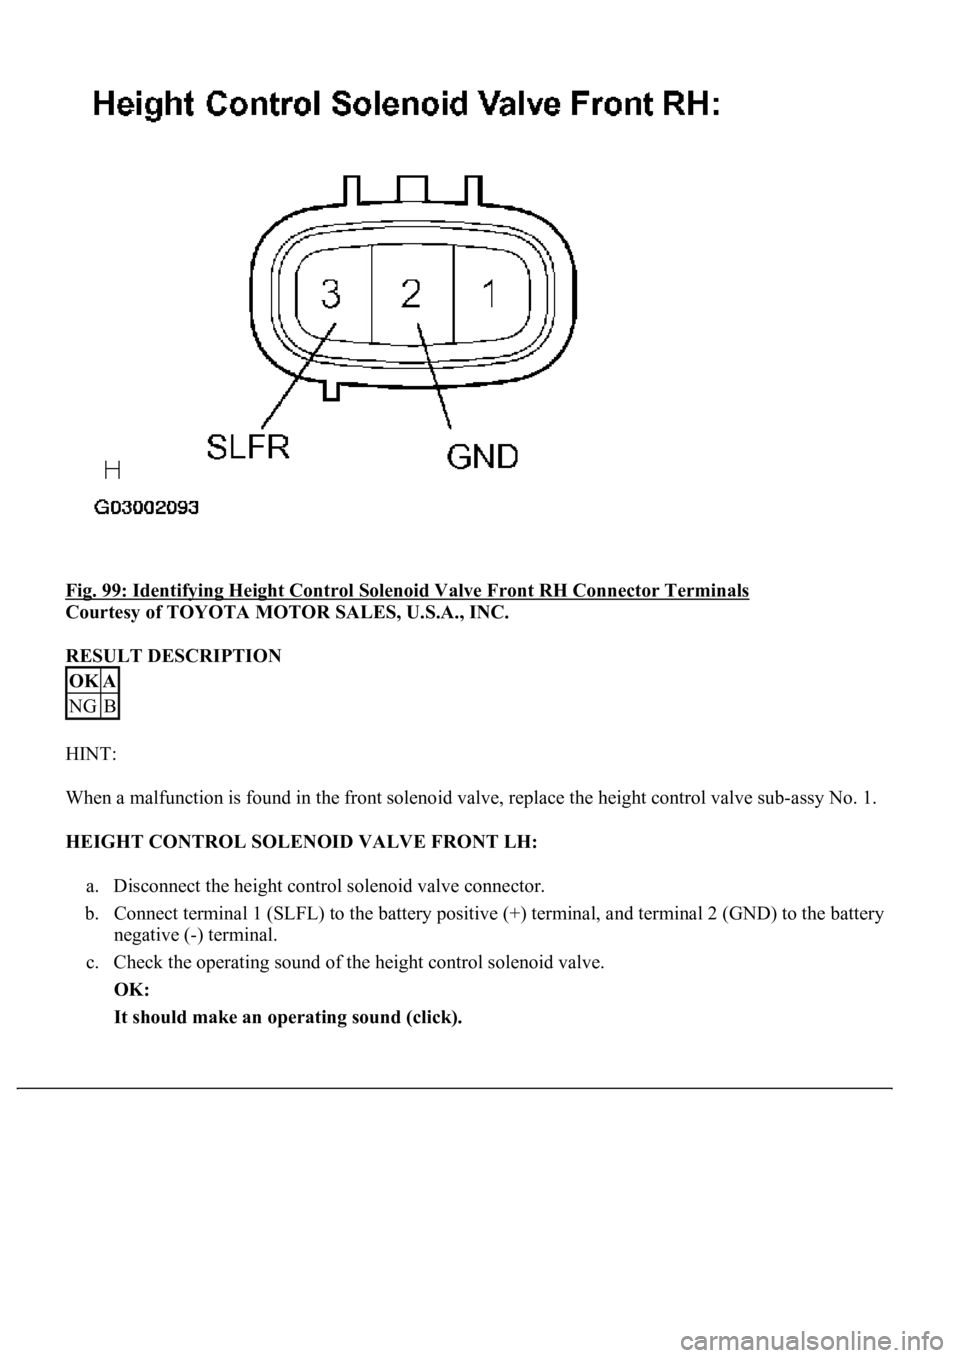
Fig. 99: Identifying Height Control Solenoid Valve Front RH Connector Terminals
Courtesy of TOYOTA MOTOR SALES, U.S.A., INC.
RESULT DESCRIPTION
HINT:
When a malfunction is found in the front solenoid valve, replace the height control valve sub-assy No. 1.
HEIGHT CONTROL SOLENOID VALVE FRONT LH:
a. Disconnect the height control solenoid valve connector.
b. Connect terminal 1 (SLFL) to the battery positive (+) terminal, and terminal 2 (GND) to the battery
negative (-) terminal.
c. Check the operating sound of the height control solenoid valve.
OK:
It should make an operating sound (click).
OKA
NGB
Page 583 of 4500
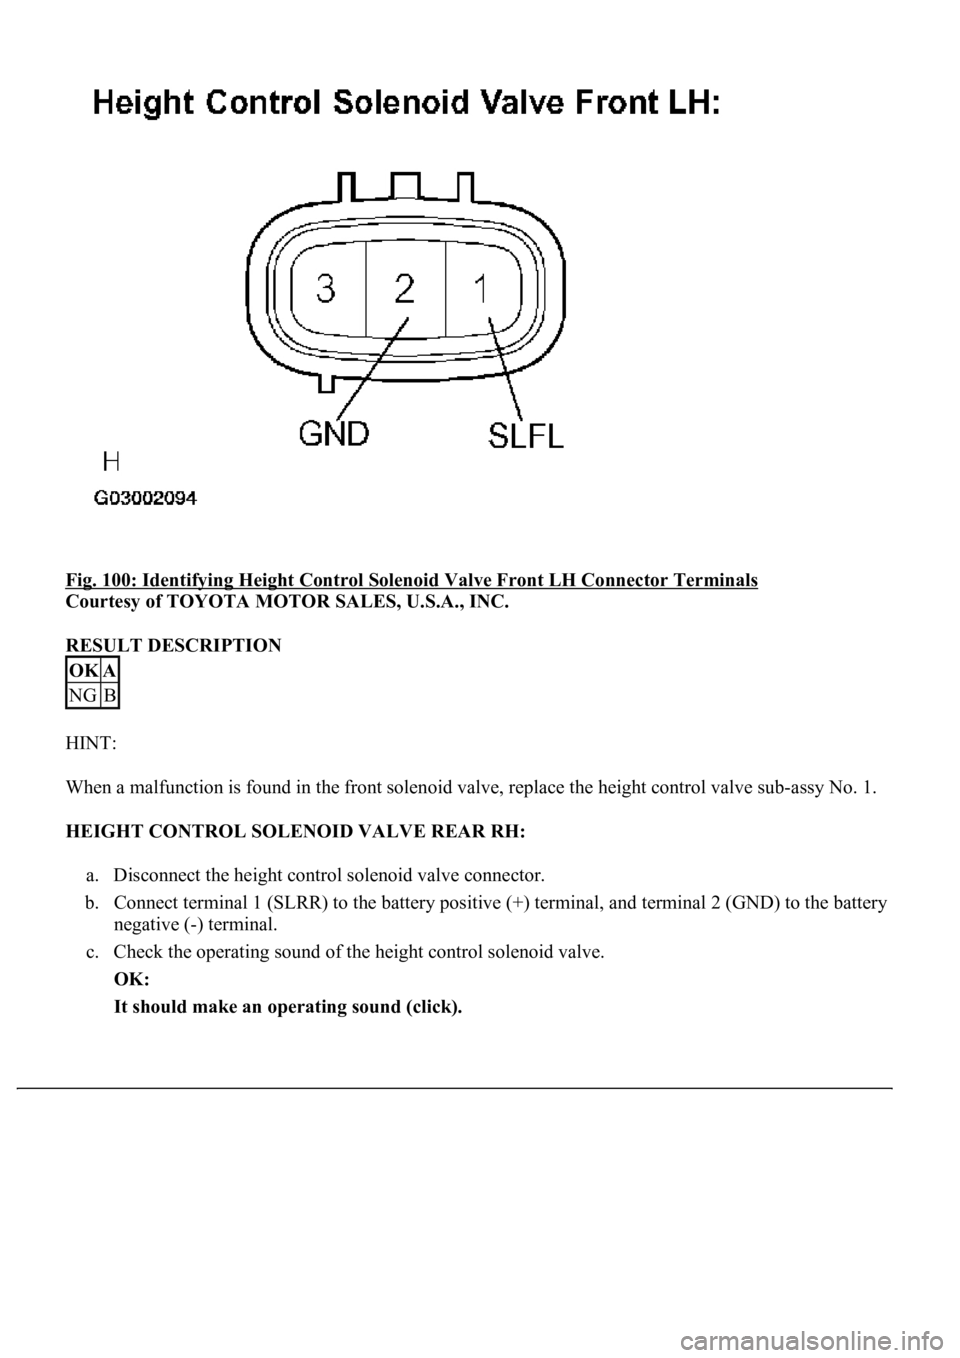
Fig. 100: Identifying Height Control Solenoid Valve Front LH Connector Terminals
Courtesy of TOYOTA MOTOR SALES, U.S.A., INC.
RESULT DESCRIPTION
HINT:
When a malfunction is found in the front solenoid valve, replace the height control valve sub-assy No. 1.
HEIGHT CONTROL SOLENOID VALVE REAR RH:
a. Disconnect the height control solenoid valve connector.
b. Connect terminal 1 (SLRR) to the battery positive (+) terminal, and terminal 2 (GND) to the battery
negative (-) terminal.
c. Check the operating sound of the height control solenoid valve.
OK:
It should make an operating sound (click).
OKA
NGB
Page 584 of 4500
Fig. 101: Identifying Height Control Solenoid Valve Rear RH Connector Terminals
Courtesy of TOYOTA MOTOR SALES, U.S.A., INC.
RESULT DESCRIPTION
HINT:
When a malfunction is found in the rear solenoid valve, replace the height control valve sub-assy No. 2.
HEIGHT CONTROL SOLENOID VALVE REAR LH:
a. Disconnect the height control solenoid valve connector.
b. Connect terminal 3 (SLRL) to the battery positive (+) terminal, and terminal 2 (GND) to the battery
negative (-) terminal.
c. Check the operating sound of the height control solenoid valve.
OK:
It should make an operating sound (click).
OKA
NGC