battery LEXUS LS430 2003 Factory Workshop Manual
[x] Cancel search | Manufacturer: LEXUS, Model Year: 2003, Model line: LS430, Model: LEXUS LS430 2003Pages: 4500, PDF Size: 87.45 MB
Page 585 of 4500
RESULT DESCRIPTION
HINT:
When a malfunction is found in the rear solenoid valve, replace the height control valve sub-assy No. 2.
B: REPLACE HEIGHT CONTROL VALVE SUB-ASSY NO. 1 (SEE REPLACEMENT
)
C: REPLACE HEIGHT CONTROL VALVE SUB-ASSY NO. 2 (SEE REPLACEMENT
)
A:Go to next step
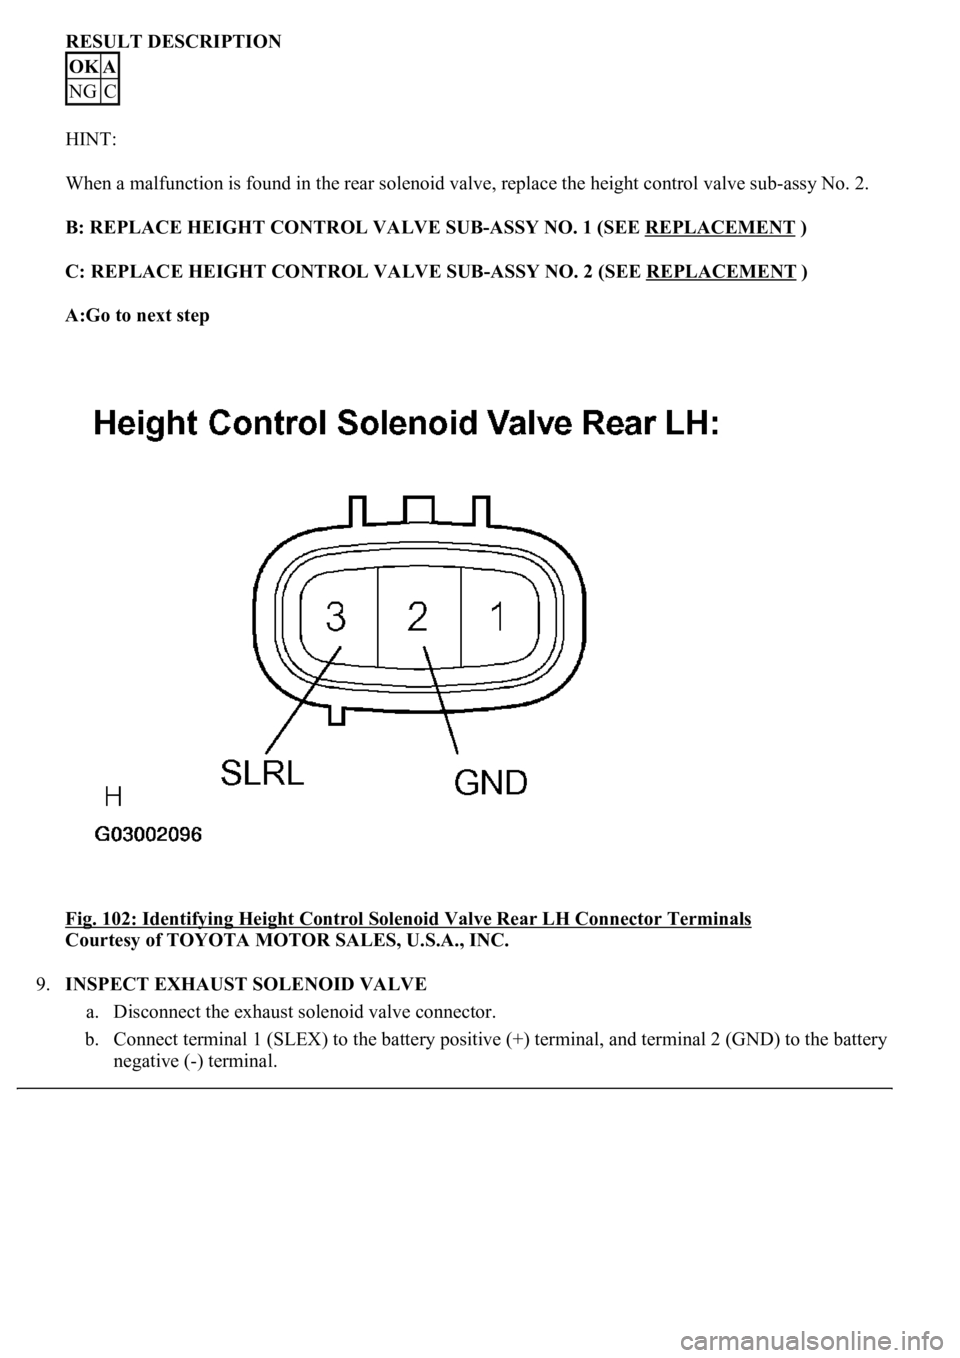
Fig. 102: Identifying Height Control Solenoid Valve Rear LH Connector Terminals
Courtesy of TOYOTA MOTOR SALES, U.S.A., INC.
9.INSPECT EXHAUST SOLENOID VALVE
a. Disconnect the exhaust solenoid valve connector.
b. Connect terminal 1 (SLEX) to the battery positive (+) terminal, and terminal 2 (GND) to the battery
ne
gative (-) terminal.
OKA
NGC
Page 588 of 4500
NG: REPAIR OR REPLACE AIR TUBE
OK:Go to next step
3.INSPECT HEIGHT CONTROL SOLENOID VALVE
a. Connect the hand-held tester to the DLC3.
b. Turn the ignition switch to the ON position and turn the hand-held tester main switch on.
c. Select the item below in the ACTIVE TEST and operate it with the hand-held tester.
VEHICLE CONDITION / TEST DETAILS AIRSUS
d. Check the operation sound of the height control solenoid valve when the solenoid is turned on
through the ACTIVE TEST.
OK:
An operation sound is heard 1 second after the height control solenoid valve is turned on.
NG: Go to step 4
OK: Go to step 6
4.INSPECT HEIGHT CONTROL SOLENOID VALVE
HEIGHT CONTROL SOLENOID VALVE FRONT RH:
a. Disconnect the height control solenoid valve connector.
b. Connect terminal 3 (SLFR) to the battery positive (+) terminal, and terminal 2 (GND) to the battery
negative (-) terminal.
c. Check the operating sound of the height control solenoid valve.
OK:
It should make an operating sound (click).
ItemVehicle Condition / Test DetailsDiagnostic Note
FR SOLTurn OFF right front solenoid valve one second
after turning it ONOperation of solenoid (clicking sound)
can be heard
FL SOLTurn OFF left front solenoid valve one second
after turning it ONOperation of solenoid (clicking sound)
can be heard
RR SOLTurn OFF right rear solenoid valve one second
after turning it ONOperation of solenoid (clicking sound)
can be heard
RL SOLTurn OFF left rear solenoid valve one second
after turning it ONOperation of solenoid (clicking sound)
can be heard
Page 589 of 4500
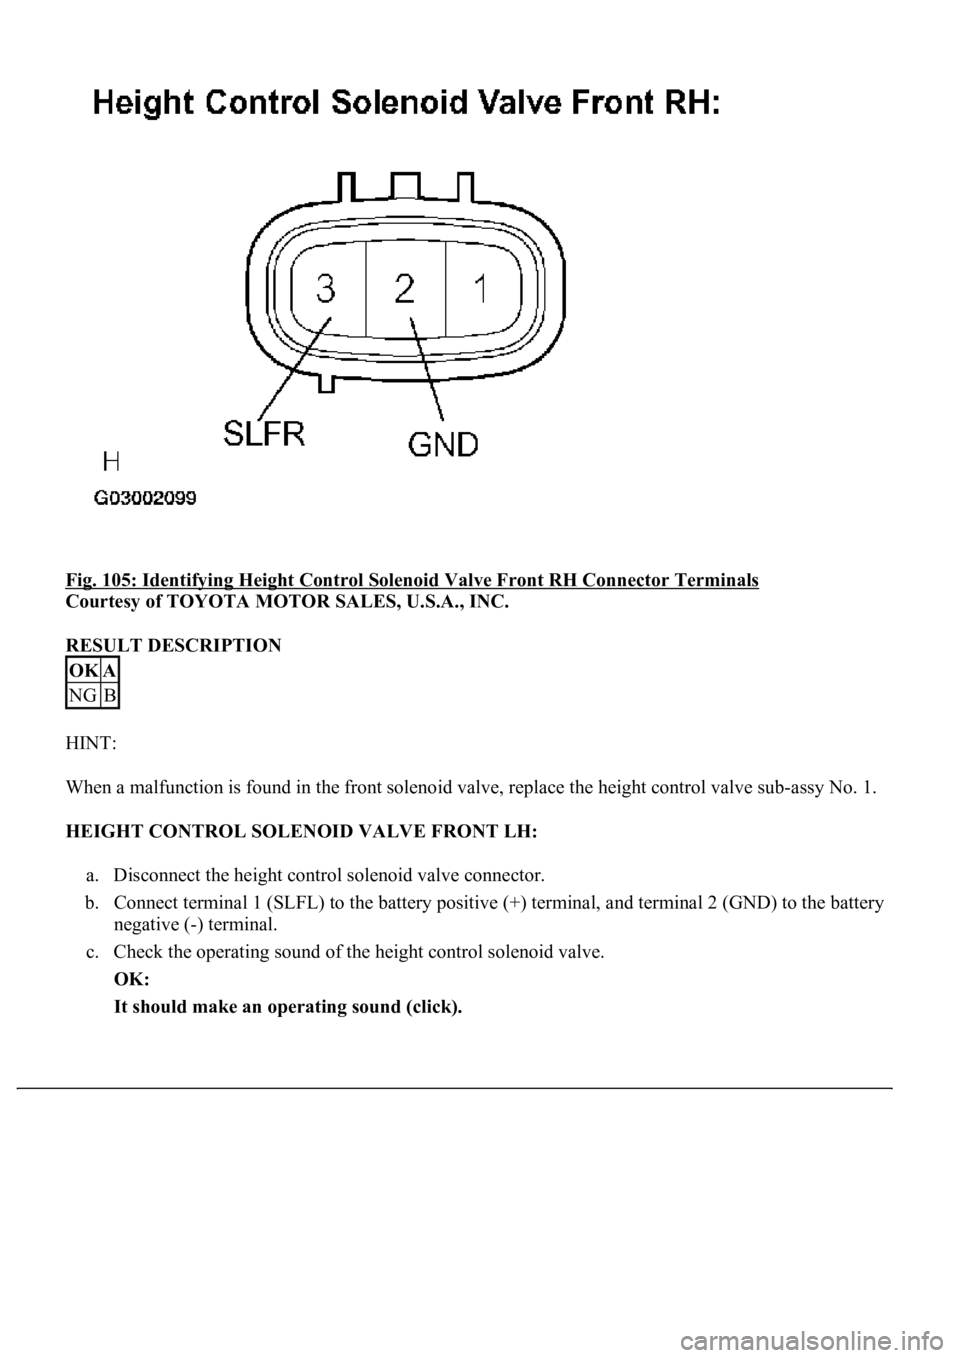
Fig. 105: Identifying Height Control Solenoid Valve Front RH Connector Terminals
Courtesy of TOYOTA MOTOR SALES, U.S.A., INC.
RESULT DESCRIPTION
HINT:
When a malfunction is found in the front solenoid valve, replace the height control valve sub-assy No. 1.
HEIGHT CONTROL SOLENOID VALVE FRONT LH:
a. Disconnect the height control solenoid valve connector.
b. Connect terminal 1 (SLFL) to the battery positive (+) terminal, and terminal 2 (GND) to the battery
negative (-) terminal.
c. Check the operating sound of the height control solenoid valve.
OK:
It should make an operating sound (click).
OKA
NGB
Page 590 of 4500
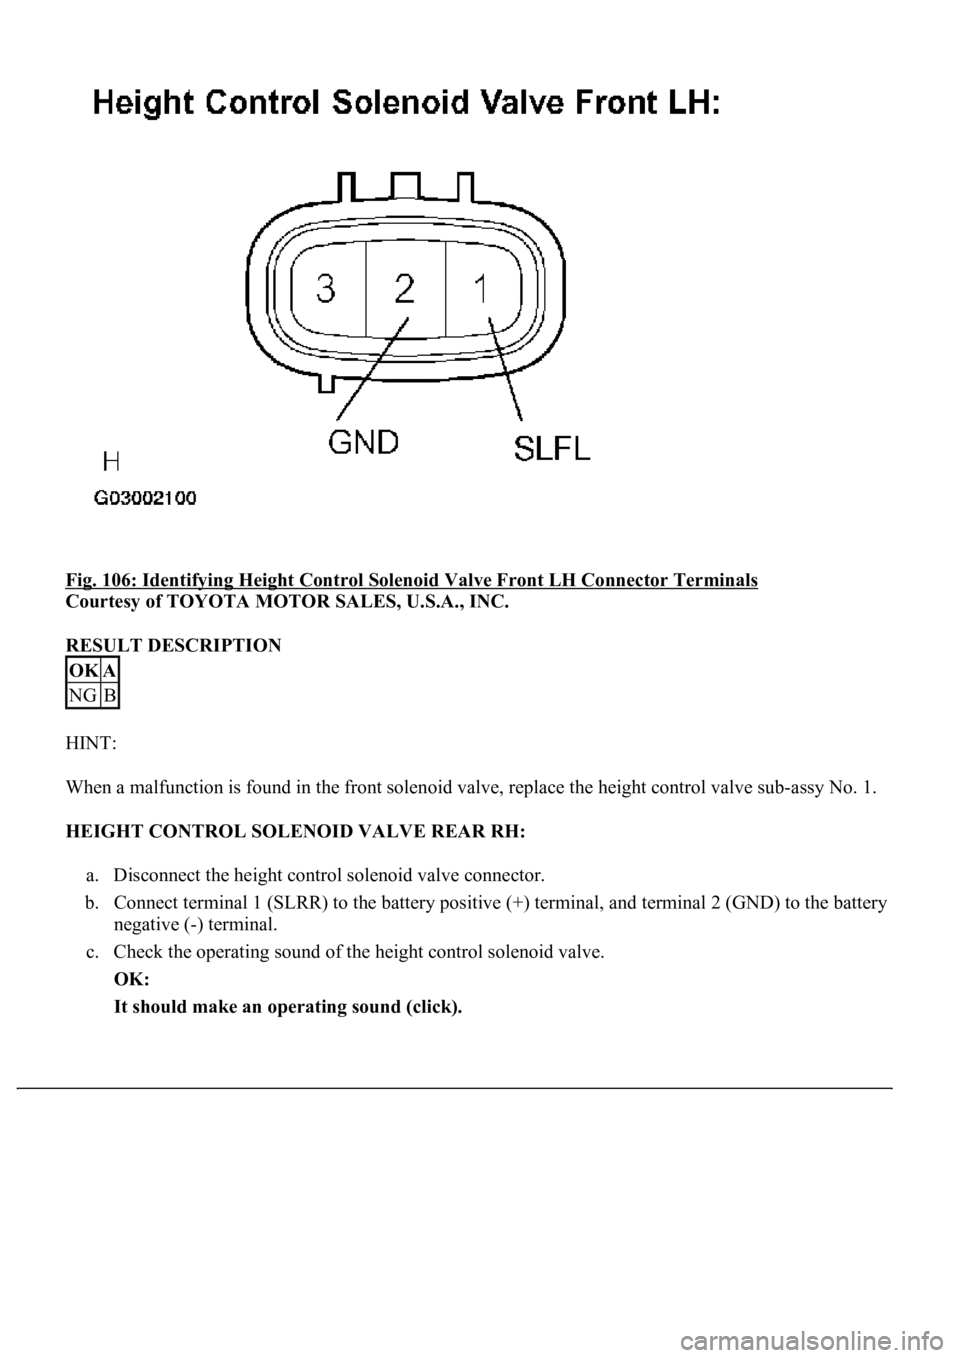
Fig. 106: Identifying Height Control Solenoid Valve Front LH Connector Terminals
Courtesy of TOYOTA MOTOR SALES, U.S.A., INC.
RESULT DESCRIPTION
HINT:
When a malfunction is found in the front solenoid valve, replace the height control valve sub-assy No. 1.
HEIGHT CONTROL SOLENOID VALVE REAR RH:
a. Disconnect the height control solenoid valve connector.
b. Connect terminal 1 (SLRR) to the battery positive (+) terminal, and terminal 2 (GND) to the battery
negative (-) terminal.
c. Check the operating sound of the height control solenoid valve.
OK:
It should make an operating sound (click).
OKA
NGB
Page 591 of 4500
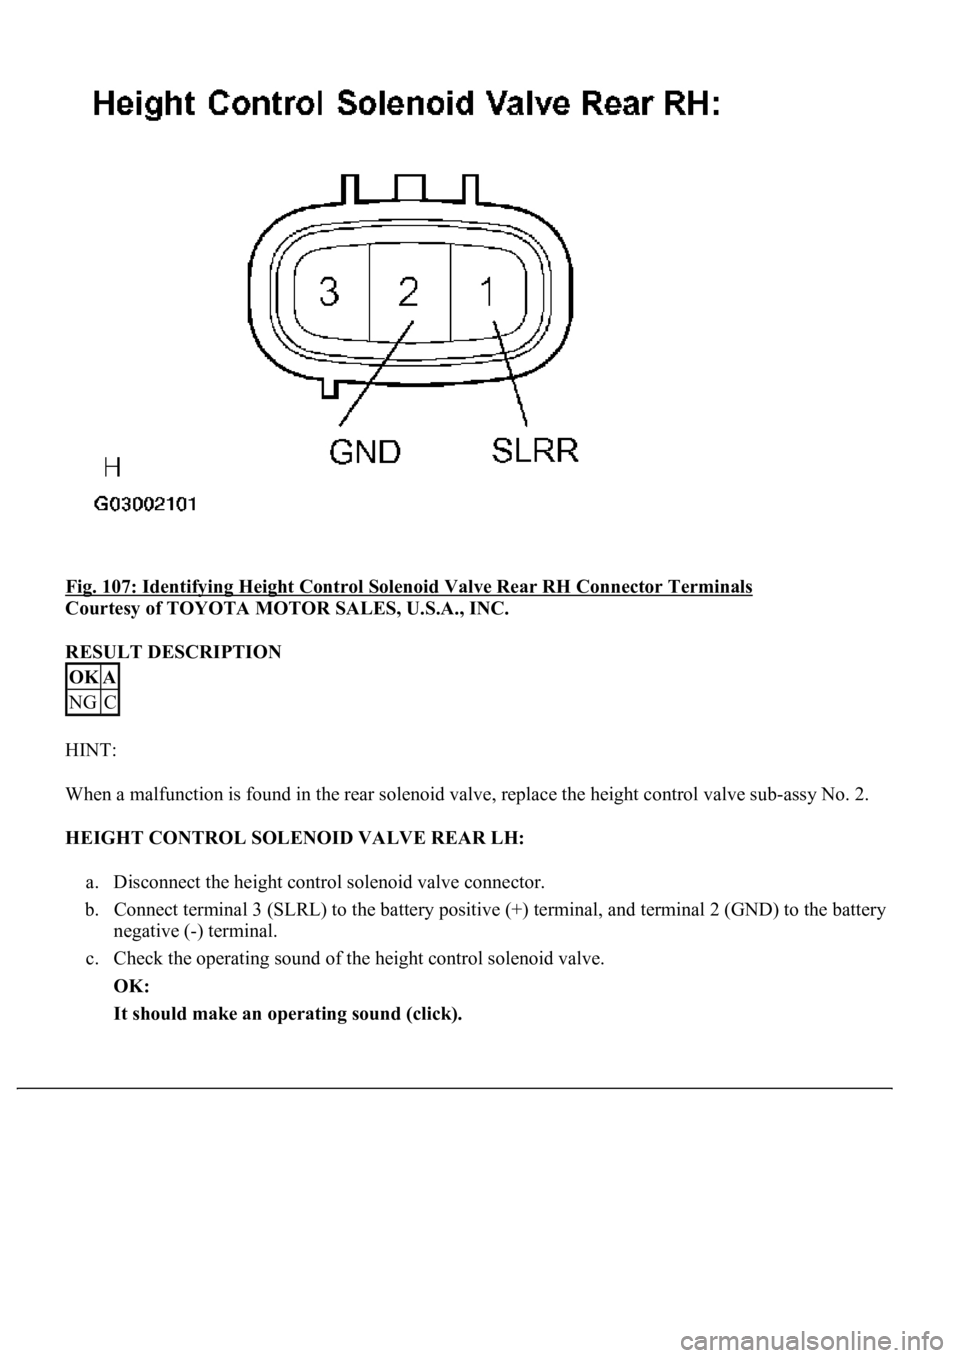
Fig. 107: Identifying Height Control Solenoid Valve Rear RH Connector Terminals
Courtesy of TOYOTA MOTOR SALES, U.S.A., INC.
RESULT DESCRIPTION
HINT:
When a malfunction is found in the rear solenoid valve, replace the height control valve sub-assy No. 2.
HEIGHT CONTROL SOLENOID VALVE REAR LH:
a. Disconnect the height control solenoid valve connector.
b. Connect terminal 3 (SLRL) to the battery positive (+) terminal, and terminal 2 (GND) to the battery
negative (-) terminal.
c. Check the operating sound of the height control solenoid valve.
OK:
It should make an operating sound (click).
OKA
NGC
Page 592 of 4500
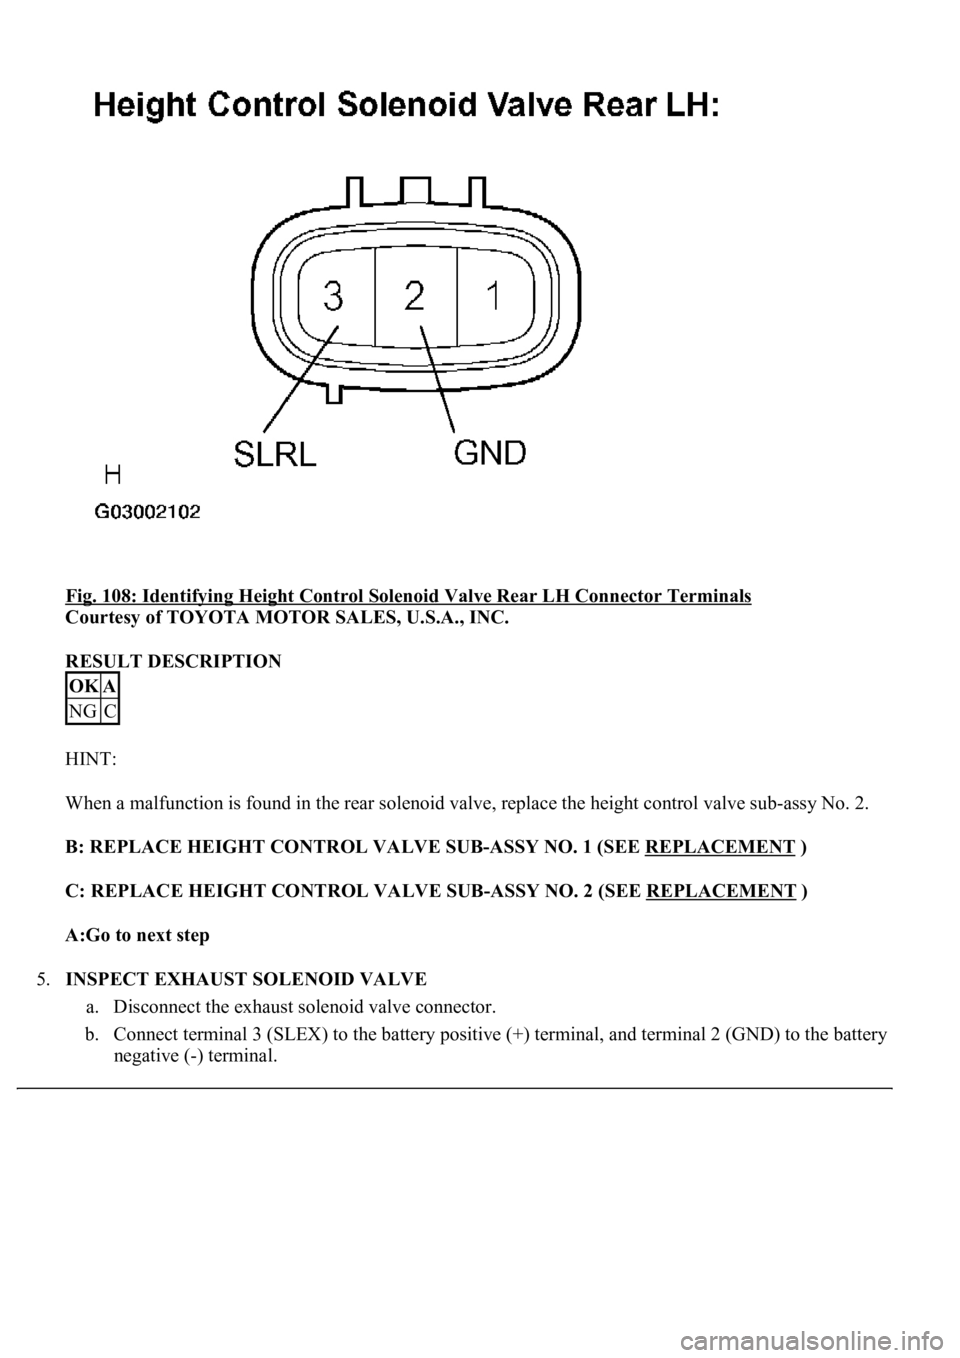
Fig. 108: Identifying Height Control Solenoid Valve Rear LH Connector Terminals
Courtesy of TOYOTA MOTOR SALES, U.S.A., INC.
RESULT DESCRIPTION
HINT:
When a malfunction is found in the rear solenoid valve, replace the height control valve sub-assy No. 2.
B: REPLACE HEIGHT CONTROL VALVE SUB-ASSY NO. 1 (SEE REPLACEMENT
)
C: REPLACE HEIGHT CONTROL VALVE SUB-ASSY NO. 2 (SEE REPLACEMENT
)
A:Go to next step
5.INSPECT EXHAUST SOLENOID VALVE
a. Disconnect the exhaust solenoid valve connector.
b. Connect terminal 3 (SLEX) to the battery positive (+) terminal, and terminal 2 (GND) to the battery
ne
gative (-) terminal.
OKA
NGC
Page 598 of 4500

Fig. 113: Identifying Suspension Control ECU Connector Terminals
Courtesy of TOYOTA MOTOR SALES, U.S.A., INC.
NG: CHECK POWER SOURCE CIRCUIT (SEE DTC C1774 POWER SOURCE CIRCUIT
)
OK: REPLACE SUSPENSION CONTROL ECU (SEE REPLACEMENT
)
CIRCUIT DESCRIPTION
When the ignition switch is turned to the ON position, the D-IG1 relay is activated and battery voltage is
applied to terminal B of the suspension control ECU. When the ignition switch is turned off, the D-IG1 relay is
de-energized and the power source is cut off.
This power source energizes the suspension control actuator, height control solenoid valve, D-IG1 relay, each
IC and sensor.
Page 600 of 4500
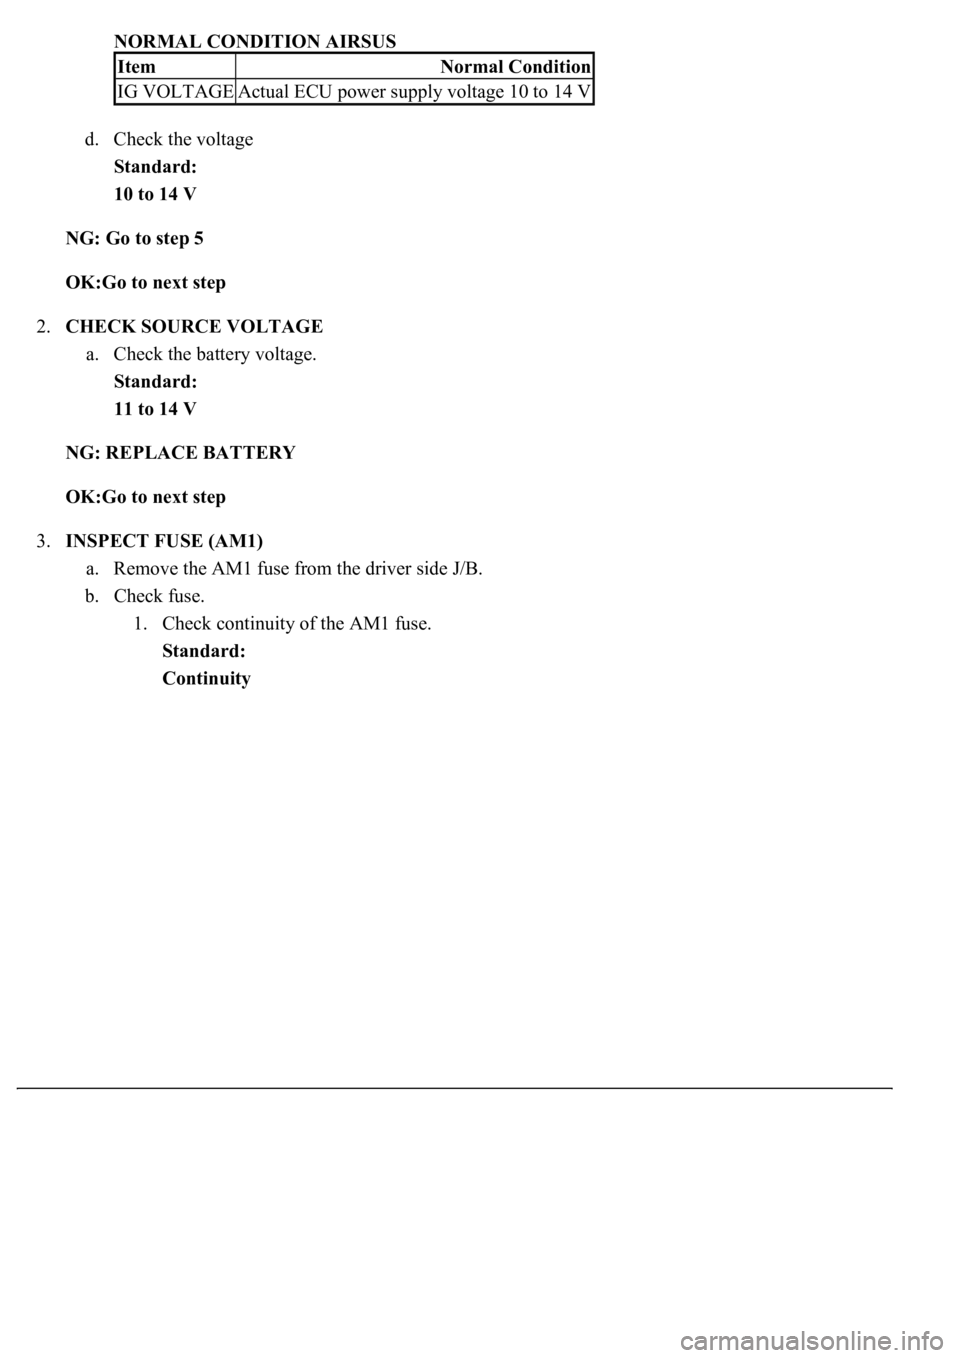
NORMAL CONDITION AIRSUS
d. Check the voltage
Standard:
10 to 14 V
NG: Go to step 5
OK:Go to next step
2.CHECK SOURCE VOLTAGE
a. Check the battery voltage.
Standard:
11 to 14 V
NG: REPLACE BATTERY
OK:Go to next step
3.INSPECT FUSE (AM1)
a. Remove the AM1 fuse from the driver side J/B.
b. Check fuse.
1. Check continuity of the AM1 fuse.
Standard:
Continuity
ItemNormal Condition
IG VOLTAGEActual ECU power supply voltage 10 to 14 V
Page 638 of 4500
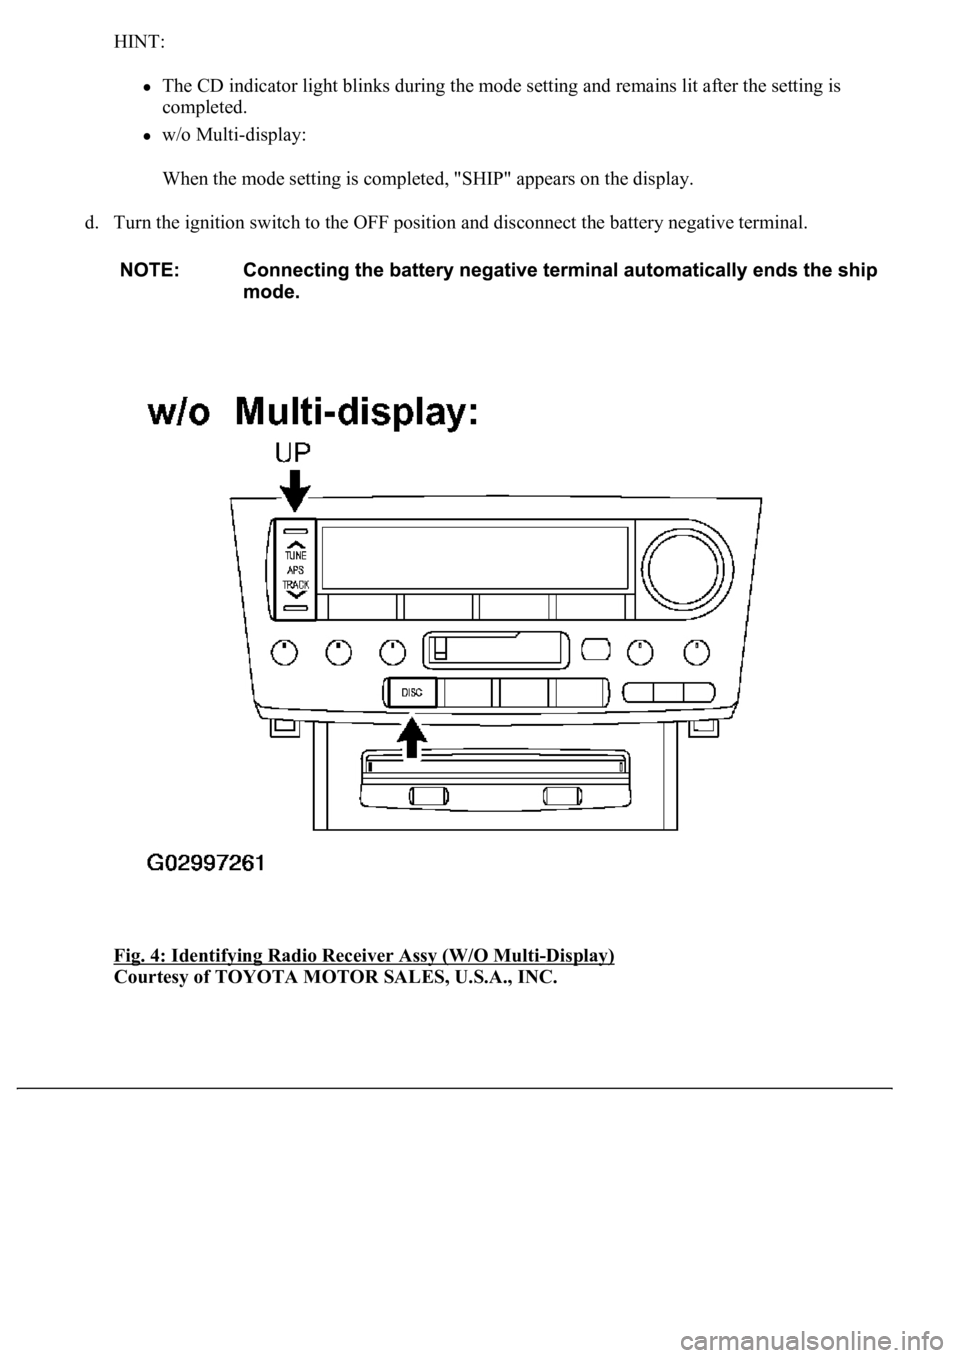
HINT:
The CD indicator light blinks during the mode setting and remains lit after the setting is
completed.
w/o Multi-display:
When the mode setting is completed, "SHIP" appears on the display.
d. Turn the ignition switch to the OFF position and disconnect the battery negative terminal.
Fig. 4: Identifying Radio Receiver Assy (W/O Multi
-Display)
Courtesy of TOYOTA MOTOR SALES, U.S.A., INC.
Page 644 of 4500
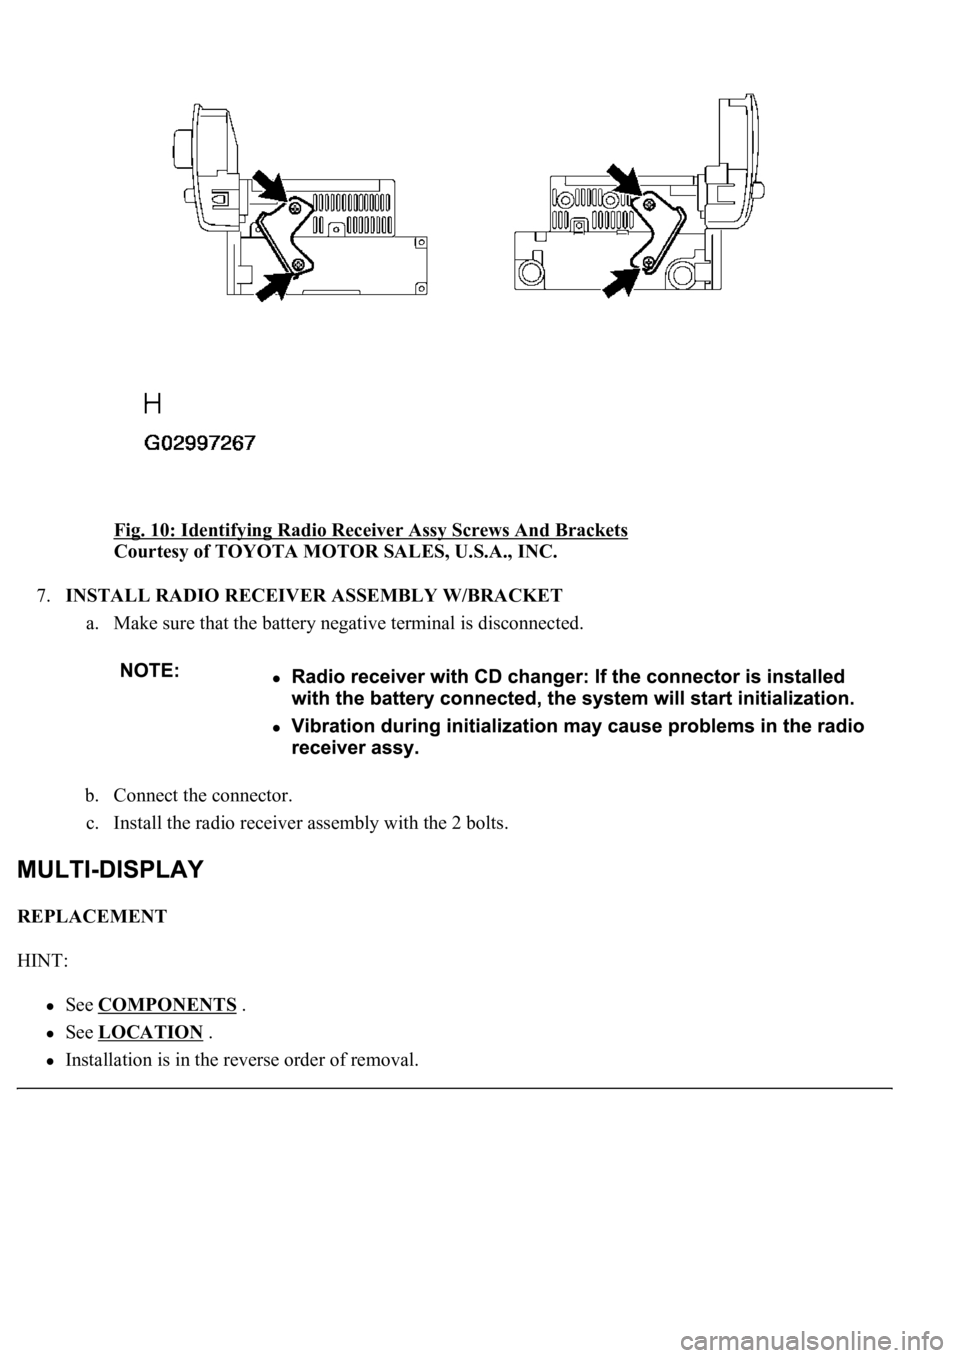
Fig. 10: Identifying Radio Receiver Assy Screws And Brackets
Courtesy of TOYOTA MOTOR SALES, U.S.A., INC.
7.INSTALL RADIO RECEIVER ASSEMBLY W/BRACKET
a. Make sure that the battery negative terminal is disconnected.
b. Connect the connector.
c. Install the radio receiver assembly with the 2 bolts.
REPLACEMENT
HINT:
See COMPONENTS .
See LOCATION .
Installation is in the reverse order of removal.