LEXUS LS430 2003 Factory Repair Manual
Manufacturer: LEXUS, Model Year: 2003,
Model line: LS430,
Model: LEXUS LS430 2003
Pages: 4500, PDF Size: 87.45 MB
LEXUS LS430 2003 Factory Repair Manual
LS430 2003
LEXUS
LEXUS
https://www.carmanualsonline.info/img/36/57050/w960_57050-0.png
LEXUS LS430 2003 Factory Repair Manual
Trending: Ecu, ABS, coolant temperature, spark plugs replace, Absorber suspension, pcv, torque
Page 971 of 4500
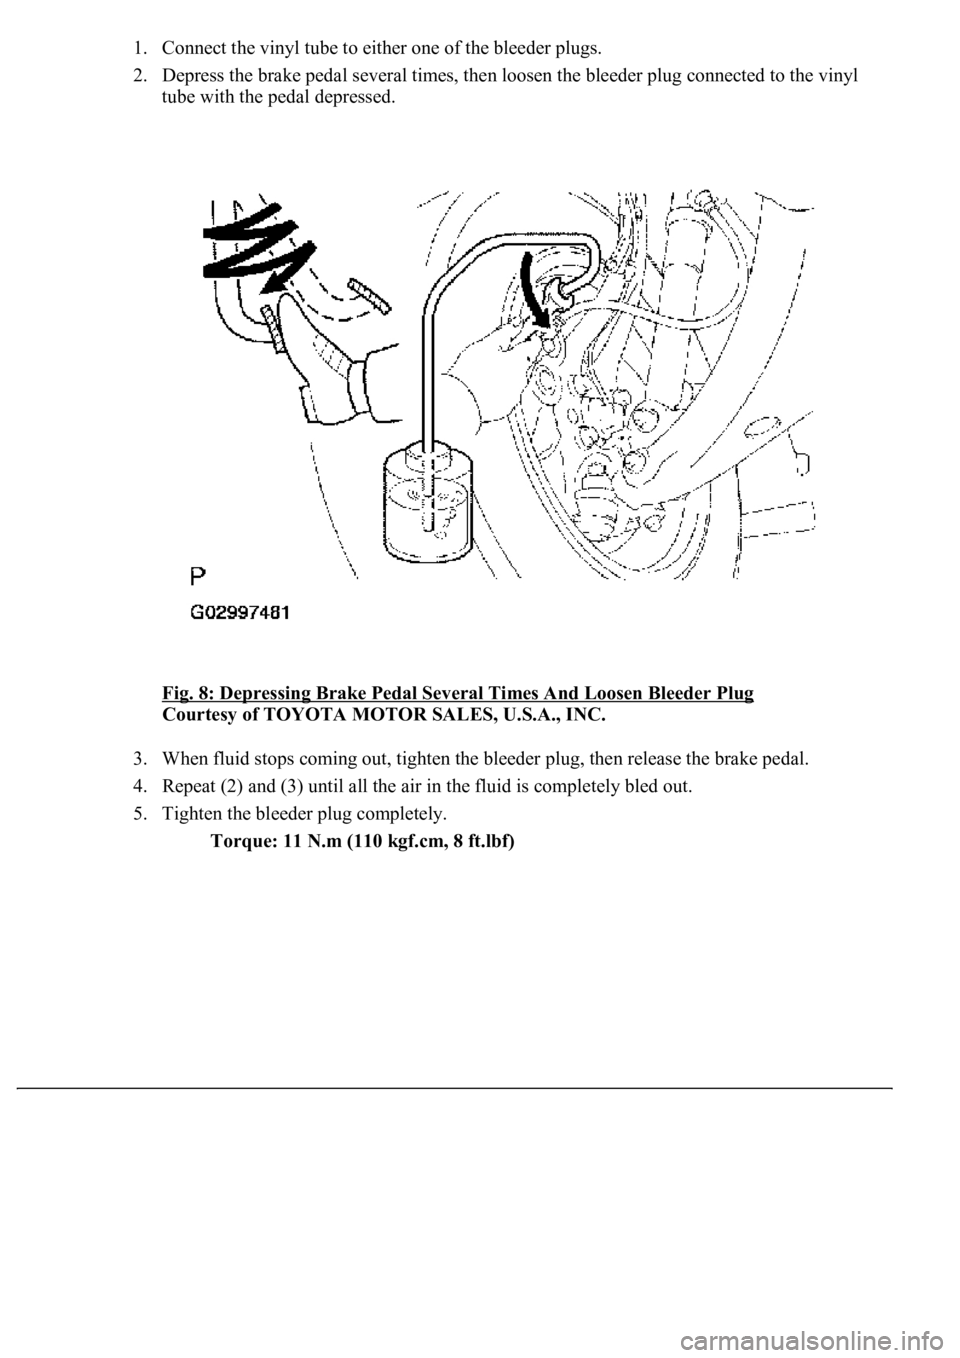
1. Connect the vinyl tube to either one of the bleeder plugs.
2. Depress the brake pedal several times, then loosen the bleeder plug connected to the vinyl
tube with the pedal depressed.
Fig. 8: Depressing Brake Pedal Several Times And Loosen Bleeder Plug
Courtesy of TOYOTA MOTOR SALES, U.S.A., INC.
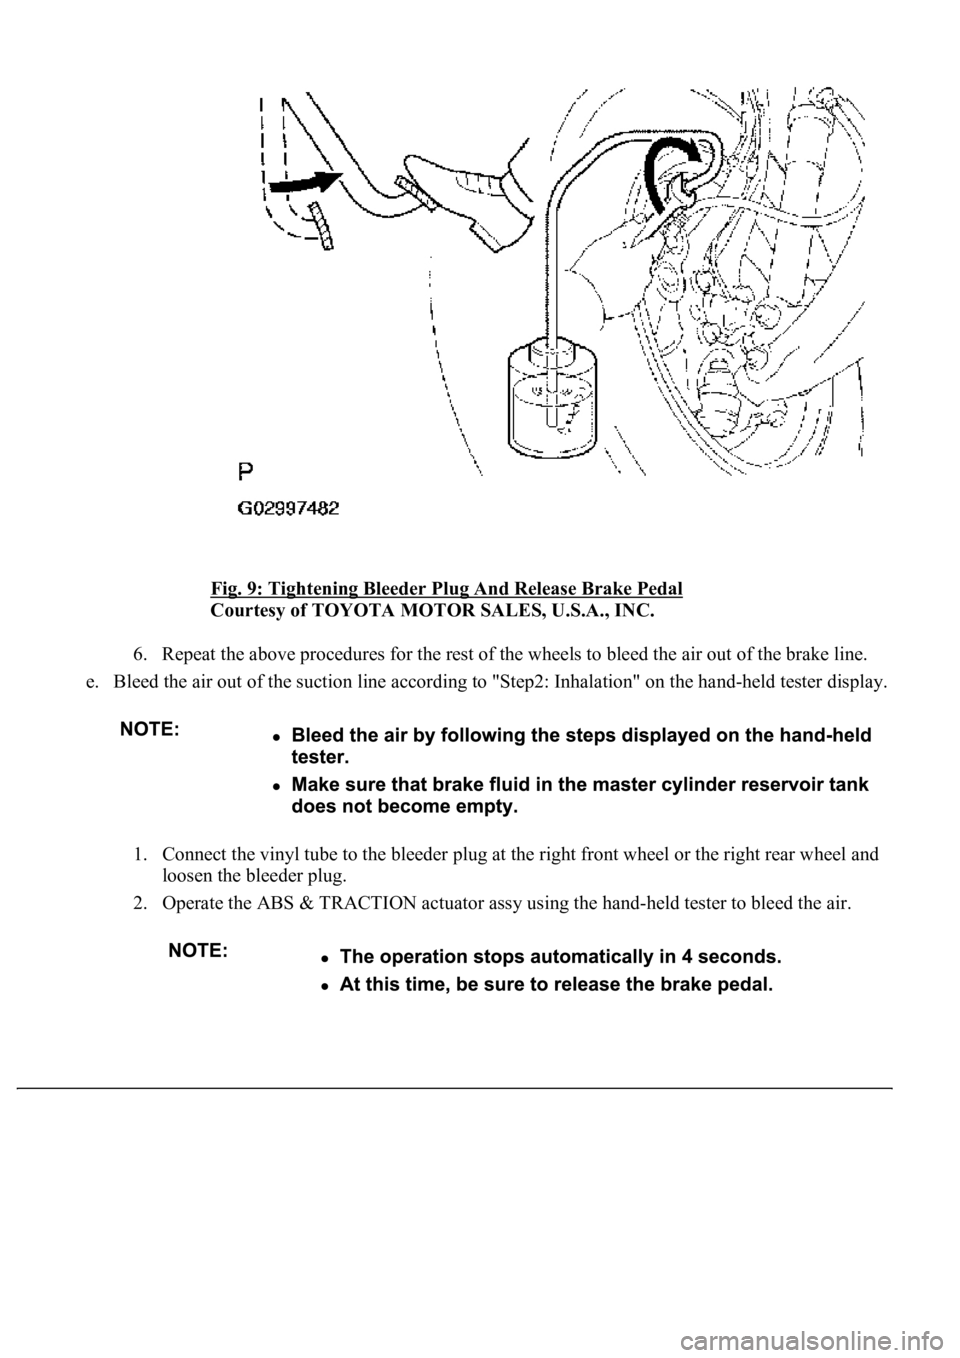
3. When fluid stops coming out, tighten the bleeder plug, then release the brake pedal.
4. Repeat (2) and (3) until all the air in the fluid is completely bled out.
5. Tighten the bleeder plug completely.
Torque: 11 N.m (110 kgf.cm, 8 ft.lbf)
Page 972 of 4500
Fig. 9: Tightening Bleeder Plug And Release Brake Pedal
Courtesy of TOYOTA MOTOR SALES, U.S.A., INC.
6. Repeat the above procedures for the rest of the wheels to bleed the air out of the brake line.
e. Bleed the air out of the suction line according to "Step2: Inhalation" on the hand-held tester display.
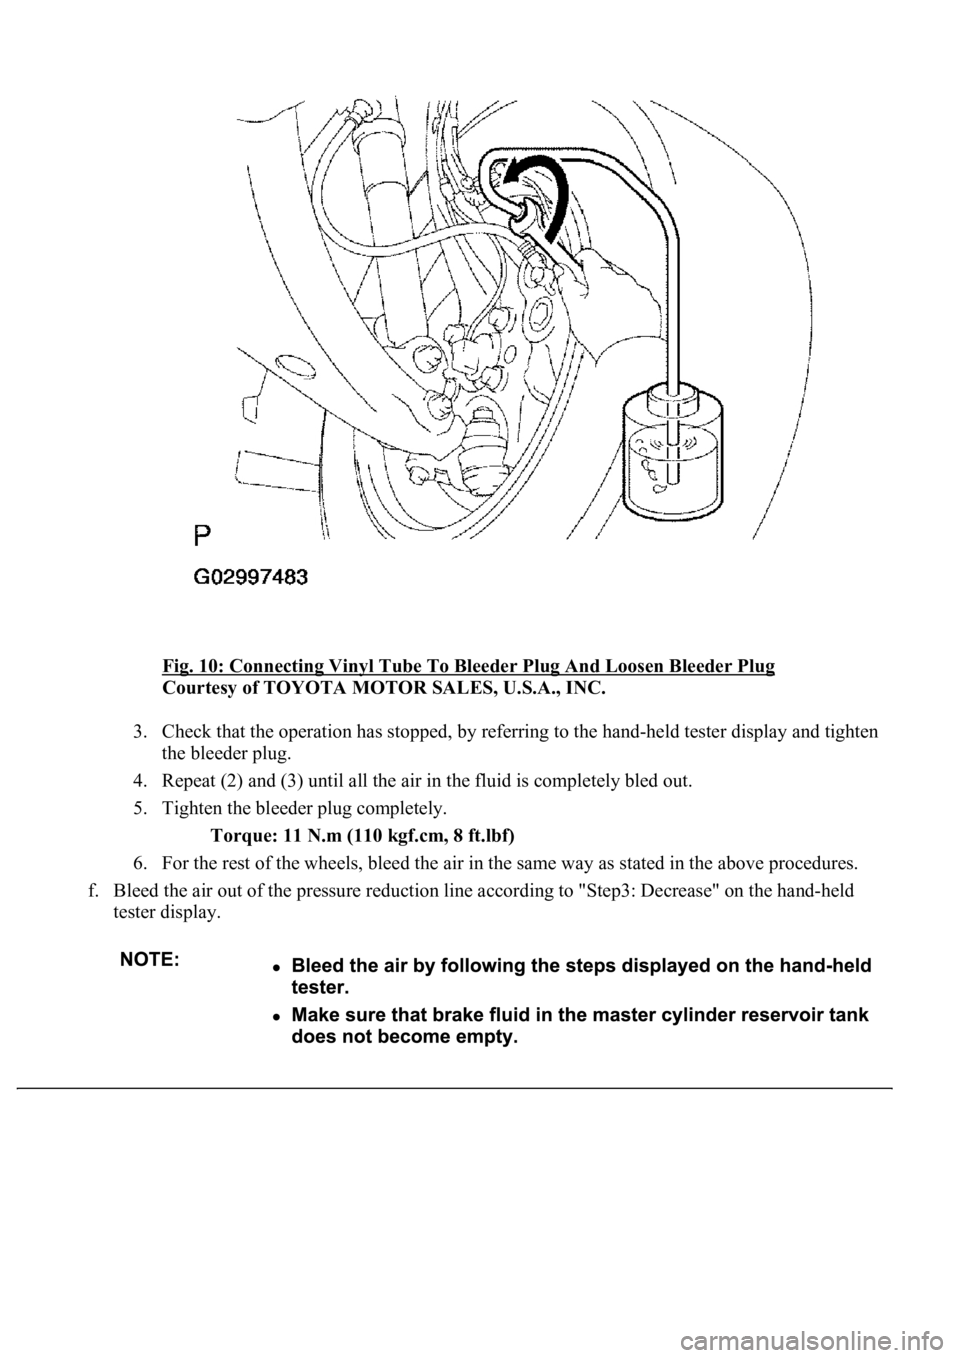
1. Connect the vinyl tube to the bleeder plug at the right front wheel or the right rear wheel and
loosen the bleeder plug.
2. Operate the ABS & TRACTION actuator assy using the hand-held tester to bleed the air.
Page 973 of 4500
Fig. 10: Connecting Vinyl Tube To Bleeder Plug And Loosen Bleeder Plug
Courtesy of TOYOTA MOTOR SALES, U.S.A., INC.
3. Check that the operation has stopped, by referring to the hand-held tester display and tighten
the bleeder plug.
4. Repeat (2) and (3) until all the air in the fluid is completely bled out.
5. Tighten the bleeder plug completely.
Torque: 11 N.m (110 kgf.cm, 8 ft.lbf)
6. For the rest of the wheels, bleed the air in the same way as stated in the above procedures.
f. Bleed the air out of the pressure reduction line according to "Step3: Decrease" on the hand-held
tester display.
Page 974 of 4500
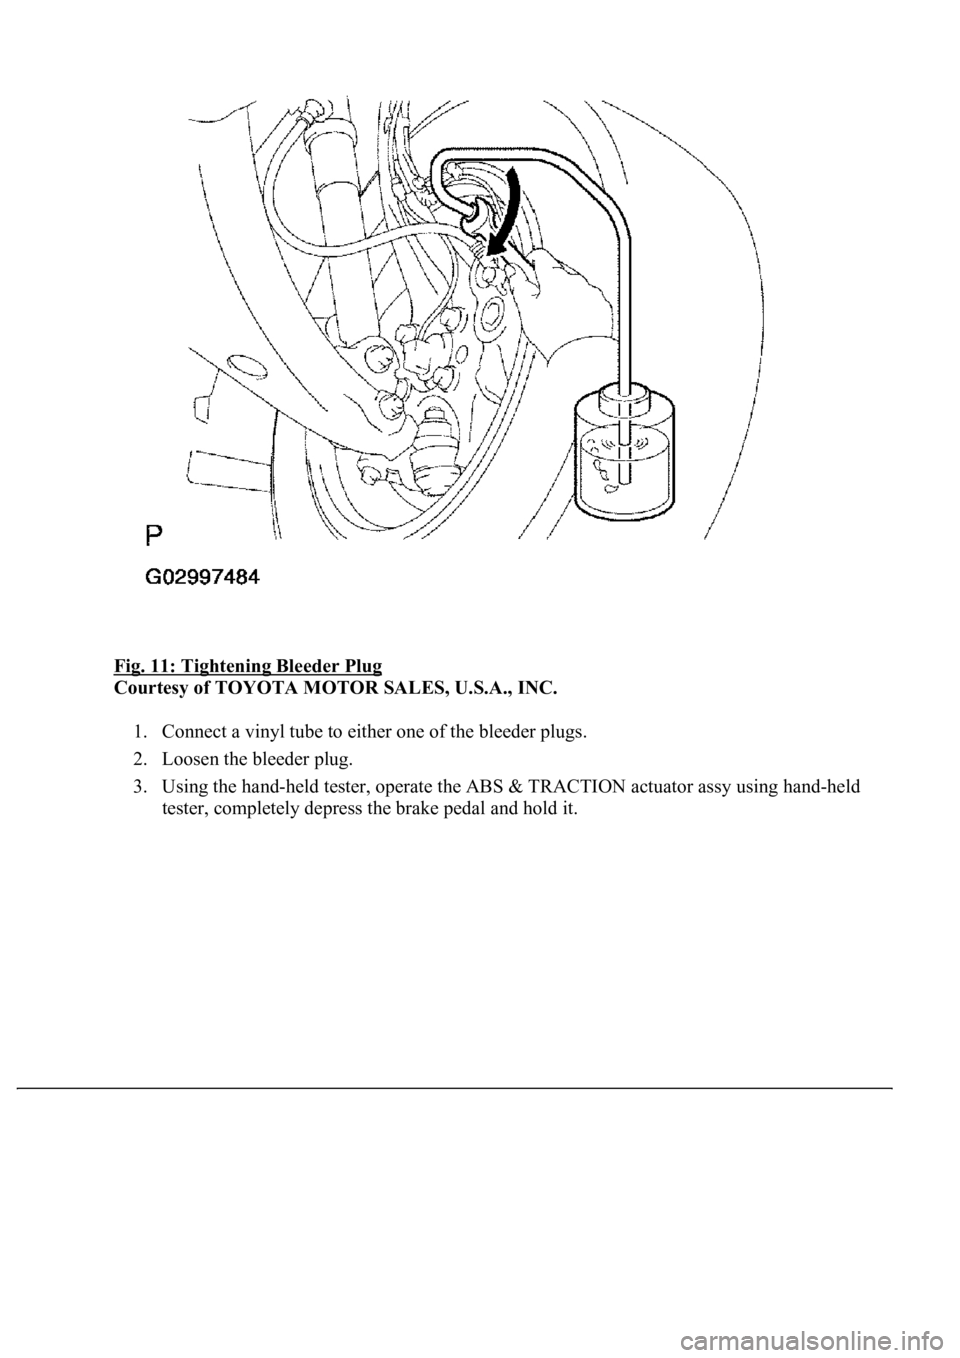
Fig. 11: Tightening Bleeder Plug
Courtesy of TOYOTA MOTOR SALES, U.S.A., INC.
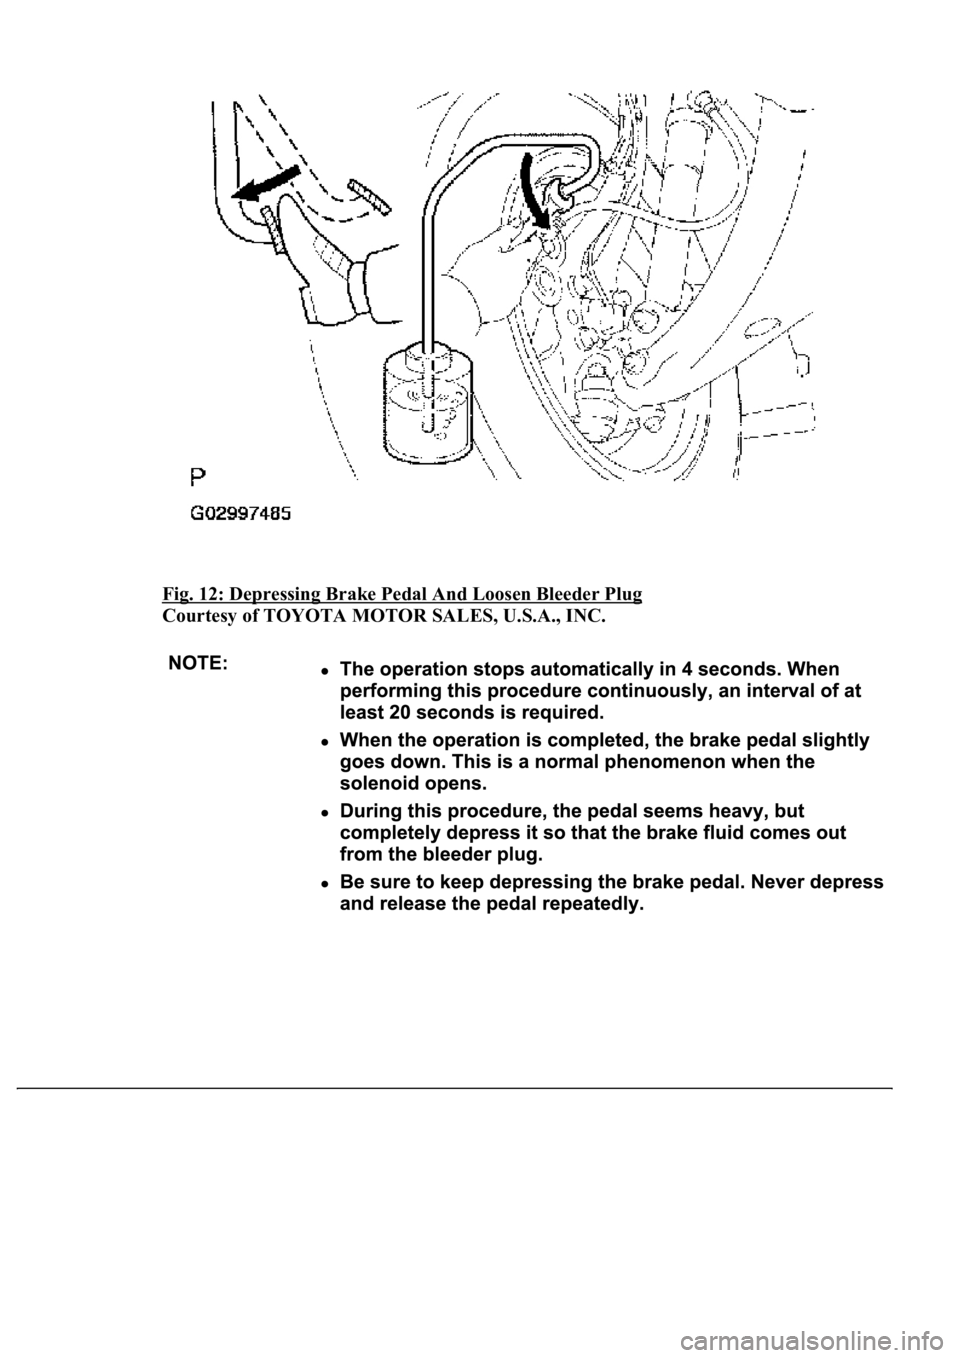
1. Connect a vinyl tube to either one of the bleeder plugs.
2. Loosen the bleeder plug.
3. Using the hand-held tester, operate the ABS & TRACTION actuator assy using hand-held
tester, completel
y depress the brake pedal and hold it.
Page 975 of 4500
Fig. 12: Depressing Brake Pedal And Loosen Bleeder Plug
Courtesy of TOYOTA MOTOR SALES, U.S.A., INC.
Page 976 of 4500
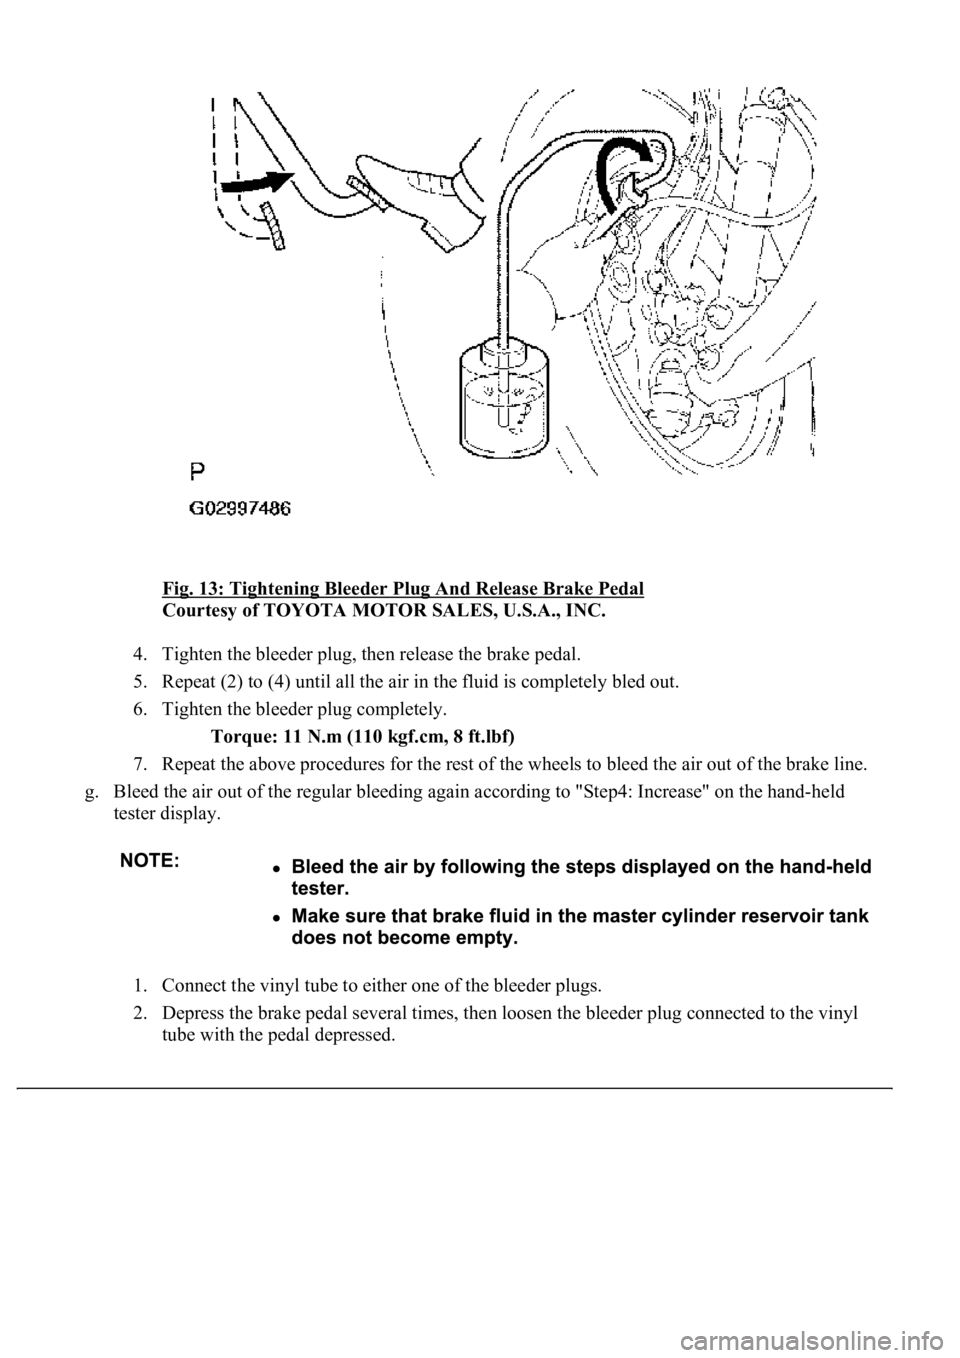
Fig. 13: Tightening Bleeder Plug And Release Brake Pedal
Courtesy of TOYOTA MOTOR SALES, U.S.A., INC.
4. Tighten the bleeder plug, then release the brake pedal.
5. Repeat (2) to (4) until all the air in the fluid is completely bled out.
6. Tighten the bleeder plug completely.
Torque: 11 N.m (110 kgf.cm, 8 ft.lbf)
7. Repeat the above procedures for the rest of the wheels to bleed the air out of the brake line.
g. Bleed the air out of the regular bleeding again according to "Step4: Increase" on the hand-held
tester display.
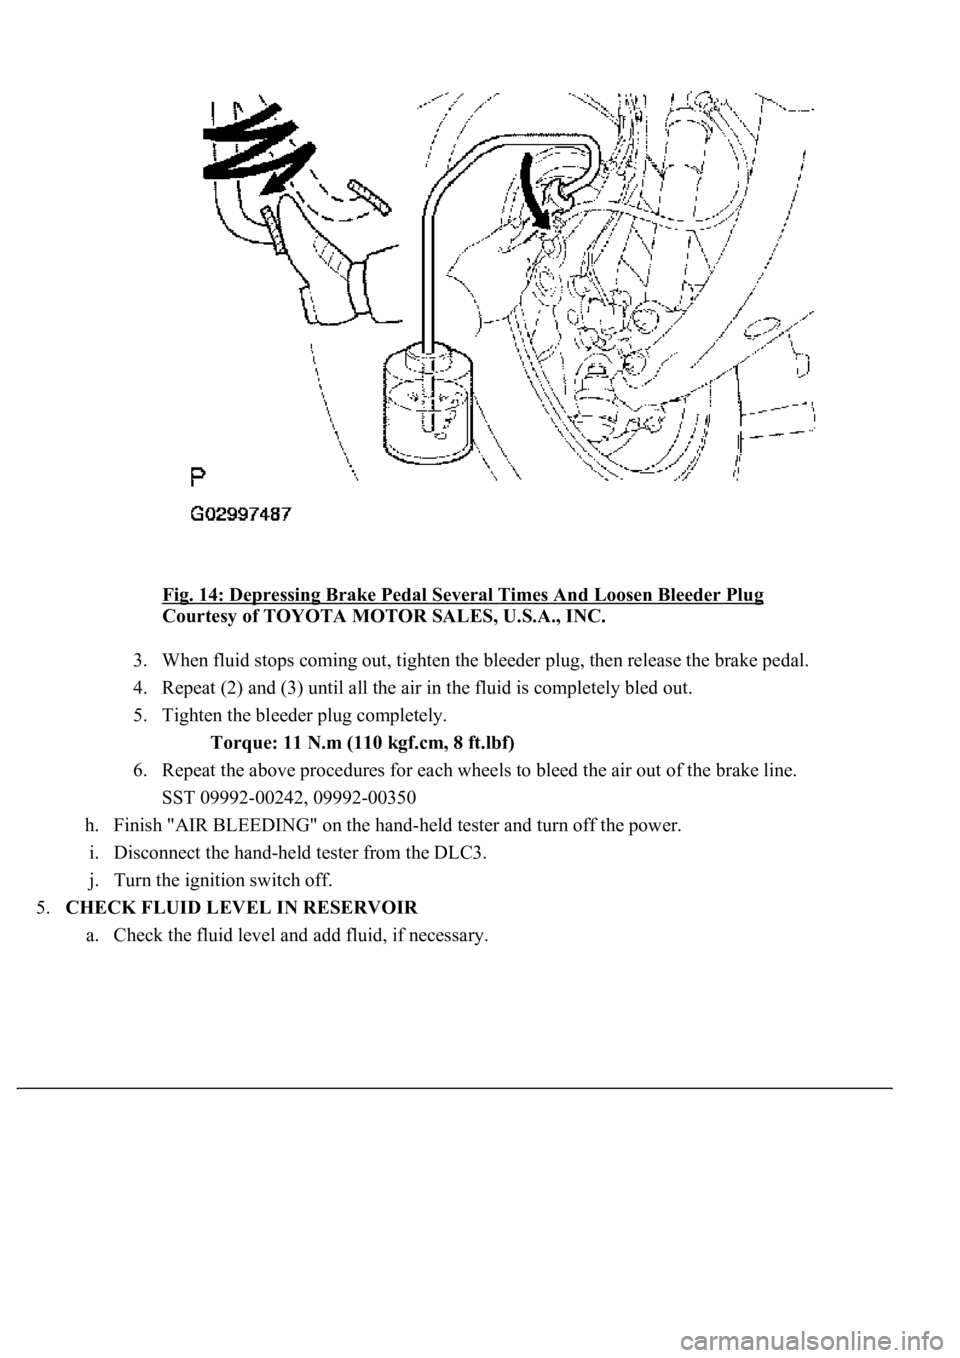
1. Connect the vinyl tube to either one of the bleeder plugs.
2. Depress the brake pedal several times, then loosen the bleeder plug connected to the vinyl
tube with the pedal depressed.
Page 977 of 4500
Fig. 14: Depressing Brake Pedal Several Times And Loosen Bleeder Plug
Courtesy of TOYOTA MOTOR SALES, U.S.A., INC.
3. When fluid stops coming out, tighten the bleeder plug, then release the brake pedal.
4. Repeat (2) and (3) until all the air in the fluid is completely bled out.
5. Tighten the bleeder plug completely.
Torque: 11 N.m (110 kgf.cm, 8 ft.lbf)
6. Repeat the above procedures for each wheels to bleed the air out of the brake line.
SST 09992-00242, 09992-00350
h. Finish "AIR BLEEDING" on the hand-held tester and turn off the power.
i. Disconnect the hand-held tester from the DLC3.
j. Turn the ignition switch off.
5.CHECK FLUID LEVEL IN RESERVOIR
a. Check the fluid level and add fluid, if necessar
y.
Page 978 of 4500
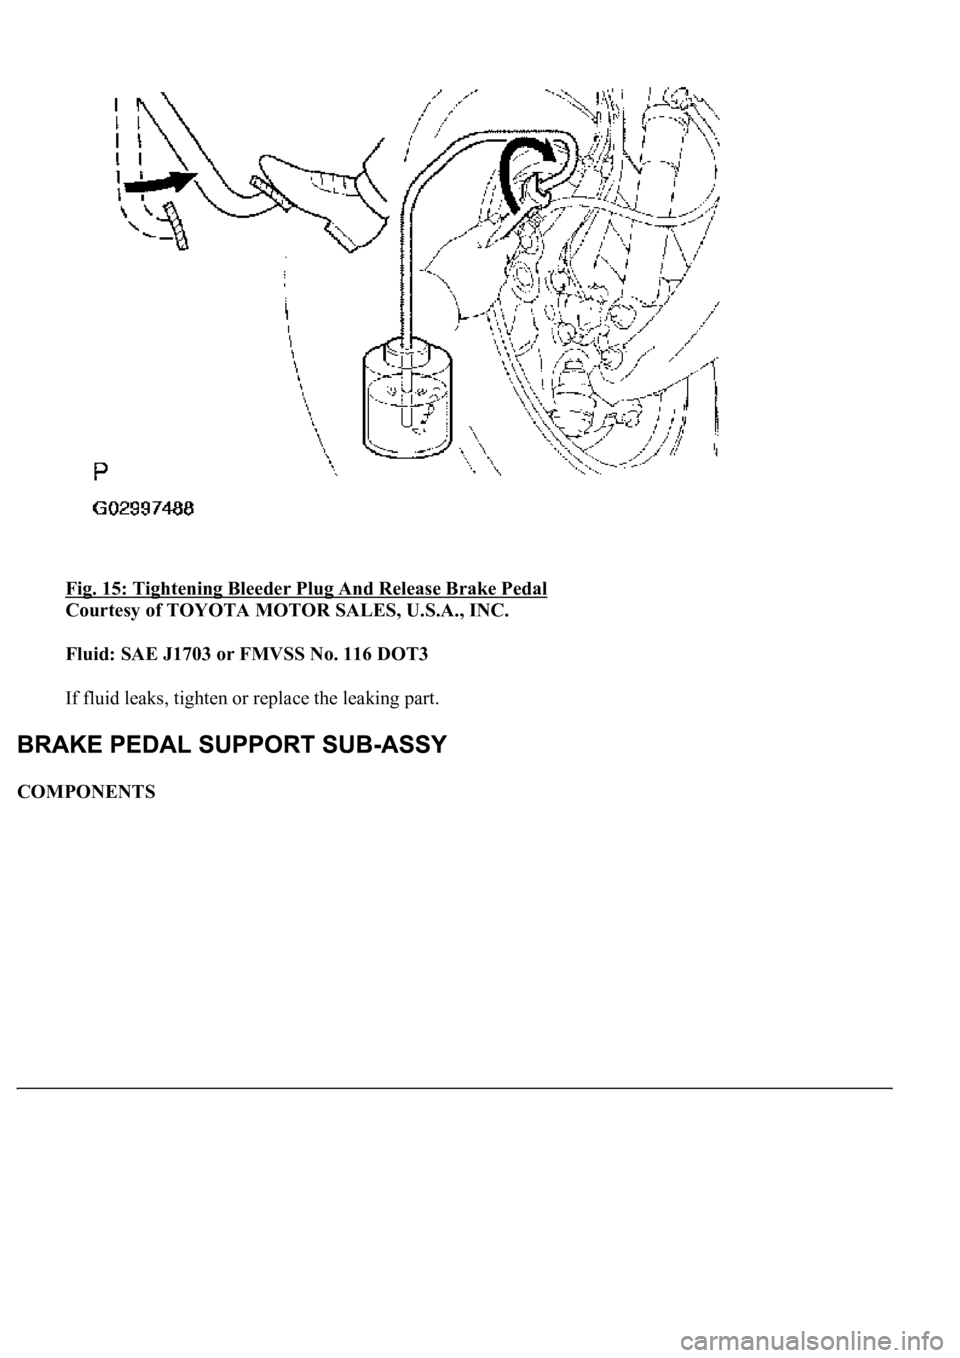
Fig. 15: Tightening Bleeder Plug And Release Brake Pedal
Courtesy of TOYOTA MOTOR SALES, U.S.A., INC.
Fluid: SAE J1703 or FMVSS No. 116 DOT3
If fluid leaks, tighten or replace the leaking part.
COMPONENTS
Page 979 of 4500
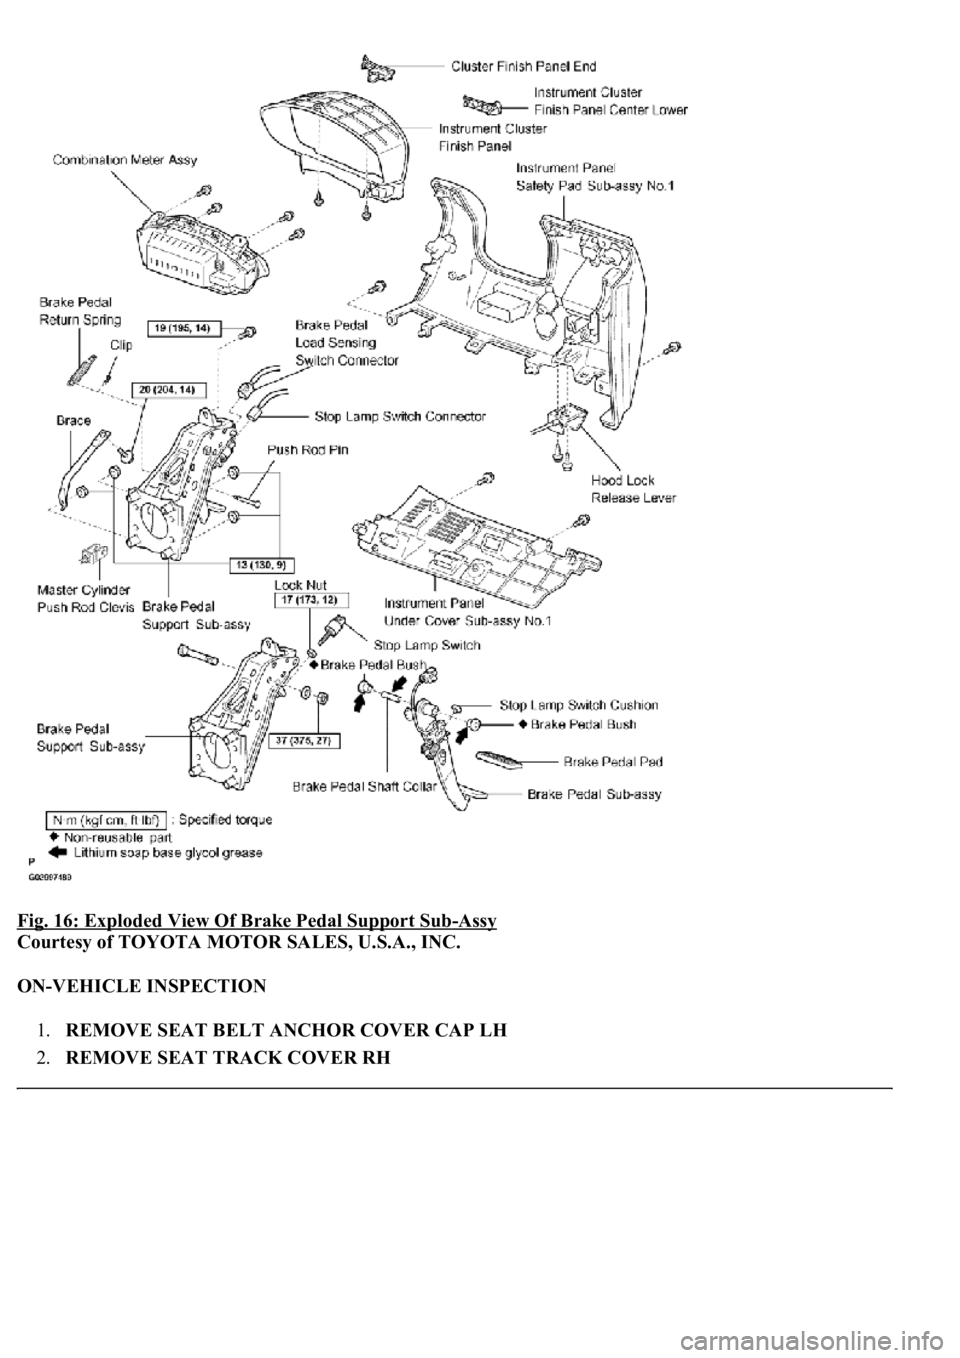
Fig. 16: Exploded View Of Brake Pedal Support Sub-Assy
Courtesy of TOYOTA MOTOR SALES, U.S.A., INC.
ON-VEHICLE INSPECTION
1.REMOVE SEAT BELT ANCHOR COVER CAP LH
2.REMOVE SEAT TRACK COVER RH
Page 980 of 4500
3.REMOVE SEAT TRACK COVER LH
4.REMOVE SEAT TRACK BRACKET COVER OUTER FR
5.REMOVE SEAT TRACK BRACKET COVER INNER FR
6.REMOVE FRONT SEAT ASSY LH
7.REMOVE INSTRUMENT CLUSTER FINISH PANEL END
8.REMOVE INSTRUMENT CLUSTER FINISH PANEL CENTER LOWER
9.REMOVE INSTRUMENT PANEL UNDER COVER SUB-ASSY NO.1 (SEE REPLACEMENT
)
10.REMOVE COIN BOX ASSY
11.REMOVE OUTER MIRROR SWITCH ASSY
12.REMOVE INSTRUMENT PANEL SAFETY PAD SUB-ASSY NO.1 (SEE REPLACEMENT
)
13.REMOVE INSTRUMENT PANEL UNDER COVER SUB-ASSY No.2 (SEE REPLACEMENT
)
14.REMOVE FR DOOR SCUFF PLATE LH (SEE REPLACEMENT
)
15.REMOVE FLOOR CARPET ASSY FRONT
16.CHECK AND ADJUST BRAKE PEDAL HEIGHT
a. Check brake pedal height.
Pedal height from asphalt sheet:
165.1 to 175.1 mm (6.49 to 6.89 in.)
b. If necessary, adjust brake pedal height.
1. Disconnect the connector from the stop lamp switch assy.
2. Loosen the stop lamp switch lock nut and remove the stop lamp switch assy.
3. Loosen the push rod lock nut.
4. Adjust the pedal height by turning the pedal push rod.
5. Tighten the push rod lock nut.
Torque: 26 N.m (265 kgf.cm, 19 ft.lbf)
6. Install the stop lamp switch assy.
7. Connect the stop lamp switch assy connector.
8. Push the brake pedal in 5 to 10 mm (0.20 to 0.39 in.), and turn the stop lamp switch assy to lock the
<0051005800570003004c005100030057004b00480003005300520056004c0057004c005200510003005a004b00480055004800030057004b0048000300560057005200530003004f0044005000530003004a00520048005600030052004900490011000300
03[
9. After installation, push the brake pedal in 5 to 10 mm (0.20 to 0.39 in.), and check that the stop
lamp comes on.
10. Tighten the stop lamp switch lock nut.
Torque: 17 N.m (173 kgf.cm, 12 ft.lbf)
If the stop lamp does not come on, repeat the steps in (
b).
Trending: B2419 bean, injection, check engine, warning light, differential, tire size, electronic modulated
