LEXUS RX350 2011 Owners Manual
RX350 2011
LEXUS
LEXUS
https://www.carmanualsonline.info/img/36/58968/w960_58968-0.png
LEXUS RX350 2011 Owners Manual
Trending: rear view mirror, torque, wheel size, automatic transmission, recommended oil, fuse box, fuel consumption
Page 461 of 821
391
3-4. Using the hands-free phone system (for mobile phones)
3
Interior features
Inputting a phone number using :
STEP2-1 Select “Manual Input” using .
STEP2-2 Input a phone number using , and press
again.
Input the phone number 1 digit at a time.
Selecting a phone number from outgoing or incoming call history:
STEP2-1 Select “Call History” using a voice command or .
STEP2-2 Select “Outgoing” or “Incoming” using a voice com-
mand or .
STEP2-3 Select the data to be registered by either of the follow-
ing methods:
a. Say “Previous” or “Go back” until the desired data is
displayed, and select “Confirm” using a voice com-
mand.
b. Select the desired data using .
Page 462 of 821
392
3-4. Using the hands-free phone system (for mobile phones)
Select the name to be registered by either of the following meth-
ods, and select “Confirm” using a voice command or :
a. Press the talk switch and say the desired name.
b. Select “Record Name” using , and say the desired
name.
Select “Confirm” using a voice command or .
In , selecting “Set Speed Dial (Speed Dial)” instead of “Con-
firm” registers the newly added phone number as a speed dial.
Changing the registered name in the phone book
Select “Change Name” using a voice command or .
Pattern A
Select the name to be changed by either of the following meth-
ods, and select “Confirm” using a voice command or :
a. Press the talk switch, say the desired name.
b. Press the talk switch, and say “List Names”. When the desired
name is read aloud, press the talk switch.
Pattern B
Select the desired name to be changed using .
STEP3
STEP4
STEP4
STEP1
STEP2
STEP2
Page 463 of 821
393
3-4. Using the hands-free phone system (for mobile phones)
3
Interior features
Press the talk switch or select “Record Name” using , and
say the new name.
Select “Confirm” using a voice command or .
Listing the registered data
Select “List Names” using a voice command or . The list of the reg-
istered data will be read aloud.
When listing is complete, the system returns to the “Phonebook”.
Pressing the talk switch while the desired data is being read aloud selects
the data, and the following function will become available:
lDialing: “Dial”
lChanging a registered name: “Change Name”
lDeleting an entry: “Delete Entry”
lSetting a speed dial: “Set Speed Dial (Speed Dial)”
STEP3
STEP4
Page 464 of 821
394
3-4. Using the hands-free phone system (for mobile phones)
Setting speed dials
Select “Set Speed Dial (Speed Dial)” using a voice command or
.
Pattern A
Select the data to be registered as a speed dial by either of the
following methods, and select “Confirm” using a voice command
or :
a. Press the talk switch, say the desired name.
b. Press the talk switch, and say “List Names”. When the desired
name is read aloud, press the talk switch.
Pattern B
Select the desired data using .
Select the desired preset button, and register the data into speed
dial by either of the following methods:
a. Press the desired preset button, and select “Confirm” by using
a voice command or .
b. Press and hold the desired preset button.
STEP1
STEP2
STEP2
STEP3
Page 465 of 821
395
3-4. Using the hands-free phone system (for mobile phones)
3
Interior features
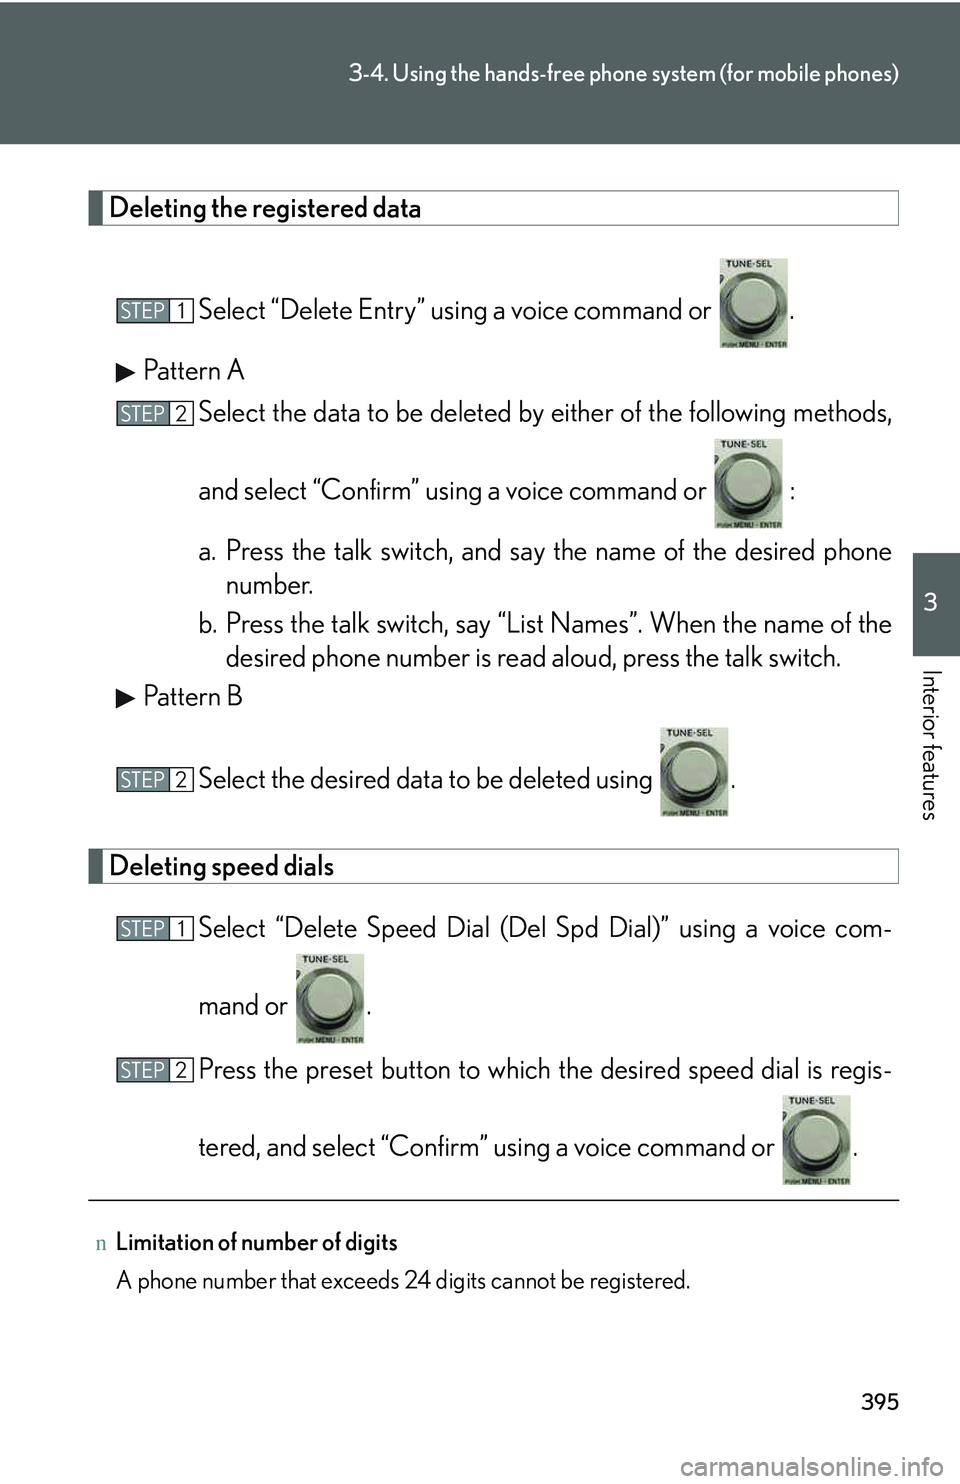
Deleting the registered data
Select “Delete Entry” using a voice command or .
Pattern A
Select the data to be deleted by either of the following methods,
and select “Confirm” using a voice command or :
a. Press the talk switch, and say the name of the desired phone
number.
b. Press the talk switch, say “List Names”. When the name of the
desired phone number is read aloud, press the talk switch.
Pattern B
Select the desired data to be deleted using .
Deleting speed dials
Select “Delete Speed Dial (Del Spd Dial)” using a voice com-
mand or .
Press the preset button to which the desired speed dial is regis-
tered, and select “Confirm” using a voice command or .
nLimitation of number of digits
A phone number that exceeds 24 digits cannot be registered.
STEP1
STEP2
STEP2
STEP1
STEP2
Page 466 of 821
396
3-5. Using the interior lights
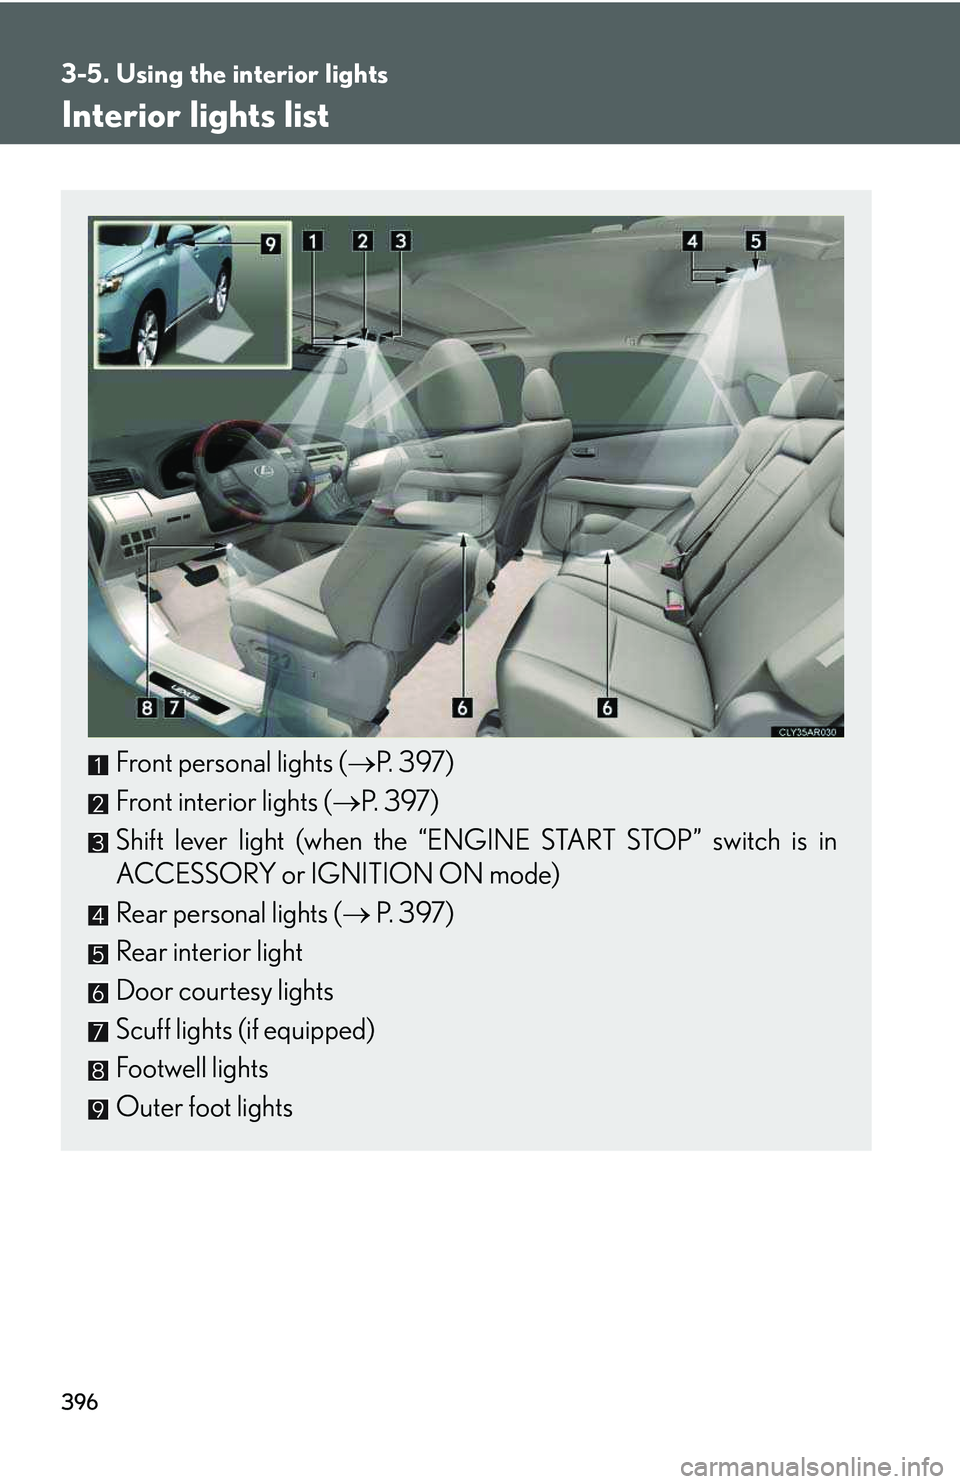
Interior lights list
Front personal lights (�→P. 397)
Front interior lights (�→P. 397)
Shift lever light (when the “ENGINE START STOP” switch is in
ACCESSORY or IGNITION ON mode)
Rear personal lights (�→ P. 397)
Rear interior light
Door courtesy lights
Scuff lights (if equipped)
Footwell lights
Outer foot lights
Page 467 of 821
397
3-5. Using the interior lights
3
Interior features
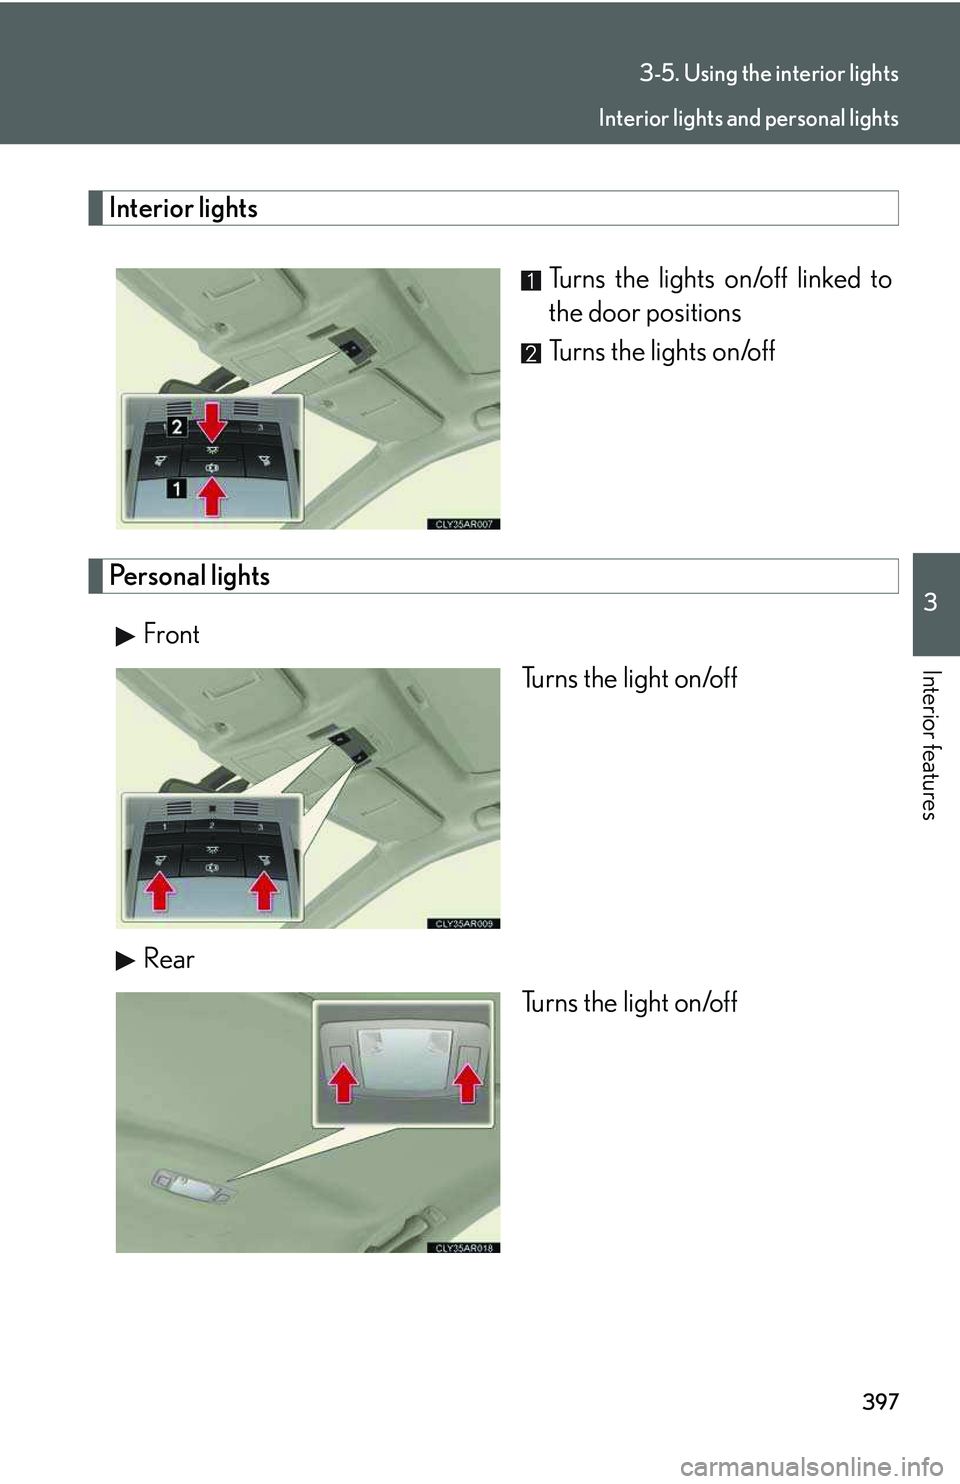
Interior lights
Turns the lights on/off linked to
the door positions
Turns the lights on/off
Personal lights
Front
Turns the light on/off
Rear
Turns the light on/off
Interior lights and personal lights
Page 468 of 821
398
3-5. Using the interior lights
nIlluminated entry system
The lights automatically turn on/off according to “ENGINE START STOP” switch
mode, the presence of the electronic key, whether the doors are locked/unlocked,
and whether the doors are open/closed.
nTo prevent battery discharge
If the interior lights remain on when the door is not fully closed and the interior light
switch (door position on/ off) is on, the lights will go off automatically after 20 min-
utes.
nCustomization
Settings (e.g. the time elapsed before the lights turn off) can be changed. (Custom-
izable features �→P. 6 2 1 )
Pe r s o n a l l i g h t s
Page 469 of 821
399
3
Interior features
3-6. Using the storage features
List of storage features
CAUTION
nItems that should not be left in the storage spaces
Do not leave glasses, lighters or spray cans in the storage spaces, as this may cause
the following when cabin temperature becomes high:
lGlasses may be deformed by heat or cracked if they come into contact with
other stored items.
lLighters or spray cans may explode. If they come into contact with other stored
items, the lighter may catch fire or the spray can may release gas, causing a fire
hazard.
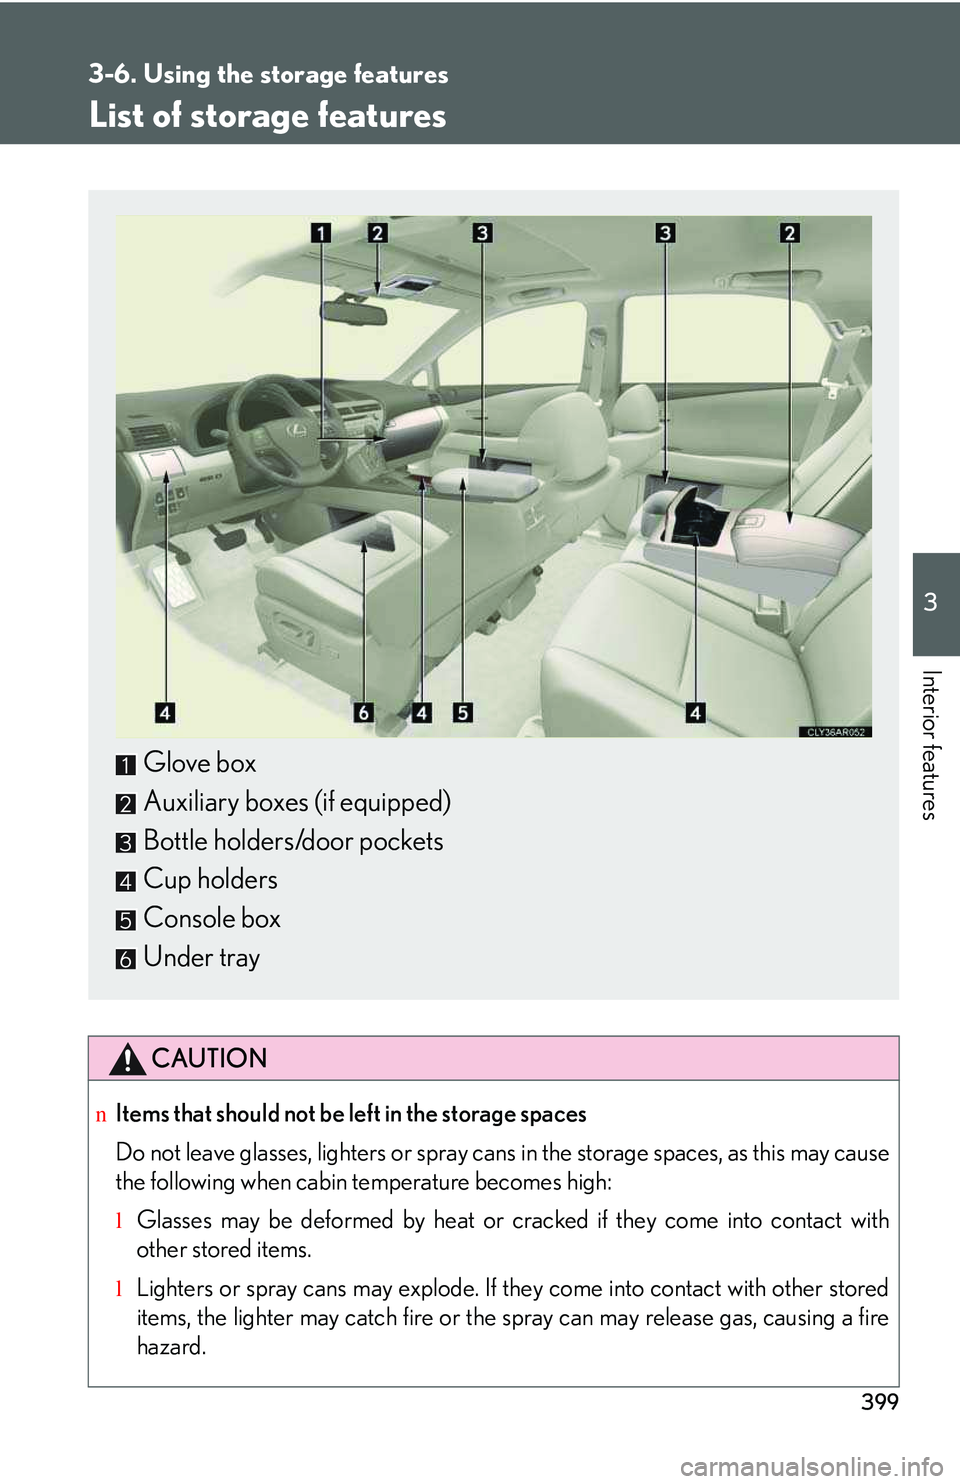
Glove box
Auxiliary boxes (if equipped)
Bottle holders/door pockets
Cup holders
Console box
Under tray
Page 470 of 821
400
3-6. Using the storage features
Glove box
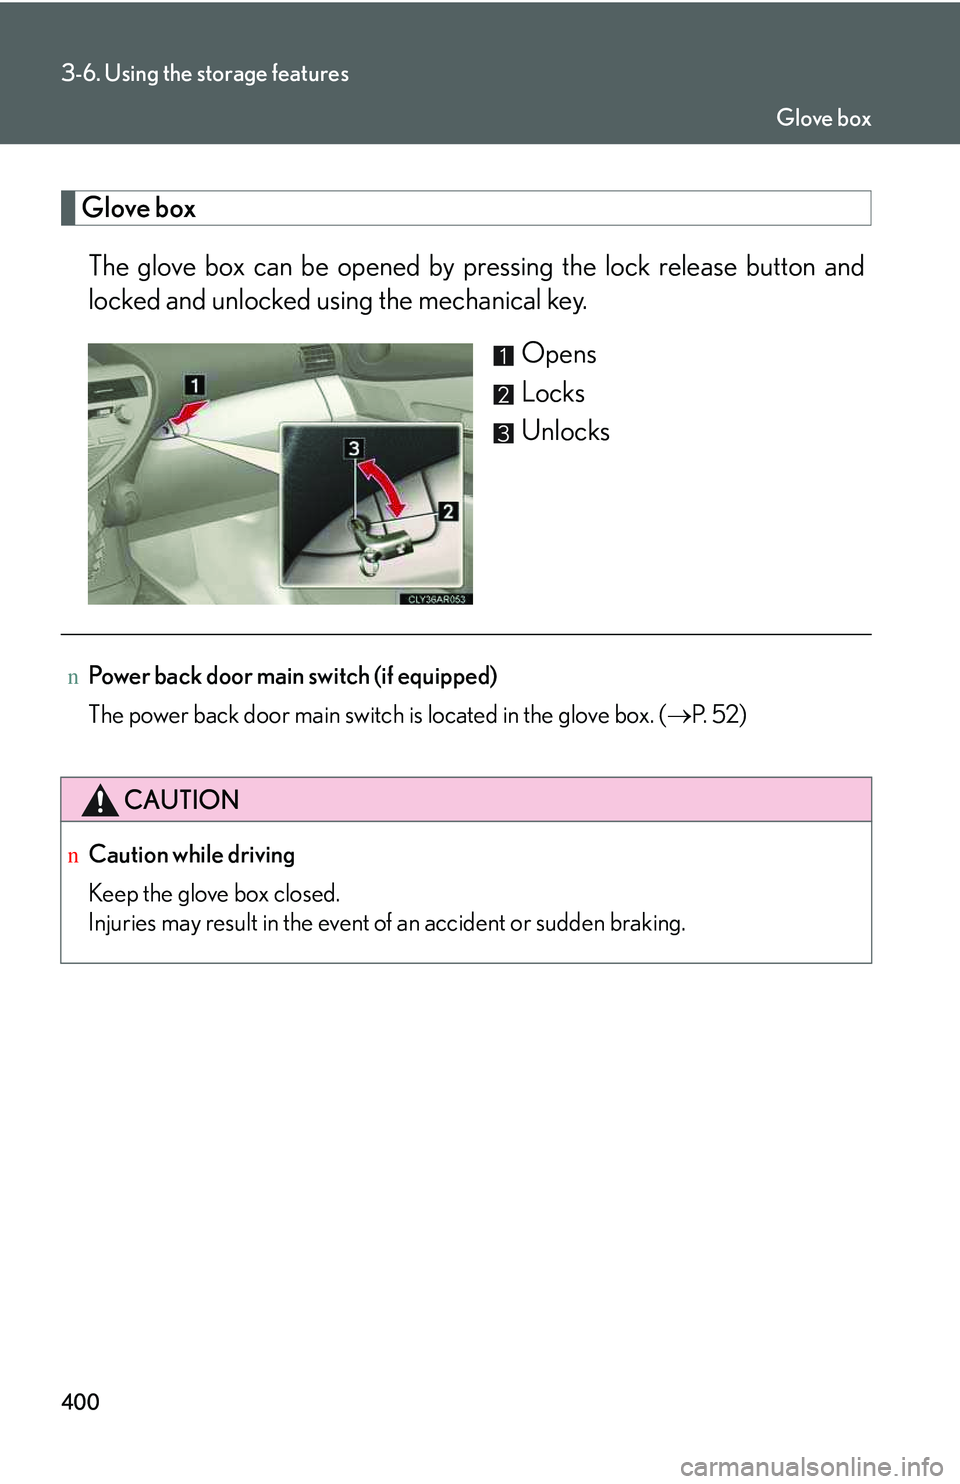
The glove box can be opened by pressing the lock release button and
locked and unlocked using the mechanical key.
Opens
Locks
Unlocks
nPower back door main switch (if equipped)
The power back door main switch is located in the glove box. (�→P. 5 2 )
CAUTION
nCaution while driving
Keep the glove box closed.
Injuries may result in the event of an accident or sudden braking.
Glove box
Trending: power steering, cooling, water pump, low beam, dashboard, check transmission fluid, steering wheel
