LINCOLN NAUTILUS 2020 Owners Manual
Manufacturer: LINCOLN, Model Year: 2020, Model line: NAUTILUS, Model: LINCOLN NAUTILUS 2020Pages: 596, PDF Size: 5.88 MB
Page 271 of 596
These systems have a range of modes which
you can choose from to customize your ideal
driving experience:
•
Comfort – Provides a more relaxed
driving experience, maximizing comfort.
Your steering effort decreases and the
suspension movement is more fluid.
Comfort mode is ideal when you desire
enhanced traveling comfort.
• Normal
– Delivers a balanced
combination of comfortable, controlled
ride and confident handling. This mode
provides an engaging driving experience
and a direct connection to the road
without sacrificing any of the composure
demanded from a luxury vehicle.
• Sport
– Provides a sportier driving
experience. The suspension stiffens, with
an emphasis on handling and control.
The engine responds more directly to
your inputs and takes on a more powerful
tone. This mode is ideal for use during
more spirited driving.
You can change the drive control settings in
the information display.
See General
Information (page 116). Note:
Not all settings may be available.
Note: Lincoln Drive Control has diagnostic
checks that continuously monitor the system
to ensure proper operation. Certain types of
system errors gray out the mode selections
within the information display, preventing
you from changing states when the gear
position is changed. Other types of errors
produce a temporary message in the
information display. If either condition
persists for multiple key cycles, see an
authorized dealer.
EcoCoach
The system is designed to monitor certain
driving characteristics to help you drive more
efficiently.
See Economical Driving (page
285).
Note: The efficiency levels do not result in a
defined fuel consumption figure.
See Fuel
Consumption (page 187).
Note: The system only indicates the
efficiency level for the current trip. The
system resets each time you switch the
ignition on. EcoCoach System Display
You can view the instantaneous efficiency
level or the trip summary in the information
display.
Instantaneous Efficiency Level
The display ring increases as the
instantaneous efficiency level increases and
illuminates when it reaches maximum
efficiency. The level continuously updates
to indicate the efficiency level for the current
trip.
Use the information display controls to view
the instantaneous efficiency level.
See
General Information (page 116).
Trip Summary
The calculated trip summary is shown as four
colored bars. The bars travel from left to right
as the calculated efficiency levels increase.
The bars indicate the average efficiency level
for acceleration, deceleration, speed and
gear shifting during the total distance
traveled by your vehicle for the current trip.
268
Nautilus (CD9) Canada/United States of America, enUSA, Edition date: 201907, First-Printing Driving Aids
Page 272 of 596
Note:
Vehicles with an automatic
transmission do not have a bar for gear
shifting.
Use the information display controls to view
the trip summary. See General Information
(page 116).
269
Nautilus (CD9) Canada/United States of America, enUSA, Edition date: 201907, First-Printing Driving Aids
Page 273 of 596
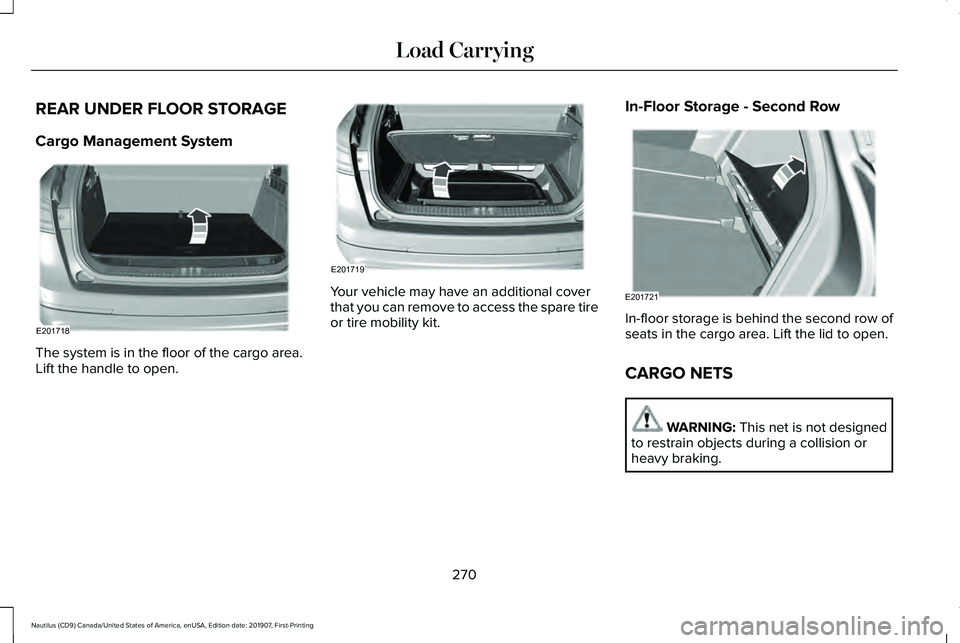
REAR UNDER FLOOR STORAGE
Cargo Management System
The system is in the floor of the cargo area.
Lift the handle to open. Your vehicle may have an additional cover
that you can remove to access the spare tire
or tire mobility kit.
In-Floor Storage - Second Row In-floor storage is behind the second row of
seats in the cargo area. Lift the lid to open.
CARGO NETS
WARNING: This net is not designed
to restrain objects during a collision or
heavy braking.
270
Nautilus (CD9) Canada/United States of America, enUSA, Edition date: 201907, First-Printing Load CarryingE201718 E201719 E201721
Page 274 of 596
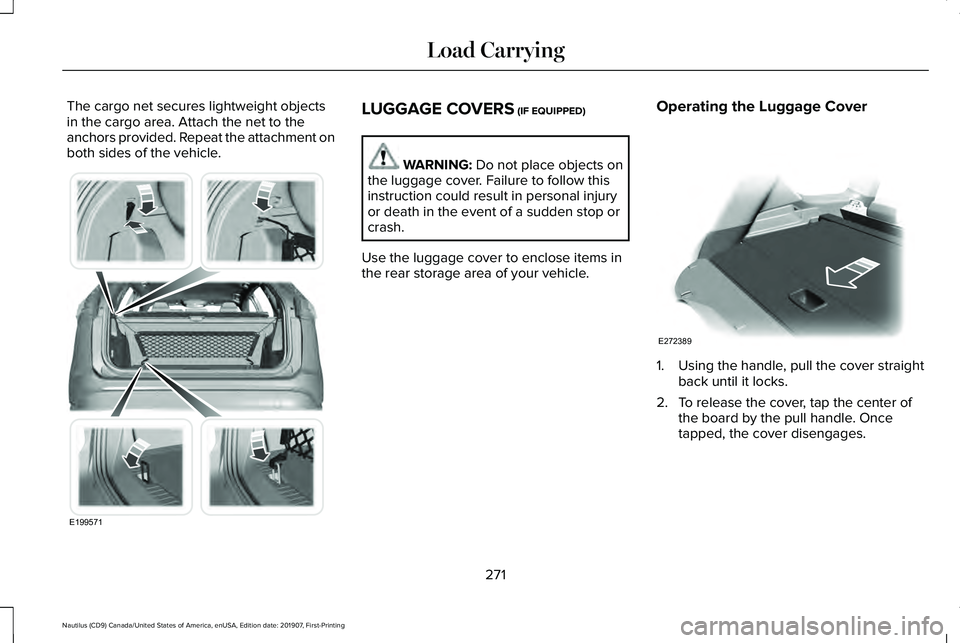
The cargo net secures lightweight objects
in the cargo area. Attach the net to the
anchors provided. Repeat the attachment on
both sides of the vehicle.
LUGGAGE COVERS (IF EQUIPPED)
WARNING:
Do not place objects on
the luggage cover. Failure to follow this
instruction could result in personal injury
or death in the event of a sudden stop or
crash.
Use the luggage cover to enclose items in
the rear storage area of your vehicle. Operating the Luggage Cover 1. Using the handle, pull the cover straight
back until it locks.
2. To release the cover, tap the center of the board by the pull handle. Once
tapped, the cover disengages.
271
Nautilus (CD9) Canada/United States of America, enUSA, Edition date: 201907, First-Printing Load CarryingE199571 E272389
Page 275 of 596
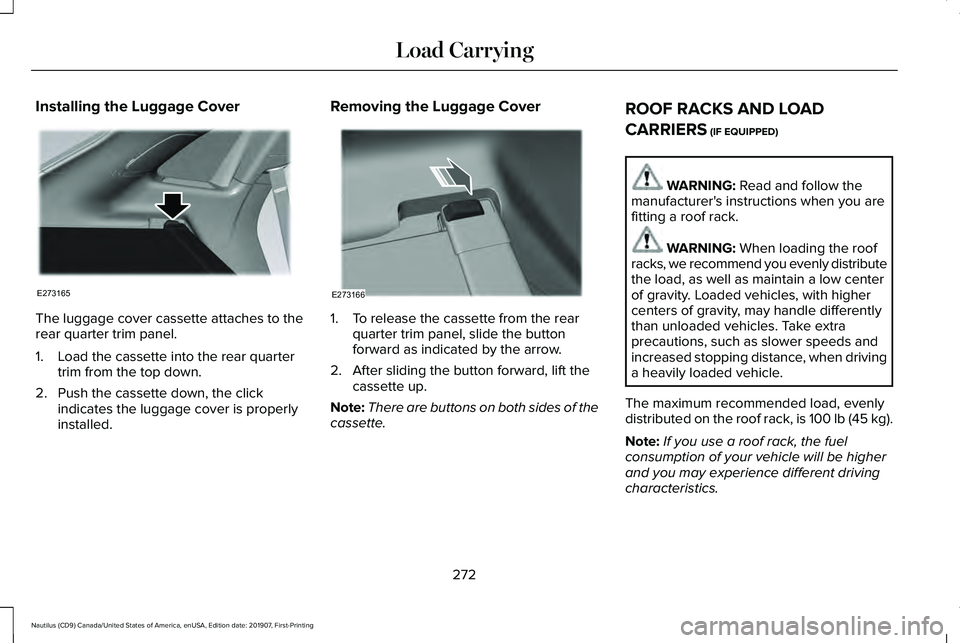
Installing the Luggage Cover
The luggage cover cassette attaches to the
rear quarter trim panel.
1. Load the cassette into the rear quarter
trim from the top down.
2. Push the cassette down, the click indicates the luggage cover is properly
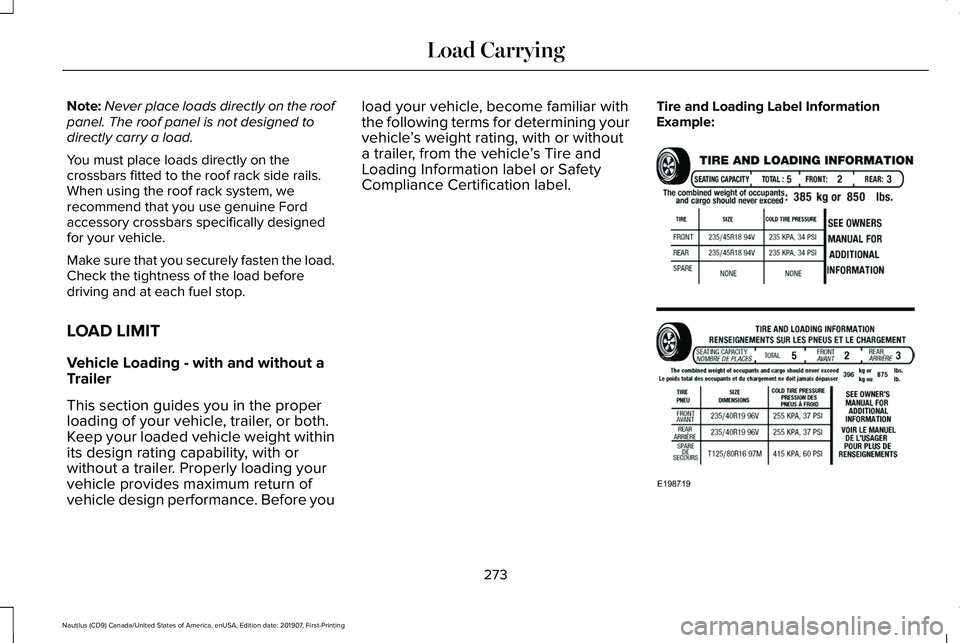
installed. Removing the Luggage Cover
1. To release the cassette from the rear
quarter trim panel, slide the button
forward as indicated by the arrow.
2. After sliding the button forward, lift the cassette up.
Note: There are buttons on both sides of the
cassette. ROOF RACKS AND LOAD
CARRIERS (IF EQUIPPED) WARNING:
Read and follow the
manufacturer's instructions when you are
fitting a roof rack. WARNING:
When loading the roof
racks, we recommend you evenly distribute
the load, as well as maintain a low center
of gravity. Loaded vehicles, with higher
centers of gravity, may handle differently
than unloaded vehicles. Take extra
precautions, such as slower speeds and
increased stopping distance, when driving
a heavily loaded vehicle.
The maximum recommended load, evenly
distributed on the roof rack, is 100 lb (45 kg).
Note: If you use a roof rack, the fuel
consumption of your vehicle will be higher
and you may experience different driving
characteristics.
272
Nautilus (CD9) Canada/United States of America, enUSA, Edition date: 201907, First-Printing Load CarryingE273165 E273166
Page 276 of 596
Note:
Never place loads directly on the roof
panel. The roof panel is not designed to
directly carry a load.
You must place loads directly on the
crossbars fitted to the roof rack side rails.
When using the roof rack system, we
recommend that you use genuine Ford
accessory crossbars specifically designed
for your vehicle.
Make sure that you securely fasten the load.
Check the tightness of the load before
driving and at each fuel stop.
LOAD LIMIT
Vehicle Loading - with and without a
Trailer
This section guides you in the proper
loading of your vehicle, trailer, or both.
Keep your loaded vehicle weight within
its design rating capability, with or
without a trailer. Properly loading your
vehicle provides maximum return of
vehicle design performance. Before you load your vehicle, become familiar with
the following terms for determining your
vehicle
’s weight rating, with or without
a trailer, from the vehicle ’s Tire and
Loading Information label or Safety
Compliance Certification label. Tire and Loading Label Information
Example:
273
Nautilus (CD9) Canada/United States of America, enUSA, Edition date: 201907, First-Printing Load CarryingE198719
Page 277 of 596
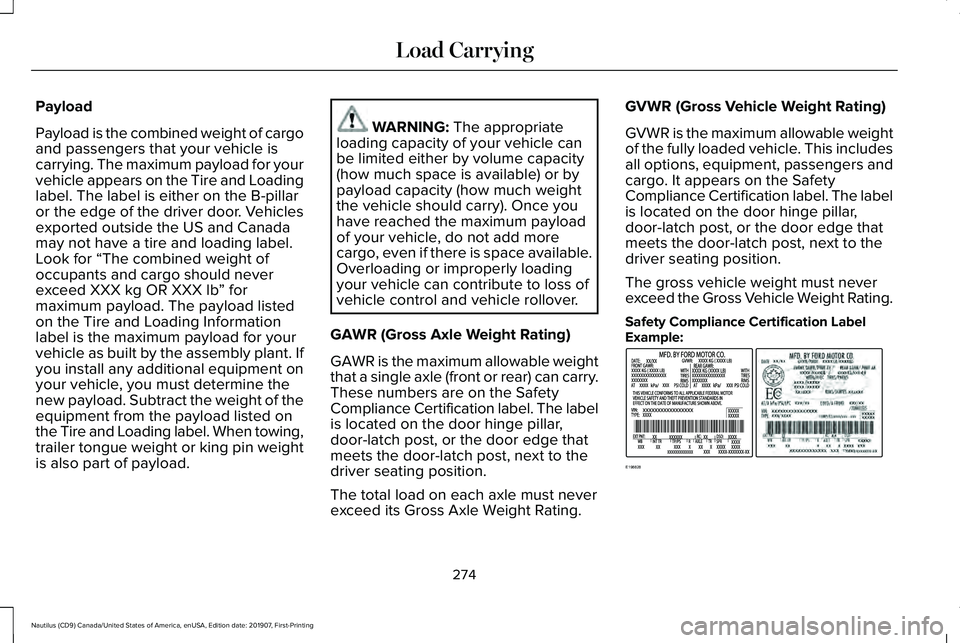
Payload
Payload is the combined weight of cargo
and passengers that your vehicle is
carrying. The maximum payload for your
vehicle appears on the Tire and Loading
label. The label is either on the B-pillar
or the edge of the driver door. Vehicles
exported outside the US and Canada
may not have a tire and loading label.
Look for “The combined weight of
occupants and cargo should never
exceed XXX kg OR XXX lb
” for
maximum payload. The payload listed
on the Tire and Loading Information
label is the maximum payload for your
vehicle as built by the assembly plant. If
you install any additional equipment on
your vehicle, you must determine the
new payload. Subtract the weight of the
equipment from the payload listed on
the Tire and Loading label. When towing,
trailer tongue weight or king pin weight
is also part of payload. WARNING: The appropriate
loading capacity of your vehicle can
be limited either by volume capacity
(how much space is available) or by
payload capacity (how much weight
the vehicle should carry). Once you
have reached the maximum payload
of your vehicle, do not add more
cargo, even if there is space available.
Overloading or improperly loading
your vehicle can contribute to loss of
vehicle control and vehicle rollover.
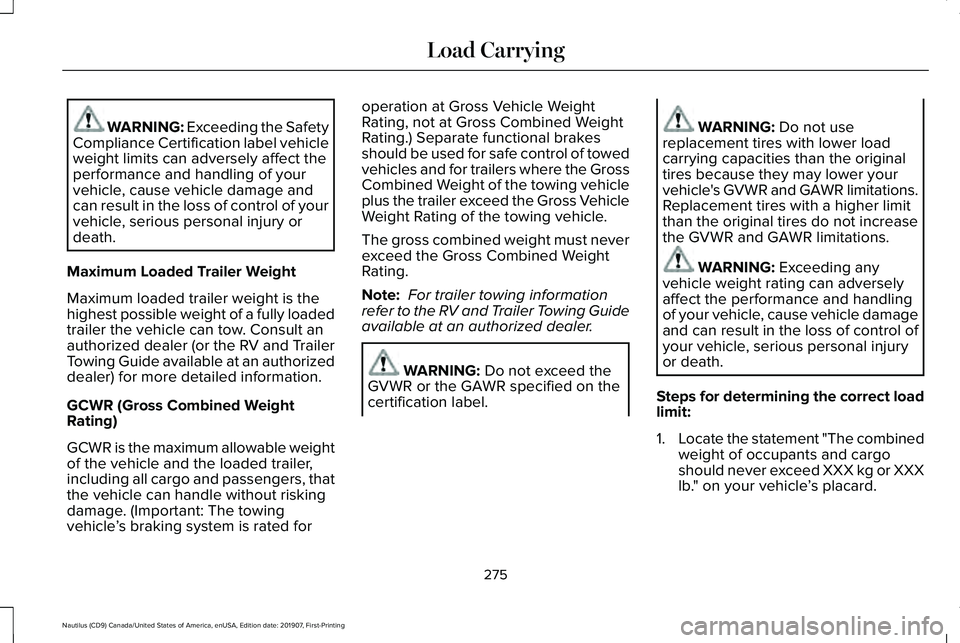
GAWR (Gross Axle Weight Rating)
GAWR is the maximum allowable weight
that a single axle (front or rear) can carry.
These numbers are on the Safety
Compliance Certification label. The label
is located on the door hinge pillar,
door-latch post, or the door edge that
meets the door-latch post, next to the
driver seating position.
The total load on each axle must never
exceed its Gross Axle Weight Rating. GVWR (Gross Vehicle Weight Rating)
GVWR is the maximum allowable weight
of the fully loaded vehicle. This includes
all options, equipment, passengers and
cargo. It appears on the Safety
Compliance Certification label. The label
is located on the door hinge pillar,
door-latch post, or the door edge that
meets the door-latch post, next to the
driver seating position.
The gross vehicle weight must never
exceed the Gross Vehicle Weight Rating.
Safety Compliance Certification Label
Example:
274
Nautilus (CD9) Canada/United States of America, enUSA, Edition date: 201907, First-Printing Load CarryingE198828
Page 278 of 596
WARNING: Exceeding the Safety
Compliance Certification label vehicle
weight limits can adversely affect the
performance and handling of your
vehicle, cause vehicle damage and
can result in the loss of control of your
vehicle, serious personal injury or
death.
Maximum Loaded Trailer Weight
Maximum loaded trailer weight is the
highest possible weight of a fully loaded
trailer the vehicle can tow. Consult an
authorized dealer (or the RV and Trailer
Towing Guide available at an authorized
dealer) for more detailed information.
GCWR (Gross Combined Weight
Rating)
GCWR is the maximum allowable weight
of the vehicle and the loaded trailer,
including all cargo and passengers, that
the vehicle can handle without risking
damage. (Important: The towing
vehicle ’s braking system is rated for operation at Gross Vehicle Weight
Rating, not at Gross Combined Weight
Rating.) Separate functional brakes
should be used for safe control of towed
vehicles and for trailers where the Gross
Combined Weight of the towing vehicle
plus the trailer exceed the Gross Vehicle
Weight Rating of the towing vehicle.
The gross combined weight must never
exceed the Gross Combined Weight
Rating.
Note:
For trailer towing information
refer to the RV and Trailer Towing Guide
available at an authorized dealer. WARNING:
Do not exceed the
GVWR or the GAWR specified on the
certification label. WARNING:
Do not use
replacement tires with lower load
carrying capacities than the original
tires because they may lower your
vehicle's GVWR and GAWR limitations.
Replacement tires with a higher limit
than the original tires do not increase
the GVWR and GAWR limitations. WARNING:
Exceeding any
vehicle weight rating can adversely
affect the performance and handling
of your vehicle, cause vehicle damage
and can result in the loss of control of
your vehicle, serious personal injury
or death.
Steps for determining the correct load
limit:
1. Locate the statement "The combined
weight of occupants and cargo
should never exceed XXX kg or XXX
lb." on your vehicle ’s placard.
275
Nautilus (CD9) Canada/United States of America, enUSA, Edition date: 201907, First-Printing Load Carrying
Page 279 of 596
2.
Determine the combined weight of
the driver and passengers that will
be riding in your vehicle.
3. Subtract the combined weight of the
driver and passengers from XXX kg
or XXX lb.
4. The resulting figure equals the available amount of cargo and
luggage load capacity. For example,
if the “XXX” amount equals 1,400 lb.
and there will be five 150 lb.
passengers in your vehicle, the
amount of available cargo and
luggage load capacity is 650 lb.
(1400-750 (5 x 150) = 650 lb.)
5. Determine the combined weight of
luggage and cargo being loaded on
the vehicle. That weight may not
safely exceed the available cargo
and luggage load capacity calculated
in Step 4. 6.
If your vehicle will be towing a trailer,
load from your trailer will be
transferred to your vehicle. Consult
this manual to determine how this
reduces the available cargo and
luggage load capacity of your
vehicle.
Helpful examples for calculating the
available amount of cargo and
luggage load capacity
Suppose your vehicle has a 1400-pound
(635-kilogram) cargo and luggage
capacity. You decide to go golfing. Is
there enough load capacity to carry you,
four of your friends and all the golf bags?
You and four friends average 220
pounds (99 kilograms) each and the golf
bags weigh approximately 30 pounds
(13.5 kilograms) each. The calculation
would be: 1400 - (5 x 220) - (5 x 30) =
1400 - 1100 - 150 = 150 pounds. Yes, you have enough load capacity in your
vehicle to transport four friends and your
golf bags. In metric units, the calculation
would be: 635 kilograms - (5 x 99
kilograms) - (5 x 13.5 kilograms) = 635 -
495 - 67.5 = 72.5 kilograms.
Suppose your vehicle has a 1400-pound
(635-kilogram) cargo and luggage
capacity. You and one of your friends
decide to pick up cement from the local
home improvement store to finish that
patio you have been planning for the
past two years. Measuring the inside of
the vehicle with the rear seat folded
down, you have room for twelve
100-pound (45-kilogram) bags of
cement. Do you have enough load
capacity to transport the cement to your
home? If you and your friend each weigh
220 pounds (99 kilograms), the
calculation would be: 1400 - (2 x 220) -
(12 x 100) = 1400 - 440 - 1200 = - 240
pounds. No, you do not have enough
cargo capacity to carry that much
weight. In metric units, the calculation
would be: 635 kilograms - (2 x 99
kilograms) - (12 x 45 kilograms) = 635 -
276
Nautilus (CD9) Canada/United States of America, enUSA, Edition date: 201907, First-Printing Load Carrying
Page 280 of 596

198 - 540 = -103 kilograms. You will need
to reduce the load weight by at least
240 pounds (104 kilograms). If you
remove three 100-pound (45-kilogram)
cement bags, then the load calculation
would be:1400 - (2 x 220) - (9 x 100) =
1400 - 440 - 900 = 60 pounds. Now you
have the load capacity to transport the
cement and your friend home. In metric
units, the calculation would be: 635
kilograms - (2 x 99 kilograms) - (9 x 45
kilograms) = 635 - 198 - 405 = 32
kilograms.
The above calculations also assume that
the loads are positioned in your vehicle
in a manner that does not overload the
front or the rear gross axle weight rating
specified for your vehicle on the Safety
Compliance Certification label.
Special Loading Instructions for
Owners of Pick-up Trucks and Utility-
type Vehicles WARNING: When loading the
roof racks, we recommend you evenly
distribute the load, as well as maintain
a low center of gravity. Loaded
vehicles, with higher centers of gravity,
may handle differently than unloaded
vehicles. Take extra precautions, such
as slower speeds and increased
stopping distance, when driving a
heavily loaded vehicle.
277
Nautilus (CD9) Canada/United States of America, enUSA, Edition date: 201907, First-Printing Load Carrying