LINCOLN NAVIGATOR 2023 Owners Manual
Manufacturer: LINCOLN, Model Year: 2023, Model line: NAVIGATOR, Model: LINCOLN NAVIGATOR 2023Pages: 660, PDF Size: 14.04 MB
Page 381 of 660
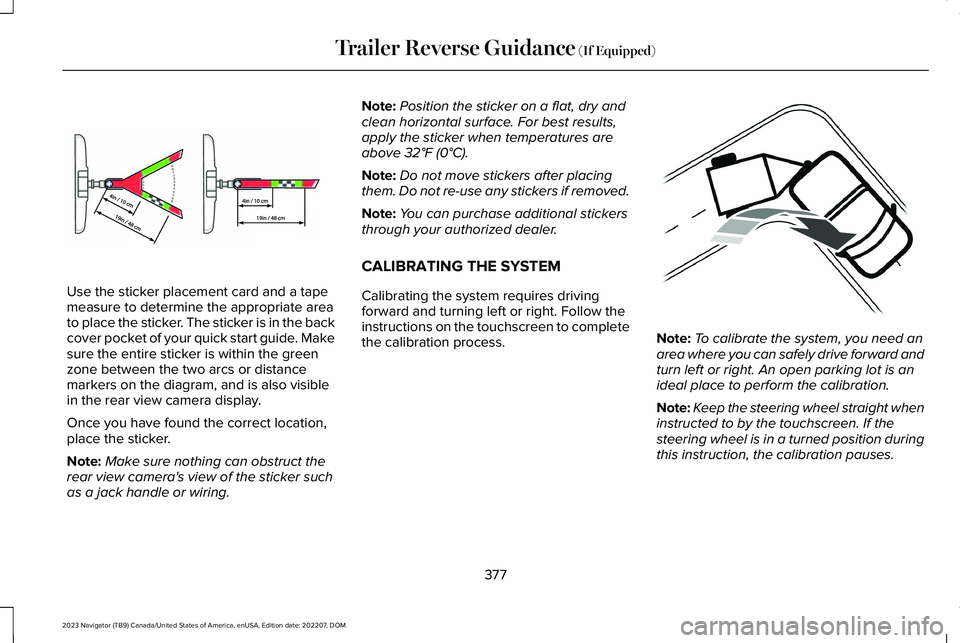
Use the sticker placement card and a tapemeasure to determine the appropriate areato place the sticker. The sticker is in the backcover pocket of your quick start guide. Makesure the entire sticker is within the greenzone between the two arcs or distancemarkers on the diagram, and is also visiblein the rear view camera display.
Once you have found the correct location,place the sticker.
Note:Make sure nothing can obstruct therear view camera's view of the sticker suchas a jack handle or wiring.
Note:Position the sticker on a flat, dry andclean horizontal surface. For best results,apply the sticker when temperatures areabove 32°F (0°C).
Note:Do not move stickers after placingthem. Do not re-use any stickers if removed.
Note:You can purchase additional stickersthrough your authorized dealer.
CALIBRATING THE SYSTEM
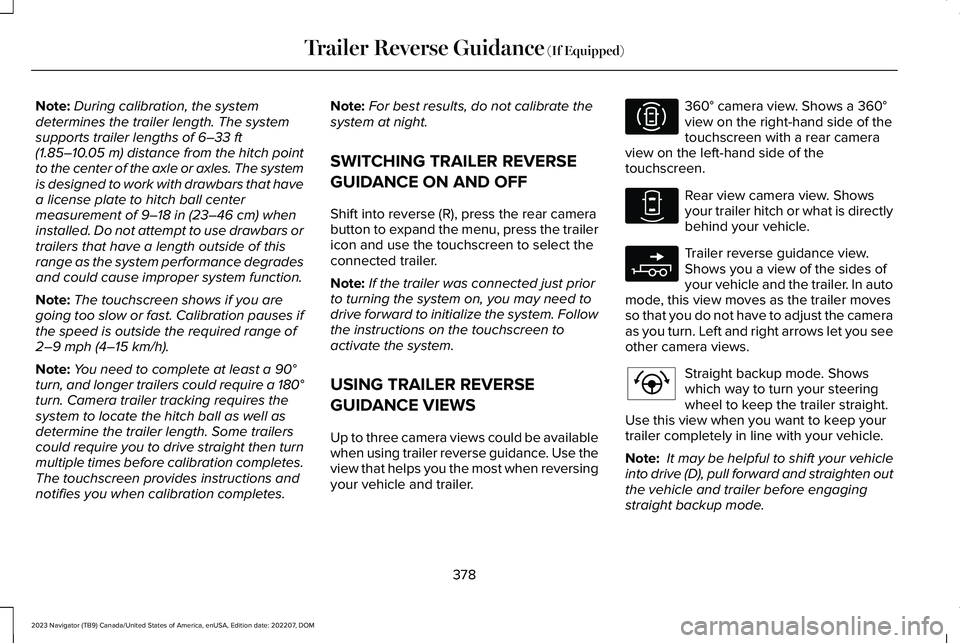
Calibrating the system requires drivingforward and turning left or right. Follow theinstructions on the touchscreen to completethe calibration process.Note:To calibrate the system, you need anarea where you can safely drive forward andturn left or right. An open parking lot is anideal place to perform the calibration.
Note:Keep the steering wheel straight wheninstructed to by the touchscreen. If thesteering wheel is in a turned position duringthis instruction, the calibration pauses.
377
2023 Navigator (TB9) Canada/United States of America, enUSA, Edition date: 202207, DOMTrailer Reverse Guidance (If Equipped)E333148 E352329
Page 382 of 660
Note:During calibration, the systemdetermines the trailer length. The systemsupports trailer lengths of 6–33 ft(1.85–10.05 m) distance from the hitch pointto the center of the axle or axles. The systemis designed to work with drawbars that havea license plate to hitch ball centermeasurement of 9–18 in (23–46 cm) wheninstalled. Do not attempt to use drawbars ortrailers that have a length outside of thisrange as the system performance degradesand could cause improper system function.
Note:The touchscreen shows if you aregoing too slow or fast. Calibration pauses ifthe speed is outside the required range of2–9 mph (4–15 km/h).
Note:You need to complete at least a 90°turn, and longer trailers could require a 180°turn. Camera trailer tracking requires thesystem to locate the hitch ball as well asdetermine the trailer length. Some trailerscould require you to drive straight then turnmultiple times before calibration completes.The touchscreen provides instructions andnotifies you when calibration completes.
Note:For best results, do not calibrate thesystem at night.
SWITCHING TRAILER REVERSE
GUIDANCE ON AND OFF
Shift into reverse (R), press the rear camerabutton to expand the menu, press the trailericon and use the touchscreen to select theconnected trailer.
Note:If the trailer was connected just priorto turning the system on, you may need todrive forward to initialize the system. Followthe instructions on the touchscreen toactivate the system.
USING TRAILER REVERSE
GUIDANCE VIEWS
Up to three camera views could be availablewhen using trailer reverse guidance. Use theview that helps you the most when reversingyour vehicle and trailer.
360° camera view. Shows a 360°view on the right-hand side of thetouchscreen with a rear cameraview on the left-hand side of thetouchscreen.
Rear view camera view. Showsyour trailer hitch or what is directlybehind your vehicle.
Trailer reverse guidance view.Shows you a view of the sides ofyour vehicle and the trailer. In automode, this view moves as the trailer movesso that you do not have to adjust the cameraas you turn. Left and right arrows let you seeother camera views.
Straight backup mode. Showswhich way to turn your steeringwheel to keep the trailer straight.Use this view when you want to keep yourtrailer completely in line with your vehicle.
Note: It may be helpful to shift your vehicleinto drive (D), pull forward and straighten outthe vehicle and trailer before engagingstraight backup mode.
378
2023 Navigator (TB9) Canada/United States of America, enUSA, Edition date: 202207, DOMTrailer Reverse Guidance (If Equipped)E310996 E310967 E310965 E224484
Page 383 of 660
This takes you back to the 360°camera system and out of thetrailer reverse guidance feature.
Auto. Press to return to auto view.
Note:Auto mode is the default setting.
Hitch Angle Graphic
The hitch angle graphic shows a smallrepresentation of your vehicle and trailer withvisual feedback to help you monitor thetrailer. The graphic shows two differentcolored lines for the trailer hitch angle. Ablack line shows you where your trailer is inrelation to your vehicle. The white linerepresents the amount the trailer can turnbased on steering wheel position.
The graphic shows a yellow and red zonefor the hitch angle to warn you of a highangle condition that could require you to pullforward to reduce the hitch angle. The anglelimits for each zone vary based on the trailerlength.
The yellow zone indicates you areapproaching the maximum controllable trailerangle for the system. When the trailer entersthis zone, it is more difficult to reduce thetrailer turn when backing up. It may benecessary to put your vehicle back into drive(D) and pull forward to get your vehicle andtrailer back to an in-line position.
The red zone indicates you have exceededthe maximum controllable trailer angle forthe system. Immediately stop reversing. Putyour vehicle into drive (D) and pull forwarduntil the trailer is no longer in the red zone.
379
2023 Navigator (TB9) Canada/United States of America, enUSA, Edition date: 202207, DOMTrailer Reverse Guidance (If Equipped)E224486 E315644
Page 384 of 660
TRAILER REVERSE GUIDANCE – TROUBLESHOOTING
TRAILER REVERSE GUIDANCE – INFORMATION MESSAGES
DescriptionMessage
Displays when the system turns on and is initializing.Detecting Trailer Please Wait…
A condition exists that prevents the system from turning on. If themessage continues to display, visit your authorized dealer to haveyour vehicle checked.
Trailer Reverse Guidance System is Not Available
The steering system needs to learn internal parameters to fully enablethe feature. Drive your vehicle straight forward above 25 mph(40 km/h) for approximately 5 minutes.
Trailer Reverse Guidance Driving Required to Initialize Steering PressOK to Exit
Displays when you exceed the maximum controllable trailer angle forthe system. Place your vehicle in drive (D) and pull forward to get yourvehicle and trailer back to an in-line position, then activate the systemby selecting the connected trailer and following the instructions onthe touchscreen.
Stop now. Deactivated by trailer angle.
If this message consistently displays, you may need to repeat thetrailer setup and calibration. Delete the trailer from the system andrepeat the setup and calibration process.
380
2023 Navigator (TB9) Canada/United States of America, enUSA, Edition date: 202207, DOMTrailer Reverse Guidance (If Equipped)
Page 385 of 660
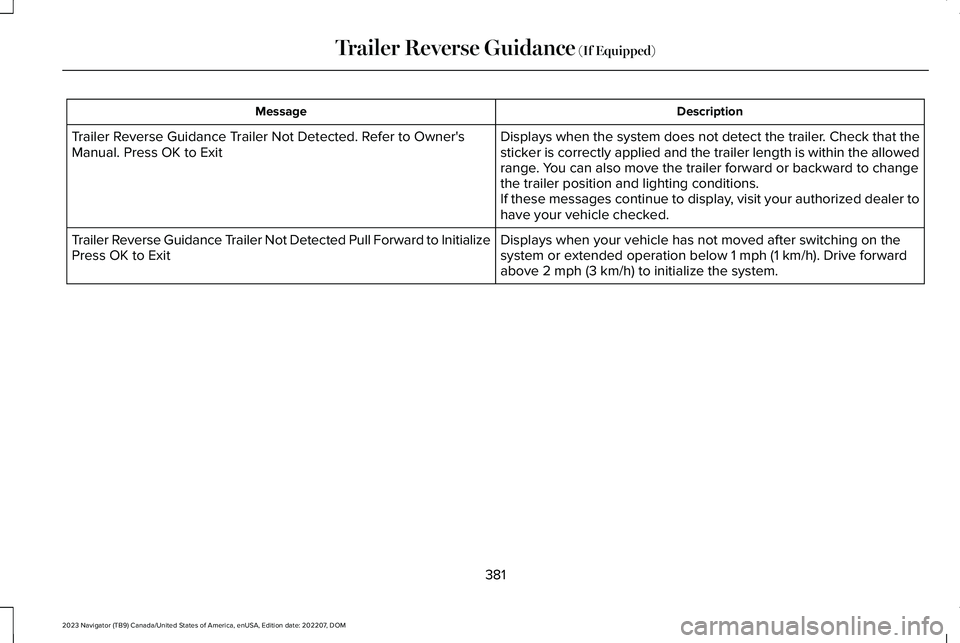
DescriptionMessage
Displays when the system does not detect the trailer. Check that thesticker is correctly applied and the trailer length is within the allowedrange. You can also move the trailer forward or backward to changethe trailer position and lighting conditions.If these messages continue to display, visit your authorized dealer tohave your vehicle checked.
Trailer Reverse Guidance Trailer Not Detected. Refer to Owner'sManual. Press OK to Exit
Displays when your vehicle has not moved after switching on thesystem or extended operation below 1 mph (1 km/h). Drive forwardabove 2 mph (3 km/h) to initialize the system.
Trailer Reverse Guidance Trailer Not Detected Pull Forward to InitializePress OK to Exit
381
2023 Navigator (TB9) Canada/United States of America, enUSA, Edition date: 202207, DOMTrailer Reverse Guidance (If Equipped)
Page 386 of 660
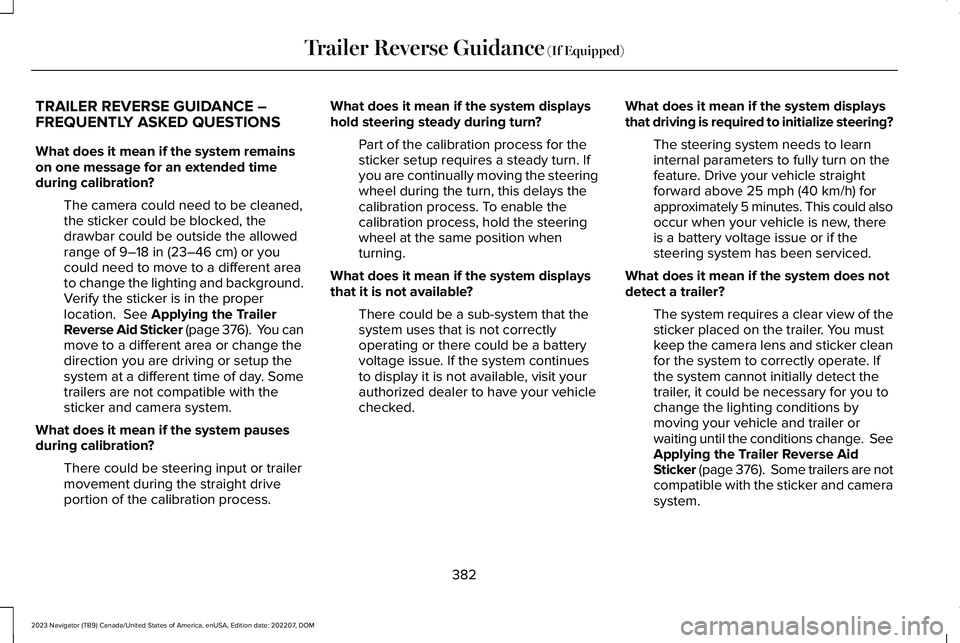
TRAILER REVERSE GUIDANCE –FREQUENTLY ASKED QUESTIONS
What does it mean if the system remainson one message for an extended timeduring calibration?
The camera could need to be cleaned,the sticker could be blocked, thedrawbar could be outside the allowedrange of 9–18 in (23–46 cm) or youcould need to move to a different areato change the lighting and background.Verify the sticker is in the properlocation. See Applying the TrailerReverse Aid Sticker (page 376). You canmove to a different area or change thedirection you are driving or setup thesystem at a different time of day. Sometrailers are not compatible with thesticker and camera system.
What does it mean if the system pausesduring calibration?
There could be steering input or trailermovement during the straight driveportion of the calibration process.
What does it mean if the system displayshold steering steady during turn?
Part of the calibration process for thesticker setup requires a steady turn. Ifyou are continually moving the steeringwheel during the turn, this delays thecalibration process. To enable thecalibration process, hold the steeringwheel at the same position whenturning.
What does it mean if the system displaysthat it is not available?
There could be a sub-system that thesystem uses that is not correctlyoperating or there could be a batteryvoltage issue. If the system continuesto display it is not available, visit yourauthorized dealer to have your vehiclechecked.
What does it mean if the system displaysthat driving is required to initialize steering?
The steering system needs to learninternal parameters to fully turn on thefeature. Drive your vehicle straightforward above 25 mph (40 km/h) forapproximately 5 minutes. This could alsooccur when your vehicle is new, thereis a battery voltage issue or if thesteering system has been serviced.
What does it mean if the system does notdetect a trailer?
The system requires a clear view of thesticker placed on the trailer. You mustkeep the camera lens and sticker cleanfor the system to correctly operate. Ifthe system cannot initially detect thetrailer, it could be necessary for you tochange the lighting conditions bymoving your vehicle and trailer orwaiting until the conditions change. SeeApplying the Trailer Reverse AidSticker (page 376). Some trailers are notcompatible with the sticker and camerasystem.
382
2023 Navigator (TB9) Canada/United States of America, enUSA, Edition date: 202207, DOMTrailer Reverse Guidance (If Equipped)
Page 387 of 660
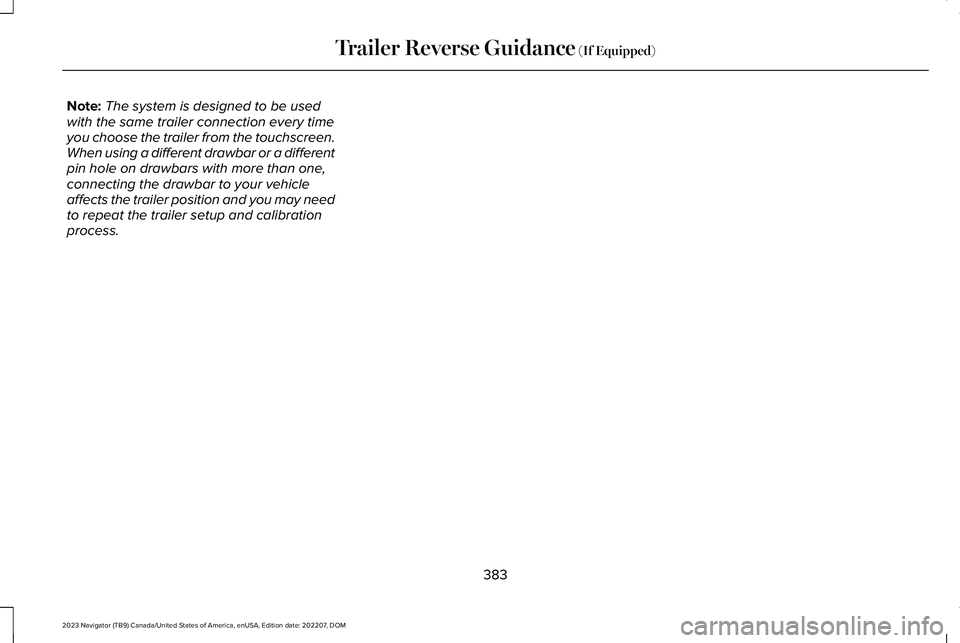
Note:The system is designed to be usedwith the same trailer connection every timeyou choose the trailer from the touchscreen.When using a different drawbar or a differentpin hole on drawbars with more than one,connecting the drawbar to your vehicleaffects the trailer position and you may needto repeat the trailer setup and calibrationprocess.
383
2023 Navigator (TB9) Canada/United States of America, enUSA, Edition date: 202207, DOMTrailer Reverse Guidance (If Equipped)
Page 388 of 660
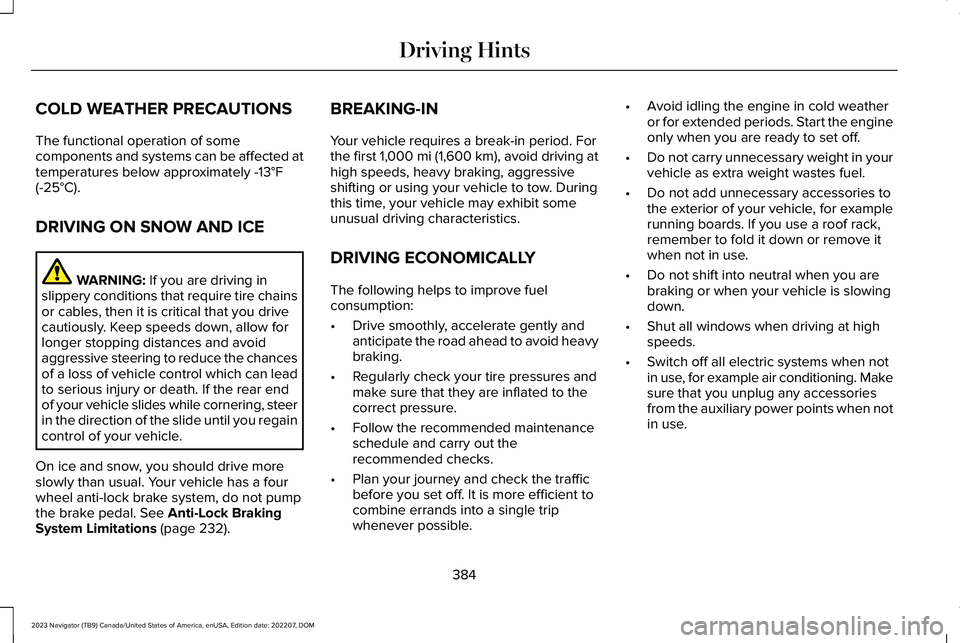
COLD WEATHER PRECAUTIONS
The functional operation of somecomponents and systems can be affected attemperatures below approximately -13°F(-25°C).
DRIVING ON SNOW AND ICE
WARNING: If you are driving inslippery conditions that require tire chainsor cables, then it is critical that you drivecautiously. Keep speeds down, allow forlonger stopping distances and avoidaggressive steering to reduce the chancesof a loss of vehicle control which can leadto serious injury or death. If the rear endof your vehicle slides while cornering, steerin the direction of the slide until you regaincontrol of your vehicle.
On ice and snow, you should drive moreslowly than usual. Your vehicle has a fourwheel anti-lock brake system, do not pumpthe brake pedal. See Anti-Lock BrakingSystem Limitations (page 232).
BREAKING-IN
Your vehicle requires a break-in period. Forthe first 1,000 mi (1,600 km), avoid driving athigh speeds, heavy braking, aggressiveshifting or using your vehicle to tow. Duringthis time, your vehicle may exhibit someunusual driving characteristics.
DRIVING ECONOMICALLY
The following helps to improve fuelconsumption:
•Drive smoothly, accelerate gently andanticipate the road ahead to avoid heavybraking.
•Regularly check your tire pressures andmake sure that they are inflated to thecorrect pressure.
•Follow the recommended maintenanceschedule and carry out therecommended checks.
•Plan your journey and check the trafficbefore you set off. It is more efficient tocombine errands into a single tripwhenever possible.
•Avoid idling the engine in cold weatheror for extended periods. Start the engineonly when you are ready to set off.
•Do not carry unnecessary weight in yourvehicle as extra weight wastes fuel.
•Do not add unnecessary accessories tothe exterior of your vehicle, for examplerunning boards. If you use a roof rack,remember to fold it down or remove itwhen not in use.
•Do not shift into neutral when you arebraking or when your vehicle is slowingdown.
•Shut all windows when driving at highspeeds.
•Switch off all electric systems when notin use, for example air conditioning. Makesure that you unplug any accessoriesfrom the auxiliary power points when notin use.
384
2023 Navigator (TB9) Canada/United States of America, enUSA, Edition date: 202207, DOMDriving Hints
Page 389 of 660

DRIVING IN SPECIAL CONDITIONS
DRIVING THROUGH MUD AND WATER
Mud
Be cautious of sudden changes in vehiclespeed or direction when you are driving inmud. Even all-wheel drive and four-wheeldrive vehicles can lose traction in mud. Ifyour vehicle slides, steer in the direction ofthe slide until you regain control of yourvehicle. After driving through mud, clean offresidue stuck to rotating driveshafts and tires.Excess residue can cause an imbalance thatcould damage drive components.
Note:If your vehicle gets stuck in mud, itcould be rocked out by shifting betweenforward and reverse gears, stoppingbetween shifts in a steady pattern. Presslightly on the accelerator in each gear.
Note:Do not rock your vehicle if the engineis not at normal operating temperature, asdamage to the transmission could occur.
Note:Do not rock your vehicle for more thana minute, as damage to the transmissionand tires could occur or the engine couldoverheat.
Water
If you must drive though deep water, driveslowly. The water could limit traction or brakecapability. See Driving Through ShallowWater (page 386).
When driving though water, determine thedepth and avoid water higher than the centerof the wheel.
Once through water, always try the brakes.Wet brakes do not stop your vehicle asquickly as dry brakes. Apply light pressureto the brake pedal while slowly moving thevehicle to dry the brakes.
Note:Driving through deep water couldcause damage to the transmission. If thefront or rear axle is submerged in water,have the axle lubricant and power transferunit lubricant checked and changed ifnecessary.
DRIVING ON HILLY OR SLOPINGTERRAIN
WARNING: Extreme care should beused when steering the vehicle in reversedown a slope so as not to cause thevehicle to swerve out of control.
Although natural obstacles could make itnecessary to travel diagonally up or down ahill or steep incline, you should try to drivestraight up or straight down.
Note:Avoid turning on steep slopes or hills.A danger lies in losing traction, slippingsideways and possible vehicle roll over.Whenever driving on a hill, determinebeforehand the route you can use. Do notdrive over the crest of a hill without seeingwhat conditions are on the other side. Donot drive in reverse over a hill without theaid of an observer.
385
2023 Navigator (TB9) Canada/United States of America, enUSA, Edition date: 202207, DOMDriving Hints
Page 390 of 660
Apply just enough power to the wheels toclimb the hill. Too much power causes thetires to slip, spin or lose traction, and youcould lose control of your vehicle. Whendescending a steep hill, do not descend thehill in neutral. Avoid sudden hard braking tokeep the front wheels rolling and to maintainyour vehicle's steering.
Note:Your vehicle has anti-lock brakes,apply the brakes steadily. Do not pump thebrakes.
Note:If your vehicle gets stuck driving onhilly or sloping terrain, it could be rocked outby shifting between forward and reversegears, stopping between shifts in a steadypattern. Press lightly on the accelerator ineach gear.
Note:Do not rock your vehicle if the engineis not at normal operating temperature, asdamage to the transmission could occur.
Note:Do not rock your vehicle for more thana minute, as damage to the transmissionand tires could occur or the engine couldoverheat.
DRIVING IN SAND
When driving over sand, try to keep all fourwheels on the most solid area of the trail. Steadily drive through the terrain. Apply theaccelerator slowly and avoid excessivewheel slip. Do not drive your vehicle in deepsand for an extended period of time. Thiscould overheat the system. A messageappears in the instrument cluster display.
Note:If your vehicle gets stuck driving onhilly or sloping terrain, it could be rocked outby shifting between forward and reversegears, stopping between shifts in a steadypattern. Press lightly on the accelerator ineach gear.
Note:Do not rock your vehicle if the engineis not at normal operating temperature, asdamage to the transmission could occur.
Note:Do not rock your vehicle for more thana minute, as damage to the transmissionand tires could occur or the engine couldoverheat
DRIVING THROUGH SHALLOW
WATER
WARNING: Do not attempt to crossa deep or flowing body of water. Failure tofollow this instruction could result in theloss of control of your vehicle, personalinjury or death.
Note:Driving through standing water cancause vehicle damage.
Note:Engine damage can occur if waterenters the air filter.
Before driving through standing water, checkthe depth. Never drive through water that ishigher than the bottom of the front rockerarea of your vehicle.
386
2023 Navigator (TB9) Canada/United States of America, enUSA, Edition date: 202207, DOMDriving Hints