LUCID AIR 2023 Owners Manual
Manufacturer: LUCID, Model Year: 2023, Model line: AIR, Model: LUCID AIR 2023Pages: 241, PDF Size: 5.15 MB
Page 91 of 241
Brakes
Braking SystemsWARNING: It is critical to occupant
safety that your braking systems are
always functioning properly. If you
experience any braking issues or
receive any fault messages regarding
the braking system, contact a Lucid
Service Center immediately.WARNING: Driving through heavy rain
or water can have a temporary adverse
effect on braking efficiency.CAUTION: Do not rest your foot on
the brake pedal while the vehicle is
in motion unless you are applying the
brakes. Resting your foot on the brake
pedal can cause premature brake
wear.
The foot pedal hydraulically-operated brakes
are electrically boosted, but only when the
vehicle is On. If the vehicle loses power when
driving, you will need to apply more force on
the brake pedal and you will experience longer
stopping distances.
If the brake fluid level in the
reservoir is low, a red brake indicator
and a notification message will be
displayed on the Cockpit Panel.
See Checking Brake Fluid on page 157.
If the yellow brake indicator displays on the Cockpit Panel, a brake
system fault has been detected.
Contact a Lucid Service Center as
soon as possible.
Note: It
Page 92 of 241
ABS warning indicatorThe ABS indicator displays on
the Cockpit Panel, along with a
notification message. If illuminated,
the ABS is disabled. Contact a Lucid
Service Center as soon as possible to have
the fault repaired.CAUTION: Even when ABS is disabled,
the pedal-operated braking system
remains operational. Be aware that
braking distances may increase and
wheels may lock under heavy braking.
Regenerative Braking
WARNING: If driving the vehicle in
reduced traction conditions (that is,
icy or snowy conditions), the use
of High regenerative braking level
may cause traction control to operate
more frequently. Lucid recommends
switching to Standard level when
driving in such conditions.
Whenever the vehicle is moving and your foot
is off the accelerator, regenerative braking
slows the vehicle and feeds energy back to
the high-voltage battery.
While you should still use the brake
pedal whenever needed to stop safely, you
can take advantage of regenerative braking
by anticipating your stops and reducing
accelerator pedal position.
Note: If regenerative braking is aggressively
slowing your vehicle (such as when your foot
is completely off the accelerator pedal at highway speeds), the brake lights turn on to
alert others that you are slowing down.
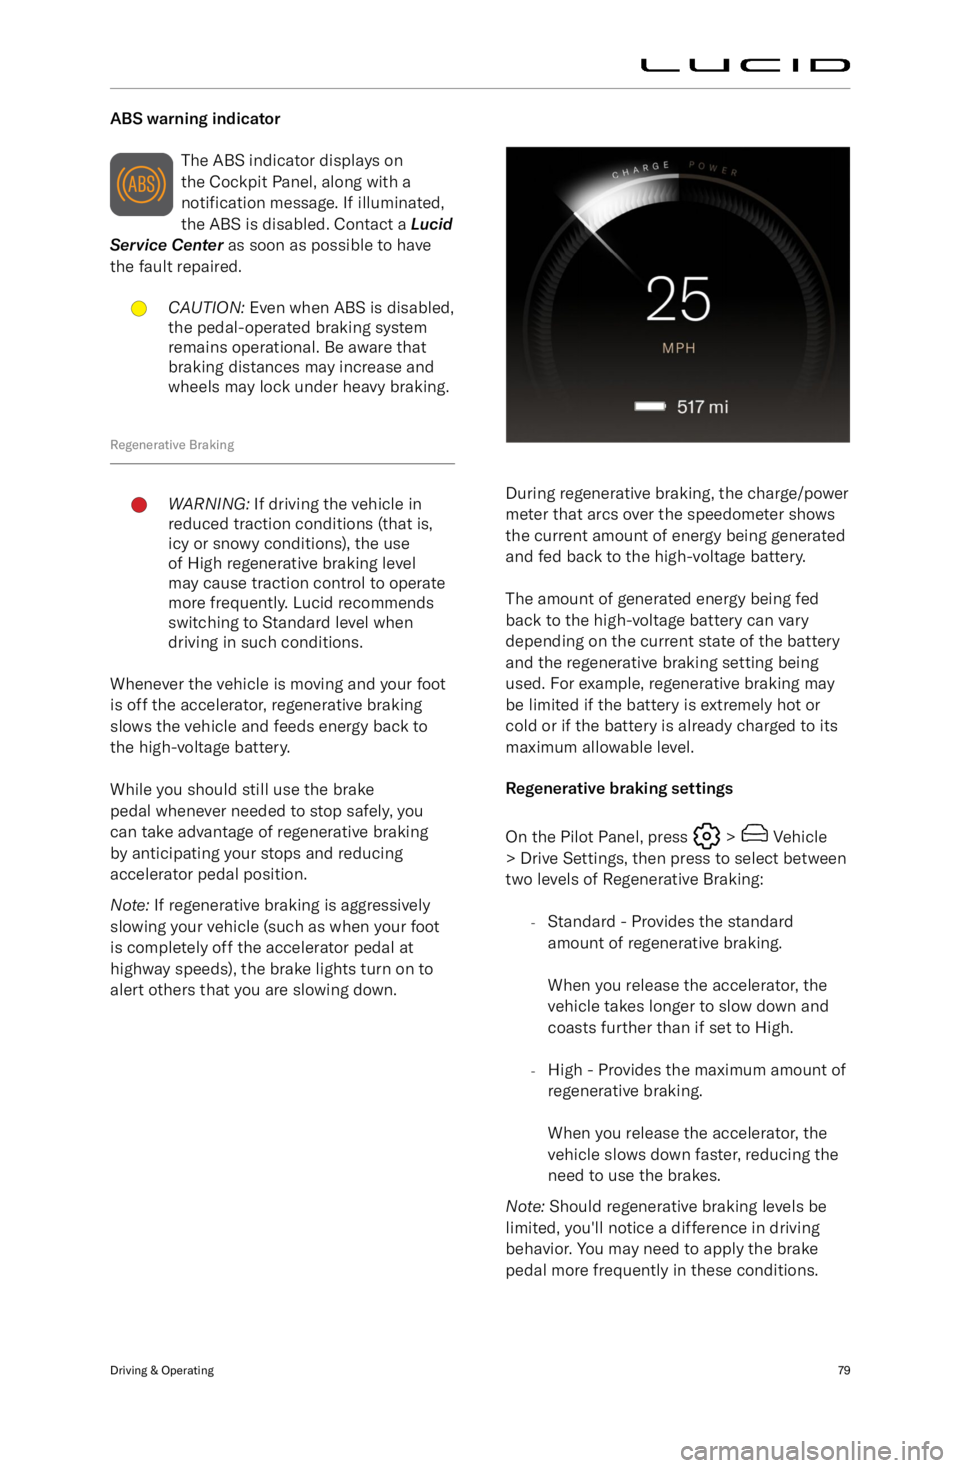
During regenerative braking, the charge/power
meter that arcs over the speedometer shows the current amount of energy being generated
and fed back to the high-voltage battery.
The amount of generated energy being fed
back to the high-voltage battery can vary
depending on the current state of the battery
and the regenerative braking setting being used. For example, regenerative braking maybe limited if the battery is extremely hot or
cold or if the battery is already charged to its
maximum allowable level.
Regenerative braking settings
On the Pilot Panel, press
> Vehicle
> Drive Settings, then press to select between
two levels of Regenerative Braking:
-Standard - Provides the standard
amount of regenerative braking.
When you release the accelerator, the
vehicle takes longer to slow down and
coasts further than if set to High.
- High - Provides the maximum amount of
regenerative braking.
When you release the accelerator, the
vehicle slows down faster, reducing the
need to use the brakes.
Note: Should regenerative braking levels be
limited, you
Page 93 of 241
Vehicle Hold
Vehicle Hold controls brake settings, and cankeep your vehicle stopped even when your
foot is not on the brake pedal.
When set to HOLD, the vehicle remains
stationary after a stop. The brakes hold until
the driver presses the accelerator pedal again.
If set to ROLL, the car rolls freely after releasing the accelerator.
To configure, use the Pilot Panel and touch
> Vehicle > Drive Settings, then
select the desired mode.
Note: The default setting is HOLD, and can
only be changed when the vehicle is in
P (Park). The setting saves to your User
Profile.
Note: Vehicle Hold disengages if the driver
shifts into N (Neutral) or presses and releases
the brake pedal.
Note: Vehicle Hold will disengage and shift
into P (Park) in any of the following instances:
-Hold has been braking for approximately
10 minutes.
- The system detects that the driver has
exited the vehicle.
Parking Brake
CAUTION: In the unlikely event that
your vehicle loses electrical power,
you will not be able to select another
gear and therefore will be unable to
release the parking brake. Contact a
Lucid Service Center for assistance.
The parking brake operates on the rear wheels
only, and is independently controlled of the
pedal-operated brake system.
The parking brake automatically applies when
P (Park) is selected, and releases when any other gear is selected. It is also engaged by
certain systems when a time limit is reached. See Vehicle Hold on page 80.
The red parking brake indicator
is displayed on the Cockpit Panel
when the parking brake is engaged.
A flashing indicator signals either
operating wiht a fault, or a parking brake
stuck in operation.
If the indicator is amber, a fault
has been detected and the parking
brake may not be applied when the
vehicle is in P (Park). This will be
accompanied by a notification on the Cockpit
Panel. Contact a Lucid Service Center to have
the fault repaired.
Emergency useCAUTION: Driving the vehicle with the
parking brake applied, or repeated
use of the parking brake to slow the
vehicle, may cause serious damage to
the brake system.
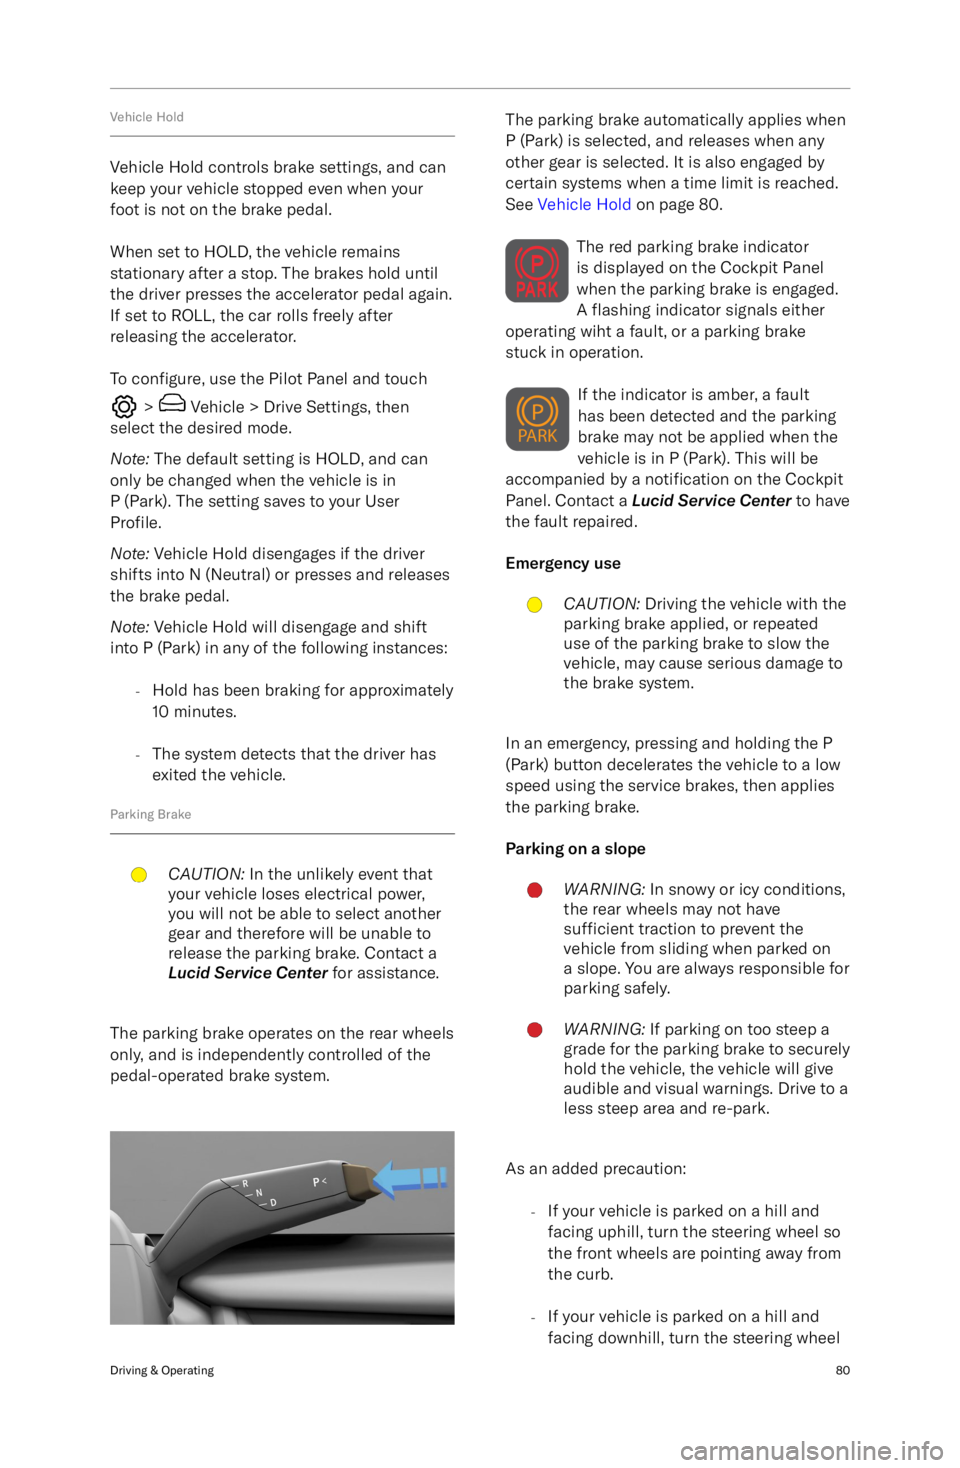
In an emergency, pressing and holding the P
(Park) button decelerates the vehicle to a low
speed using the service brakes, then applies
the parking brake.
Parking on a slope
WARNING: In snowy or icy conditions,
the rear wheels may not have
sufficient traction to prevent the
vehicle from sliding when parked on
a slope. You are always responsible for parking safely.WARNING: If parking on too steep a
grade for the parking brake to securely
hold the vehicle, the vehicle will give
audible and visual warnings. Drive to a
less steep area and re-park.
As an added precaution:
-If your vehicle is parked on a hill and
facing uphill, turn the steering wheel so
the front wheels are pointing away from
the curb.
- If your vehicle is parked on a hill and
facing downhill, turn the steering wheel
Driving & Operating80
Page 94 of 241

so the front wheels are pointing towards
the curb.
Brake Pad WearWARNING: Neglecting to replace worn
brake pads can damage the brake
rotors, reduce the vehicle
Page 95 of 241

Lucid Stability Control
Lucid Stability ControlWARNING: No electronic system can
remove the need for safe driving
practices. Although the Lucid Stability
Control system can help to maintain
control of the vehicle under certain
driving conditions, it cannot prevent
any accident which may occur due
to unforeseen road conditions (e.g.
black ice, standing water, etc.) or
result from careless/dangerous driving
techniques.
The Lucid Stability Control system uses
multiple sensors to monitor driver inputs
and vehicle motion. Under certain driving
conditions, the system helps to perform the following functions:
-Controls brake pressure to reduce wheel
slip on one slipping drive wheel so
power is transferred to a drive wheel on the same axle that is not slipping.
- Controls brake pressure and traction
motor output to reduce drive wheel slip.
Controls brake pressure at individual
wheels and traction motor output to
help the driver maintain control of the
vehicle in the following conditions:
Page 96 of 241
Getting Maximum Range
Driving Tips to Maximize Range
-Remove any unnecessary cargo to
reduce vehicle load weight.
- Ensure your tires are maintained at
their specified inflation pressures. See
Maintaining Tire Pressures on page 177.
- Keep all windows closed when possible
to reduce drag.
- Avoid abrupt and/or frequent
acceleration. Try to maintain an even
speed.
- When it is safe to do so, use one pedal
driving techniques to gradually slow
the vehicle using regenerative braking
rather than friction braking. See Braking
Systems on page 78.
- Switch into Smooth mode. See Drive
Modes on page 70.
- Limit the use of the heating and air
conditioning controls when possible.
Using seat heaters to keep warm is a
more energy-efficient alternative than
heating the entire cabin.
Driving & Operating83
Page 97 of 241
Heating, Ventilation Air Conditioning
Temperature Control
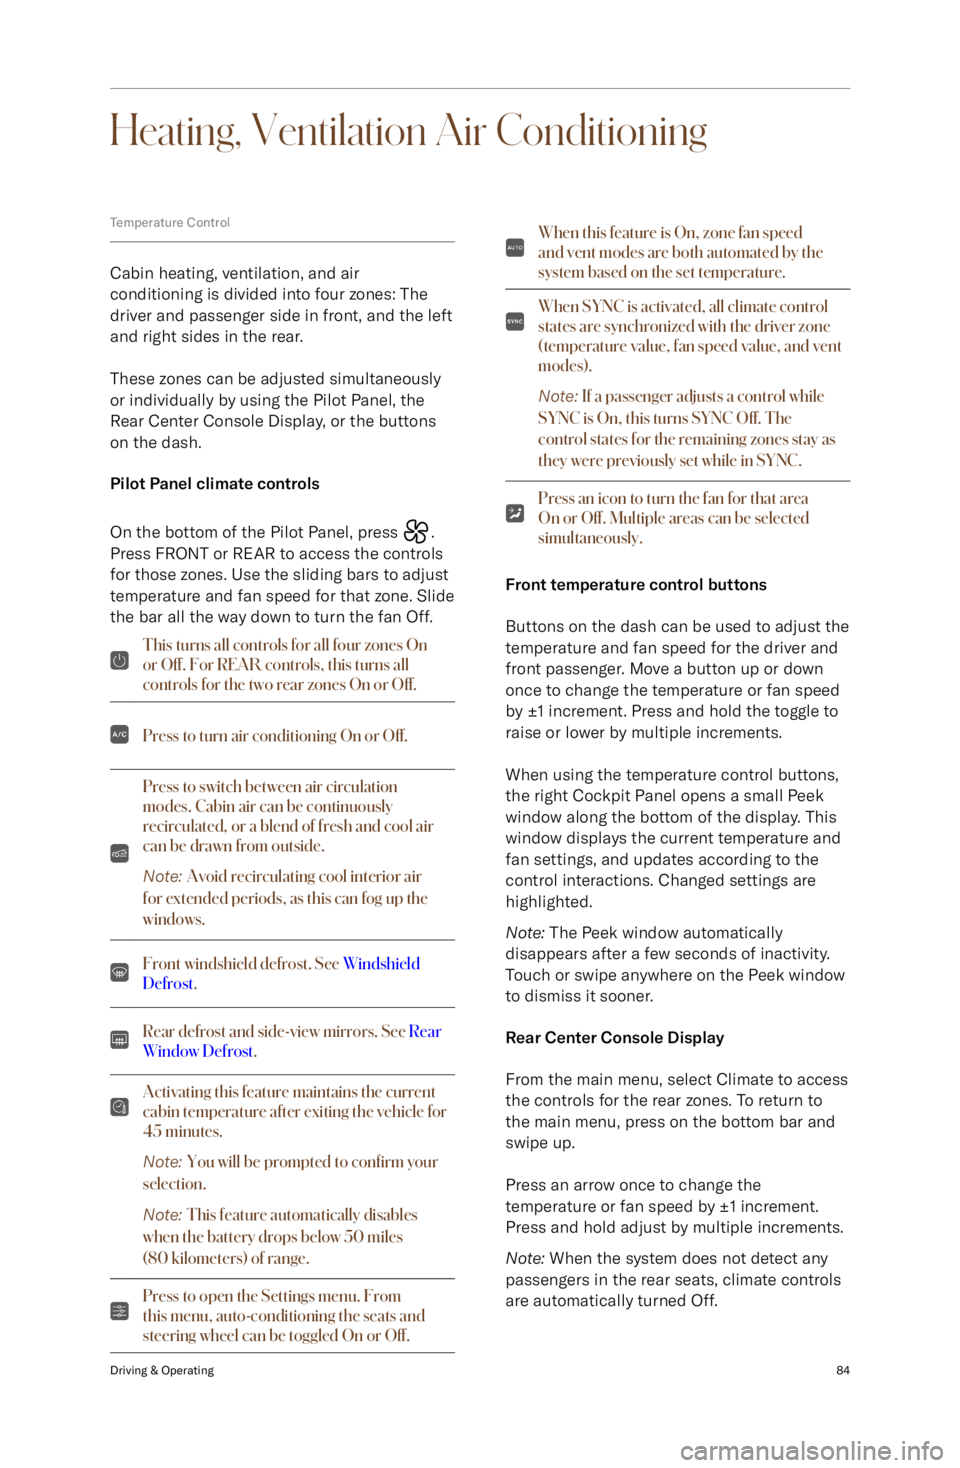
Cabin heating, ventilation, and air
conditioning is divided into four zones: The
driver and passenger side in front, and the left
and right sides in the rear.
These zones can be adjusted simultaneously
or individually by using the Pilot Panel, the
Rear Center Console Display, or the buttons on the dash.
Pilot Panel climate controls
On the bottom of the Pilot Panel, press
.
Press FRONT or REAR to access the controls for those zones. Use the sliding bars to adjust
temperature and fan speed for that zone. Slide
the bar all the way down to turn the fan Off.
This turns all controls for all four zones On
or Off. For REA
Page 98 of 241
Remote Climate
Remote Climate is available within the Lucid
mobile app, allowing you to remotely set the
cabin temperature or windshield defrosting controls.
Note: When Remote Climate is activated, any
changes to the temperature controls via the
Pilot Panel will cancel the feature.
Defrost
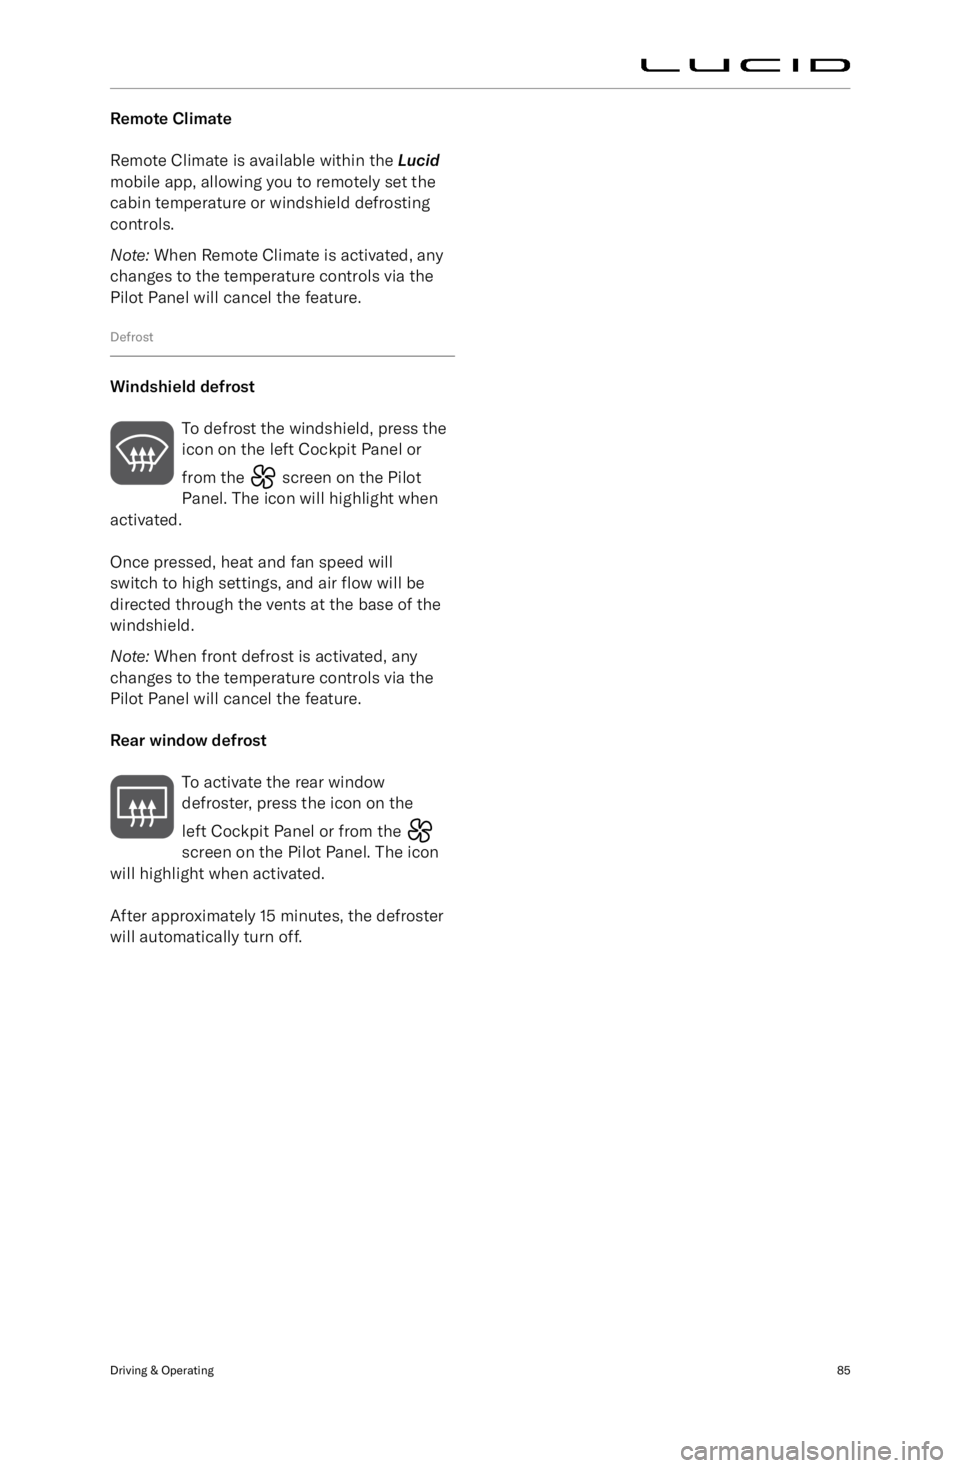
Windshield defrost
To defrost the windshield, press the
icon on the left Cockpit Panel or
from the
screen on the Pilot
Panel. The icon will highlight when
activated.
Once pressed, heat and fan speed will
switch to high settings, and air flow will be
directed through the vents at the base of the
windshield.
Note: When front defrost is activated, any
changes to the temperature controls via the
Pilot Panel will cancel the feature.
Rear window defrost To activate the rear window
defroster, press the icon on the
left Cockpit Panel or from the
screen on the Pilot Panel. The icon
will highlight when activated.
After approximately 15 minutes, the defroster
will automatically turn off.
Driving & Operating85
Page 99 of 241
Interior Equipment
Sun Visors
To use a sun visor, fold it down from its
stowed position. Sun visors can also pivot
towards the side window by releasing it from
the retaining clip.
Note: Make sure the sun visor is secured
by the retaining clip when returning it to its
stowed position.
Both sun visors have a covered mirror. Raise the cover to use the mirror; an integrated light
automatically turns On. The light turns Off
when the cover is closed.
Sun visor battery replacement
WARNING: Each sun visor contains
three coin/button type batteries.
These batteries contain toxic and
corrosive substances. Batteries are
a chemical burn hazard and should never be ingested. If a battery is
swallowed, it can cause serious
internal burns and may even lead to
death.
- Keep new and used batteries out of
the reach of children.
- If you think batteries may have
been swallowed or placed inside any part of the body, seek
immediate medical attention.
Due to the unique design of your vehicle, the
sun visors use batteries to power the mirror
lights.
Note: The batteries have an estimated life
of approximately two years based on typical
usage.
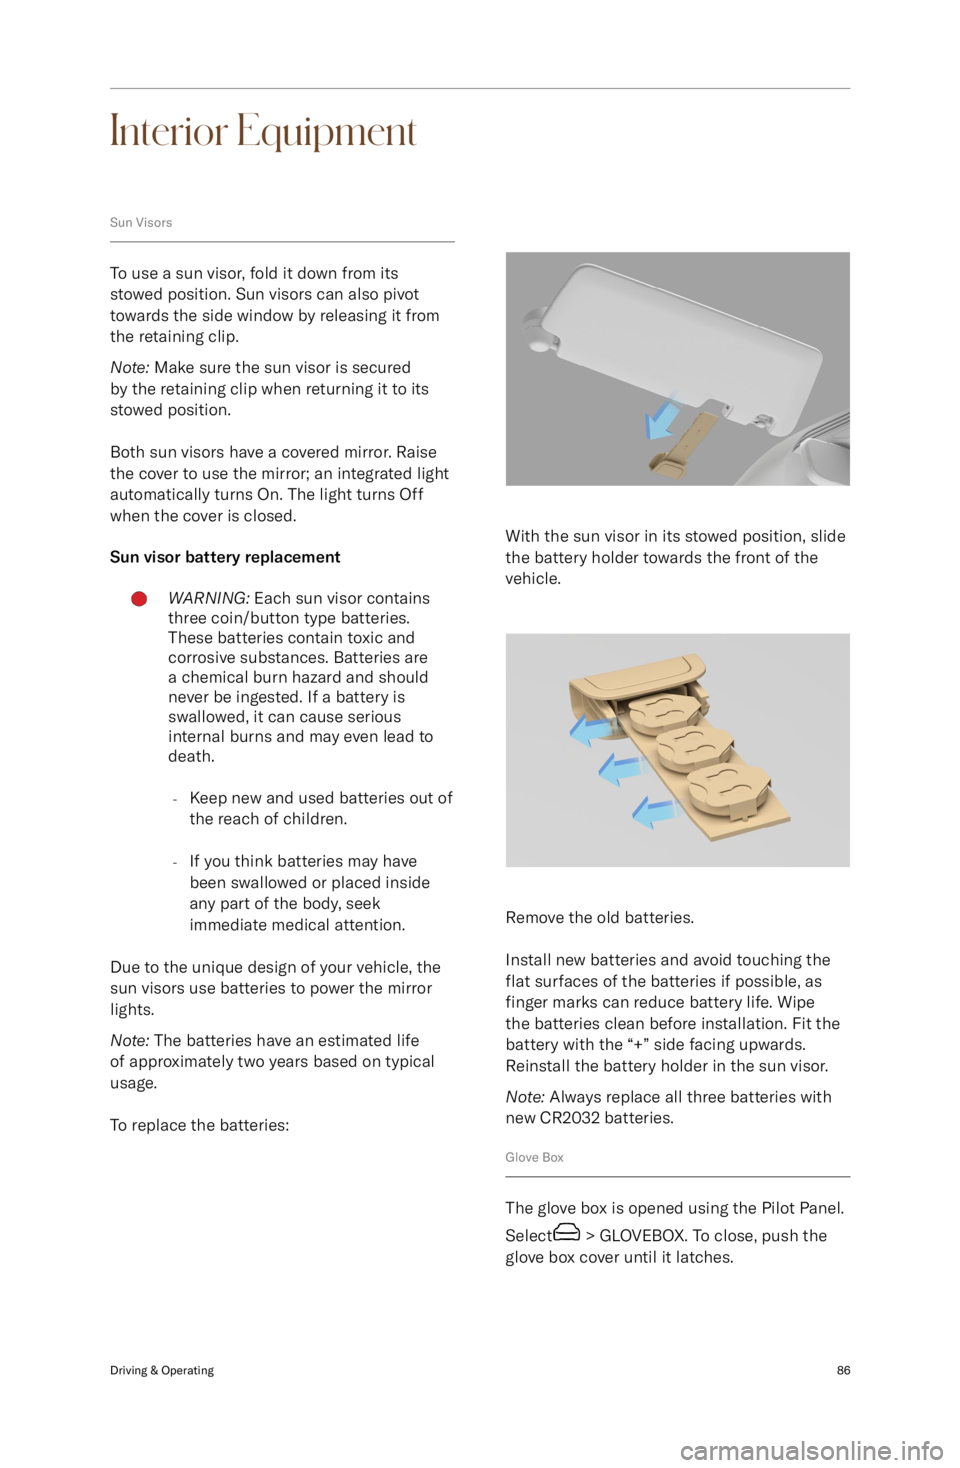
To replace the batteries:
With the sun visor in its stowed position, slide
the battery holder towards the front of the
vehicle.
Remove the old batteries.
Install new batteries and avoid touching the
flat surfaces of the batteries if possible, as
finger marks can reduce battery life. Wipe
the batteries clean before installation. Fit the
battery with the “+” side facing upwards.
Reinstall the battery holder in the sun visor.
Note: Always replace all three batteries with
new CR2032 batteries.
Glove Box
The glove box is opened using the Pilot Panel.
Select
> GLOVEBOX. To close, push the
glove box cover until it latches.
Driving & Operating86
Page 100 of 241

Front Armrest and Storage CompartmentWARNING: Do not operate the vehicle
with the storage compartment lid in
the open position as this could result
in injury in a collision.
Slide the cover to access the front cup
holders and storage area.
Pull the release latch and lift up the armrest
to access the storage compartment.
Center Console Storage Compartment
Pull the latch to release the storage
compartment cover and allow it to open. Press
the cover to close.
Rear Armrest and Storage Compartment
WARNING: The rear armrest must not
be used as a seat or a booster cushion for small children. Children must be
seated in a seat suitable for their size
and weight to reduce the risk of injury
in a crash.Use the latch to pull down the rear center
armrest.
Pull up on the lid to access the storage
compartment. Close the lid and push the armrest up to close.
Cup Holders
Note: The cup holders have a rubber insert
that can be removed to allow them to be
cleaned if there is a spillage.
Cup holders are located in the following
locations:
Front center console. Slide the cover
rearwards to use the cup holder.
Driving & Operating87