engine coolant MAZDA 6 2002 Suplement User Guide
[x] Cancel search | Manufacturer: MAZDA, Model Year: 2002, Model line: 6, Model: MAZDA 6 2002Pages: 909, PDF Size: 17.16 MB
Page 46 of 909
CYLINDER HEAD GASKET
B2–15
B2
End Of Sie
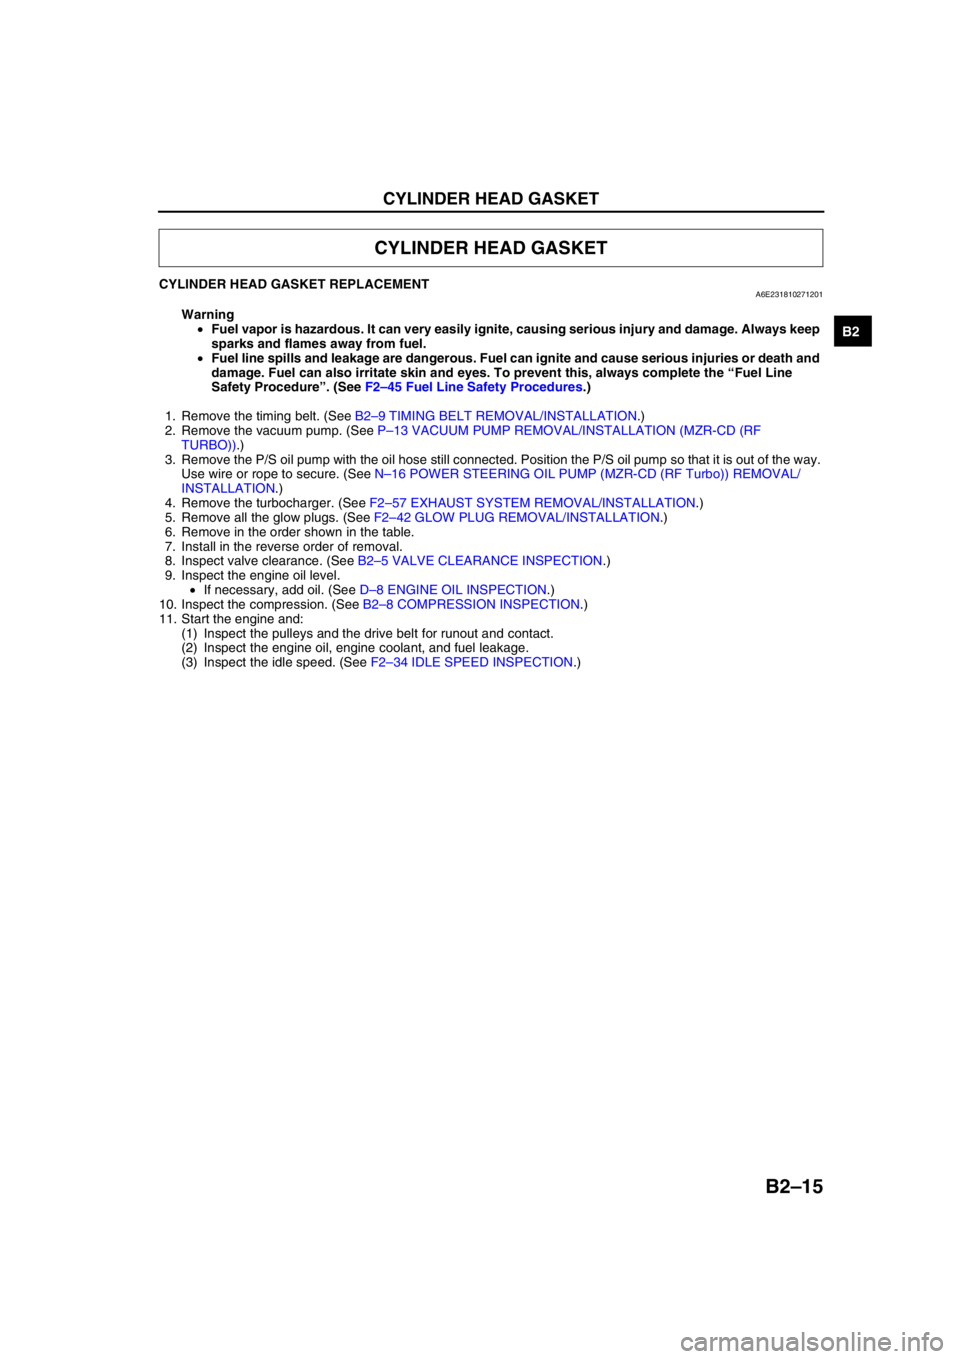
CYLINDER HEAD GASKET REPLACEMENTA6E231810271201
Warning
•Fuel vapor is hazardous. It can very easily ignite, causing serious injury and damage. Always keep
sparks and flames away from fuel.
•Fuel line spills and leakage are dangerous. Fuel can ignite and cause serious injuries or death and
damage. Fuel can also irritate skin and eyes. To prevent this, always complete the “Fuel Line
Safety Procedure”. (See F2–45 Fuel Line Safety Procedures.)
1. Remove the timing belt. (See B2–9 TIMING BELT REMOVAL/INSTALLATION.)
2. Remove the vacuum pump. (See P–13 VACUUM PUMP REMOVAL/INSTALLATION (MZR-CD (RF
TURBO)).)
3. Remove the P/S oil pump with the oil hose still connected. Position the P/S oil pump so that it is out of the way.
Use wire or rope to secure. (See N–16 POWER STEERING OIL PUMP (MZR-CD (RF Turbo)) REMOVAL/
INSTALLATION.)
4. Remove the turbocharger. (See F2–57 EXHAUST SYSTEM REMOVAL/INSTALLATION.)
5. Remove all the glow plugs. (See F2–42 GLOW PLUG REMOVAL/INSTALLATION.)
6. Remove in the order shown in the table.
7. Install in the reverse order of removal.
8. Inspect valve clearance. (See B2–5 VALVE CLEARANCE INSPECTION.)
9. Inspect the engine oil level.
•If necessary, add oil. (See D–8 ENGINE OIL INSPECTION.)
10. Inspect the compression. (See B2–8 COMPRESSION INSPECTION.)
11. Start the engine and:
(1) Inspect the pulleys and the drive belt for runout and contact.
(2) Inspect the engine oil, engine coolant, and fuel leakage.
(3) Inspect the idle speed. (See F2–34 IDLE SPEED INSPECTION.)
CYLINDER HEAD GASKET
Page 58 of 909
ENGINE
B2–27
B2
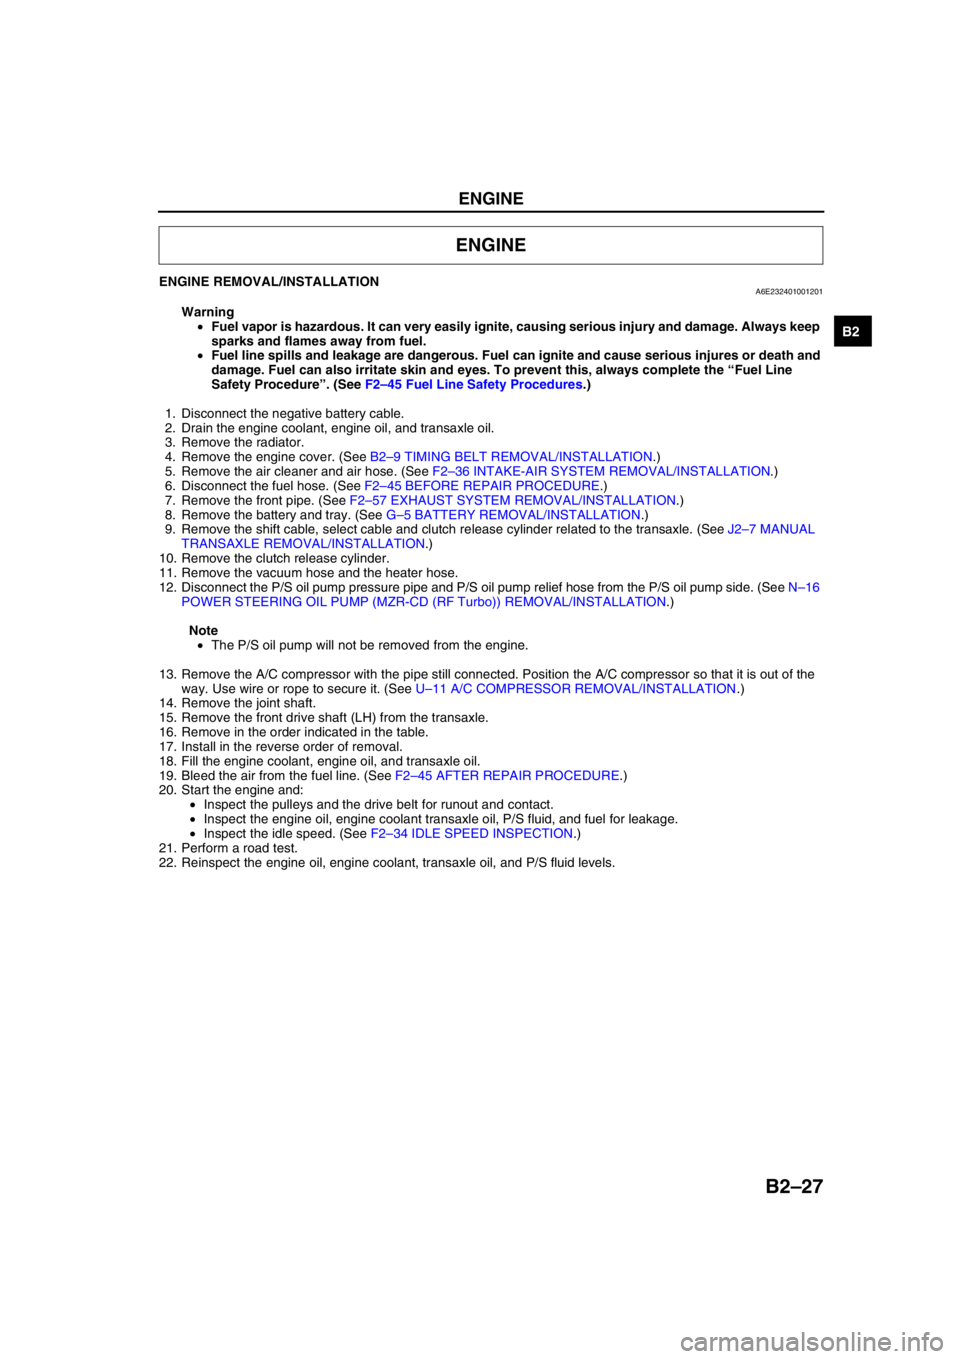
ENGINE REMOVAL/INSTALLATIONA6E232401001201
Warning
•Fuel vapor is hazardous. It can very easily ignite, causing serious injury and damage. Always keep
sparks and flames away from fuel.
•Fuel line spills and leakage are dangerous. Fuel can ignite and cause serious injures or death and
damage. Fuel can also irritate skin and eyes. To prevent this, always complete the “Fuel Line
Safety Procedure”. (See F2–45 Fuel Line Safety Procedures.)
1. Disconnect the negative battery cable.
2. Drain the engine coolant, engine oil, and transaxle oil.
3. Remove the radiator.
4. Remove the engine cover. (See B2–9 TIMING BELT REMOVAL/INSTALLATION.)
5. Remove the air cleaner and air hose. (See F2–36 INTAKE-AIR SYSTEM REMOVAL/INSTALLATION.)
6. Disconnect the fuel hose. (See F2–45 BEFORE REPAIR PROCEDURE.)
7. Remove the front pipe. (See F2–57 EXHAUST SYSTEM REMOVAL/INSTALLATION.)
8. Remove the battery and tray. (See G–5 BATTERY REMOVAL/INSTALLATION.)
9. Remove the shift cable, select cable and clutch release cylinder related to the transaxle. (See J2–7 MANUAL
TRANSAXLE REMOVAL/INSTALLATION.)
10. Remove the clutch release cylinder.
11. Remove the vacuum hose and the heater hose.
12. Disconnect the P/S oil pump pressure pipe and P/S oil pump relief hose from the P/S oil pump side. (See N–16
POWER STEERING OIL PUMP (MZR-CD (RF Turbo)) REMOVAL/INSTALLATION.)
Note
•The P/S oil pump will not be removed from the engine.
13. Remove the A/C compressor with the pipe still connected. Position the A/C compressor so that it is out of the
way. Use wire or rope to secure it. (See U–11 A/C COMPRESSOR REMOVAL/INSTALLATION.)
14. Remove the joint shaft.
15. Remove the front drive shaft (LH) from the transaxle.
16. Remove in the order indicated in the table.
17. Install in the reverse order of removal.
18. Fill the engine coolant, engine oil, and transaxle oil.
19. Bleed the air from the fuel line. (See F2–45 AFTER REPAIR PROCEDURE.)
20. Start the engine and:
•Inspect the pulleys and the drive belt for runout and contact.
•Inspect the engine oil, engine coolant transaxle oil, P/S fluid, and fuel for leakage.
•Inspect the idle speed. (See F2–34 IDLE SPEED INSPECTION.)
21. Perform a road test.
22. Reinspect the engine oil, engine coolant, transaxle oil, and P/S fluid levels.
ENGINE
Page 73 of 909
OIL FILTER, OIL COOLER
D–9
D
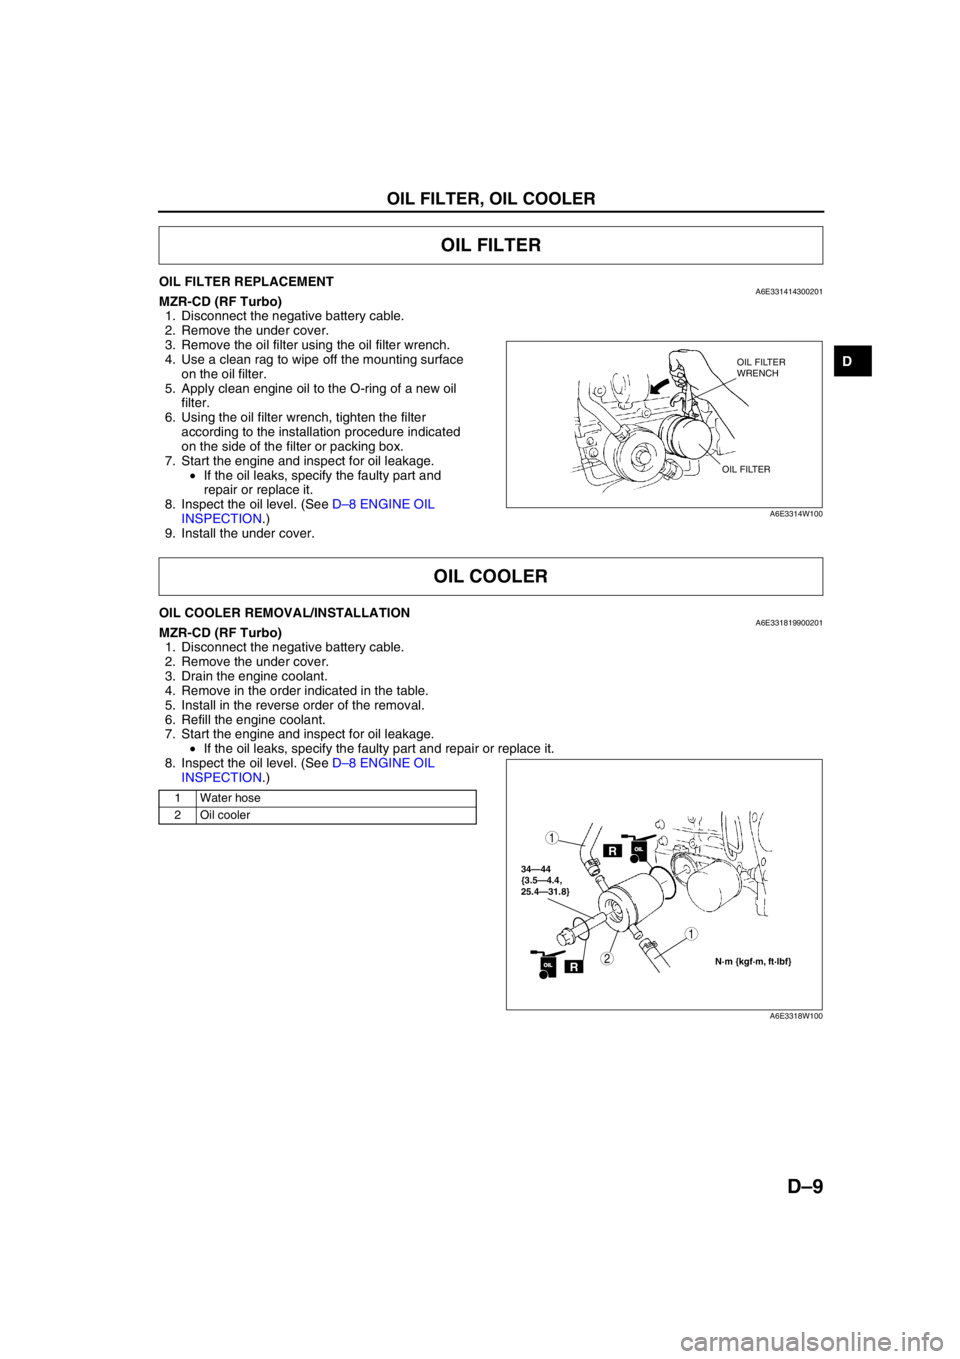
OIL FILTER REPLACEMENTA6E331414300201MZR-CD (RF Turbo)
1. Disconnect the negative battery cable.
2. Remove the under cover.
3. Remove the oil filter using the oil filter wrench.
4. Use a clean rag to wipe off the mounting surface
on the oil filter.
5. Apply clean engine oil to the O-ring of a new oil
filter.
6. Using the oil filter wrench, tighten the filter
according to the installation procedure indicated
on the side of the filter or packing box.
7. Start the engine and inspect for oil leakage.
•If the oil leaks, specify the faulty part and
repair or replace it.
8. Inspect the oil level. (See D–8 ENGINE OIL
INSPECTION.)
9. Install the under cover.
End Of Sie
OIL COOLER REMOVAL/INSTALLATIONA6E331819900201MZR-CD (RF Turbo)
1. Disconnect the negative battery cable.
2. Remove the under cover.
3. Drain the engine coolant.
4. Remove in the order indicated in the table.
5. Install in the reverse order of the removal.
6. Refill the engine coolant.
7. Start the engine and inspect for oil leakage.
•If the oil leaks, specify the faulty part and repair or replace it.
8. Inspect the oil level. (See D–8 ENGINE OIL
INSPECTION.)
.
End Of Sie
OIL FILTER
OIL FILTER
WRENCH
OIL FILTER
A6E3314W100
OIL COOLER
1 Water hose
2 Oil cooler
ROILOIL
34—44
{3.5—4.4,
25.4—31.8}
1
2N·m {kgf·m, ft·lbf}ROILOIL
1
A6E3318W100
Page 76 of 909
E–1
E
ECOOLING SYSTEM
OUTLINE................................................................ E-2
OUTLINE OF CONSTRUCTION.......................... E-2
FEATURES .......................................................... E-2
SPECIFICATIONS ............................................... E-3
COOLING SYSTEM................................................ E-4
STRUCTURAL VIEW ........................................... E-4
COOLING FLOW DIAGRAM ............................... E-5
COOLING FAN .................................................... E-5
OUTLINE................................................................ E-6
SUPPLEMENTAL SERVICE INFORMATION ..... E-6
LOCATION INDEX ............................................... E-6
RADIATOR CAP..................................................... E-7
RADIATOR CAP INSPECTION ........................... E-7
ENGINE COOLANT................................................ E-8
ENGINE COOLANT LEAKAGE INSPECTION .... E-8
THERMOSTAT....................................................... E-9
THERMOSTAT REMOVAL/INSTALLATION ....... E-9
THERMOSTAT INSPECTION ........................... E-10
WATER PUMP...................................................... E-11
WATER PUMP REMOVAL/INSTALLATION...... E-11
FAN MOTOR........................................................ E-12
COOLING FAN MOTOR
REMOVAL/INSTALLATION ............................ E-12
COOLING FAN MOTOR INSPECTION ............. E-13 FEATURES
SERVICE
Page 78 of 909
OUTLINE
E–3
E
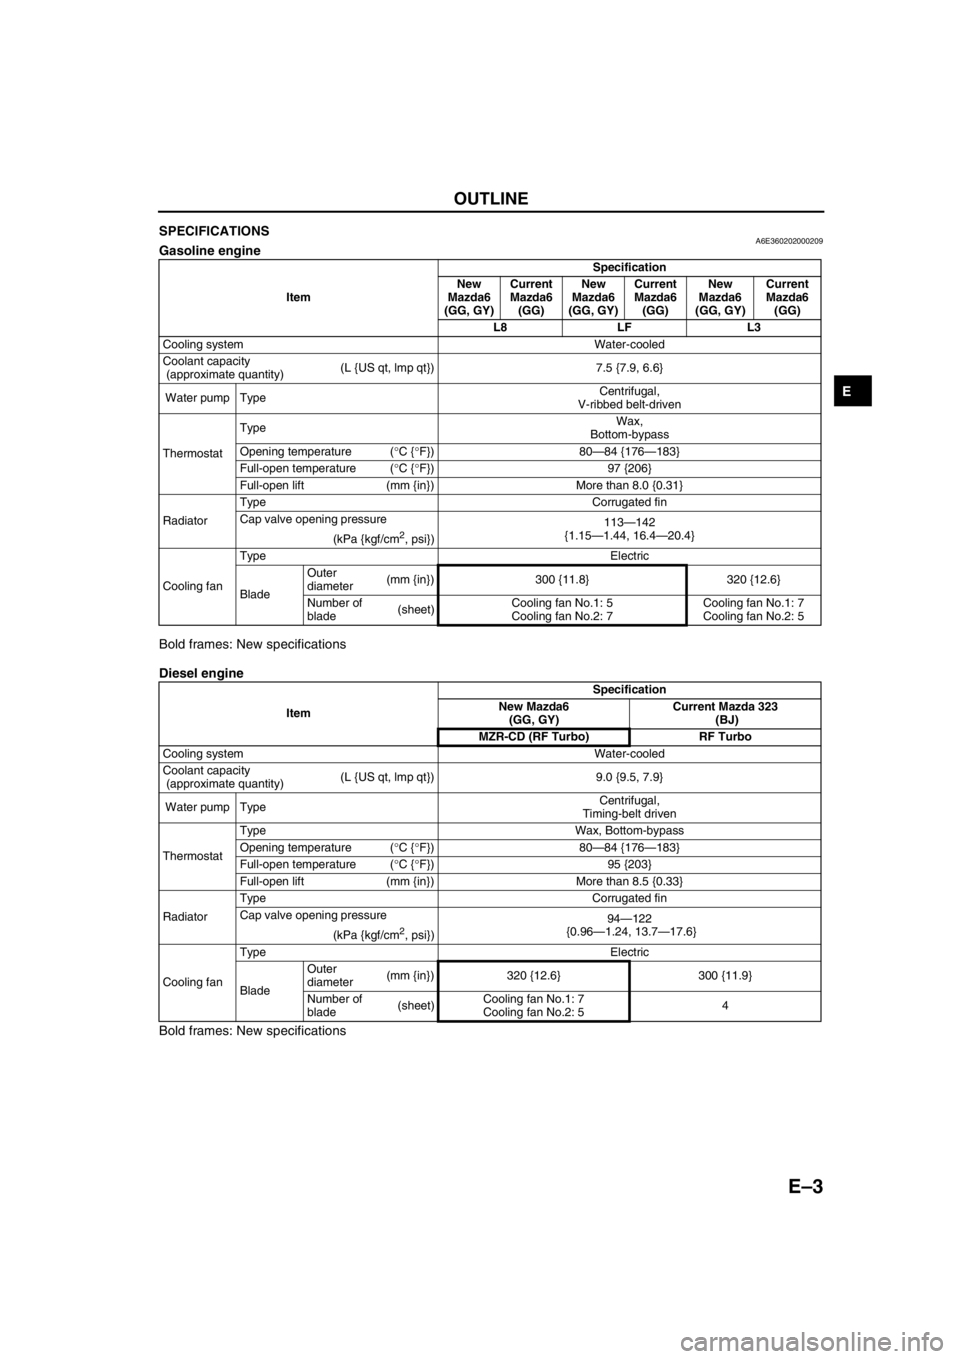
SPECIFICATIONSA6E360202000209Gasoline engine
Bold frames: New specifications
Diesel engine
Bold frames: New specifications
End Of Sie
ItemSpecification
New
Mazda6
(GG, GY)Current
Mazda6
(GG)New
Mazda6
(GG, GY)Current
Mazda6
(GG)New
Mazda6
(GG, GY)Current
Mazda6
(GG)
L8 LF L3
Cooling system Water-cooled
Coolant capacity
(approximate quantity)(L {US qt, lmp qt}) 7.5 {7.9, 6.6}
Water pump TypeCentrifugal,
V-ribbed belt-driven
ThermostatTypeWax,
Bottom-bypass
Opening temperature (°C {°F}) 80—84 {176—183}
Full-open temperature (°C {°F}) 97 {206}
Full-open lift (mm {in}) More than 8.0 {0.31}
RadiatorType Corrugated fin
Cap valve opening pressure
113—142
{1.15—1.44, 16.4—20.4}
(kPa {kgf/cm
2, psi})
Cooling fanType Electric
BladeOuter
diameter(mm {in}) 300 {11.8} 320 {12.6}
Number of
blade(sheet)Cooling fan No.1: 5
Cooling fan No.2: 7Cooling fan No.1: 7
Cooling fan No.2: 5
ItemSpecification
New Mazda6
(GG, GY)Current Mazda 323
(BJ)
MZR-CD (RF Turbo) RF Turbo
Cooling system Water-cooled
Coolant capacity
(approximate quantity)(L {US qt, lmp qt}) 9.0 {9.5, 7.9}
Water pump TypeCentrifugal,
Timing-belt driven
ThermostatType Wax, Bottom-bypass
Opening temperature (°C {°F}) 80—84 {176—183}
Full-open temperature (°C {°F}) 95 {203}
Full-open lift (mm {in}) More than 8.5 {0.33}
RadiatorType Corrugated fin
Cap valve opening pressure
94—122
{0.96—1.24, 13.7—17.6}
(kPa {kgf/cm
2, psi})
Cooling fanType Electric
BladeOuter
diameter(mm {in}) 320 {12.6} 300 {11.9}
Number of
blade(sheet)Cooling fan No.1: 7
Cooling fan No.2: 54
Page 79 of 909
E–4
COOLING SYSTEM
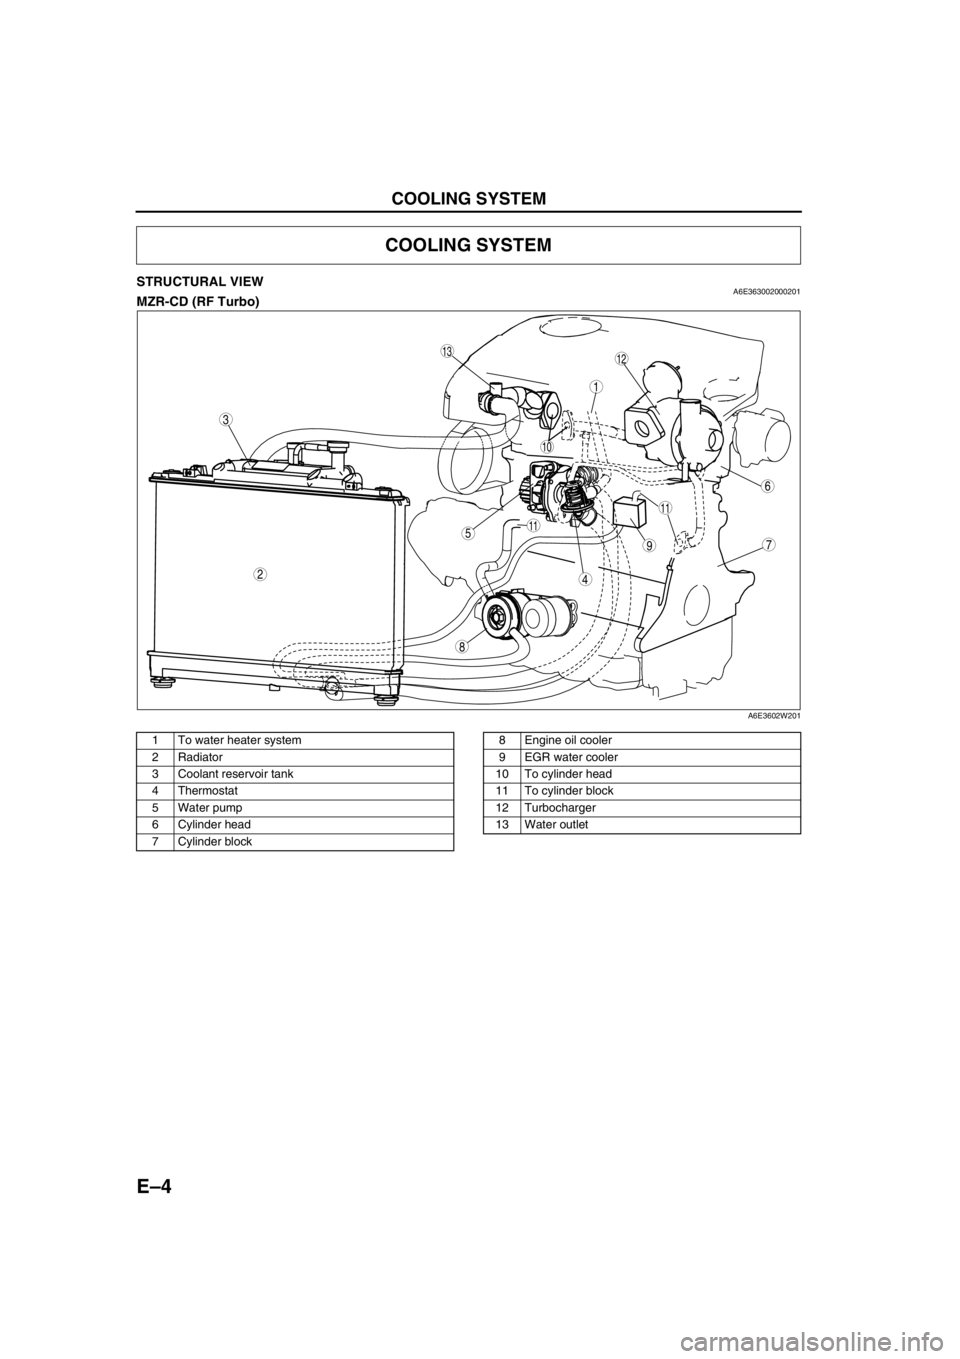
STRUCTURAL VIEWA6E363002000201MZR-CD (RF Turbo)
.
End Of Sie
COOLING SYSTEM
8
75
4
3
1
2
6
10
11
11
9
1312
A6E3602W201
1 To water heater system
2 Radiator
3 Coolant reservoir tank
4Thermostat
5 Water pump
6 Cylinder head
7 Cylinder block8 Engine oil cooler
9EGR water cooler
10 To cylinder head
11 To cylinder block
12 Turbocharger
13 Water outlet
Page 80 of 909
COOLING SYSTEM
E–5
E
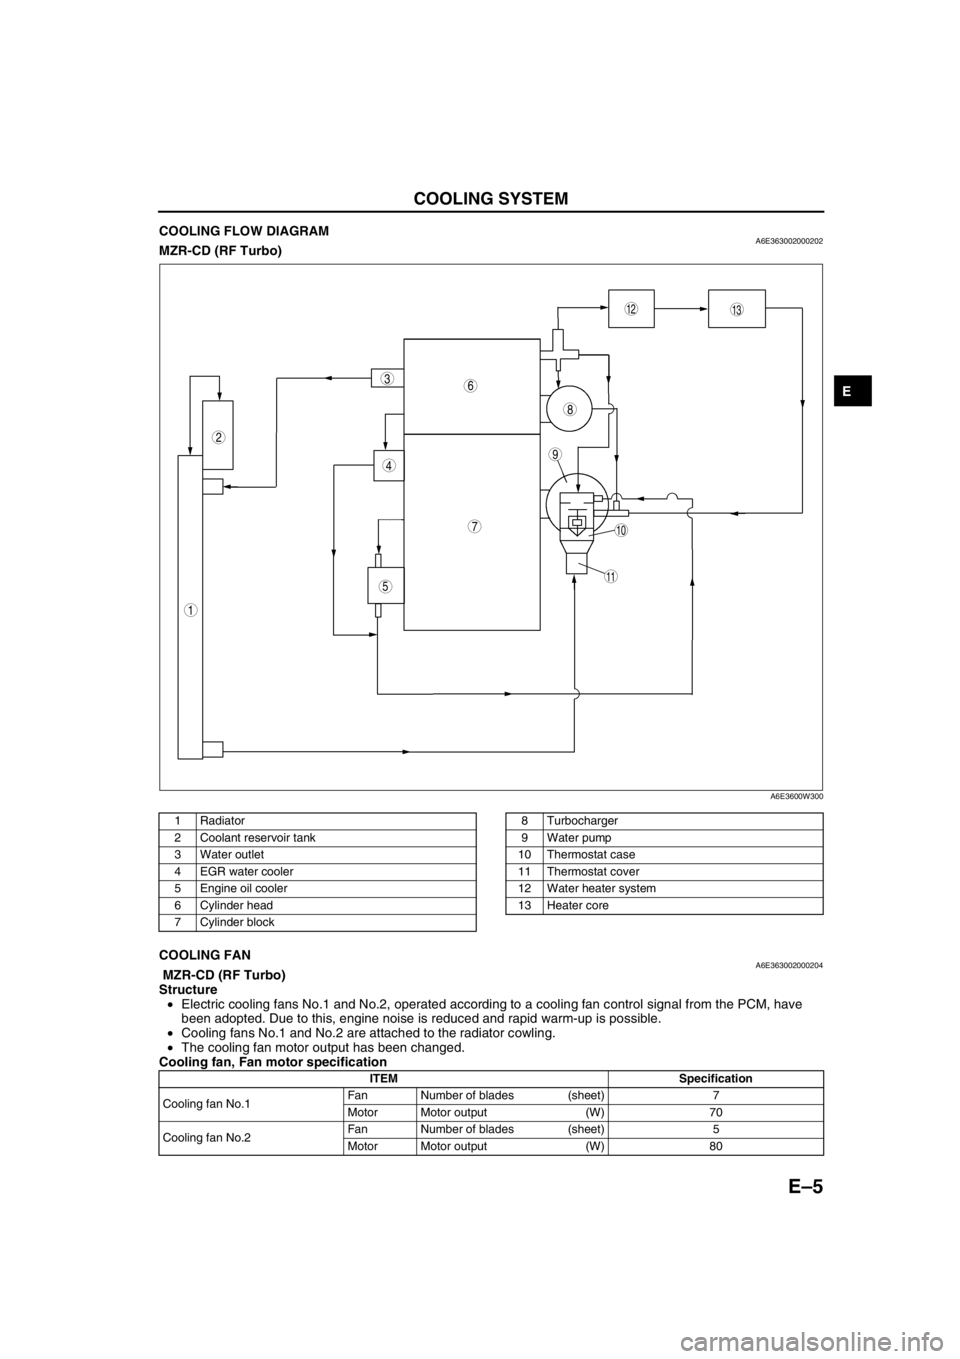
COOLING FLOW DIAGRAMA6E363002000202MZR-CD (RF Turbo)
.
End Of SieCOOLING FANA6E363002000204 MZR-CD (RF Turbo)
Structure
•Electric cooling fans No.1 and No.2, operated according to a cooling fan control signal from the PCM, have
been adopted. Due to this, engine noise is reduced and rapid warm-up is possible.
•Cooling fans No.1 and No.2 are attached to the radiator cowling.
•The cooling fan motor output has been changed.
Cooling fan, Fan motor specification
End Of Sie
9
8
7
5
4
3
1
2
10
13
11
12
6
A6E3600W300
1Radiator
2 Coolant reservoir tank
3 Water outlet
4EGR water cooler
5 Engine oil cooler
6 Cylinder head
7 Cylinder block8 Turbocharger
9 Water pump
10 Thermostat case
11 Thermostat cover
12 Water heater system
13 Heater core
ITEM Specification
Cooling fan No.1Fan Number of blades (sheet) 7
Motor Motor output (W) 70
Cooling fan No.2Fan Number of blades (sheet) 5
Motor Motor output (W) 80
Page 82 of 909
RADIATOR CAP
E–7
E
RADIATOR CAP INSPECTIONA6E361415201201MZR-CD (RF Turbo)
Warning
•Never remove the radiator cap while the engine is running, or when the engine and radiator are
hot. Scalding coolant and steam may shoot out and cause serious injury. It may also damage the
engine and cooling system.
•Turn off the engine and wait until it is cool. Even then, be very careful when removing the cap.
Wrap a thick cloth around it and slowly turn it counterclockwise to the first stop. Step back while
the pressure escapes.
•When you are sure all the pressure is gone, press down on the cap using the cloth, turn it, and
remove it.
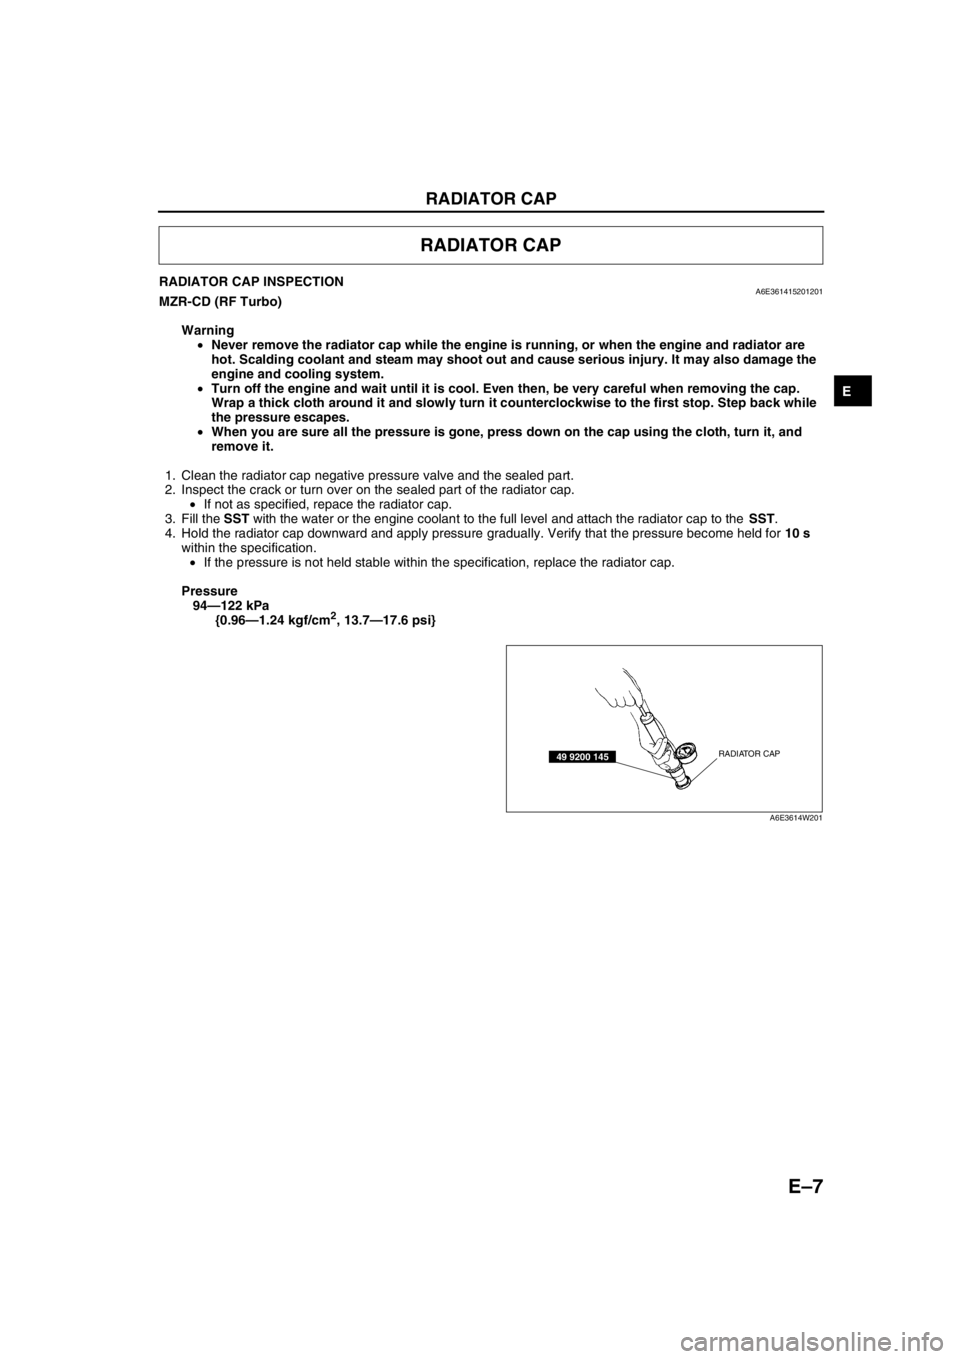
1. Clean the radiator cap negative pressure valve and the sealed part.
2. Inspect the crack or turn over on the sealed part of the radiator cap.
•If not as specified, repace the radiator cap.
3. Fill the SST with the water or the engine coolant to the full level and attach the radiator cap to the SST.
4. Hold the radiator cap downward and apply pressure gradually. Verify that the pressure become held for 10 s
within the specification.
•If the pressure is not held stable within the specification, replace the radiator cap.
Pressure
94—122 kPa
{0.96—1.24 kgf/cm
2, 13.7—17.6 psi}
End Of Sie
RADIATOR CAP
RADIATOR CAP49 9200 145
A6E3614W201
Page 83 of 909
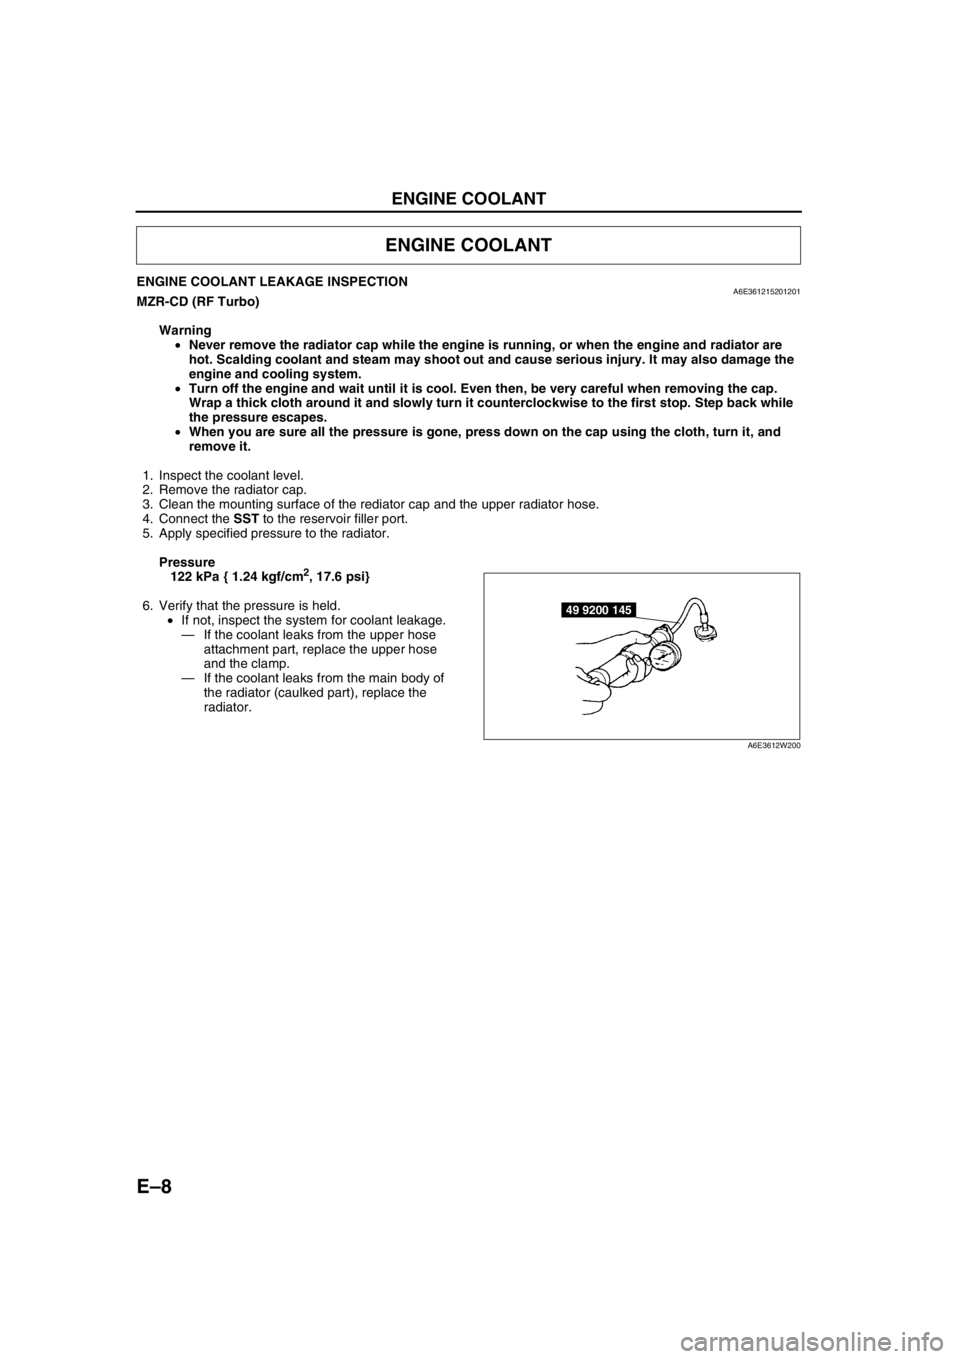
E–8
ENGINE COOLANT
ENGINE COOLANT LEAKAGE INSPECTIONA6E361215201201MZR-CD (RF Turbo)
Warning
•Never remove the radiator cap while the engine is running, or when the engine and radiator are
hot. Scalding coolant and steam may shoot out and cause serious injury. It may also damage the
engine and cooling system.
•Turn off the engine and wait until it is cool. Even then, be very careful when removing the cap.
Wrap a thick cloth around it and slowly turn it counterclockwise to the first stop. Step back while
the pressure escapes.
•When you are sure all the pressure is gone, press down on the cap using the cloth, turn it, and
remove it.
1. Inspect the coolant level.
2. Remove the radiator cap.
3. Clean the mounting surface of the rediator cap and the upper radiator hose.
4. Connect the SST to the reservoir filler port.
5. Apply specified pressure to the radiator.
Pressure
122 kPa { 1.24 kgf/cm
2, 17.6 psi}
6. Verify that the pressure is held.
•If not, inspect the system for coolant leakage.
—If the coolant leaks from the upper hose
attachment part, replace the upper hose
and the clamp.
—If the coolant leaks from the main body of
the radiator (caulked part), replace the
radiator.
End Of Sie
ENGINE COOLANT
49 9200 145
A6E3612W200
Page 84 of 909

THERMOSTAT
E–9
E
THERMOSTAT REMOVAL/INSTALLATIONA6E361815171201MZR-CD (RF Turbo)
1. Disconnect the negative battery cable.
2. Remove the under cover.
3. Drain the engine coolant.
4. Remove in the order indicated in the table.
5. Install in the reverse order of removal.
6. Fill the radiator with the specified amount and type of engine coolant.
7. Inspect the engine coolant leakage. (See E–8 ENGINE COOLANT LEAKAGE INSPECTION.)
Thermostat Installation Note
1. Verify that the positions of the jiggle pin and the projection on the gasket are as shown.
2. Install the thermostat into the thermostat case, aligning the projection on the gasket to the thermostat cover.
End Of Sie
THERMOSTAT
1 Lower radiator hose
2 Thermostat cover
3Thermostat
(See E–9 Thermostat Installation Note )
3
1
2
7.9—10.7 N·m
{80—110 kgf·cm,
69.5—95.4 in·lbf}
A6E3618W100
THERMOSTAT
COVER
GASKET
PROJECTIONJIGGLE PIN
A6A3618W101