brake light MAZDA 6 2002 Suplement Repair Manual
[x] Cancel search | Manufacturer: MAZDA, Model Year: 2002, Model line: 6, Model: MAZDA 6 2002Pages: 909, PDF Size: 17.16 MB
Page 825 of 909

T–14
OUTLINE
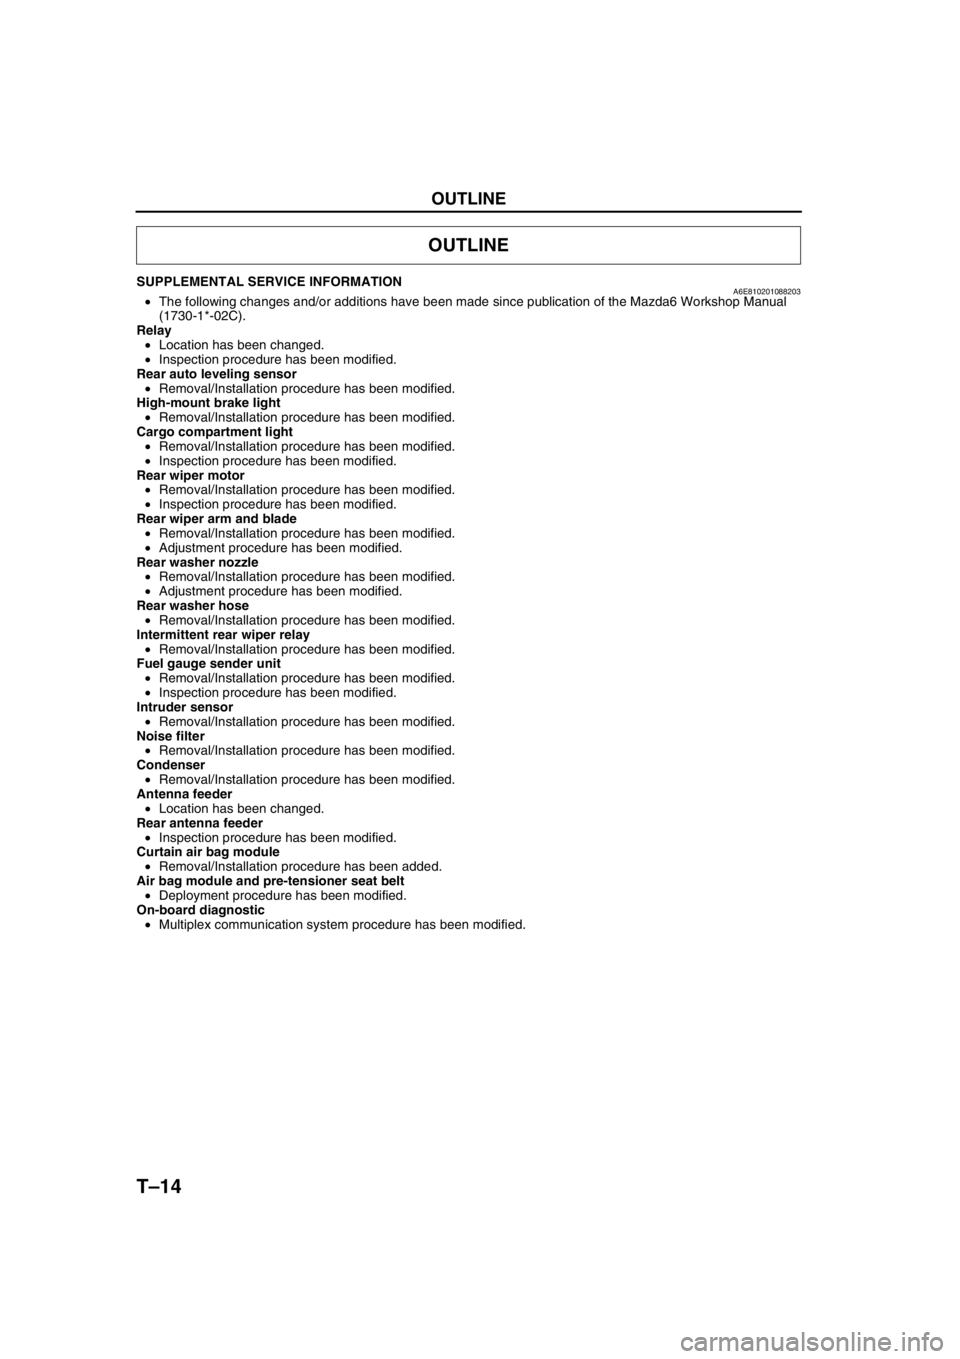
SUPPLEMENTAL SERVICE INFORMATIONA6E810201088203•The following changes and/or additions have been made since publication of the Mazda6 Workshop Manual
(1730-1*-02C).
Relay
•Location has been changed.
•Inspection procedure has been modified.
Rear auto leveling sensor
•Removal/Installation procedure has been modified.
High-mount brake light
•Removal/Installation procedure has been modified.
Cargo compartment light
•Removal/Installation procedure has been modified.
•Inspection procedure has been modified.
Rear wiper motor
•Removal/Installation procedure has been modified.
•Inspection procedure has been modified.
Rear wiper arm and blade
•Removal/Installation procedure has been modified.
•Adjustment procedure has been modified.
Rear washer nozzle
•Removal/Installation procedure has been modified.
•Adjustment procedure has been modified.
Rear washer hose
•Removal/Installation procedure has been modified.
Intermittent rear wiper relay
•Removal/Installation procedure has been modified.
Fuel gauge sender unit
•Removal/Installation procedure has been modified.
•Inspection procedure has been modified.
Intruder sensor
•Removal/Installation procedure has been modified.
Noise filter
•Removal/Installation procedure has been modified.
Condenser
•Removal/Installation procedure has been modified.
Antenna feeder
•Location has been changed.
Rear antenna feeder
•Inspection procedure has been modified.
Curtain air bag module
•Removal/Installation procedure has been added.
Air bag module and pre-tensioner seat belt
•Deployment procedure has been modified.
On-board diagnostic
•Multiplex communication system procedure has been modified.
End Of Sie
OUTLINE
Page 826 of 909

LOCATION INDEX
T–15
T
POWER SYSTEMA6E810001072201
.
End Of Sie
EXTERIOR LIGHTING SYSTEMA6E810001052201
.
LOCATION INDEX
1
A6E81101124
1 Main fuse block
(See T–19 RELAY LOCATION)
(See T–19 RELAY INSPECTION)
11
2
A6E81121162
1 High-mount brake light
(See T–20 HIGH-MOUNT BRAKE LIGHT
REMOVAL/INSTALLATION)2 Rear auto leveling sensor (4WD)
(See T–20 REAR AUTO LEVELING SENSOR
REMOVAL/INSTALLATION)
Page 831 of 909

T–20
EXTERIOR LIGHTING SYSTEM
REAR AUTO LEVELING SENSOR REMOVAL/INSTALLATIONA6E8112510302011. Disconnect the negative battery cable.
2. Jack up the vehicle.
3. Remove in the order indicated in the table.
4. Install in the reverse order of removal.
5. Adjust the headlight zeroset.
End Of SieHIGH-MOUNT BRAKE LIGHT REMOVAL/INSTALLATIONA6E811251580201In-vehicle-type
1. Disconnect the negative battery cable.
2. Remove the liftgate upper trim.
3. Remove in the order indicated in the table.
4. Install in the reverse order of removal.
EXTERIOR LIGHTING SYSTEM
1 Connector
2Bolt
3Bracket
4 Rear auto leveling sensor
2
1
3
4
4
6.9—9.8 N·m {70—99 kgf·cm, 61—85 in·lbf}
REAR STABILIZER
3
A6E81121158
1 Connector
2Socket
3 High-mount brake light bulb
4 High-mount brake light
12
3HOOK
LIFTGATE
4
A6A8112W113
Page 832 of 909

EXTERIOR LIGHTING SYSTEM, INTERIOR LIGHTING SYSTEM
T–21
T
Rear spoiler type
1. Disconnect the negative battery cable.
2. Remove the rear spoiler.
3. Remove in the order indicated in the table.
4. Install in the reverse order of removal.
End Of Sie
CARGO COMPARTMENT LIGHT REMOVAL/INSTALLATIONA6E8114514412011. Disconnect the negative battery cable.
2. Remove in the order indicated in the table.
3. Install in the reverse order of removal.
Lens Removal Note
1. Insert a tape-wrapped flathead screwdriver into
the service hole.
2. Twist the flathead screwdriver as indicated by the
arrow to remove the lens.
End Of Sie
1Bolt
2 Cover
3 Connector
4 High-mount brake light
4
12
3
A6J81121004
INTERIOR LIGHTING SYSTEM
1Lens
(See T–21 Lens Removal Note)
2 Cargo compartment light bulb
3 Screw (if equipped)
4 Cargo compartment light
5 Connector
12
33
4
5
A6J81141102
SERVICE HOLE
A6A8114W104
Page 835 of 909

T–24
WIPER AND WASHER
Rear Wiper Arm Installation Note
1. Clean the rear wiper arm connector shaft using a
wire brush before installing the rear wiper arm.
End Of SieREAR WIPER ARM AND BLADE ADJUSTMENTA6E8116674202021. Operate the rear wiper motor to set the wiper in the park position.
2. Set the rear wiper arm onto the ceramic end line.
End Of SieREAR WASHER NOZZLE REMOVAL/INSTALLATIONA6E8116675112011. Disconnect the negative battery cable.
2. Remove the liftgate upper trim. (See S–23 LIFTGATE UPPER TRIM REMOVAL/INSTALLATION)
3. Remove the high-mount brake light (In-vehicle-type).
4. Remove the rear washer hose from the rear washer nozzle.
5. Squeeze the tabs of the rear washer nozzle.
6. Pull the rear washer nozzle out to remove it.
7. Install in the reverse order of removal.
8. Adjust the rear washer nozzle. (See T–25 REAR
WASHER NOZZLE ADJUSTMENT.)
End Of Sie
REAR WIPER ARM
CONNECTOR
SHAFT
A6E81161103
20—23
CERAMIC
END LINE GLASS
END LINE
CERAMIC
END
LINE
GLASS
END LINE {0.8—0.9}
mm {in}
A6E81161129
TA B
A6E81161105
Page 841 of 909

T–30
AUDIO AND NAVIGATION SYSTEM
NOISE FILTER REMOVAL/INSTALLATIONA6E812466869201Brake Light Noise Filter
1. Remove the noise filter according to the NOISE FILTER REMOVAL/INSTALLATION procedure for the 4SD.
2. Install in the reverse order of removal.
Rear Window Defroster Noise Filter
1. Disconnect the negative battery cable.
2. Remove the liftgate lower trim.
3. Remove in the order indicated in the table.
4. Install in the reverse order of removal.
End Of SieCONDENSER REMOVAL/INSTALLATIONA6E8124668692021. Disconnect the negative battery cable.
2. Remove the liftgate lower trim.
3. Remove in the order indicated in the table.
4. Install in the reverse order of removal.
End Of Sie
AUDIO AND NAVIGATION SYSTEM
1Bolt
2Screw
3 Connector
4 Noise filter
2
3
4
8.9—12.7 N·m
{90—130 kgf·cm,
79—11 2 in·lbf}
1
A6E81241109
1Bolt
2 Connector
3 Condenser
1
3
2
1
2
3
3
2
1
N·m {kgf·cm, in·lbf} 8.9—12.7
{90—130, 79—112}
8.9—12.7
{90—130, 79—112} 8.9—12.7
{90—130, 79—112}
A6E81241122
Page 900 of 909

TD–8
TECHNICAL DATA
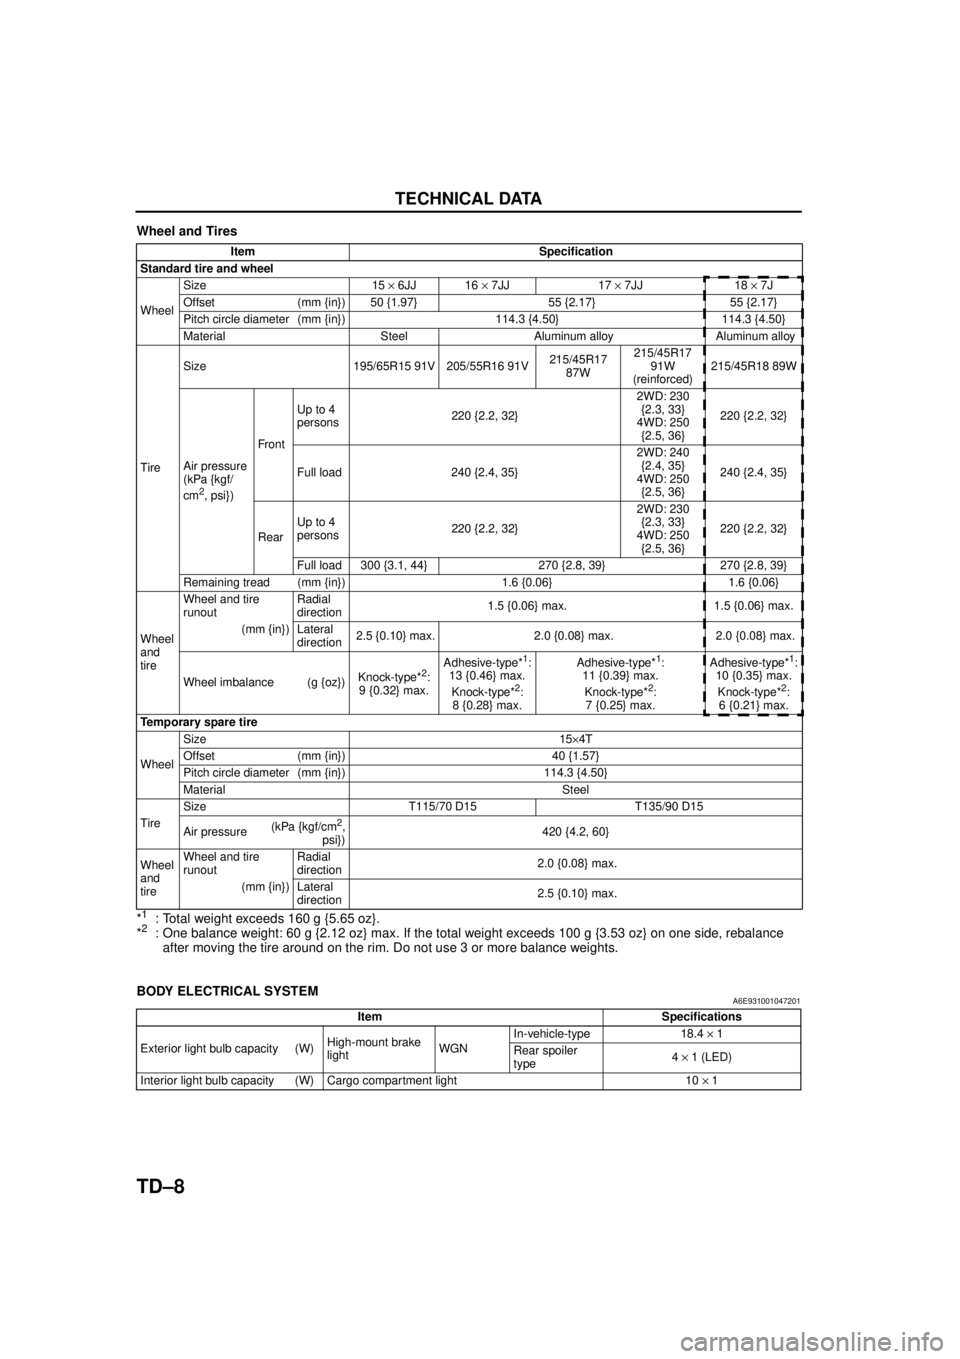
Wheel and Tires
*
1: Total weight exceeds 160 g {5.65 oz}.
*2: One balance weight: 60 g {2.12 oz} max. If the total weight exceeds 100 g {3.53 oz} on one side, rebalance after moving the tire around on the rim. Do not use 3 or more balance weights.
End Of Sie
BODY ELECTRICAL SYSTEMA6E931001047201
End Of Sie
Item Specification
Standard tire and wheel
Wheel Size 15
× 6JJ 16 × 7JJ 17 × 7JJ 18 × 7J
Offset (mm {in}) 50 {1.97} 55 {2.17} 55 {2.17}
Pitch circle diameter (mm {in}) 114.3 {4.50} 114.3 {4.50}
Material Steel Aluminum alloy Aluminum alloy
Tire Size 195/65R15 91V 205/55R16 91V
215/45R17
87W 215/45R17
91W
(reinforced) 215/45R18 89W
Air pressure
(kPa {kgf/
cm
2, psi}) Front
Up to 4
persons
220 {2.2, 32} 2WD: 230
{2.3, 33}
4WD: 250 {2.5, 36} 220 {2.2, 32}
Full load 240 {2.4, 35} 2WD: 240
{2.4, 35}
4WD: 250 {2.5, 36} 240 {2.4, 35}
Rear Up to 4
persons
220 {2.2, 32} 2WD: 230
{2.3, 33}
4WD: 250 {2.5, 36} 220 {2.2, 32}
Full load 300 {3.1, 44} 270 {2.8, 39} 270 {2.8, 39}
Remaining tread (mm {in}) 1.6 {0.06} 1.6 {0.06}
Wheel
and
tire Wheel and tire
runout
Radial
direction
1.5 {0.06} max. 1.5 {0.06} max.
(mm {in}) Lateral direction 2.5 {0.10} max. 2.0 {0.08} max. 2.0 {0.08} max.
Wheel imbalance (g {oz}) Knock-type*
2:
9 {0.32} max. Adhesive-type*
1:
13 {0.46} max.
Knock-type*
2:
8 {0.28} max. Adhesive-type*
1:
11 {0.39} max.
Knock-type*
2:
7 {0.25} max. Adhesive-type*
1:
10 {0.35} max.
Knock-type*
2:
6 {0.21} max.
Temporary spare tire
Wheel Size 15
×4T
Offset (mm {in}) 40 {1.57}
Pitch circle diameter (mm {in}) 114.3 {4.50}
Material Steel
Tire Size T115/70 D15 T135/90 D15
Air pressure
(kPa {kgf/cm
2,
psi}) 420 {4.2, 60}
Wheel
and
tire Wheel and tire
runout
Radial
direction
2.0 {0.08} max.
(mm {in}) Lateral direction 2.5 {0.10} max.
Item Specifications
Exterior light bulb capacity (W) High-mount brake
lightWGNIn-vehicle-type 18.4
× 1
Rear spoiler
type 4
× 1 (LED)
Interior light bulb capacity (W) Cargo compartment light 10 × 1