auto MAZDA MODEL CX-9 2015 Owners Manual (in English)
[x] Cancel search | Manufacturer: MAZDA, Model Year: 2015, Model line: MODEL CX-9, Model: MAZDA MODEL CX-9 2015Pages: 604, PDF Size: 9.15 MB
Page 315 of 604

Black plate (315,1)
Scan tuning
Touch the
on-screen button to
automatically sample stations. Scanning
stops at each station for about five
seconds.
To hold a station, touch the
on-
screen button again during this interval.
NOTE
Unsubscribed channels, invalid channels,
parental lock channels and channel 0 are not
subject to the scan, therefore these channels
will skip automatically.
Channel number, channel name,
category name, artist name, song titles
and information display
The information regarding the channel
which is currently being received is
displayed.
NOTE
If channels have not been subscribed to or
parental locked, the channel name, category
name, artist name, song title and information
is not displayed.
Display scroll
If a whole title cannot be displayed at one
time, touch the
on-screen button on
the right side of the title. When the last
character is displayed, touch the
on-
screen button to display the first character
of the title.
NOTE
Theon-screen button is displayed only if a
whole title cannot be displayed at one time.
Instant replay
This function allows you to rewind and
replay the program that you were
previously or are currently listening to. When the
on-screen button is
touched, playback starts from the
beginning of the current program.
When the
on-screen button is
touched twice, playback starts from the
beginning of the previous program.
Touch and hold the
on-screen
button to reverse the program while the
button is being pressed.
When the
on-screen button is
touched, playback starts from the
beginning of the next program.
When the
on-screen button is
touched while the last program is being
played, the instant replay mode is
canceled.
Touch and hold the
on-screen
button to fast-forward the program while
the button is being pressed.
When touching and holding the button
until the end of the program, the instant
replay mode is canceled.
Instant replay (PAUSE)
If the
on-screen button is touched,
instant replay mode is turned on in a
paused condition (PAUSE).
Touch the
on-screen button again
to resume playback from the point at
which it was paused.
Parental lock
Parental lock, parental unlock, parental
lock code change, and parental lock code
reset can be set.
Interior Comfort
Audio System
6-41
CX-9_8DU1-EA-14H_Edition1 Page315
Thursday, June 5 2014 4:18 PM
Form No.8DU1-EA-14H
Page 320 of 604

Black plate (320,1)
qOperating the Compact Disc (CD) Player
Audio button CD eject button
Track up/Fast-
forward button
File dial
Track down/
Reverse button
CD slot
TypePlayable data
Music/MP3/WMA/
AAC CD player
lMusic data (CD-DA)lMP3/WMA/AAC file
NOTE
If a disc has both music data (CD-DA) and
MP3/WMA/AAC files, playback of the two or
three file types differs depending on how the
disc was recorded.
Inserting the CD
Insert the CD into the slot, label-side up.
The auto-loading mechanism will set the
CD and begin play.
NOTE
There will be a short lapse before play begins
while the player reads the digital signals on
the CD.
Ejecting the CD
Press the CD eject button (
) to eject the
CD.
Playback
Press the audio button (
)or
on-screen tab with a CD inserted.
Pause
To pause playback, touch the
on-
screen button.
Touch the
on-screen button during
a pause to cancel it.
6-46
Interior Comfort
Audio System
CX-9_8DU1-EA-14H_Edition1 Page320
Thursday, June 5 2014 4:19 PM
Form No.8DU1-EA-14H
Page 351 of 604

Black plate (351,1)
Before Operation
qDisplay Opening/Closing
CAUTION
Ø Close the display while the Rear
Entertainment System is not in
use. If the display is left open, a
passenger could be injured by
hitting the display, or the display
could be damaged.
Ø Do not press the monitor screen
while opening the display. It may
cause a malfunction.
Opening the display
Press the monitor screen release knob and
open the display until it is in the lock
position.
Monitor screen
release Knob
Closing the display
Close and press the display until a
clicking sound can be heard. NOTE
lIf the display is closed while the power is
on, it automatically turns off.
lThe display locks in two positions when
opened to 100 or 120-degrees.
q
Disc Insertion/Ejection
CAUTION
If the signal surface of a disc is
touched, it could cause the sound to
skip. Pick up a disc by grasping the
edge of the hole and the outer edge.
NOTE
When no disc is inserted, “No Disc ”is
displayed on the monitor.
Interior Comfort
Rear Entertainment System
6-77
CX-9_8DU1-EA-14H_Edition1 Page351
Thursday, June 5 2014 4:19 PM
Form No.8DU1-EA-14H
Page 352 of 604

Black plate (352,1)
Inserting the disc
Insert the disc into the disc slot with the
label-side up.
Disc slot
CAUTION
Insert the disc with its label-side
(decorated side) facing upward. If the
disc is inserted upside-down, it may
cause a malfunction.
NOTE
If a disc is inserted while the Rear
Entertainment System is turned off but the
display is open, and when the ignition is
switched to ACC or ON, the system
automatically turns on and starts playback.
Ejecting the disc
Press the eject button to eject the disc.
Eject button
NOTElWhen the eject button is pressed, the disc is
ejected halfway.
lA disc can be ejected with the Rear
Entertainment System turned off.
q Picture Adjustment
The brightness (BRIGHT), color
adjustment (TINT), color density
(COLOR), and contrast (CONTRAST) of
the screen can be adjusted.
Press the picture adjust button
(PICTURE) on the remote controller to
change to the picture adjustment mode.
The picture mode changes in the order of
BRIGHT →TINT →COLOR
→ CONTRAST →OFF each time the
button is pressed in this mode.
Press the picture adjust button (
)or(),
positioned to top/bottom of the picture
adjustment mode button (PICTURE), to
adjust each picture mode.
NOTE
lIf the picture adjustment mode is on and no
operation has been done for about 5
seconds, the mode is canceled
automatically.
lIf the picture is no longer adjustable by
pressing the picture adjust button (
)or
(
), it indicates that the adjustment value
has reached the maximum/minimum value.
Adjusting the brightness
1. Press the picture adjustment mode button (PICTURE) and select the
BRIGHT mode.
2. Press the picture adjust button (
)or
(
) to adjust.
lPicture adjust button (): Brighten
6-78
Interior Comfort
Rear Entertainment System
CX-9_8DU1-EA-14H_Edition1 Page352
Thursday, June 5 2014 4:19 PM
Form No.8DU1-EA-14H
Page 357 of 604

Black plate (357,1)
Sound Output
qSound Output from Vehicle Speakers
Press the audio button () andon-screen tab. “AUX ”is displayed on the audio
display and it changes to the Rear Entertainment System sound.
Sound/Music being played by the Rear Entertainment System can be heard from the
vehicle speakers.
Adjust the volume with the dial on the audio unit.
q Using the Headphone Speakers
CAUTION
Ø For safety reasons, the driver should never wear the headphones while driving.
Not being able to hear sound outside of the vehicle could result in a serious
accident.
Ø Use the headphones with the volume set at moderate level. Listening at an
excessive volume level for extended periods of time will have an adverse effect on
your hearing ability.
Ø If the headphone arms are spread excessively is could result in damage.
Ø Do not apply excessive force to the headphones or get them wet. Also, do not
leave the headphones in a place exposed to direct sunlight or high temperature. It
could cause a malfunction.
NOTE
lTo listen to audio other than from the speakers of the rear entertainment system, it is necessary to
use the wireless headphones that are included. For headphone specification, refer to
“ Operation Tips for Headphones ”(page 6-73).
lWhen the headphones are not in use, turn them off.lIf there is no sound produced from a signal for 3 minutes or longer after the headphone power is
turned on, or there is no signal reception, the headphone power turns off automatically.
lIf the headphones are continuously used for 4 hours or more after the sound signal is received, the
headphone power turns off automatically.
Interior Comfort
Rear Entertainment System
6-83
CX-9_8DU1-EA-14H_Edition1 Page357
Thursday, June 5 2014 4:19 PM
Form No.8DU1-EA-14H
Page 362 of 604

Black plate (362,1)
DVD video, DVD audio,
Video CD, Audio CD and
MP3/WMA CD Playback
(Disc Mode)
DVD video, DVD audio, Video CD,
Audio CD, and MP3/WMA CD can be
played in the Disc mode.
CAUTION
For safe driving, adjust the volume
while driving so that ambient sound
can be heard.
NOTE
lDo not use the Rear Entertainment System
for a long period with the engine off. The
vehicle battery could run down.
lTo listen to the Rear Entertainment System
sound from the vehicle speakers, change the
audio sound to the Rear Entertainment
System sound.
Refer to Sound Output from Vehicle
Speakers on page 6-83.
lTo listen to audio other than from the
speakers of the rear entertainment system, it
is necessary to use the wireless headphones
that are included. For headphone
specification, refer to
“ Operation Tips for Headphones ”(page
6-73).
lThe cooling fan of this unit may activate if
the temperature of the unit is high, however,
this does not indicate a malfunction.
q Basic Operation
Power ON/OFF
Turning on the power
The Rear Entertainment System
automatically turns on when any of the
following operations are done with the
ignition switched to ACC or ON.
lThe display is open and a disc is
inserted.
lThe POWER button on the remote
controller is pressed.
Turning off
The Rear Entertainment System turns off
when any of the following operations are
done.
lThe POWER button on the remote
controller is pressed.
lThe ignition is switched off.lThe display is closed.
Playback
The top menu or disc menu may be
displayed on the monitor screen when a
disc is played. From these menus, the disc
functions can be performed.
Refer to Assist Functions (DVD video,
DVD audio, video CD and audio CD) on
page 6-91.
NOTE
lFor some discs, the top menu or disc menu
may be displayed automatically after
playback.
lRefer to the instruction manual attached to
the disc for the top menu or disc menu.
When no disc is inserted
1. Switch the ignition to ACC or ON.
2. Insert the disc into the disc slot. After the disc is inserted, the playback
starts.
6-88
Interior Comfort
Rear Entertainment System
CX-9_8DU1-EA-14H_Edition1 Page362
Thursday, June 5 2014 4:19 PM
Form No.8DU1-EA-14H
Page 363 of 604

Black plate (363,1)
CAUTION
Insert the disc with its label-side
(decorated side) facing upward. If the
disc is inserted upside-down, it may
cause a malfunction.
When a disc has been inserted
1. Switch the ignition to ACC or ON.
2. Turn on the Rear Entertainment System.
3. Press the PLAY button to start playback.
NOTE
If the Rear Entertainment System has been
turned off during a previous playback,
playback automatically resumes when the
system is turned on.
Stopping the playback
Press the STOP button to stop the
playback.
To resume the playback, press the PLAY
button.
Resume playback function
The Rear Entertainment System stores the
position where the playback has been
stopped using the resume playback
function.
Press the PLAY button to resume the
playback from the position previously
stopped.
NOTE
If the RETURN button is pressed after the
playback has been stopped, the resume
playback function is canceled. Once the
resume playback function is canceled, the
playback starts from the first chapter (DVD
video)/track (video CD, audio CD, DVD
audio, or MP3/WMA CD) when the PLAY
button is pressed.
Pausing the playback
Press the PAUSE button to pause the
playback.
Press the PAUSE or PLAY button to
resume the playback.
Fast-forward/Reverse
Fast-forward
Image and sound is fast-forwarded while
the FWD button (
) is pressed.
Reverse
Image and sound is reversed while the
REW button (
) is pressed.
Slow playback (DVD video and video
CD)
Press the SLOW button to slow the
playback.
Press the SLOW or PLAY button to return
to normal playback speed.
NOTE
lSlow playback is not available for audio
CD, DVD audio and MP3/WMA CD.
lThe unit is muted while in slow playback.
Skipping the chapter/track
Chapter (DVD video) or track (video CD,
DVD audio, audio CD, and MP3/WMA
CD) can be skipped (changed).
Fast-forward skip
Press the NEXT button (
) to skip to
the next chapter/track.
Reverse skip
Press the PREV button (
) to return to
the beginning of the current chapter/track.
Interior Comfort
Rear Entertainment System
6-89
CX-9_8DU1-EA-14H_Edition1 Page363
Thursday, June 5 2014 4:19 PM
Form No.8DU1-EA-14H
Page 366 of 604

Black plate (366,1)
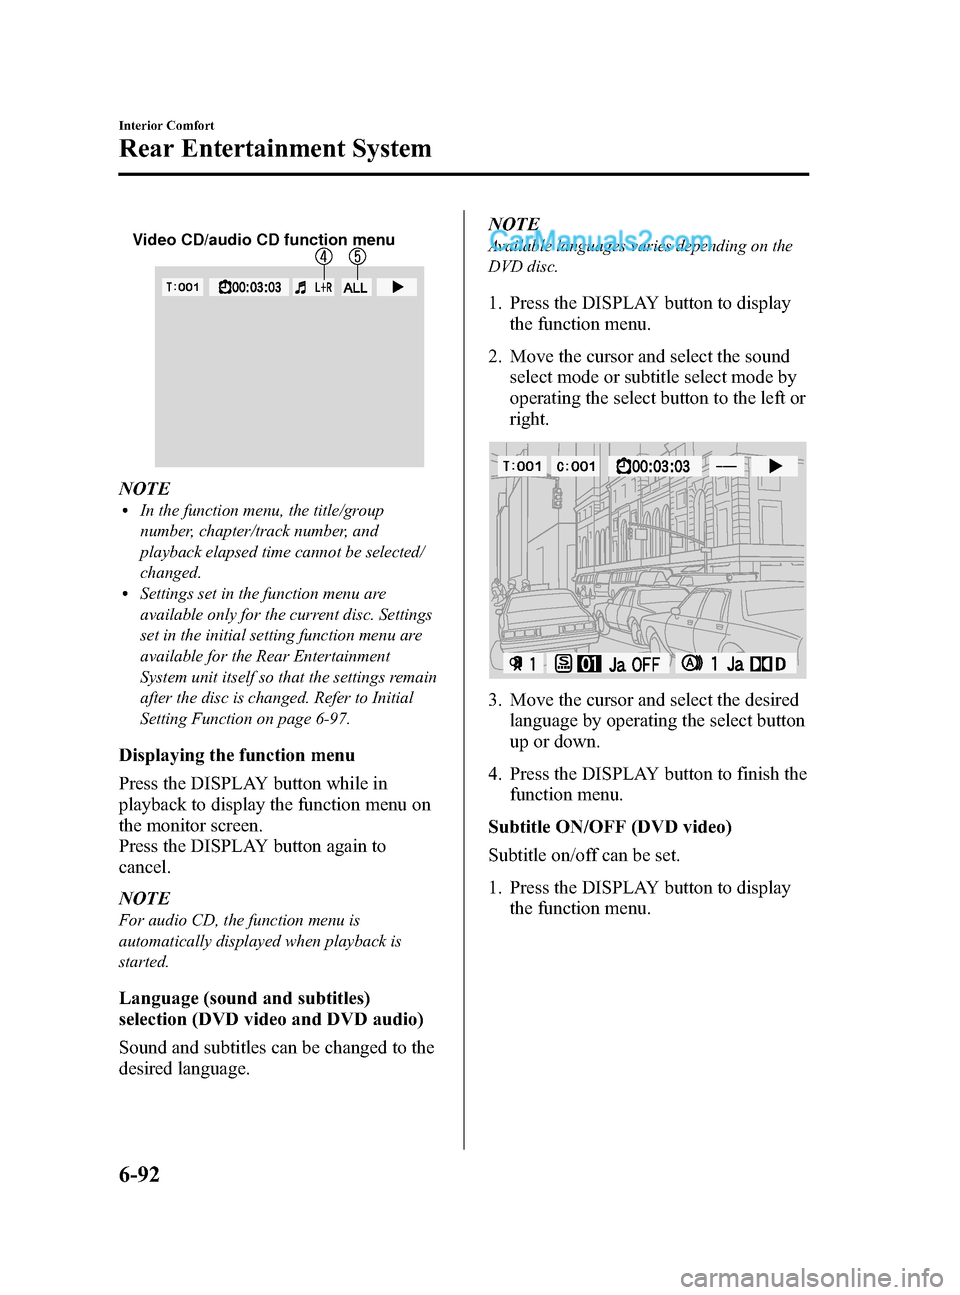
Video CD/audio CD function menu
NOTElIn the function menu, the title/group
number, chapter/track number, and
playback elapsed time cannot be selected/
changed.
lSettings set in the function menu are
available only for the current disc. Settings
set in the initial setting function menu are
available for the Rear Entertainment
System unit itself so that the settings remain
after the disc is changed. Refer to Initial
Setting Function on page 6-97.
Displaying the function menu
Press the DISPLAY button while in
playback to display the function menu on
the monitor screen.
Press the DISPLAY button again to
cancel.
NOTE
For audio CD, the function menu is
automatically displayed when playback is
started.
Language (sound and subtitles)
selection (DVD video and DVD audio)
Sound and subtitles can be changed to the
desired language.NOTE
Available languages varies depending on the
DVD disc.
1. Press the DISPLAY button to display
the function menu.
2. Move the cursor and select the sound select mode or subtitle select mode by
operating the select button to the left or
right.
3. Move the cursor and select the desiredlanguage by operating the select button
up or down.
4. Press the DISPLAY button to finish the function menu.
Subtitle ON/OFF (DVD video)
Subtitle on/off can be set.
1. Press the DISPLAY button to display the function menu.
6-92
Interior Comfort
Rear Entertainment System
CX-9_8DU1-EA-14H_Edition1 Page366
Thursday, June 5 2014 4:19 PM
Form No.8DU1-EA-14H
Page 389 of 604

Black plate (389,1)
SymptomCause Action
There are
subtle spots
or
luminescent
spots on the
screen. The LCD is high tech equipment with a
99.99% effective sensor resolution.
However, please be aware that 0.01%
pixel failure or pixel continuous
illuminated pixels may exist.
―
Subtitles
cannot be
changed Other languages are not recorded on the
disc.
Check the available language in the instruction manual
accompanying the disc.
Display
angle cannot
be changed Multiple angles are not recorded on the
disc.
Check the available angle in the instruction manual
accompanying the disc.
Remote
controller is
inoperable The remote controller is not pointed
toward the receiver on the unit.
Point the remote controller toward the receiver on the unit.
The receiver is near the disc slot.
There is an obstruction between the
remote controller and the unit. Operate the remote controller avoiding the obstruction so
that the signal reaches the receiver on the unit. The
receiver is near the disc slot.
The remote controller batteries are
weak. Replace the batteries with new ones.
Refer to Remote Controller on page 6-81.
Remote controller batteries poles are
pointed in the wrong direction. Install the batteries in the correct direction.
Refer to Remote Controller on page 6-81.
No audio
output from the
headphones. No power to the headphones. Turn on the power to the headphones.
The headphones' optical receiver is not
pointed towards the main unit's
transmitter.
Point the headphones' optical receiver towards the main
unit's transmitter. The main unit's transmitter is located
near the disc insertion area.
There is an obstruction between the
headphones and the main unit. Avoid the obstruction.
The headphones' batteries are depleted. Replace the batteries with new ones.
The headphones' batteries have not been
correctly inserted in the
/directions. Insert the batteries correctly.
The headphones are exposed to direct
sunlight. Use the headphones while avoiding direct sunlight.
Power turns off automatically. If there is no sound for 3 minutes or longer, or if the
headphones are continuously used for 4 hours, there is a
function which automatically turns the power off. Turn the
power to headphones back on.
The
headphones'
optical
reception
range is too
narrow. The headphones' batteries are weak. Replace the batteries with new ones.
There is
excessive
noise in the
headphone
audio The headphones' batteries are weak. Replace the batteries with new ones.
Interior Comfort
Rear Entertainment System
6-115
CX-9_8DU1-EA-14H_Edition1 Page389
Thursday, June 5 2014 4:19 PM
Form No.8DU1-EA-14H
Page 393 of 604

Black plate (393,1)
4. Touch theon-screen button to
display the message and switch to the
device operation.
5. Using your device, perform a search for the Bluetooth
®device (Peripheral
device).
6. Select “Mazda ”from the device list
searched by the device.
7. (Device with Bluetooth
®version 2.0)
Input the displayed 4-digit pairing code
into the device.
(Device with Bluetooth
®version 2.1
or higher)
lJust Works is detected
The pairing is performed
automatically.
lNumeric Comparison is detected
Make sure the displayed 6-digit
code on the audio is also displayed
on the device, and touch the
on-screen button. A connection
license agreement may be required
depending on the device.
After a device is registered, the system
automatically identifies the device. By
activating Bluetooth
®Hands-Free again,
or by activating Bluetooth®Hands-Free
first after switching the ignition from OFF
to ACC, the device connection condition
is indicated in the display.
Device selection
If several devices have been programmed,
the Bluetooth
®unit links the device last
programmed. If you would like to link a
different programmed device, it is
necessary to change the link. The order of
device priority after the link has been
changed is maintained even when the
ignition is switched off. NOTE
If the device name cannot be displayed,
“... ” is
added at the end of the title which is displayed.
Connecting other devices
1. Press the phone button (
).
2. Touch the
on-screen tab.
3. Touch the
on-screen
button.
4. Touch the device name which you want to connect to display the device
information screen.
5. Touch the
on-screen button to
connect as a Hands-Free device. Touch
the
on-screen button to connect
as a Bluetooth®audio device.
6. Touch the
on-screen button.
If the connection is completed, the device
name is displayed. Touch the
on-
screen button to display the device list
screen and display the
oricon in the
new device name which is connected.
Disconnecting a device
1. Touch the
on-screen tab.
2. Touch the
on-screen
button.
3. Touch the device name which is currently connected to display the
device information screen.
4. Touch the
on-screen button to
disconnect the Hands-Free device.
Touch the
on-screen button to
disconnect the audio device.
5. Touch the
on-screen button.
Deleting a device
1. Touch the
on-screen tab.
Interior Comfort
Bluetooth®
6-119
CX-9_8DU1-EA-14H_Edition1 Page393
Thursday, June 5 2014 4:19 PM
Form No.8DU1-EA-14H