MERCEDES-BENZ C-Class 2015 W205 Comand Manual
Manufacturer: MERCEDES-BENZ, Model Year: 2015, Model line: C-Class, Model: MERCEDES-BENZ C-Class 2015 W205Pages: 214, PDF Size: 5.16 MB
Page 71 of 214
X
Select the address entry menu
(Y page 67).
X To select: State/Province State/Province, ZIP Code
ZIP Code,
Center
Center orIntersection
Intersection turn, slide6
and press the controller.
X Select an entry ( Ypage 68).
Saving an address You can store the address you have entered
either as your home address or as another
navigable contact in the address book
(Y page 117).
X Call up the address entry menu
(Y page 67).
X To select Save
Save: slide 6the controller,
turn and press to confirm.
X As the home address: selectAs "My
As "My
Address" Address".
COMAND stores your home address under
My Address My Address in the list of contacts. X
As a contact: selectAs New Contact
As New Contact.
X Select Not Classified
Not Classified, Home
HomeorWork
Work. X
Enter a last name and first name
(Y page 28).
X To select OK OK: turn and press the controller.
The destination address is saved in the
address book as a navigable contact.
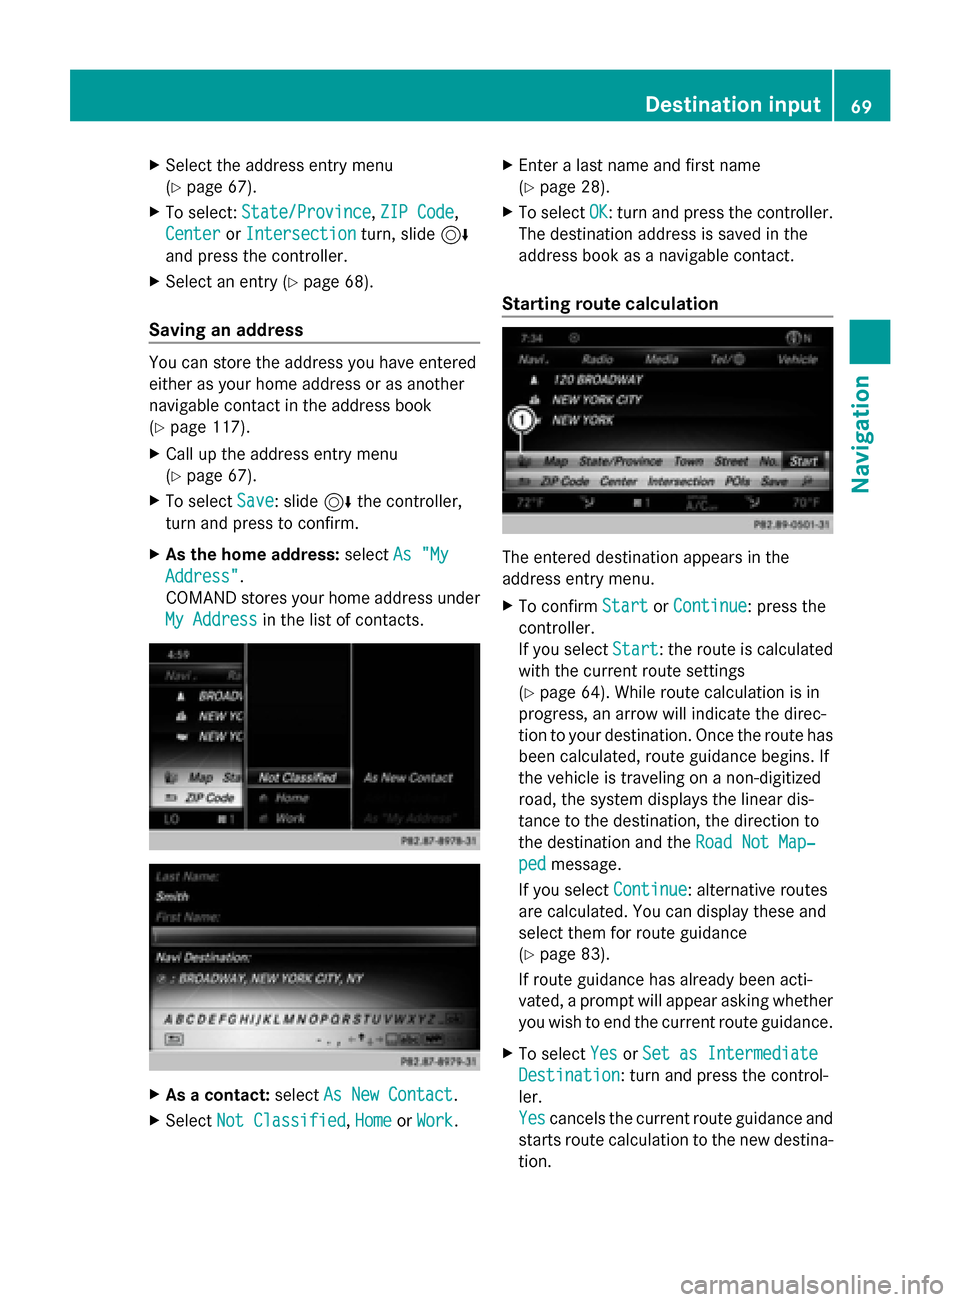
Starting route calculation The entered destination appears in the
address entry menu.
X
To confirm Start
Start orContinue Continue: press the
controller.
If you select Start Start: the route is calculated
with the current route settings
(Y page 64). While route calculation is in
progress, an arrow will indicate the direc-
tion to your destination. Once the route has
been calculated, route guidance begins. If
the vehicle is traveling on a non-digitized
road, the system displays the linear dis-
tance to the destination, the direction to
the destination and the Road Not Map‐ Road Not Map‐
ped
ped message.
If you select Continue
Continue: alternative routes
are calculated. You can display these and
select them for route guidance
(Y page 83).
If route guidance has already been acti-
vated, a prompt will appear asking whether
you wish to end the current route guidance.
X To select Yes YesorSet as Intermediate
Set as Intermediate
Destination
Destination: turn and press the control-
ler.
Yes Yes cancels the current route guidance and
starts route calculation to the new destina-
tion. Destination input
69Navigation Z
Page 72 of 214
Set as Intermediate Destination
Set as Intermediate Destination
adds the new destination in addition to the
existing destination and opens the inter-
mediate destinations list.
i The route is calculated using the digital
map data. The calculation time depends on
the distance from the destination, for
example.
The calculated route may differ from the
ideal route, e.g. due to road works or
incomplete map data. Please also refer to
the notes about the digital map
(Y page 96).
Calling up the keyword search
X To select the magnifying glass symbol:
while in the address entry menu, slide
6, turn and then press the controller.
Viewing the vicinity of the destination
X To select symbol 0043: turn the controller and
press to confirm.
You can explore the destination area.
Requirement for exploring a destination:
mbrace must be activated for Internet
access (Y page 136). Keyword search
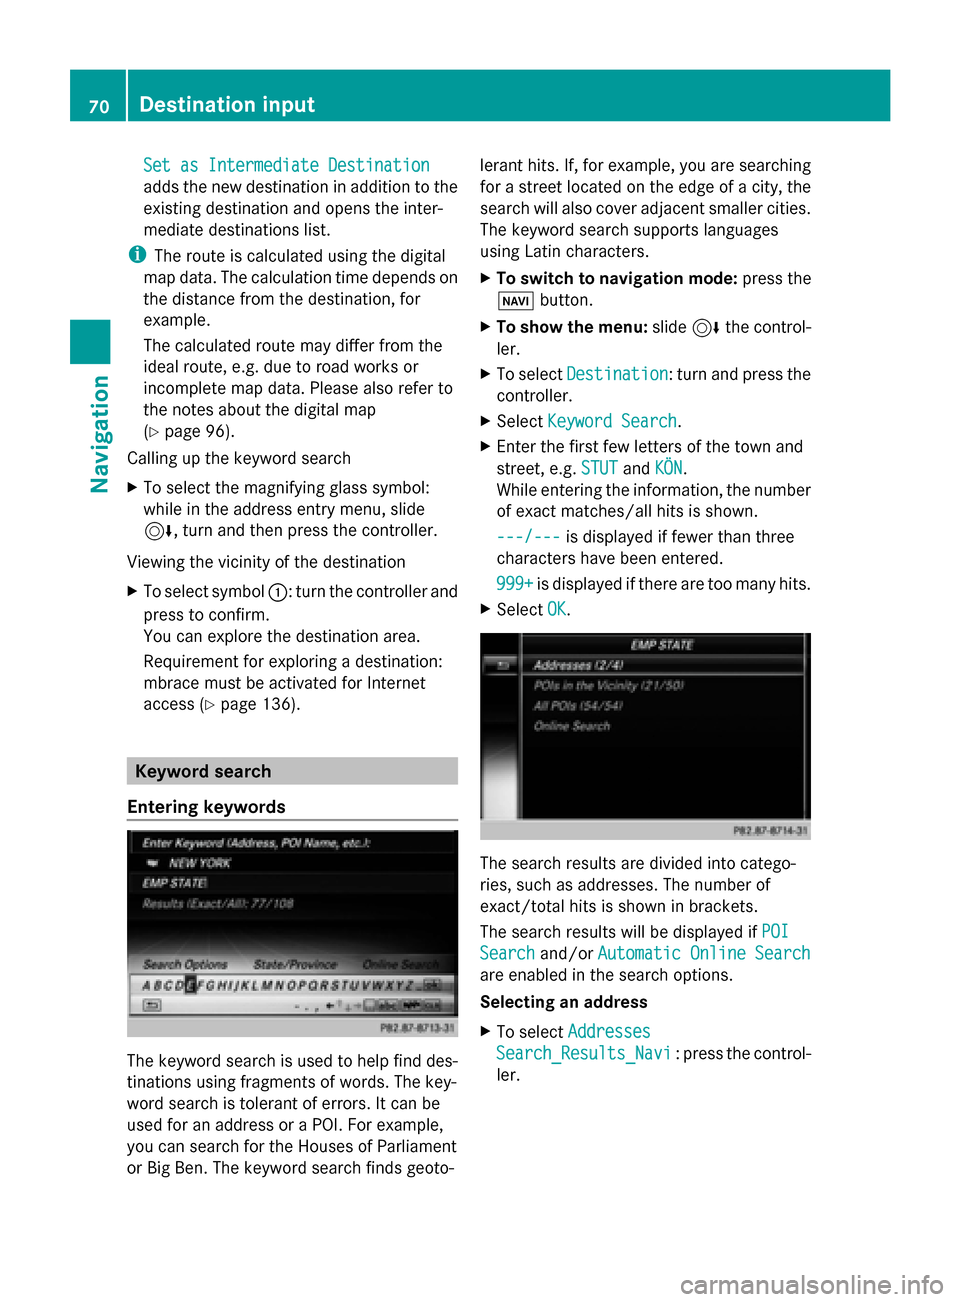
Entering keywords The keyword search is used to help find des-
tinations using fragments of words. The key-
word search is tolerant of errors. It can be
used for an address or a POI. For example,
you can search for the Houses of Parliament
or Big Ben. The keyword search finds geoto- lerant hits. If, for example, you are searching
for a street located on the edge of a city, the
search will also cover adjacent smaller cities.
The keyword search supports languages
using Latin characters.
X
To switch to navigation mode: press the
00BE button.
X To show the menu: slide6the control-
ler.
X To select Destination Destination: turn and press the
controller.
X Select Keyword Search
Keyword Search.
X Enter the first few letters of the town and
street, e.g. STUT STUTandKÖN
KÖN.
While entering the information, the number
of exact matches/all hits is shown.
---/--- ---/--- is displayed if fewer than three
characters have been entered.
999+ 999+ is displayed if there are too many hits.
X Select OK
OK. The search results are divided into catego-
ries, such as addresses. The number of
exact/total hits is shown in brackets.
The search results will be displayed if
POI POI
Search
Search and/orAutomatic Online Search
Automatic Online Search
are enabled in the search options.
Selecting an address
X To select Addresses Addresses
Search_Results_Navi Search_Results_Navi : press the control-
ler. 70
Destination inputNavigation
Page 73 of 214
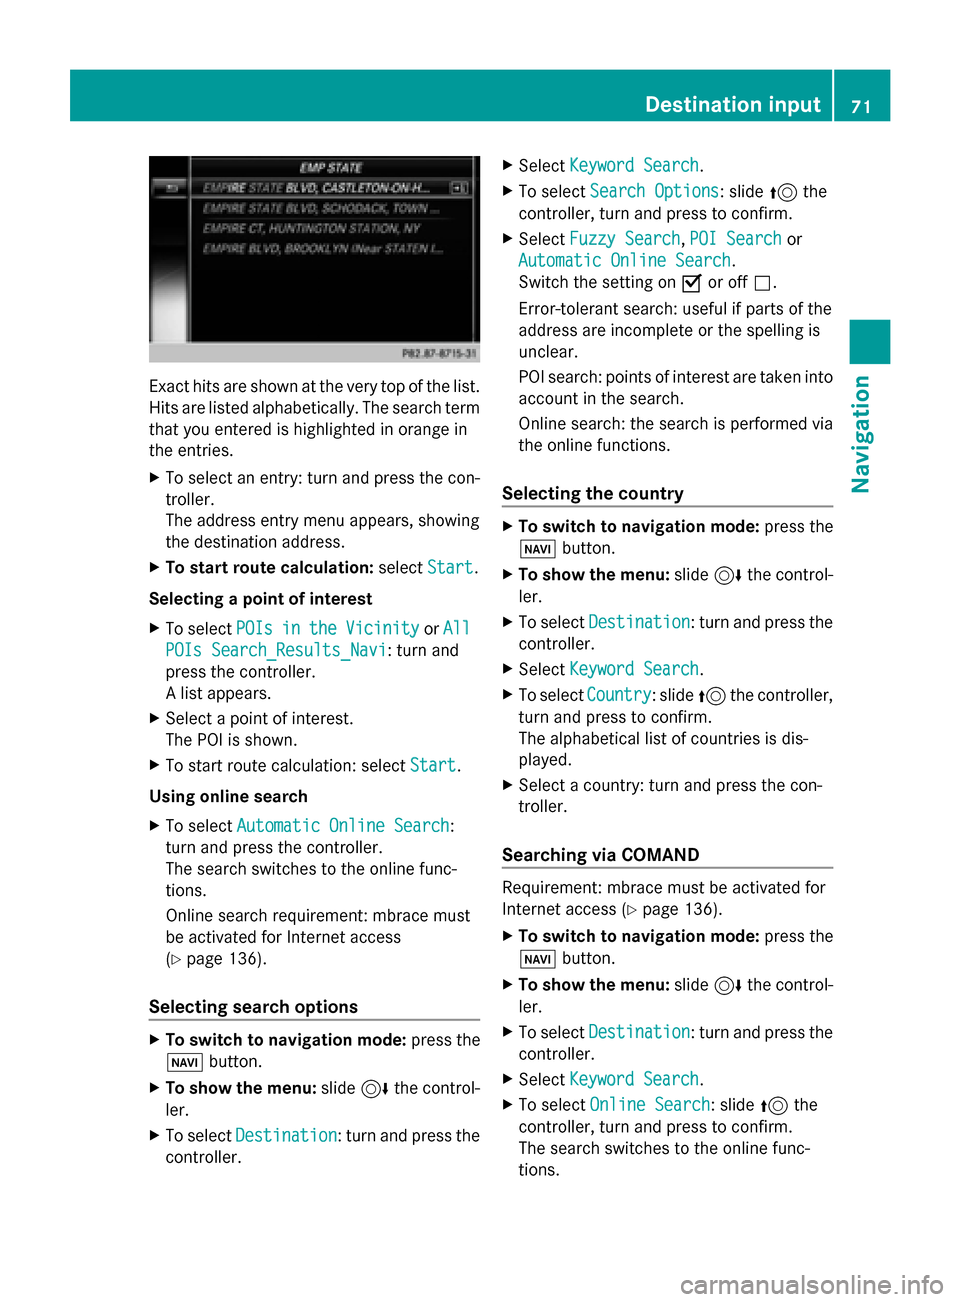
Exact hits are shown at the very top of the list.
Hits are listed alphabetically. The search term
that you entered is highlighted in orange in
the entries.
X To select an entry: turn and press the con-
troller.
The address entry menu appears, showing
the destination address.
X To start route calculation: selectStart
Start.
Selecting a point of interest
X To select POIs POIsin
inthe
the Vicinity
Vicinity orAll
All
POIs Search_Results_Navi
POIs Search_Results_Navi: turn and
press the controller.
A list appears.
X Select a point of interest.
The POI is shown.
X To start route calculation: select Start Start.
Using online search
X To select Automatic Online Search
Automatic Online Search :
turn and press the controller.
The search switches to the online func-
tions.
Online search requirement: mbrace must
be activated for Internet access
(Y page 136).
Selecting search options X
To switch to navigation mode: press the
00BE button.
X To show the menu: slide6the control-
ler.
X To select Destination Destination: turn and press the
controller. X
Select Keyword Search
Keyword Search .
X To select Search Options
Search Options: slide 5the
controller, turn and press to confirm.
X Select Fuzzy Search
Fuzzy Search ,POI Search
POI Search or
Automatic Online Search
Automatic Online Search .
Switch the setting on 0073or off 0053.
Error-tolerant search: useful if parts of the
address are incomplete or the spelling is
unclear.
POI search: points of interest are taken into
account in the search.
Online search: the search is performed via
the online functions.
Selecting the country X
To switch to navigation mode: press the
00BE button.
X To show the menu: slide6the control-
ler.
X To select Destination Destination: turn and press the
controller.
X Select Keyword Search
Keyword Search .
X To select Country
Country: slide 5the controller,
turn and press to confirm.
The alphabetical list of countries is dis-
played.
X Select a country: turn and press the con-
troller.
Searching via COMAND Requirement: mbrace must be activated for
Internet access (
Ypage 136).
X To switch to navigation mode: press the
00BE button.
X To show the menu: slide6the control-
ler.
X To select Destination Destination: turn and press the
controller.
X Select Keyword Search
Keyword Search .
X To select Online Search Online Search : slide5the
controller, turn and press to confirm.
The search switches to the online func-
tions. Destina
tion input
71Navigation Z
Page 74 of 214
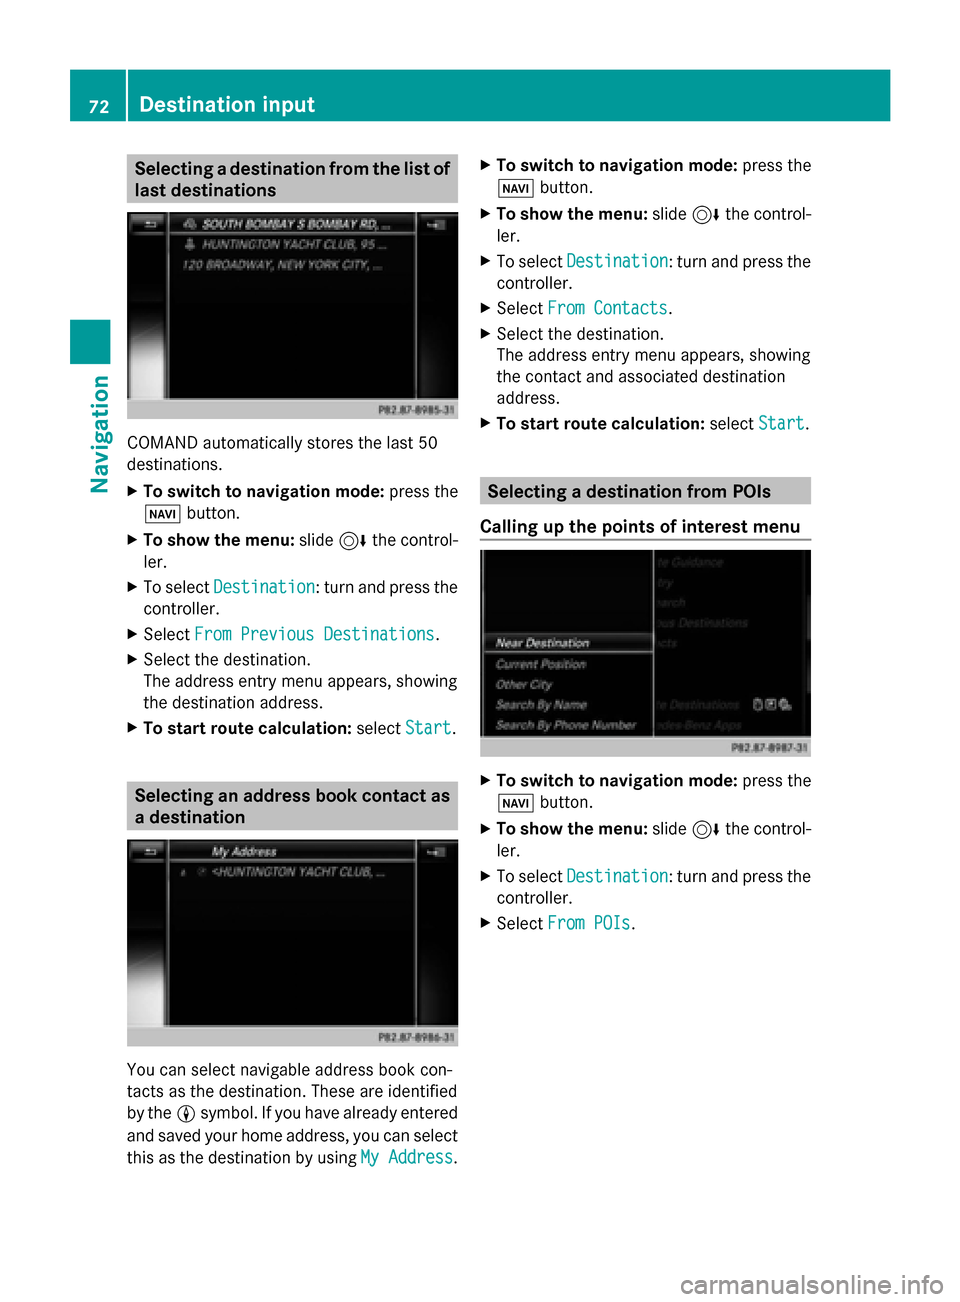
Selecting a destination from the list of
last destinations COMAND automatically stores the last 50
destinations.
X To switch to navigation mode: press the
00BE button.
X To show the menu: slide6the control-
ler.
X To select Destination
Destination: turn and press the
controller.
X Select From Previous Destinations
From Previous Destinations.
X Select the destination.
The address entry menu appears, showing
the destination address.
X To start route calculation: selectStart
Start. Selecting an address book contact as
a destination You can select navigable address book con-
tacts as the destination. These are identified
by the 0048symbol. If you have already entered
and saved your home address, you can select
this as the destination by using My Address
My Address .X
To switch to navigation mode: press the
00BE button.
X To show the menu: slide6the control-
ler.
X To select Destination Destination: turn and press the
controller.
X Select From Contacts
From Contacts.
X Select the destination.
The address entry menu appears, showing
the contact and associated destination
address.
X To start route calculation: selectStart Start. Selecting a destination from POIs
Calling up the points of interest menu X
To switch to navigation mode: press the
00BE button.
X To show the menu: slide6the control-
ler.
X To select Destination
Destination: turn and press the
controller.
X Select From POIs
From POIs. 72
Destination inputNavigation
Page 75 of 214
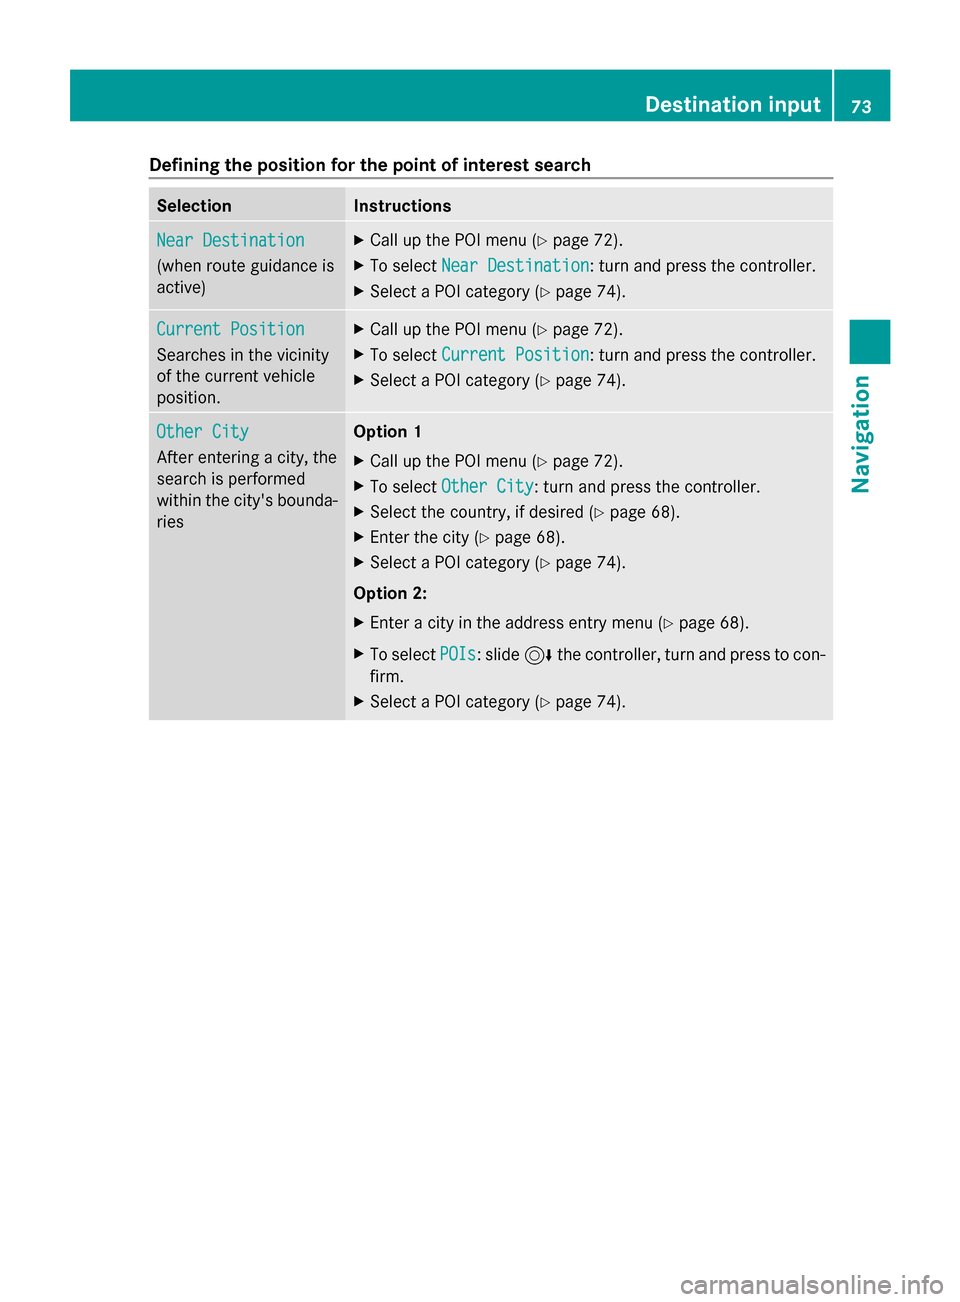
Defining the position for the point of interest search
Selection Instructions
Near Destination
Near Destination
(when route guidance is
active) X
Call up the POI menu ( Ypage 72).
X To select Near Destination Near Destination: turn and press the controller.
X Select a POI category (Y page 74).Current Position
Current Position
Searches in the vicinity
of the current vehicle
position. X
Call up the POI menu ( Ypage 72).
X To select Current Position Current Position: turn and press the controller.
X Select a POI category (Y page 74).Other City
Other City
After entering a city, the
search is performed
within the city's bounda-
ries Option 1
X
Call up the POI menu ( Ypage 72).
X To select Other City Other City: turn and press the controller.
X Select the country, if desired (Y page 68).
X Enter the city (Y page 68).
X Select a POI category (Y page 74).
Option 2:
X Enter a city in the address entry menu (Y page 68).
X To select POIs POIs: slide 6the controller, turn and press to con-
firm.
X Select a POI category (Y page 74). Destination input
73Navigation Z
Page 76 of 214
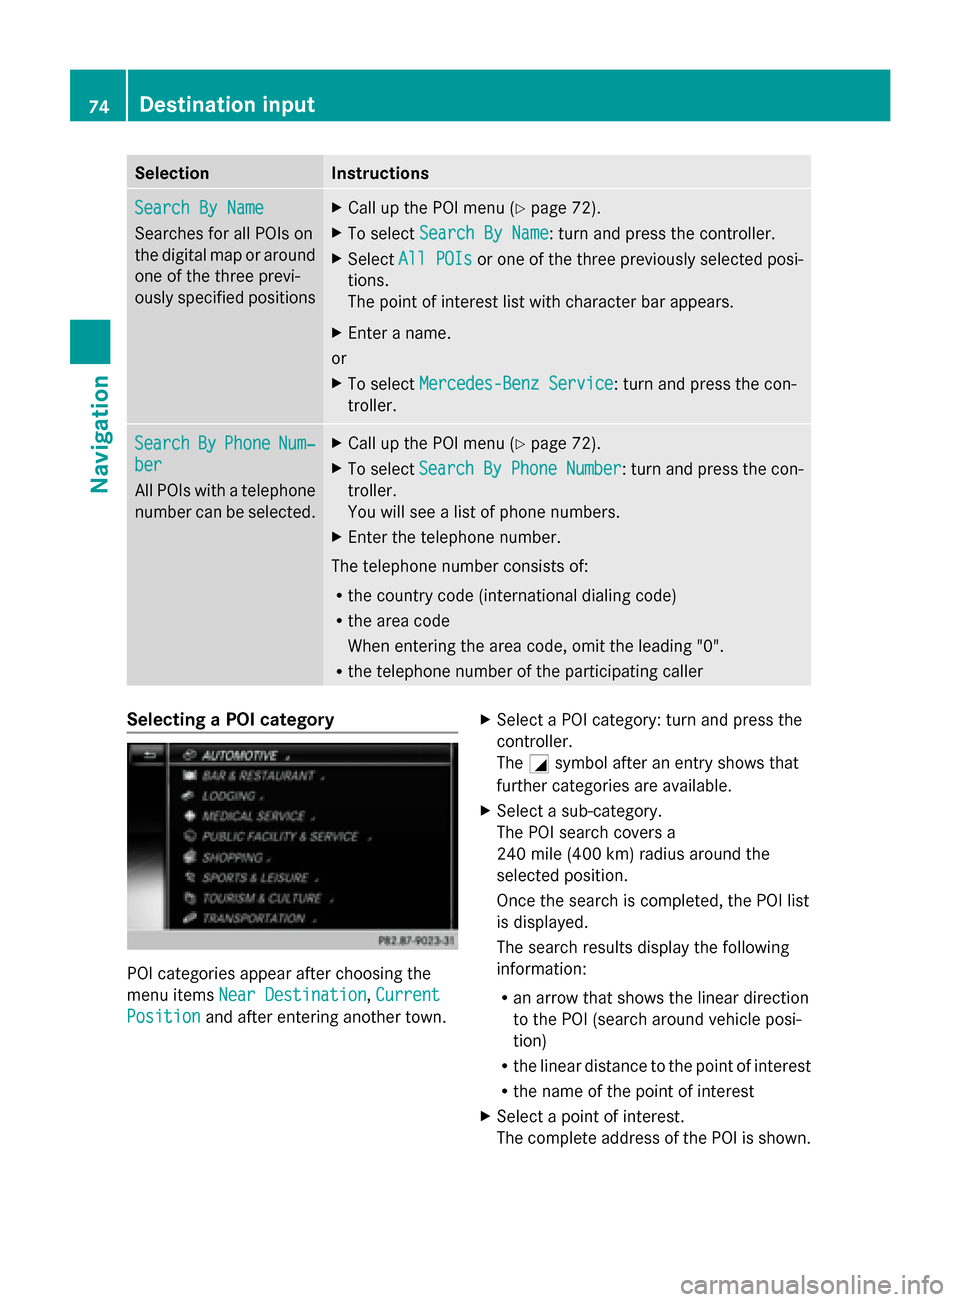
Selection Instructions
Search By Name
Search By Name
Searches for all POIs on
the digital map or around
one of the three previ-
ously specified positions X
Call up the POI menu (Y page 72).
X To select Search By Name Search By Name: turn and press the controller.
X Select All POIs
All POIs or one of the three previously selected posi-
tions.
The point of interest list with character bar appears.
X Enter a name.
or
X To select Mercedes-Benz Service Mercedes-Benz Service: turn and press the con-
troller. Search
Search
By
ByPhone
Phone Num‐
Num‐
ber
ber
All POIs with a telephone
number can be selected. X
Call up the POI menu (Y page 72).
X To select Search SearchBy
ByPhone
Phone Number
Number : turn and press the con-
troller.
You will see a list of phone numbers.
X Enter the telephone number.
The telephone number consists of:
R the country code (international dialing code)
R the area code
When entering the area code, omit the leading "0".
R the telephone number of the participating caller Selecting a POI category
POI categories appear after choosing the
menu items Near Destination Near Destination, Current
Current
Position
Position and after entering another town. X
Select a POI category: turn and press the
controller.
The 0043symbol after an entry shows that
further categories are available.
X Select a sub-category.
The POI search covers a
240 mile (400 km) radius around the
selected position.
Once the search is completed, the POI list
is displayed.
The search results display the following
information:
R
an arrow that shows the linear direction
to the POI (search around vehicle posi-
tion)
R the linear distance to the point of interest
R the name of the point of interest
X Select a point of interest.
The complete address of the POI is shown. 74
Destination inputNavigation
Page 77 of 214
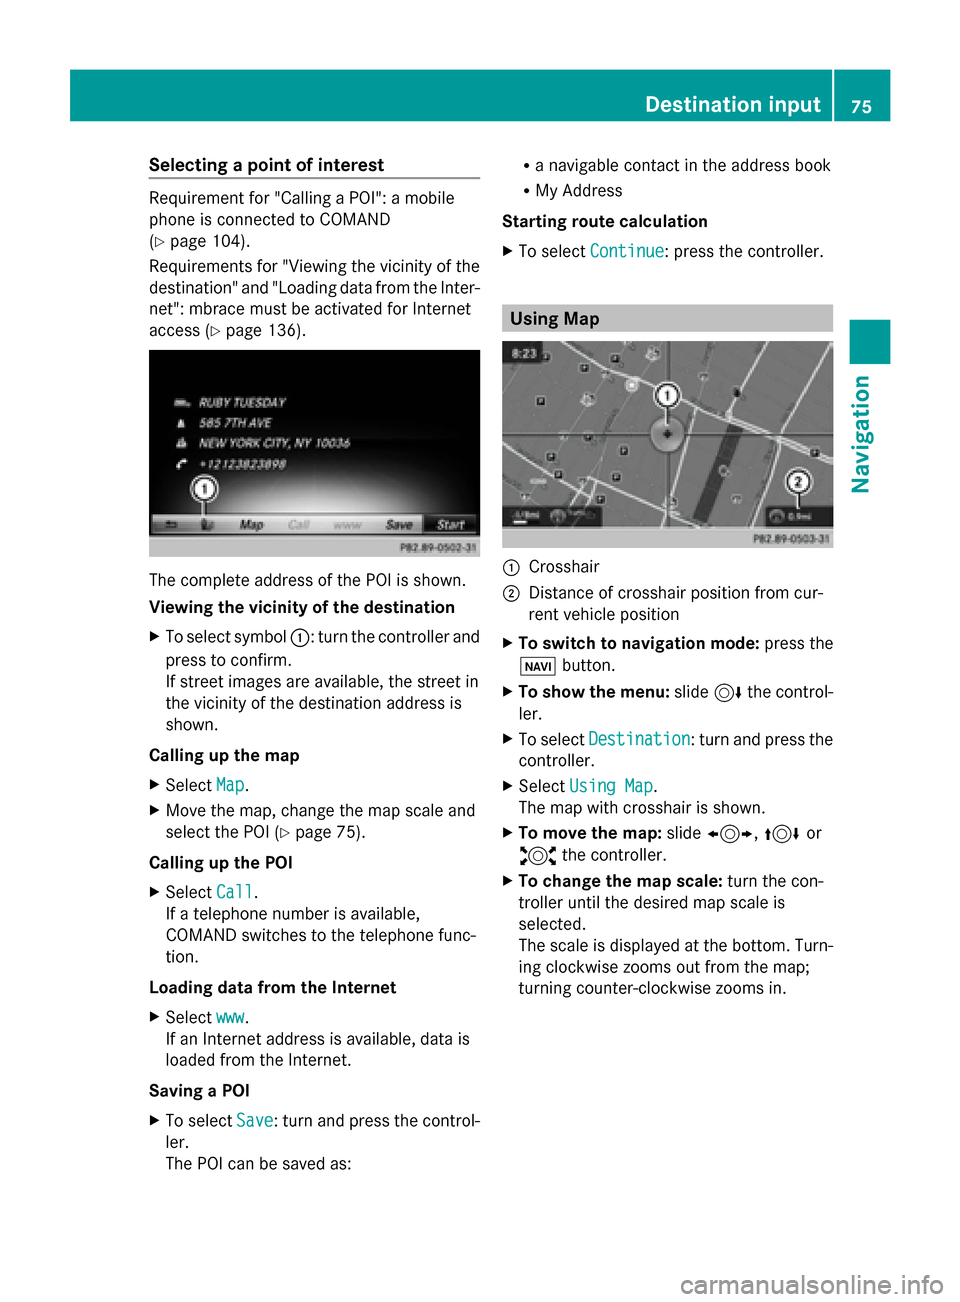
Selecting a point of interest
Requirement for "Calling a POI": a mobile
phone is connected to COMAND
(Y page 104).
Requirements for "Viewing the vicinity of the
destination" and "Loading data from the Inter-
net": mbrace must be activated for Internet
access (Y page 136). The complete address of the POI is shown.
Viewing the vicinity of the destination
X To select symbol 0043: turn the controller and
press to confirm.
If street images are available, the street in
the vicinity of the destination address is
shown.
Calling up the map
X Select Map
Map.
X Move the map, change the map scale and
select the POI (Y page 75).
Calling up the POI
X Select Call Call.
If a telephone number is available,
COMAND switches to the telephone func-
tion.
Loading data from the Internet
X Select www
www.
If an Internet address is available, data is
loaded from the Internet.
Saving a POI
X To select Save
Save: turn and press the control-
ler.
The POI can be saved as: R
a navigable contact in the address book
R My Address
Starting route calculation
X To select Continue Continue: press the controller. Using Map
0043
Crosshair
0044 Distance of crosshair position from cur-
rent vehicle position
X To switch to navigation mode: press the
00CB button.
X To show the menu: slide6the control-
ler.
X To select Destination Destination: turn and press the
controller.
X Select Using Map
Using Map.
The map with crosshair is shown.
X To move the map: slide1, 4or
2 the controller.
X To change the map scale: turn the con-
troller until the desired map scale is
selected.
The scale is displayed at the bottom. Turn-
ing clockwise zooms out from the map;
turning counter-clockwise zooms in. Destination input
75Navigation Z
Page 78 of 214
X
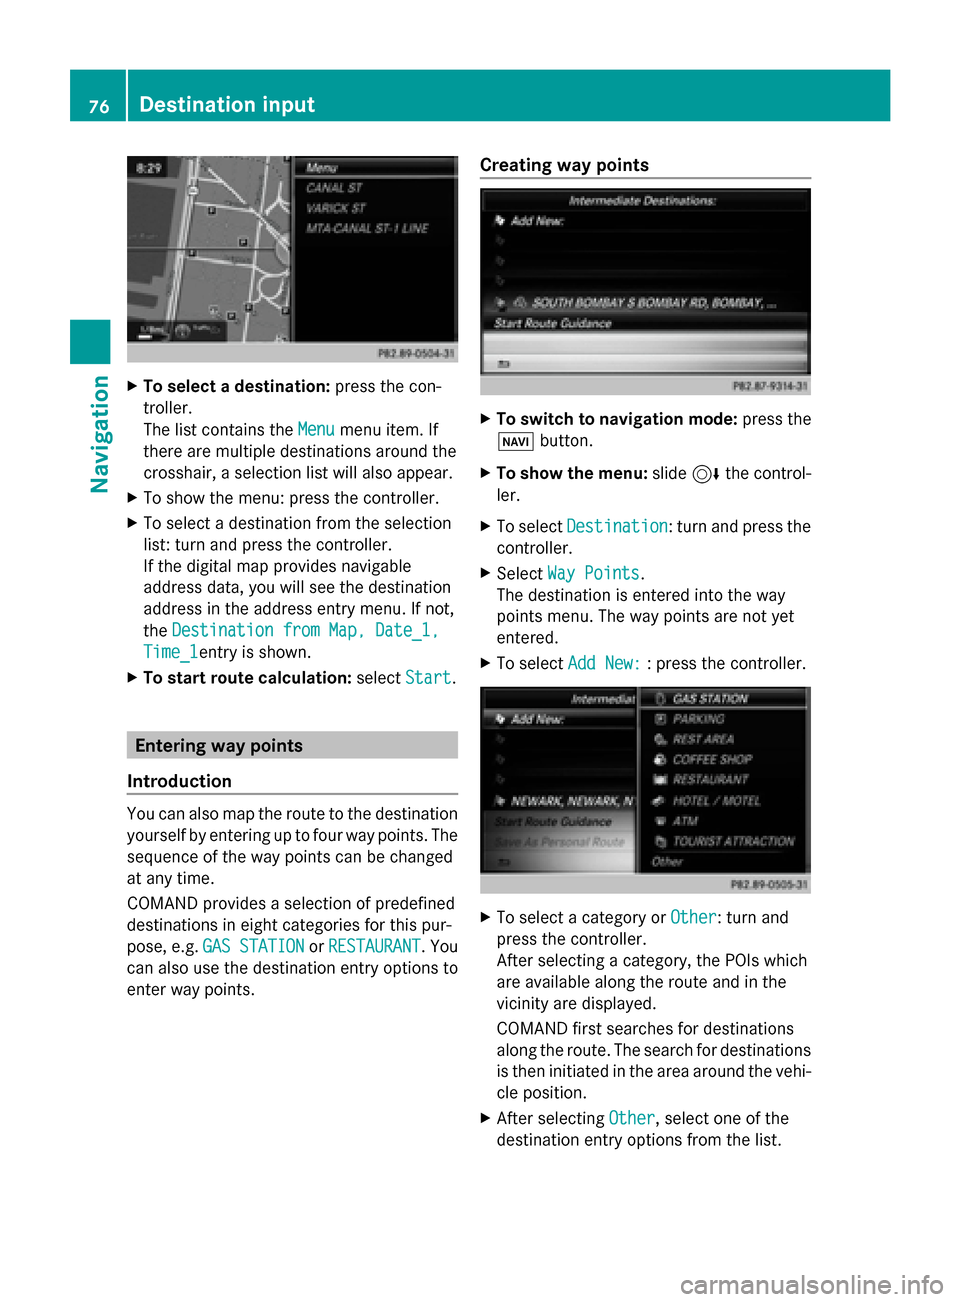
To select a destination: press the con-
troller.
The list contains the Menu
Menu menu item. If
there are multiple destinations around the
crosshair, a selection list will also appear.
X To show the menu: press the controller.
X To select a destination from the selection
list: turn and press the controller.
If the digital map provides navigable
address data, you will see the destination
address in the address entry menu. If not,
the Destination from Map, Date_1,
Destination from Map, Date_1,
Time_1
Time_1 entry is shown.
X To start route calculation: selectStart Start. Entering way points
Introduction You can also map the route to the destination
yourself by entering up to four way points. The
sequence of the way points can be changed
at any time.
COMAND provides a selection of predefined
destinations in eight categories for this pur-
pose, e.g. GAS STATION
GAS STATION orRESTAURANT RESTAURANT. You
can also use the destination entry options to
enter way points. Creating way points X
To switch to navigation mode: press the
00BE button.
X To show the menu: slide6the control-
ler.
X To select Destination Destination: turn and press the
controller.
X Select Way Points
Way Points .
The destination is entered into the way
points menu. The way points are not yet
entered.
X To select Add New: Add New: : press the controller. X
To select a category or Other
Other: turn and
press the controller.
After selecting a category, the POIs which
are available along the route and in the
vicinity are displayed.
COMAND first searches for destinations
along the route. The search for destinations
is then initiated in the area around the vehi-
cle position.
X After selecting Other Other, select one of the
destination entry options from the list. 76
Destination inputNavigation
Page 79 of 214
Selection Action
Address
Address
Entry Entry X
Enter a destination by
address (Y page 68). Keyword Keyword
Search Search X
Select a destination by
means of a keyword
search (Y page 70). From Previ‐ From Previ‐
ous Destina‐ ous Destina‐
tions tions X
Select a destination
from the list of last des-
tinations (Y page 72). From POIs From POIs X
Select a point of inter-
est (Y page 72). Using Map
Using Map X
Enter a destination
using the map
(Y page 75). From From
Mercedes- Mercedes-
Benz Apps Benz Apps X
Enter a destination
from Mercedes-Benz
Apps (Y page 78). Using Geo- Using Geo-
Coordinates Coordinates X
Enter a destination
using the geo-coordi-
nates (Y page 79). X
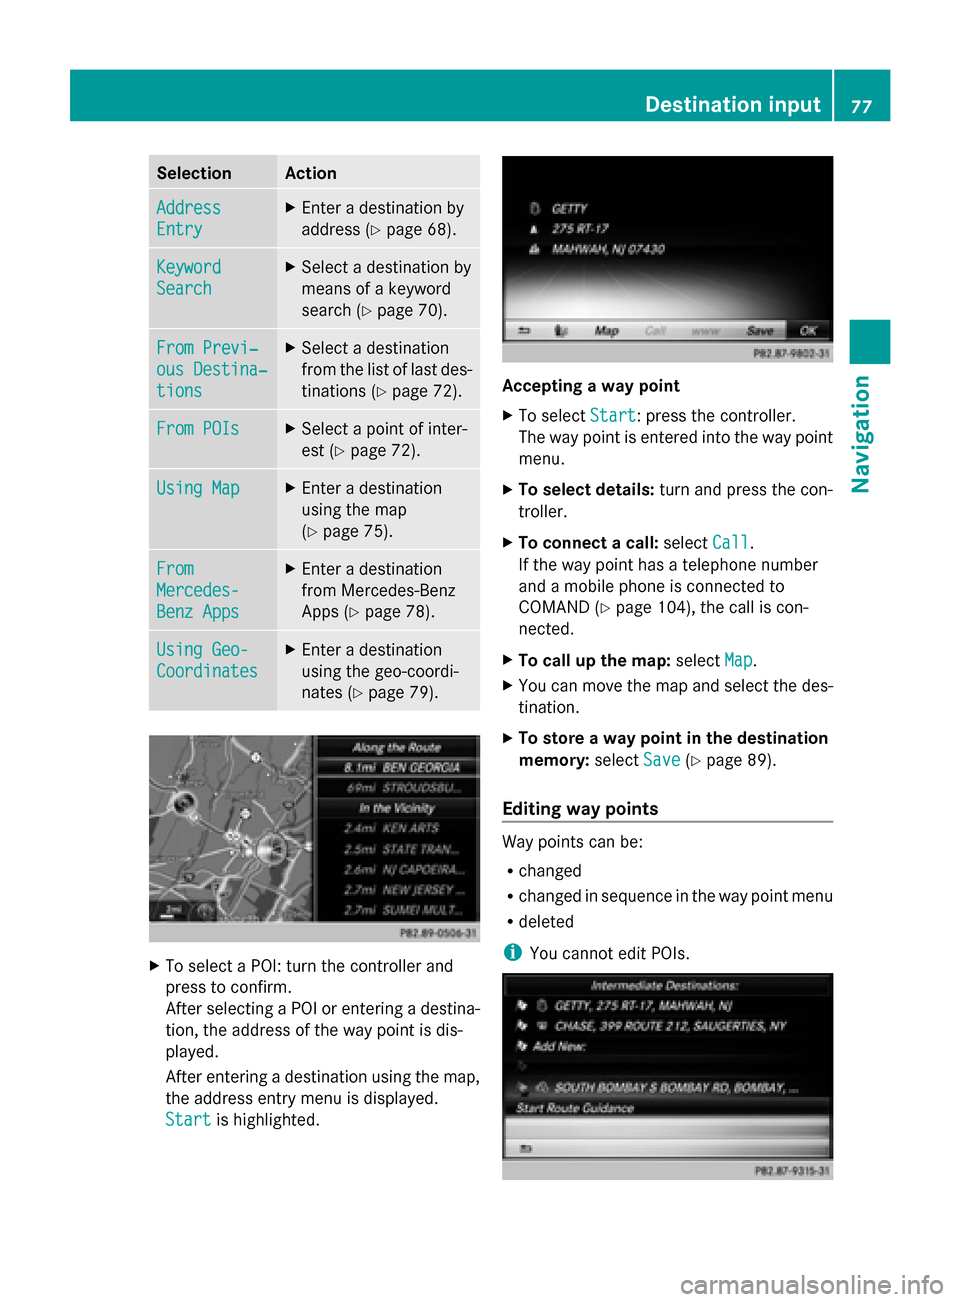
To select a POI: turn the controller and
press to confirm.
After selecting a POI or entering a destina-
tion, the address of the way point is dis-
played.
After entering a destination using the map,
the address entry menu is displayed.
Start
Start is highlighted. Accepting a way point
X
To select Start Start: press the controller.
The way point is entered into the way point
menu.
X To select details: turn and press the con-
troller.
X To connect a call: selectCall
Call.
If the way point has a telephone number
and a mobile phone is connected to
COMAND (Y page 104), the call is con-
nected.
X To call up the map: selectMap Map.
X You can move the map and select the des-
tination.
X To store a way point in the destination
memory: selectSave Save(Ypage 89).
Editing way points Way points can be:
R
changed
R changed in sequence in the way point menu
R deleted
i You cannot edit POIs. Destination input
77Navigation Z
Page 80 of 214
X
To select a way point in the way point menu:
turn the controller and press to confirm.
A menu appears.
X To change the way point: in the menu,
select Edit
Edit.
X Change the address, e.g. the city and
street.
X To select OK
OK: turn and press the controller.
The way point menu appears and displays
the modified way point.
You can change the sequence of the way
points and the destination. To change the
sequence, at least one way point and the des-
tination must be entered.
X To change the order: in the menu, select
Move
Move.
X Turn the controller and move the way point
or destination to the desired position.
X Press the controller.
X To delete way points: in the menu, select
Delete Delete.
Accepting way points for the route X
To select Start
Startfrom the way point menu:
press the controller.
The route is calculated with the entered
way points.
If in the basic settings Calculate Alter‐ Calculate Alter‐
native Routes
native Routes is enabled, the menu item
Continue
Continue is displayed instead of Start
Start
(Y page 64).
If a way point was passed during route guid-
ance, the way point will be displayed in the
way point menu with a green check mark.
Once the route has been recalculated, the
way point is deleted from the way point
menu.
Searching for a gas station when the
fuel level is low Requirement: the setting
Gas on Reserve Gas on Reserve
must be enabled (Y page 66). If the fuel tank reserve level is displayed, you
will see the
Gas
Gas on onReserve
Reserve Do
Doyou
you want
want
to start a search for surrounding
to start a search for surrounding
gas stations? gas stations? message.
X To select Yes
YesorNo
No: turn and press the con-
troller.
If you select Yes Yes, the filling station search
starts. When the search is complete, a list
of the gas stations available along the route
or in the vicinity is displayed.
If you select No
No, the search is canceled.
X Select the gas station.
The address of the gas station is displayed.
X To select Start Start: press the controller.
The selected gas station is entered into
position 1 of the way points menu. Route
guidance begins.
If the way points menu already contains
four way points, a prompt will be displayed,
asking you whether you wish to enter the
gas station into position 1. If you select
Yes Yes, the filling station is transferred into the
list and way point 4 is deleted. Entering a destination from
Mercedes-Benz Apps
Requirement: mbrace must be activated for
the Mercedes-Benz Apps (Y page 136).
X To switch to navigation mode: press the
00BE button.
X To show the menu: slide6the control-
ler.
X To select Destination Destination: turn and press the
controller.
X Select From Mercedes-Benz Apps
From Mercedes-Benz Apps.
A list shows the available destinations that
have been transmitted to the vehicle up to
this point (Y page 140).78
Destination inputNavigation