MERCEDES-BENZ E-Class 2016 W213 Comand Manual
Manufacturer: MERCEDES-BENZ, Model Year: 2016, Model line: E-Class, Model: MERCEDES-BENZ E-Class 2016 W213Pages: 246, PDF Size: 6.7 MB
Page 231 of 246
XTo open the battery compartment:
remove battery compartment cover=on
the back of the remote control.
XTo do so, press down retaining lug ;and
take off battery compartment cover =.
XRemove discharged batteriesAfrom the
tray.
XInsert the new batteries. Observe the polar-
ity markings on the batteries and battery
compartment when doing so.
Left-hand battery: the positive pole (+)
must face upwards.
Right-hand battery: the positive pole (+)
must face downwards.
XTo close the battery compartment:
insert battery compartment cover =start-
ing with retaining lugs ?into the battery
compartment and allow catch tab ;to
engage in place.
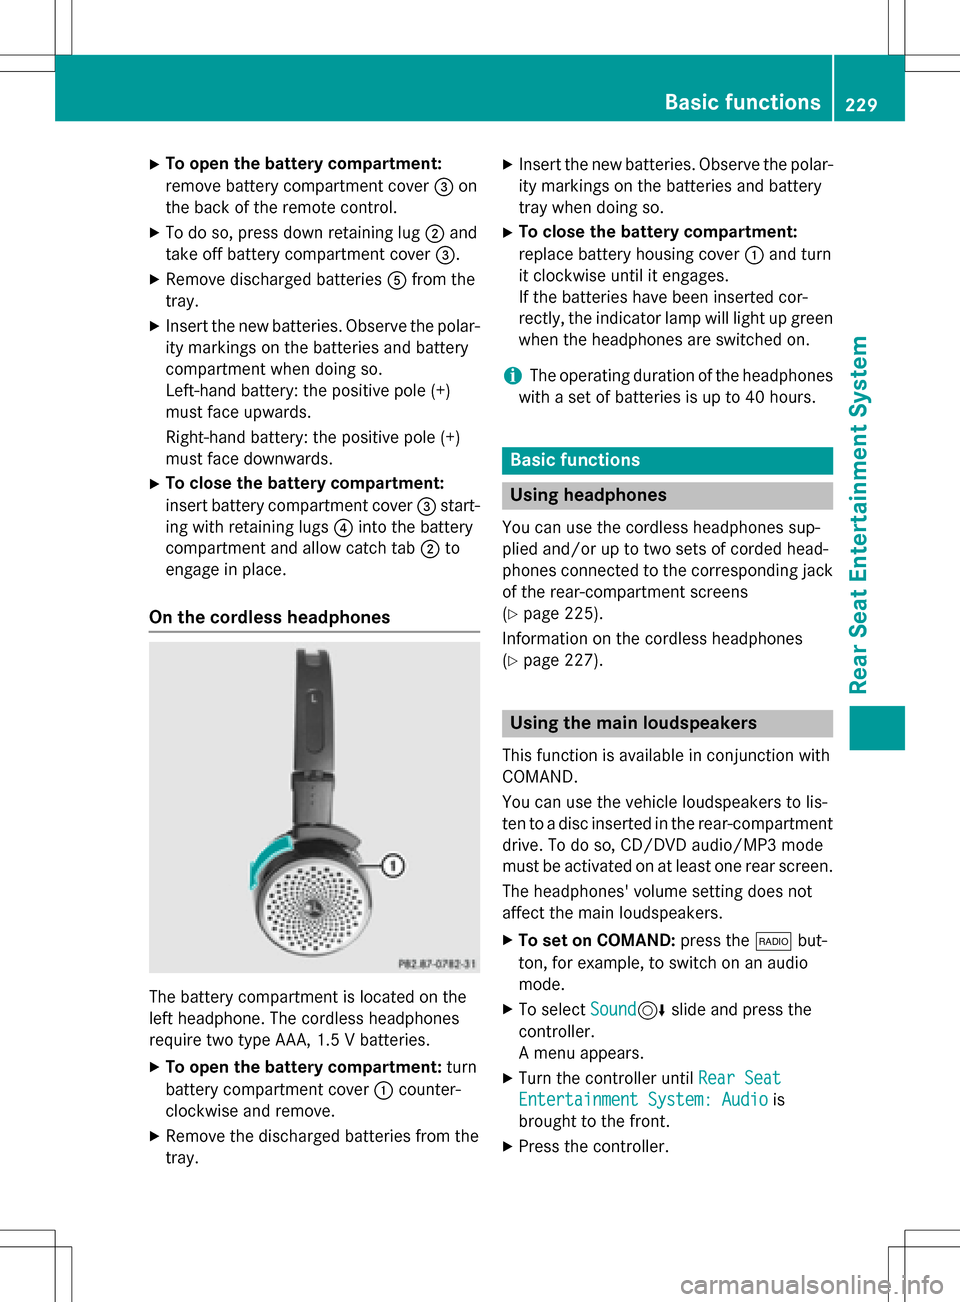
On the cordless headphones
The battery compartment is located on the
left headphone. The cordless headphones
require two type AAA, 1.5 V batteries.
XTo open the battery compartment: turn
battery compartment cover :counter-
clockwise and remove.
XRemove the discharged batteries from the
tray.
XInsert the new batteries. Observe the polar-
ity markings on the batteries and battery
tray when doing so.
XTo close the battery compartment:
replace battery housing cover :and turn
it clockwise until it engages.
If the batteries have been inserted cor-
rectly, the indicator lamp will light up green
when the headphones are switched on.
iThe operating duration of the headphones
with a set of batteries is up to 40 hours.
Basic functions
Using headphones
You can use the cordless headphones sup-
plied and/or up to two sets of corded head-
phones connected to the corresponding jack
of the rear-compartment screens
(
Ypage 225).
Information on the cordless headphones
(
Ypage 227).
Using the main loudspeakers
This function is available in conjunction with
COMAND.
You can use the vehicle loudspeakers to lis-
ten to a disc inserted in the rear-compartment
drive. To do so, CD/DVD audio/MP3 mode
must be activated on at least one rear screen.
The headphones' volume setting does not
affect the main loudspeakers.
XTo set on COMAND: press the$but-
ton, for example, to switch on an audio
mode.
XTo select Sound6slide and press the
controller.
A menu appears.
XTurn the controller until Rear Seat
Entertainment System: Audiois
brought to the front.
XPress the controller.
Basic functions229
Rear Seat Entertainment System
Z
Page 232 of 246
Selecting sound settings
You can select sound settings in the following
operating modes:
RCD/MP3
RVideo DVD
RRadio (active media source in COMAND)
RAUX
XSwitch on an operating mode (e.g. audio
CD mode) (
Ypage 232).
XSelect TrebleorBassusing
the :=; buttons on the remote
control and press the 9button to confirm.
An adjustment scale appears.
XSelect a setting using the 9:but-
tons and press the 9button to confirm.
Multiple users
Simultaneous use of the rear-compart-
ment disc drive
The two rear-compartment screens can be
operated almost entirely independently from
one another. However, a conflict may occur in
some menus if the two screens are used
simultaneously.
The following functions affect both screens:
Rchanging playback options
Rselecting a track (from a track list or folder)
Rusing the play, pause and stop functions
Rfast forward/rewind or scrolling
Rcalling up the DVD menu and navigating
within it
Rsetting the language, subtitles and camera angle
Rcalling up interactive DVD content
The following functions affect only one
screen:
Rchanging audio and video functions as well
as picture settings
Rswitching between full screen and the
menu
Switching between operating modes
When you exit an operating mode (e.g. audio
CD mode), the current setting is saved. If you
call up this operating mode again later, there
are two possibilities:
Rthe operating mode has been changed on
the other screen.
Rthe operating mode has not been changed.
In the first case, the operating mode appears as it is on the other screen.
In the second case, the setting appears on the
screen as it was when you last exited the
operating mode.
Picture settings
Overview
You can select the picture settings in video
DVD and AUX mode (
Ypage 241).
Adjusting the brightness, contrast and
color
XSwitch to video DVD mode (Ypage 235).
XTo show the menu: press the9button on
the remote control.
XSelect DVD-Videousing
the :=; buttons and press the
9 button to confirm.
XSelect Brightness,Contrastor Color
using the 9: buttons and press the
9 button to confirm.
A scale appears.
XSelect a setting using the 9:but-
tons and press the 9button to confirm.
230Basic functions
Rear Seat Entertainment System
Page 233 of 246
Changing the picture format
XTo show the menu:press the9button on
the remote control.
XSelect DVD-Videousing
the :=; buttons and press the
9 button to confirm.
The dot in front of one of the menu items
Automatic
, 16:9 Optimized,4:3or
Widescreen
shows the currently set pic-
ture format.
XSelect a format using the 9:but-
tons and press the 9button to confirm.
System settings
Note
You can adjust all system settings individually
for each rear screen without affecting the
other screen.
Selecting the display language
XSelect Systemusing the 9=;
buttons on the remote control and press 9
to confirm.
You see the system menu on the selected
rear screen.
XSelect Settingsusing the :button
and press 9to confirm.
XConfirm Languageby pressing the 9but-
ton.
The list of languages appears. The #dot
indicates the current setting.
XSelect a language using the 9:but-
tons and press the 9button to confirm.
The Rear Seat Entertainment System sets
the selected language.
Switching the display design
XSelect Settingsusing the :button
and press 9to confirm.
XSelect Day Mode,Night Modeor Auto‐
maticusing the 9: buttons and
press the 9button to confirm.
The dot indicates the current setting.
DesignExplanation
Day ModeThe display is set per-
manently to day
design.
Night ModeThe display is set per-
manently to night
design.
AutomaticThe display design
changes depending on
the vehicle instrument
cluster illumination.
Setting the brightness
XSelect Settingsusing the :button
and press 9to confirm.
XSelect Brightnessusing the 9:
buttons and press the 9button to confirm.
A scale appears.
XAdjust the brightness using the 9:
buttons and press the 9button to confirm.
The bar moves up or down. The picture
becomes lighter or darker.
Showing/hiding the picture
XTo hide the picture: selectDisplay Off
in the system menu using the :;
buttons on the remote control and press
the 9button to confirm.
The picture is hidden.
XTo display the picture: press the9but-
ton.
System settings231
Rear Seat Entertainment System
Z
Page 234 of 246
Audio CD/DVD and MP3mode
Import ant safety notes
GWARNIN G
The CD/DV Ddrive is aclas s 1laser product.
If you open th ehousing of th eCD/DV Ddrive,
there is aris kof exposure to invisible laser
radiation .This laser radiation could damag e
your retina .There is aris kof injury.
Never open th ehousing .Always hav emain -
tenance and repair wor kcarrie dout at aquali-
fie dspecialis tworkshop .
General notes
The rear-compartmen tdriv eis asingle disc
drive.
Notes on audio mod ecan be foun din th e
"Media" section (
Ypage 180):
RNotes on CDs/DVD s
RNotes on MP3 mode
RNotes on copyright
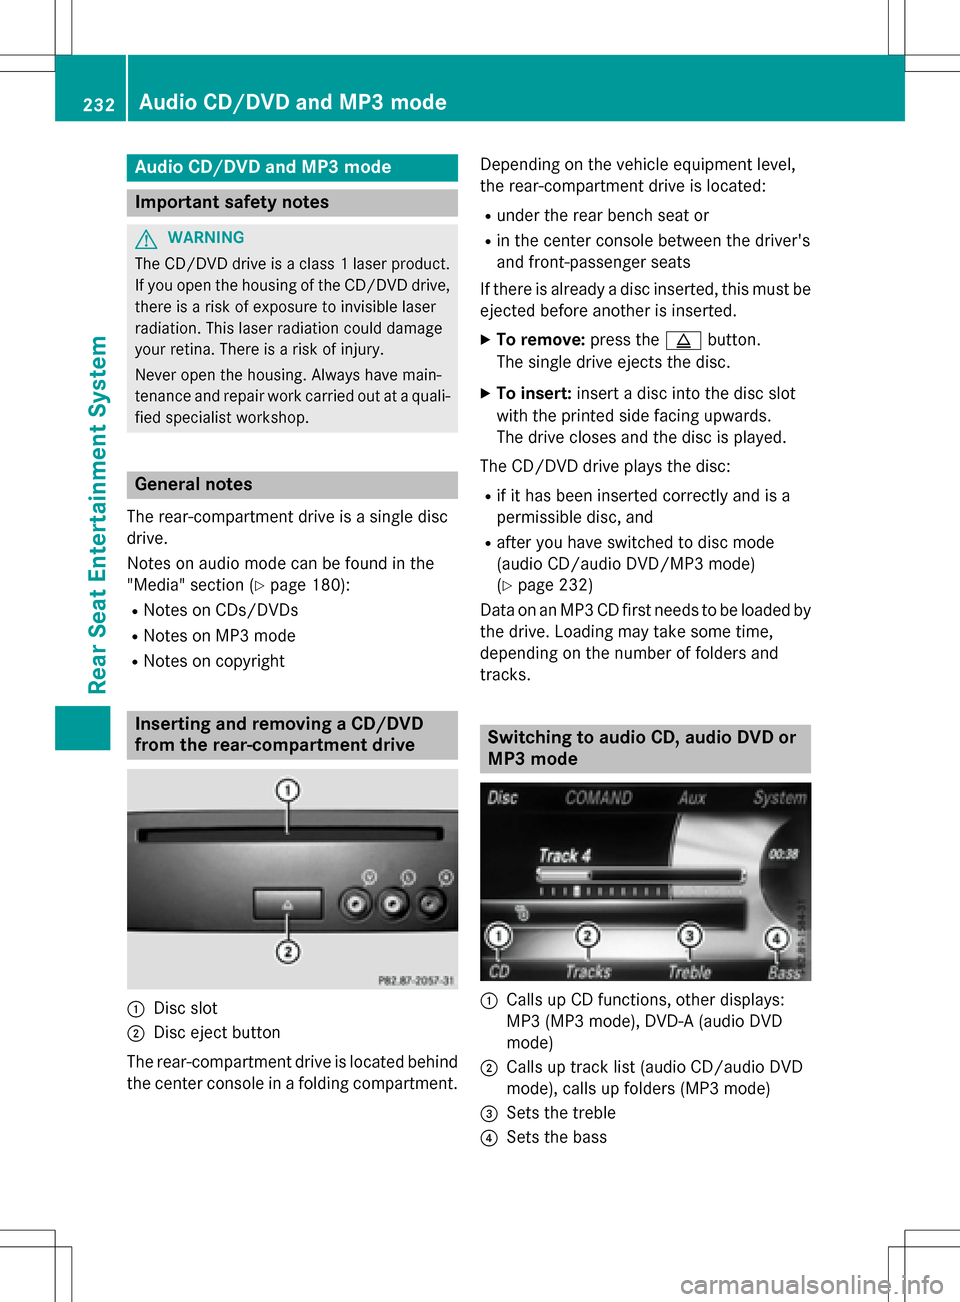
Inserting and removing a CD/DVD
from the rea r-compa rtment drive
:Disc slot
;Disc ejec tbutto n
The rear-compartmen tdriv eis locate dbehind
th ecenter console in afoldin gcompartment. Dependin
gon th evehicl eequipmen tlevel,
th erear-compartmen tdriv eis located:
Runder th erear bench seat or
Rin th ecenter console between th edriver' s
and front-passenger seat s
If there is already adisc inserted, this mus tbe
ejecte dbefore another is inserted.
XTo remove: presstheþ button.
The single driv eejects th edisc .
XTo insert: insertadisc int oth edisc slot
wit hth eprinte dside facing upward s.
The driv eclo ses and th edisc is played.
The CD/DV Ddriv eplays th edisc :
Rif it has been inserted correctl yand is a
permissible disc ,and
Rafter you hav eswitched to disc mod e
(audio CD/audio DVD/MP3 mode)
(
Ypage 232)
Dat aon an MP3 CD fir stneeds to be loade dby
th edrive. Loading may tak e sometime,
depending on th enumber of folder sand
track s.
Switching to audio CD, audio DVD or
MP3 mode
:Calls up CD functions, other displays:
MP3 (MP3 mode), DVD- A(audio DV D
mode)
;Calls up track list (audio CD/audio DV D
mode), call sup folder s(MP3 mode)
=Sets th etreble
?Sets th ebass
232Audio CD/DVD and MP3 mode
Rear Seat Entertainment System
Page 235 of 246
The example shows audio CD mode. The num-
ber and the elapsed playback time for the
current track are displayed.
XInsert a CD/DVD (Ypage 232).
The Rear Seat Entertainment System loads
the inserted disc.
XSelect Discin the menu using the
9=; buttons on the remote
control and confirm by pressing the 9
button.
The corresponding mode is switched on.
The Rear Seat Entertainment System plays
the disc.
iVariable bit rates in MP3 tracks can result
in the elapsed time shown being different
from the actual elapsed time.
Selecting a track
Via skip function
XPress the =or; button on the
remote control.
or
XPress the EorF button.
The skip forward function skips to the next
track.
If the elapsed track time has passed 8 sec-
onds, the function skips back to the begin-
ning of the track. If the elapsed time is
shorter, it will skip to the start of the pre-
vious track.
If the Random Tracks
orRandom Folder
playback option has been selected, the
track order is random.
Via track list
In audio CD mode, the track list contains all
tracks on the disc currently playing. In audio
DVD mode, the track list contains all tracks in
the currently active group.
In MP3 mode, the track list shows all tracks in
the currently active folder as well as the folder
structure, allowing you to select any track on
the MP3 CD.
XSelect Tracks(audio CD/DVD mode) or
Folder
(MP3 mode) using
the :=; buttons on the remote
control, and confirm by pressing the 9
button.
or
XPress the 9button when the display/
selection window is active.
The track list appears. The #dot indicates
the current track.
XSelect a track using the 9:buttons
and press the 9button to confirm.
By entering the track number directly
XPress the hbutton on the remote con-
trol.
The track entry display appears.
Example: track 2
XPress the ·button.
Example: track 23
XPress the ·and¸ buttons in quick
succession.
XWait for approximately three seconds after
making the entry.
You will hear the track which has been
entered. The corresponding basic menu
then reappears.
iIt is not possible to enter numbers that
exceed the number of tracks on the CD or in
the currently active folder.
Fast forwarding/rewinding
XWith the display/selection window active,
press the =or; button on the
remote control repeatedly until you reach
the desired position.
or
XPress and hold the EorF button
until the desired position has been
reached.
Audio CD/DVD and MP3 mode233
Rear Seat Entertainment System
Z
Page 236 of 246
Selecting a folder
This function is available in MP3 mode.
XSelectFolderin MP3 mode using
the :=; buttons on the remote
control and press the 9button to confirm.
or
XPress the 9button when the display/
selection window is active.
The folder content appears.
XTo switch to the superordinate folder:
select symbol Uusing the 9:
buttons on the remote control and press
the 9button to confirm.
The display shows the next folder up.
XTo select a folder: select a folder by press-
ing the 9: button and confirm by
pressing the 9button.
You will see the tracks in the folder.
XSelect a track using the 9:buttons
and press the 9button to confirm.
The track is played and the selected folder is now the active folder.
Pause function
This function is available in audio DVD mode.
XTo pause playback: selectËusing
the :=; buttons on the remote
control and press the 9button to confirm.
The Ë display changes to Ì.
XTo continue playback: selectÌand
press the 9button to confirm.
The Ì display changes to Ë.
Stop function
This function is available in audio DVD mode.
XTo interrupt playback: selectÉusing
the :=; buttons on the remote
control and press the 9button to confirm.
The Ë display changes to Ì.
XTo continue playback: selectÌand
press the 9button to confirm.
Playback continues from the point where it
was interrupted.
XTo stop playback: while playback is inter-
rupted, select Éagain and press the 9
button to confirm.
Playback stops and returns to the begin-
ning of the DVD. Ìis highlighted.
XTo restart playback: selectÌand
press the 9button to confirm.
Playback starts from the beginning of the
DVD.
Setting the audio format
The content of an audio DVD can be divided
into up to 9 groups. The availability and type
of group depends on the respective DVD. A
group can contain music of different sound
qualities (stereo and multichannel formats,
for example), or bonus tracks.
XSelect DVD-Ausing the :=;
buttons on the remote control and press 9
to confirm.
XSelect Groupusing the 9: buttons
and press the 9button to confirm.
The list of available audio formats appears.
The #dot indicates the format currently
selected.
XSelect an audio format using the 9:
buttons and press the 9button to confirm.
XTo exit the menu: press the=or;
button.
234Audio CD/DVD and MP3 mode
Rear Seat Entertainment System
Page 237 of 246
Playback options
XSelectCD,DVD-Aor MP3using
the :=; buttons on the remote
control and press the 9button to confirm.
A list appears. The #dot indicates the play-
back option currently selected.
XSelect NormalTrackSequence,Random
Tracksor Random Folderusing the
9: buttons and press the 9button
to confirm.
The option is switched on. For all options
except Normal Track Sequence
, you will
see a corresponding display in the display/
selection window.
iIf you switch the data carrier which you
are currently listening to, the Normal
Track Sequenceoption is activated auto-
matically. If an option is selected, it
remains selected after the Rear Seat Enter- tainment System is switched on or off.
Switching track information on/off
(MP3 mode only)
If the function is switched on, folder and track
names are displayed.
If the function is switched off, disc and file
names are displayed.
XSelect MP3using the :=; but-
tons on the remote control and press the
9 button to confirm.
XSelect Display Track Information
using the 9: buttons and press the
9 button to confirm.
The function is switched on Oor off ª,
depending on the previous status.
Video DVD mode
Important safety notes
GWARNING
The CD/DVD drive is a class 1 laser product.
If you open the housing of the CD/DVD drive,
there is a risk of exposure to invisible laser
radiation. This laser radiation could damage
your retina. There is a risk of injury.
Never open the housing. Always have main-
tenance and repair work carried out at a quali- fied specialist workshop.
General notes
DVD playback conditions
Playback problems may occur when playing
copied discs. There is a large variety of discs,
DVD authoring software, writing software and
writers available. This variety means that
there is no guarantee that the Rear Seat
Entertainment System will be able to play
video DVDs that you have copied yourself.
Further information (
Ypage 198). Informa-
tion regarding COMAND also applies to the
Rear Seat Entertainment System.
Function restrictions
Depending on the DVD, it is possible that cer- tain functions or actions described in this
section will be temporarily blocked or may not
function at all. As soon as you try to activate
these functions or actions, you will see the K
symbol in the display.
Switching on video DVD mode
XInsert a video DVD (Ypage 232).
The Rear Seat Entertainment System loads
the disc.
If disc mode was the last mode selected, it
will now be active.
If it was not, switch on video DVD mode as described in the following instructions.
XSelect Discin the menu using the
9=; buttons on the remote
control and confirm by pressing the 9
button.
If the video DVD fulfills the playback crite-
ria, the film either starts automatically or
Video DVD mode235
Rear Seat Entertainment System
Z
Page 238 of 246
the menu stored on the DVD appears. If the
DVD menu appears, you must start the film
manually.
XSelect the corresponding menu item in the
DVD menu.
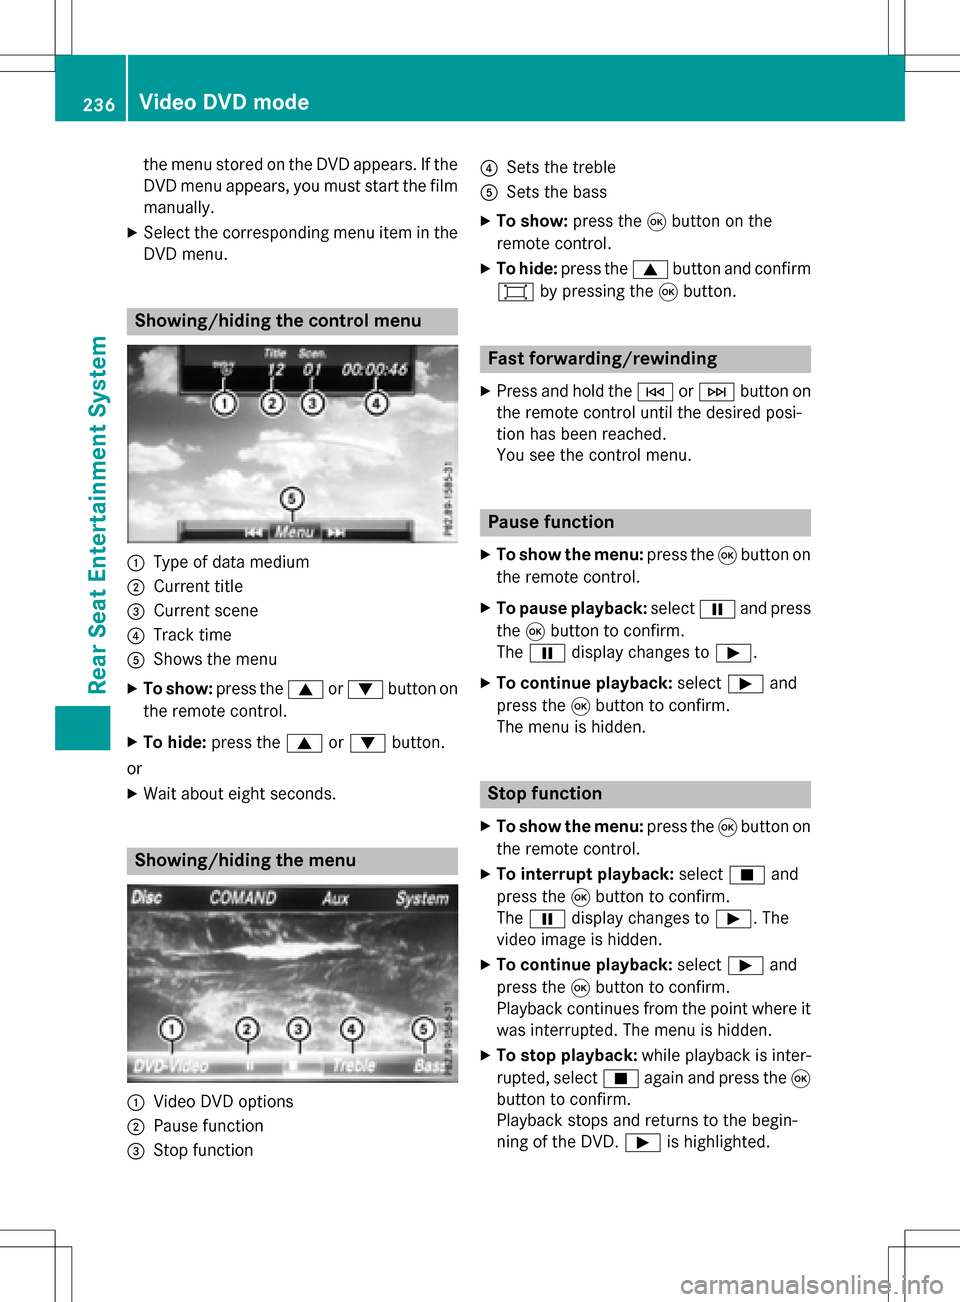
Showing/hiding the control menu
:Type of data medium
;Current title
=Current scene
?Track time
AShows the menu
XTo show: press the9or: button on
the remote control.
XTo hide: press the 9or: button.
or
XWait about eight seconds.
Showing/hiding the menu
:Video DVD options
;Pause function
=Stop function
?Sets the treble
ASets the bass
XTo show: press the9button on the
remote control.
XTo hide: press the 9button and confirm
# by pressing the 9button.
Fast forwarding/rewinding
XPress and hold the EorF button on
the remote control until the desired posi-
tion has been reached.
You see the control menu.
Pause function
XTo show the menu: press the9button on
the remote control.
XTo pause playback: selectËand press
the 9button to confirm.
The Ë display changes to Ì.
XTo continue playback: selectÌand
press the 9button to confirm.
The menu is hidden.
Stop function
XTo show the menu: press the9button on
the remote control.
XTo interrupt playback: selectÉand
press the 9button to confirm.
The Ë display changes to Ì. The
video image is hidden.
XTo continue playback: selectÌand
press the 9button to confirm.
Playback continues from the point where it was interrupted. The menu is hidden.
XTo stop playback: while playback is inter-
rupted, select Éagain and press the 9
button to confirm.
Playback stops and returns to the begin-
ning of the DVD. Ìis highlighted.
236Video DVD mode
Rear Seat Entertainment System
Page 239 of 246
XTo restart playback:selectÌand
press the 9button to confirm.
Playback starts from the beginning of the
DVD.
Selecting a scene/chapter
Skipping forwards/backwards
XPress the =or; button on the
remote control.
or
XPress the EorF button.
The navigation menu (
Ypage 236 )appears
for approximately eight seconds.
Selecting a scene/chapter directly
These examples illustrate how to select
scene/chapter 5.
XOption 1: while the film is playing, press
the h button on the remote control.
XPress a button, such as ¿.
XOption 2:press the9button on the
remote control.
XSelect DVD-Videoand press the 9button
to confirm.
XSelect DVD Functionsand press the 9
button to confirm.
XSelect SceneSelectionand press the 9
button to confirm.
XSelect the ¿digit using the 9
or : button and press the 9button to
confirm.
In both cases, playback will begin from the
5th scene or chapter after a brief pause.
Selecting a film/track
XOption 1: press the9button on the
remote control.
XSelect DVD-Videoand press the 9button
to confirm.
XSelect DVD Functionsand press the 9
button to confirm.
XSelect TitleSelectionand press the 9
button to confirm.
XTo close the list: press the 9button.
XSelect a film/track.
XOption 2: to select film 2, for example,
press the ·button on the remote con-
trol.
After a brief pause, the second film is
played.
DVD menu
Calling up the DVD menu
The DVD menu is the menu stored on the DVD
itself. It is structured in various ways accord-
ing to the individual DVD and permits various
actions and settings.
In the case of multi-language DVDs, for exam-
ple, you can change the DVD language in the
DVD menu.
XTo show the menu: press the9button on
the remote control.
XSelect DVD-Videoand press the 9button
on the remote control to confirm.
XSelect DVD Functionsand press the 9
button to confirm.
XSelect Menuand press the 9button to
confirm.
The DVD menu appears.
Selecting menu items in the DVD menu
XSelect a menu item using the
9:=; buttons on the
Video DVD mode237
Rear Seat Entertainment System
Z
Page 240 of 246
remote control and press the9button to
confirm.
A menu appears.
XConfirm Selectby pressing the 9button.
A submenu is displayed.
XIf available, additional options can now be
selected.
The Rear Seat Entertainment System then
switches back to the DVD menu.
iMenu items which cannot be selected are
shown in gray.
iDepending on the DVD, the menu items
Back (to movie)
, Play,Stop,E,
F orGo
Upmay not function at all or not
at certain points in the DVD menu. To indi-
cate this, the Ksymbol appears in the dis-
play.
Stopping a film or skipping to the begin-
ning or end of a scene
XSelect any menu item from the DVD menu.
The menu appears.
XTo stop the film: select theStopmenu
item and press the 9button on the remote
control to confirm.
XTo skip to the end of a scene: select the
F menu item and press the 9button to
confirm.
XTo skip to the beginning of a scene:
select the Emenu item and press the
9 button to confirm.
Moving up one level in the DVD menu
XCall up the DVD menu.
XPress the %back button on the remote
control or select the corresponding menu
item in the DVD menu.
or
XSelect any menu item in the DVD menu and
press the 9remote control button to con-
firm.
XSelect Go Upand press Wto confirm.
Back to the film
XPress the kback button repeatedly
until you see the film.
or
XSelect any menu item in the DVD menu and press the 9remote control button to con-
firm.
XSelect the Back(tomovie)menu item in
the menu and press the 9button to con-
firm.
Setting the audio format
You can use this function to set the audio lan-
guage or the audio format. The number of
settings is determined by the DVD content. It
may also be possible to access the settings
from the DVD menu. This function is not avail-
able on all DVDs.
XTo show the menu: press the9button on
the remote control.
XSelect DVD-Videoand press the 9button
on the remote control to confirm.
XSelect DVD Functionsand press the 9
button to confirm.
XSelect Audio Languageand press the 9
button to confirm.
A menu appears after a short while. The #
dot indicates the currently set language.
XSelect a language using the 9:but-
tons and press the 9button to confirm.
XTo exit the menu: press the=or;
button.
Subtitles and camera angle
These functions are not available on all DVDs.
The number of subtitle languages and camera
angles available depends on the content of
the DVD. It may also be possible to access the
settings from the DVD menu.
238Video DVD mode
Rear Seat Entertainment System