MERCEDES-BENZ METRIS 2019 MY19 Operator’s Manual
Manufacturer: MERCEDES-BENZ, Model Year: 2019, Model line: METRIS, Model: MERCEDES-BENZ METRIS 2019Pages: 318, PDF Size: 5.07 MB
Page 241 of 318
GPS reception
Correct functioning of the navigation system
depends, amongst other aspects, on GPS recep-
tion. In certain situations, GPS reception may be
impaired, there may be interference or there
may be no reception at all, e.g. in tunnels or
parking garages.
Preparing navigation
Inserting the navigation module
iSwitch off the ignition before removing or
inserting the navigation module.
XOpen the glove box.
XInsert the navigation module into the device
holder.
The battery built into the navigation module
starts charging when the vehicle ignition is
switched on.
XRemove the catch on the front side of the
device holder.
This way, the navigation module is secured, as
well as protected against theft.
XClose the glove box.
Switching on the navigation system
XPress the ßbutton.
or
XPress the 9button repeatedly until the
main menu bar is selected.
XSelect Navi.
The display shows the main menu of the nav- igation system.
iIf the battery was completely discharged, it
takes up to 1 minute before the navigation
system is ready.
Audio 15239
Multimedia systems in brief
Z
Page 242 of 318
Useful information
This Operator's Manual describes all models as
well as standard and optional equipment of your
vehicle that were available at the time of going
to print. Country-specific variations are possi-
ble. Note that your vehicle may not be equipped
with all of the described functions. This also
applies to systems and functions relevant to
safety.
Read the information on qualified specialist
workshops (
Ypage 31).
Stowage spaces and stowage com-
partments
Important safety notes
GWARNING
If you transport objects in the vehicle interior
and these are not adequately secured, they
could slip or be flung around and thereby
strike vehicle occupants. In addition, cup
holders, open stowage spaces and mobile
phone brackets may not always be able to
hold the objects placed in them in the event of
an accident. There is a risk of injury, particu-
larly in the event of sharp braking or sudden
changes of direction.
RAlways stow objects in such a way that they cannot be tossed about in these or similar
situations.
RAlways make sure that objects do not pro-
trude out of the stowage spaces, luggage
nets or stowage nets.
REnsure that closable stowage spaces are
shut before beginning your journey.
RAlways stow and secure heavy, hard, poin-
ted, sharp-edged, fragile or large objects in
the cargo compartment.
Observe the "Loading guidelines" (
Ypage 244).
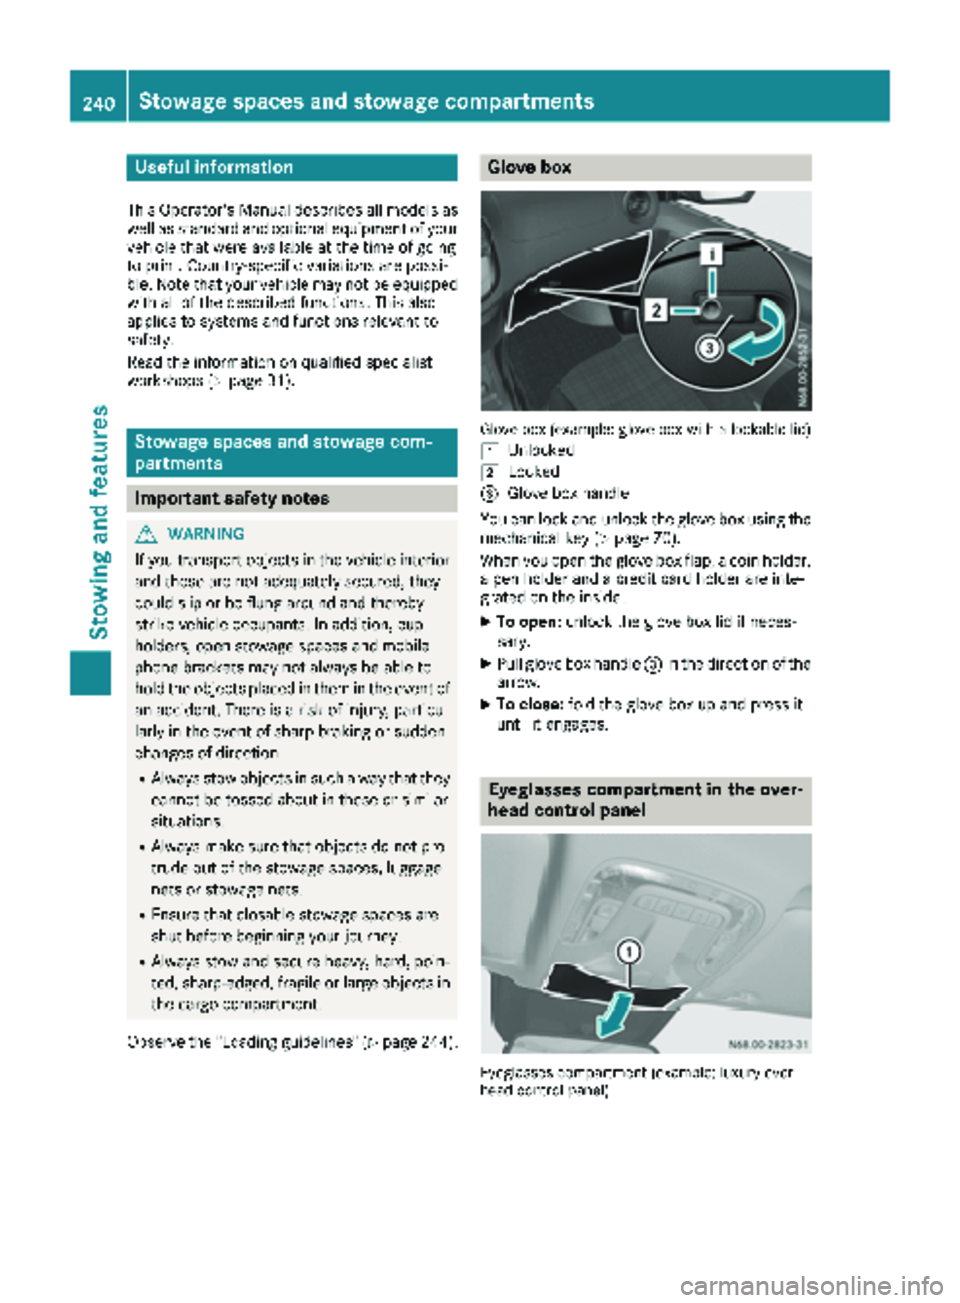
Glove box
Glove box (example: glove box with a lockable lid)
1
Unlocked
2Locked
=Glove box handle
You can lock and unlock the glove box using the mechanical key (
Ypage 70).
When you open the glove box flap, a coin holder,
a pen holder and a credit card holder are inte-
grated on the inside.
XTo open: unlock the glove box lid if neces-
sary.
XPull glove box handle =in the direction of the
arrow.
XTo close: fold the glove box up and press it
until it engages.
Eyeglasses compartment in the over-
head control panel
Eyeglasses compartment (example: luxury over-
head control panel)
240Stowage spaces and stowage compartments
Stowing and features
Page 243 of 318
XTo open:briefly press cover of spectacles
compartment :.
The eyeglasses compartment opens down-
wards.
XTo close: press the cover of spectacles com-
partment :into the overhead control panel
until it engages.
Make sure that the eyeglasses compartment is
always closed while the vehicle is in motion.
Stowage net
You can use the stowage nets on the back of the
seat backrests to store small, lightweight items.
Observe the loading directions (
Ypage 244)
and the safety information about the stowage
spaces (
Ypage 240).
Sun visors
Overview
GWARNING
If the mirror cover of the vanity mirror is folded
up when the vehicle is in motion, you could be
blinded by incident light. There is a risk of an
accident.
Always keep the mirror cover folded down
while driving.
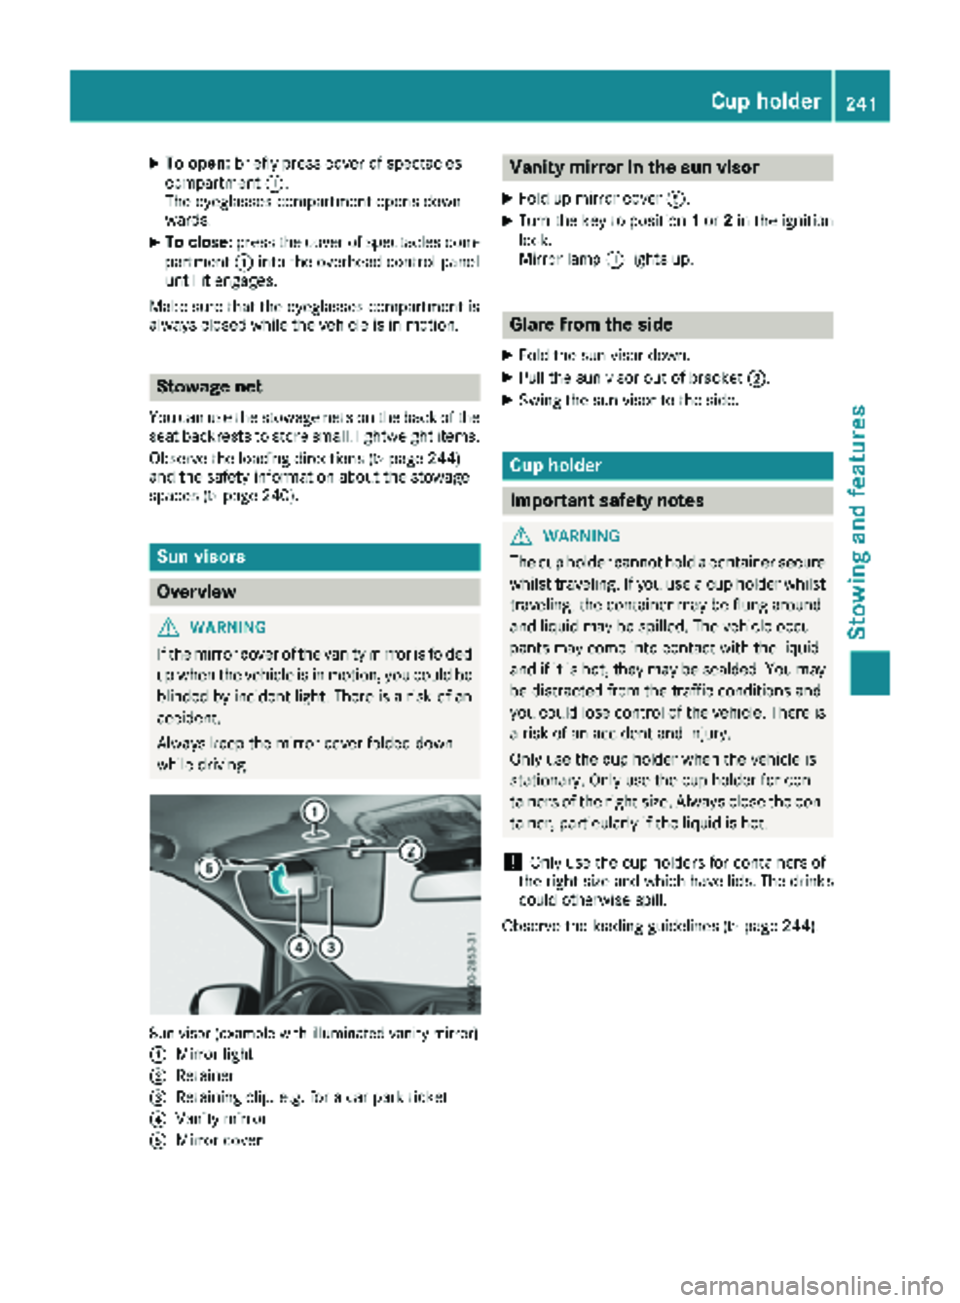
Sun visor (example with illuminated vanity mirror)
:
Mirror light
;Retainer
=Retaining clip, e.g. for a car park ticket
?Vanity mirror
AMirror cover
Vanity mirror in the sun visor
XFold up mirror cover A.
XTurn the key to position 1or 2in the ignition
lock.
Mirror lamp :lights up.
Glare from the side
XFold the sun visor down.
XPull the sun visor out of bracket ;.
XSwing the sun visor to the side.
Cup holder
Important safety notes
GWARNING
The cup holder cannot hold a container secure
whilst traveling. If you use a cup holder whilst
traveling, the container may be flung around
and liquid may be spilled. The vehicle occu-
pants may come into contact with the liquid
and if it is hot, they may be scalded. You may
be distracted from the traffic conditions and
you could lose control of the vehicle. There is a risk of an accident and injury.
Only use the cup holder when the vehicle is
stationary. Only use the cup holder for con-
tainers of the right size. Always close the con-
tainer, particularly if the liquid is hot.
!Only use the cup holders for containers of
the right size and which have lids. The drinks could otherwise spill.
Observe the loading guidelines (
Ypage 244).
Cup holder241
Stowing an d features
Z
Page 244 of 318
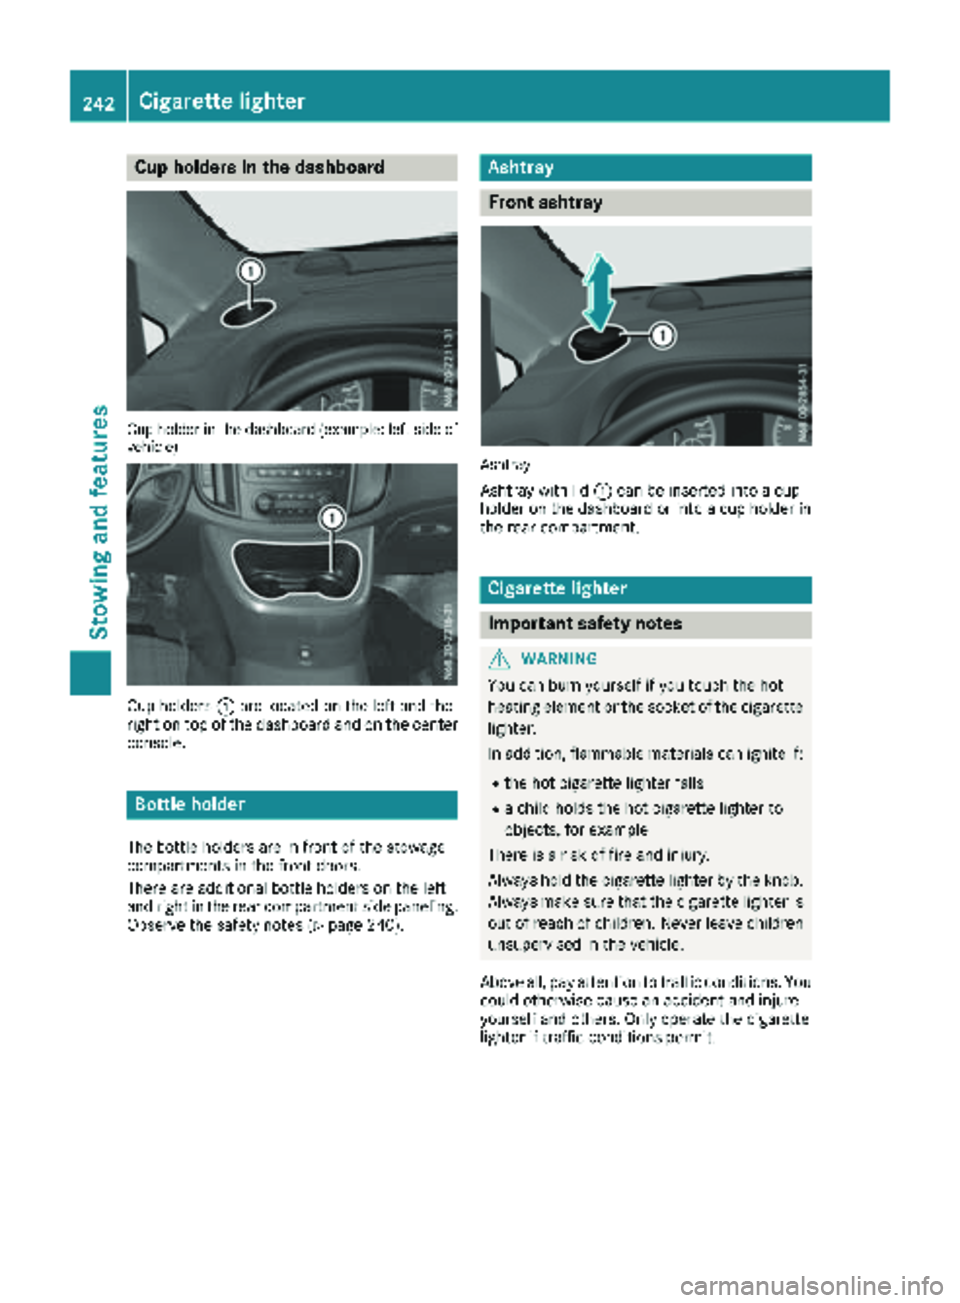
Cup holders in the dashboard
Cup holder in thedashboar d(example :left side of
vehicle )
Cup holders :are located on the left and the
right on top of the dashboard and on the center
console.
Bottle holder
The bottle holders are in front of the stowage
compartments in the front doors.
There are additional bottle holders on the left
and right in the rear compartment side paneling.
Observe the safety notes (
Ypage 240).
Ashtray
Front ashtray
Ashtray
Ashtray with lid :can be inserted into a cup
holder on the dashboard or into a cup holder in
the rear compartment.
Cigarette lighter
Important safety notes
GWARNING
You can burn yourself if you touch the hot
heating element or the socket of the cigarette lighter.
In addition, flammable materials can ignite if:
Rthe hot cigarette lighter falls
Ra child holds the hot cigarette lighter to
objects, for example
There is a risk of fire and injury.
Always hold the cigarette lighter by the knob.
Always make sure that the cigarette lighter is
out of reach of children. Never leave children
unsupervised in the vehicle.
Above all, pay attention to traffic conditions. You
could otherwise cause an accident and injure
yourself and others. Only operate the cigarette
lighter if traffic conditions permit.
242Cigarette lighter
Stowing and features
Page 245 of 318
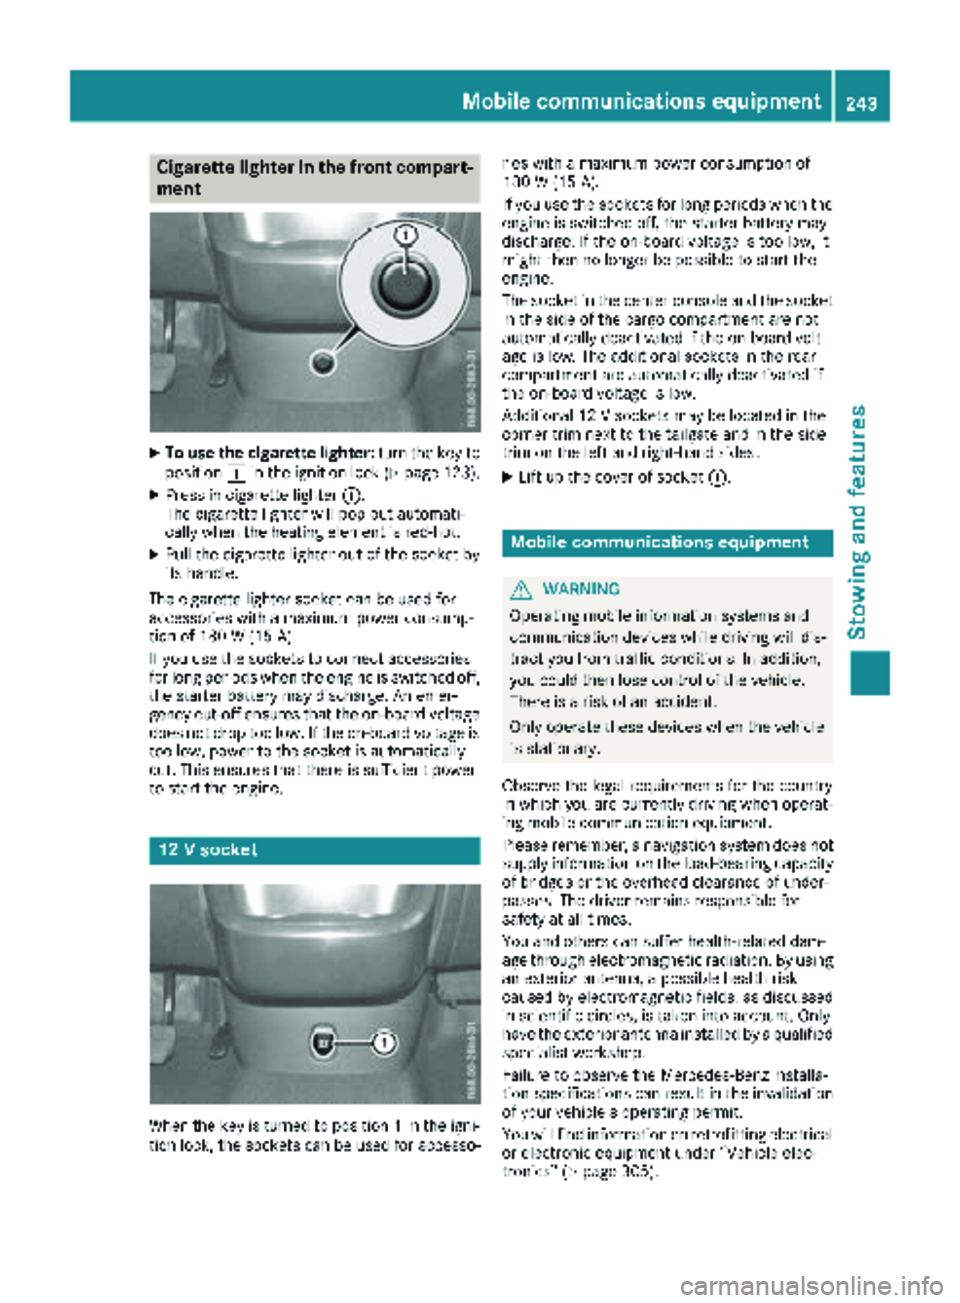
Cigarette lighter in the front compart-
ment
XTo use the cigarette lighter:turn the key to
position 1in the ignition lock (Ypage 123).
XPress in cigarette lighter :.
The cigarette lighter will pop out automati-
cally when the heating element is red-hot.
XPull the cigarette lighter out of the socket by
its handle.
The cigarette lighter socket can be used for
accessories with a maximum power consump-
tion of 180 W (15A).
If you use th esockets to connec taccessories
fo rlon gperiod swhe nth eengin eis switched off,
th estarter battery may discharge. An emer -
gency cut-off ensures that th eon-boar dvoltage
doe sno tdro pto olow. If th eon-boar dvoltage is
to olow, powe rto th esocke tis automatically
cut .Thi sensures that ther eis sufficien tpowe r
to start th eengine.
12 Vsocket
Whe nth eke yis turned to position 1in th eigni-
tion lock, th esockets can be used fo raccesso- rie
swit h a maximum powe rconsumption of
18 0 W (15 A) .
If you use th esockets fo rlon gperiod swhe nth e
engin eis switched off, th estarter battery may
discharge. If th eon-boar dvoltage is to olow, it
might then no longer be possible to start th e
engine.
The socke tin th ecenter console an dth esocke t
in th esid eof th ecargo compartment are no t
automatically deactivated if th eon-boar dvolt -
age is low. The additional sockets in th erear
compartment are automatically deactivated if
th eon-boar dvoltage is low.
Additional 12 Vsockets may be located in th e
corner trim next to th etailgate an din th esid e
trim on th elef tan dright-han dsides.
XLif tup th ecove rof socke t: .
Mobile communications equipment
GWARNING
Operatin gmobile information systems an d
communication devices whil edrivin gwill dis -
tract you from traffic conditions. In addition ,
you could then los econtro lof th evehicle.
There is aris kof an accident.
Only operat ethese devices whe nth evehicle
is stationary.
Observe th elegal requirements fo rth ecountr y
in whic hyou are currently drivin gwhe noperat -
in g mobile communication equipment .
Please remember, anavigation syste mdoe sno t
supply information on th eload-bearin gcapacity
of bridge sor th eoverhead clearance of under -
passes. The drive rremains responsible fo r
safet yat all times.
You an dother scan suffe rhealth-related dam -
age through electromagnetic radiation .By usin g
an exterio rantenna, apossible health ris k
caused by electromagnetic fields ,as discussed
in scientific circles ,is take ninto account. Only
hav eth eexterio rantenn ainstalled by aqualifie d
specialis tworkshop .
Failur eto observe th eMercedes-Ben zinstalla-
tion specification scan result in th einvalidation
of your vehicle' soperatin gpermit .
You will fin d
i
nformation on retrofitting electrical
or electronic equipment under “Vehicle elec -
tronics” (
Ypage 305).
Mobile communications equipment243
Stowing an d features
Z
Page 246 of 318
Useful information
This Operator's Manual describes all models as
well as standard and optional equipment of your
vehicle that were available at the time of going
to print. Country-specific variations are possi-
ble. Note that your vehicle may not be equipped
with all of the described functions. This also
applies to systems and functions relevant to
safety.
Read the information on qualified specialist
workshops (
Ypage 31).
Loading guidelines
Important safety notes
GWARNING
When objects are unsecured or inadequately
secured, they can slip, turn over or be thrown
about, striking vehicle occupants. This also
applies to:
Rluggage or loads
Rseats which have been removed and are
being transported in the vehicle in an
exceptional case.
There is a risk of injury, particularly in the
event of a braking maneuver or abrupt change
in direction.
Always stow objects in such a way that they
cannot be tossed about. Before traveling,
secure objects, luggage or loads to prevent
them slipping or tipping over. If you remove a
seat, store it preferably outside the vehicle.
GWARNING
As a result of improperly placed or unevenly
distributed loads, the center of gravity of the
load being transported may be too high or too
far back. This can significantly impair handling
as well as steering and braking characteris-
tics. There is a risk of an accident.
Always make sure that the center of gravity of
the load is:
Rbetween the axles
and
Ras low as possible, near the rear axle.
GWARNING
When the permissible wheel loads, axle loads
and/or the maximum permissible gross vehi-
cle weight are exceeded, driving safety is
compromised. The handling as well as steer-
ing and braking characteristics may be signif-
icantly impaired. Overloaded tires may over-
heat, causing them to burst. There is a risk of
an accident.
When transporting a load, always observe the
permissible wheel loads, axle loads and the
maximum permissible gross vehicle weight
for the vehicle (including occupants).
!If you are using a roof carrier, observe the
maximum roof load and maximum roof carrier
load.
RDo not stack luggage or loads higher than the
backrests.
RObjects to be transported should preferably
be stowed in the cargo compartment.
RWhen transporting luggage, always use the
cargo tie-down rings for securing loads and a
cargo net, if installed.
RUse cargo tie-down rings and fasteners which
are suitable for the weight and size of the
load.
When using suitable load securing aids and tie
downs, always follow the manufacturer's oper-
ating instructions, in particular the notes on dis-
card criteria contained therein.
Load securing aids or tie downs must not be
used if:
Ridentification marks are missing or illegible
Rthere are yarn breakages, damage to bearing seams or other signs of tearing
Rthere are signs of shearing, deformation,
pinching or other damage
Rthere is damage to clamping or connecting
elements
Load securing aids and tie downs in this condi-
tion are ready for discard and must be replaced.
If you use load securing aids or tie downs which are worn out, the load may not be sufficiently
secured and could cause damage to property.
244Loading guidelines
Transporting loads
Page 247 of 318
In the event of an accident, have a damaged
cargo compartment floor or loading area, the
cargo tie-down rings and the tie down checked
at a specialist workshop. Otherwise, the load
may not be correctly secured the next time any-
thing is stowed.
Even if you follow all loading guidelines, the load
increases the risk of injury in the event of an
accident. Observe the information in the "Secur-ing a load" (
Ypage 246) and "Load distribution"
(Ypage 245) sections.
You will find information about the maximum
roof load under "Cargo tie-down points and car-
rier systems" (
Ypage 314). You will find infor-
mation about roof carriers under "Carrier sys-
tems" (
Ypage 250).
Before loading
!
The anti-slip mats cannot be used for secur-
ing goods and must be replaced when they
show signs of:
RPermanent deformation and crushing
RCrack formation
RCuts
XTire pressure: check the tire pressure and
correct if necessary (Ypage 282).
XCargo compartment floor: clean the cargo
compartment floor.
The cargo compartment floor must be free
from oil and dust, dry and swept clean to pre-
vent the load from slipping.
XPlace non-slip mats (anti-slip mats) on the
cargo compartment floor if necessary.
During loading
XObserve the gross axle weight rating and per-
missible gross vehicle weight for your vehicle.
Take into account that your vehicle's curb
weight is increased if accessories or optional equipment are installed. The maximum pay-
load is thus reduced.
XObserve the notes on load distribution
(Ypage 245).
The overall center of gravity of the load should
always be as low as possible, centered and
between the axles near the rear axle.
XSecure the load (Ypage 246).
Observe the legal requirements of the country
in which you are currently driving.
Checks after loading
GWARNING
Combustion engines emit poisonous exhaust
gases such as carbon monoxide. If the tail-
gate/rear door is open when the engine is
running, particularly if the vehicle is moving,
exhaust fumes could enter the passenger
compartment. There is a risk of poisoning.
Turn off the engine before opening the tail-
gate/rear door. Never drive off with the tail-
gate/rear door open.
XSecuring luggage/loads: make sure that
the luggage and/or load is secure before
every journey and at regular intervals during a
long journey, and correct it if necessary.
XDoors/tailgate: close the sliding doors and
tailgate/door.
XTire pressure: adjust the tire pressure
according to the vehicle load (Ypage 282).
XDriving style: adapt your driving style
according to the vehicle load.
Load distribution
General notes
!
Excessive loads on individual points of the
cargo floor or on the load surface impair vehi-
cle handling characteristics and could cause
damage to the floor covering.
The overall center of gravity of the load should
always be as low as possible, centered and
between the axles near the rear axle.
Load distribution245
Transporting loads
Z
Page 248 of 318
XAlways transport loads in the cargo compart-
ment and with the seat backrests folded up
and properly locked in position.
XAlways place the load against the backrests ofthe front or rear seats.
XMove large and heavy loads as far towards thefront of the vehicle as possible against the
front or rear seats. Stow the load flush with
the rear or front seats.
XAlways additionally secure the load with suit-
able load-securing aids or tie downs.
Observe the following notes:
RDo not stack loads higher than the upper edge
of the backrests.
RTransport loads behind seats that are not
occupied.
RIf the rear bench seat is not occupied, insert
the seat belts crosswise into the buckle of the
opposite seat belt.
Cargo compartment variations
You can vary the cargo compartment according
to your transportation requirements as follows:
Rby folding the seat backrests forward to the
table position.
Rby removing the rear bench seat.
You will find information about rear bench seats in the "Rear bench seats" section (
Ypage 87).
Securing loads
Important safety notes
GWARNING
If you attach the tie-down incorrectly when
securing the load, the following may occur in
the event of abrupt changes in direction, brak- ing maneuvers or an accident:
Rthe cargo tie-down rings may become
detached or the tie-down may tear if the
permissible load is exceeded
Rthe load may not be restrained.
This may cause the load to slip, tip over or be
tossed about, striking vehicle occupants.
There is a risk of an accident and injury.
Always tension the tie-downs in the proper
manner and only between the described
cargo tie-down rings. Always use tie-downs
designed specifically for the loads.
!Observe the information on the maximum
loading capacity of the individual cargo tie-
down points.
If you use several cargo tie-down points to
secure a load, you must always take the max-
imum loading capacity of the weakest cargo
tie-down point into account.
If you brake hard, for example, the forces act- ing could be up to several times the weight
force of the load. Always use multiple cargo
tie-down points in order to distribute the force
absorption. Load the anchorages evenly.
Spread the load evenly across the cargo tie-
down points/cargo tie-down rings. You will find information on the maximum loading capacity of
the cargo tie-down points under "Cargo tie-
down points and carrier systems" (
Ypage 314).
Do not attempt to modify or repair the cargo tie-
down points/cargo tie-down rings or tie downs.
Read the information on qualified specialist
workshops: (
Ypage 31).
As the driver, you are responsible for ensuring
that:
RThe load is secured against slipping, tipping,
rolling or falling off in normal traffic condi-
tions, should the vehicle swerve to avoid an
obstacle, in the event of full brake application
and on poor road surfaces.
RThe applicable requirements and guidelines
relating to load-securing practices must be
met.
If this is not the case, this may constitute a
punishable offense, depending on local legis-
lation and any ensuing consequences.
Always observe the legal requirements for the country you are currently in.
Make sure that the load is secure before every
journey and at regular intervals during a long
journey. Correct an incorrectly or inadequately
secured load if necessary.
Always observe the operating instructions or the
notes of the lashing strap manufacturer for the
operation of the lashing strap.
You can obtain information about securing the
load correctly from the manufacturer of the load
securing aids or tie down for securing the load.
246Securing loads
Transporting loads
Page 249 of 318
Also observe the safety information in the load-
ing directions (Ypage 244).
XFill spaces between the load and the cargo
compartment walls or wheel housings (form-
locking). Use rigid load securing aids, such as
wedges, wooden fixings or padding.
XAttach secured and stabilized loads in all
directions to the cargo tie-down rings and the
guide rails in the rear.
Only use tie downs, such as lashing nets and
lashing straps, that have been tested in
accordance with current standards.
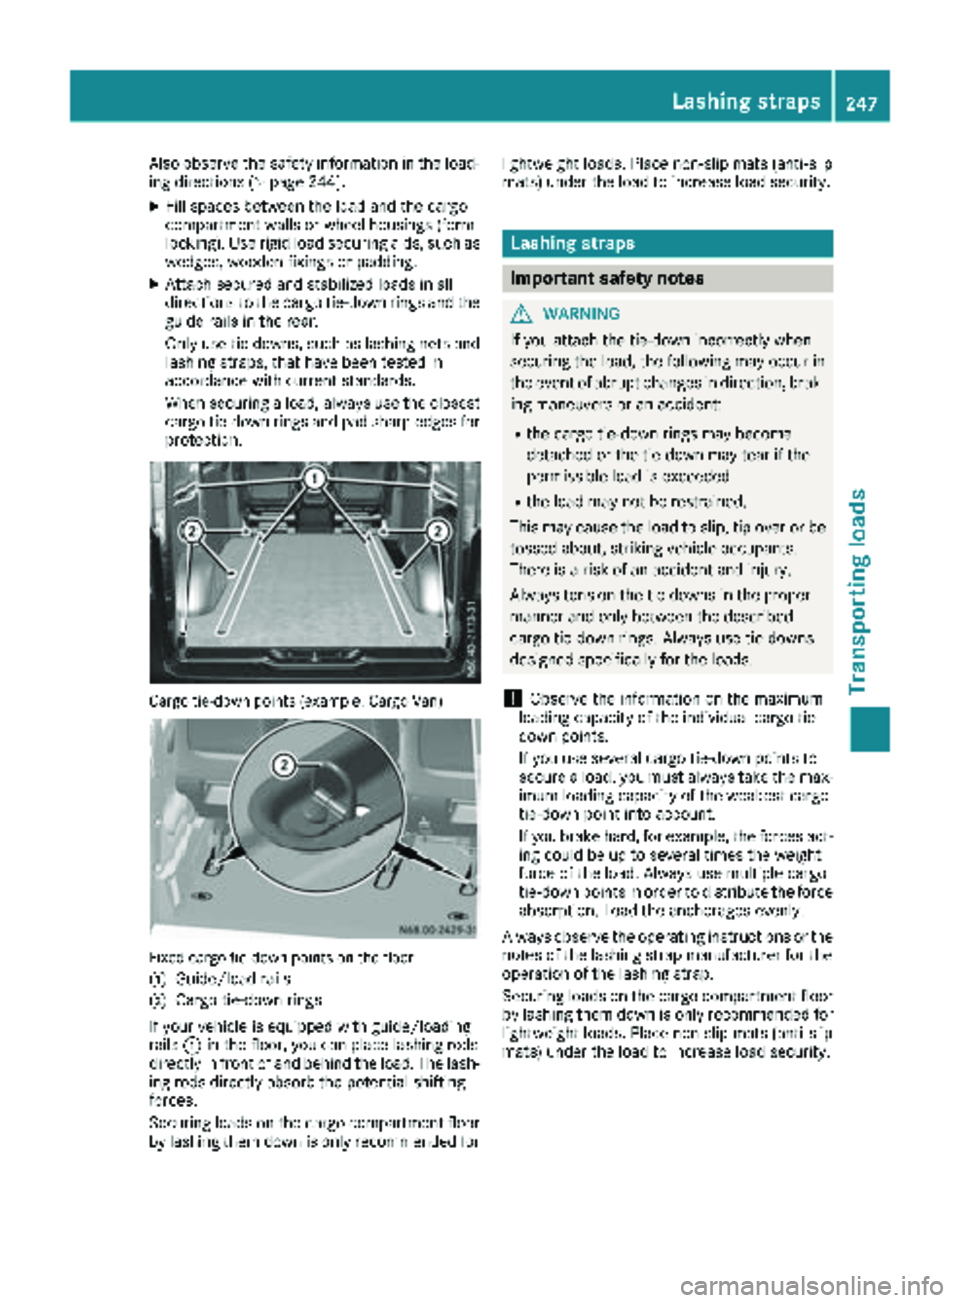
When securing a load, always use the closest cargo tie-down rings and pad sharp edges for
protection.
Cargo tie-down points (example: Cargo Van)
Fixed cargo tie-down points on the floor
:
Guide/load rails
;Cargo tie-down rings
If your vehicle is equipped with guide/loading
rails :in the floor, you can place lashing rods
directly in front of and behind the load. The lash-
ing rods directly absorb the potential shifting
forces.
Securing loads on the cargo compartment floor
by lashing them down is only recommended for lightweight loads. Place non-slip mats (anti-slip
mats) under the load to increase load security.
Lashing straps
Important safety notes
GWARNING
If you attach the tie-down incorrectly when
securing the load, the following may occur in
the event of abrupt changes in direction, brak- ing maneuvers or an accident:
Rthe cargo tie-down rings may become
detached or the tie-down may tear if the
permissible load is exceeded
Rthe load may not be restrained.
This may cause the load to slip, tip over or be
tossed about, striking vehicle occupants.
There is a risk of an accident and injury.
Always tension the tie-downs in the proper
manner and only between the described
cargo tie-down rings. Always use tie-downs
designed specifically for the loads.
!Observe the information on the maximum
loading capacity of the individual cargo tie-
down points.
If you use several cargo tie-down points to
secure a load, you must always take the max-
imum loading capacity of the weakest cargo
tie-down point into account.
If you brake hard, for example, the forces act-
ing could be up to several times the weight
force of the load. Always use multiple cargo
tie-down points in order to distribute the force absorption. Load the anchorages evenly.
Always observe the operating instructions or the
notes of the la shing strap ma
nufacturer for the
operation of the lashing strap.
Securing loads on the cargo compartment floor
by lashing them down is only recommended for
lightweight loads. Place non-slip mats (anti-slip
mats) under the load to increase load security.
Lashing straps247
Transporting loads
Z
Page 250 of 318
Notes and information on:
Rthe operation of the cargo tie-down rings and
cargo tie-down points can be found in the
"Securing a load" section (
Ypage 246)
Rthe maximum loading capacity of the cargo
tie-down points can be found in the "Technical
data" section (
Ypage 314)
Rthe maximum loading capacity of the lashing
strap can be found on the lashing strap label
If the label is missing or illegible, the lashing
strap is ready to be discarded. Such a lashing
strap must be removed from use.
If stickers have been included in the delivery:
XClean the surface before sticker:is affixed.
The stickers must be affixed to a flat, metallic
surface free from grease and dust.
XAffix stickers :on every side of the vehicle in
close proximity to the loading rails in a clearly
visible location.
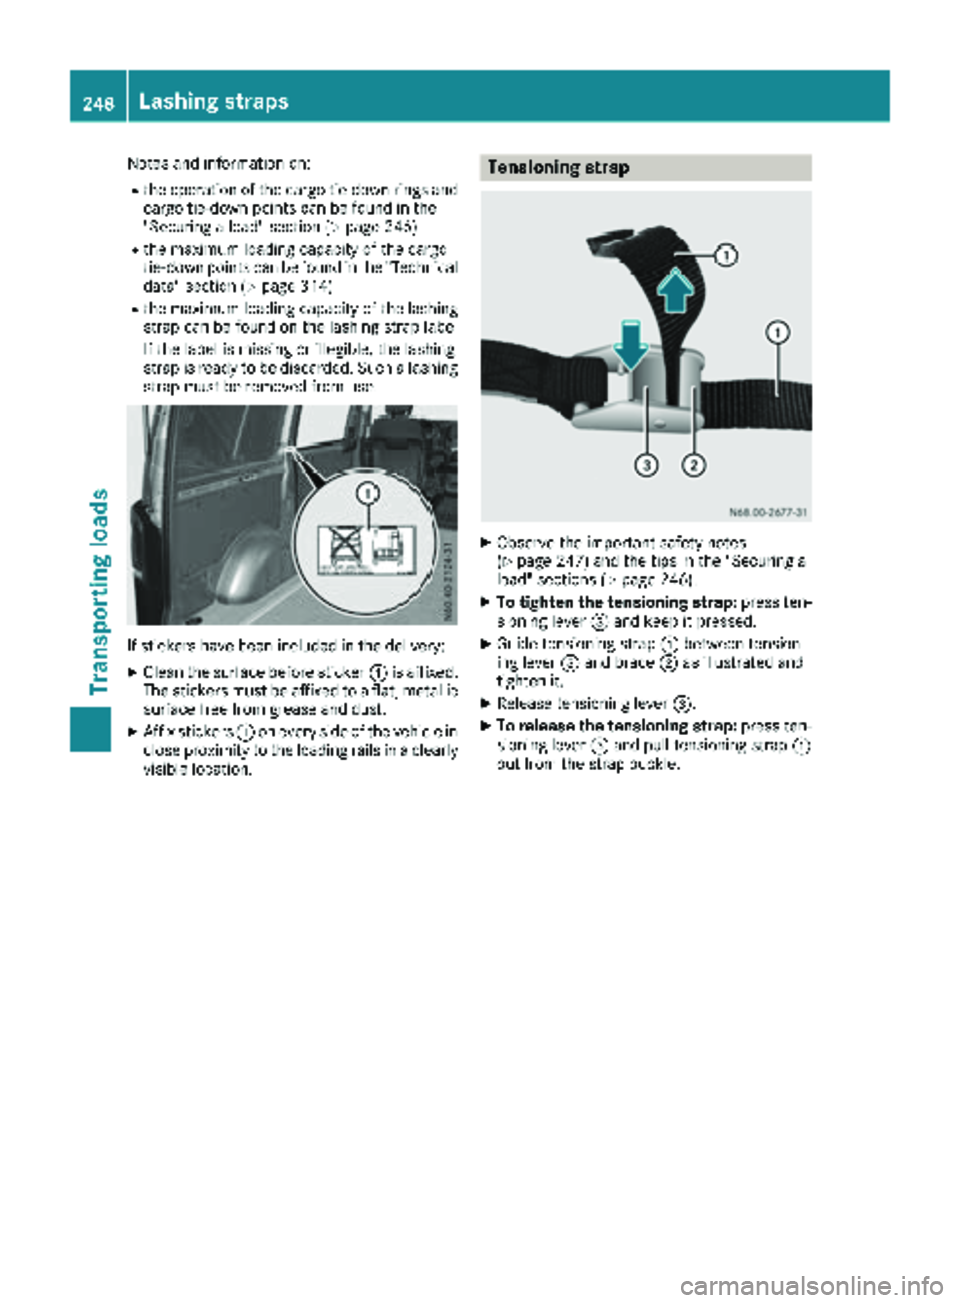
Tensioning strap
XObserve the important safety notes
(Ypage 247) and the tips in the "Securing a
load" sections (Ypage 246).
XTo tighten the tensioning strap: press ten-
sioning lever =and keep it pressed.
XGuide tensioning strap :between tension-
ing lever =and brace ;as illustrated and
tighten it.
XRelease tensioning lever =.
XTo release the tensioning strap: press ten-
sioning lever =and pull tensioning strap :
out from the strap buckle.
248Lashing straps
Transporting loads