MERCEDES-BENZ SLK ROADSTER 2008 Owners Manual
Manufacturer: MERCEDES-BENZ, Model Year: 2008, Model line: SLK ROADSTER, Model: MERCEDES-BENZ SLK ROADSTER 2008Pages: 273, PDF Size: 4.42 MB
Page 101 of 273
On-board computer
98
Resetting the current lap
X
Press the æbutton to stop the RACE-
TIMER.
X Press the çbutton to reset the lap time
to "0".
Deleting all laps
If you have switched off the engine, the RACE-
TIMER is reset to "0" after 30 seconds. All laps
are deleted.
It is not possible to delete a single stored lap
on its own.
X Press the æbutton to stop the RACE-
TIMER.
X Press the 4reset button on the left of the
instrument cluster twice.
X Press the æbutton to start the RACE-
TIMER.
All laps are deleted.
Overall evaluation This function is only available if you have
stored at least one lap and have stopped the
RACETIMER.
X
Press the jbutton repeatedly until the
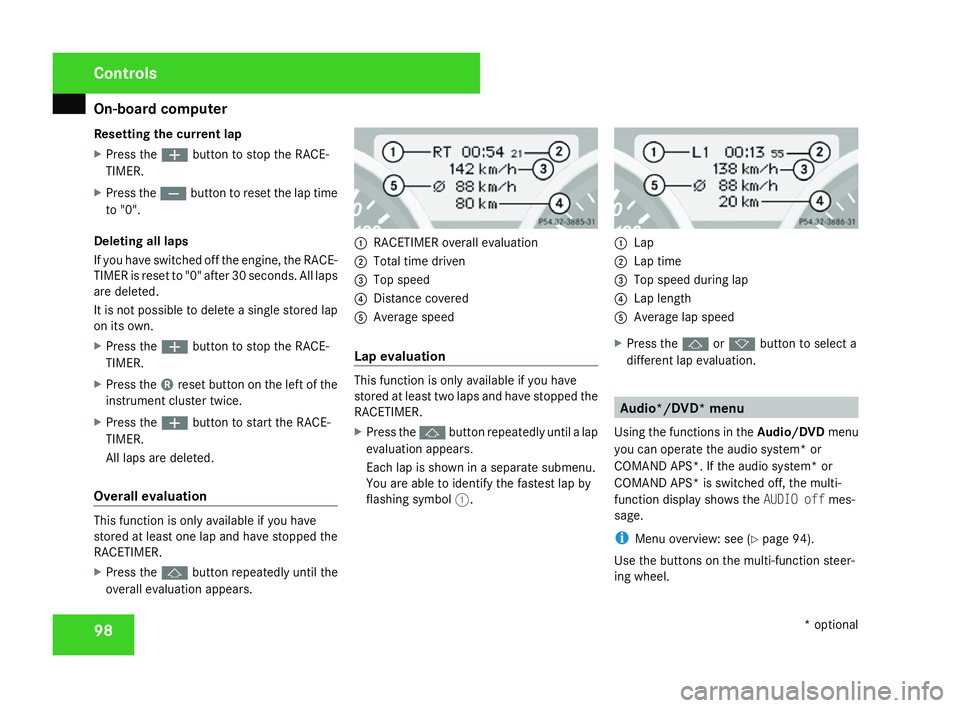
overall evaluation appears. 1
RACETIMER overall evaluation
2 Total time driven
3 Top speed
4 Distance covered
5 Average spee d
Lap evaluation This function is only available if you have
stored at least two laps and have stopped th
e
RACETIMER.
X Press the jbutton repeatedly until a lap
evaluation appears.
Each lap is shown in a separate submenu.
You are able to identify the fastest lap by
flashing symbol 1. 1
Lap
2 Lap time
3 Top speed during lap
4 Lap length
5 Average lap spee d
X Press the jork button to select a
different lap evaluation. Audio*/DVD* menu
Using the functions in the Audio/DVDmenu
you can operate the audio system* or
COMAND APS*. If the audio system* or
COMAND APS* is switched off, the multi-
function display shows the AUDIO offmes-
sage.
i Menu overview: see (Y page 94).
Use the buttons on the multi-function steer -
ing wheel. Controls
* optional
171_AKB; 3; 4, en-GB
vpfaff7,
2007-11-13T10:50:25+01:00 - Seite 98
Page 102 of 273
On-board computer
99
X
Use the èor· button to select the
Audio/DVD menu.
Selecting a radio station You can only store new stations using the
audio system
*or COMAND APS*. Please
refer to the separate operating instructions
for notes on how to do this.
X Switch on the audio equipment* or
COMAND APS* and select the radio; see
the separate operating instructions.
X To select a stored station :briefly press
the j ork button.
X To select a channel from the channel
list: press and hold the jork but-
ton .
X To select a station using the station
search (only if no station list is being
received): press and hold the jor
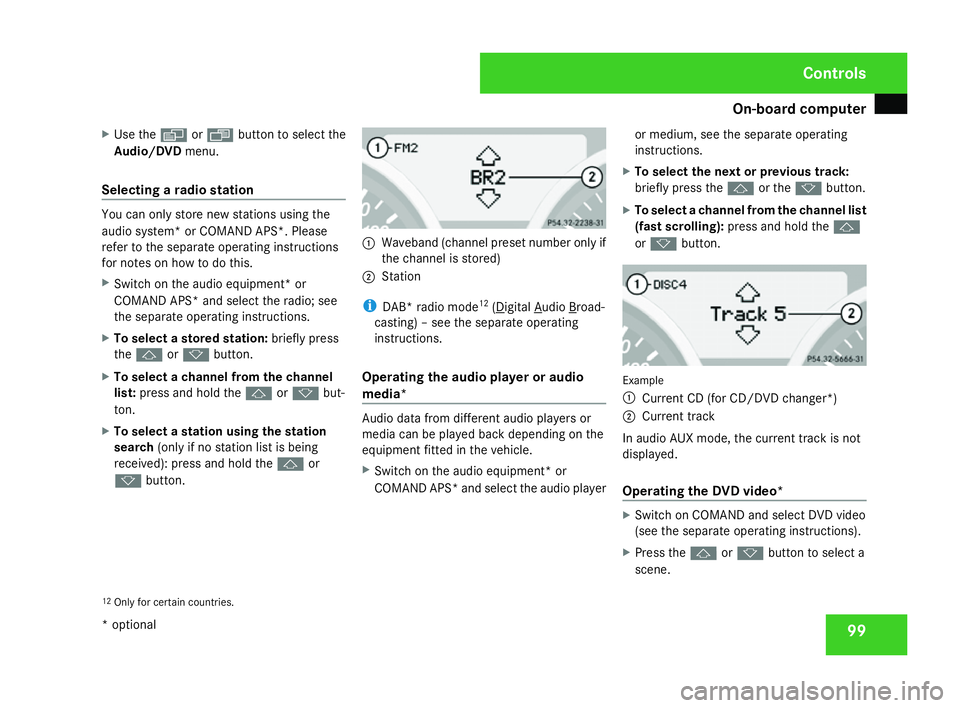
k button. 1
Waveband (channel preset number only if
the channel is stored)
2 Station
i DAB* radio mod e12
( Digital Audio Broad-
casting) – see the separate operating
instructions.
Operating the audio player or audi o
media* Audio data from different audio players or
media can be played back depending on the
equipment fitted in the vehicle.
X Switch on the audio equipment* or
COMAND APS* and select the audio player or medium, see the separate operating
instructions.
X To select the next or previous track :
briefly press the jor the kbutton.
X To select a channel from the channel list
(fast scrolling): press and hold the j
or k button. Example
1 Current CD (for CD/DVD changer*)
2 Current track
In audio AUX mode, the current track is no t
displayed.
Operating the DVD video* X
Switch on COMAND and select DVD video
(see the separate operating instructions) .
X Press the jork button to select a
scene.
12 Only for certain countries. Controls
* optional
171_AKB; 3; 4, en-GB
vpfaff7,
2007-11-13T10:50:25+01:00 - Seite 99
Page 103 of 273

On-board computer
1001
Disc number (only for DVD changer* )
2 Current scene Navigation* menu
In the Navigation menu, the multi-functio n
display shows information from the naviga-
tion system.
i Menu overview: see (Y page 94).
Use the buttons on the multi-function steer-
ing wheel.
X Press èorÿ to select the Naviga-
tio nmenu.
X Switch on the audio system* or COMAND
APS* (see separate operating instruc-
tions) . Route guidance inactiv
e The multi-function display shows the direc-
tion of travel.
1
Direction of trave l
Route guidance activ e The following may appear in the multi-func-
tion display: Message memory menu
Previous display messages can be called up
in the Message memory menu. You will only
see the Message memory menu if there are
any display messages. G
Risk of acciden
t
The on-board computer only records and
displays messages and warnings from cer-
tain systems. For this reason, you should
always make sure that your vehicle is safe
to drive. You could otherwise cause an acci-
dent by driving an unsafe vehicle.
Switching off the ignition clears the Message
memory except for the highest priority dis-
play messages. The on-board computer will
delete these display messages only after the
reason for the message has been rectified.
i Menu overview: see (Y page 94).
Displaying messages Use the buttons on the multi-function steer-
ing wheel.Controls
* optional
171_AKB; 3; 4, en-GB
vpfaff7 , 2007-11-13T10:50:25+01:00 - Seite 100
Page 104 of 273
On-board computer
101
X
Press the èor· button repeatedly
until either the original menu or the Mes-
sage memory menu appears.
If the Message memory menu does not
appear, there are no display messages.
If there are messages, the following mes-
sage may appear in the multi-function dis-
play, for example: 2 messages.
X Press the jork button to call up a
display message.
You can scroll through the display mes-
sages in sequence. The possible display
messages are explained in the "Practical
advice" section (Y page 174). Settings menu
In the Settings menu, you can use the To
reset: Press reset button for 3 sec-
onds function to restore most settings to the
factory settings. There are also submenus in
which you can make individual settings for
your vehicle.
i Menu overview: see (Y page 94).
Use the buttons on the multi-function steer -
ing wheel. Resetting to factory settings For safety reasons, not all functions are reset
:
permanent Speedtronic can only be set in the
Vehicl esubmenu. The Headlamp mode
function in the Lightingsubmenu is only
reset if the vehicle is stationary.
X Press èor· to select the Set-
tings menu.
X Press and hold reset button Jon the left
of the instrument cluster for approximately
three seconds.
A prompt appears in the multi-function dis-
play asking you to press the reset button
again to confirm.
X Press reset button Jagain .
The functions of most submenus are
restored to the factory settings.
or
X If you want to retain the settings, do not
press reset buttonJ a second time.
You will see the Settingsmenu again after
approximately 5 seconds.
X Press the èor· button to select a
different menu. Submenus in the Settings menu X
Press èor· to select the Set-
tings menu.
X Press the jbutton to call up the selec-
tion of submenus.
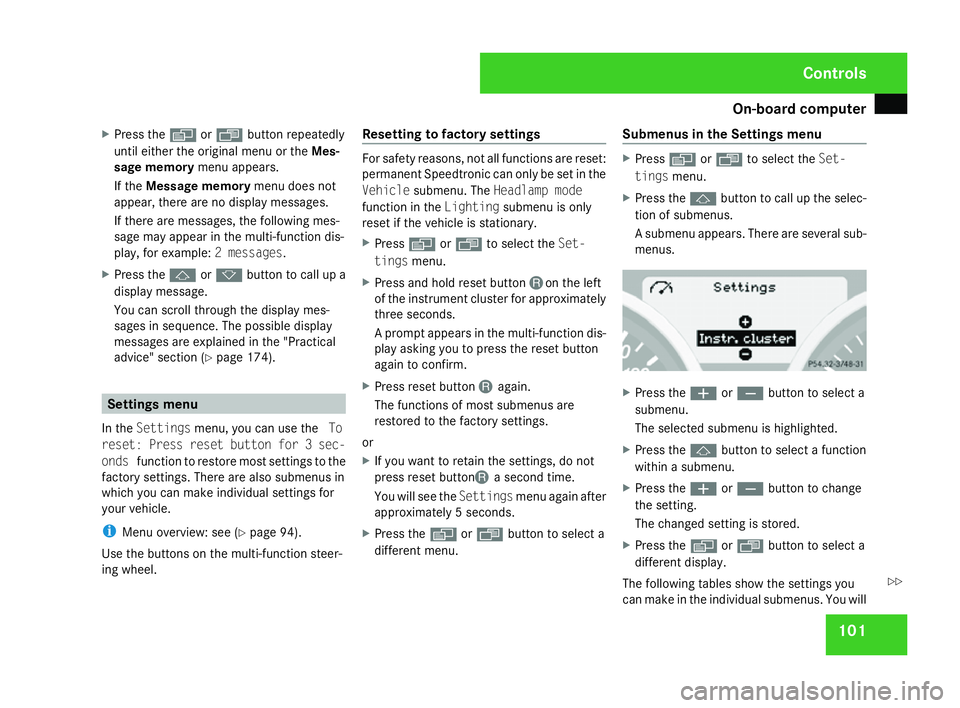
A submenu appears. There are several sub-
menus. X
Press the æorç button to select a
submenu.
The selected submenu is highlighted.
X Press the jbutton to select a function
within a submenu.
X Press the æorç button to chang e
the setting .
The changed setting is stored.
X Press the èorÿ button to select a
different display.
The following tables show the settings you
can make in the individual submenus. You will Controls
171_AKB; 3; 4, en-GB
vpfaff7,
2007-11-13T10:50:25+01:00 - Seite 101 Z
Page 105 of 273
On-board computer
102
find additional information on the pages
shown. Instrument cluster submenu
R
Unit of measurement for distance
(Y page 102 )
R Language (Y page 102 )
R Status line display (Y page 103 ) Time/date submen
u13 R
Time and date (Y page 103 ) Lighting submenu
R
Constant headlamp mode (Y page 104 )
R Surround lighting (Y page 104 )
R Exterior lighting delayed switch-off
(Y page 105 )
R Interior lighting delayed switch-off
(Y page 105 ) Vehicle submen
u R
Permanent Speedtronic (Y page 114 )
R Automatic locking feature (Y page 105 ) Convenience submenu*
R
Easy-entry/exit feature * (Y page 106 )
R Fold in the exterior mirrors when locking
the vehicle* (Y page 106 ) Selecting the unit of measurement for
distance
The selected unit of measurement for dis-
tance applies to:
R the analogue speedometer (only vehicles
with speedometers in km/h )
R the digital speedometer (not for vehicles
for the United Kingdom with speedometers
in mph )
R the total distance recorder and the tri p
meter
R the trip compute r R
cruise control
R Speedtroni c
Vehicles for the United Kingdom: the ana-
logue speedometer and the digital speedom-
eter always show different units.
X Press the èor· button to select the
Settings menu.
X Press the jbutton to call up the selec-
tion of submenus.
X Press the æorç button to select the
Instr. cluste rsubmenu.
X Press the jbutton to select Display
unit Speed-/odometer.
X Press æorç to select km(kilome-
tres) or milesas the unit of measurement
for distance.
X Press the j,è orÿ button to
select a different display.
Selecting the language X
Press the èor· button to select the
Settings menu.
X Press the jbutton to call up the selec-
tion of submenus.
13 This function is not available on vehicles with Audio 50 APS*, Audio 55 APS* or COMAND APS*. Controls
* optional
171_AKB; 3; 4, en-GB
vpfaff7,
2007-11-13T10:50:25+01:00 - Seite 102
Page 106 of 273
On-board computer
103
X
Press the æorç button to select the
Instr. cluste rsubmenu.
X Press the jbutton to select Lan-
guage.
X Press the æorç button to select a
language:
R Deutsch
R Englis h
R Français
R Italiano
R Españo l
R Nederlands
R Dans k
R Svenska
R Português
R Türkçe
X Press the j,è orÿ button to
select a different display.
Selecting the status line displa yVehicles for the United Kingdom: this func-
tion is not available. X
Press the èor· button to select the
Settings menu.
X Press the jbutton to call up the selec-
tion of submenus.
X Press the æorç button to select the
Instr. cluste rsubmenu.
X Press jto select the Select dis-
play option.
X Press æorç to select the display in
the status bar: outside temperature (Out-
side temp.) or speed (Speed).
The selected display now appears continu-
ously in the multi-function display. You will
see the display you have not selected when
you scroll through the Standard display
menu (Y page 95).
X Press the j,è orÿ button to
select a different display.
Setting the date and tim e Your vehicle could have the following audio
equipment*:
A:
Audio 20* or Audio 25*
B: Audio 50 APS* or Audio 55 APS *
C: COMAND APS* X
You can see which audio system* is fitted
in your vehicle by referring to the separat e
operating instructions.
Depending on the audio system* fitted, time
and date are received from GPS satellites and
therefore cannot be set using the on-board
computer; see the following table. A B C
Set using on-board compute
r X
Automatic GPS satellite recep-
tio
n X X
X
Press the èor· button to select the
Settings menu.
X Press the jbutton to call up the selec-
tion of submenus.
X Press the æorç button to select the
Time/Date submenu. Controls
* optional
171_AKB; 3; 4, en-GB
vpfaff7,
2007-11-13T10:50:25+01:00 - Seite 103
Page 107 of 273
On-board computer
104
Setting the tim
e
X Use the jbutton to select Clock,
hours Press R to confir m(or Clock ,
minutes Press R to confirm).
X Press the æorç button to set a
value.
X Press the reset button Jon the left of the
instrument cluster.
The set time is stored.
Setting the date
X Press the jbutton to select Set date
Day (orSet date Month orSet date
Year).
X Press the æorç button to set the
values.
X Press the j,è orÿ button to
select a different display.
Setting constant headlamp mode If you have selected constant headlamp mode
and the light switch is set to the
Mor
U position, the side lamps, dipped-beam
headlamps and licence plate lighting switc h
on automatically when the engine is running. Turning the light switch to a different position
switches on the corresponding lights.
In countries in which constant headlamp
mode is a legal requirement,
Constantis the
factory setting.
X Press the èor· button to select the
Settings menu.
X Press the jbutton to call up the selec-
tion of submenus.
X Press the æorç button to select the
Lighting submenu.
X Press the jbutton to select Headlamp
mode.
X Press the æorç button to set the
switch-on mode for the headlamps to Man-
ual orConstant (constant headlamp
mode).
X Press the j,è orÿ button to
select a different display. Switching the surround lighting on or
off If the surround lighting is switched on, the
following lights will be switched on automat-
ically in the dark after you have unlocked the
vehicle using the key:
R the side lamps
R the tail lamps
R the licence plate lighting
R the front foglamps
The surround lighting switches off automati-
cally if you open the driver's door or after 40
seconds.
X Press the èor· button to select the
Settings menu.
X Press the jbutton to call up the selec-
tion of submenus.
X Press the æorç button to select the
Lighting submenu.
X Press the jbutton to select the Sur-
round lighting function. Cont
rols
171_AKB; 3; 4, en-GB
vpfaff7,
2007-11-13T10:50:25+01:00 - Seite 104
Page 108 of 273
On-board computer
105
X
Press the æorç button to switc h
the Surround lighting function on or
off .
X Press the j,è orÿ button to
select a different display.
Activating or deactivating the exterior
lighting delayed switch-off You can set whether the exterior lightin
g
should remain on when it is dark for 15 sec-
onds after the doors are closed using the
Headlamp switch-off delay function. If
none of the doors are opened after the engine
is switched off or if an open door is not closed,
the exterior lighting goes out after 60 sec-
onds.
When you have set a delayed switch-off time
and then switch off the engine, the following
remain lit:
R the side lamps
R the tail lamps
R the licence plate lighting
R the front foglamps X
Press the èor· button to select the
Settings menu.
X Press the jbutton to call up the selec-
tion of submenus.
X Press the æorç button to select the
Lighting submenu.
X Press the jbutton to select Headlamps
delayed switch-off.
X Press the æorç button to activate
or deactivate the Headlamps delaye d
switch-off function.
X Press the j,è orÿ button to
select a different display.
To temporarily deactivate the delayed switch-
off:
X Before leaving the vehicle, turn the key to
position 0in the ignition lock .
X Turn the key to position 2in the ignition
lock and back to position 0.
Delayed switch-off is deactivated .
When you switch on the ignition, the interior
lighting delayed switch-off is reactivated. Activating or deactivating the interior
lighting delayed switch-off The
Interior lighting delayed switch-
off function allows you to set whether the
interior lighting should remain on for 10 sec-
onds after the key is removed from the igni-
tion lock when it is dark.
X Press the èor· button to select the
Settings menu.
X Press the jbutton to call up the selec-
tion of submenus.
X Press the æorç button to select the
Lighting submenu.
X Press the jbutton to select Interior
lighting delayed switch-off.
X Press the æorç button to activate
or deactivate Interior lighting
delayed switch-off.
X Press the j,è orÿ button to
select a different display.
Activating/deactivating the automatic
door locking feature The
Automatic door lockin gfeature
allows you to set whether your vehicle wil l Cont
rols
171_AKB; 3; 4, en-GB
vpfaff7,
2007-11-13T10:50:25+01:00 - Seite 105 Z
Page 109 of 273

On-board computer
106
lock centrally from a speed of about
15 km/h upwards.
i
For more information on automatic lock-
ing, see (Y page 57).
X Press the èor· button to select the
Settings menu.
X Press the jbutton to call up the selec-
tion of submenus.
X Press the æorç button to select the
Vehicl esubmenu.
X Press the jbutton to select Automatic
door lockin g.
X Press the æorç button to switc h
the Automatic door lockin gfeature on
or off.
X Press the j,è orÿ button to
select a different display.
Activating or deactivating the easy-
entry/exit feature* i
For more information on the easy-entry/
exit feature, see (Y page 65). G
Risk of injury
When the easy-entry/exit feature is active,
the steering wheel moves. There is a risk of
occupants becoming trapped. Before acti -
vating the easy-entry/exit feature, make
sure that nobody can become trapped.
Do not leave children unsupervised in the
vehicle, even if they are secured in a child
restraint system. The children could open
the driver's door and thereby unintention-
ally activate the easy-entry/exit feature
and become trapped.
X Press the èor· button to select the
Settings menu.
X Press the jbutton to call up the selec-
tion of submenus.
X Press æorç to select the Conve-
nience submenu.
X Press the jbutton to select the EASY-
ENTRY system .
X Press the æorç button to activate
or deactivate the EASY-ENTRY system .
X Press the j,è orÿ button to
select a different display. Activating or deactivating the fold-in
mirrors when locking* function The
Fold in mirrors when lockin gfunc-
tion allows you to determine whether the
exterior mirrors should fold in when you lock
the vehicle. When you open a door or switch
on the ignition, the exterior mirrors fold out
again.
If you have switched the function on and you
fold in the exterior mirrors using the button
on the centre console (Y page 66), they will
not fold out automatically. The exterior mir-
rors can then only be folded out using the
button on the centre console.
X Press the èor· button to select the
Settings menu.
X Press the jbutton to call up the selec-
tion of submenus.
X Press the æorç button to select the
Convenience submenu.
X Press the jbutton to select Fold in
mirrors when lockin g. Cont
rols
* optional
171_AKB; 3; 4, en-GB
vpfaff7,
2007-11-13T10:50:25+01:00 - Seite 106
Page 110 of 273
On-board computer
107
X
Press the æorç button to activate
or deactivate the Fold in mirrors when
lockin gfeature.
X Press the j,è orÿ button to
select a different display. Trip computer menu
You can use the Trip computermenu to call
up or reset statistical data for your vehicle.
i You can select kmormile sas the unit of
measurement for distance (Y page 102).
i Menu overview: see (Y page 94).
Use the buttons on the multi-function steer -
ing wheel.
X Press èor· to select After
start.
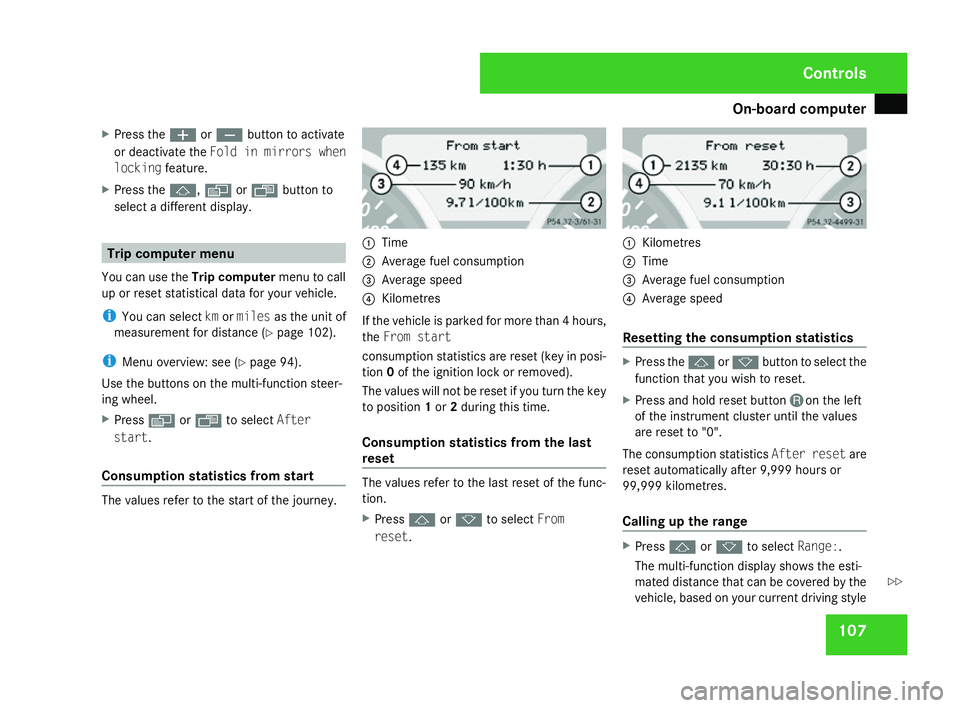
Consumption statistics from star tThe values refer to the start of the journey. 1
Time
2 Average fuel consumption
3 Average spee d
4 Kilometres
If the vehicle is parked for more than 4 hours,
the From start
consumption statistics are reset (key in posi-
tion 0of the ignition lock or removed).
The values will not be reset if you turn the key
to position 1or 2during this time.
Consumption statistics from the last
reset The values refer to the last reset of the func
-
tion.
X Press jork to select From
reset. 1
Kilometres
2 Time
3 Average fuel consumption
4 Average spee d
Resetting the consumption statistic s X
Press the jork button to select the
function that you wish to reset .
X Press and hold reset button Jon the left
of the instrument cluster until the values
are reset to "0".
The consumption statistics After resetare
reset automatically after 9,999 hours or
99,999 kilometres.
Calling up the range X
Press jork to select Range:.
The multi-function display shows the esti-
mated distance that can be covered by the
vehicle, based on your current driving style Controls
171_AKB; 3; 4, en-GB
vpfaff7,
2007-11-13T10:50:25+01:00 - Seite 107 Z