MITSUBISHI COLT 2008 Owner's Manual (in English)
Manufacturer: MITSUBISHI, Model Year: 2008, Model line: COLT, Model: MITSUBISHI COLT 2008Pages: 450, PDF Size: 14.57 MB
Page 251 of 450
For pleasant driving5-35
5
NOTE●If the TUNE/SEEK button (3 or 4) is pressed for more
than 1 second, the radio will try to find out another broad-
cast of the same program t ype as currently selected.
● If no station is found with your desired PTY, the display
will show “EMPTY” for about 5 seconds and the radio
will return to the previous station.
How to enter PTYs in the memoryE00721400034
As many as 6 PTYs can be entered in the memory.
Follow the steps described below.
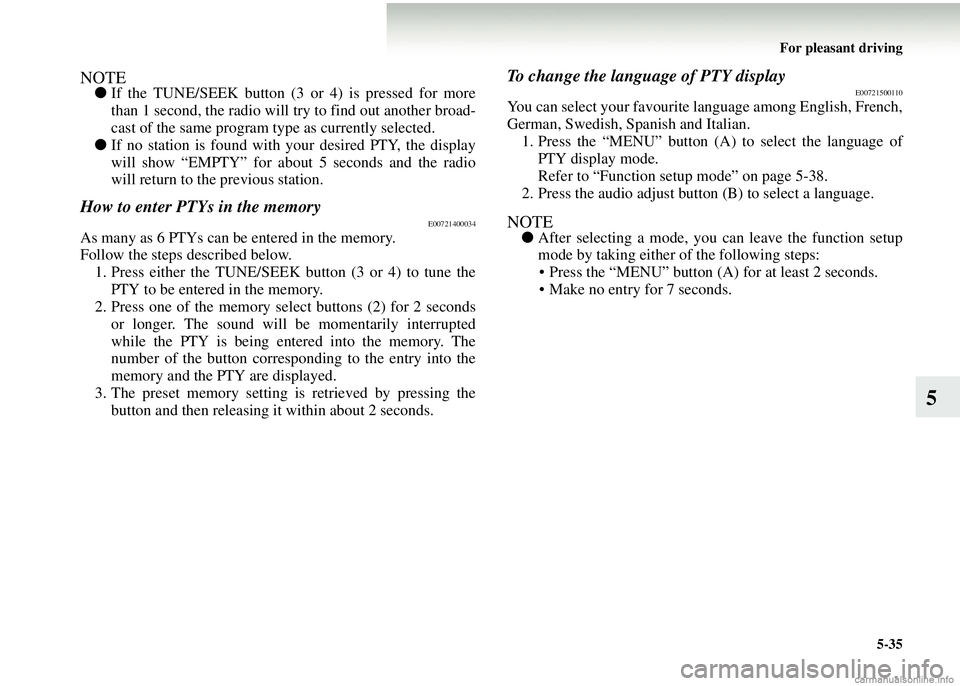
1. Press either the TUNE/SEEK button (3 or 4) to tune the PTY to be entered in the memory.
2. Press one of the memory select buttons (2) for 2 seconds
or longer. The sound will be momentarily interrupted
while the PTY is being entered into the memory. The
number of the button corresponding to the entry into the
memory and the PTY are displayed.
3. The preset memory setting is retrieved by pressing the button and then releasing it within about 2 seconds.
To change the language of PTY displayE00721500110
You can select your favourite language among English, French,
German, Swedish, Spanish and Italian.
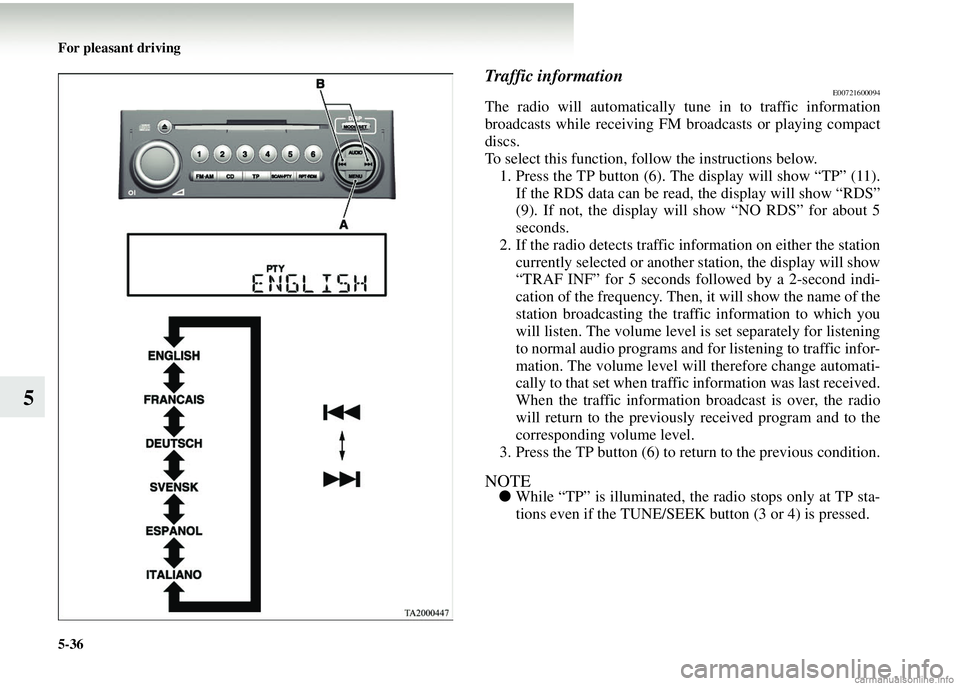
1. Press the “MENU” button (A ) to select the language of
PTY display mode.
Refer to “Function setup mode” on page 5-38.
2. Press the audio adjust button (B) to select a language.
NOTE● After selecting a mode, you can leave the function setup
mode by taking either of the following steps:
• Press the “MENU” button (A ) for at least 2 seconds.
• Make no entry for 7 seconds.
Page 252 of 450
5-36 For pleasant driving
5
Traffic informationE00721600094
The radio will automatically tune in to traffic information
broadcasts while receiving FM broadcasts or playing compact
discs.
To select this function, follow the instructions below.1. Press the TP button (6). The display will show “TP” (11).
If the RDS data can be read, the display will show “RDS”
(9). If not, the display will show “NO RDS” for about 5
seconds.
2. If the radio detects traffic info rmation on either the station
currently selected or another station, the display will show
“TRAF INF” for 5 seconds followed by a 2-second indi-
cation of the frequency. Then, it will show the name of the
station broadcasting the traffic information to which you
will listen. The volume level is set separately for listening
to normal audio programs and for listening to traffic infor-
mation. The volume level will therefore change automati-
cally to that set when traffi c information was last received.
When the traffic information broadcast is over, the radio
will return to the previously received program and to the
corresponding volume level.
3. Press the TP button (6) to return to the previous condition.
NOTE● While “TP” is illuminated, the radio stops only at TP sta-
tions even if the TUNE/SEEK button (3 or 4) is pressed.
Page 253 of 450
For pleasant driving5-37
5
TP (Traffic information Program) search functionE00721800038
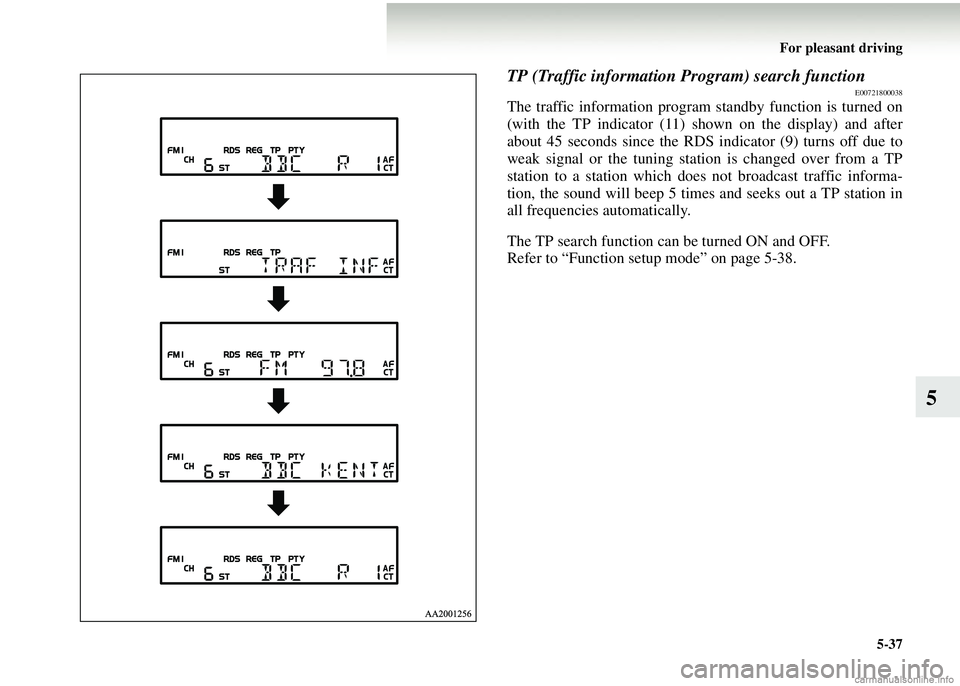
The traffic information program standby function is turned on
(with the TP indicator (11) shown on the display) and after
about 45 seconds since the RDS indicator (9) turns off due to
weak signal or the tuning station is changed over from a TP
station to a station which does not broadcast traffic informa-
tion, the sound will beep 5 times and seeks out a TP station in
all frequencies automatically.
The TP search function can be turned ON and OFF.
Refer to “Function setup mode” on page 5-38.
Page 254 of 450
5-38 For pleasant driving
5
Emergency broadcastsE00721700109
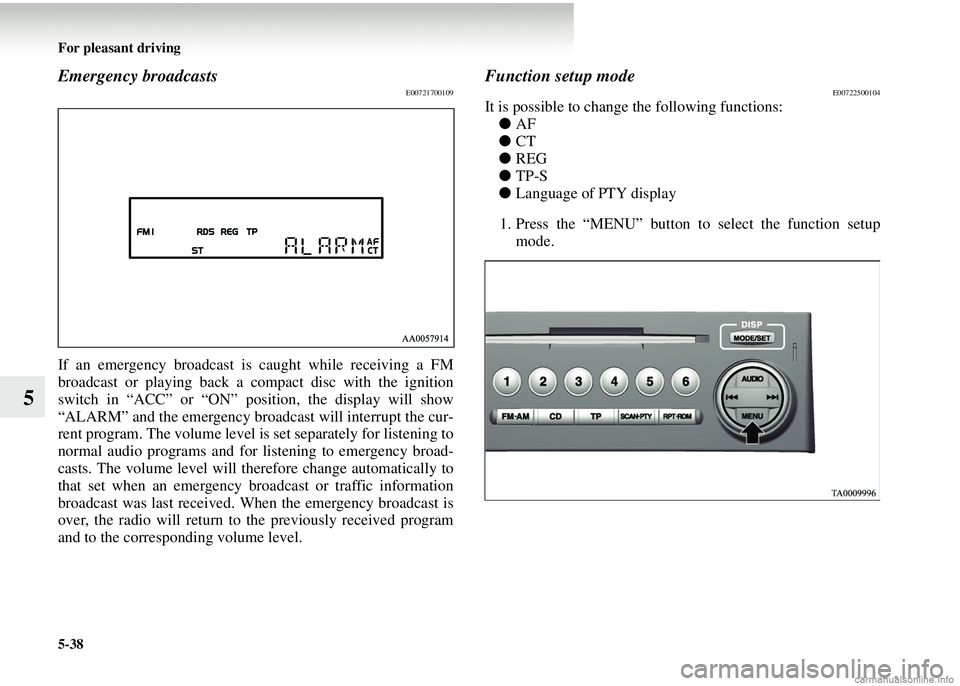
If an emergency broadcast is caught while receiving a FM
broadcast or playing back a compact disc with the ignition
switch in “ACC” or “ON” position, the display will show
“ALARM” and the emergency broadcast will interrupt the cur-
rent program. The volume level is set separately for listening to
normal audio programs and for listening to emergency broad-
casts. The volume level will ther efore change automatically to
that set when an emergency br oadcast or traffic information
broadcast was last received. Wh en the emergency broadcast is
over, the radio will return to the previously received program
and to the corresponding volume level.
Function setup modeE00722500104
It is possible to change the following functions: ● AF
● CT
● REG
● TP-S
● Language of PTY display
1. Press the “MENU” button to select the function setup
mode.
Page 255 of 450
For pleasant driving5-39
5
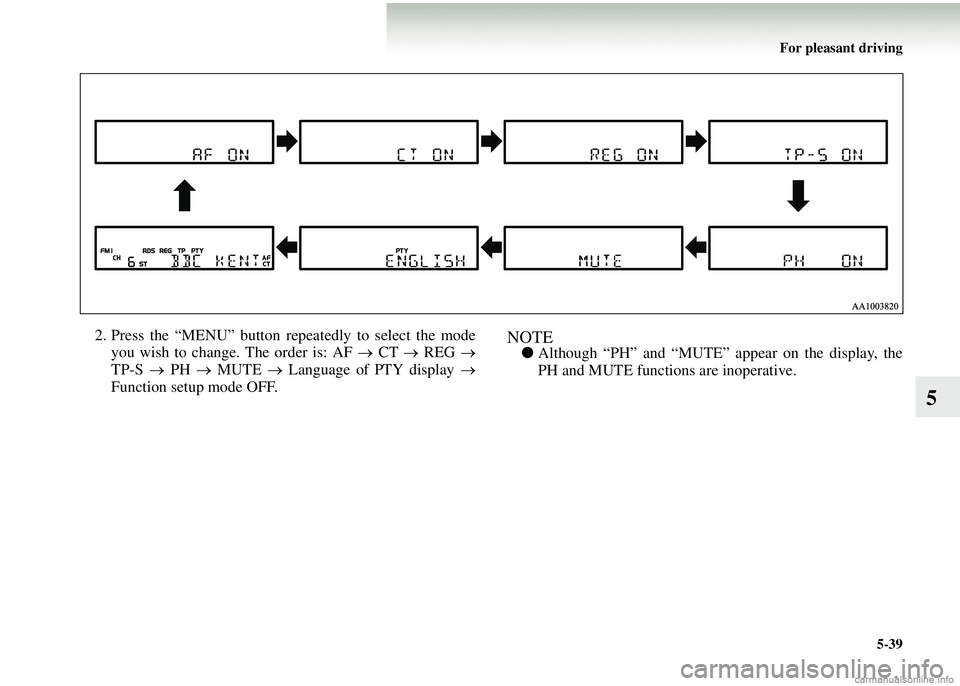
2. Press the “MENU” button repeatedly to select the modeyou wish to change. The order is: AF → CT → REG →
TP-S → PH → MUTE → Language of PTY display →
Function setup mode OFF.NOTE● Although “PH” and “MUTE” appear on the display, the
PH and MUTE functi ons are inoperative.
Page 256 of 450
5-40 For pleasant driving
5
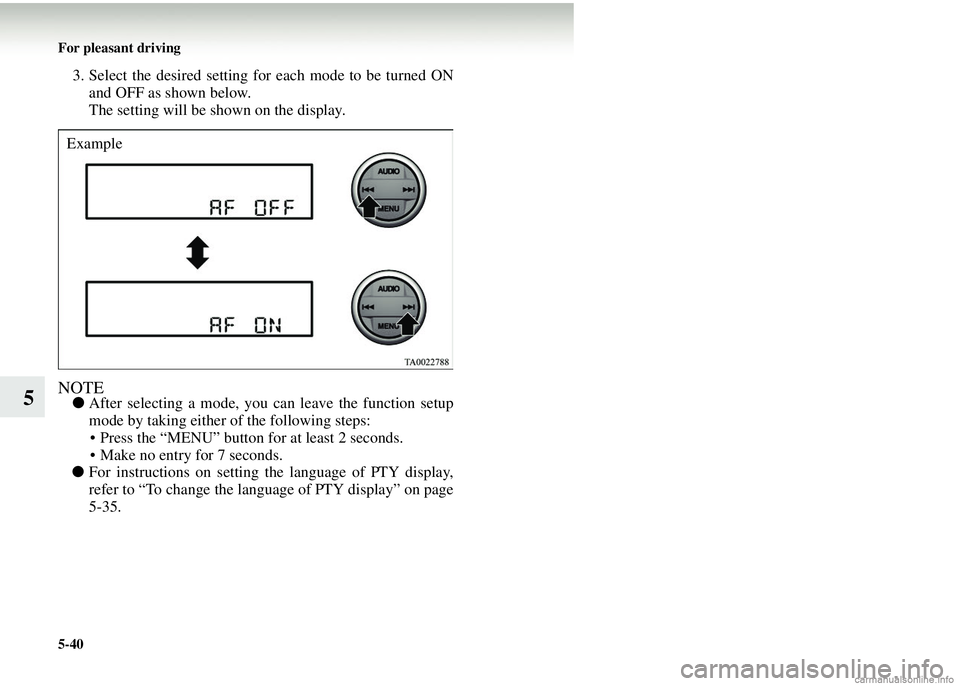
3. Select the desired setting for each mode to be turned ONand OFF as shown below.
The setting will be shown on the display.
NOTE● After selecting a mode, you can leave the function setup
mode by taking either of the following steps:
• Press the “MENU” button for at least 2 seconds.
• Make no entry for 7 seconds.
● For instructions on setting the language of PTY display,
refer to “To change the language of PTY display” on page
5-35.
Example
Page 257 of 450
For pleasant driving5-41
5
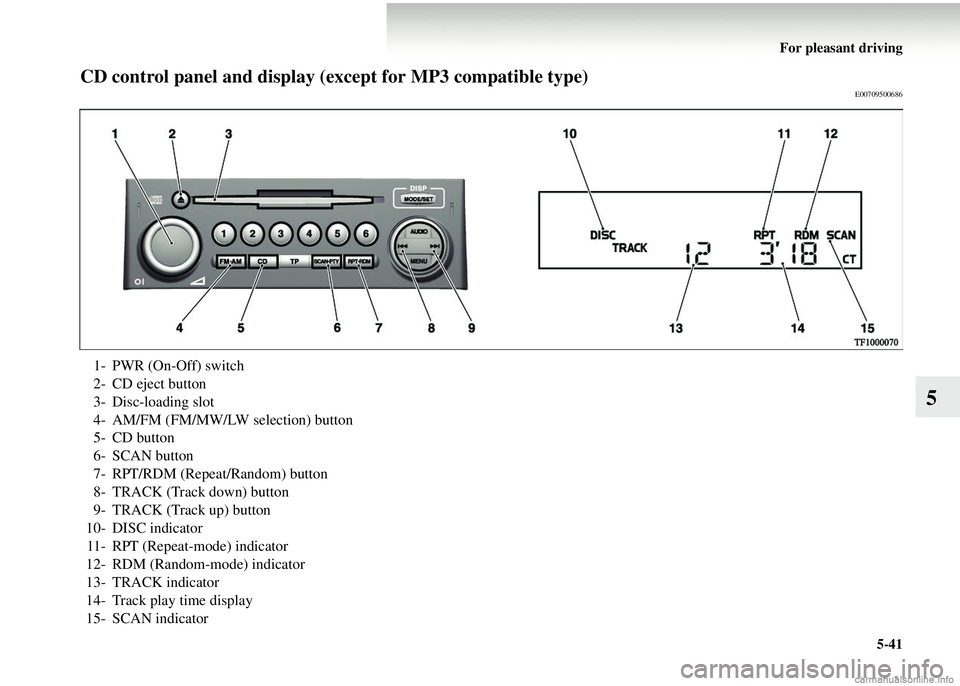
CD control panel and display (except for MP3 compatible type)E00709500686
1- PWR (On-Off) switch
2- CD eject button
3- Disc-loading slot
4- AM/FM (FM/MW/LW selection) button
5- CD button
6- SCAN button
7- RPT/RDM (Repeat/Random) button
8- TRACK (Track down) button
9- TRACK (Track up) button
10- DISC indicator 11- RPT (Repeat-mode) indicator
12- RDM (Random-mode) indicator
13- TRACK indicator
14- Track play time display
15- SCAN indicator
Page 258 of 450
5-42 For pleasant driving
5
To listen to a CDE00709601017
With a CD player1. Insert the disc with the label facing up.
When a disc is inserted, the DISC indicator (10) will come
on and the CD player will be gin playing even if the radio
is being used. The CD player will also start playback
when the CD button (5) is pressed with a disc in the player
even if the radio is being used.
2. To adjust the volume and tone, refer to “To adjust the vol- ume” on page 5-27 and “To adjust the tone” on page 5-27.
3. When an 8 cm compact disc is used, the adapter is not
needed for playback. Insert th e disc in the centre of the
disc-loading slot.
NOTE● For information concerning the handling of compact
discs, refer to “Handling of compact discs” on page 5-56.
To fast forward/reverse the disc
To fast forward or reverse, use either the TRACK button
(8 or 9).
Fast forward
You can fast forward by holding down the TRACK button (9)
for more than 1 second.
Fast reverse
You can fast reverse by holding down the TRACK button (8)
for more than 1 second.
To select a desired track
You can select by using the TRACK button (8 or 9).
Track up
Press the TRACK butt on (9) until the desired track is reached.
The TRACK indicator (13) will display the number of the
selected track.
Track down
Press the TRACK butt on (8) until the desired track is reached.
The TRACK indicator (13) will display the number of the
selected track.
NOTE● Pressing the TRACK button (8) once during the song will
cause the CD to restart playing from the beginning of the
song.
Page 259 of 450
For pleasant driving5-43
5
To repeat the same track or change the order of tracks
for playback
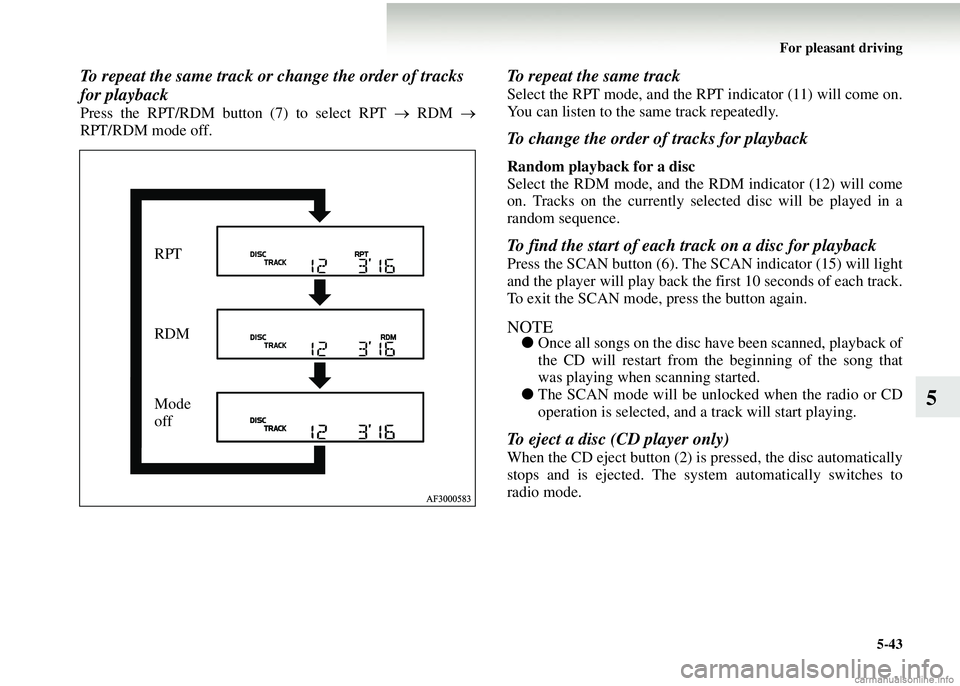
Press the RPT/RDM button (7) to select RPT → RDM →
RPT/RDM mode off.
To repeat the same track
Select the RPT mode, and the RPT indicator (11) will come on.
You can listen to the same track repeatedly.
To change the order of tracks for playback
Random playback for a disc
Select the RDM mode, and the RDM indicator (12) will come
on. Tracks on the currently select ed disc will be played in a
random sequence.
To find the start of each track on a disc for playback
Press the SCAN button (6). The SCAN indicator (15) will light
and the player will play back the first 10 seconds of each track.
To exit the SCAN mode, press the button again.
NOTE● Once all songs on the disc have been scanned, playback of
the CD will restart from the beginning of the song that
was playing when scanning started.
● The SCAN mode will be unlocked when the radio or CD
operation is selected, and a track will start playing.
To eject a disc (CD player only)
When the CD eject button (2) is pressed, the disc automatically
stops and is ejected. The syst em automatically switches to
radio mode.
RPT
RDM
Mode
off
Page 260 of 450
5-44 For pleasant driving
5
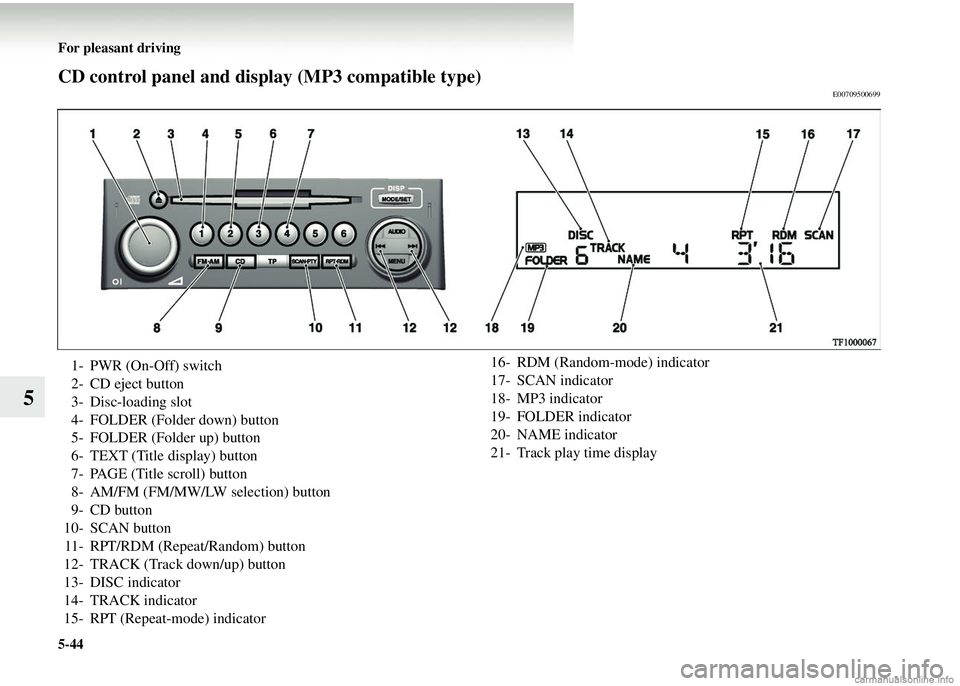
CD control panel and display (MP3 compatible type)E00709500699
1- PWR (On-Off) switch
2- CD eject button
3- Disc-loading slot
4- FOLDER (Folder down) button
5- FOLDER (Folder up) button
6- TEXT (Title display) button
7- PAGE (Title scroll) button
8- AM/FM (FM/MW/LW selection) button
9- CD button
10- SCAN button 11- RPT/RDM (Repeat/Random) button
12- TRACK (Track down/up) button
13- DISC indicator
14- TRACK indicator
15- RPT (Repeat-mode) indicator 16- RDM (Random-mode) indicator
17- SCAN indicator
18- MP3 indicator
19- FOLDER indicator
20- NAME indicator
21- Track play time display