auto stop MITSUBISHI ECLIPSE CROSS 2018 (in English) Service Manual
[x] Cancel search | Manufacturer: MITSUBISHI, Model Year: 2018, Model line: ECLIPSE CROSS, Model: MITSUBISHI ECLIPSE CROSS 2018Pages: 417, PDF Size: 74.06 MB
Page 288 of 417
HomeLink® Wireless Control System (if so equipped)
Features and controls 5-209
5
Accessories can be operated in all ignition switch positions or all operation modes.
N00554301066
HomeLink
® Wireless Control System is a
registered trademark of Gentex Corporation. HomeLink
® provides a convenient way to
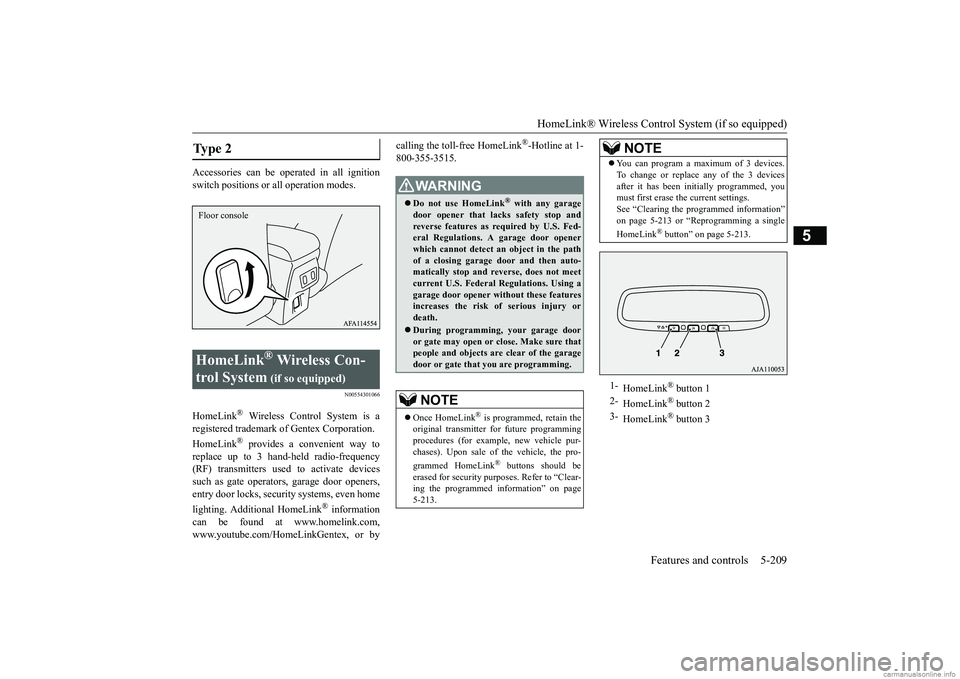
replace up to 3 hand-held radio-frequency (RF) transmitters used to activate devices such as gate operators, garage door openers,entry door locks, security systems, even home lighting. Additional HomeLink
® information
can be found at www.homelink.com,www.youtube.com/HomeLinkGentex, or by
calling the toll-free HomeLink
®-Hotline at 1-
800-355-3515.
Type 2 HomeLink
® Wireless Con-
trol System
(if so equipped)
Floor console
WA R N I N G Do not use HomeLink
® with any garage
door opener that lacks safety stop and reverse features as required by U.S. Fed-eral Regulations. A garage door opener which cannot detect an object in the path of a closing garage door and then auto-matically stop and reverse, does not meet current U.S. Federal Regulations. Using a garage door opener without these featuresincreases the risk of serious injury or death. During programming, your garage door or gate may open or close. Make sure that people and objects ar
e clear of the garage
door or gate that you are programming.NOTE
Once HomeLink
® is programmed, retain the
original transmitter for future programming procedures (for example, new vehicle pur- chases). Upon sale of the vehicle, the pro- grammed HomeLink
® buttons should be
erased for security purposes. Refer to “Clear-ing the programmed information” on page 5-213.
You can program a maximum of 3 devices. To change or replace any of the 3 devices after it has been initially programmed, you must first erase the current settings. See “Clearing the programmed information”on page 5-213 or “Reprogramming a single HomeLink
® button” on page 5-213.
1-
HomeLink
® button 1
2-
HomeLink
® button 2
3-
HomeLink
® button 3
NOTE
BK0252700US.book
209 ページ 2017年10月4日 水曜日 午後4時54分
Page 296 of 417
Storage spaces
Features and controls 5-217
5
N00595400027
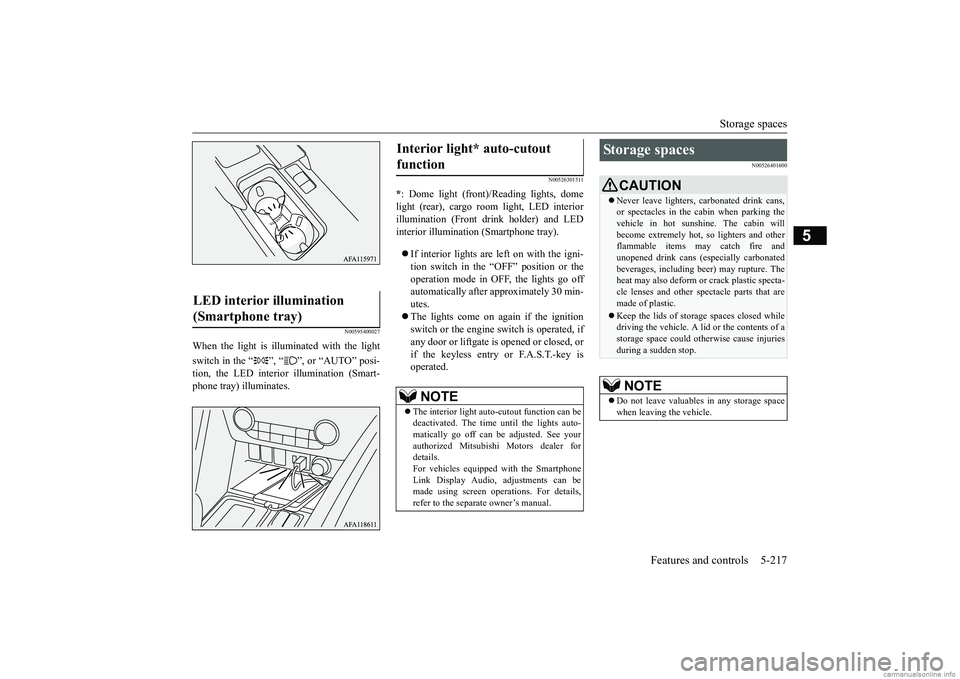
When the light is illuminated with the light switch in the “ ”, “ ”, or “AUTO” posi- tion, the LED interior illumination (Smart- phone tray) illuminates.
N00526301511
* : Dome light (front)/Reading lights, dome light (rear), cargo room light, LED interior illumination (Front drink holder) and LED interior illumination (Smartphone tray). If interior lights are left on with the igni- tion switch in the “OFF” position or theoperation mode in OFF, the lights go off automatically after approximately 30 min- utes. The lights come on again if the ignition switch or the engine switch is operated, if any door or liftgate is opened or closed, orif the keyless entry or F.A.S.T.-key is operated.
N00526401600
LED interior illumination (Smartphone tray)
Interior light* auto-cutout function
NOTE
The interior light auto-cutout function can be deactivated. The time until the lights auto-matically go off can be adjusted. See your authorized Mitsubishi Motors dealer for details. For vehicles equipped with the Smartphone Link Display Audio, adjustments can bemade using screen operations. For details, refer to the separate owner’s manual.
Storage spaces
CAUTION Never leave lighters, carbonated drink cans, or spectacles in the cabin when parking the vehicle in hot sunshine. The cabin will become extremely hot, so lighters and otherflammable items may catch fire and unopened drink cans (especially carbonated beverages, including beer) may rupture. Theheat may also deform or crack plastic specta- cle lenses and other spectacle parts that are made of plastic. Keep the lids of storage spaces closed while driving the vehicle. A lid or the contents of astorage space could otherwise cause injuries during a sudden stop.NOTE
Do not leave valuables in any storage space when leaving the vehicle.
BK0252700US.book
217 ページ 2017年10月4日 水曜日 午後4時54分
Page 305 of 417
Driving precaution 6-2 Driving safety
6
N00629301119
Your vehicle has been designed for both nor- mal and occasional off-road use. However,avoid driving the vehicle through areas where the tires may get stuck in deep sand or mud as your vehicle is designed primarily for use onpavement, unlike a conventional off-road vehicle. Keep in mind that 2-wh
eel drive vehicles are
less capable than 4-wheel drive vehicles for driving on muddy, slippery, wet or snow-cov- ered roads. Utility vehicles have higher ground clearance and a narrower track, which enables them to perform in a wide variety of off-road situa- tions. Because of the higher ground clear-ance, these vehicles have a higher center of gravity, which makes them handle differently than ordinary vehicles when driving on pave-ment. They are not designed to maneuver or corner at the same speed on pavement as con- ventional 2-wheel drive passenger cars anymore than low-slung sports cars are designed
to perform satisfactorily in off-road condi- tions. Always drive safely and steer the vehicle carefully. Avoid operating the vehicle in amanner that might require sharp turns or abrupt maneuvers. As with other vehicles of this type, failure to operate this vehicle cor-rectly can result in loss of control or vehicle rollover. In a rollover crash, an unbelted person is sig-nificantly more likely to die than a personwearing a seat belt. Before starting the vehi- cle, always make certain that you and all your passengers are properly wearing their seatbelts (with children in the rear seat, in appro- priate restraints).
N00628801218
Fuel economy is dependent on many factors.Your personal driving habits can have a sig- nificant effect on your fuel consumption.Several recommendations for achieving the greatest fuel economy are listed below. Whenever accelerating from a stop, always accelerate slowly and smoothly. When parked for even a short period, do not idle the engine. Shut it off. Plan your trips to avoid unnecessary stops.
Keep your tires inflated to the recom- mended pressures. When driving a 4-wheel drive vehicle on highways or dry improved roads, set thedrive mode to “AUTO”. For freeway driving, maintain a speed of approximately 50 mph (80 km/h) whentraffic, roadway and weather conditions safely permit. Keep your air cleaner filter clean and your vehicle lubricated according to the recom-mendations in this manual. Always keep your vehicle well main- tained. A poorly maintained enginewastes fuel and costs money. Never overload your vehicle.
N00628900049
Drunk driving is one of the most frequent causes of accidents. Your driving ability can be seriously impairedeven with blood alcohol levels far below the legal minimum. If you have been drinking, don’t drive. Ride with a designated non-drinking driver, call a cab or a friend, or use public transportation. Drinking coffee or tak- ing a cold shower will not make you sober.Similarly, prescription and nonprescription drugs affect your alertness, perception and reaction time. Consult with your doctor or
Driving precaution
WA R N I N G Utility vehicles have
a significantly higher
rollover rate than other types of vehicles. Avoid abrupt maneuvers and excessive speed. Always buckle up.
Fuel economy
Driving, alcohol and drugs
BK0252700US.bo
ok 2 ページ 2017年10月4日 水曜日 午後4時54分
Page 314 of 417
Trailer towing
Driving safety 6-11
6
N00629801374
Towing a trailer will adversely affect your vehicle’s handling, performance, braking, durability and driving economy (fuel con-sumption, etc.). If you do tow a trailer with this vehicle, be sure to use proper equipment and cautioussteering and braking for safe driving.
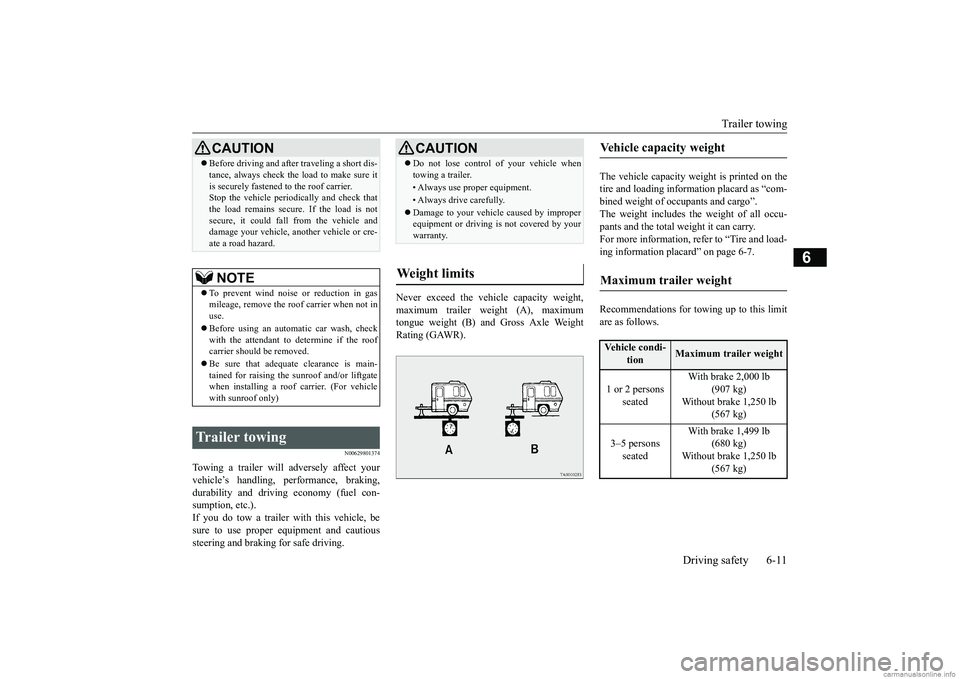
Never exceed the vehicle capacity weight, maximum trailer weight (A), maximum tongue weight (B) and Gross Axle Weight Rating (GAWR).
The vehicle capacity weight is printed on the tire and loading information placard as “com-bined weight of occupants and cargo”. The weight includes the weight of all occu- pants and the total weight it can carry.For more information, refer to “Tire and load- ing information placard” on page 6-7. Recommendations for towing up to this limit are as follows.
Before driving and after traveling a short dis- tance, always check the load to make sure it is securely fastened to the roof carrier. Stop the vehicle periodically and check that the load remains secure. If the load is notsecure, it could fall from the vehicle and damage your vehicle, another vehicle or cre- ate a road hazard.NOTE
To prevent wind noise or reduction in gas mileage, remove the roof carrier when not in use. Before using an automatic car wash, check with the attendant to determine if the roof carrier should be removed. Be sure that adequate clearance is main- tained for raising the sunroof and/or liftgatewhen installing a roof carrier. (For vehicle with sunroof only)
Trailer towing
CAUTION
CAUTION Do not lose control of your vehicle when towing a trailer.• Always use proper equipment.• Always drive carefully. Damage to your vehicle caused by improper equipment or driving is not covered by your warranty.
Weight limits
Vehicle capacity weight Maximum trailer weight Vehicle condi-
tion
Maximum trailer weight
1 or 2 persons
seated
With brake 2,000 lb
(907 kg)
Without brake 1,250 lb
(567 kg)
3–5 persons
seated
With brake 1,499 lb
(680 kg)
Without brake 1,250 lb
(567 kg)
BK0252700US.bo
ok 11 ページ 2017年10月4日 水曜日 午後4時54分
Page 317 of 417
Trailer towing 6-14 Driving safety
6
yourself with the feel
of handling and braking
with the added weight of the trailer. Always keep in mind that the vehicle you are driving is now a good deal longer and not nearly asresponsive as your vehicle is without a trailer. Before you start, check the trailer hitch, safety chains, tires and mirror adjustment. Be sure your vehicle’s tires are inflated to the cold inflation pressure listed in the manual.You’ll find these numbers on the tire and loading information placard at the sill of the driver’s door.Refer to “Tire inflation pressures” on page 9-15. Stay at least twice as far behind the vehicle ahead as you would when driving your vehi-cle without a trailer. This can help you avoid situations that require heavy braking and sud- den turns.
You’ll need more passing distance up ahead when you’re towing a trailer. And, becauseyou’re a good deal longer, you’ll need to go much farther beyond the passed vehicle before you can return to your lane. Hold the bottom of the steering wheel with one hand. Then, to move the trailer to the left, just move that hand to the left. To move thetrailer to the right, move your hand to the right. Always back up slowly and, if possible, have someone guide you. When you’re turning with a trailer, make wider than normal turns to help prevent thetrailer from striking shoulders, curbs, road signs, trees or other objects.
Avoid jerky or sudden maneuvers. Signal well in advance. Towing a trailer puts additional burden on the engine and transaxle, which may cause over- heating. Following are some suggestions to reduce overheating: When towing at high altitudes, engine coolant and automatic transaxle fluid will overheat at a lower temperature than at normal altitudes.If you turn your engine off immediately after towing at high altitude on steep uphill grades, your vehicle may show signs similar to over-heating. To avoid this, let the engine run while parked (preferably on level ground)
Vehicle preparation Tire Following distance
Passing Backing up Making turns
CAUTION Making sharp turns while towing a trailer could cause the trailer to come in contact with the vehicle. Your vehicle could be dam- aged. Avoid making sharp turns while tow-ing a trailer.
Overheating
Cause of over-
heating
Solution
Air conditioning on Turn off Highway speeds Reduce speed Going up hills
Select lower gear posi- tion
Stop-and-go city traffic
With the vehicle stopped, shift to the “N” (NEUTRAL) position and idle the engine at high idle.
BK0252700US.bo
ok 14 ページ 2017年10月4日 水曜日 午後4時54分
Page 318 of 417
Trailer towing
Driving safety 6-15
6
with the automatic transaxle in the “P” (PARK) position for a few minutes before turning the engine off. If the engine coolant temperature indica- tor flashes on the information screen in the multi-information display or the engine power drops suddenly, refer to “Engine overheating” on page 8-4. If the warning display or warning display illuminates, refer to “Warning dis- play” on page 5-63.
Reduce speed and downshift before you start down a long or steep
downgrade. If you don’t
downshift, prolonged or frequent applicationof the brakes can cause reduced braking effi- ciency and performance. You can tow in “D” (DRIVE) position. How- ever, you may want to shift the selector leverto the 3rd or a lower position, under heavy loads or hilly conditions. Always place chocks or blocks under both the vehicle and trailer wheels when parking. Be sure that the parking brake is firmly set and
that the selector lever is in the “P” (PARK) position. Avoid parking on a hill with a trailer, but if it cannot be avoided, do so only after performing the following: 1. Apply the brakes and keep them applied. 2. Have someone place chocks or blocks under both the vehicle and trailer wheels. 3. When the chocks or blocks are in place,release your brakes slowly until the chocks or blocks absorb the load. 4. Apply the parking brake firmly.5. Set the selector lever to the “P” (PARK)position and turn off the engine.
When restarting out after parking on a hill: 1. Check that the selector lever is set to the “P” (PARK) position. 2. Start the engine. Be sure to keep the brakepedal depressed. 3. Set the selector lever to the “D” (DRIVE) position or “R” (REVERSE) position.4. Release the parking brake and brake pedal and slowly pull or
back away from the
chocks or blocks. Stop and apply yourbrakes. 5. Have someone retrieve the chocks or blocks.
Driving on hills Parking
BK0252700US.bo
ok 15 ページ 2017年10月4日 水曜日 午後4時54分
Page 327 of 417
Automatic air conditioning (if so equipped) 7-8 Comfort controls
7
N00737001451
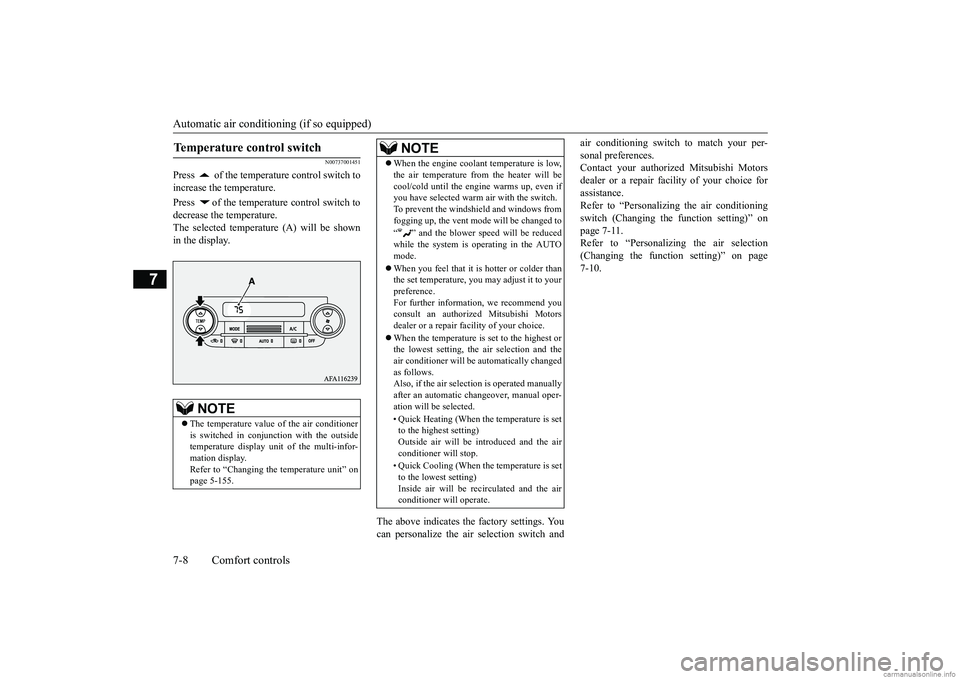
Press of the temperature control switch to increase the temperature. Press of the temperature control switch to decrease the temperature.The selected temperature (A) will be shown in the display.
The above indicates the factory settings. You can personalize the air selection switch and
air conditioning switch to match your per- sonal preferences. Contact your authorized Mitsubishi Motors dealer or a repair facility of your choice forassistance. Refer to “Personalizing the air conditioning switch (Changing the function setting)” onpage 7-11. Refer to “Personalizing the air selection (Changing the function setting)” on page7-10.
Temperature control switch
NOTE
The temperature value of the air conditioner is switched in conjunction with the outside temperature display unit of the multi-infor-mation display. Refer to “Changing the temperature unit” on page 5-155.
When the engine coolant temperature is low, the air temperature from the heater will be cool/cold until the engine warms up, even if you have selected warm
air with the switch.
To prevent the windshield and windows fromfogging up, the vent mode will be changed to “ ” and the blower speed will be reduced while the system is operating in the AUTOmode. When you feel that it is hotter or colder than the set temperature, you may adjust it to your preference. For further information, we recommend youconsult an authorized Mitsubishi Motors dealer or a repair facility of your choice. When the temperature is set to the highest or the lowest setting, the air selection and the air conditioner will be automatically changedas follows. Also, if the air selection is operated manually after an automatic changeover, manual oper-ation will be selected. • Quick Heating (When the temperature is set to the highest setting) Outside air will be introduced and the air conditioner will stop. • Quick Cooling (When the temperature is set to the lowest setting) Inside air will be recirculated and the air conditioner will operate.NOTE
BK0252700US.bo
ok 8 ページ 2017年10月4日 水曜日 午後4時54分
Page 330 of 417
Automatic air conditioning (if so equipped)
Comfort controls 7-11
7
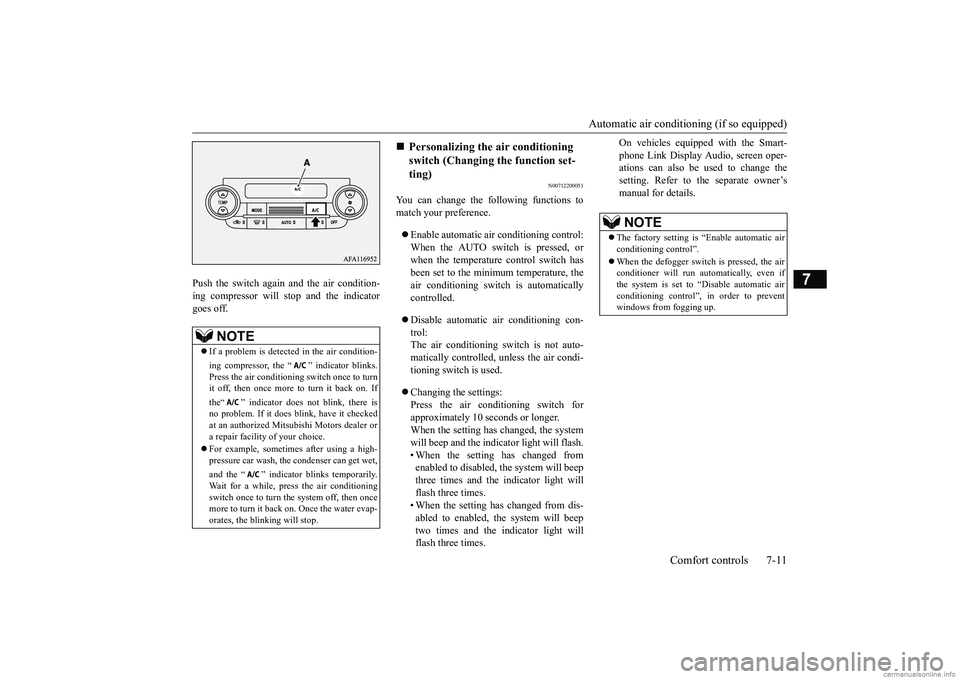
Push the switch again and the air condition- ing compressor will stop and the indicatorgoes off.
N00712200051
You can change the following functions to match your preference. Enable automatic air conditioning control: When the AUTO switch is pressed, orwhen the temperature control switch has been set to the minimum temperature, the air conditioning switch is automaticallycontrolled. Disable automatic air conditioning con- trol: The air conditioning switch is not auto- matically controlled, unless the air condi-tioning switch is used. Changing the settings: Press the air conditioning switch for approximately 10 seconds or longer.When the setting has changed, the system will beep and the indicator light will flash. • When the setting has changed fromenabled to disabled, the system will beep three times and the indicator light will flash three times.• When the setting has changed from dis- abled to enabled, the system will beep two times and the indicator light willflash three times.
On vehicles equipped with the Smart- phone Link Display Audio, screen oper- ations can also be used to change the setting. Refer to the separate owner’smanual for details.
NOTE
If a problem is detected in the air condition- ing compressor, the “ ” indicator blinks. Press the air conditioning switch once to turn it off, then once more to turn it back on. If the“ ” indicator does not blink, there is no problem. If it does blink, have it checkedat an authorized Mitsubishi Motors dealer or a repair facility of your choice. For example, sometimes after using a high- pressure car wash, the condenser can get wet, and the “ ” indicator blinks temporarily. Wait for a while, press the air conditioning switch once to turn the system off, then once more to turn it back on. Once the water evap- orates, the blinking will stop.
Personalizing the air conditioning switch (Changing the function set-ting)
NOTE
The factory setting is “Enable automatic air conditioning control”. When the defogger switch is pressed, the air conditioner will run automatically, even if the system is set to “Disable automatic airconditioning control”, in order to prevent windows from fogging up.
BK0252700US.bo
ok 11 ページ 2017年10月4日 水曜日 午後4時54分
Page 336 of 417
Dual-zone automatic climate control
air conditioning (if so equipped)
Comfort controls 7-17
7
N00737001464
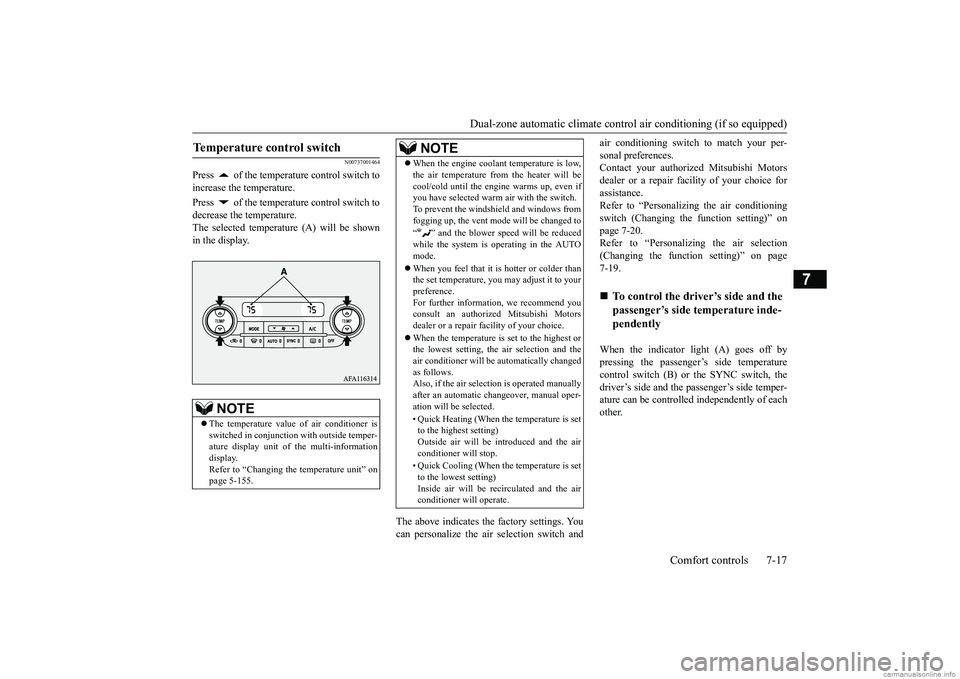
Press of the temperature control switch to increase the temperature. Press of the temperature control switch to decrease the temperature.The selected temperature (A) will be shown in the display.
The above indicates the factory settings. You can personalize the air selection switch and
air conditioning switch to match your per- sonal preferences. Contact your authorized Mitsubishi Motors dealer or a repair facility of your choice forassistance. Refer to “Personalizing the air conditioning switch (Changing the function setting)” onpage 7-20. Refer to “Personalizing the air selection (Changing the function setting)” on page7-19. When the indicator light (A) goes off by pressing the passenger’s side temperature control switch (B) or the SYNC switch, thedriver’s side and the passenger’s side temper- ature can be controlled independently of each other.
Temperature control switch
NOTE
The temperature value of air conditioner is switched in conjunction with outside temper- ature display unit of the multi-informationdisplay. Refer to “Changing the
temperature unit” on
page 5-155.
When the engine coolant temperature is low, the air temperature from the heater will be cool/cold until the engine warms up, even if you have selected warm air with the switch. To prevent the windshield and windows fromfogging up, the vent mode will be changed to “ ” and the blower speed will be reduced while the system is operating in the AUTOmode. When you feel that it is hotter or colder than the set temperature, you may adjust it to your preference. For further information, we recommend youconsult an authorized Mitsubishi Motors dealer or a repair facility of your choice. When the temperature is set to the highest or the lowest setting, the air selection and the air conditioner will be automatically changedas follows. Also, if the air selection is operated manually after an automatic changeover, manual oper-ation will be selected. • Quick Heating (When the temperature is set to the highest setting) Outside air will be introduced and the air conditioner will stop. • Quick Cooling (When the temperature is set to the lowest setting) Inside air will be recirculated and the air conditioner will operate.NOTE
To control the driver’s side and the passenger’s side temperature inde-pendently
BK0252700US.bo
ok 17 ページ 2017年10月4日 水曜日 午後4時54分
Page 339 of 417
Dual-zone automatic climate contro
l air conditioning (if so equipped)
7-20 Comfort controls
7
• When the setting has changed from enabled to disabled, the system will beep three times and the indicator light will flash three times.• When the setting has changed from dis- abled to enabled, the system will beep two times and the indicator light willflash three times. On vehicles equipped with the Smart- phone Link Display Audio, screen oper-ations can also be used to change thesetting. Refer to the separate owner’s manual for details.
N00737301483
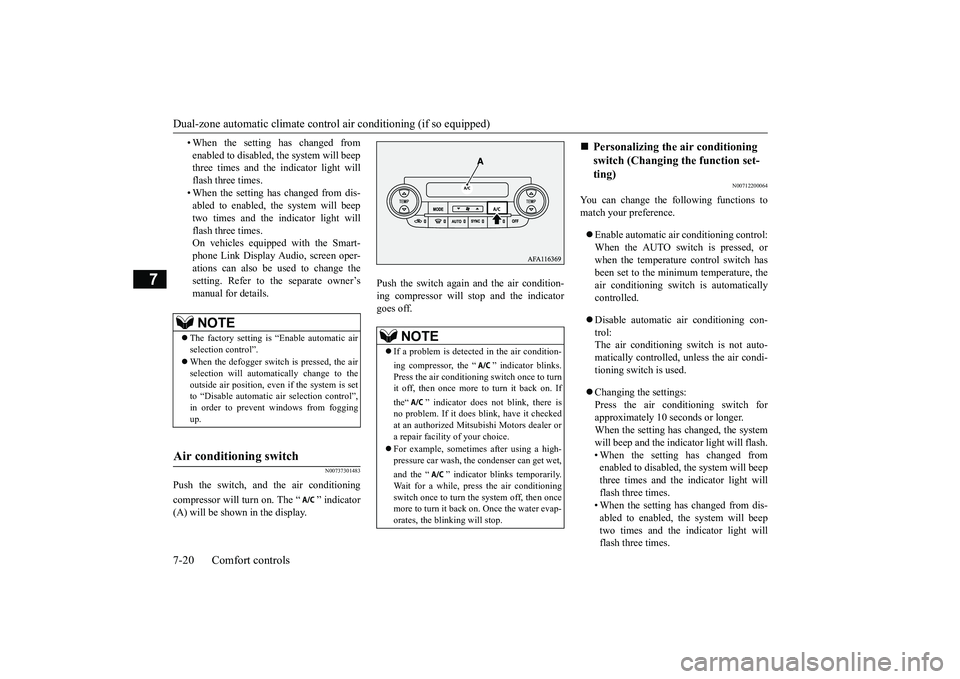
Push the switch, and the air conditioning compressor will turn on. The “ ” indicator (A) will be shown in the display.
Push the switch again and the air condition- ing compressor will stop and the indicatorgoes off.
N00712200064
You can change the following functions to match your preference. Enable automatic air conditioning control: When the AUTO switch is pressed, orwhen the temperature control switch has been set to the minimum temperature, the air conditioning switch is automaticallycontrolled. Disable automatic air conditioning con- trol: The air conditioning switch is not auto- matically controlled, unless the air condi-tioning switch is used. Changing the settings: Press the air conditioning switch for approximately 10 seconds or longer.When the setting has changed, the system will beep and the indicator light will flash. • When the setting has changed fromenabled to disabled, the system will beep three times and the indicator light will flash three times.• When the setting has changed from dis- abled to enabled, the system will beep two times and the indicator light willflash three times.
NOTE
The factory setting is “Enable automatic air selection control”. When the defogger switch is pressed, the air selection will automatically change to theoutside air position, even if the system is set to “Disable automatic air selection control”, in order to prevent windows from foggingup.
Air conditioning switch
NOTE
If a problem is detected in the air condition- ing compressor, the “ ” indicator blinks. Press the air conditioning switch once to turn it off, then once more to turn it back on. If the“ ” indicator does not blink, there is no problem. If it does blink, have it checkedat an authorized Mitsubishi Motors dealer or a repair facility of your choice. For example, sometimes after using a high- pressure car wash, the condenser can get wet, and the “ ” indicator blinks temporarily. Wait for a while, press the air conditioning switch once to turn the system off, then once more to turn it back on. Once the water evap- orates, the blinking will stop.
Personalizing the air conditioning switch (Changing the function set-ting)
BK0252700US.bo
ok 20 ページ 2017年10月4日 水曜日 午後4時54分