air suspension MITSUBISHI ENDEAVOR 2004 Service Repair Manual
[x] Cancel search | Manufacturer: MITSUBISHI, Model Year: 2004, Model line: ENDEAVOR, Model: MITSUBISHI ENDEAVOR 2004Pages: 3870, PDF Size: 98.47 MB
Page 1934 of 3870
the direction of the spline chamfered side. See Fig. 13
.
C. Using Bar (Snap-In Type) (MB990938) and Installer Adapter (MB990932),
press-fit the center bearing into the center bearing bracket. See Fig. 18
.
D. Apply the specified great (from the repair kit) to the rear surface of all dust
seals. Using Rear Suspension Bushing Base (MB990890), Bar (Snap-In type)
(MB990838), and Installer Adapter (MB990934), press the dust seals into the
center bearing bracket until they are flush with each other. See Fig. 19 . Apply
repair kit grease to the lip of each dust seal.
E. Using Inner Shaft Installer Base (MB991172), hold the center bearing inner
race, and then press-in the inner shaft. See Fig. 20
. Apply repair kit grease to
the inner shaft spline, then press-fit it into the PTJ case.
F. After applying the specified grease to the PTJ case, insert the axle shaft and
apply grease again.
G. Set the PTJ boot bands at the specified distance to adjust the amount of air
inside the PTJ joint, and then tighten the small and large PTJ boot bands. See
Fi
g. 12
. CAUTION: When applying grease, make sure that it does not
adhere to anything outside the lip.
NOTE: When press-fitting the inner shaft into the PTJ case,
apply a thin coat of repair kit grease to the dust seal
outer lip part and the outside edge of the PTJ axial part.
CAUTION: The axle shaft joint uses special grease. DO NOT
mix old, new, or different types of grease.
NOTE: The grease in the repair kit should be divided in half for
use, respectively, at the joint and inside the boot.
2004 Mitsubishi Endeavor LS
2004 DRIVE AXLES Axle Shafts - Front - Endeavor
Page 1939 of 3870
If the front suspension is faulty, the vehicle will not run straightforward or noise
will occur. Incorrect wheel alignment, malfunction of strut assembly, stabilizer bar,
coil spring, or worn or out-of-balance tires can cause these problems. FRONT SUSPENSION DIAGNOSIS TROUBLESHOOTING STRATEGY Use these steps to plan your diagnostic strategy. If you follow them carefully, you
will be sure that you have exhausted most of the possible ways to find a front
suspension fault.
1. Gather information from the customer.
2. Verify that the condition described by the customer exists.
3. Find and repair the malfunction by following the Symptom Chart and
Symptom Procedures.
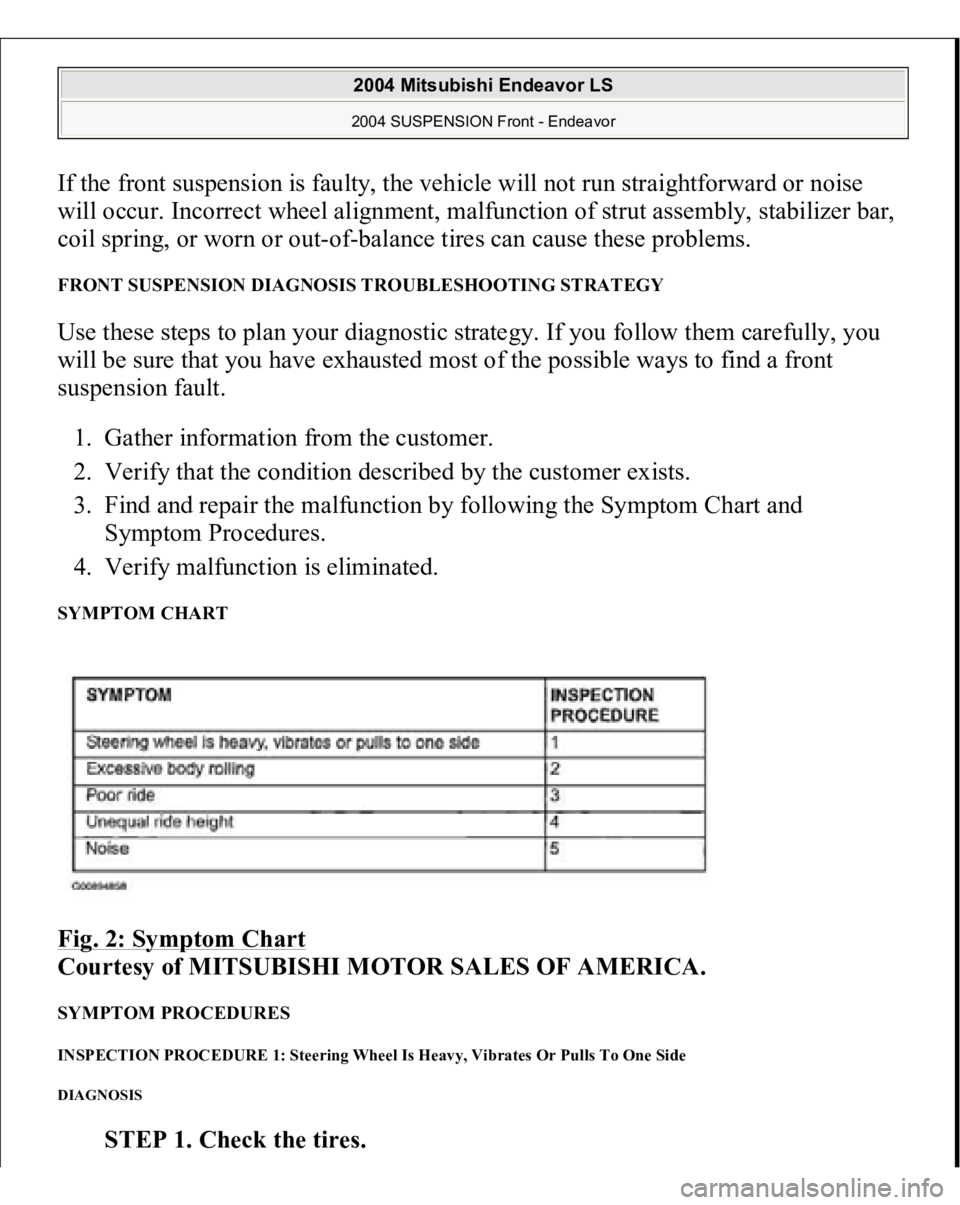
4. Verify malfunction is eliminated. SYMPTOM CHART Fig. 2: Symptom Chart
Courtesy of MITSUBISHI MOTOR SALES OF AMERICA.
SYMPTOM PROCEDURES INSPECTION PROCEDURE 1: Steering Wheel Is Heavy, Vibrates Or Pulls To One Side DIAGNOSIS
STEP 1. Check the tires.
2004 Mitsubishi Endeavor LS 2004 SUSPENSION Front - Endeavor
Page 1971 of 3870
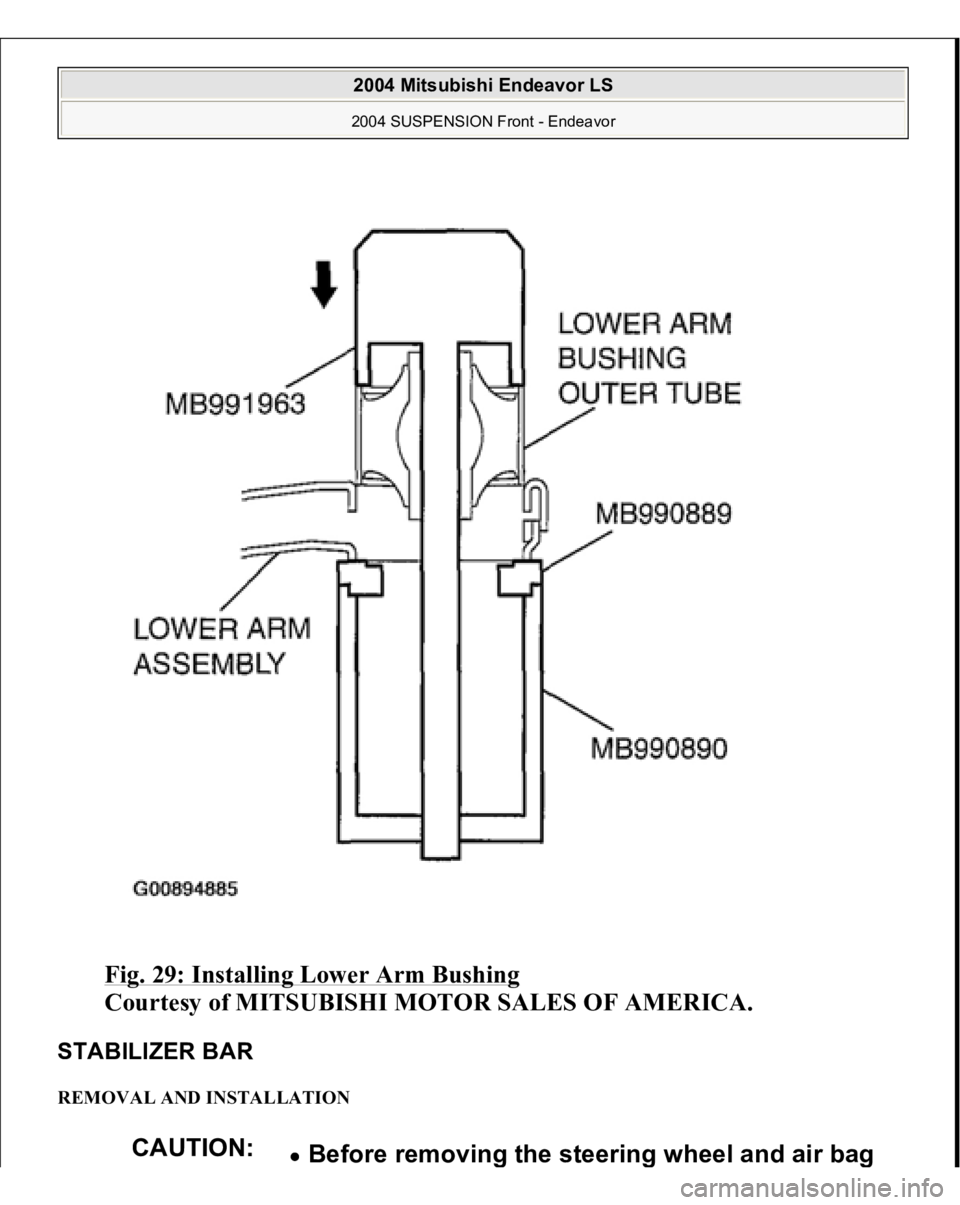
Fig. 29: Installing Lower Arm Bushing
Courtesy of MITSUBISHI MOTOR SALES OF AMERICA.
STABILIZER BAR REMOVAL AND INSTALLATION
CAUTION:
Before removin
g the steerin
g wheel and air ba
g
2004 Mitsubishi Endeavor LS 2004 SUSPENSION Front - Endeavor
Page 1972 of 3870
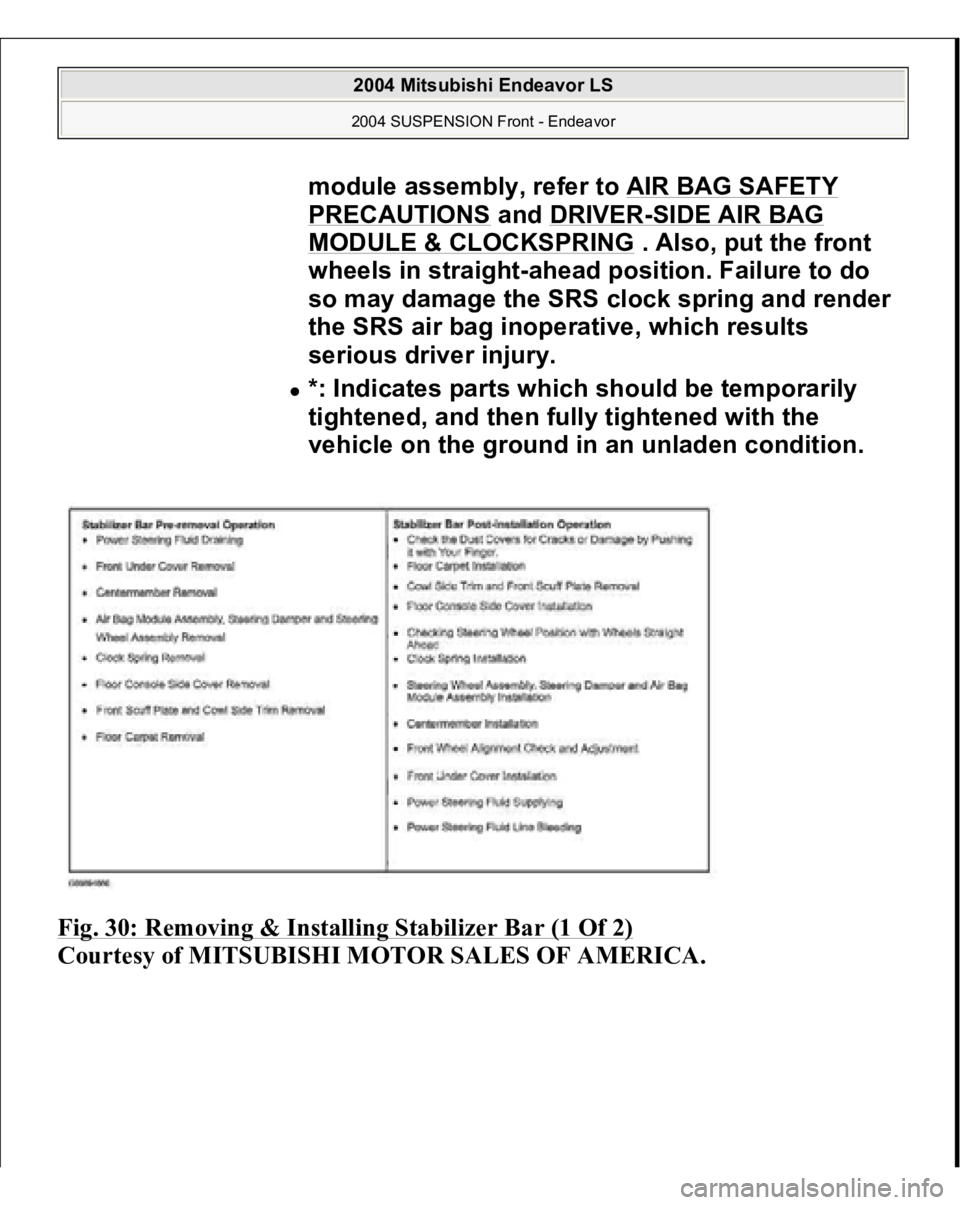
Fig. 30: Removing & Installing Stabilizer Bar (1 Of 2)
Courtes
y of MITSUBISHI MOTOR SALES OF AMERICA
.
module assembly, refer to AIR BAG SAFETY PRECAUTIONS
and DRIVER
-SIDE AIR BAG
MODULE & CLOCKSPRING
. Also, put the front
wheels in straight-ahead position. Failure to do
so may damage the SRS clock spring and render
the SRS air bag inoperative, which results
serious driver injury.
*: Indicates parts which should be temporarily
tightened, and then fully tightened with the
vehicle on the ground in an unladen condition.
2004 Mitsubishi Endeavor LS 2004 SUSPENSION Front - Endeavor
Page 2930 of 3870
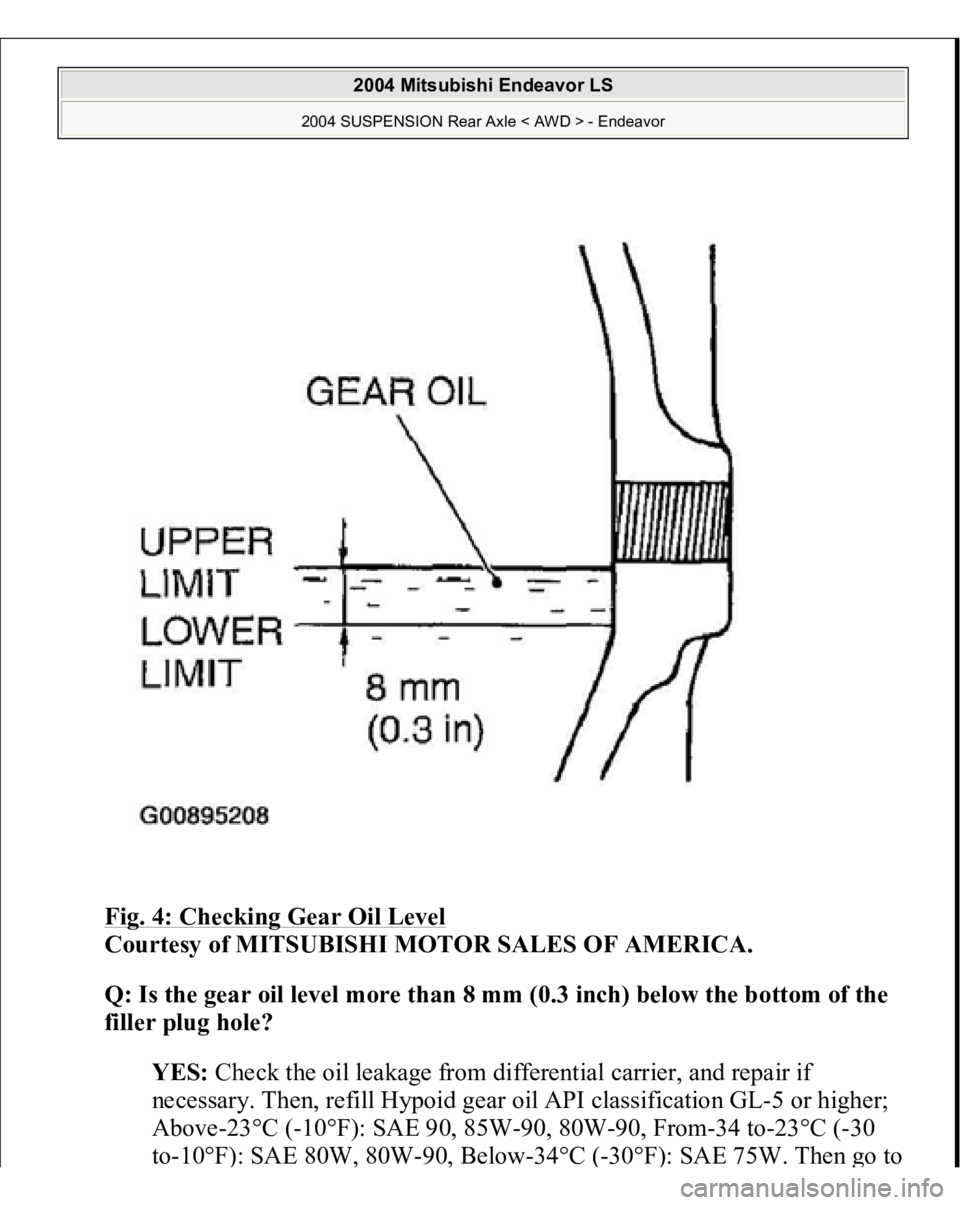
Fig. 4: Checking Gear Oil Level
Courtesy of MITSUBISHI MOTOR SALES OF AMERICA.
Q: Is the gear oil level more than 8 mm (0.3 inch) below the bottom of the
filler plug hole?
YES: Check the oil leakage from differential carrier, and repair if
necessary. Then, refill Hypoid gear oil API classification GL-5 or higher;
Above-23°C (-10°F): SAE 90, 85W-90, 80W-90, From-34 to-23°C (-30
to-10°F
): SAE 80W
, 80W-90
, Below-34°C
(-30°F
): SAE 75W. Then
go to
2004 Mitsubishi Endeavor LS
2004 SUSPENSION Rear Axle < AWD > - Endeavor
Page 2933 of 3870
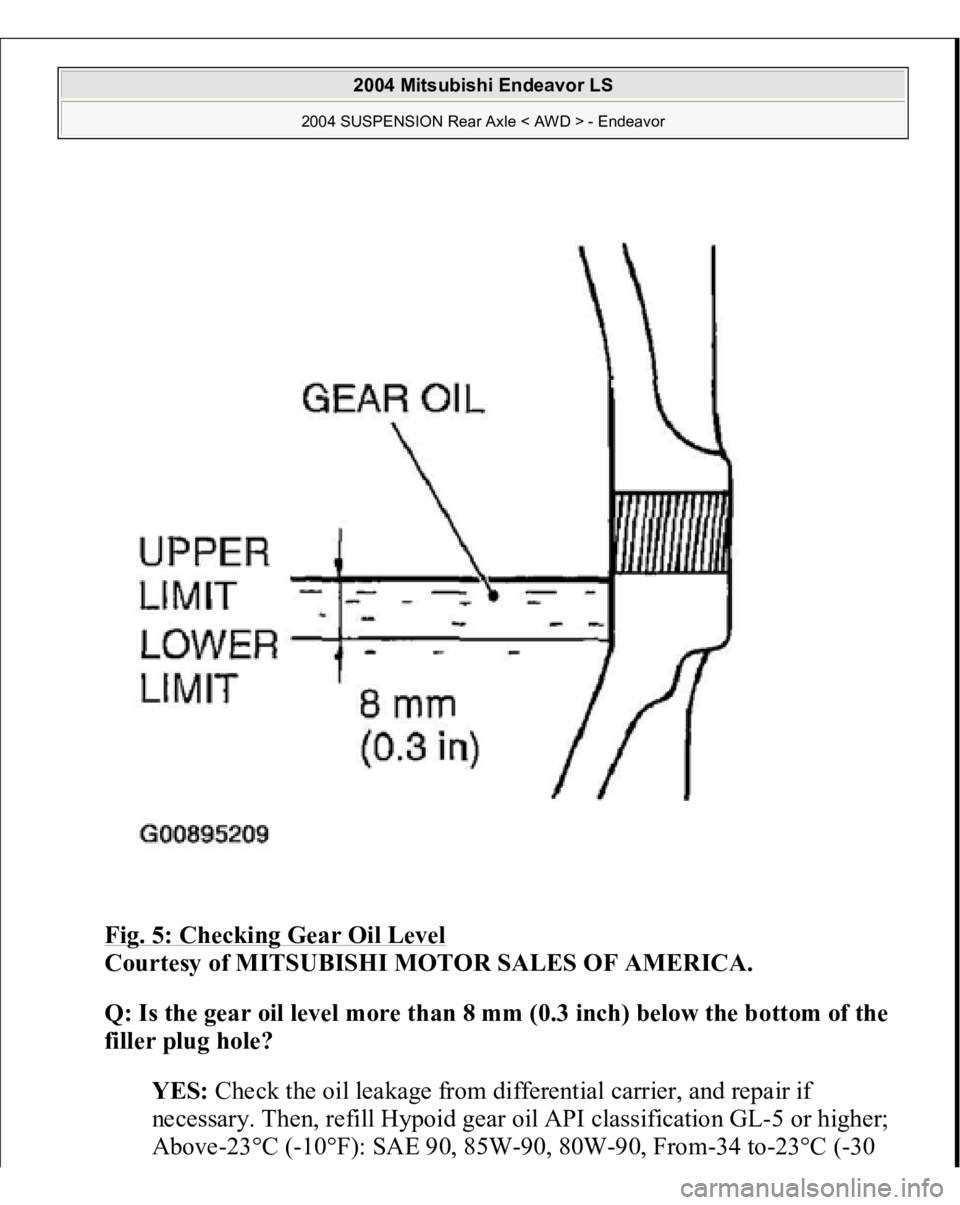
Fig. 5: Checking Gear Oil Level
Courtesy of MITSUBISHI MOTOR SALES OF AMERICA.
Q: Is the gear oil level more than 8 mm (0.3 inch) below the bottom of the
filler plug hole?
YES: Check the oil leakage from differential carrier, and repair if
necessary. Then, refill Hypoid gear oil API classification GL-5 or higher;
Above-23°C
(-10°F): SAE 90, 85W-90, 80W-90, Fro
m-34 to-23°C
(-30
2004 Mitsubishi Endeavor LS
2004 SUSPENSION Rear Axle < AWD > - Endeavor
Page 2937 of 3870
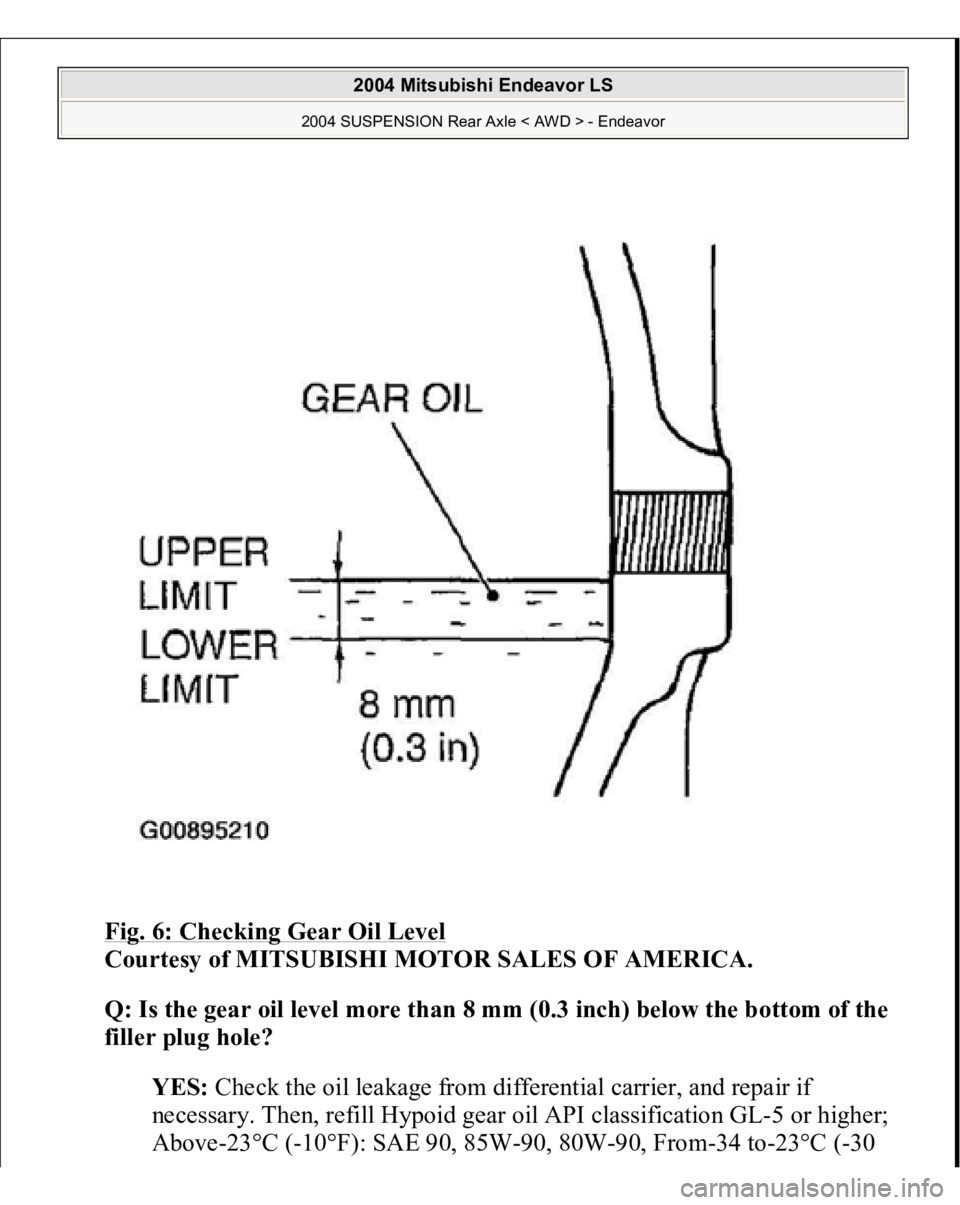
Fig. 6: Checking Gear Oil Level
Courtesy of MITSUBISHI MOTOR SALES OF AMERICA.
Q: Is the gear oil level more than 8 mm (0.3 inch) below the bottom of the
filler plug hole?
YES: Check the oil leakage from differential carrier, and repair if
necessary. Then, refill Hypoid gear oil API classification GL-5 or higher;
Above-23°C
(-10°F
): SAE 90, 85W-90, 80W-90, Fro
m-34 to-23°C
(-30
2004 Mitsubishi Endeavor LS
2004 SUSPENSION Rear Axle < AWD > - Endeavor
Page 2938 of 3870
to-10°F): SAE 80W, 80W-90, Below-34°C (-30°F): SAE 75W. Then go to
Step 3 .
NO: Go to Step 2.
STEP 2. Check for excessive gear backlash (Refer to DISASSEMBLY
).
Q: Is the gear backlash correct?
YES: Go to Step 3.
NO: Adjust the backlash. Then go to step 3.
STEP 3. Retest the system.
Q: Is the heat eliminated?
YES: The procedure is complete.
NO: Start over at Step 1.
INSPECTION PROCEDURE 8: OIL LEAKAGE {{DIFFERENTIAL}} DIAGNOSIS
STEP 1. Check the cover installation.
Q: Is the cover installed correctly?
YES: Go to Step 2.
NO: Repair. Then go to Step 4 .
STEP 2. Check the oil seal for wear or damage.
Q: Is the oil seal worn or damaged?
YES: Replace the seal. Then go to Step 4 .
NO: Go to Step 3.
STEP 3. Check the oil level.
Remove the filler
plug and check the
gear oil level.
2004 Mitsubishi Endeavor LS
2004 SUSPENSION Rear Axle < AWD > - Endeavor
Page 2974 of 3870
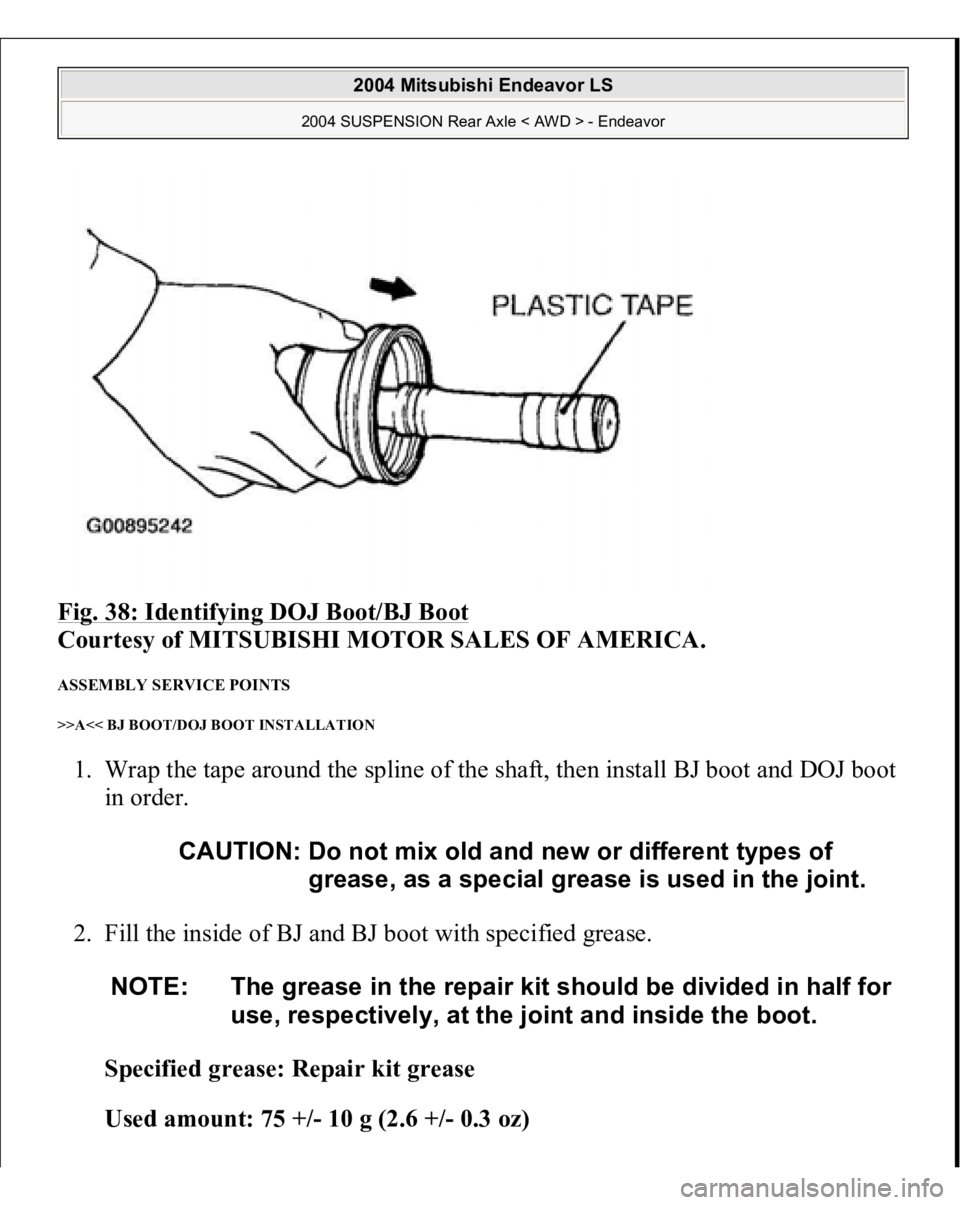
Fig. 38: Identifying DOJ Boot/BJ Boot
Courtesy of MITSUBISHI MOTOR SALES OF AMERICA.
ASSEMBLY SERVICE POINTS >>A<< BJ BOOT/DOJ BOOT INSTALLATION 1. Wrap the tape around the spline of the shaft, then install BJ boot and DOJ boot
in order.
2. Fill the inside of BJ and BJ boot with specified grease.
Specified grease: Repair kit grease
Used amount: 75 +/- 10 g (2.6 +/- 0.3 oz)
CAUTION: Do not mix old and new or different types of
grease, as a special grease is used in the joint.
NOTE: The grease in the repair kit should be divided in half for
use, respectively, at the joint and inside the boot.
2004 Mitsubishi Endeavor LS
2004 SUSPENSION Rear Axle < AWD > - Endeavor
Page 2975 of 3870
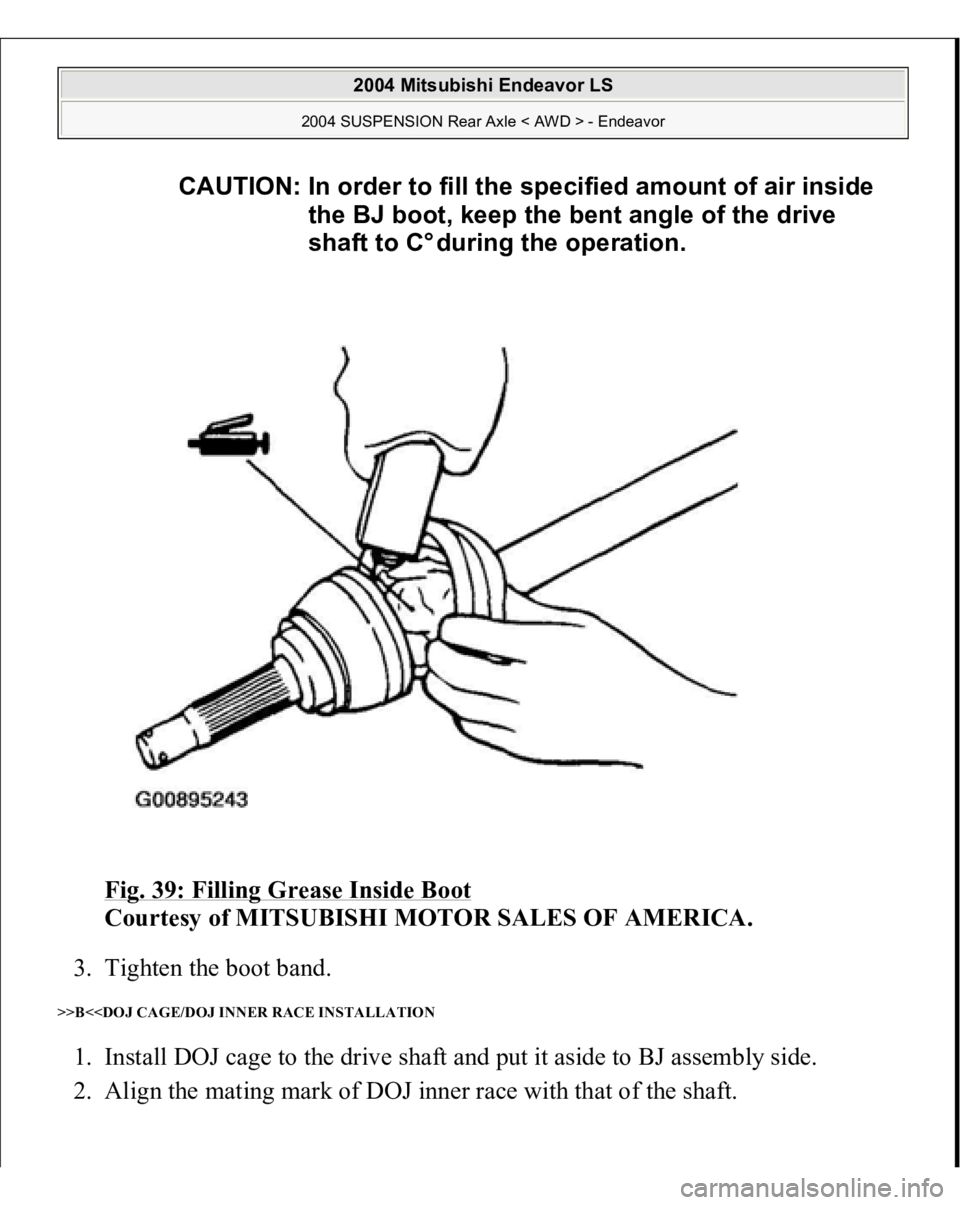
Fig. 39: Filling Grease Inside Boot
Courtesy of MITSUBISHI MOTOR SALES OF AMERICA.
3. Tighten the boot band.
>>B<
CAUTION: In order to fill the specified amount of air inside
the BJ boot, keep the bent angle of the drive
shaft to C° during the operation.
2004 Mitsubishi Endeavor LS
2004 SUSPENSION Rear Axle < AWD > - Endeavor