MITSUBISHI GRANDIS 2008 Owner's Manual (in English)
Manufacturer: MITSUBISHI, Model Year: 2008, Model line: GRANDIS, Model: MITSUBISHI GRANDIS 2008Pages: 458, PDF Size: 18.52 MB
Page 181 of 458
Starting and driving
4-9
4 Inside rear-view mirror
E00600800425
Adjust the rear-view mirror only after making any seat adjust-
ments so you have a clear view to the rear of the vehicle.
Adjust the rear-view mirror to maximize the view through the
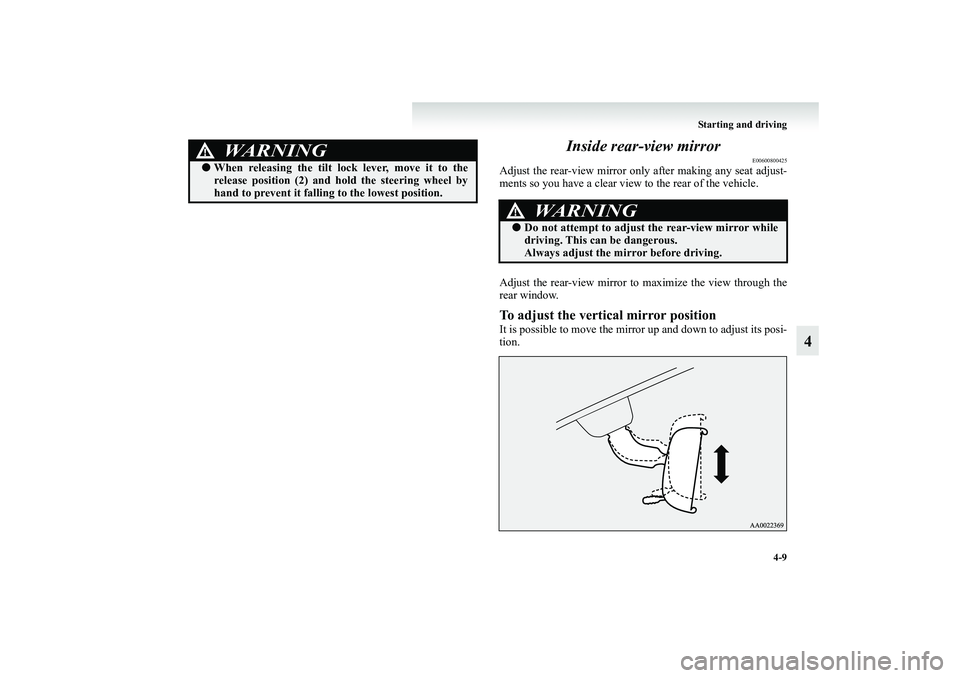
rear window.To adjust the vertical mirror positionIt is possible to move the mirror up and down to adjust its posi-
tion.
●When releasing the tilt lock lever, move it to the
release position (2) and hold the steering wheel by
hand to prevent it falling to the lowest position.
WARNING
!
WARNING
!●Do not attempt to adjust the rear-view mirror while
driving. This can be dangerous.
Always adjust the mirror before driving.
BK-XP08E1ENUK.en-uk.book Page 9 Monday, August 13, 2007 2:20 PM
Page 182 of 458
4-10 Starting and driving
4
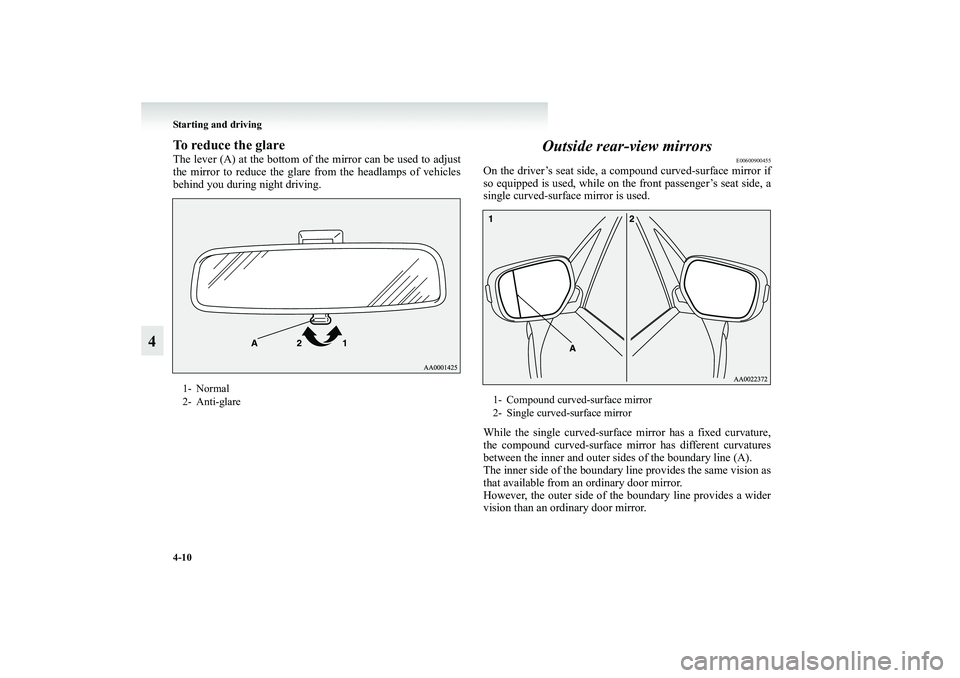
To reduce the glareThe lever (A) at the bottom of the mirror can be used to adjust
the mirror to reduce the glare from the headlamps of vehicles
behind you during night driving.
Outside rear-view mirrors
E00600900455
On the driver’s seat side, a compound curved-surface mirror if
so equipped is used, while on the front passenger’s seat side, a
single curved-surface mirror is used.
While the single curved-surface mirror has a fixed curvature,
the compound curved-surface mirror has different curvatures
between the inner and outer sides of the boundary line (A).
The inner side of the boundary line provides the same vision as
that available from an ordinary door mirror.
However, the outer side of the boundary line provides a wider
vision than an ordinary door mirror.
1- Normal
2- Anti-glare
1- Compound curved-surface mirror
2- Single curved-surface mirror
BK-XP08E1ENUK.en-uk.book Page 10 Monday, August 13, 2007 2:20 PM
Page 183 of 458
Starting and driving
4-11
4
To adjust the mirror position
E00601000134
The outside rear-view mirrors can be operated when the igni-
tion switch is in the “ON” or “ACC” position.
WARNING
!●The sense of distance that you get from an object
you see on the inner side of the mirror boundary line
differs from the sense of distance that you get from
an object you see on the outer side.
An object you see on the outer side of the boundary
line of the mirror will look farther away than actu-
ally is (farther away than if you see in a normal flat
mirror) as compared with an object you see on the
inner side.
WARNING
!●Do not attempt to adjust the rear-view mirrors while
driving. This can be dangerous.
Always adjust the mirrors before driving.●Your vehicle is equipped with convex type mirrors.
Please take into consideration. Objects you see in the
mirror will look smaller and farther away compared
to a normal flat mirror.
Do not use this mirror to estimate distance of follow-
ing vehicles when changing lanes.
BK-XP08E1ENUK.en-uk.book Page 11 Monday, August 13, 2007 2:20 PM
Page 184 of 458
4-12 Starting and driving
4
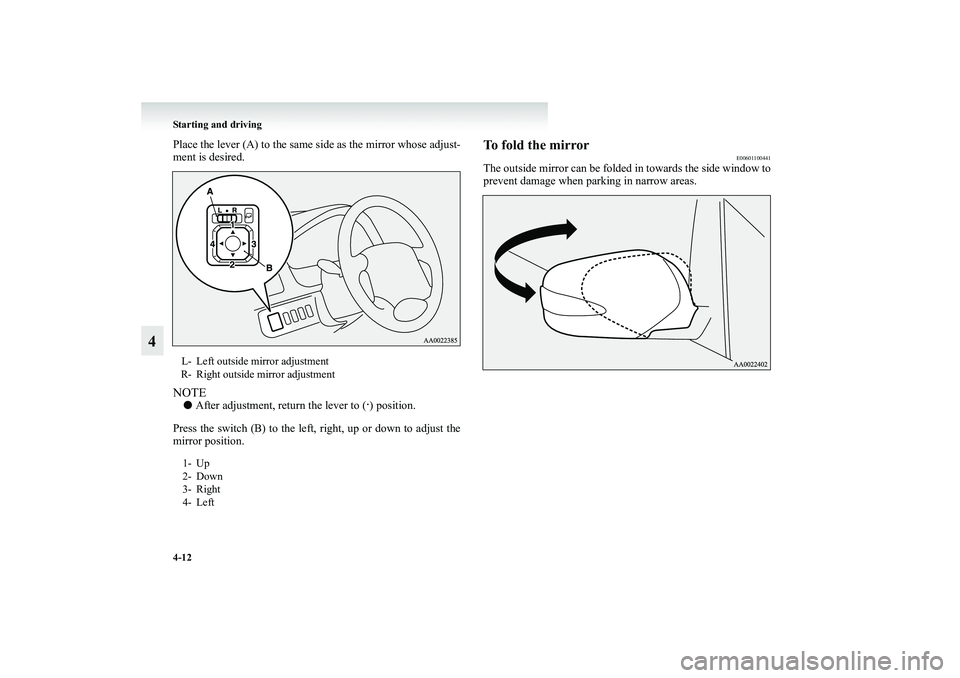
Place the lever (A) to the same side as the mirror whose adjust-
ment is desired.NOTE●After adjustment, return the lever to (
·) position.
Press the switch (B) to the left, right, up or down to adjust the
mirror position.
To fold the mirror
E00601100441
The outside mirror can be folded in towards the side window to
prevent damage when parking in narrow areas.
L- Left outside mirror adjustment
R- Right outside mirror adjustment
1- Up
2- Down
3- Right
4- Left
BK-XP08E1ENUK.en-uk.book Page 12 Monday, August 13, 2007 2:20 PM
Page 185 of 458
Starting and driving
4-13
4
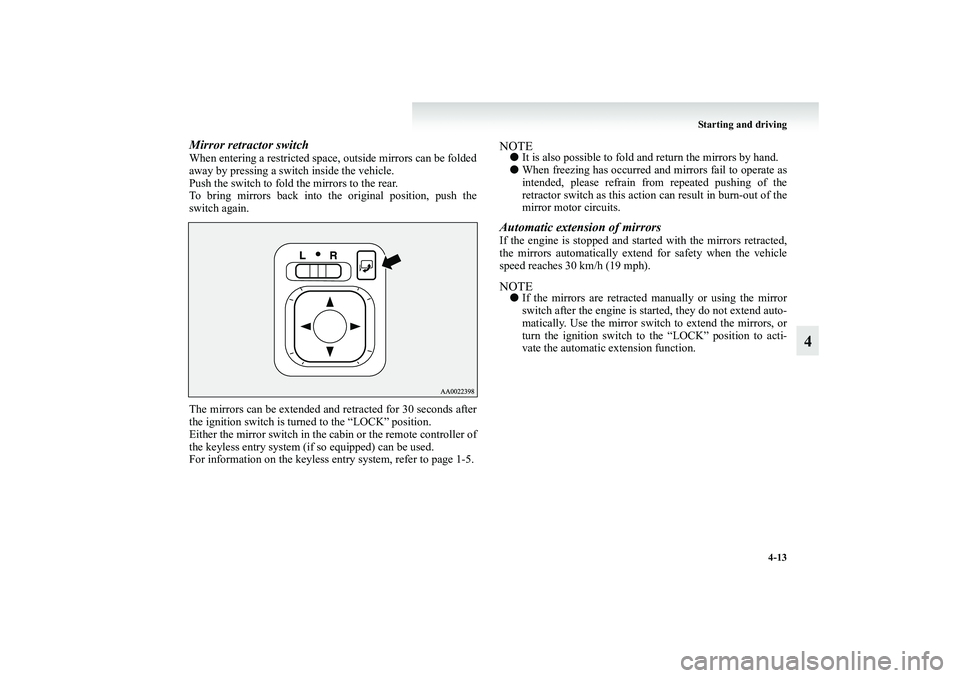
Mirror retractor switchWhen entering a restricted space, outside mirrors can be folded
away by pressing a switch inside the vehicle.
Push the switch to fold the mirrors to the rear.
To bring mirrors back into the original position, push the
switch again.
The mirrors can be extended and retracted for 30 seconds after
the ignition switch is turned to the “LOCK” position.
Either the mirror switch in the cabin or the remote controller of
the keyless entry system (if so equipped) can be used.
For information on the keyless entry system, refer to page 1-5.
NOTE●It is also possible to fold and return the mirrors by hand.
●When freezing has occurred and mirrors fail to operate as
intended, please refrain from repeated pushing of the
retractor switch as this action can result in burn-out of the
mirror motor circuits.Automatic extension of mirrorsIf the engine is stopped and started with the mirrors retracted,
the mirrors automatically extend for safety when the vehicle
speed reaches 30 km/h (19 mph).NOTE●If the mirrors are retracted manually or using the mirror
switch after the engine is started, they do not extend auto-
matically. Use the mirror switch to extend the mirrors, or
turn the ignition switch to the “LOCK” position to acti-
vate the automatic extension function.
BK-XP08E1ENUK.en-uk.book Page 13 Monday, August 13, 2007 2:20 PM
Page 186 of 458
4-14 Starting and driving
4
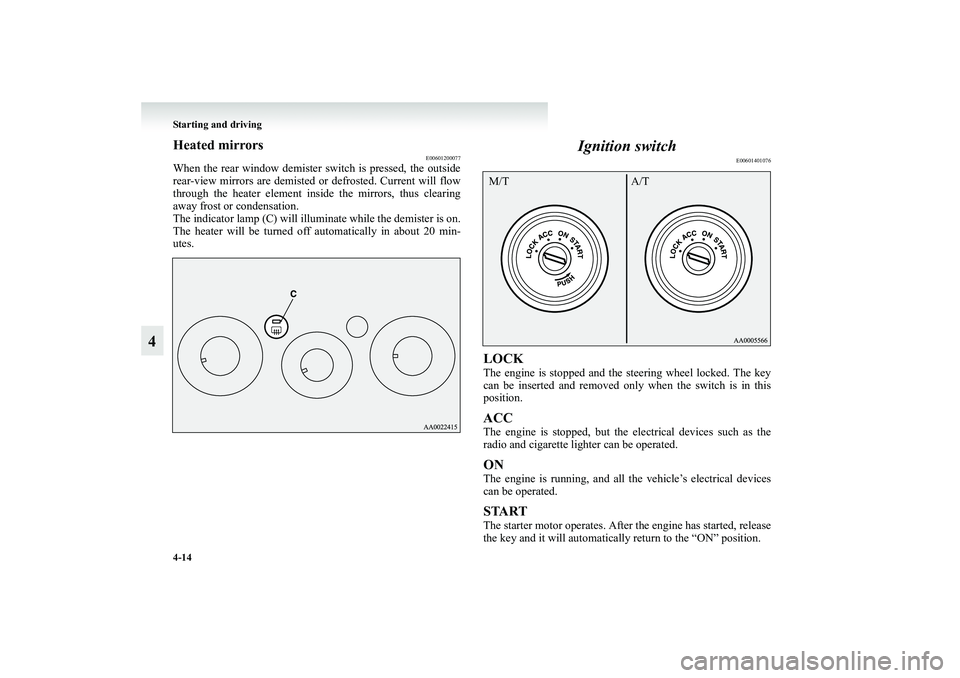
Heated mirrors
E00601200077
When the rear window demister switch is pressed, the outside
rear-view mirrors are demisted or defrosted. Current will flow
through the heater element inside the mirrors, thus clearing
away frost or condensation.
The indicator lamp (C) will illuminate while the demister is on.
The heater will be turned off automatically in about 20 min-
utes.
Ignition switch
E00601401076
LOCKThe engine is stopped and the steering wheel locked. The key
can be inserted and removed only when the switch is in this
position.ACCThe engine is stopped, but the electrical devices such as the
radio and cigarette lighter can be operated.ONThe engine is running, and all the vehicle’s electrical devices
can be operated.STARTThe starter motor operates. After the engine has started, release
the key and it will automatically return to the “ON” position.M/T A/T
BK-XP08E1ENUK.en-uk.book Page 14 Monday, August 13, 2007 2:20 PM
Page 187 of 458
Starting and driving
4-15
4
NOTE●This vehicle is equipped with ignition switch illumination.
• The ignition switch illumination comes on while the
driver’s door is opened and remains on for about 30 sec-
onds after the driver’s door is closed.
• [On vehicles with keyless entry system]
When you get out of the vehicle and remove the ignition
key, it will be illuminated for about 30 seconds.
However, it will go off even while the illumination
comes on if the ignition switch is set to “ON” position.
●For vehicles equipped with the Daytime Running Lamp,
when the ignition switch is in the “ON”, the headlamp low
beams etc. are turned on.
Refer to “Headlamps” on page 3-32.
●Your vehicle is equipped with an electronic immobilizer.
To start the engine, the ID code which the transponder
inside the key sends must match the one registered to the
immobilizer computer. (Refer to “Electronic immobilizer
(Anti-theft starting system)” on page 1-3.)
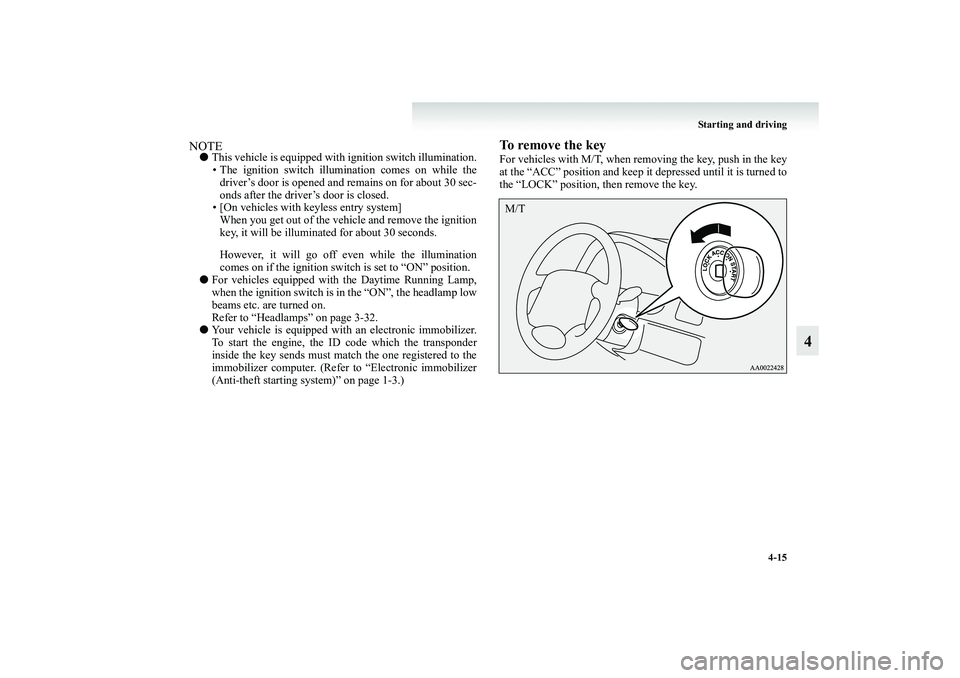
To remove the keyFor vehicles with M/T, when removing the key, push in the key
at the “ACC” position and keep it depressed until it is turned to
the “LOCK” position, then remove the key.M/T
BK-XP08E1ENUK.en-uk.book Page 15 Monday, August 13, 2007 2:20 PM
Page 188 of 458
4-16 Starting and driving
4
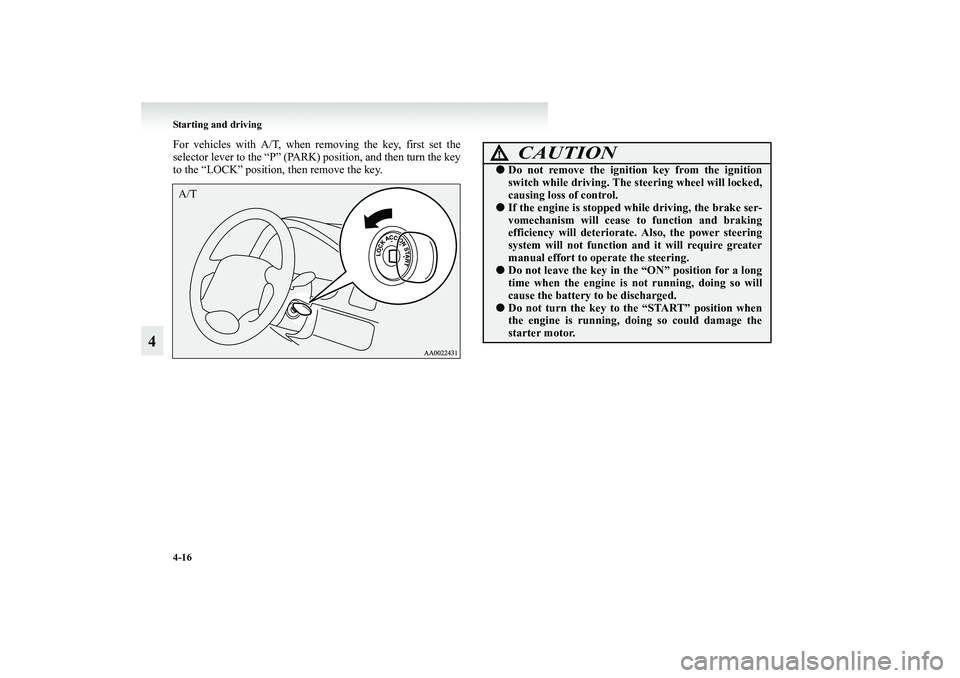
For vehicles with A/T, when removing the key, first set the
selector lever to the “P” (PARK) position, and then turn the key
to the “LOCK” position, then remove the key.A/T
CAUTION
!●Do not remove the ignition key from the ignition
switch while driving. The steering wheel will locked,
causing loss of control.●If the engine is stopped while driving, the brake ser-
vomechanism will cease to function and braking
efficiency will deteriorate. Also, the power steering
system will not function and it will require greater
manual effort to operate the steering.●Do not leave the key in the “ON” position for a long
time when the engine is not running, doing so will
cause the battery to be discharged.●Do not turn the key to the “START” position when
the engine is running, doing so could damage the
starter motor.
BK-XP08E1ENUK.en-uk.book Page 16 Monday, August 13, 2007 2:20 PM
Page 189 of 458
Starting and driving
4-17
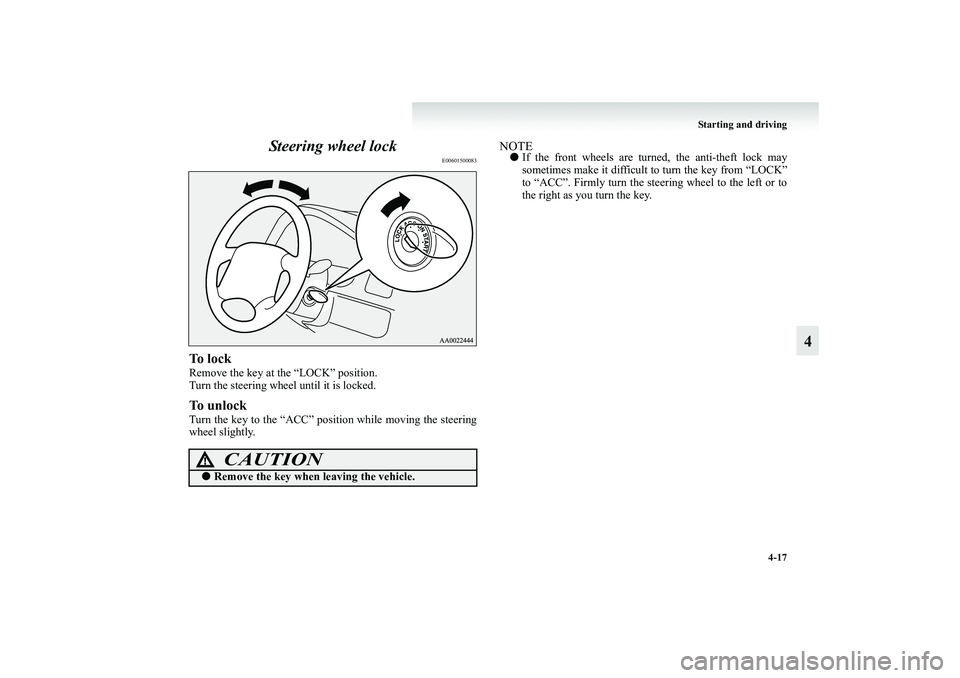
4 Steering wheel lock
E00601500083
To l o c kRemove the key at the “LOCK” position.
Turn the steering wheel until it is locked.To u n l o c kTurn the key to the “ACC” position while moving the steering
wheel slightly.
NOTE●If the front wheels are turned, the anti-theft lock may
sometimes make it difficult to turn the key from “LOCK”
to “ACC”. Firmly turn the steering wheel to the left or to
the right as you turn the key.
CAUTION
!●Remove the key when leaving the vehicle.
BK-XP08E1ENUK.en-uk.book Page 17 Monday, August 13, 2007 2:20 PM
Page 190 of 458
4-18 Starting and driving
4Starting
E00601600693
Tips for starting●Do not operate the starter motor continuously for anything
longer than 10 seconds; doing so could run down the bat-
tery. If the engine does not start, turn the ignition switch
back to “LOCK”, wait a few seconds, and then try again.
Trying repeatedly with the starter motor still turning will
damage the starter mechanism.
●If the engine cannot be started because the battery is weak
or dead, refer to the “Emergency starting” section for
instructions on starting the engine.
●The engine is well warmed up if the coolant temperature
gauge needle starts to move (the engine speed decreases).
Extended warming-up operation will result in excessive
fuel consumption.
WARNING
!●Never run the engine in a closed or poorly ventilated
area any longer than is needed to move your vehicle
in or out of the area. Carbon monoxide gases are
odourless and can be fatal.
CAUTION
!●Never attempt to start the engine by pushing or pull-
ing the vehicle. Especially in the A/T, since the struc-
ture is different from a M/T, it is not possible to start
the engine by using this technique. Never attempt
this or it could damage the A/T.●Do not run the engine at high rpm or drive the vehi-
cle at high speed until the engine has had a chance to
warm up.●Release the ignition key as soon as the engine starts
to avoid damaging the starter motor.●If your vehicle is equipped with a turbocharger, do
not stop the engine immediately after high-speed or
uphill driving. First allow the engine to idle to give
the turbocharger a chance to cool down.
BK-XP08E1ENUK.en-uk.book Page 18 Monday, August 13, 2007 2:20 PM