MITSUBISHI GRANDIS 2008 Owner's Manual (in English)
Manufacturer: MITSUBISHI, Model Year: 2008, Model line: GRANDIS, Model: MITSUBISHI GRANDIS 2008Pages: 458, PDF Size: 18.52 MB
Page 151 of 458
Instruments and controls
3-25
3
●Automatic reset mode
When 4 hours have passed after the ignition switch is
turned to the “OFF” or “ACC” position, the display is
automatically reset. It then shows “---”.
●Manual reset mode
If you reset the display at the time when you want to start
the measurements, average fuel consumption from that
point of time can be displayed.
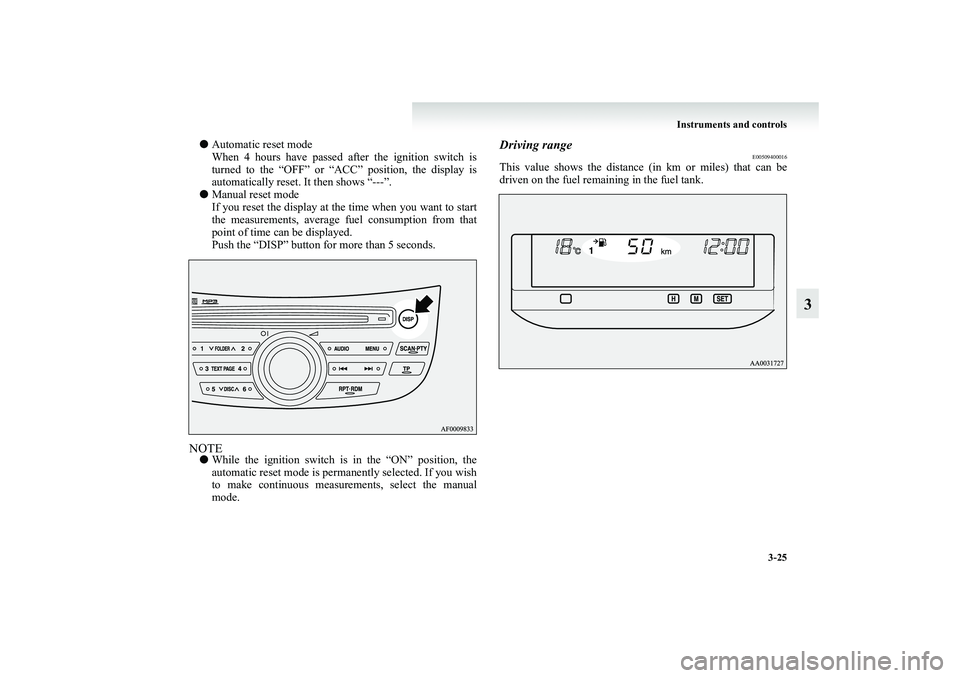
Push the “DISP” button for more than 5 seconds.NOTE●While the ignition switch is in the “ON” position, the
automatic reset mode is permanently selected. If you wish
to make continuous measurements, select the manual
mode.
Driving range
E00509400016
This value shows the distance (in km or miles) that can be
driven on the fuel remaining in the fuel tank.
BK-XP08E1ENUK.en-uk.book Page 25 Monday, August 13, 2007 2:20 PM
Page 152 of 458
3-26 Instruments and controls
3
NOTE●If the driving range drops below 50 km (30 miles) while
the driving range is displayed, the display shows “---”.
When this occurs, top up the fuel tank as soon as possible.
●The driving range varies depending on road conditions,
the manner of driving and other related factors. Conse-
quently, the display should be used only as a guide. It is
recommended to add fuel as soon as the low fuel warning
lamp in the instrument cluster illuminates.
(Refer to “Low fuel warning lamp” on page 3-6.)
●Refueling will update the driving range indication.
●The driving range displayed is based on previous fuel con-
sumption data. Disconnecting the battery cable will result
in the deletion of existing fuel consumption data, which
will affect the unit’s calculations.
●The driving range figure can occasionally increase if the
vehicle is stopped on an incline. This is because the fuel
has moved in the tank because of the incline and is not
considered as a fault.
Average speed
E00509500062
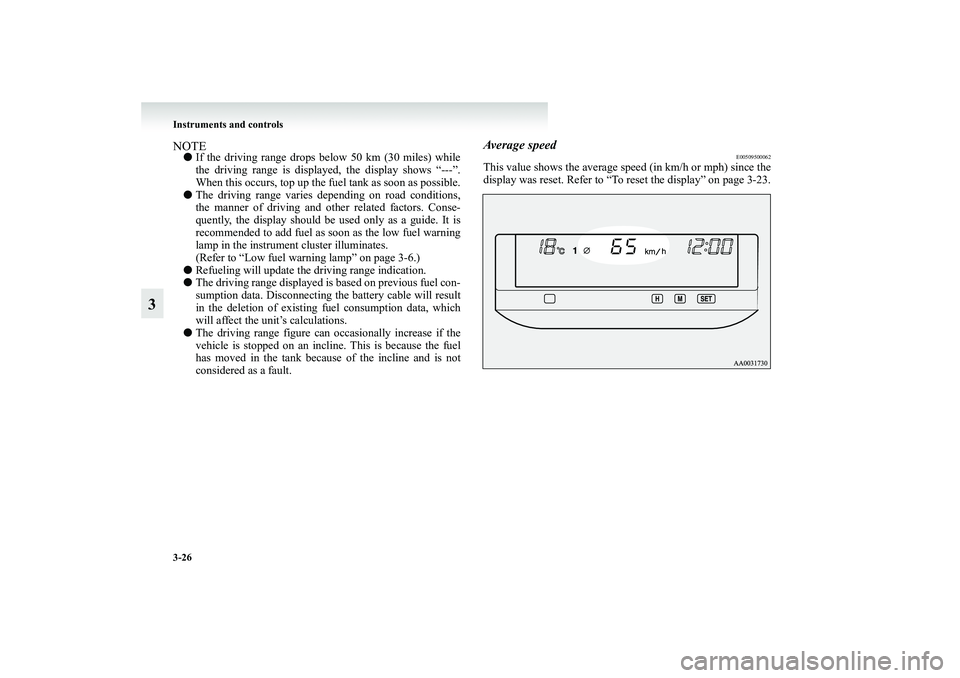
This value shows the average speed (in km/h or mph) since the
display was reset. Refer to “To reset the display” on page 3-23.
BK-XP08E1ENUK.en-uk.book Page 26 Monday, August 13, 2007 2:20 PM
Page 153 of 458
Instruments and controls
3-27
3
●Automatic reset mode
When 4 hours have passed after the ignition switch is
turned to the “OFF” or “ACC” position, the display is
automatically reset. It then shows “---”.
●Manual reset mode
If you reset the display at the time when you want to start
the measurements, average speed from that point of time
can be displayed.
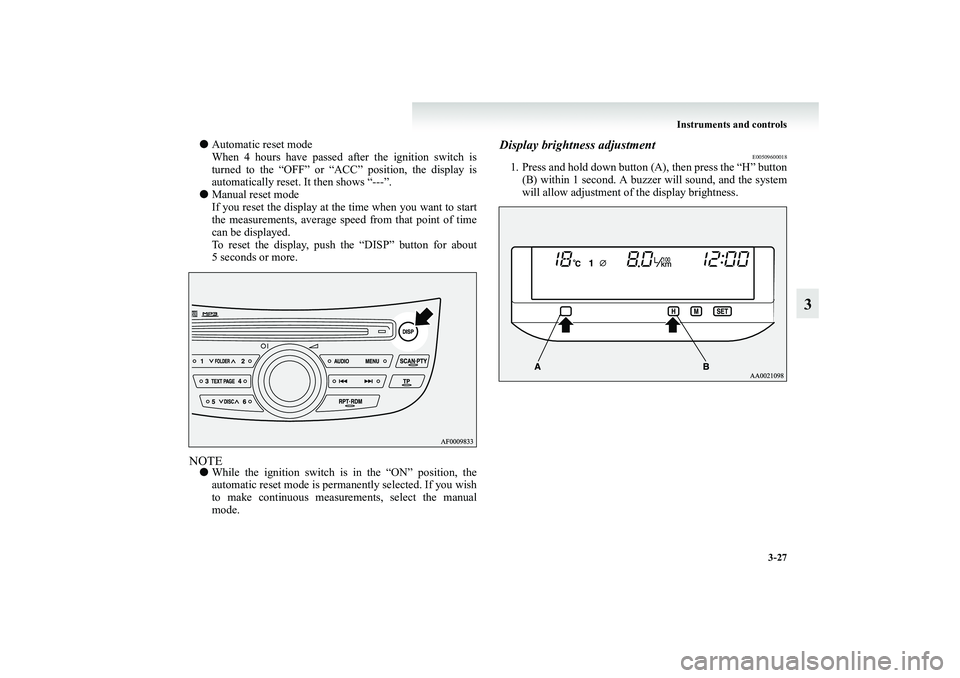
To reset the display, push the “DISP” button for about
5 seconds or more.NOTE●While the ignition switch is in the “ON” position, the
automatic reset mode is permanently selected. If you wish
to make continuous measurements, select the manual
mode.
Display brightness adjustment
E00509600018
1. Press and hold down button (A), then press the “H” button
(B) within 1 second. A buzzer will sound, and the system
will allow adjustment of the display brightness.
BK-XP08E1ENUK.en-uk.book Page 27 Monday, August 13, 2007 2:20 PM
Page 154 of 458
3-28 Instruments and controls
3
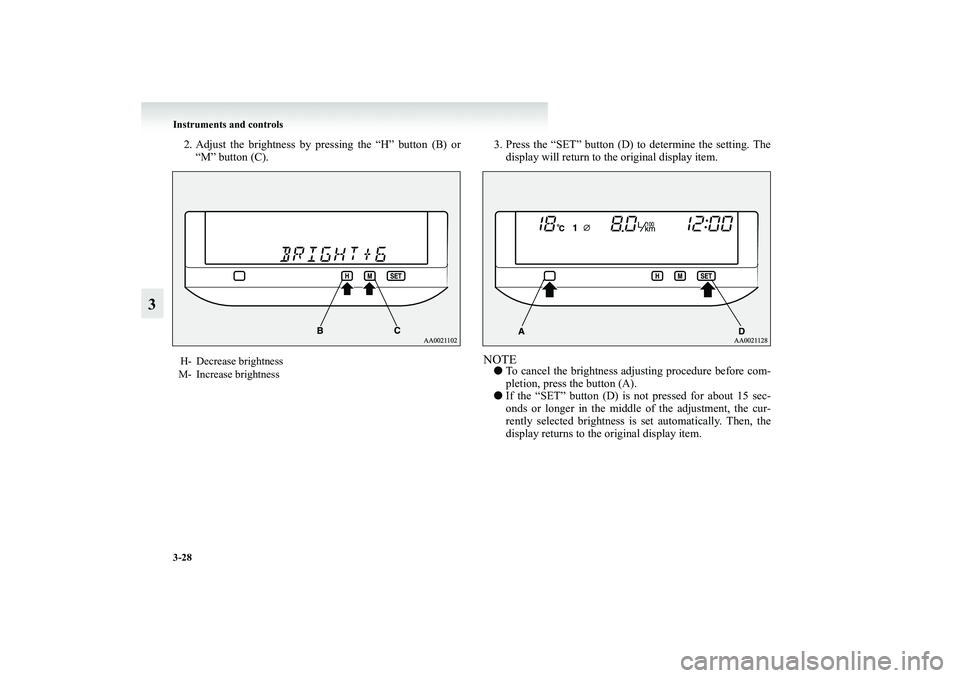
2. Adjust the brightness by pressing the “H” button (B) or
“M” button (C).3. Press the “SET” button (D) to determine the setting. The
display will return to the original display item.
NOTE●To cancel the brightness adjusting procedure before com-
pletion, press the button (A).
●If the “SET” button (D) is not pressed for about 15 sec-
onds or longer in the middle of the adjustment, the cur-
rently selected brightness is set automatically. Then, the
display returns to the original display item.
H- Decrease brightness
M- Increase brightness
BK-XP08E1ENUK.en-uk.book Page 28 Monday, August 13, 2007 2:20 PM
Page 155 of 458
Instruments and controls
3-29
3
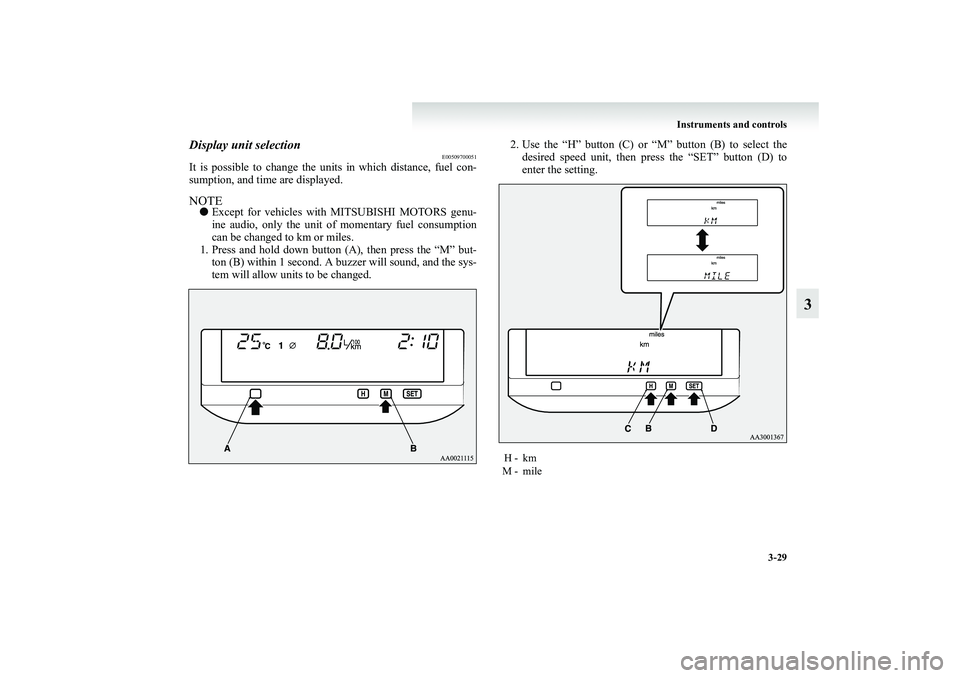
Display unit selection
E00509700051
It is possible to change the units in which distance, fuel con-
sumption, and time are displayed.NOTE●Except for vehicles with MITSUBISHI MOTORS genu-
ine audio, only the unit of momentary fuel consumption
can be changed to km or miles.
1. Press and hold down button (A), then press the “M” but-
ton (B) within 1 second. A buzzer will sound, and the sys-
tem will allow units to be changed.2. Use the “H” button (C) or “M” button (B) to select the
desired speed unit, then press the “SET” button (D) to
enter the setting.
H - km
M - mile
BK-XP08E1ENUK.en-uk.book Page 29 Monday, August 13, 2007 2:20 PM
Page 156 of 458
3-30 Instruments and controls
3
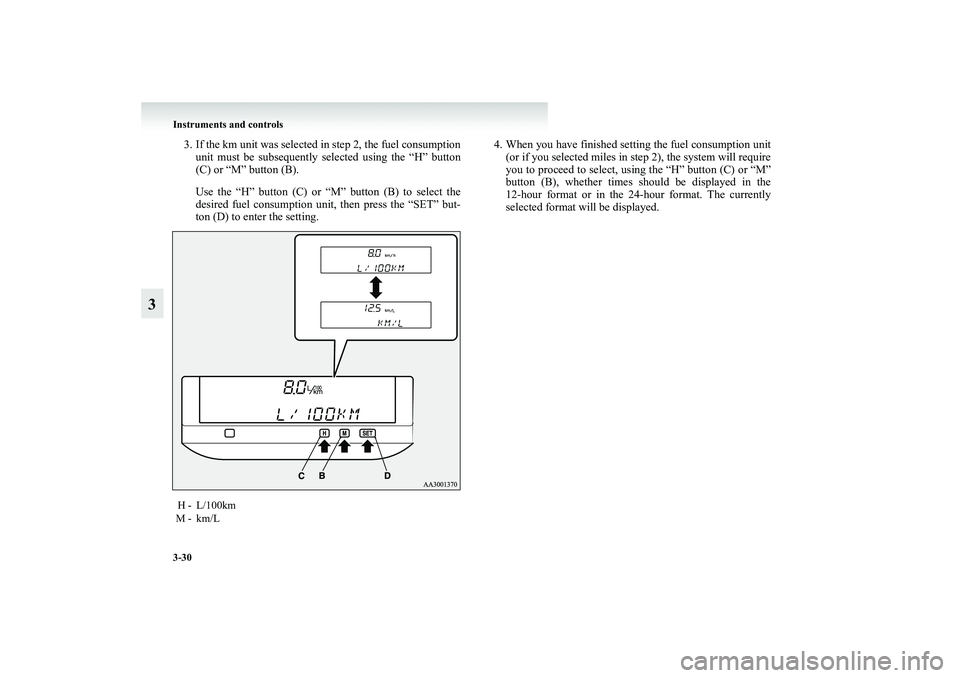
3. If the km unit was selected in step 2, the fuel consumption
unit must be subsequently selected using the “H” button
(C) or “M” button (B).
Use the “H” button (C) or “M” button (B) to select the
desired fuel consumption unit, then press the “SET” but-
ton (D) to enter the setting.4. When you have finished setting the fuel consumption unit
(or if you selected miles in step 2), the system will require
you to proceed to select, using the “H” button (C) or “M”
button (B), whether times should be displayed in the
12-hour format or in the 24-hour format. The currently
selected format will be displayed.H - L/100km
M - km/LBK-XP08E1ENUK.en-uk.book Page 30 Monday, August 13, 2007 2:20 PM
Page 157 of 458
Instruments and controls
3-31
3
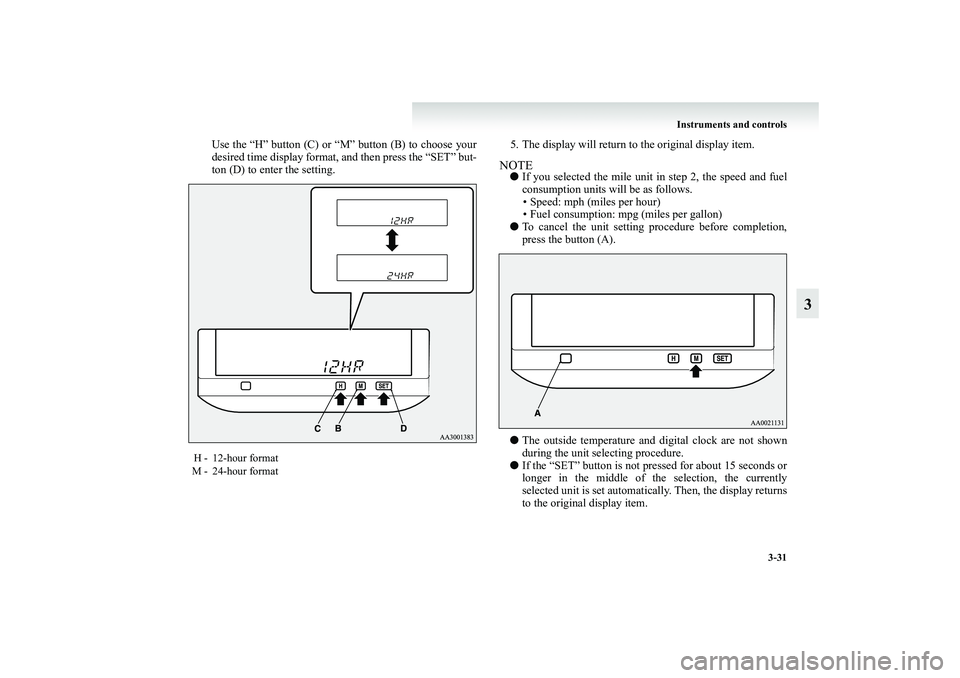
Use the “H” button (C) or “M” button (B) to choose your
desired time display format, and then press the “SET” but-
ton (D) to enter the setting.5. The display will return to the original display item.
NOTE●If you selected the mile unit in step 2, the speed and fuel
consumption units will be as follows.
• Speed: mph (miles per hour)
• Fuel consumption: mpg (miles per gallon)
●To cancel the unit setting procedure before completion,
press the button (A).
●The outside temperature and digital clock are not shown
during the unit selecting procedure.
●If the “SET” button is not pressed for about 15 seconds or
longer in the middle of the selection, the currently
selected unit is set automatically. Then, the display returns
to the original display item.
H - 12-hour format
M - 24-hour format
BK-XP08E1ENUK.en-uk.book Page 31 Monday, August 13, 2007 2:20 PM
Page 158 of 458
3-32 Instruments and controls
3Combination headlamps and dipper switch
E00506000776
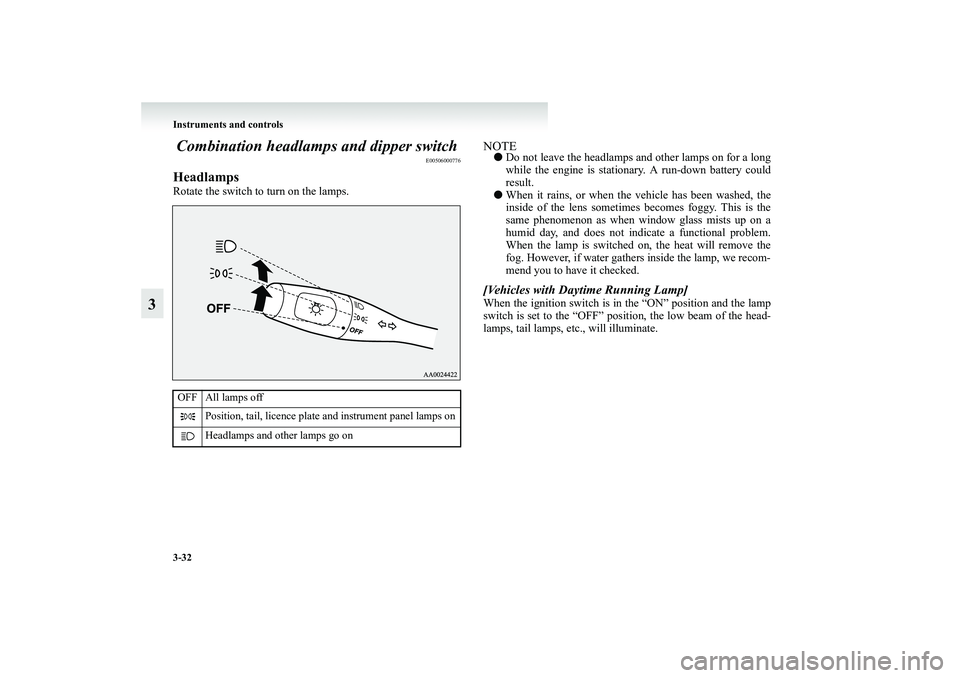
HeadlampsRotate the switch to turn on the lamps.
NOTE●Do not leave the headlamps and other lamps on for a long
while the engine is stationary. A run-down battery could
result.
●When it rains, or when the vehicle has been washed, the
inside of the lens sometimes becomes foggy. This is the
same phenomenon as when window glass mists up on a
humid day, and does not indicate a functional problem.
When the lamp is switched on, the heat will remove the
fog. However, if water gathers inside the lamp, we recom-
mend you to have it checked.[Vehicles with Daytime Running Lamp]When the ignition switch is in the “ON” position and the lamp
switch is set to the “OFF” position, the low beam of the head-
lamps, tail lamps, etc., will illuminate.
OFF All lamps off
Position, tail, licence plate and instrument panel lamps on
Headlamps and other lamps go onBK-XP08E1ENUK.en-uk.book Page 32 Monday, August 13, 2007 2:20 PM
Page 159 of 458
Instruments and controls
3-33
3
Lamps (headlamps, fog lamps, etc.) auto-cutout
function●If the key is turned to “LOCK” or “ACC” position or
removed from the ignition switch and the lamps will stay
on for about 3 minutes without opening the driver’s door
while the lamp switch in the “ ” position, automatically
turn off.
●If the key is turned to “LOCK” or “ACC” position or
removed from the ignition switch and the driver’s door is
opened within 3 minutes while the lamp switch in the
“ ” position, a buzzer will sound to warn the driver that
the lamps have not been turned off, and these lamps will
automatically turn off.NOTE●The lamp auto-cutout will not function when the lamp
switch is in the “ ” position.
●When the key has been turned to either the “LOCK” or
“ACC” position or removed from the ignition switch with
the lamp switch in the “ ” position, and the lamp switch
is turned to the “OFF” position within approximately
3 minutes, the auto-cutout function will not be activated.
(Even if the lamp switch is again turned to the “ ” posi-
tion, the lamps will not go off automatically; the lamps
will remain on as normal.)
When you want to keep the lamps on●Turn the switch in the “OFF” position to switch off all
lamps while the key is in the “LOCK” or “ACC” position
or remove the key from the ignition switch.
●Turn on the lamps with the switch in the “ ” or “ ”
position again, then the lamps will remain on.NOTE●It is possible to disable the lamps auto-cutout function.
For further information, we recommend you to consult a
MITSUBISHI MOTORS Authorized Service Point.Lamp monitor buzzer
E00506100012
If the driver’s door is opened when the key is in the “LOCK” or
“ACC” position or removed from the ignition switch while the
lamps are on, a buzzer will sound to remind the driver to turn
off the lamps. When the lamp auto-cutout function acts, the
buzzer will stop automatically. When this function does not act,
turn off the lamp switch to stop the buzzer.
BK-XP08E1ENUK.en-uk.book Page 33 Monday, August 13, 2007 2:20 PM
Page 160 of 458
3-34 Instruments and controls
3
Dipper (High/Low beam change)
E00506200114
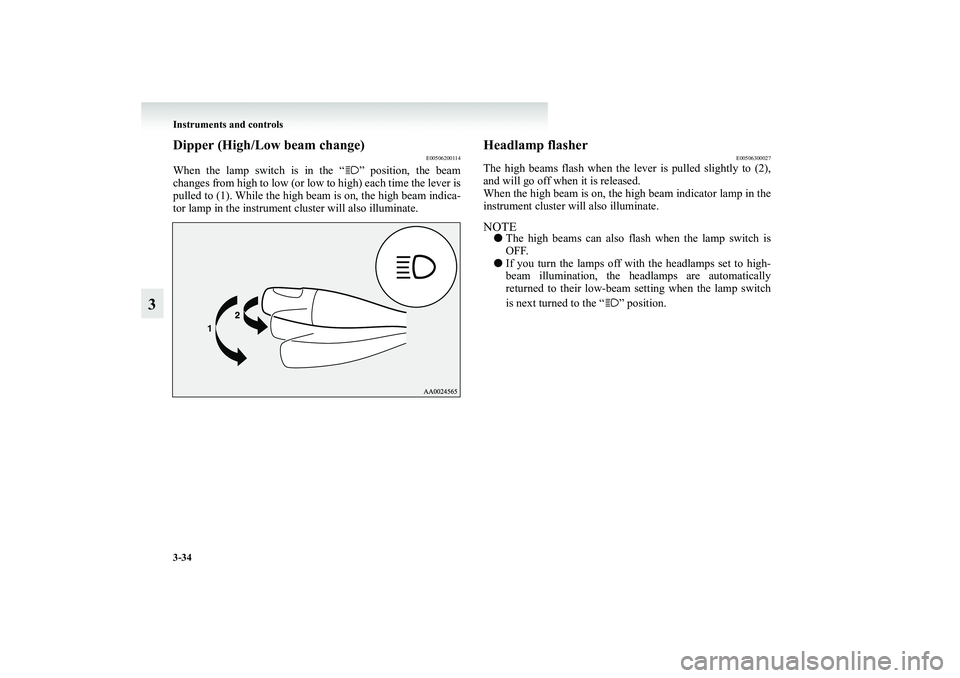
When the lamp switch is in the “ ” position, the beam
changes from high to low (or low to high) each time the lever is
pulled to (1). While the high beam is on, the high beam indica-
tor lamp in the instrument cluster will also illuminate.
Headlamp flasher
E00506300027
The high beams flash when the lever is pulled slightly to (2),
and will go off when it is released.
When the high beam is on, the high beam indicator lamp in the
instrument cluster will also illuminate.NOTE●The high beams can also flash when the lamp switch is
OFF.
●If you turn the lamps off with the headlamps set to high-
beam illumination, the headlamps are automatically
returned to their low-beam setting when the lamp switch
is next turned to the “ ” position.
BK-XP08E1ENUK.en-uk.book Page 34 Monday, August 13, 2007 2:20 PM