engine MITSUBISHI L200 2004 (in English) Workshop Manual
[x] Cancel search | Manufacturer: MITSUBISHI, Model Year: 2004, Model line: L200, Model: MITSUBISHI L200 2004Pages: 264, PDF Size: 4.14 MB
Page 151 of 264
FOR PLEASANT DRIVING
Cooling (vehicles with
air conditioning)
EH04FBA
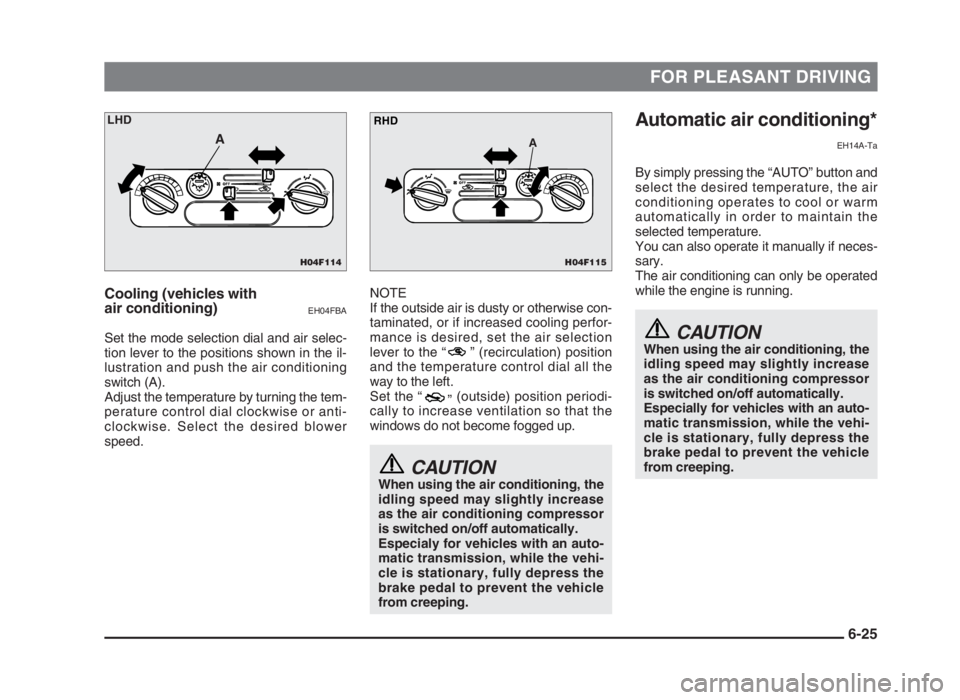
Set the mode selection dial and air selec-
tion lever to the positions shown in the il-
lustration and push the air conditioning
switch (A).
Adjust the temperature by turning the tem-
perature control dial clockwise or anti-
clockwise. Select the desired blower
speed.
Automatic air conditioning*
EH14A-Ta
By simply pressing the “AUTO” button and
select the desired temperature, the air
conditioning operates to cool or warm
automatically in order to maintain the
selected temperature.
You can also operate it manually if neces-
sary.
The air conditioning can only be operated
while the engine is running.
CAUTIONWhen using the air conditioning, the
idling speed may slightly increase
as the air conditioning compressor
is switched on/off automatically.
Especially for vehicles with an auto-
matic transmission, while the vehi-
cle is stationary, fully depress the
brake pedal to prevent the vehicle
from creeping.
NOTE
If the outside air is dusty or otherwise con-
taminated, or if increased cooling perfor-
mance is desired, set the air selection
lever to the “ ” (recirculation) position
and the temperature control dial all the
way to the left.
Set the “
”(outside) position periodi-
cally to increase ventilation so that the
windows do not become fogged up.
CAUTIONWhen using the air conditioning, the
idling speed may slightly increase
as the air conditioning compressor
is switched on/off automatically.
Especialy for vehicles with an auto-
matic transmission, while the vehi-
cle is stationary, fully depress the
brake pedal to prevent the vehicle
from creeping.
6-25
H04F114
A
LHD
H04F115
A
RHD
06engL2_240082_4 22-01-2004 13:07 Page 6-25
Page 152 of 264
FOR PLEASANT DRIVING
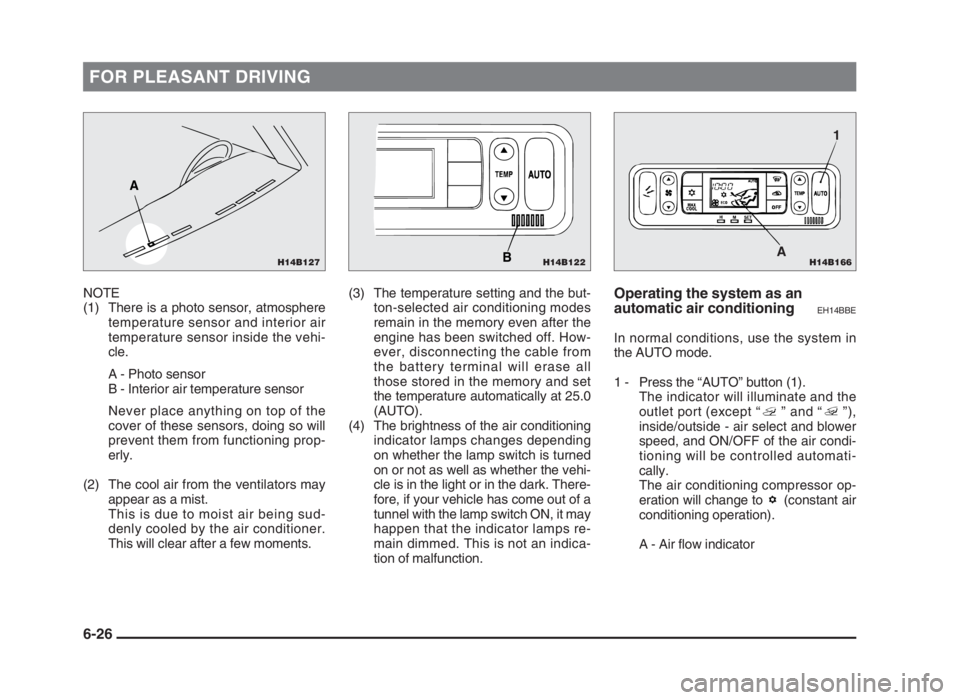
NOTE
(1) There is a photo sensor, atmosphere
temperature sensor and interior air
temperature sensor inside the vehi-
cle.
A - Photo sensor
B - Interior air temperature sensor
Never place anything on top of the
cover of these sensors, doing so will
prevent them from functioning prop-
erly.
(2) The cool air from the ventilators may
appear as a mist.
This is due to moist air being sud-
denly cooled by the air conditioner.
This will clear after a few moments.(3) The temperature setting and the but-
ton-selected air conditioning modes
remain in the memory even after the
engine has been switched off. How-
ever, disconnecting the cable from
the battery terminal will erase all
those stored in the memory and set
the temperature automatically at 25.0
(AUTO).
(4) The brightness of the air conditioning
indicator lamps changes depending
on whether the lamp switch is turned
on or not as well as whether the vehi-
cle is in the light or in the dark. There-
fore, if your vehicle has come out of a
tunnel with the lamp switch ON, it may
happen that the indicator lamps re-
main dimmed. This is not an indica-
tion of malfunction.Operating the system as an
automatic air conditioning
EH14BBE
In normal conditions, use the system in
the AUTO mode.
1 - Press the “AUTO” button (1).
The indicator will illuminate and the
outlet port (except “ ” and “ ”),
inside/outside - air select and blower
speed, and ON/OFF of the air condi-
tioning will be controlled automati-
cally.
The air conditioning compressor op-
eration will change to (constant air
conditioning operation).
A - Air flow indicator
6-26
H14B166
1
A
H14B122BH14B127
A
06engL2_240082_4 22-01-2004 13:07 Page 6-26
Page 153 of 264
FOR PLEASANT DRIVING
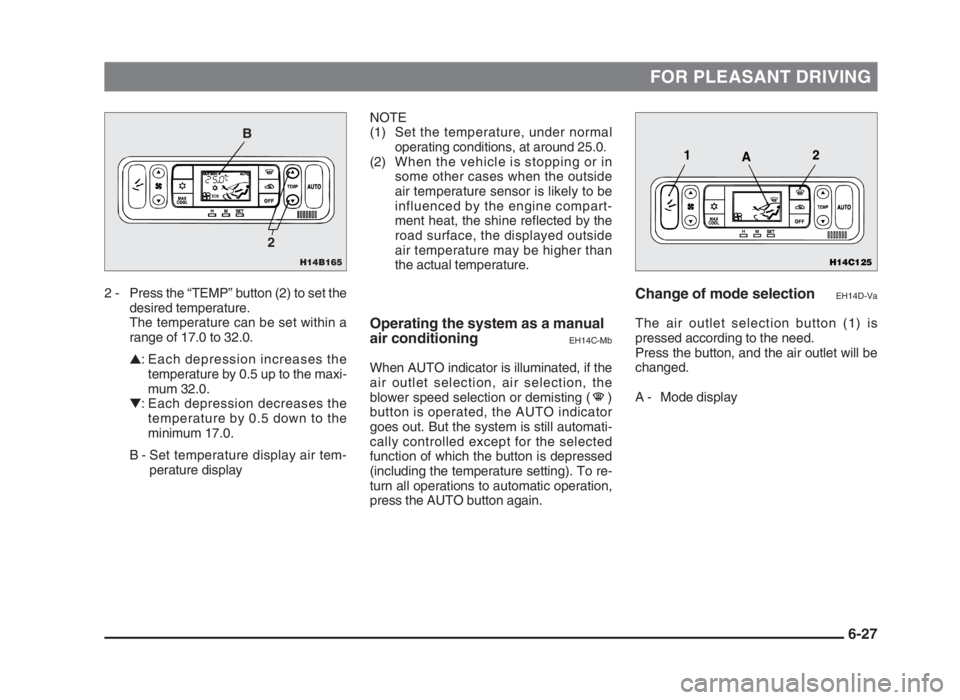
2 - Press the “TEMP” button (2) to set the
desired temperature.
The temperature can be set within a
range of 17.0 to 32.0.
▲: Each depression increases the
temperature by 0.5 up to the maxi-
mum 32.0.
▼: Each depression decreases the
temperature by 0.5 down to the
minimum 17.0.
B - Set temperature display air tem-
perature displayChange of mode selectionEH14D-Va
The air outlet selection button (1) is
pressed according to the need.
Press the button, and the air outlet will be
changed.
A - Mode display NOTE
(1) Set the temperature, under normal
operating conditions, at around 25.0.
(2) When the vehicle is stopping or in
some other cases when the outside
air temperature sensor is likely to be
influenced by the engine compart-
ment heat, the shine reflected by the
road surface, the displayed outside
air temperature may be higher than
the actual temperature.Operating the system as a manual
air conditioning
EH14C-Mb
When AUTO indicator is illuminated, if the
air outlet selection, air selection, the
blower speed selection or demisting ( )
button is operated, the AUTO indicator
goes out. But the system is still automati-
cally controlled except for the selected
function of which the button is depressed
(including the temperature setting). To re-
turn all operations to automatic operation,
press the AUTO button again.
6-27
H14B165
B
2
H14C125
12
A
06engL2_240082_4 22-01-2004 13:07 Page 6-27
Page 157 of 264
FOR PLEASANT DRIVING
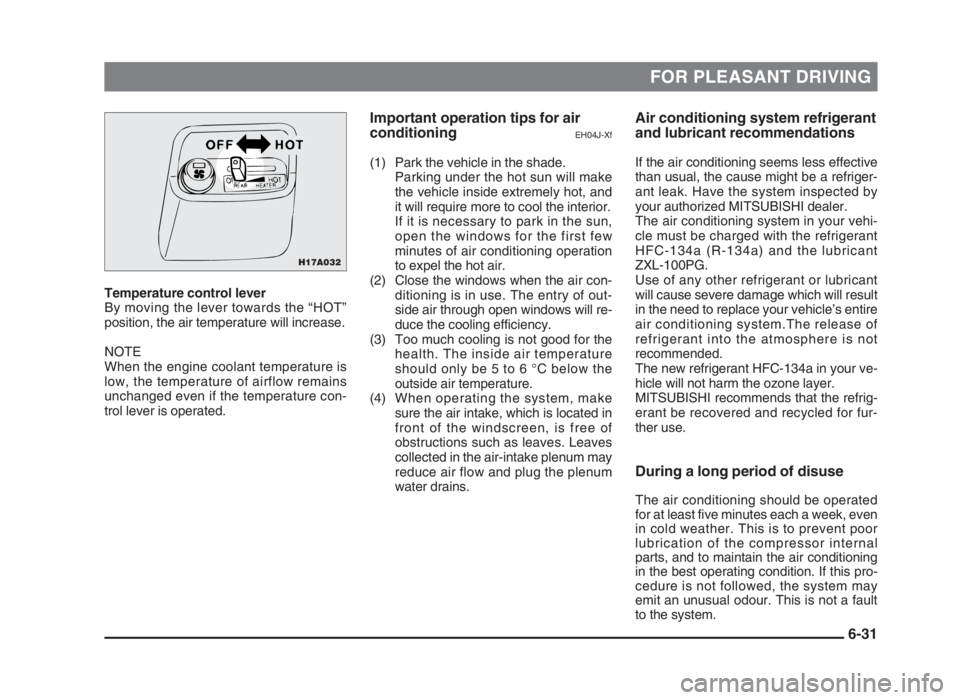
Temperature control lever
By moving the lever towards the “HOT”
position, the air temperature will increase.
NOTE
When the engine coolant temperature is
low, the temperature of airflow remains
unchanged even if the temperature con-
trol lever is operated.
Air conditioning system refrigerant
and lubricant recommendations
If the air conditioning seems less effective
than usual, the cause might be a refriger-
ant leak. Have the system inspected by
your authorized MITSUBISHI dealer.
The air conditioning system in your vehi-
cle must be charged with the refrigerant
HFC-134a (R-134a) and the lubricant
ZXL-100PG.
Use of any other refrigerant or lubricant
will cause severe damage which will result
in the need to replace your vehicle’s entire
air conditioning system.The release of
refrigerant into the atmosphere is not
recommended.
The new refrigerant HFC-134a in your ve-
hicle will not harm the ozone layer.
MITSUBISHI recommends that the refrig-
erant be recovered and recycled for fur-
ther use.
During a long period of disuse
The air conditioning should be operated
for at least five minutes each a week, even
in cold weather. This is to prevent poor
lubrication of the compressor internal
parts, and to maintain the air conditioning
in the best operating condition. If this pro-
cedure is not followed, the system may
emit an unusual odour. This is not a fault
to the system.
Important operation tips for air
conditioning
EH04J-Xf
(1) Park the vehicle in the shade.
Parking under the hot sun will make
the vehicle inside extremely hot, and
it will require more to cool the interior.
If it is necessary to park in the sun,
open the windows for the first few
minutes of air conditioning operation
to expel the hot air.
(2) Close the windows when the air con-
ditioning is in use. The entry of out-
side air through open windows will re-
duce the cooling efficiency.
(3) Too much cooling is not good for the
health. The inside air temperature
should only be 5 to 6 °C below the
outside air temperature.
(4) When operating the system, make
sure the air intake, which is located in
front of the windscreen, is free of
obstructions such as leaves. Leaves
collected in the air-intake plenum may
reduce air flow and plug the plenum
water drains.
6-31
H17A032
06engL2_240082_4 22-01-2004 13:08 Page 6-31
Page 159 of 264
FOR PLEASANT DRIVING
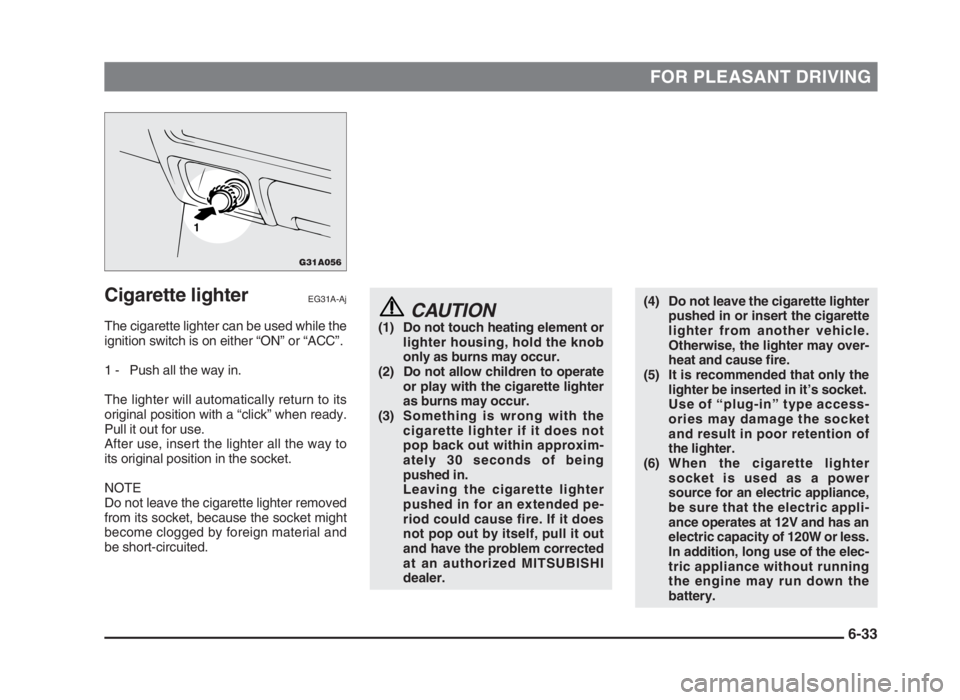
Cigarette lighterEG31A-Aj
The cigarette lighter can be used while the
ignition switch is on either “ON” or “ACC”.
1 - Push all the way in.
The lighter will automatically return to its
original position with a “click” when ready.
Pull it out for use.
After use, insert the lighter all the way to
its original position in the socket.
NOTE
Do not leave the cigarette lighter removed
from its socket, because the socket might
become clogged by foreign material and
be short-circuited.
(4) Do not leave the cigarette lighter
pushed in or insert the cigarette
lighter from another vehicle.
Otherwise, the lighter may over-
heat and cause fire.
(5) It is recommended that only the
lighter be inserted in it’s socket.
Use of “plug-in” type access-
ories may damage the socket
and result in poor retention of
the lighter.
(6) When the cigarette lighter
socket is used as a power
source for an electric appliance,
be sure that the electric appli-
ance operates at 12V and has an
electric capacity of 120W or less.
In addition, long use of the elec-
tric appliance without running
the engine may run down the
battery.CAUTION(1) Do not touch heating element or
lighter housing, hold the knob
only as burns may occur.
(2) Do not allow children to operate
or play with the cigarette lighter
as burns may occur.
(3) Something is wrong with the
cigarette lighter if it does not
pop back out within approxim-
ately 30 seconds of being
pushed in.
Leaving the cigarette lighter
pushed in for an extended pe-
riod could cause fire. If it does
not pop out by itself, pull it out
and have the problem corrected
at an authorized MITSUBISHI
dealer.
6-33
G31A056
1
06engL2_240082_4 22-01-2004 13:08 Page 6-33
Page 170 of 264
VEHICLE CARE
Cleaning the outside of
your vehicle
EK28A-Ah
If the following is left on your vehicle, it
may cause corrosion, discoloration and
stains, wash the vehicle as soon as pos-
sible.
• Seawater, anti-freeze for road use.
• Soot and dust, iron powder from fact-
ories, chemical substance (acids, alka-
lis, coal-tar, etc.).
• Droppings from birds, carcasses of
insects, tree sap, etc.
WashingEK22AAZa
Chemicals contained in the dirt and dust
picked up from the road surface can
damage the paint coat and body of your
vehicle if left in prolonged contact.
Frequent washing and waxing is the best
way to protect your vehicle from this
damage. This will also be effective in
protecting it from environmental elements
such as rain, snow, salt air, etc.
Do not wash the vehicle in direct sunlight.
Park the vehicle in the shade and spray it
with water to remove dust. Next, using an
ample amount of clean water and a car
washing brush or sponge, wash the
vehicle from top to bottom.
Use a mild car washing soap if necessary.
Rinse thoroughly and wipe dry with a soft
cloth. After washing the vehicle, carefully
clean the joints and flanges of the doors,
bonnet, etc., where dirt is likely to remain.CAUTION(1)When washing the under side of
your vehicle or wheel, wear a pair
of rubber gloves in order to pro-
tect your hands.
(2) Refrain from using a car wash as
its brushes may scratch the
paint surface, causing it to lose
its gloss.
Scratches will be especially vis-
ible on darker coloured vehicles.
(3) Never spray or splash water on
the electrical components in the
engine compartment, as this
may adversely affect engine
starting.
Exercise caution also when
washing the underbody; be
careful not to spray water into
the engine compartment.
7-4
07engL2_240082_4 22-01-2004 13:09 Page 7-4
Page 172 of 264
VEHICLE CARE
PolishingEK04A-Ac
The vehicle should only be polished if the
paintwork has become stained or lost its
lustre. Matt-finish parts and plastic
bumpers must not be polished, polishing
these parts will stain them or damage their
finish.
Damaged paintEK08A-Ac
Small cracks and scratches in the paint
coat should be touched up as soon as
possible with MITSUBISHI touch-up paint
to prevent corrosion.
Check body areas facing the road or the
tyres carefully for damage to the paint coat
caused by flying stones, etc. The paint
code number for your vehicle can be
found on the vehicle information code
plate in the engine compartment.
Servicing of plastic partsEK29APDc
Use a sponge or chamois leather.
If car wax adheres to the gray or black
rough surface of the bumper or moulding,
the surface becomes white. If this hap-
pens, wipe it off using lukewarm water and
soft cloth or chamois leather.
CAUTION(1) Do not use a scrubbing brush or
other hard tools as they may
damage the plastic part surface.
(2) Do not use wax containing com-
pound (polishing powder) which
may damage the plastic part sur-
face.
(3) Do not bring the plastic parts
into contact with brake fluids,
engine oils, greases, paint thin-
ners, and sulphuric acid (battery
electrolyte) which may stain,
crack or discolour the plastic
parts.
If they touch the plastic part,
wipe them off with soft cloth,
chamois or the like and an aque-
ous solution of neutral deter-
gent, then immediately rinse the
affected parts with water.
Chrome partsEK06A-Aa
In order to prevent spots and corrosion of
chrome parts, wash with water, dry thor-
oughly, and apply a special protective
coating. This should be done more fre-
quently in winter.
Aluminium wheels*EK35A-Af
A protective coating is provided over the
aluminium type wheels.
Clean aluminium wheels with a cleaner
designed for use on aluminium and apply
an appropriate protection agent.
NOTE
(1) When cleaning aluminium type
wheels, do not use abrasive cleaners.
Wheels exposed to sea water or road
chemicals should be cleaned as soon
as possible.
(2) Brushes may damage the aluminium
wheel surface. Always use a sponge,
chamois leather, etc.
(3) Do not apply hot water directly from
the steam cleaner or similar to the
wheel surface.
7-6
07engL2_240082_4 22-01-2004 13:09 Page 7-6
Page 173 of 264
VEHICLE CARE
Window glassEK10A-A
The window glass can normally be
cleaned using only a sponge and water.
Glass cleaner can be used to remove oil,
grease, dead insects, etc. After washing
the glass, wipe dry with a clean, dry, soft
cloth. Never use the same cloth to wipe
the window glass as would be used to
wipe the paintwork; wax from the painted
surfaces could adhere to the glass and re-
duce its transparency and visibility.
Wiper bladesEK11A-A
Use a soft cloth and glass cleaner to re-
move grease, dead insects, etc., from the
wiper blades. Replace the wiper blades
when they no longer wipe properly.
Engine compartmentEK13A-Aa
Clean the engine compartment at the
beginning and end of winter. Pay particu-
lar attention to flanges, crevices and
peripheral parts where dust containing
road chemicals and other corrosive mater-
ials might collect.
If salt and other chemicals are used on the
roads in your area, clean the engine
compartment at least once every three
months.
Chassis and underbody protection
EK12A-Jc
Your vehicle’s underbody has been
treated at the factory in order to protect it
from rust and corrosion. Some areas have
been injected with anti-corrosion agents
and wax.
The effectiveness of these measures,
however, will be reduced by flying stones,
road chemicals, etc., as the vehicle is
driven. You should take your vehicle to
your authorized MITSUBISHI dealer every
12 months to have body sheet metal
inspected, and it is recommended to have
the underbody checked regularly (autumn
and spring) and have additional protection
treatment carried out as required.
As not all of the commercially available
materials are suitable for use on your
vehicle, it is recommended that you have
this work carried out by an authorized
MITSUBISHI dealer.
When washing the vehicle, especially in
winter, spray the underbody with water to
remove dirt and dust which might contain
salts, road chemicals, etc.
7-7
07engL2_240082_4 22-01-2004 13:09 Page 7-7
Page 175 of 264
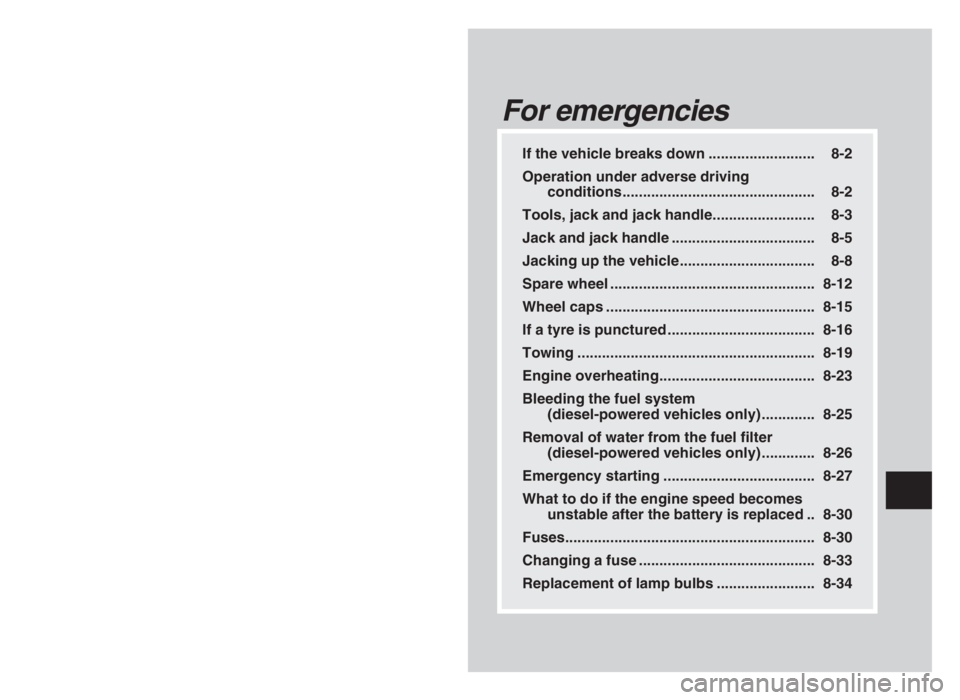
If the vehicle breaks down .......................... 8-2
Operation under adverse driving
conditions............................................... 8-2
Tools, jack and jack handle......................... 8-3
Jack and jack handle ................................... 8-5
Jacking up the vehicle................................. 8-8
Spare wheel .................................................. 8-12
Wheel caps ................................................... 8-15
If a tyre is punctured .................................... 8-16
Towing .......................................................... 8-19
Engine overheating...................................... 8-23
Bleeding the fuel system
(diesel-powered vehicles only) ............. 8-25
Removal of water from the fuel filter
(diesel-powered vehicles only) ............. 8-26
Emergency starting ..................................... 8-27
What to do if the engine speed becomes
unstable after the battery is replaced .. 8-30
Fuses............................................................. 8-30
Changing a fuse ........................................... 8-33
Replacement of lamp bulbs ........................ 8-34
For emergencies
8
08engL2_240082_4 22-01-2004 13:10 Page 8-1
Page 176 of 264
FOR EMERGENCIES
If the vehicle breaks down
EN40B-Dc
If the vehicle breaks down on the road,
move it to the shoulder and use the
hazard warning flashers.
If the engine stops/fails
Vehicle operation and control are affected
if the engine stops. Before moving the ve-
hicle to a safe area, be aware of the fol-
lowing.
(1) The brake booster becomes inopera-
tive and the pedal effort will increase.
Press down the brake pedal harder
than usual.
(2) For vehicles with power steering,
since the power steering pump is no
longer operative, the steering wheel
feels heavy when turning it. Turn the
wheel with more effort than usual.
Operation under adverse
driving conditions
EI43APD
If your vehicle is stuck: in sand,
mud or snow
If the vehicle becomes stuck in snow,
sand, or mud, it can often be moved a
rocking motion. Move the selector lever
alternately between the “L” (LOW) and “R”
(REVERSE) position (with manual trans-
mission, between 1st and Reverse), while
applying slight pressure to the accelerator
pedal.
Avoid racing the engine or spinning the
wheels. Prolonged efforts to free a stuck
vehicle may result in overheating and
transmission failure. Allow the engine to
idle for a few minutes to let the transmis-
sion cool between rocking attempts.
If the vehicle remains stuck after several
rocking attempts, seek other assistance.
WARNINGWhen attempting to rock your vehi-
cle out of a stuck position, be sure
that the area around the vehicle is
clear of people and physical objects.
The rocking motion may cause the
vehicle to suddenly launch forward
or backward, causing injury or dam-
age to nearby people or objects.
On 2WD models, it is recommended to
start the vehicle with parking brake par-
tially, but not completely, applied by
slightly pulling the parking brake lever. Af-
ter the vehicle has become free, do not
forget to release the parking brake.
NOTE
Depress the accelerator pedal gradually
when starting the vehicle.
8-2
08engL2_240082_4 22-01-2004 13:10 Page 8-2