MITSUBISHI PAJERO 1996 2.G Workshop Manual
Manufacturer: MITSUBISHI, Model Year: 1996, Model line: PAJERO, Model: MITSUBISHI PAJERO 1996 2.GPages: 302, PDF Size: 48.23 MB
Page 51 of 302
Downloaded from www.Manualslib.com manuals search engine lSTUIMET JA TURVAVVC>T ;',. , ". '. " " _ SEAT ANO SEAT' ,BELT~~'
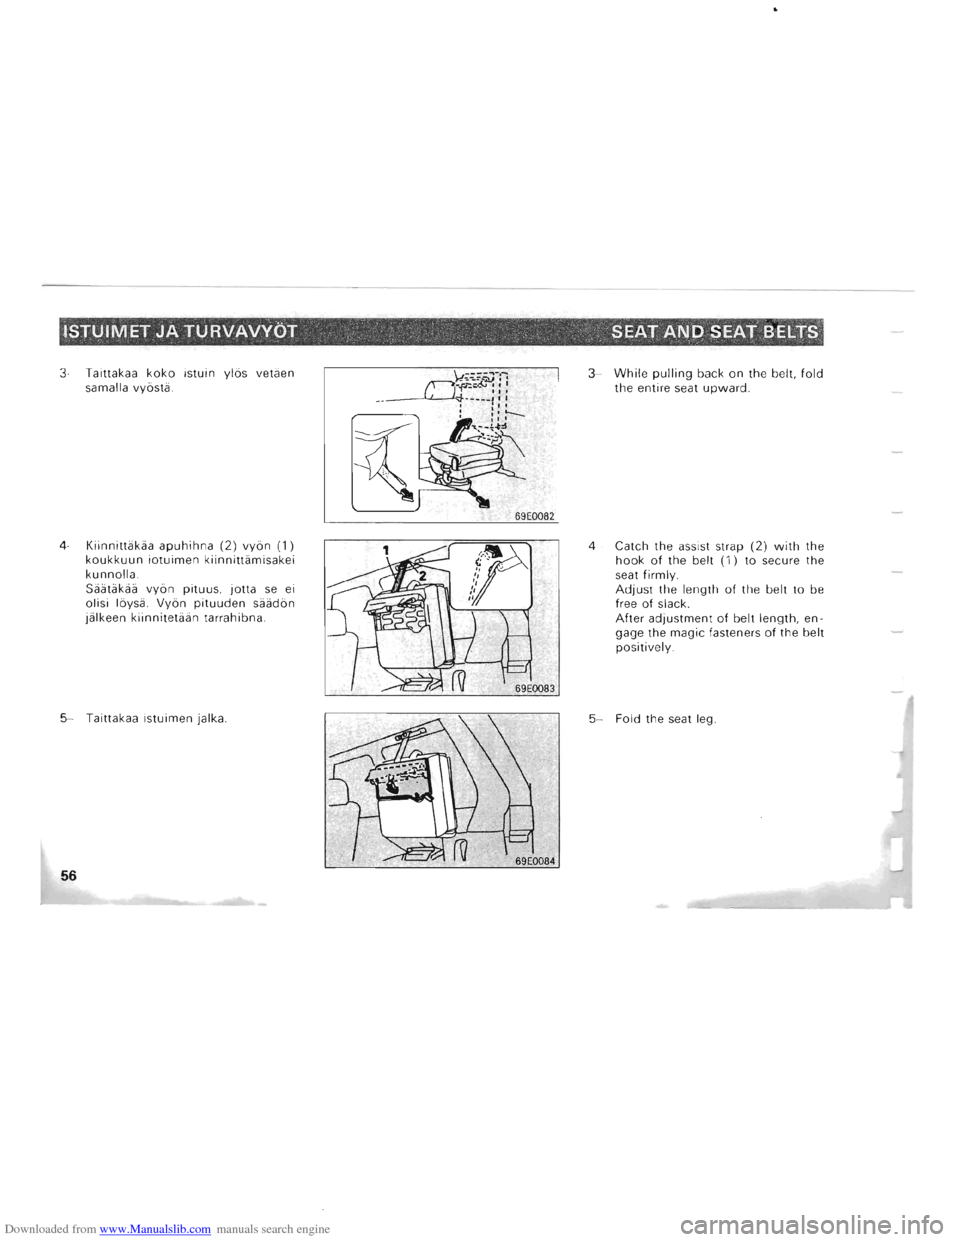
3-Taittakaa koko istuin ylas vetaen
samalla vyasta.
4-Kiinnittakaa apuhihna (2) vyan (1) koukkuun iotuimen kiinnittamisakei kunnolla.
Saatakaa vyan pituus, jotta se ei olisi laysa. Vyan pituuden saadan
jalkeen kiinnitetaan tarrahibna.
5-Taittakaa istuimen jalka.
56
3-While pulling back on the belt, fold the entire seat upward.
4-Catch the assist strap (2) with the hook of the belt (1) to secure the
seat firmly.
Adjust the length of the belt to be
free of slack. After adjustment of belt length, en
gage the magic fasteners of the belt positively.
5-Fold the seat leg,
Page 52 of 302
Downloaded from www.Manualslib.com manuals search engine ISTUIMET JATURVAVVOT '-', SEAT AND SEAT BELTS , . ' '. , , -
Istuinten esiintaittaminen HG04B ·B
1. Nostakaa jalka.
2 . Irrottakaa koukku apuhihnasta samalla koko istuinta tu-
kien . 3. Kun olette laskenut istuimen hitaasti alas, tyantakaa se ala s voimalla, jotta se lukkiutuisi kunnolla.
4 . Istuinnojan saa ylas nostamalla istuimen sivussa olevan
nuppia.
& VAROITUKSIA (1) Nostakaa ehdottomasti takaistuimen jalka ennen kuin kaytatte istuinta. (2) Taitettuanne istuimen tai palautettuanne sen alkuperaiseen asentoon ravistakaa istuinnojaa hieman eteen-taakse varmistaaksenne etta istuin on kunnolla kiinni.
Unfolding the seats EG04B-B
1. Raise the leg.
2 . Remove the hook from the assist strap while supporting the entire seat.
3 . After lowering the seat slowly, push the entire seat down with force to secure it positively. 4. Pull up the knob located on the side of the seat to raise the seatback ,
& CAUTIONS (1) Be sure to raise the third seat leg before use of the seat. (2) After folding the seat or returning it to the original position. shake the seat back back and forth lightly to make sure that the seat is secured positively.
57
Page 53 of 302
Downloaded from www.Manualslib.com manuals search engine ISTUIMET JA TURVAVVOT' ..' . SEAT AND SEAT l3ELTS ...
Keski-ja takaistuinten makuua-Iustaksi
laskeminen (Farmari) HG05AD
Liikuttakaa etuistuin niin eteen kuin mahdollista.
Irrottakaa keski-istuinten niskatuet ja sijoittakaa ne keski-istuinten jalkatilassa oleviin sailytysreikiin.
Laskekaa keski-istuimen selkanoja kokonaan alas toimien seu
raavasti :
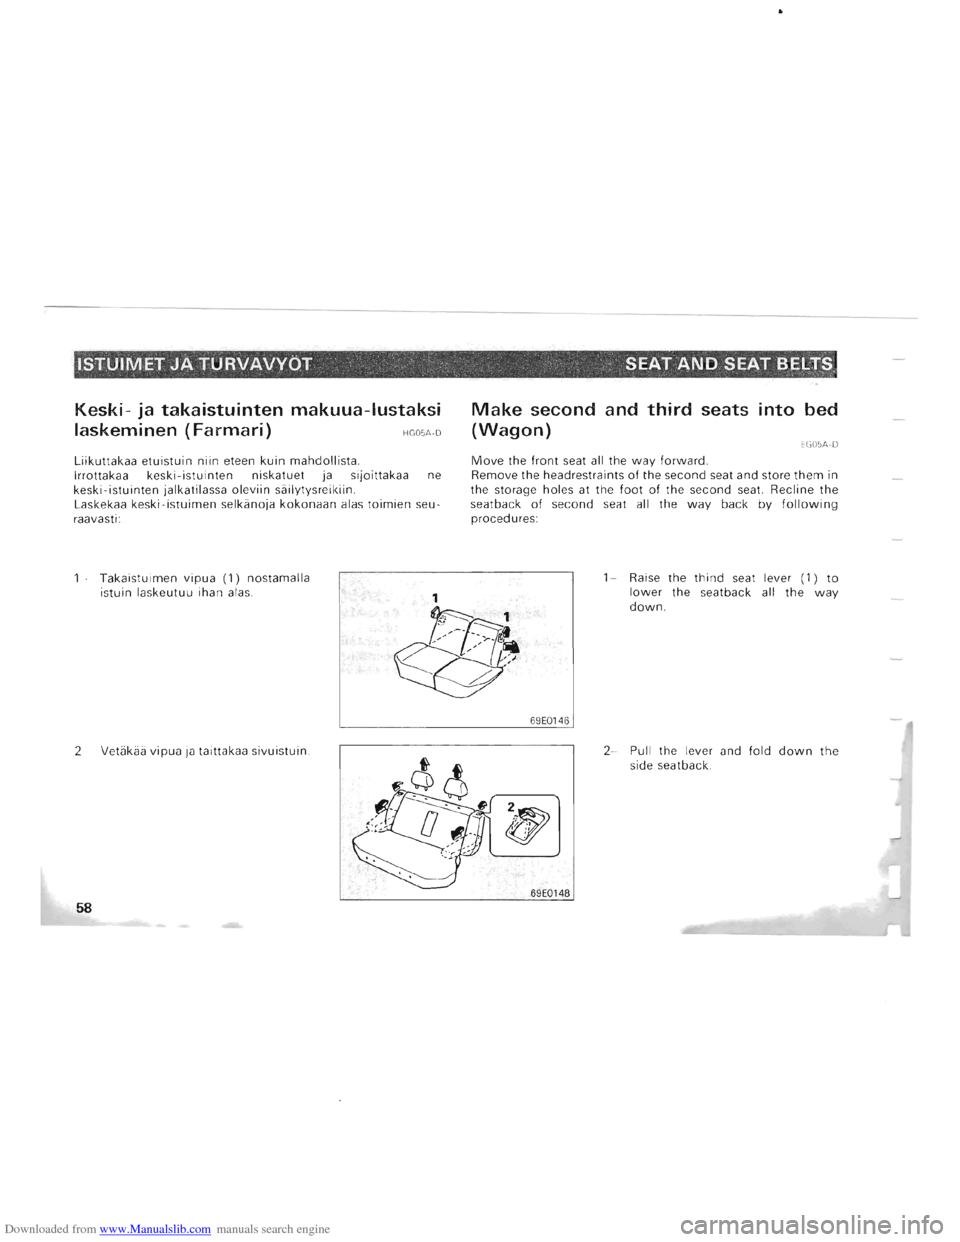
1 - Tak aistuimen vipua (
1) nostamalla
istuin laskeutuu ihan alas.
2-Vetakaa vipua ja taittakaa sivuistuin.
58
Make second and third seats into bed
(Wagon) EG05A-D
Move the front seat all the way forward.
Remove the head restraints of the second seat and store them in
the storage holes at the foot of the second seat. Recline the
seat back of second seat all the way back by following procedures:
69E0146
~~~
~
69E0148
1-Raise the thind seat lever (1) to lower the seatback all the way down.
2-Pull the lever and fold down the
side seatback .
Page 54 of 302
Downloaded from www.Manualslib.com manuals search engine ISTUIMET:JA TURVAVYOT.· .-. " ' .. ,. ,,'.";" .' ' , ,'~;"<,>SEAT AND SEAT BELTS . .!' ~ J. ," ~,.... t' /,' .' l' ~ • • • I ._
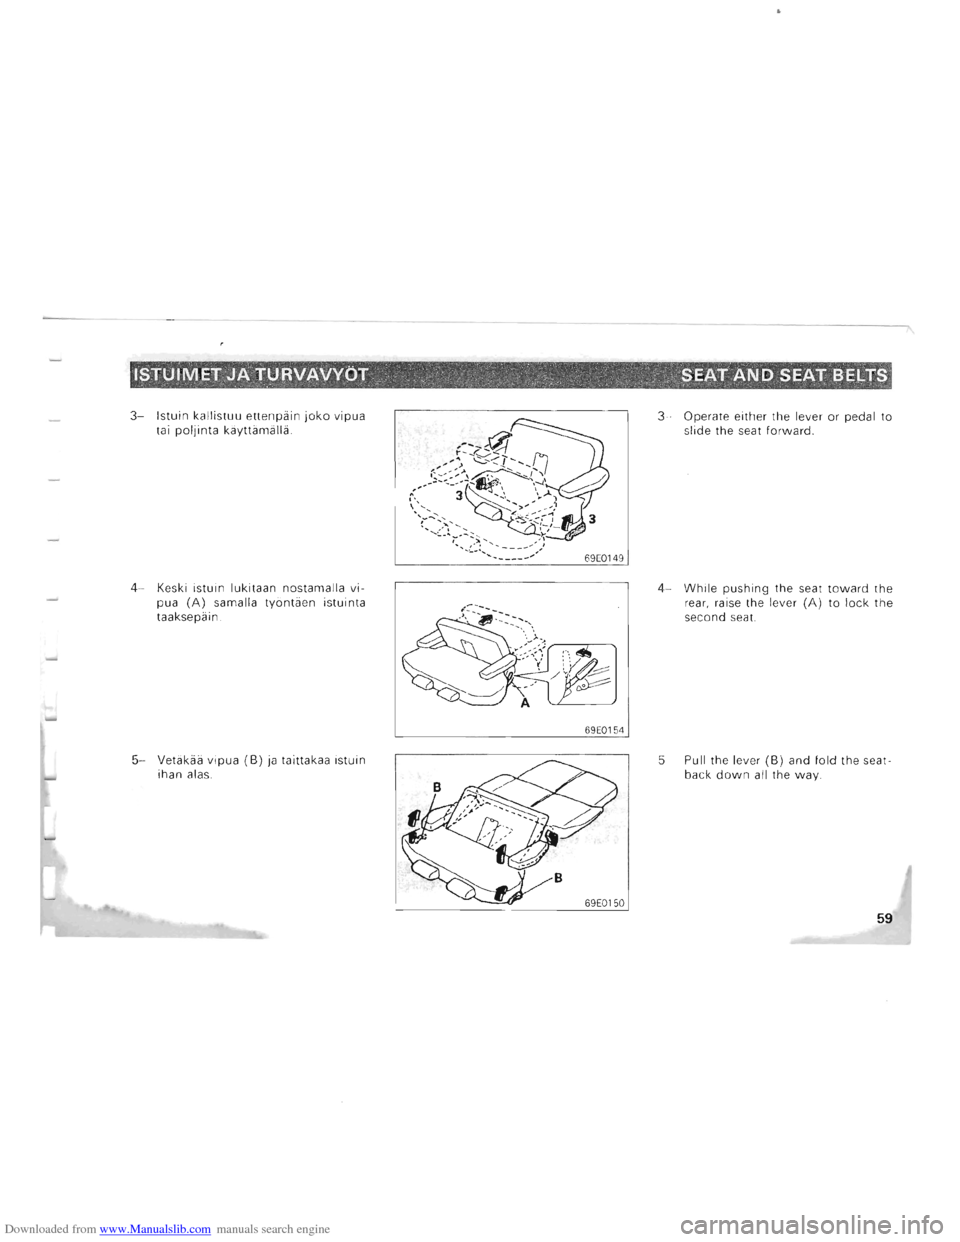
3-Istuin kallistuu ettenpiiin joko vipua
tai poljinta kiiyttiimiillii.
4 -Keski istuin lukitaan nostamalla vi
pua (A) samalla tyontiien istuinta
taaksepiiin .
5-Vetiikiiii vipua (8) ja taittakaa istuin
ihan alas.
69E0154
3-Operate either the lever or pedal to slid e the seat forward.
4-While pushing the seat toward the
rear, raise the lever (A) to lo ck the
seco nd seat.
5-Pull the lever (8) and fold the seat·
back down all the way.
59
Page 55 of 302
Downloaded from www.Manualslib.com manuals search engine ISTUIMET JA TURVAVVDT SEAT AND SEAT BELTS '
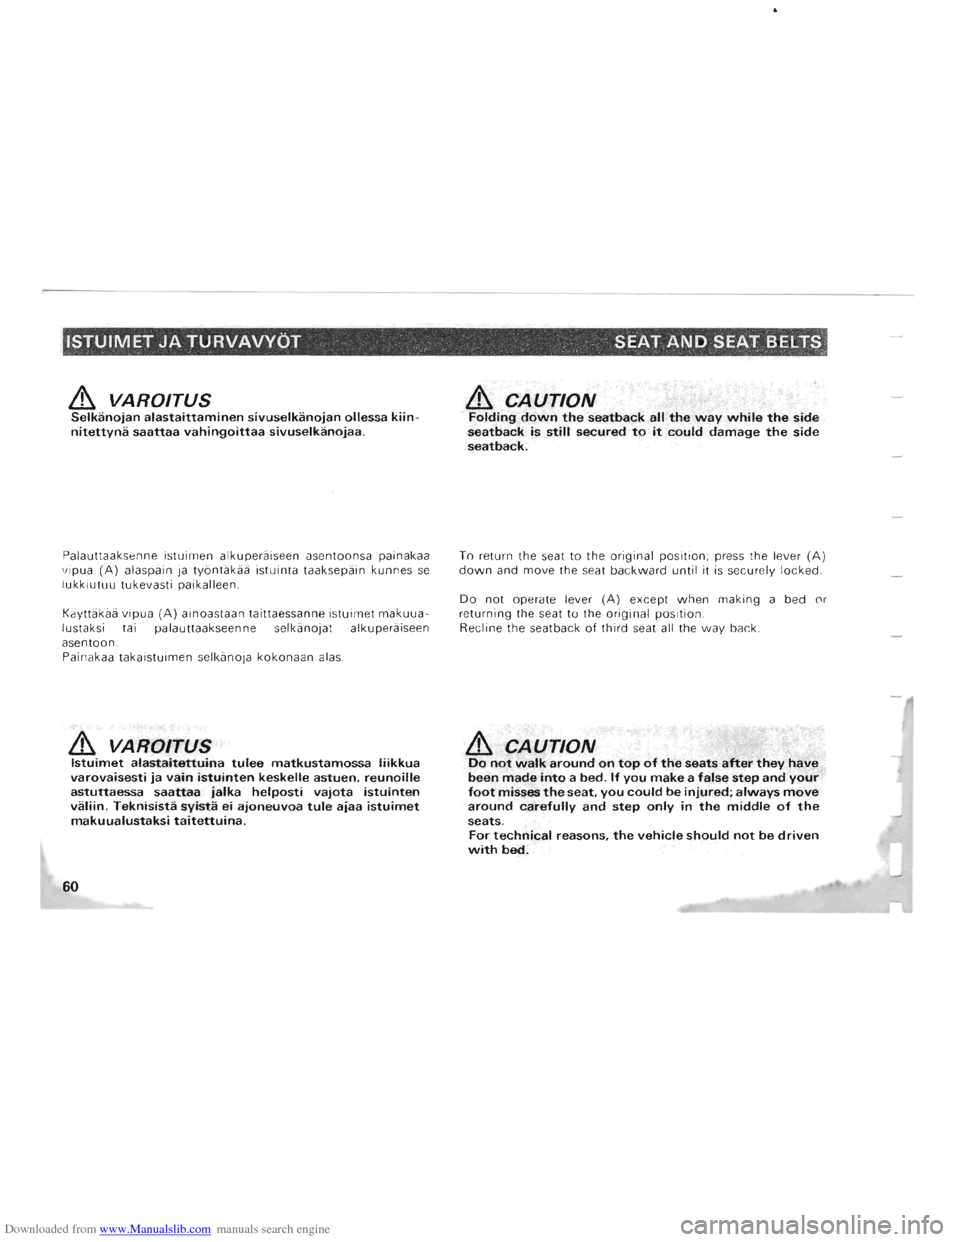
& VAROITUS Selkanojan alastaittaminen sivuselkanojan ollessa kiinnitettyna saattaa vahingoittaa sivuselkanojaa .
Palauttaaksenne istuimen alkuperaiseen asentoonsa painakaa
vi pua (A) alaspain ja tyontakaa istuinta taaksepain kunnes se lukkiutuu tukevasti paikalleen .
Kayttakaa
vipua (A) ainoastaan taittaessanne istuimet makuua
lustaksi tai palauttaakseenne selkanojat alkuperaiseen
asentoon .
Painakaa takaistuimen selkanoja
kokonaan alas.
& VAROITUS Istuimet alastaitettuina tulee matkustamossa liikkua
varovaisesti ja vain istuinten keskelle astuen. reunoille
astuttaessa saattaa jalka helposti vajota istuinten valiin . Teknisista syista ei ajoneuvoa tule ajaa istuimet makuualustaksi taitettuina.
60
. .'
& CAUTION Folding down the seat back all the way while the side seatback is still secured to it could damage the side
seatback.
To return the seat to the original position; press the lever (A) down and move the seat backward until it is securely locked.
Do not operate lever (A) except when making a bed or returning the seat to the original position.
Recline the seatback of third seat all the way back .
& CAUTION Do not walk around on top of the seats after they have been made into a bed. If you make a false step and your foot misses the seat. you could be injured; always move around carefully and step only in the middle of the seats.
For technical reasons. the vehicle should not be driven with bed.
Page 56 of 302
Downloaded from www.Manualslib.com manuals search engine --------------
ISTUIMET JA TURVAVYDT' , .' '. ," . . SEAT AND' SEAT BELTS ' , !.' , . " , , ." ~ . . ~.
Paatuet
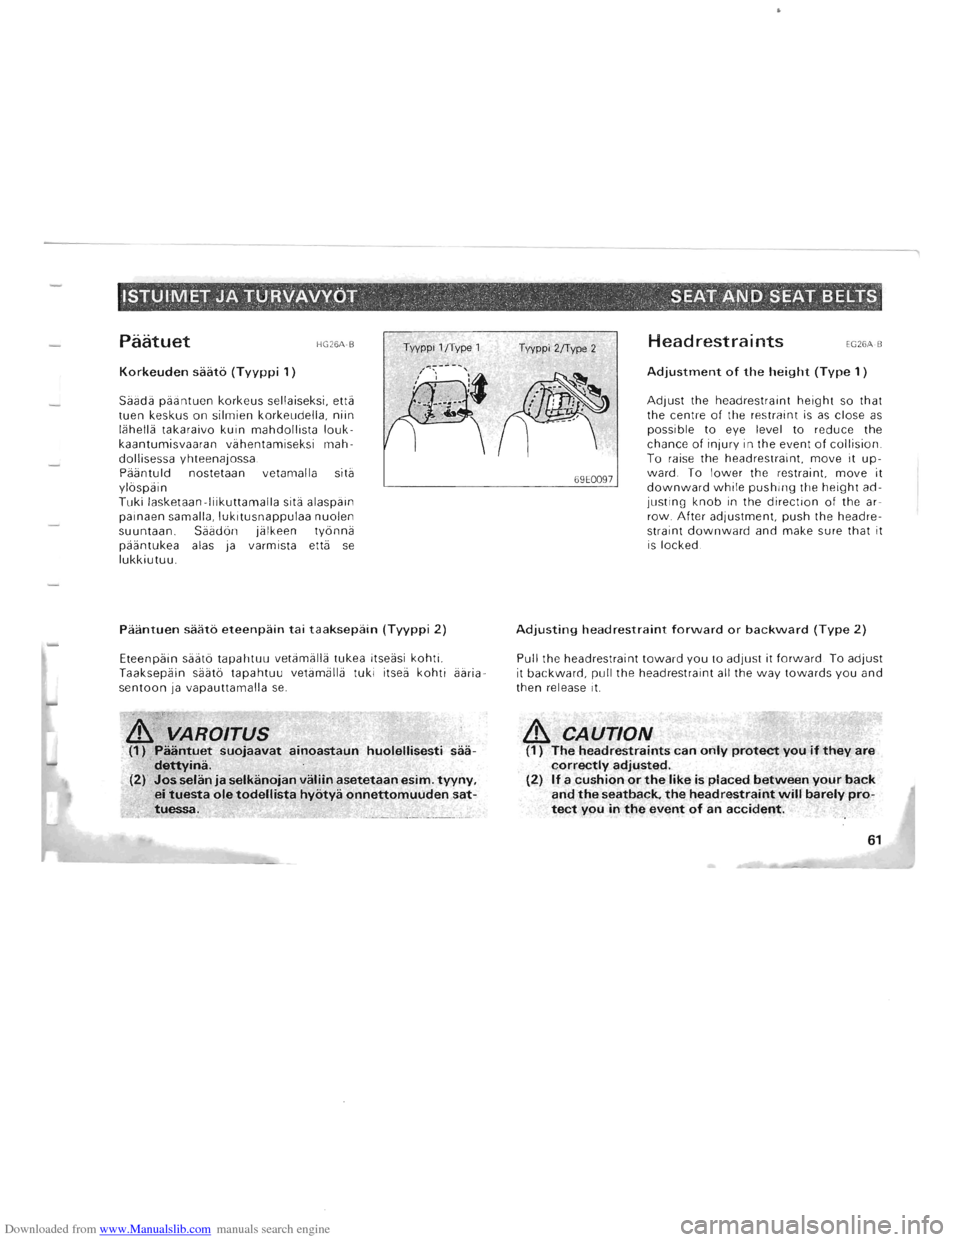
Korkeuden saato (Tyyppi 1 )
Saada paantuen korkeus sellaiseksi, etta
tuen keskus on silmien korkeudella , niin
lahella takaraivo kuin mahdollista
loukkaantumisvaaran vahentamiseksi mah
dollisessa yhteenajossa .
Paantuld nostetaan vetamalla sita
ylaspain
Tuki lasketaan -liikuttamalla sita alaspain
painaen samalla,
lukitusnappulaa nuolen
suuntaan. Saadan jalkeen tyanna
paantukea alas ja varmista etta se lukkiutuu.
Tyyppi l/Type 1
Paantuen saato eteenpain tai taaksepain (Tyyppi 2)
Eteenpain saata tapahtuu vetamalla tukea itseasi kohti.
Taaksepain saata tapahtuu vetamalla tuki itsea kohti aariasentoon ja vapauttamalla se.
, ... ", /" 7 .-:wqtrt~.'~
g;::. ,'VA ROITUS
. (1). ·Paantuet suojaavat ainoastaun huolellisesti saa
'," d~~ina. (2), Jos'selan ja selkanojan vi!lliin asetetaan esim. tyyny, , ei tuesta ole todellista hyotya onnettomuuden sat-
." •. 'tuessa. ' " ... _ ... .'._ .. _ ... _____ ....
T yyppi 2fT ype 2
69E0097
Headrestraints EG26A·B
Adjustment of the height (Type 1 )
Adjust the headrestraint height so that
the centre of the restraint is as close as possible to eye level to reduce the
chance of injury in the event of collision.
To raise the headrestraint move it up
ward. To lower the restraint move it downward while pushing the height ad
justing knob in the direction of the arrow. After adjustment push the headr e
straint downward and make sure that it is locked.
Adjusting headrestraint forward or backward (Type 2)
Pull the headrestraint toward you to adjust it forward. To adjust
it backward, pull the headrestraint all the way towards you and
then release it.
& CAUTION . , .
(1) The head restraints can only protect you if they are correctly adjusted. (2) If a cushion or the like is placed between your back and the seatback. the head restraint will barely pro-tect you in the event of an accident. .
61
Page 57 of 302
Downloaded from www.Manualslib.com manuals search engine I$T.UIMET,JA TURVAVVDT , ' SEAT AND,SEAT BELTS
Paantukien irrottaminen HG26B -A
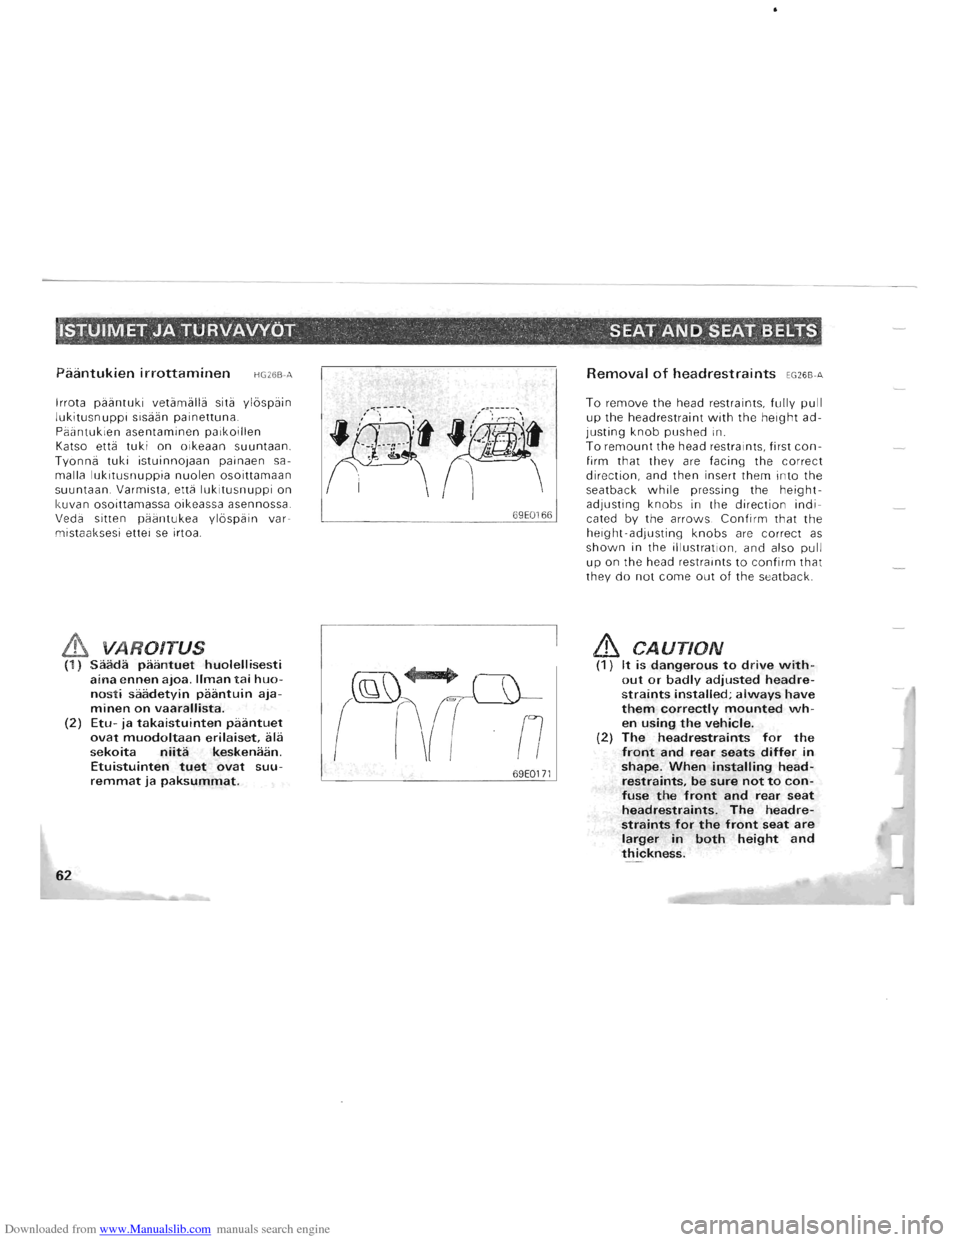
Irrota paantuki vetamalla sita ylospa in lukitusnuppi sisaan painettuna.
Paantukien asentaminen paikoillen Katso etta tuki on oikeaan suuntaan , Tyonna tuki istuinnojaan painaen sa
malla lukitusnuppia nuolen osoittamaan suuntaan . Varmista, etta lukitusnuppi on
k uvan osoittamassa oikeassa asennossa .
Veda sitten
paantukea ylospain var
mistaaksesi ettei se irtoa.
& VAROITUS (1) Saada paantuet huolellisesti aina ennen ajoa, IIman tai huonosti saadetyin paantuin ajaminen on vaarallista,
(2) Etu-ja takaistuinten paantuet ovat muodoltaan erilaiset, ala sekoita nllta keskenaan . Etuistuinten tuet ovat suuremmat ja paksummat.
62
69E0166
69E0171
Removal of headrestraints EG26B-A
To remove the head restraints, fully pull up the headrestraint with the height adjusting knob pushed in_
To remount the head restraints, first con
firm that they are facing the correct direction, and then insert them into the seatback while pressing the height
adjusting knobs in the direction indicate d by the arrows. Confirm that the h eight-adjusti ng knobs are correct as shown in the illustration, and also pull up on the head restraints to confirm that they do not come out of the seatback.
& CAUTION (1) It is dangerous to drive without or badly adjusted headrestraints installed; always have them correctly mounted when using the vehicle. (2) The headrestraints for the front and rear seats differ in
shape.
When installing headrestraints, be sure not to confuse the front and rear seat headrestraints. The headrestraints for the front seat are larger in both height and
thickness.
Page 58 of 302
Downloaded from www.Manualslib.com manuals search engine 'ISTUIMET JA TURVAVVOT ' " ." .", SEAT AND SEAT BELTS , '.' . , " .. " . , '
Turvavyot
Ajajan ja matkustajien turvallisuuden kannalta mahdollisen onnettomuuden sattuessa on suositeltavaa etta turvavoita
kaytetaan seka tie-etta maastoajossa,
& VAROITUS (1) Yhta turvavyota voi kayttaa vain yksi hen kilo kerrallaan, Toisin menetteleminen saattaa olla vaarallista, (2) Lantiovyota ei saa pitaa vatsan kohdalla, Onnettomuuden sattuessa se saattaa painaa akillisesti vatsaa vastaan ja lisata vahingoittumisen vaaraa, (3) Turvavyon olkaosaa ei saa pitaa kainalossa eika missaan muussakaan sopimattomassa paikassa, (4) Poistakaa vyosta kaikki kaanteet ja solmut ennen kayttoa, (5) Turvavyo antaa kantajallen suurimman mahdollisen suojan vain jos selkanoja on pystyasennossa, Jos istuinnoja on taaksepain kallellaan, on suurempi vaara etta matkustaja liukuu vyon alia, etenkin etukolarissa. Vyo saattaa nain vahingoittaa hanta tai han Iyo itsensa kojelautaan tai istuinnojaan.
Seat belts fG28A·D
To protect you and your passengers in the event of an accident,
it is recommended that the seat belts be worn by all occupants during vehicle use both on-and off-road. Seat belt should be
worn correctly.
& CAUTION (1) One seat belt should be used by only one person. Doing otherwise can be dangerous. (2) Never wear the lap belt across your abdomen. During accidents it can press sharply against abdomen and increase the risk of injury. (3) Never wear the shoulder portion of the seat belt under the arm or other out of position location. (4) Remove any twists when using the belt. (5) The seat belt will provide maximum protection for its wearer if the recliner seat back is placed in fully upright position. When the seat back is reclined, there is greater risk that the passenger will slide under the belt, especially in a forward impact accedent, and may be injured by the belt or by striking the instrument panel or seatbacks.
63
Page 59 of 302
Downloaded from www.Manualslib.com manuals search engine 'ISTUIMET JA TURVAVVOT' ,,':', .,' ",' . ' SEAT AND SEAT 'B~LTS' " . .. ~ ,. .
3-pisteturvavyo (Rullaturvavyo)
Tiimiin tyyppinen vyb ei vaadi pituuden siiiitbii. Vybn ollessa
kiiytbssii se mybtiiilee kiiyttiijiin liikkeitii, mutta iikillisen, voi
makkaan iskun vaikutuksesta se lukkiutuu automaattisesti pi
tiien kayttiijan paikoillaan .
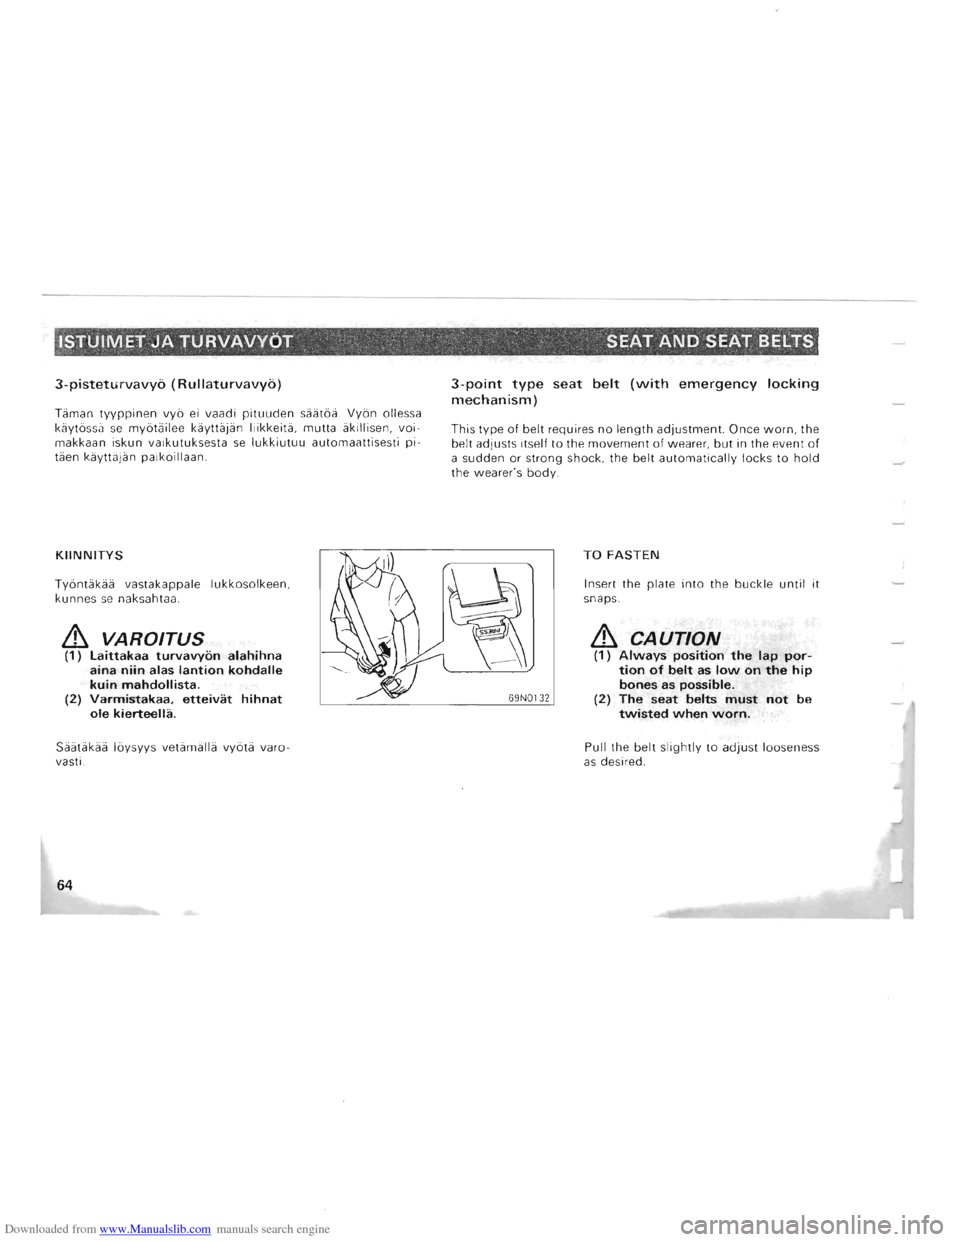
KIINNITYS
Tybntakaa vastakappale lukkosolkeen,
kunnes se naksahtaa .
& VAROITUS (1) Laittakaa turvavyon alahihna
aina niin alas lantion kohdalle
kuin mahdollista,
(2) Varmistakaa,
etteivat hihnat ole kierteella.
Siiatakiia Ibysyys vetamalla vybta varo·
vasti .
64
3-point type seat belt (with emergency locking
mechanism)
This type of belt requires no length adjustment. Once worn, the
belt adjusts itself to the movement of wearer, but in the event of a sudden or strong shock , the belt automatically locks to hold the wearer's body.
TO FASTEN
Insert the plate into the buckle until it snaps .
& CAUTION (1) Always position the lap portion of belt as low on the hip bones as possible.
(2) The seat belts must not be twisted when worn.
Pull the belt slightly to adjust looseness as desired.
Page 60 of 302
Downloaded from www.Manualslib.com manuals search engine ISTUIMET JATURVAVYOT .' ,", SEAT-AND SEAT BELTS : , '" ' , 1
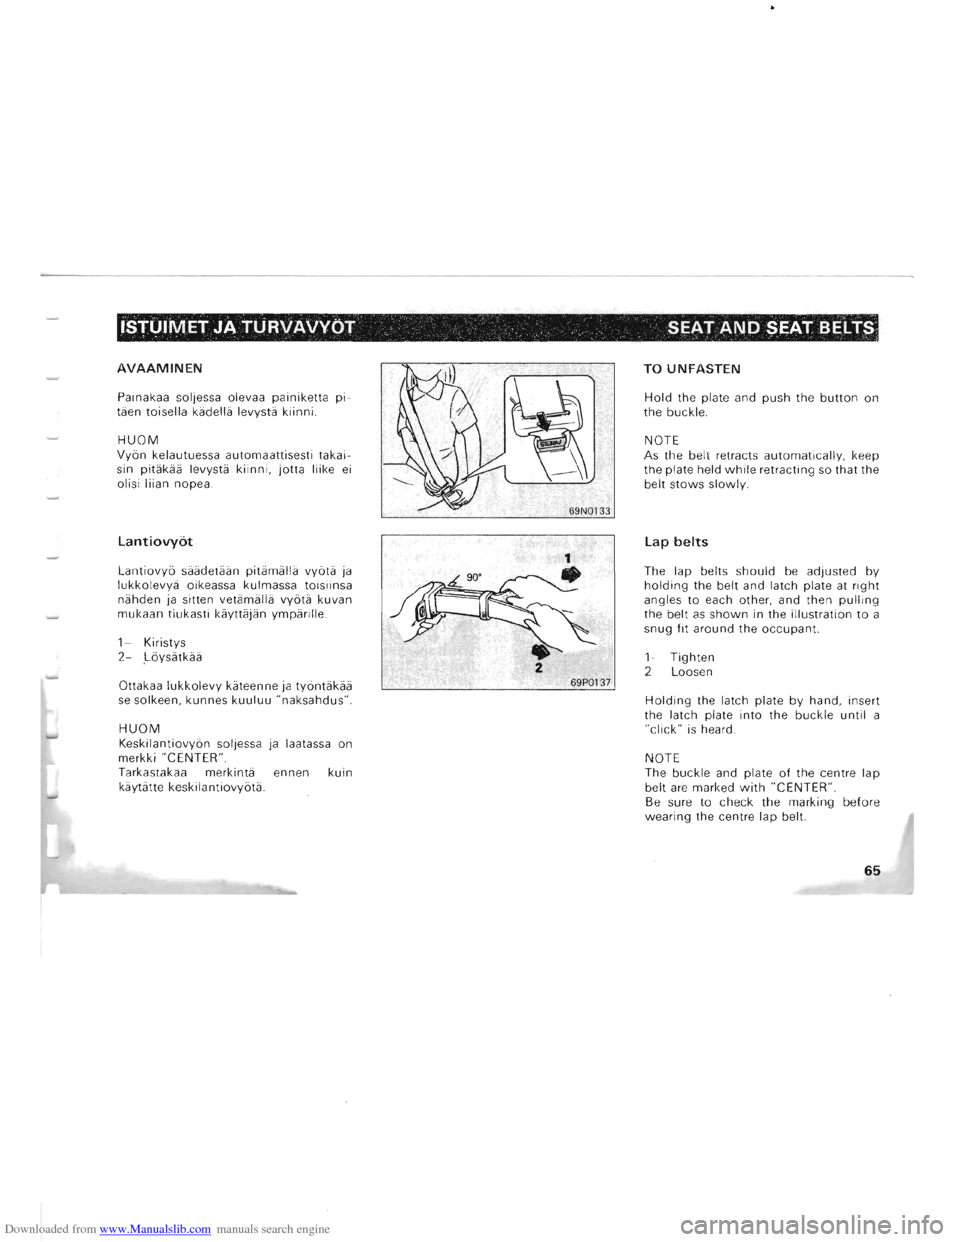
AVAAMINEN
Painakaa soljessa olevaa painiketta pitiien toisella kiidellii levystii kiinni.
HUOM Vyon kelautuessa automaattisesti takai
sin pitiikiiii levystii kiinni, jotta liike ei olisi liian nopea .
Lantiovyot
Lantiovyo siiiidetiiiin pitiimiillii vyotii ja lukkolevyii oikeassa kulmassa toisiinsa niihden ja sitten vetiimiillii vyotii kuvan
mukaan tiukasti kiiyttiijiin ympiirille.
1-Kiristys 2-,Loysiitkiiii
Ottakaa lukkolevy kiiteenne ja tyontiikiiii se solkeen, kunnes kuuluu "naksahdus".
HUOM Keskilantiovyon soljessa ja laatassa on
merkki "CENTER".
Tarkastakaa merkintii ennen kuin
kiiytiitte keskilantiovyotii.
2 69P0137
TO UNFASTEN
Hold the plate and push the button on
the buckle.
NOTE
As the belt retracts
automatically, keep
the plate held while retracting so that the
belt stows slowly.
Lap belts
The lap belts should be adjusted by holding the belt and latch plate at right angles to each other, and then pulling
the belt as shown in the illustration to a
snug fit around the occupant.
1-Tighten 2-Loosen
Holding the latch plate by hand, insert
the latch plate into the buckle until a "click" is heard.
NOTE
The
buckle and plate of the centre lap
belt are marked with "CENTER".
Be sure to check the marking before
wearing the centre lap belt.
65