instrument panel MITSUBISHI SHOGUN 2003 Owner's Manual (in English)
[x] Cancel search | Manufacturer: MITSUBISHI, Model Year: 2003, Model line: SHOGUN, Model: MITSUBISHI SHOGUN 2003Pages: 392, PDF Size: 14.34 MB
Page 75 of 392

WARNING
IT IS VERY IMPORTANT TO BE
PROPERLY SEATED.
A driver or front passenger too close
to the steering wheel or instrument
panel during air bag deployment can
be killed or seriously injured.
Air bags inflate very fast, and with
great force.
If the driver and front passenger are
not properly seated and restrained
the air bags may not protect you
properly, and could cause serious or
fatal injuries when it inflates.
(1) Before driving, adjust the driv-
er’s seat as far back as pos-
sible while still maintaining
complete control of the vehicle.
(2) Before driving, adjust the front
passenger seat as far back as
possible.
(3) Make sure all vehicle occupants
are always properly restrained
using the available seat belts.
(4) With seat belts properly fas-
tened the driver and front pas-
senger should sit well back and
upright without leaning against
the window or door.
G28G157A
WARNING
(5) Do not sit on the edge of the
seat, or lean head or chest close
to the steering wheel or instru-
ment panel. Do not put feet or
legs on or against the instru-
ment panel.
(6) Place all infants and small chil-
dren in the rear seat and prop-
erly restrained using an
appropriate child restraint sys-
tem.
The rear seat is the safest for
infants and children.
G28G176A
WARNING
(7) Infants and small children should
never be unrestrained, stand up
against the instrument panel or
held in your arms or on your lap.
They could be seriously injured
or killed in a collision, includ-
ing when the air bag inflates.
They should be properly seated
in the rear seat in an appropri-
ate child restraint system. See
the“Child restraint”section of
this owner’s manual.
Seat and seat belts
3-43
Div:
Out put date:
Page 78 of 392
When the impact sensors detect an impact
of sufficient frontal or side force, an auto-
mated circuit ignites materials in the infla-
tor to generate gas and inflate the air bags.
The air bags deployment produces a sud-
den, loud noise, and releases some smoke
and powder, but these conditions are not
injurious, and do not indicate a fire in the
vehicle. People with respiratory problems
may feel some temporary irritation from
chemicals used to produce the deployment;
open the windows after air bag deploy-
ment, if safe to do so.
The air bags deflate very rapidly after
deployment, so there is little danger of
obscured vision.
The time required from the sensors detect-
ing an impact to deflation of the air bags
after deployment is shorter than a blink of
an eye.
CAUTION
Air bags are inflated at an extremely
rapid speed. In certain situations,
contact with inflating air bags can
result in light cuts, bruises, and the
like.
G28G242A
Driver’s and passenger’s front air
bag system
EG29C-D
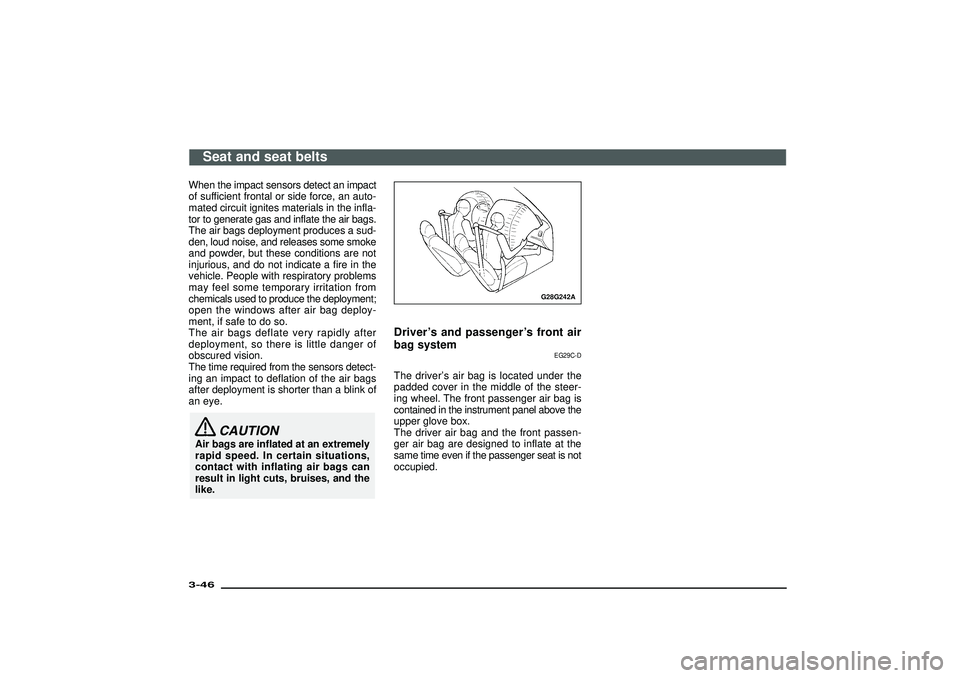
The driver’s air bag is located under the
padded cover in the middle of the steer-
ing wheel. The front passenger air bag is
contained in the instrument panel above the
upper glove box.
The driver air bag and the front passen-
ger air bag are designed to inflate at the
same time even if the passenger seat is not
occupied.
Seat and seat belts
3-46Div:
Out put date:
Page 79 of 392

G28L079D
Deployment of front air bagsThe front air bags ARE DESIGNED TO DEPLOY when…
The front air bags are designed to deploy when the vehicle suf-
fers a moderate to severe frontal impact. A typical condition is
shown in the illustration:
1- Head-on collision with a solid wall at a speed of approxi-
mately 25 km/h (16 mph) or higher
2- Moderate to severe frontal impact within the shaded area
between the arrows
The front air bags will deploy if the severity of the impact is above
the designed threshold level, comparable to an approximately 25
km/h (16 mph) collision when impacting straight into a solid wall
that does not move or deform. If the severity of the impact is below
the above threshold level, the front air bags may not deploy. How-
ever, this threshold speed will be considerably higher if the vehicle
strikes an object that absorbs the impact by either deforming ormoving (for example, another stationary vehicle, pole or a guard
rail).
Because frontal collisions can easily move you out of position, it
is important to always properly wear your seat belts. Your seat
belts will help you to keep safe distance from the steering wheel
and instrument panel during the initial stages of air bag deploy-
ment. The initial stage of air bag inflation is the most forceful, and
can possibly cause serious or fatal injuries. Moreover, the seat
belts in your vehicle are your primary means of protection in a col-
lision. The SRS (Supplemental Restraint System) air bags are
designed to provide additional protection. Therefore, for your safety
and the safety of all occupants, be sure to always properly wear
your seat belts.
Seat and seat belts
3-47
Div:
Out put date:
Page 82 of 392
G28L082D
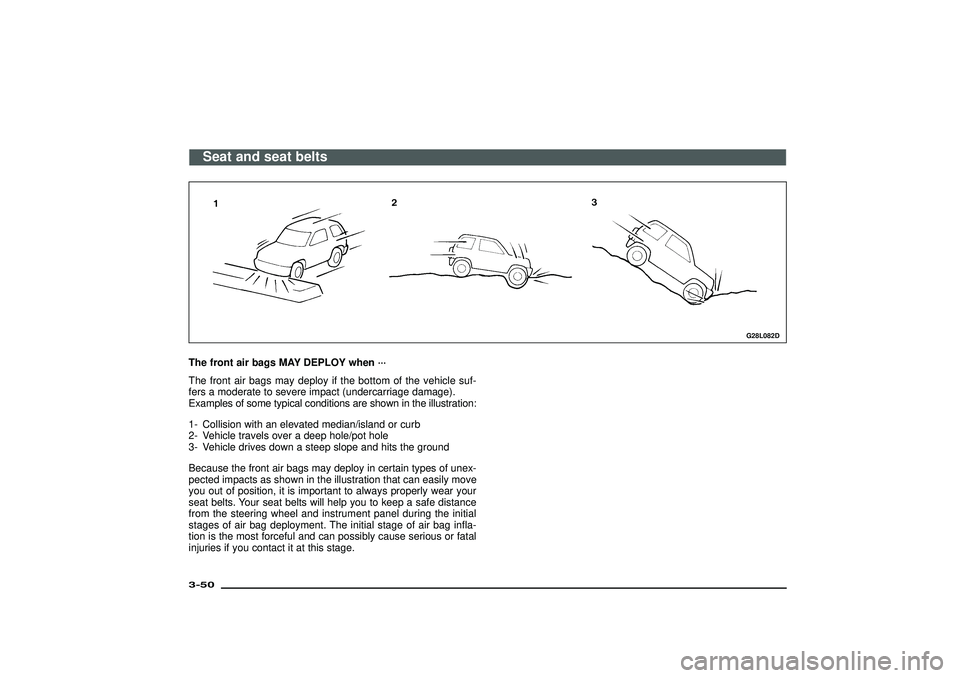
The front air bags MAY DEPLOY when···
The front air bags may deploy if the bottom of the vehicle suf-
fers a moderate to severe impact (undercarriage damage).
Examples of some typical conditions are shown in the illustration:
1- Collision with an elevated median/island or curb
2- Vehicle travels over a deep hole/pot hole
3- Vehicle drives down a steep slope and hits the ground
Because the front air bags may deploy in certain types of unex-
pected impacts as shown in the illustration that can easily move
you out of position, it is important to always properly wear your
seat belts. Your seat belts will help you to keep a safe distance
from the steering wheel and instrument panel during the initial
stages of air bag deployment. The initial stage of air bag infla-
tion is the most forceful and can possibly cause serious or fatal
injuries if you contact it at this stage.
Seat and seat belts
3-50Div:
Out put date:
Page 83 of 392
G28G308A
WARNING
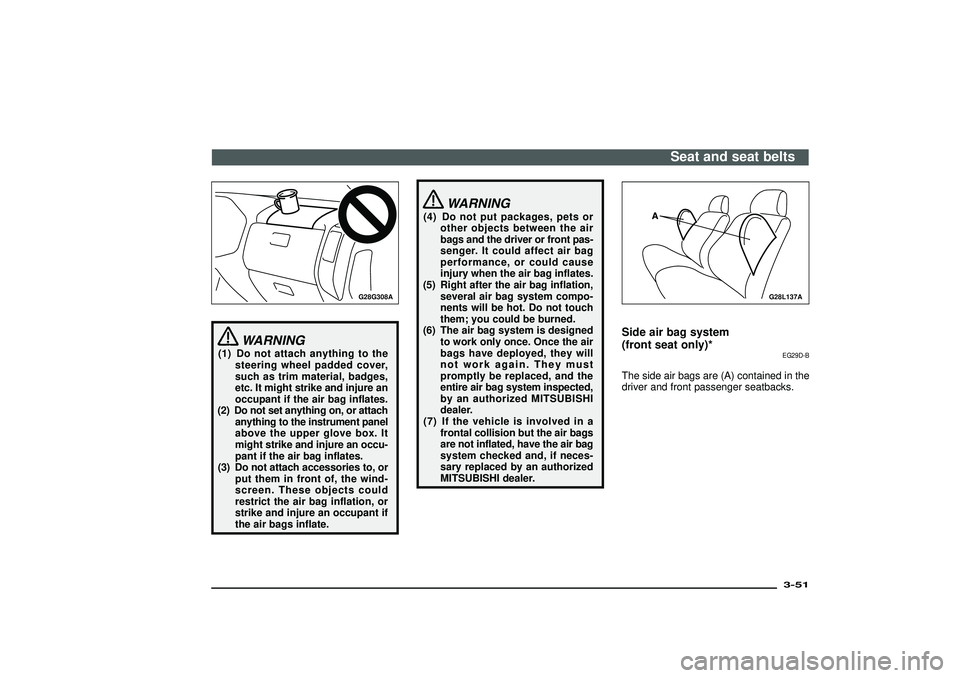
(1) Do not attach anything to the
steering wheel padded cover,
such as trim material, badges,
etc. It might strike and injure an
occupant if the air bag inflates.
(2) Do not set anything on, or attach
anything to the instrument panel
above the upper glove box. It
might strike and injure an occu-
pant if the air bag inflates.
(3) Do not attach accessories to, or
put them in front of, the wind-
screen. These objects could
restrict the air bag inflation, or
strike and injure an occupant if
the air bags inflate.
WARNING
(4) Do not put packages, pets or
other objects between the air
bags and the driver or front pas-
senger. It could affect air bag
performance, or could cause
injury when the air bag inflates.
(5) Right after the air bag inflation,
several air bag system compo-
nents will be hot. Do not touch
them; you could be burned.
(6) The air bag system is designed
to work only once. Once the air
bags have deployed, they will
not work again. They must
promptly be replaced, and the
entire air bag system inspected,
by an authorized MITSUBISHI
dealer.
(7) If the vehicle is involved in a
frontal collision but the air bags
are not inflated, have the air bag
system checked and, if neces-
sary replaced by an authorized
MITSUBISHI dealer.
G28L137A
Side air bag system
(front seat only)*
EG29D-B
The side air bags are (A) contained in the
driver and front passenger seatbacks.
Seat and seat belts
3-51
Div:
Out put date:
Page 89 of 392
The pre-tensioner activates whenever a
strong impact is applied at the front of the
vehicle, even if the seat belt is not worn.
The pre-tensioner seat belts may not acti-
vate in certain frontal collisions, even
though the vehicle may be severely dam-
aged. Such non-activation does not mean
that something is wrong with the SRS sys-
tem, but rather that the collision forces were
not severe enough to activate it.
WARNING
(1) Following the pre-tensioner seat
belt activation, several
pre-tensioner seat belt system
components will be hot. Do not
touch them after activation.
(2) The pre-tensioner seat belt sys-
tem is designed to work only
once. After the pre-tensioner
seat belts have been activated,
they will not work again. They
must promptly be replaced, and
the entire pre-tensioner seat belt
system inspected by an autho-
rized MITSUBISHI dealer.
(3) If the vehicle is involved in a
frontal collision but the
pre-tensioner seat belts are not
activated, be sure to have the
pre-tensioner seat belt system
checked and, if necessary,
replaced by an authorized MIT-
SUBISHI dealer.
G28L103A
SRS warning lamp
EG29F-R
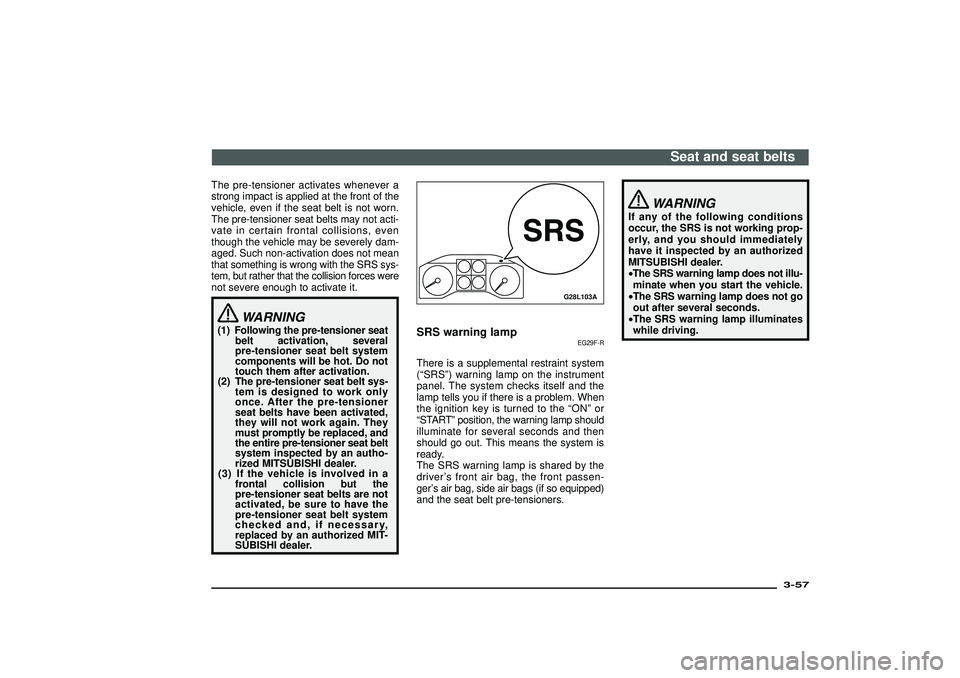
There is a supplemental restraint system
(“SRS”) warning lamp on the instrument
panel. The system checks itself and the
lamp tells you if there is a problem. When
the ignition key is turned to the“ON”or
“START”position, the warning lamp should
illuminate for several seconds and then
should go out. This means the system is
ready.
The SRS warning lamp is shared by the
driver’s front air bag, the front passen-
ger’s air bag, side air bags (if so equipped)
and the seat belt pre-tensioners.
WARNING
If any of the following conditions
occur, the SRS is not working prop-
erly, and you should immediately
have it inspected by an authorized
MITSUBISHI dealer.
•The SRS warning lamp does not illu-
minate when you start the vehicle.
•The SRS warning lamp does not go
out after several seconds.
•The SRS warning lamp illuminates
while driving.
Seat and seat belts
3-57
Div:
Out put date:
Page 106 of 392
E11A039A
Combination headlamps, dip-
per and turn signal switch
EE11AHEe
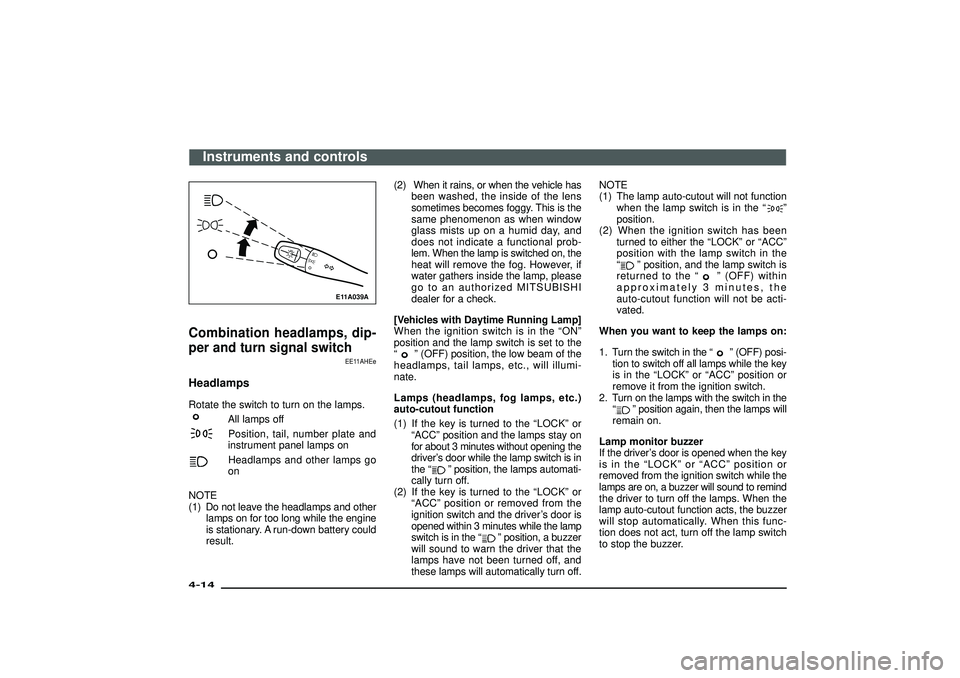
HeadlampsRotate the switch to turn on the lamps.
All lamps offPosition, tail, number plate and
instrument panel lamps onHeadlamps and other lamps go
on
NOTE
(1) Do not leave the headlamps and other
lamps on for too long while the engine
is stationary. A run-down battery could
result.(2) When it rains, or when the vehicle has
been washed, the inside of the lens
sometimes becomes foggy. This is the
same phenomenon as when window
glass mists up on a humid day, and
does not indicate a functional prob-
lem. When the lamp is switched on, the
heat will remove the fog. However, if
water gathers inside the lamp, please
go to an authorized MITSUBISHI
dealer for a check.
[Vehicles with Daytime Running Lamp]
When the ignition switch is in the“ON”
position and the lamp switch is set to the
“
”(OFF) position, the low beam of the
headlamps, tail lamps, etc., will illumi-
nate.
Lamps (headlamps, fog lamps, etc.)
auto-cutout function
(1) If the key is turned to the“LOCK”or
“ACC”position and the lamps stay on
for about 3 minutes without opening the
driver’s door while the lamp switch is in
the“
”position, the lamps automati-
cally turn off.
(2) If the key is turned to the“LOCK”or
“ACC”position or removed from the
ignition switch and the driver’s door is
opened within 3 minutes while the lamp
switch is in the“
”position, a buzzer
will sound to warn the driver that the
lamps have not been turned off, and
these lamps will automatically turn off.NOTE
(1) The lamp auto-cutout will not function
when the lamp switch is in the“
”
position.
(2) When the ignition switch has been
turned to either the“LOCK”or“ACC”
position with the lamp switch in the
“
”position, and the lamp switch is
returned to the“
”(OFF) within
approximately 3 minutes, the
auto-cutout function will not be acti-
vated.
When you want to keep the lamps on:
1. Turn the switch in the“
”(OFF) posi-
tion to switch off all lamps while the key
is in the“LOCK”or“ACC”position or
remove it from the ignition switch.
2. Turn on the lamps with the switch in the
“
”position again, then the lamps will
remain on.
Lamp monitor buzzer
If the driver’s door is opened when the key
is in the“LOCK”or“ACC”position or
removed from the ignition switch while the
lamps are on, a buzzer will sound to remind
the driver to turn off the lamps. When the
lamp auto-cutout function acts, the buzzer
will stop automatically. When this func-
tion does not act, turn off the lamp switch
to stop the buzzer.
Instruments and controls
4-14Div:
Out put date:
Page 162 of 392
Filling the fuel tank
EC20DOI
WARNING
Gasoline is highly flammable and
explosive. You could be burned or
seriously injured when handling it.
When refueling your vehicle, always
turn the engine off and keep away
from flames, sparks, and smoking
materrials. Always handlle fuel in
well-ventilated outdoor areas.Fuel tank capacity3-door models : 71 litres
5-door models : 90 litres
C20A197A
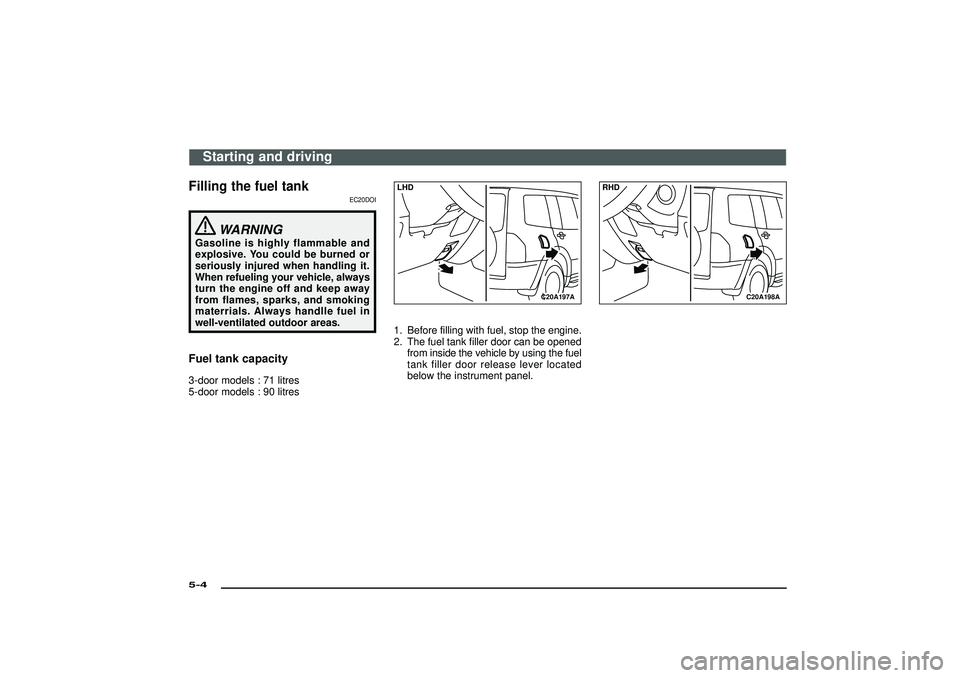
LHD1. Before filling with fuel, stop the engine.
2. The fuel tank filler door can be opened
from inside the vehicle by using the fuel
tank filler door release lever located
below the instrument panel.
C20A198A
RHD
Starting and driving
5-4Div:
Out put date:
Page 177 of 392
I04A196A
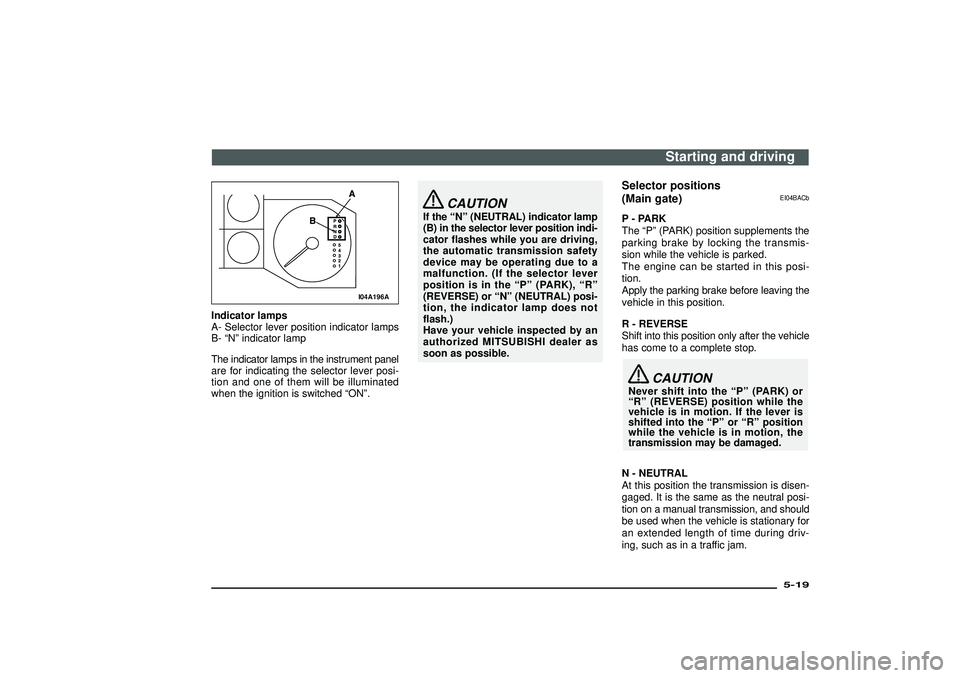
Indicator lamps
A- Selector lever position indicator lamps
B-“N”indicator lamp
The indicator lamps in the instrument panel
are for indicating the selector lever posi-
tion and one of them will be illuminated
when the ignition is switched“ON”.
CAUTION
If the“N”(NEUTRAL) indicator lamp
(B) in the selector lever position indi-
cator flashes while you are driving,
the automatic transmission safety
device may be operating due to a
malfunction. (If the selector lever
position is in the“P”(PARK),“R”
(REVERSE) or“N”(NEUTRAL) posi-
tion, the indicator lamp does not
flash.)
Have your vehicle inspected by an
authorized MITSUBISHI dealer as
soon as possible.
Selector positions
(Main gate)
EI04BACb
P - PARK
The“P”(PARK) position supplements the
parking brake by locking the transmis-
sion while the vehicle is parked.
The engine can be started in this posi-
tion.
Apply the parking brake before leaving the
vehicle in this position.
R - REVERSE
Shift into this position only after the vehicle
has come to a complete stop.
CAUTION
Never shift into the“P”(PARK) or
“R”(REVERSE) position while the
vehicle is in motion. If the lever is
shifted into the“P”or“R”position
while the vehicle is in motion, the
transmission may be damaged.
N - NEUTRAL
At this position the transmission is disen-
gaged. It is the same as the neutral posi-
tion on a manual transmission, and should
be used when the vehicle is stationary for
an extended length of time during driv-
ing, such as in a traffic jam.
Starting and driving
5-19
Div:
Out put date:
Page 251 of 392
To listen to a disc1. Insert the disc with the label facingupward.
When a disc is inserted, the CD player
will begin playing even if the radio or
tape player is being used.
2. To adjust the volume and tone, use the controls on the radio.
Refer to “How to adjust the volume ”and
“ How to adjust the tone ”on page 6-4.
3. When the eject button (1) is pressed, the disc will automatically stop and be
ejected.
4 . Whe nthe 3-inc hcompac tdis cis used,
playback can be made without using the
adapter. Insert the disc about in the cen-
tre of the discloading slot.
5. For information concerning the han- dling of compact discs, refer to the sec-
tion “Handling of compact discs ”on
page 6-33.
H12H079A
How to set CD autochanger*
EH12HAAb
The CD autochanger is located under the
centre of the instrument panel. It can
accommodate up to 6 discs.
NOTE
The 8 cm disc cannot be used in this com-
pact disc player.
H12H088A
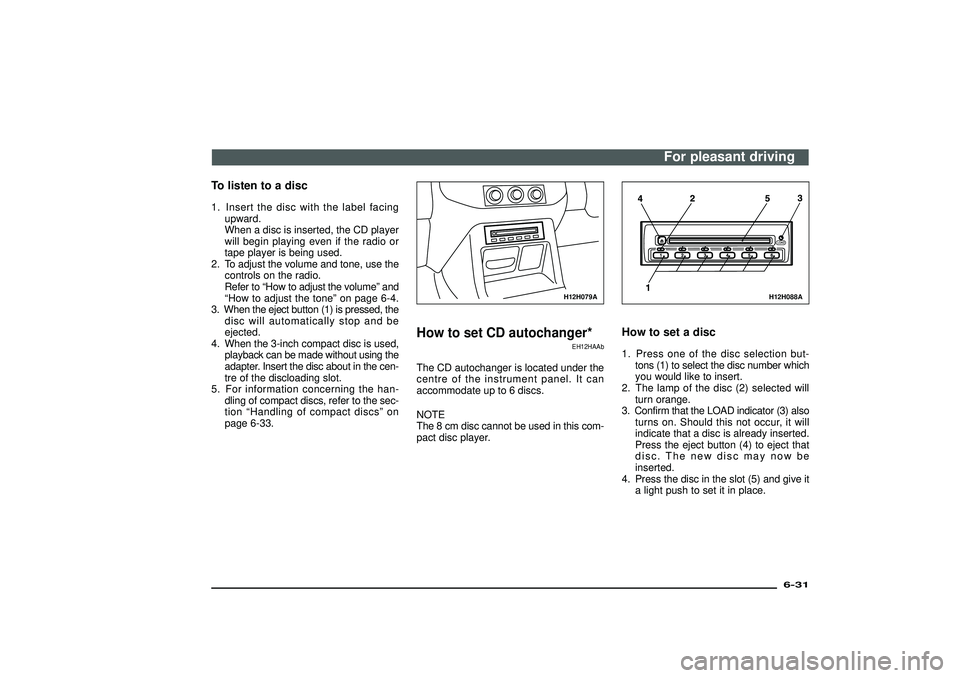
How to set a disc1. Press one of the disc selection but- tons (1) to select the disc number which
you would like to insert.
2. The lamp of the disc (2) selected will turn orange.
3. Confirm that the LOAD indicator (3) also turns on. Should this not occur, it will
indicate that a disc is already inserted.
Press the eject button (4) to eject that
disc. The new disc may now be
inserted.
4. Press the disc in the slot (5) and give it a light push to set it in place.
For pleasant driving
6-31
Div:
Out put date: