tow MITSUBISHI SHOGUN 2003 Owner's Manual (in English)
[x] Cancel search | Manufacturer: MITSUBISHI, Model Year: 2003, Model line: SHOGUN, Model: MITSUBISHI SHOGUN 2003Pages: 392, PDF Size: 14.34 MB
Page 18 of 392
F12A259A
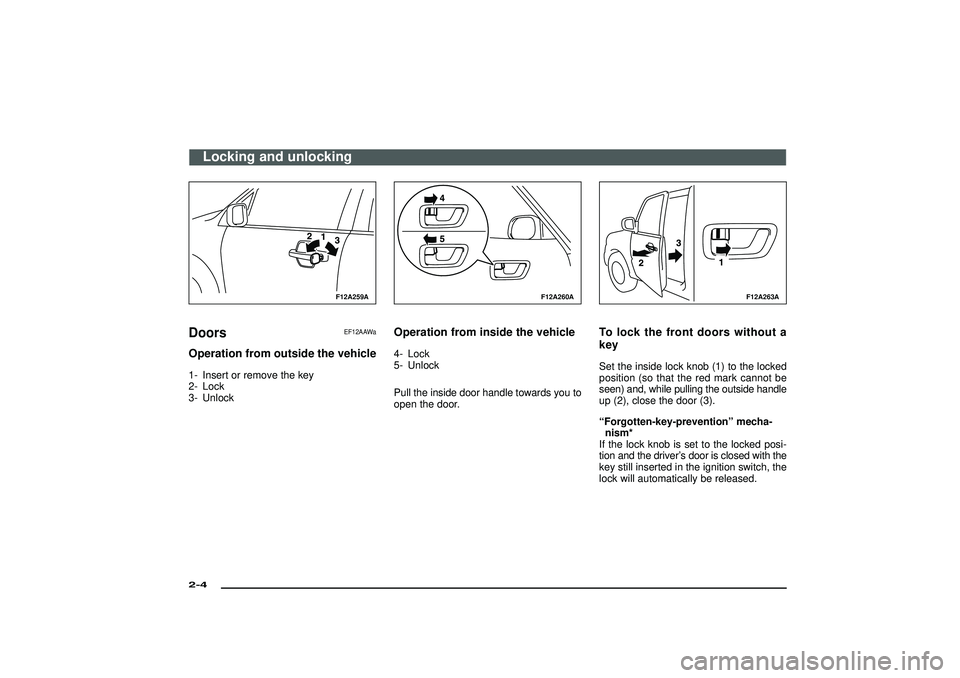
Doors
EF12AAWa
Operation from outside the vehicle1- Insert or remove the key
2- Lock
3- Unlock
F12A260A
Operation from inside the vehicle4- Lock
5- Unlock
Pull the inside door handle towards you to
open the door.
F12A263A
To lock the front doors without a
keySet the inside lock knob (1) to the locked
position (so that the red mark cannot be
seen) and, while pulling the outside handle
up (2), close the door (3).
“Forgotten-key-prevention”mecha-
nism*
If the lock knob is set to the locked posi-
tion and the driver’s door is closed with the
key still inserted in the ignition switch, the
lock will automatically be released.
Locking and unlocking
2-4Div:
Out put date:
Page 20 of 392
NOTE
(1) The confirmation function (this indi-
cates locking or unlocking of the doors
and backdoor with the flash of the turn-
signal lamps) can be deactivated. For
further information, please contact your
authorized MITSUBISHI dealer.
(2) The keyless entry system does not
operate if the key is left in the key cyl-
inder, or any door (including the
backdoor) is open.
(3) If the UNLOCK switch is pressed and
no door is opened within approxi-
mately 30 seconds: relocking will auto-
matically occur.
(4) The remote control switch will oper-
ate within about 4 m from the vehicle.
However, the operating range of the
remote control switch may change if
the vehicle is located near a TV trans-
mitting tower, power station, or radio
broadcasting station.
(5) If the doors cannot be locked or
unlocked after pressing the remote
control switch, the battery inside the
switch may need to be replaced.
Replace the battery at your autho-
rized MITSUBISHI dealer.(6) If your remote control switch is lost,
please contact your authorized MIT-
SUBISHI dealer for a replacement
remote control switch.
(7) If you wish to add a remote control
switch, please contact your autho-
rized MITSUBISHI dealer. A maxi-
mum of 4 remote control switches are
available for your vehicle.
CAUTION
(1) Do not leave the remote con-
trol switch where it may be
exposed to heat caused by the
direct rays of the sun.
(2) The remote control switch is a
precision electronic device.
Therefore, pay attention to the
following:
•Avoid knocking the remote
control switch hard against
other objects or dropping it.
•Keep the remote control switch
dry.
•Do not disassemble the remote
control switch.
F12C038A
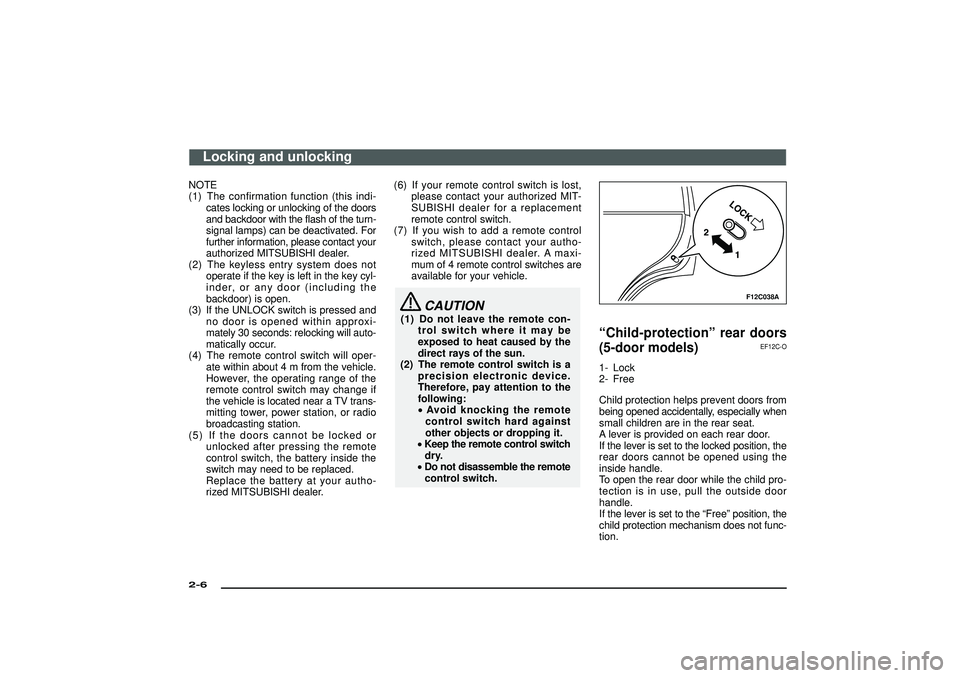
“Child-protection”rear doors
(5-door models)
EF12C-O
1- Lock
2- Free
Child protection helps prevent doors from
being opened accidentally, especially when
small children are in the rear seat.
A lever is provided on each rear door.
If the lever is set to the locked position, the
rear doors cannot be opened using the
inside handle.
To open the rear door while the child pro-
tection is in use, pull the outside door
handle.
If the lever is set to the“Free”position, the
child protection mechanism does not func-
tion.
Locking and unlocking
2-6Div:
Out put date:
Page 23 of 392
F13A157A
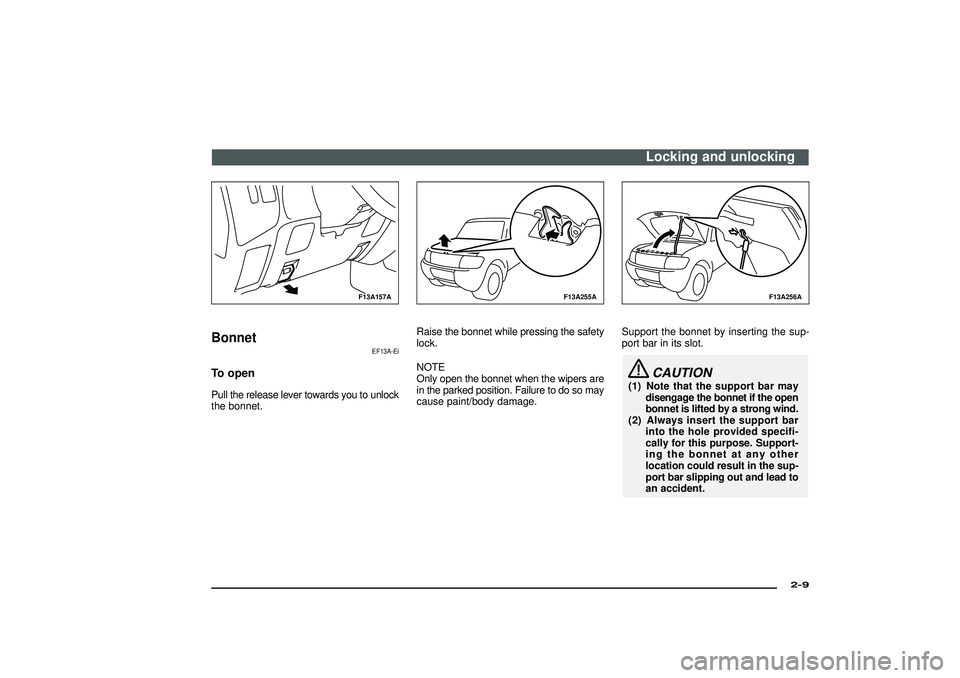
Bonnet
EF13A-Ei
To openPull the release lever towards you to unlock
the bonnet.
F13A255A
Raise the bonnet while pressing the safety
lock.
NOTE
Only open the bonnet when the wipers are
in the parked position. Failure to do so may
cause paint/body damage.
F13A256A
Support the bonnet by inserting the sup-
port bar in its slot.
CAUTION
(1) Note that the support bar may
disengage the bonnet if the open
bonnet is lifted by a strong wind.
(2) Always insert the support bar
into the hole provided specifi-
cally for this purpose. Support-
ing the bonnet at any other
location could result in the sup-
port bar slipping out and lead to
an accident.
Locking and unlocking
2-9
Div:
Out put date:
Page 25 of 392
F15A192A
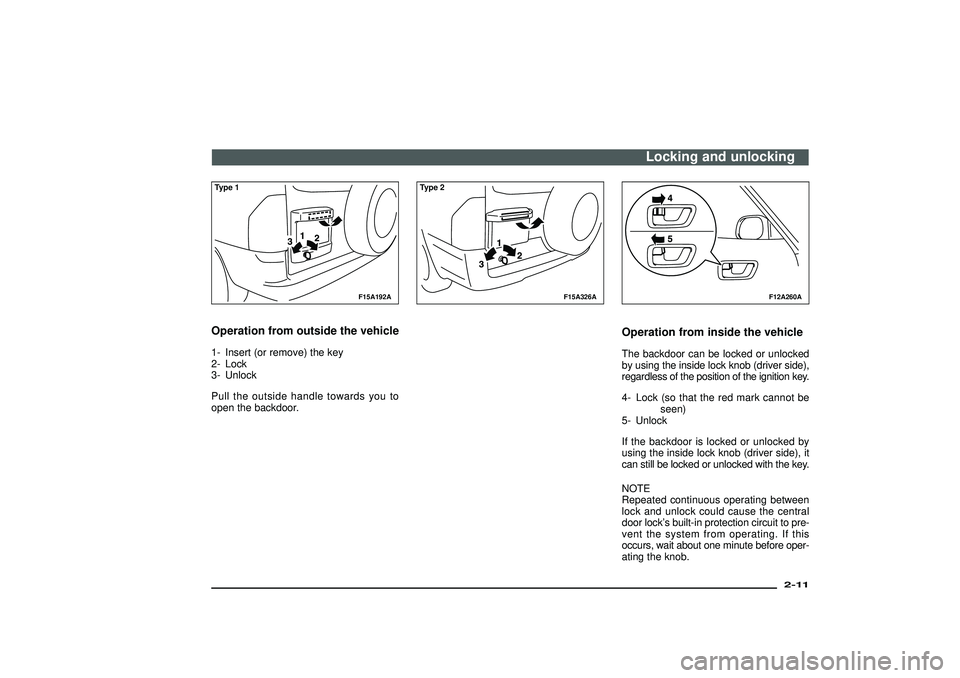
Type 1Operation from outside the vehicle1- Insert (or remove) the key
2- Lock
3- Unlock
Pull the outside handle towards you to
open the backdoor.
F15A326A
Type 2
F12A260A
Operation from inside the vehicleThe backdoor can be locked or unlocked
by using the inside lock knob (driver side),
regardless of the position of the ignition key.
4- Lock (so that the red mark cannot be
seen)
5- Unlock
If the backdoor is locked or unlocked by
using the inside lock knob (driver side), it
can still be locked or unlocked with the key.
NOTE
Repeated continuous operating between
lock and unlock could cause the central
door lock’s built-in protection circuit to pre-
vent the system from operating. If this
occurs, wait about one minute before oper-
ating the knob.
Locking and unlocking
2-11
Div:
Out put date:
Page 29 of 392
F18C014A
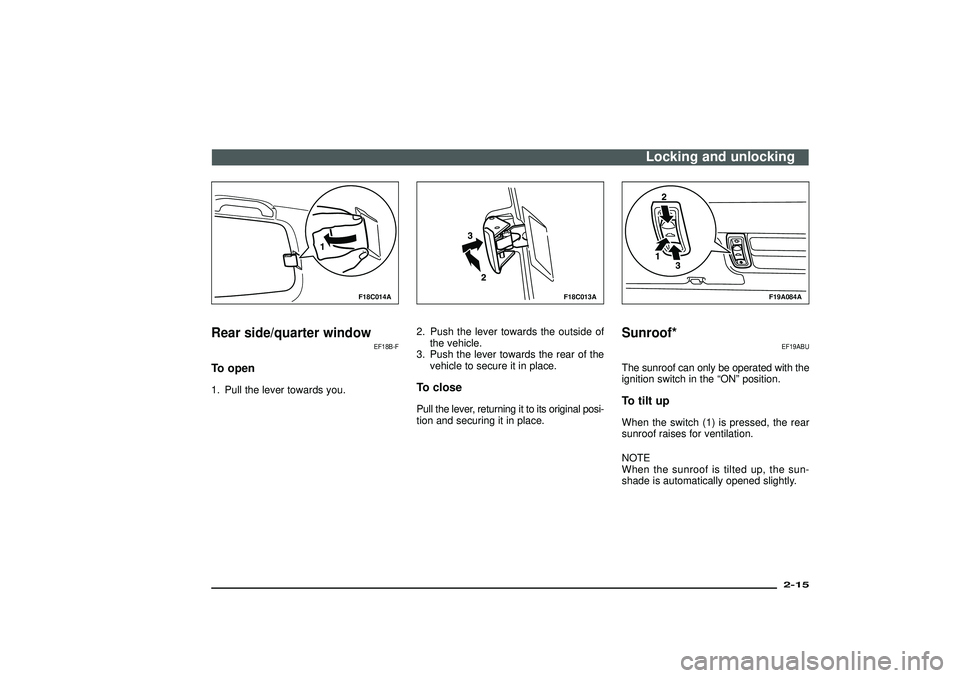
Rear side/quarter window
EF18B-F
To open1. Pull the lever towards you.
F18C013A
2. Push the lever towards the outside of
the vehicle.
3. Push the lever towards the rear of the
vehicle to secure it in place.To closePull the lever, returning it to its original posi-
tion and securing it in place.
F19A084A
Sunroof*
EF19ABU
The sunroof can only be operated with the
ignition switch in the“ON”position.To tilt upWhen the switch (1) is pressed, the rear
sunroof raises for ventilation.
NOTE
When the sunroof is tilted up, the sun-
shade is automatically opened slightly.
Locking and unlocking
2-15
Div:
Out put date:
Page 36 of 392
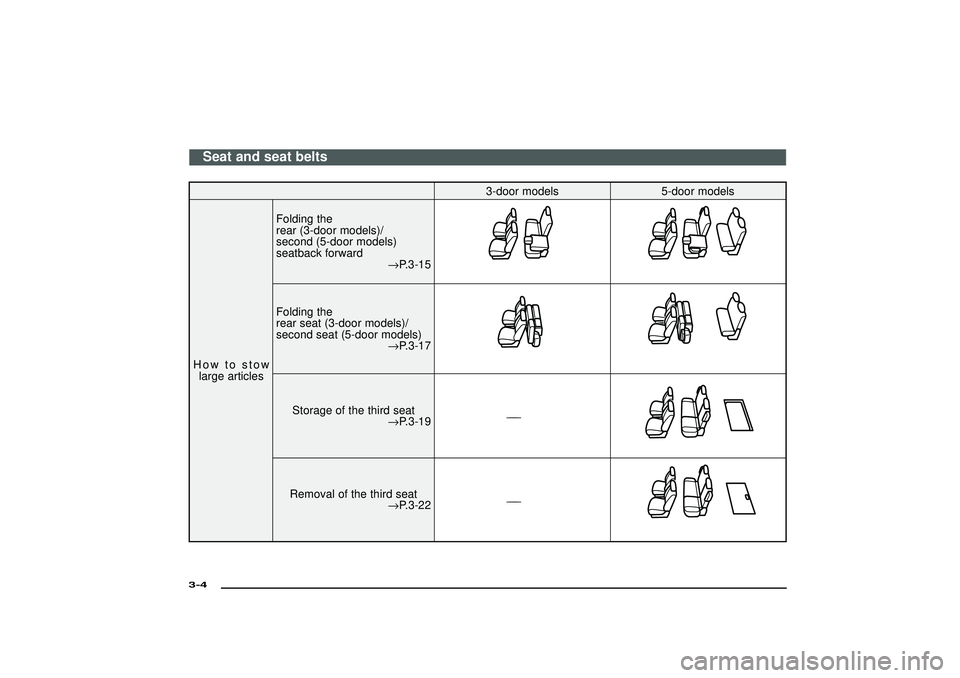
3-door models 5-door models
How to stow
large articlesFolding the
rear (3-door models)/
second (5-door models)
seatback forward
→P.3-15
Folding the
rear seat (3-door models)/
second seat (5-door models)
→P.3-17
Storage of the third seat
→P.3-19
————
Removal of the third seat
→P.3-22
————
Seat and seat belts
3-4Div:
Out put date:
Page 55 of 392
G24F032A
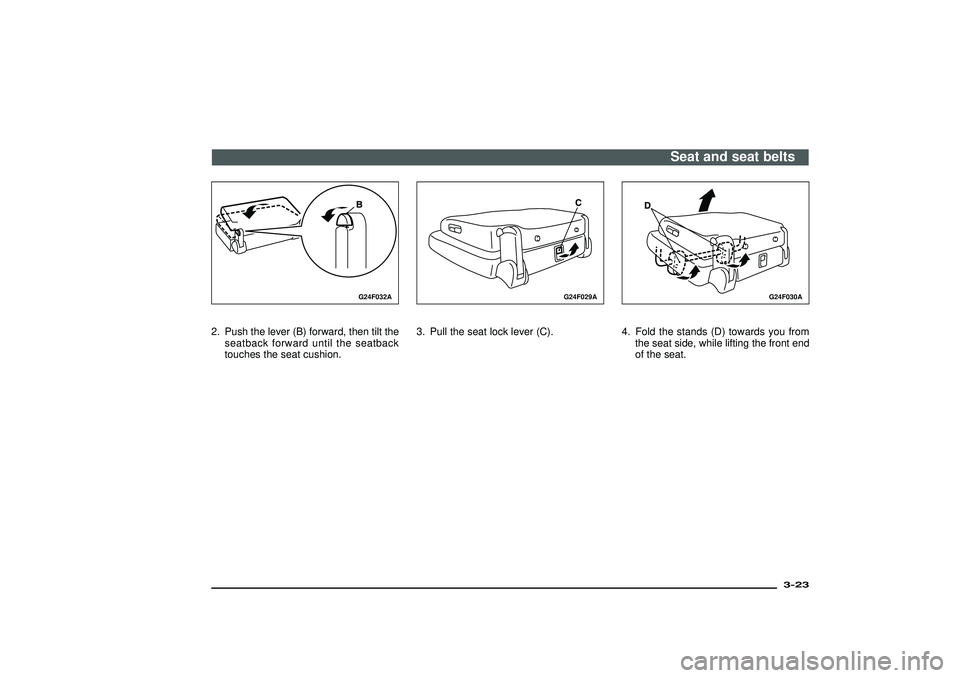
2. Push the lever (B) forward, then tilt the
seatback forward until the seatback
touches the seat cushion.
G24F029A
3. Pull the seat lock lever (C).
G24F030A
4. Fold the stands (D) towards you from
the seat side, while lifting the front end
of the seat.
Seat and seat belts
3-23
Div:
Out put date:
Page 61 of 392
G26A064A
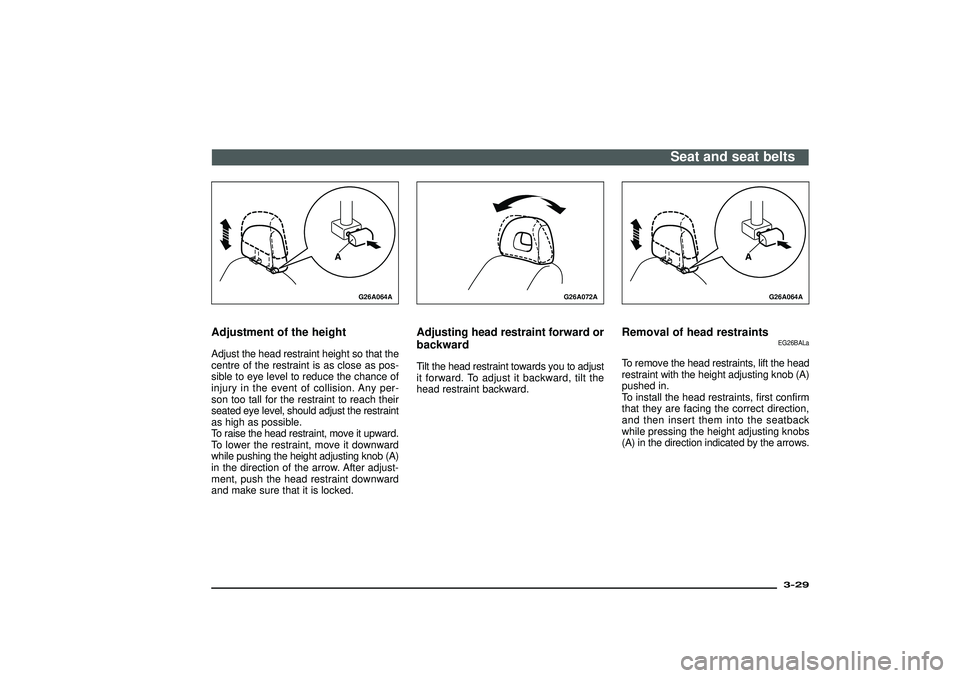
Adjustment of the heightAdjust the head restraint height so that the
centre of the restraint is as close as pos-
sible to eye level to reduce the chance of
injury in the event of collision. Any per-
son too tall for the restraint to reach their
seated eye level, should adjust the restraint
as high as possible.
To raise the head restraint, move it upward.
To lower the restraint, move it downward
while pushing the height adjusting knob (A)
in the direction of the arrow. After adjust-
ment, push the head restraint downward
and make sure that it is locked.
G26A072A
Adjusting head restraint forward or
backwardTilt the head restraint towards you to adjust
it forward. To adjust it backward, tilt the
head restraint backward.
G26A064A
Removal of head restraints
EG26BALa
To remove the head restraints, lift the head
restraint with the height adjusting knob (A)
pushed in.
To install the head restraints, first confirm
that they are facing the correct direction,
and then insert them into the seatback
while pressing the height adjusting knobs
(A) in the direction indicated by the arrows.
Seat and seat belts
3-29
Div:
Out put date:
Page 64 of 392

G28A051A
To unfasten
Hold the latch plate and push the button on
the buckle.
NOTE
As the belt retracts automatically, keep the
latch plate held while retracting so that the
belt stows slowly. Failure to do this could
damage the vehicle.
G08C007A
Adjustable seat belt anchor
(front seats)
EG08C-Ca
The seat belt anchor height can be
adjusted.
Move the seat belt anchor down with the
lock knob (A) depressed. To move the
anchor up, slide it without depressing the
lock knob (A).
CAUTION
When adjusting the seat belt anchor,
set it at a position that is suffi-
ciently high so that the belt will make
full contact with your shoulder but
will not touch your neck.
G28E045A
Rear/second, third seat belt storage
EG28EABa
When the seat belt is not in use, store it as
shown in the illustration.
1- Seat belt plate storage
A-Short (3-door) models
B-Long (5-door) models
Seat and seat belts
3-32Div:
Out put date:
Page 102 of 392
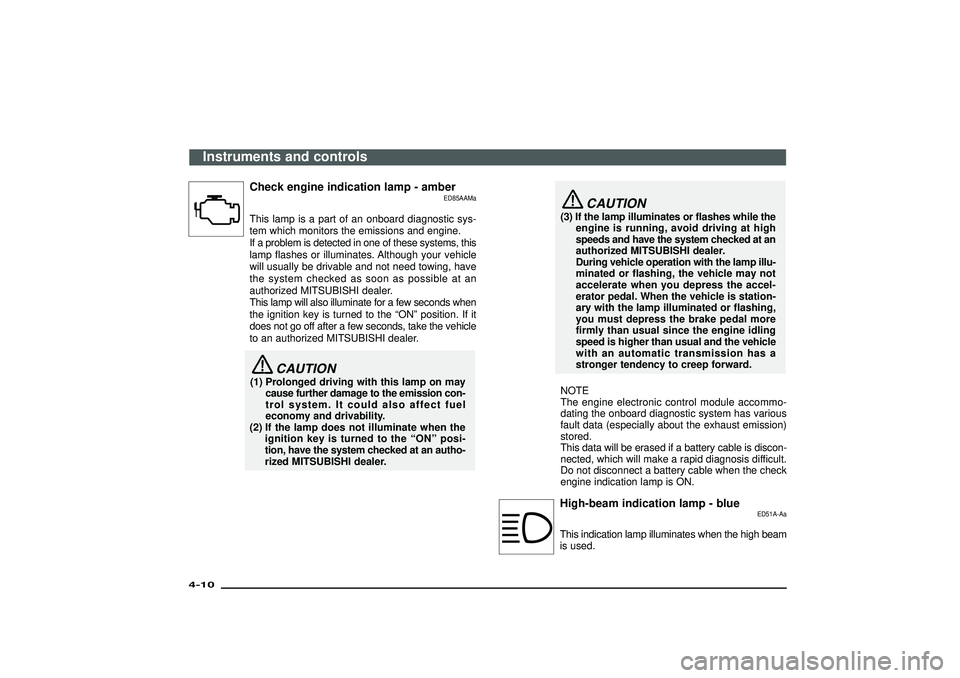
Check engine indication lamp - amber
ED85AAMa
This lamp is a part of an onboard diagnostic sys-
tem which monitors the emissions and engine.
If a problem is detected in one of these systems, this
lamp flashes or illuminates. Although your vehicle
will usually be drivable and not need towing, have
the system checked as soon as possible at an
authorized MITSUBISHI dealer.
This lamp will also illuminate for a few seconds when
the ignition key is turned to the “ON” position. If it
does not go off after a few seconds, take the vehicle
to an authorized MITSUBISHI dealer.
CAUTION
(1) Prolonged driving with this lamp on maycause further damage to the emission con-
trol system. It could also affect fuel
economy and drivability.
(2) If the lamp does not illuminate when the ignition key is turned to the “ON ”posi-
tion, have the system checked at an autho-
rized MITSUBISHI dealer.
CAUTION
(3) If the lamp illuminates or flashes while the engine is running, avoid driving at high
speeds and have the system checked at an
authorized MITSUBISHI dealer.
During vehicle operation with the lamp illu-
minated or flashing, the vehicle may not
accelerate when you depress the accel-
erator pedal. When the vehicle is station-
ary with the lamp illuminated or flashing,
you must depress the brake pedal more
firmly than usual since the engine idling
speed is higher than usual and the vehicle
with an automatic transmission has a
stronger tendency to creep forward.
NOTE
The engine electronic control module accommo-
dating the onboard diagnostic system has various
fault data (especially about the exhaust emission)
stored.
This data will be erased if a battery cable is discon-
nected, which will make a rapid diagnosis difficult.
Do not disconnect a battery cable when the check
engine indication lamp is ON.High-beam indication lamp - blue
ED51A-Aa
This indication lamp illuminates when the high beam
is used.
Instruments and controls
4-10Div:
Out put date: