NISSAN 300ZX 1984 Z31 Manual Transmission Workshop Manual
300ZX 1984 Z31
NISSAN
NISSAN
https://www.carmanualsonline.info/img/5/575/w960_575-0.png
NISSAN 300ZX 1984 Z31 Manual Transmission Workshop Manual
Trending: length, lock, ECO mode, transmission fluid, tow, recommended oil, ECU
Page 1 of 34
MANUAL TRANSMISSION
I
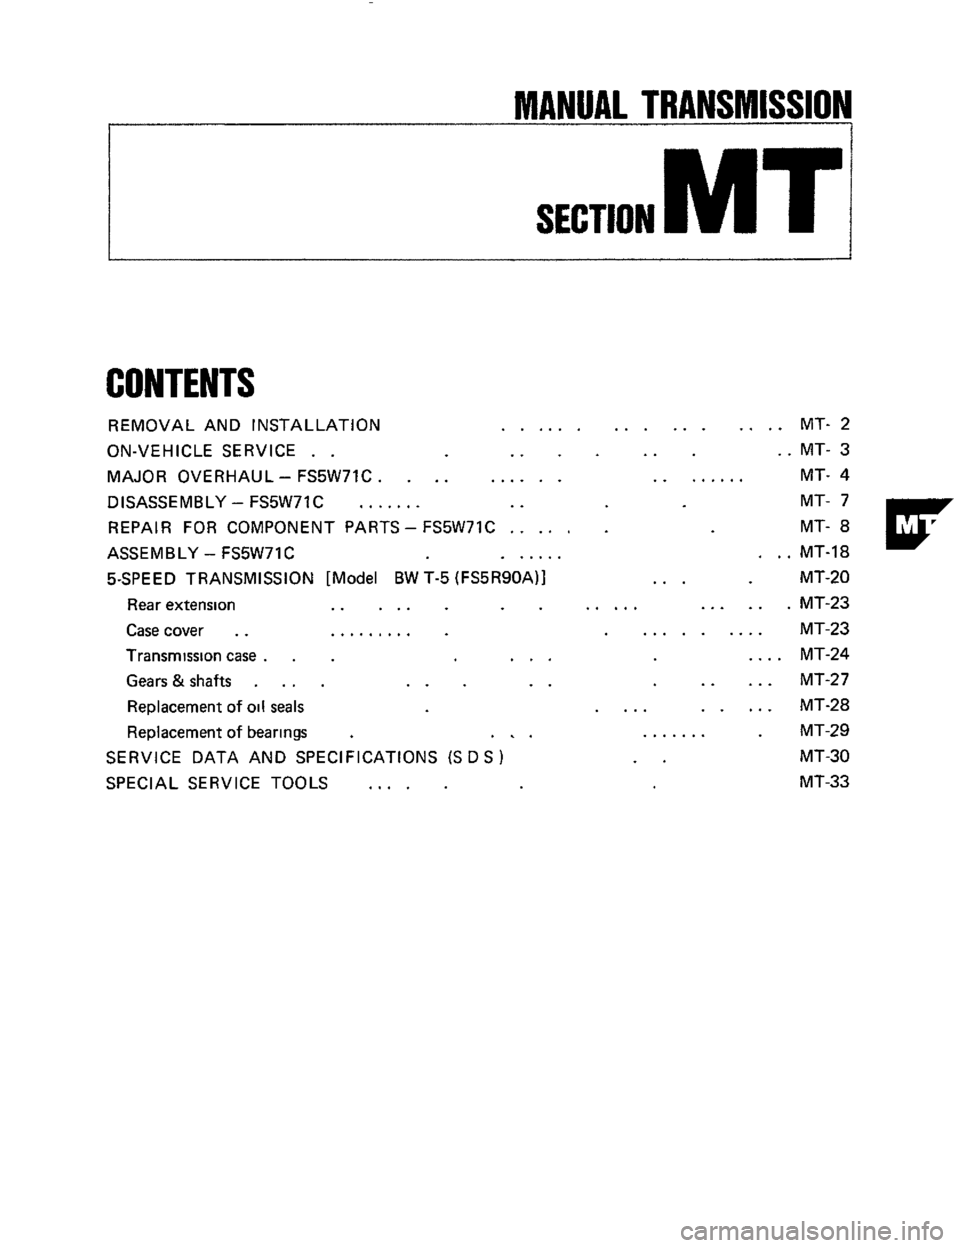
CONTENTS
REMOVAL AND INSTALLATION ...... ...... .... MT-2
ON-VEHICLE SERVICE
. . .. .. _. MT- 3
MAJOR OVERHAUL - FS5W71C. ... ...... ........ Mi- 4
DISASSEMBLY - FS5W71C ....... .. MT- 7
REPAIR FOR COMPONENT PARTS-FS5W71C ..... MT- a
ASSEMBLY - FS5W71C ...... , . . MT-18
5-SPEED TRANSMISSION [Model BW T-5 (FS5R90AIl
... MT-20
Rear extension
.. ... ..... ...... MT-23
Case cover
. . ......... ......... MT-23
Transmission case
. . ... .... MT-24
Gearstkshafts
.... .. .. .. ... MT-27
Replacement of
oil seals .... ..... MT-28
Replacement
of bearings . .I. ....... . MT-29
SPECIAL SERVICE TOOLS .... MT-33
SERVICE DATA AND SPECIFICATIONS (S D S ) .. MT-30
Page 2 of 34
REMOVAL AND INSTALLATION
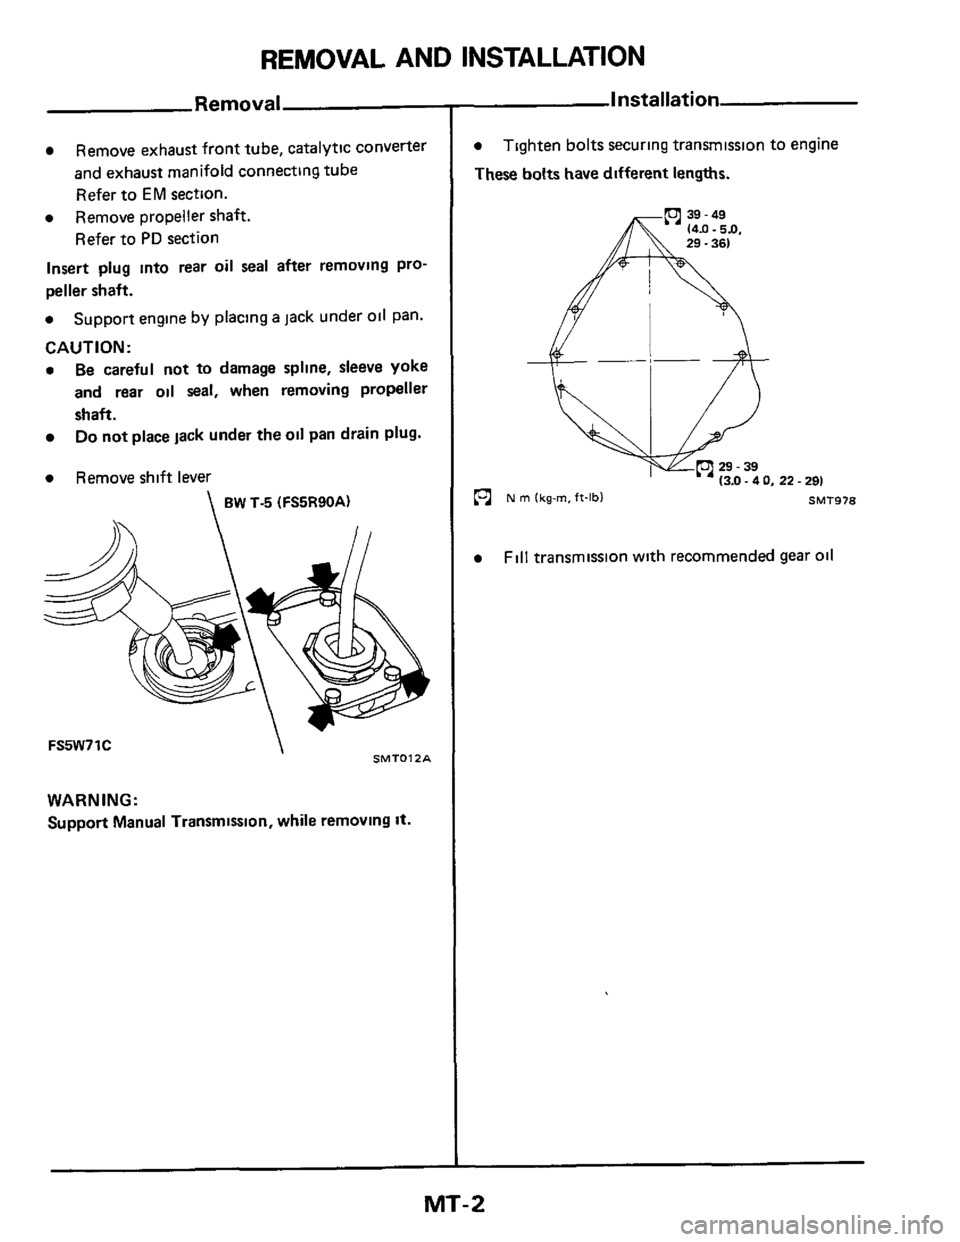
Remove exhaust front tube, catalytic converter
and exhaust manifold connecting tube
Refer to
EM section.
a Remove propeller shaft.
Refer to
PD section
Insert plug into rear oil seal after removing pro-
peller shaft.
a Support engine by placing a jack under oil pan.
CAUTION:
a Be careful not to damage spline, sleeve yoke
and rear oil seal, when removing propeller
shaft.
Do not place lack under the oil pan drain plug.
a Remove shift lever
BW T-5 (FS5R90A)
SMTOlZA FS5W71C
WARNING:
Support Manual Transmission, while removing It.
Installation
a
These bolts have different lengths.
Tighten bolts securing transmission to engine
22.291
SMT978
Fill transmission with recommended gear oil
MT-2
Page 3 of 34
ON-VEHICLE SERVICE
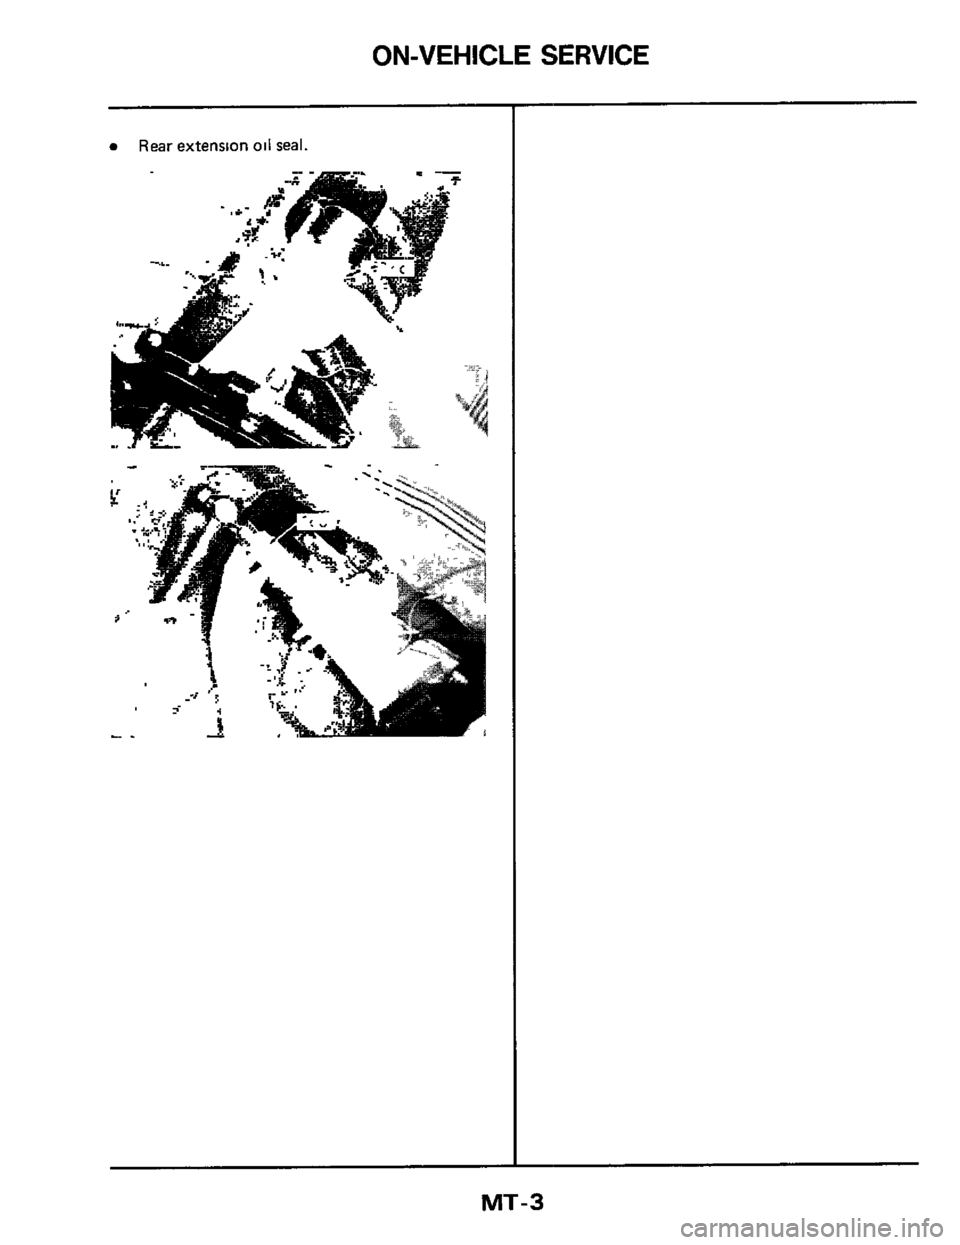
0 Rear extension oil seal.
I
MT-3
Page 4 of 34
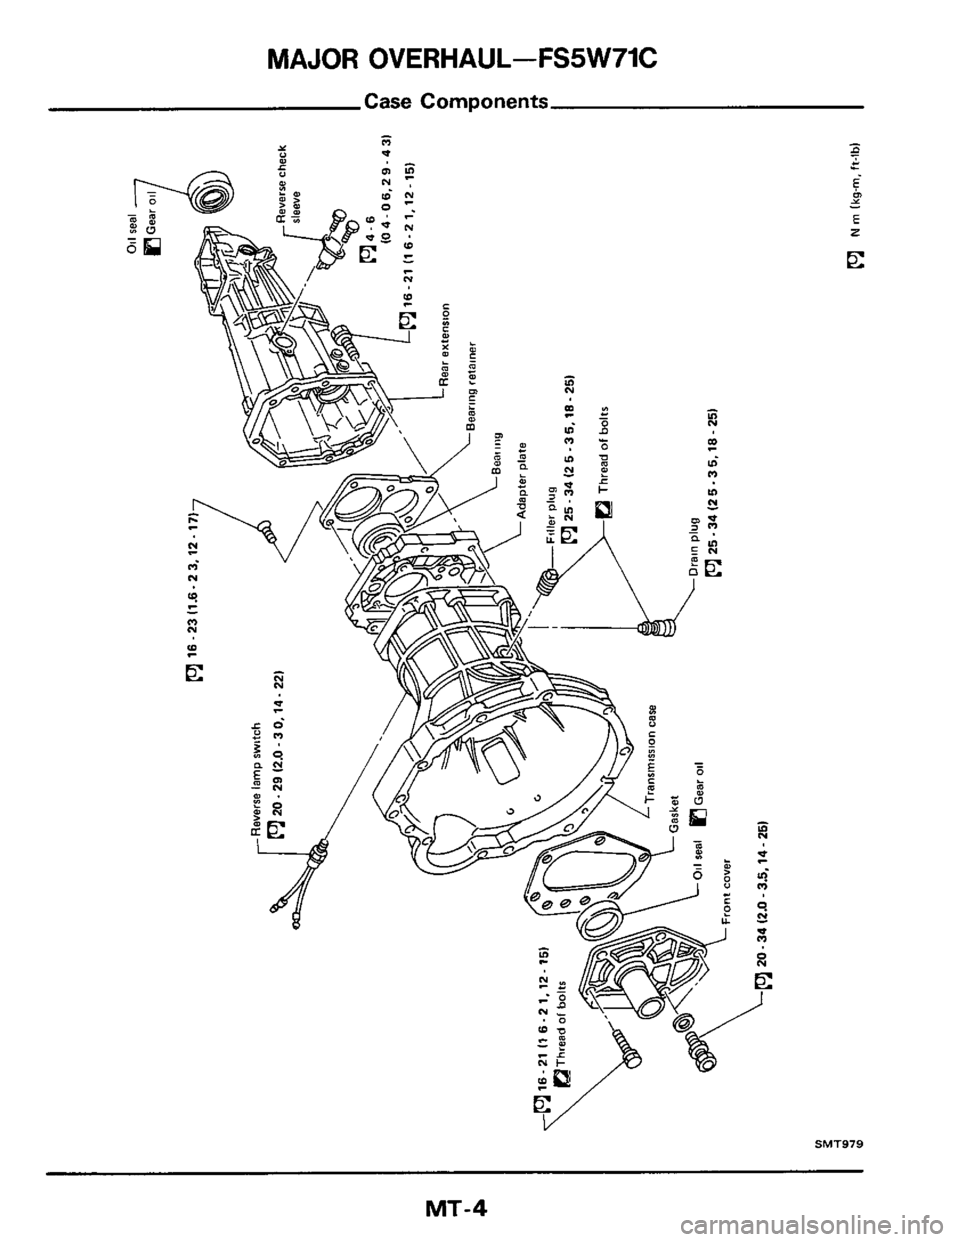
MAJOR OVERHAUL-FS5W71C
Case Components
MT-4
Page 5 of 34
MAJOR OVERHAUL-FS5W71C
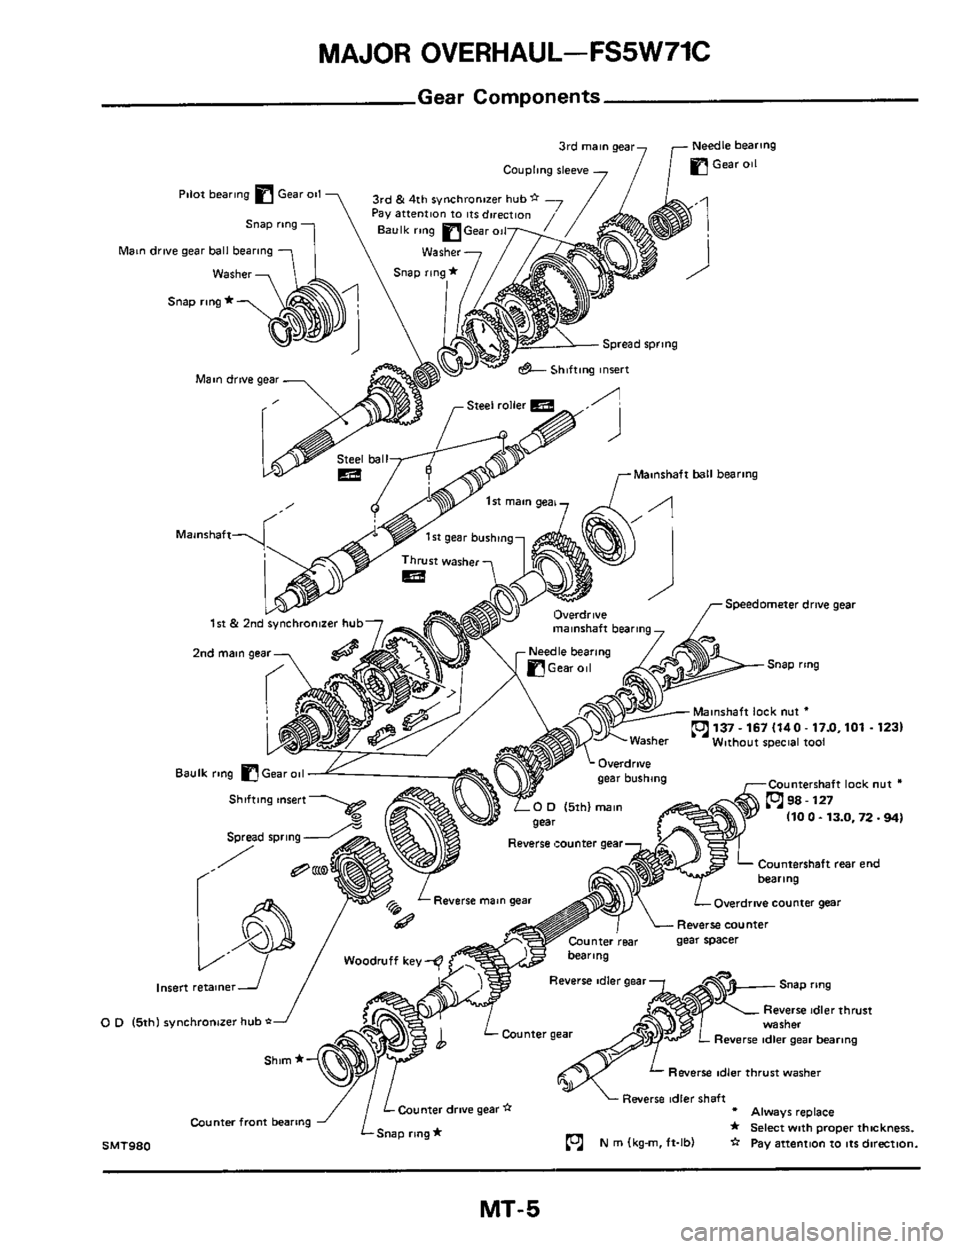
Gear Components
3rd main gear Needle bearing
Coupling sleeve 7 TmGearoiI
3rd & 4th synchroi Pay attention to ~ts
Pilot bearing Gear 011
Baulk ring Gear uu
Man drive gear ball bearing -,
Snap rc )
Mainshaft
I
2nd main gear- @A?
Mainshaft ball bearing r
Speedometer drive geai
Snap ring
1st 8 2nd synchronizer hub
Counterrhaft lock nut *
110 0 - 13.0,12.94)
Reverse ~ounter gear
Countershaft rear end
Reverse main gear Overdrive counter gear
gear spacer
Reverse idler gear
Reverse idler thrust
lnsen retainer
Reverse idler gear bearing
0 D (5th) synchronaer hub *
Rwerre idler thrust washer
Reverse idler shaft * Always replace
* Select with proper thickness. SMT980 N m (kg-m, ft-lb) * pay anemon to Itsdlrectlon.
counter front bearing
MT- 5
Page 6 of 34
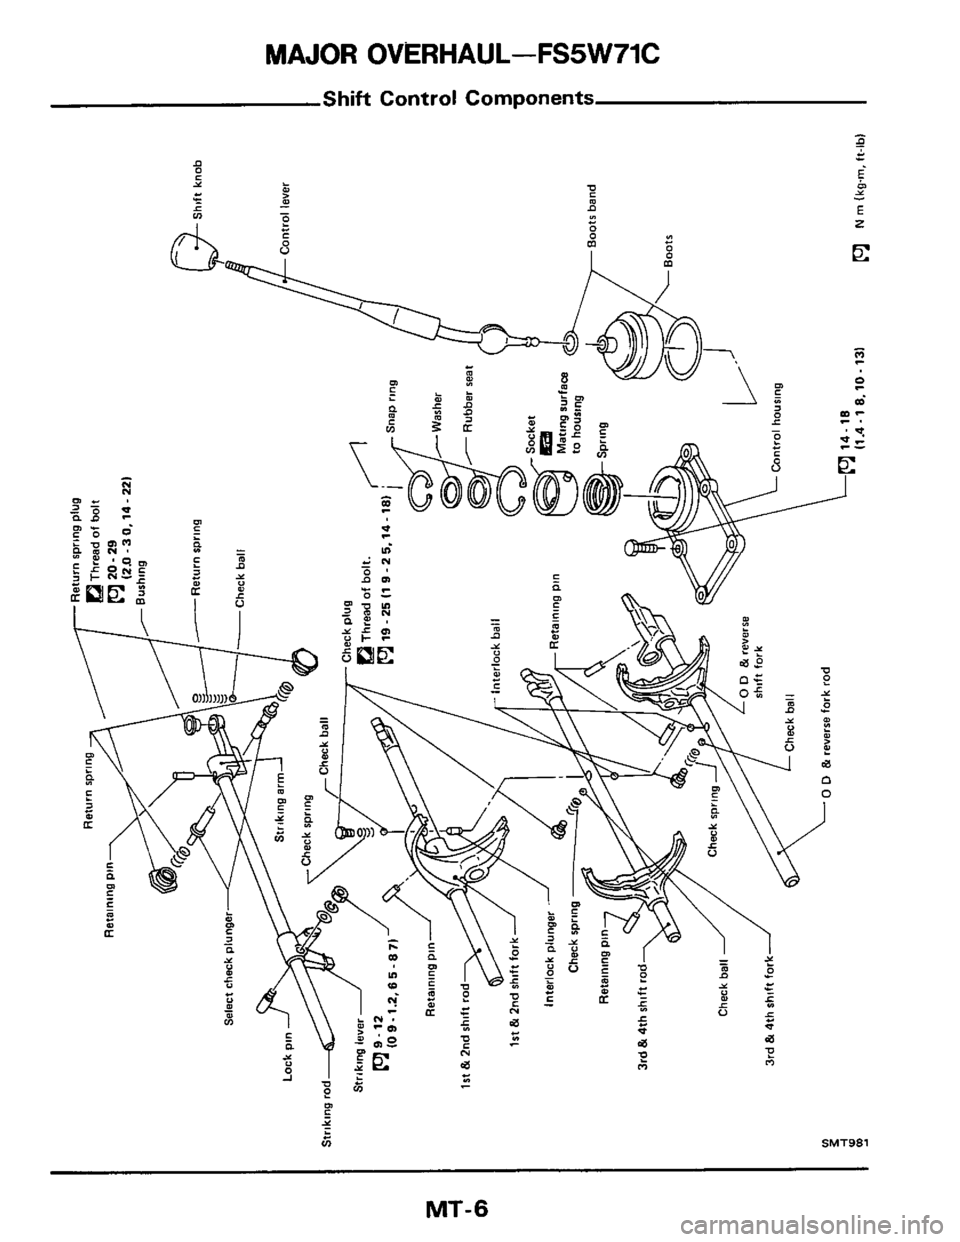
MAJOR OVERHAUL-FS5W71C
Shift Control Components
Page 7 of 34
DlSASSEMBLY-IFS5W71C
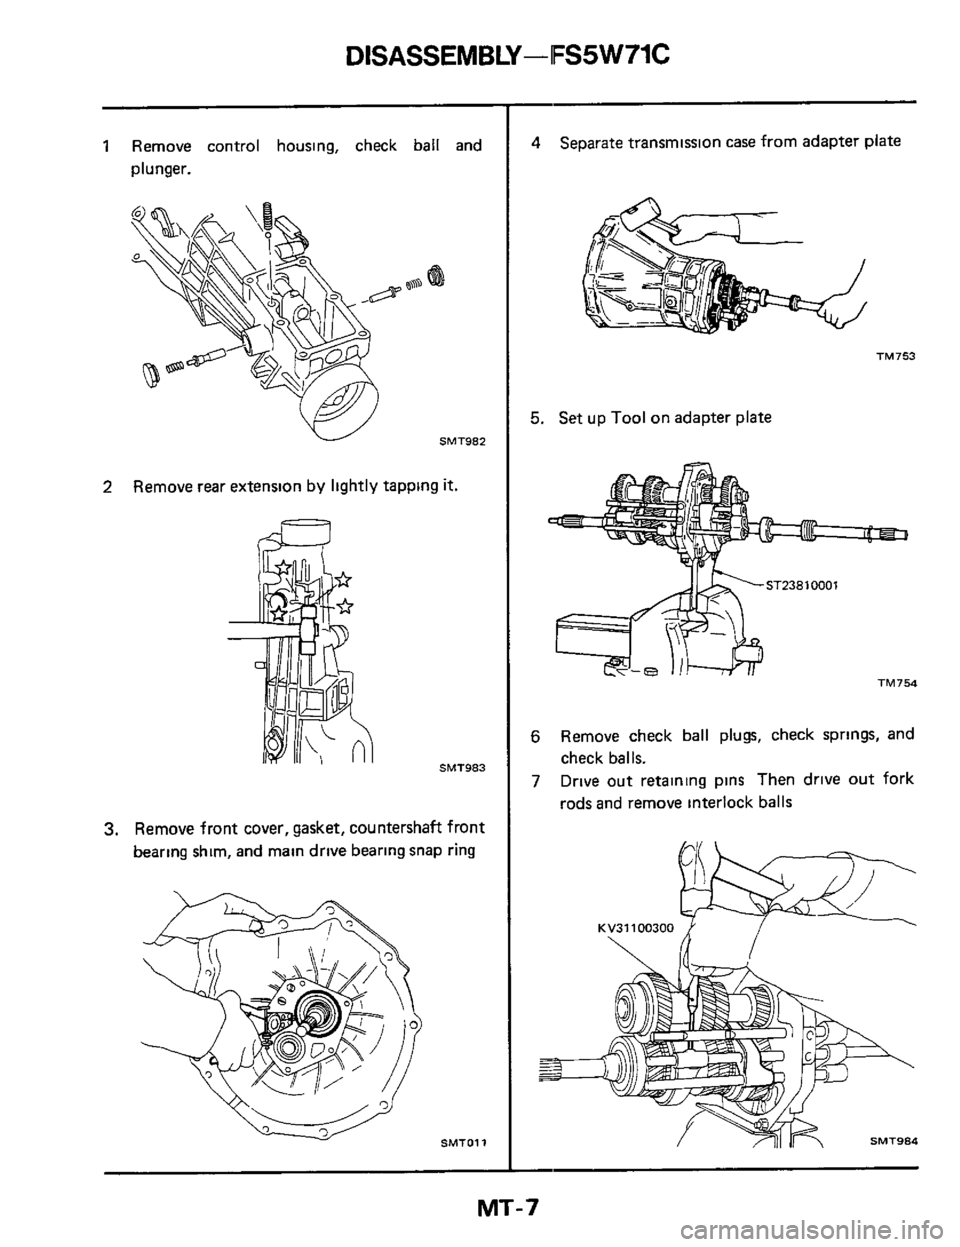
1 Remove control housing, check ball and
plunger.
W SMT982
2 Remove rear extension by lightly tapping it.
60
SMT983
3. Remove front cover, gasket, countershaft front
bearing shim, and main drive bearing snap ring
SMTOll
4 Separate transmission case from adapter plate
TM753
5. Set up Tool on adapter plate
TM754
6 Remove check ball plugs, check springs, and
7 Drive out retaining pins Then drive out fork
check balls.
rods and remove interlock balls
MT-7
Page 8 of 34
REPAIR FOR COMPONENT PARTS-FS5W71C
1 st
2nd
3rd
OD
Reverse idler
Forks and Fork Rods
031 .037 (00122 -0 01461
0 11 -0 17 (00043 -0 00671
0 11 - 0 17 (0 0043 - 0 00671
032-035(00126-00138~
0 05 - 0 50 (0 0020 - 0 01971
INSPECTION
Check for wear, scratches, projection or dam-
age.
SMT137
Gears and Shafts
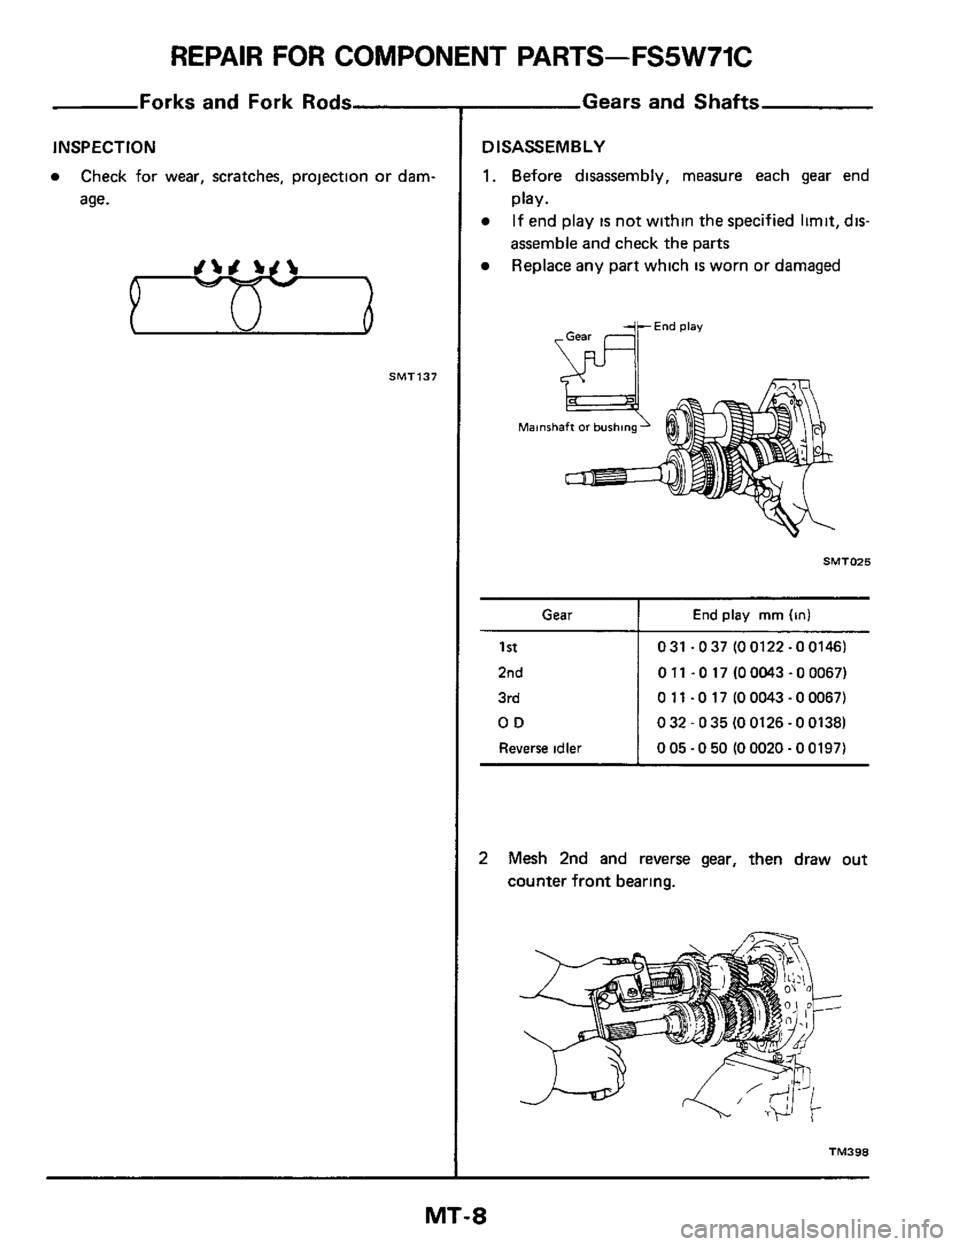
D ISASSEMB LY
1.
0
Before disassembly, measure each gear end
If end play IS not within the specified limit, dis-
assemble and check the parts
Replace any part which
IS worn or damaged
play.
Mainshaft or bushing
WL
SMT025
Gear I End play mrn (in1
2 Mesh 2nd and reverse gear, then draw out
counter front bearing.
TM398
MT-8
Page 9 of 34
REPAIR FOR COMPONENT PARTS-FS5W71C
Gears and S
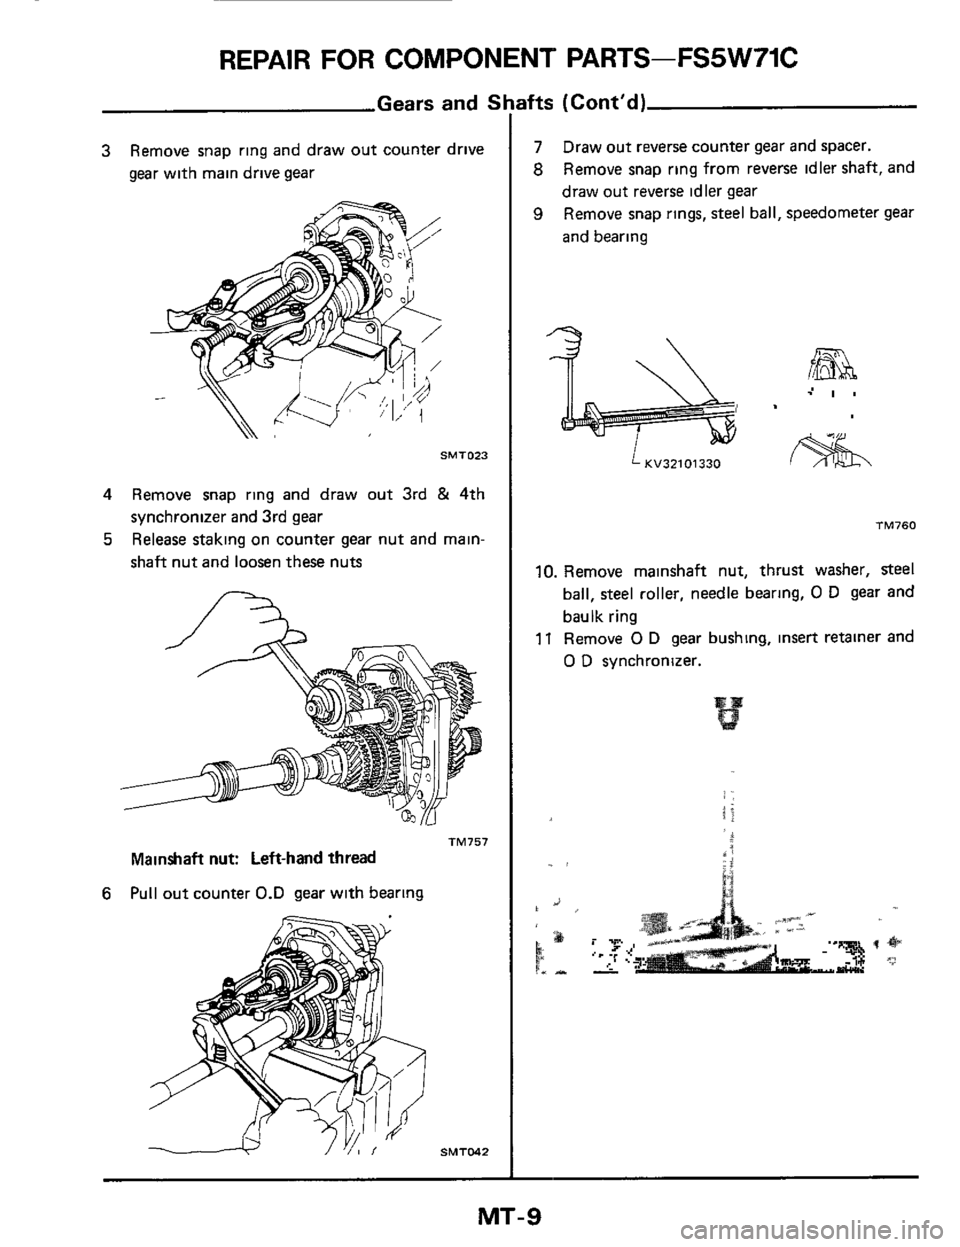
3 Remove snap ring and draw out counter drive
gear with main drive gear
SMT023
4 Remove snap ring and draw out 3rd & 4th
synchronizer and 3rd
gear
5 Release staking on counter gear nut and main-
shaft nut and loosen these nuts
TM757
Mainshaft nut: Left-hand thread
Pull out counter 0.D gear with bearing 6
ifts (Cont'd)
7
8
9
Draw out reverse counter gear and spacer.
Remove snap ring from reverse idler shaft, and
draw out reverse idler gear
Remove snap rings,
steel ball, speedometer gear
and bearing
-37 \ II \ .' I . .-
KV32101330
TM760
10. Remove mainshaft nut, thrust washer, steel
ball, steel roller, needle bearing, 0 D gear and
baulk ring
11 Remove 0 D gear bushing, insert retainer and
0 D synchronizer.
MT-9
Page 10 of 34
REPAIR FOR COMPONENT PARTS-FS5W71C
Gears and S
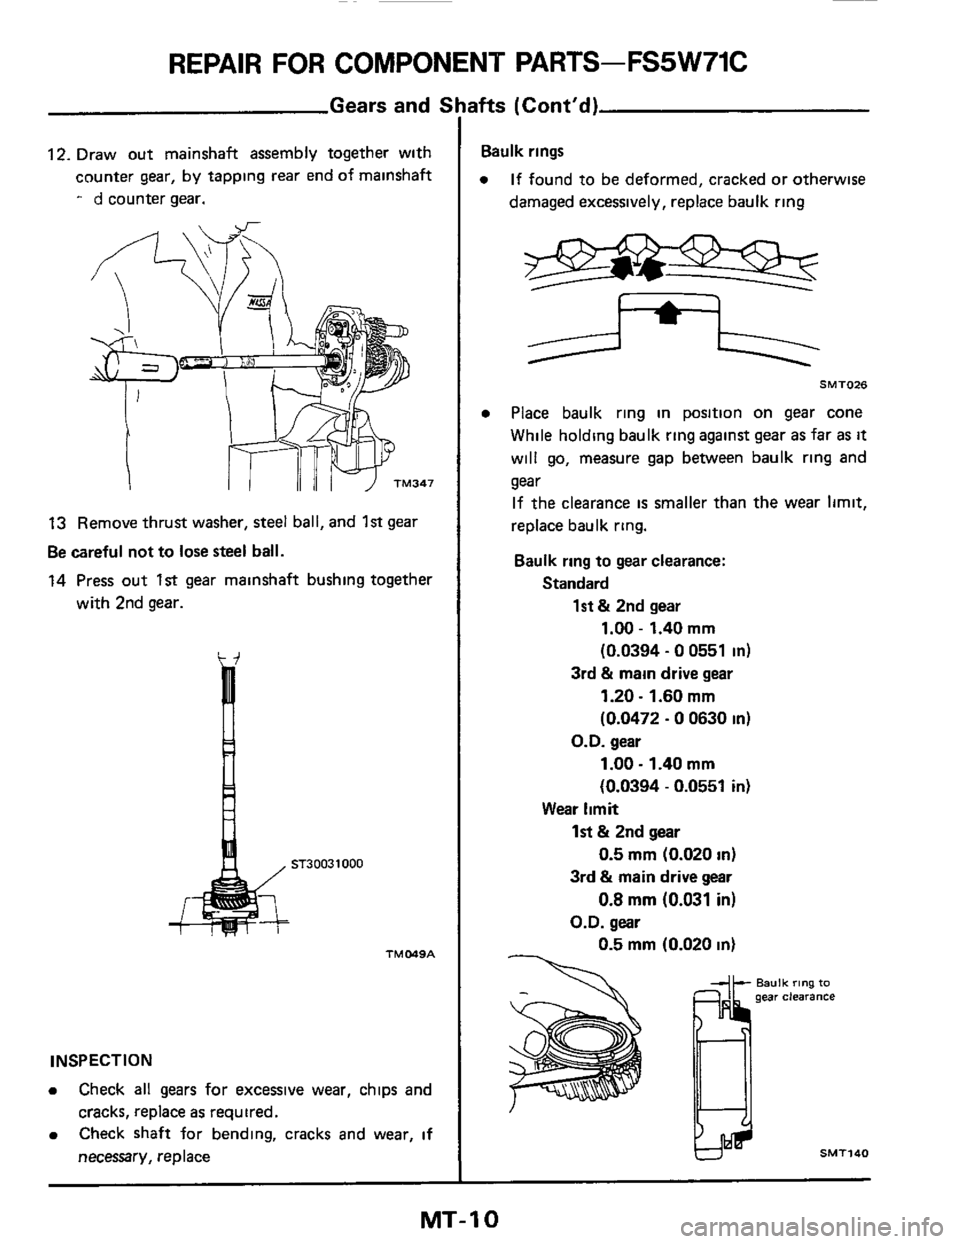
12. Draw out mainshaft assembly together with
counter gear, by tapping rear end of mainshaft
- d counter gear.
13 Remove thrust washer, steel ball, and 1st gear
Be careful not to lose steel ball.
14 Press out 1st gear mainshaft bushing together
with 2nd gear.
d H
TMMSA
INSPECTION
0 Check all gears for excessive wear, chips and
cracks, replace
as required.
Check shaft for bending, cracks and wear, if
necessary, replace
0
ifts (Cont'd)
bulk rings
0 If found to be deformed, cracked or otherwise
damaged excessively, replace baulk ring
SMT026
0 Place baulk ring in position on gear cone
While holding baulk ring against gear
as far as it
will go, measure gap between baulk ring and
gear If the clearance
is smaller than the wear limit,
replace baulk ring.
Baulk ring to gear clearance:
Standard
1st & 2nd gear
1.00 - 1.40 mm
(0.0394 - 0 0551 in)
3rd & main drive gear
1.20 - 1.60 mm
(0.0472 - 0 0630 in)
1 .OO - 1.40 mm
(0.0394 - 0.0551 in)
O.D. gear
Wear limit
1st & 2nd gear
0.5 mm (0.020 in)
3rd
& main drive gear
0.8 mm (0.031 in)
O.D. gear
0.5
mm (0.020 in)
hulk ring to gear clearance
w SMT140
MT-10
Trending: ECU, lock, light, drain bolt, clutch, tow, Gear shifter
