steering wheel NISSAN GT-R 2017 R35 Multi Function Display Owners Manual
[x] Cancel search | Manufacturer: NISSAN, Model Year: 2017, Model line: GT-R, Model: NISSAN GT-R 2017 R35Pages: 248, PDF Size: 1.72 MB
Page 17 of 248
2 Getting started
System features ........................................................................\
. 2-2Navigation system ............................................................... 2-2
Multi function meter ............................................................ 2-2
Control buttons and touch screen display .......................... 2-4 Control panel ........................................................................\
2-4
Liquid crystal display .......................................................... 2-5
Steering wheel switches ................................................... 2-6
Display Commander ........................................................... 2-7
USB (Universal Serial Bus) Connection Ports and
AUX (auxiliary) input jack ................................................... 2-7
Starting system ........................................................................\
.. 2-8
Start-up screen .................................................................... 2-8
Basic operation ........................................................................\
.. 2-9 Selecting menu from Launch Bar .................................... 2-9 Touch panel operation .................................................. 2-11
Main screen operations ................................................ 2-11
Adjusting settings .......................................................... 2-13
How to input letters and numbers ............................. 2-13
How to view and operate HOME MENU screen ..... 2-14
Functions disabled while driving ................................ 2-16
System settings ..................................................................... 2-17
Settings menu ................................................................. 2-17
Display settings .............................................................. 2-18
Volume and Beeps settings ......................................... 2-19
Comfort & Convenience settings ............................... 2-19
Language and unit settings ......................................... 2-20
Clock settings ................................................................. 2-21
Connecting Bluetooth
�Šdevice ................................... 2-21
Page 22 of 248
2. Getting started
.The screen may become distorted by strong
magnetic fields.
Maintenance of display
NOTICE
.To clean the display, stop the vehicle
in a safe location.
. Clean the display with the ignition
switch in the OFF position. If the
display is cleaned while the ignition
switch is placed in the ON position,
unintentional operation may occur.
. To clean the display, never use a
rough cloth, alcohol, benzine, thinner
or any kind of solvent or paper towel
with a chemical cleaning agent. They
will scratch or deteriorate the panel.
. Do not splash any liquid such as
water or car fragrance on the display.
Contact with liquid will cause the
system to malfunction.
To clean the display screen, use a dry, soft cloth.
If additional cleaning is necessary, use a small
amount of neutral detergent with a soft cloth.
Never spray the screen with water or detergent.
Dampen the cloth first, then wipe the screen.
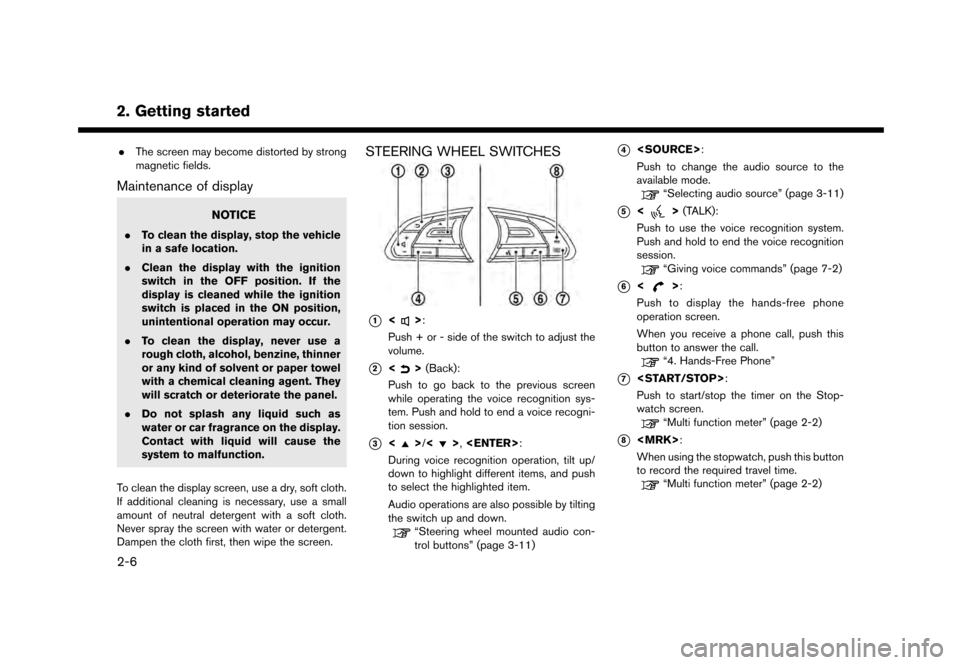
STEERING WHEEL SWITCHES
*1<>:
Push + or - side of the switch to adjust the
volume.
*2<> (Back):
Push to go back to the previous screen
while operating the voice recognition sys-
tem. Push and hold to end a voice recogni-
tion session.
*3<>/<>,
During voice recognition operation, tilt up/
down to highlight different items, and push
to select the highlighted item.
Audio operations are also possible by tilting
the switch up and down.
“Steering wheel mounted audio con-
trol buttons” (page 3-11)
*4
Push to change the audio source to the
available mode.
“Selecting audio source” (page 3-11)
*5<> (TALK):
Push to use the voice recognition system.
Push and hold to end the voice recognition
session.
“Giving voice commands” (page 7-2)
*6<>:
Push to display the hands-free phone
operation screen.
When you receive a phone call, push this
button to answer the call.
“4. Hands-Free Phone”
*7
Push to start/stop the timer on the Stop-
watch screen.
“Multi function meter” (page 2-2)
*8
When using the stopwatch, push this button
to record the required travel time.
“Multi function meter” (page 2-2)
2-6
Page 25 of 248
NOTE:
Do not keep the system running with the
engine stopped. Doing so may discharge
the vehicle battery. When you use the
system, always keep the engine running.
INFO:
. After the engine is started, the operation
instructions will only be displayed the first
time the screen is displayed.
.The system saves the screen displayed at
the time the engine is turned off.
. “Clarion” logo is a registered trademark of
Clarion Co., Ltd. and the “POLYPHONY
DIGITAL” logo is a registered trademark of
Polyphony Digital Corporation.
. The operation instruction screen will disap-
pear automatically after a few seconds or
when you start to operate the screen.
BASIC OPERATION
The system can be operated with the touch panel
as well as switches on the control panel, steering
wheel and the Display Commander.
This manual mainly describes the touch panel
operation.
SELECTING MENU FROM LAUNCH
BAR
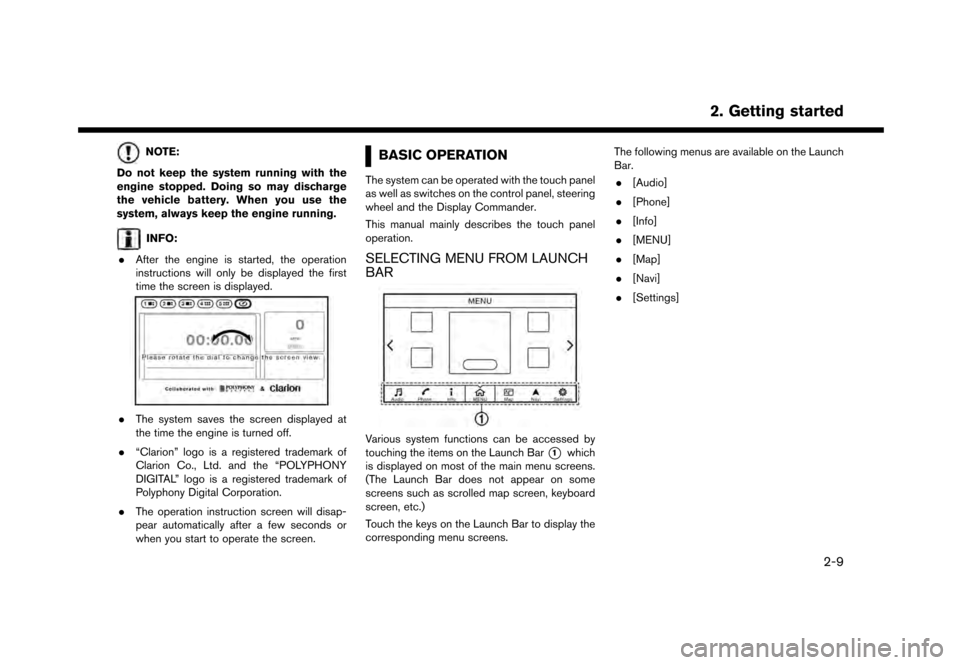
Various system functions can be accessed by
touching the items on the Launch Bar
*1which
is displayed on most of the main menu screens.
(The Launch Bar does not appear on some
screens such as scrolled map screen, keyboard
screen, etc.)
Touch the keys on the Launch Bar to display the
corresponding menu screens. The following menus are available on the Launch
Bar.
. [Audio]
. [Phone]
. [Info]
. [MENU]
. [Map]
. [Navi]
. [Settings]
2. Getting started
2-9
Page 26 of 248
2. Getting started
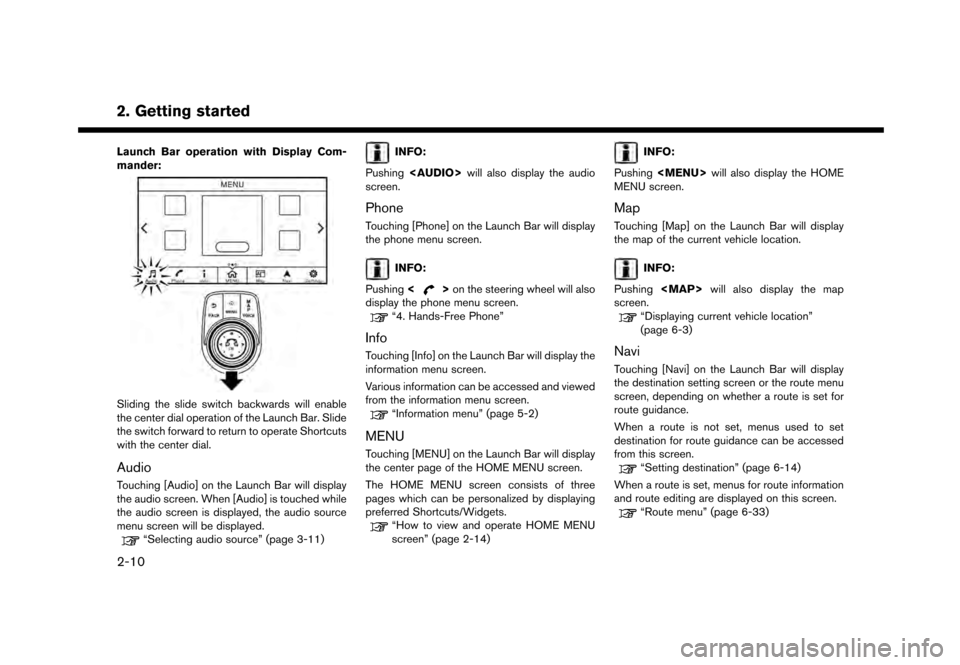
Launch Bar operation with Display Com-
mander:
Sliding the slide switch backwards will enable
the center dial operation of the Launch Bar. Slide
the switch forward to return to operate Shortcuts
with the center dial.
Audio
Touching [Audio] on the Launch Bar will display
the audio screen. When [Audio] is touched while
the audio screen is displayed, the audio source
menu screen will be displayed.
“Selecting audio source” (page 3-11)
INFO:
Pushing
Page 39 of 248
3 Audio system
Audio operation precautions .................................................. 3-2Radio ........................................................................\
.............. 3-2
Compact Disc (CD) player ............................................... 3-4USB (Universal Serial Bus) connection ports .............. 3-5
Compressed Audio Files (MP3/WMA/AAC) ............... 3-7
Bluetooth
�Šstreaming audio .............................................. 3-9
Names and functions of audio control buttons ............... 3-10
Audio main buttons .......................................................... 3-10
Steering wheel mounted audio control buttons ........ 3-11
Audio operations .................................................................... 3-11 Audio main operation ...................................................... 3-11
Radio ........................................................................\
........... 3-12 Compact Disc (CD) player .......................................... 3-17
USB memory device player ......................................... 3-20
iPod
�Šplayer ..................................................................... 3-23
Bluetooth�Šaudio ............................................................ 3-28
Auxiliary (AUX) devices ................................................. 3-30
Audio settings ........................................................................\
3-32 Audio adjustments when map, audio or HOME
MENU is displayed ........................................................ 3-33
CD/USB memory device care and cleaning ................... 3-33 CD ........................................................................\
............. 3-33
USB memory device ...................................................... 3-33
Page 49 of 248
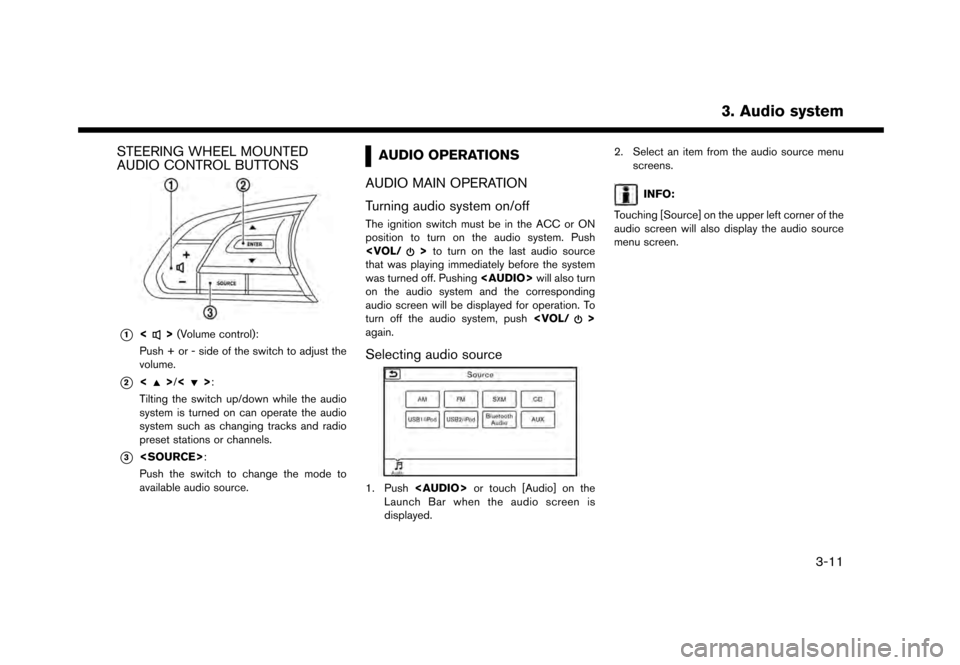
STEERING WHEEL MOUNTED
AUDIO CONTROL BUTTONS
*1<>(Volume control):
Push + or - side of the switch to adjust the
volume.
*2<>/<>:
Tilting the switch up/down while the audio
system is turned on can operate the audio
system such as changing tracks and radio
preset stations or channels.
*3
Push the switch to change the mode to
available audio source.
AUDIO OPERATIONS
AUDIO MAIN OPERATION
Turning audio system on/off
The ignition switch must be in the ACC or ON
position to turn on the audio system. Push
that was playing immediately before the system
was turned off. Pushing
Page 51 of 248
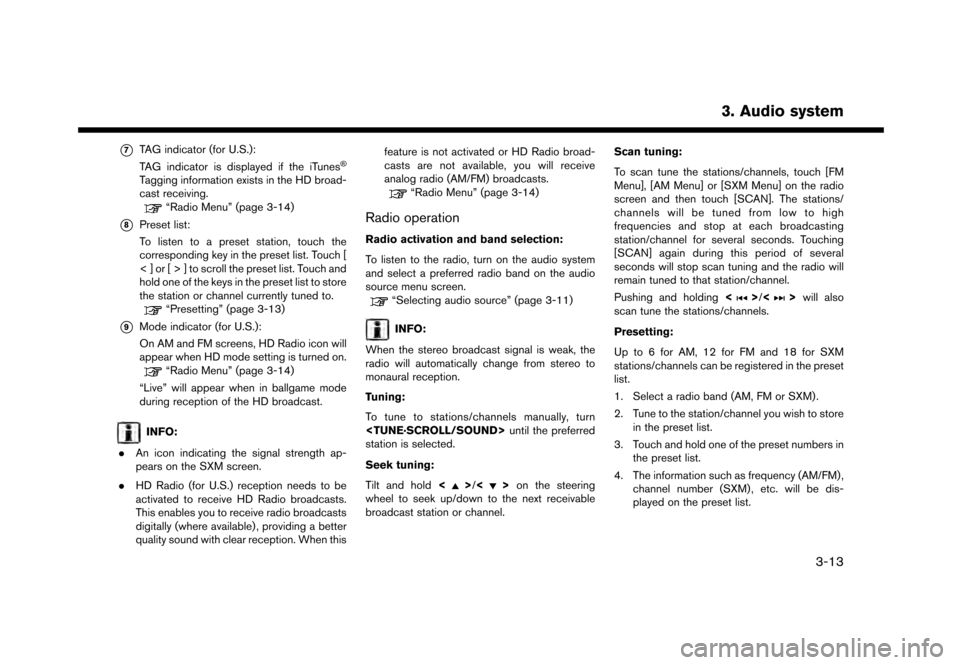
*7TAG indicator (for U.S.):
TAG indicator is displayed if the iTunes�Š
Tagging information exists in the HD broad-
cast receiving.
“Radio Menu” (page 3-14)
*8Preset list:
To listen to a preset station, touch the
corresponding key in the preset list. Touch [
< ] or [ > ] to scroll the preset list. Touch and
hold one of the keys in the preset list to store
the station or channel currently tuned to.
“Presetting” (page 3-13)
*9Mode indicator (for U.S.):
On AM and FM screens, HD Radio icon will
appear when HD mode setting is turned on.
“Radio Menu” (page 3-14)
“Live” will appear when in ballgame mode
during reception of the HD broadcast.
INFO:
. An icon indicating the signal strength ap-
pears on the SXM screen.
. HD Radio (for U.S.) reception needs to be
activated to receive HD Radio broadcasts.
This enables you to receive radio broadcasts
digitally (where available) , providing a better
quality sound with clear reception. When this feature is not activated or HD Radio broad-
casts are not available, you will receive
analog radio (AM/FM) broadcasts.
“Radio Menu” (page 3-14)
Radio operation
Radio activation and band selection:
To listen to the radio, turn on the audio system
and select a preferred radio band on the audio
source menu screen.
“Selecting audio source” (page 3-11)
INFO:
When the stereo broadcast signal is weak, the
radio will automatically change from stereo to
monaural reception.
Tuning:
To tune to stations/channels manually, turn
station is selected.
Seek tuning:
Tilt and hold <
>/<>on the steering
wheel to seek up/down to the next receivable
broadcast station or channel. Scan tuning:
To scan tune the stations/channels, touch [FM
Menu], [AM Menu] or [SXM Menu] on the radio
screen and then touch [SCAN]. The stations/
channels will be tuned from low to high
frequencies and stop at each broadcasting
station/channel for several seconds. Touching
[SCAN] again during this period of several
seconds will stop scan tuning and the radio will
remain tuned to that station/channel.
Pushing and holding
<
>/<>will also
scan tune the stations/channels.
Presetting:
Up to 6 for AM, 12 for FM and 18 for SXM
stations/channels can be registered in the preset
list.
1. Select a radio band (AM, FM or SXM) .
2. Tune to the station/channel you wish to store in the preset list.
3. Touch and hold one of the preset numbers in the preset list.
4. The information such as frequency (AM/FM) , channel number (SXM) , etc. will be dis-
played on the preset list.
3. Audio system
3-13
Page 52 of 248
3. Audio system
To select and listen to the preset stations/
channels, tilt<>/<> on the steering
wheel briefly or touch a preferred station/channel
on the preset list on the radio screen.
Radio Menu
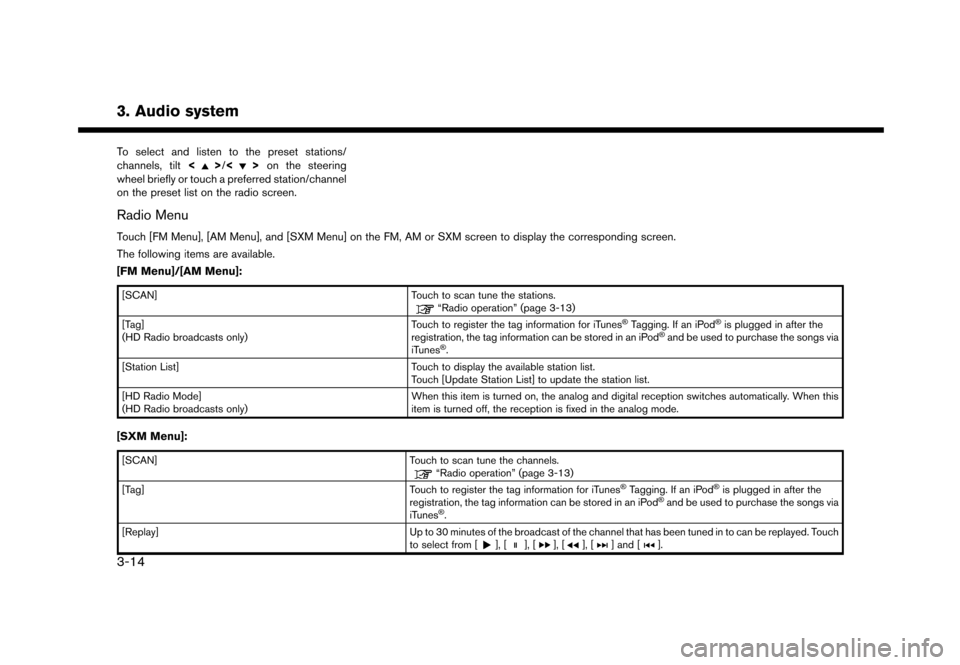
Touch [FM Menu], [AM Menu], and [SXM Menu] on the FM, AM or SXM screen to display the corresponding screen.
The following items are available.
[FM Menu]/[AM Menu]:
[SCAN] Touch to scan tune the stations.“Radio operation” (page 3-13)
[Tag]
(HD Radio broadcasts only) Touch to register the tag information for iTunes�ŠTagging. If an iPod�Šis plugged in after the
registration, the tag information can be stored in an iPod�Šand be used to purchase the songs via
iTunes�Š.
[Station List] Touch to display the available station list.
Touch [Update Station List] to update the station list.
[HD Radio Mode]
(HD Radio broadcasts only) When this item is turned on, the analog and digital reception switches automatically. When this
item is turned off, the reception is fixed in the analog mode.
[SXM Menu]:
[SCAN]
Touch to scan tune the channels.“Radio operation” (page 3-13)
[Tag] Touch to register the tag information for iTunes�ŠTagging. If an iPod�Šis plugged in after the
registration, the tag information can be stored in an iPod�Šand be used to purchase the songs via
iTunes�Š.
[Replay] Up to 30 minutes of the broadcast of the channel that has been tuned in to can be replayed. Touch
to select from [
], [], [], [], [] and [].
3-14
Page 56 of 248
![NISSAN GT-R 2017 R35 Multi Function Display Owners Manual 3. Audio system
[] Each time [] is touched, the
repeat mode changes.
“Changing play mode”
(page 3-18)
[
] Touch once to return to the begin- ning of the current track. Touch again
to select the pr NISSAN GT-R 2017 R35 Multi Function Display Owners Manual 3. Audio system
[] Each time [] is touched, the
repeat mode changes.
“Changing play mode”
(page 3-18)
[
] Touch once to return to the begin- ning of the current track. Touch again
to select the pr](/img/5/524/w960_524-55.png)
3. Audio system
[] Each time [] is touched, the
repeat mode changes.
“Changing play mode”
(page 3-18)
[
] Touch once to return to the begin- ning of the current track. Touch again
to select the previous track. Touch
and hold to rewind the current track.
[
] Touch to play the track.
[
] Touch to pause the track.
[
] Touch to select the next track. Touch and hold to fast-forward the track.
[
] Each time [] is touched, the
random mode changes.
“Changing play mode”
(page 3-18)
*8Track and folder number:
Indicates the track number and the folder
number.
*9Data type indicator:
Indicates the type of data currently playing.
CD player operation
Loading:
Insert a CD into the slot with the label side facing
up. The CD will be guided automatically into the
slot and start playing.
After loading the CD, the CD screen will appear
on the display.
Activation and playing:
The CD mode can be also selected from the
source list with a CD loaded.
“Selecting audio source” (page 3-11)
Skipping tracks:
To skip the tracks, push <
>/<>, touch
[]/[] on the screen, or tilt up/down
<>/<> on the steering wheel repeatedly
until preferred track is selected.
INFO:
Depending on the condition, skipping to the
previous track may require pushing the button or
touching the key twice. Pushing the button or
touching the key once may only restart the
currently track from the beginning. Changing folders:
To change folders, touch [CD Menu] and touch
[Folder List].
“CD Menu” (page 3-19)
Turn
different folders. If no folders are found, tracks
will be skipped.
Fast-forwarding/rewinding:
The following operation methods are available for
rewinding and fast-forwarding the track.
Control panel operation:
. Push and hold <
>/<>.
. Touch and hold [
]/[].
Steering wheel switch operation: . Tilt and hold <
>/<>on the steering
wheel.
Changing play mode:
Repeat mode
Touch [
] on the CD screen to change the
repeat mode as follows.
. CD:
[Disc] ⇔[1 Track]
. CD with compressed audio files:
[All] ?[1 Track] ?[1 Folder] ?[All]
3-18
Page 60 of 248
![NISSAN GT-R 2017 R35 Multi Function Display Owners Manual 3. Audio system
*7USB operation keys:
Touch an icon for operations.
[] Each time [] is touched, the
repeat mode changes.
“Changing play mode”
(page 3-22)
[
] Touch to return to the beginning of th NISSAN GT-R 2017 R35 Multi Function Display Owners Manual 3. Audio system
*7USB operation keys:
Touch an icon for operations.
[] Each time [] is touched, the
repeat mode changes.
“Changing play mode”
(page 3-22)
[
] Touch to return to the beginning of th](/img/5/524/w960_524-59.png)
3. Audio system
*7USB operation keys:
Touch an icon for operations.
[] Each time [] is touched, the
repeat mode changes.
“Changing play mode”
(page 3-22)
[
] Touch to return to the beginning of the current track. Touch again to
select the previous track. Touch and
hold to rewind the current track.
[
] Touch to play the track.
[
] Touch to pause the track.
[
] Touch to select the next track. Touch and hold to fast-forward the track.
[
] Each time [] is touched, the
random mode changes.
“Changing play mode”
(page 3-22)
*8Track and folder number:
Indicates the track number and the folder
number.
*9Data type indicator:
Indicates the type of data currently playing.
USB memory device player operation
Activation and playing:
Connecting the USB memory device into the
port will activate the USB mode.
USB memory device can also be played by
selecting the source on the audio source menu
screen.
“Selecting audio source” (page 3-11)
To pause playing the USB memory device, touch
[
]. To resume playing, touch [].
Skipping tracks:
To skip the tracks, push <
>/<>, touch
[]/[] on the screen, or tilt up/down
<
>/<> on the steering wheel repeatedly
until preferred track is selected.
INFO:
Depending on the condition, skipping to the
previous track may require pushing the button or
touching the key twice. Pushing the button or
touching the key once may only restart the
current track from the beginning.
Changing folders:
To change folders, touch [USB Menu] and touch
[Folder List].
“USB Menu” (page 3-22)
Turn
different folders. If no folders are found, tracks
will be skipped.
Fast-forwarding/rewinding:
To rewind or fast-forward the track, push and
hold <
>/<>, touch and hold []/[],
or tilt and hold <>/<>on the steering
wheel.
Changing play mode:
Repeat mode
Touch [
] on the screen to change the repeat
mode as follows.
[All] ?[1 Track] ?[1 Folder] ?[All]
Random mode
Touch [
] on the screen to change the random
mode as follows.
(off) ?[1 Folder] ?[All] ?(off)
USB Menu
Touch [USB Menu] on the USB screen to display
the USB Menu screen.
The following items are available.
3-22