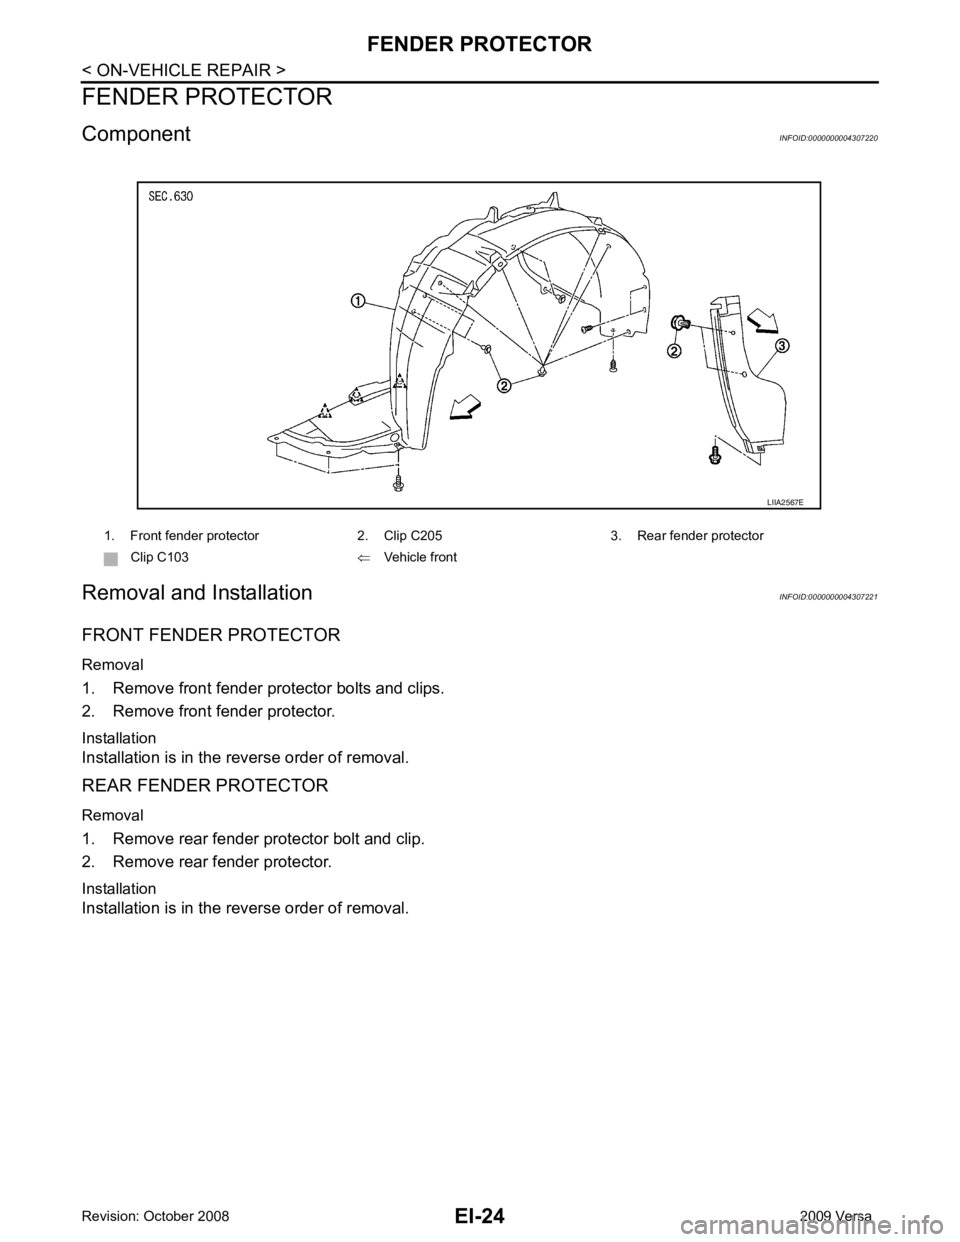
NISSAN LATIO 2009 Service Repair Manual
LATIO 2009
NISSAN
NISSAN
https://www.carmanualsonline.info/img/5/57359/w960_57359-0.png
NISSAN LATIO 2009 Service Repair Manual
Trending: display, overheating, manual transmission, differential, wheel size, jack points, key fob
Page 2911 of 4331
EI-20< ON-VEHICLE REPAIR >
REAR BUMPER
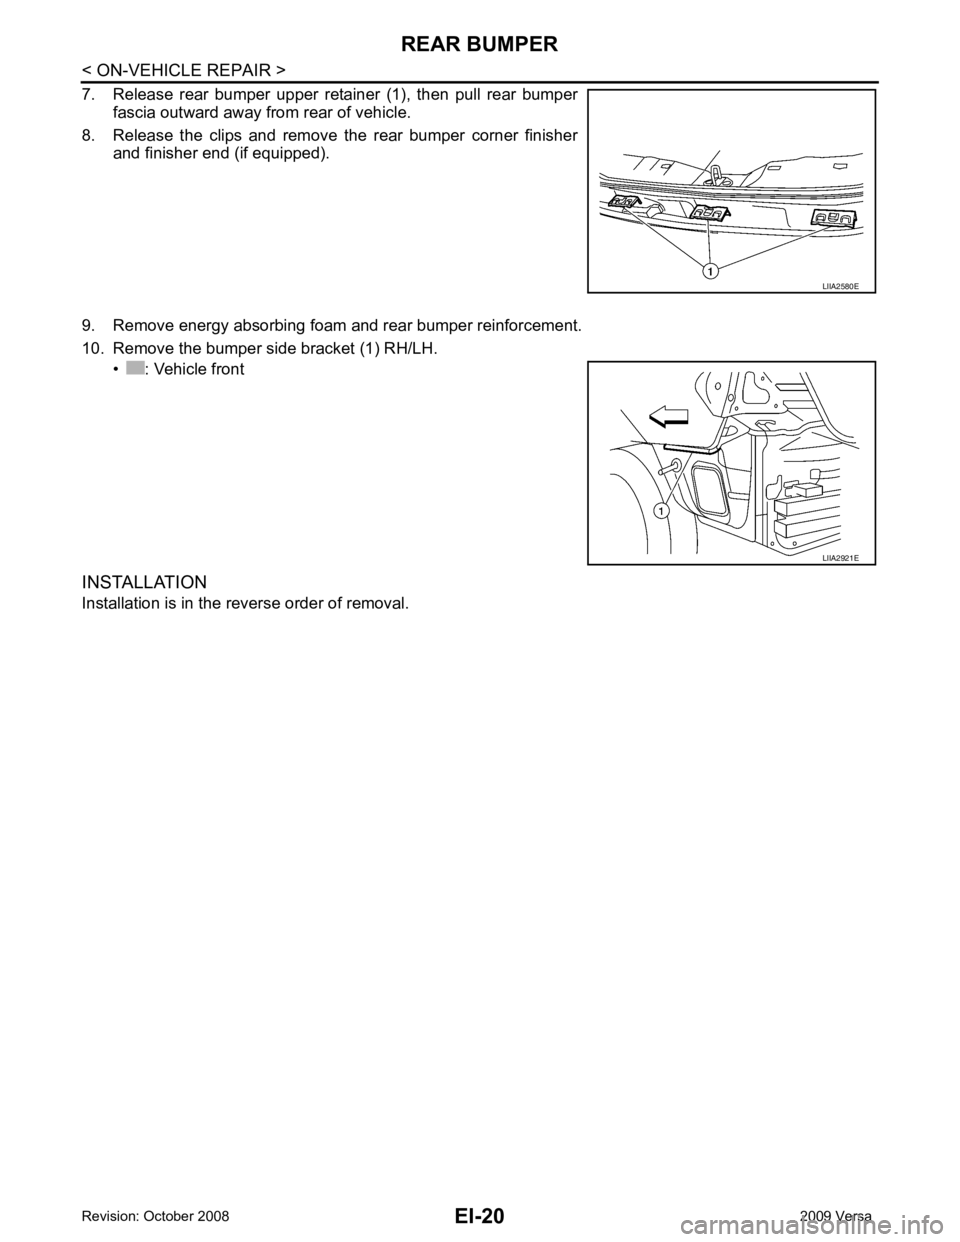
7. Release rear bumper upper retainer (1), then pull rear bumper fascia outward away from rear of vehicle.
8. Release the clips and remove the rear bumper corner finisher and finisher end (if equipped).
9. Remove energy absorbing foam and rear bumper reinforcement.
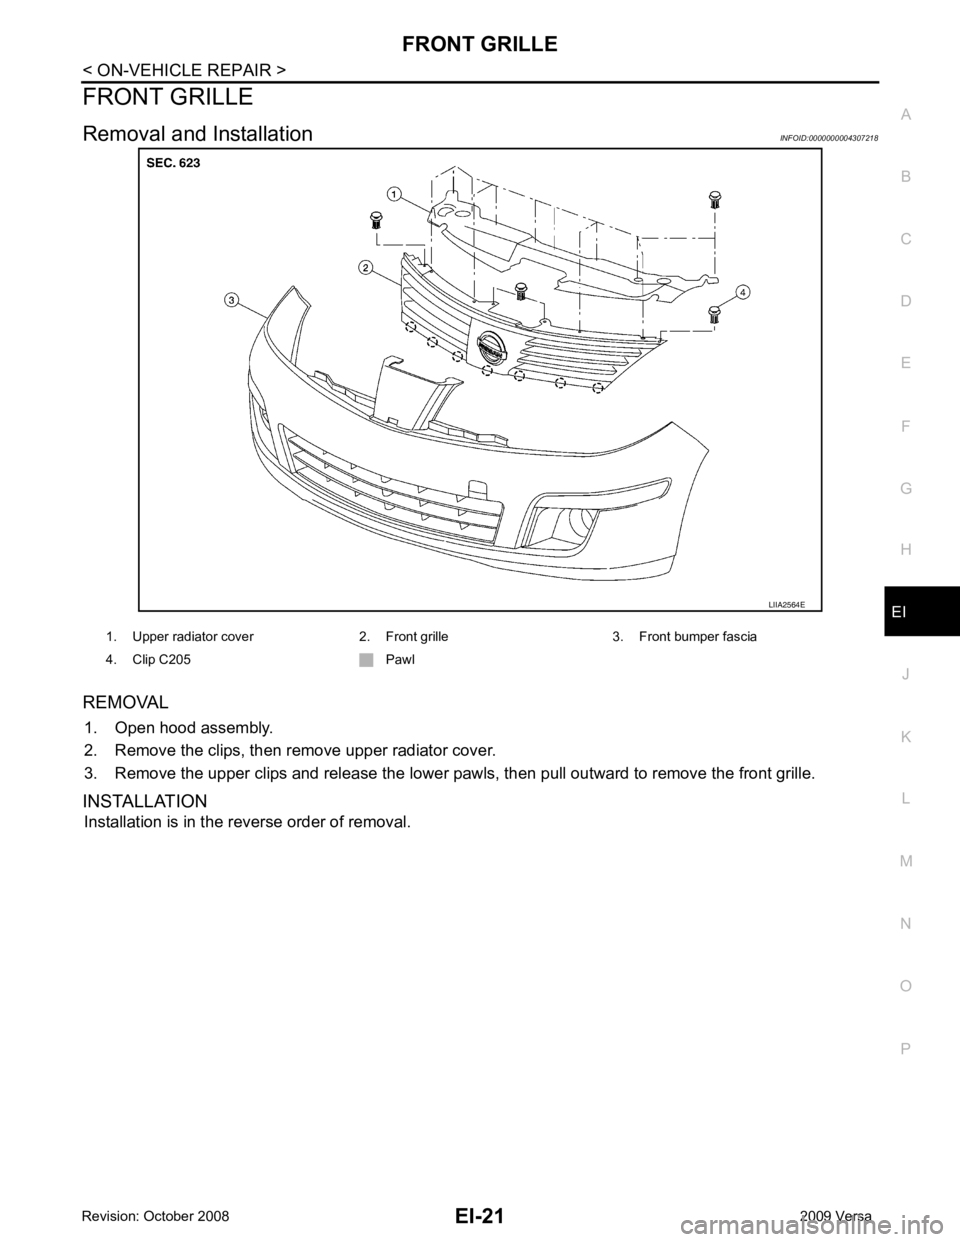
10. Remove the bumper side bracket (1) RH/LH. • : Vehicle front
INSTALLATION
Installation is in the reverse order of removal. LIIA2580E
LIIA2921E
Page 2912 of 4331
EI
N
O P
FRONT GRILLE
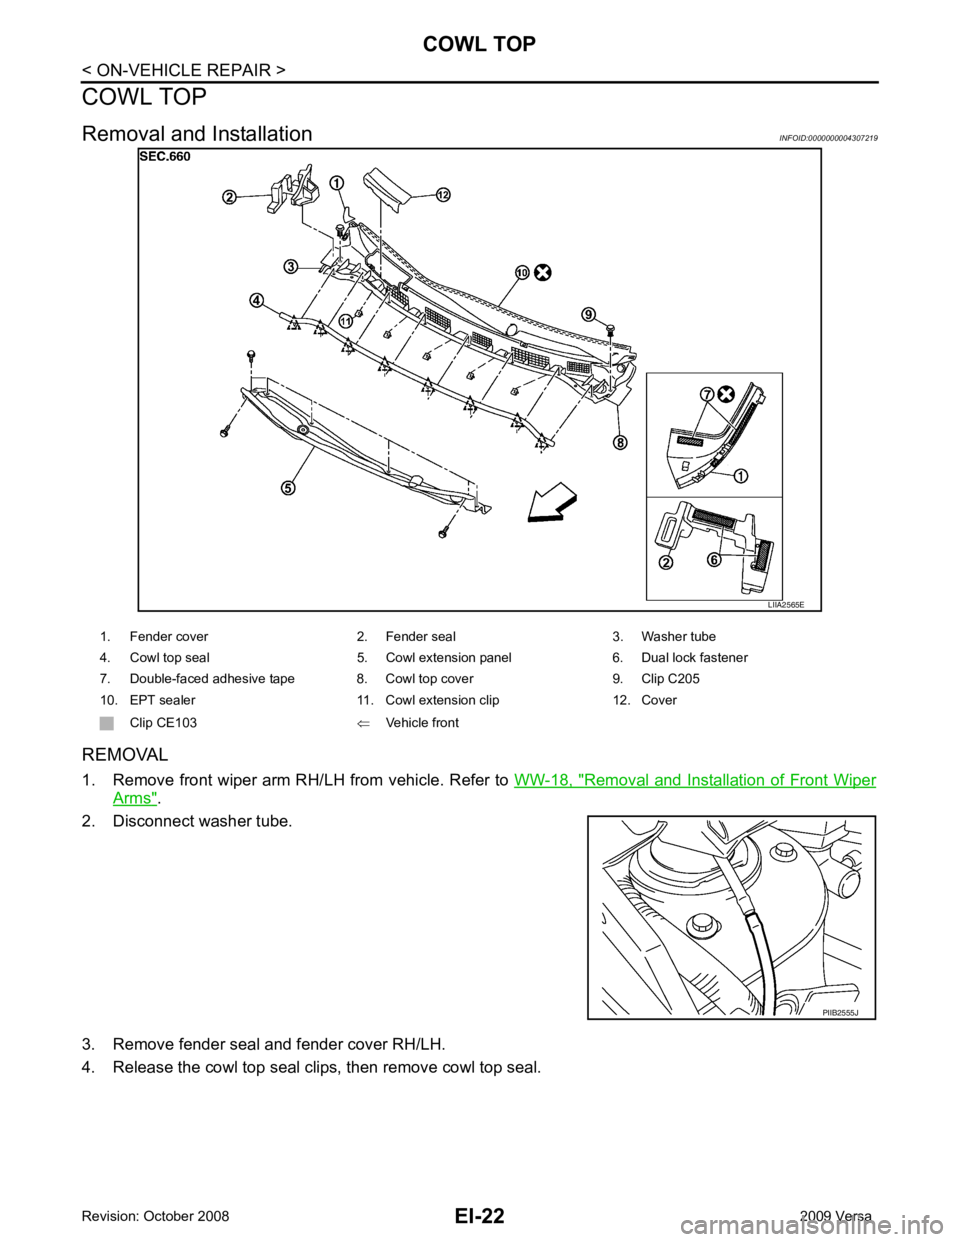
Removal and Installation INFOID:0000000004307218
REMOVAL 1. Open hood assembly.
2. Remove the clips, then remove upper radiator cover.
3. Remove the upper clips and release the lower pawls, then pull outward to remove the front grille.
INSTALLATION Installation is in the reverse order of removal.
Page 2913 of 4331
Removal and Installation of Front Wiper
Arms " .
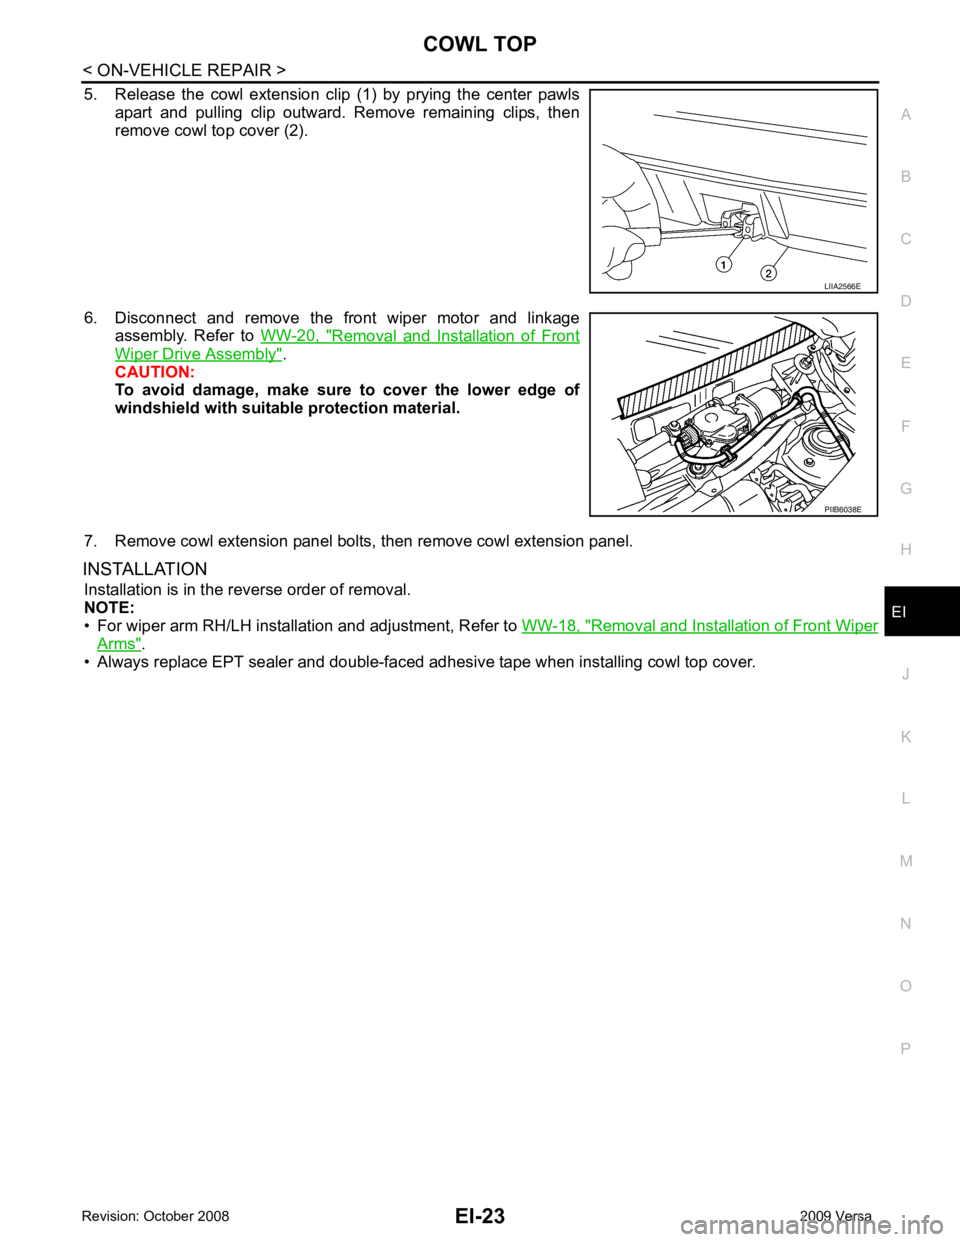
2. Disconnect washer tube.
3. Remove fender seal and fender cover RH/LH.
4. Release the cowl top seal clips, then remove cowl top seal.
Page 2914 of 4331
EI
N
O P
5. Release the cowl extension clip (1) by prying the center pawls
apart and pulling clip outward. Remove remaining clips, then
remove cowl top cover (2).
6. Disconnect and remove the front wiper motor and linkage assembly. Refer to WW-20, " Removal and Installation of Front
Wiper Drive Assembly " .
CAUTION:
To avoid damage, make sure to cover the lower edge of
windshield with suitable protection material.
7. Remove cowl extension panel bolts, then remove cowl extension panel.
INSTALLATION Installation is in the reverse order of removal.
NOTE:
• For wiper arm RH/LH installation and adjustment, Refer to WW-18, " Removal and Installation of Front Wiper
Arms " .
• Always replace EPT sealer and double-faced adhesive tape when installing cowl top cover. PIIB6038E
Page 2915 of 4331
Page 2916 of 4331
EI
N
O P
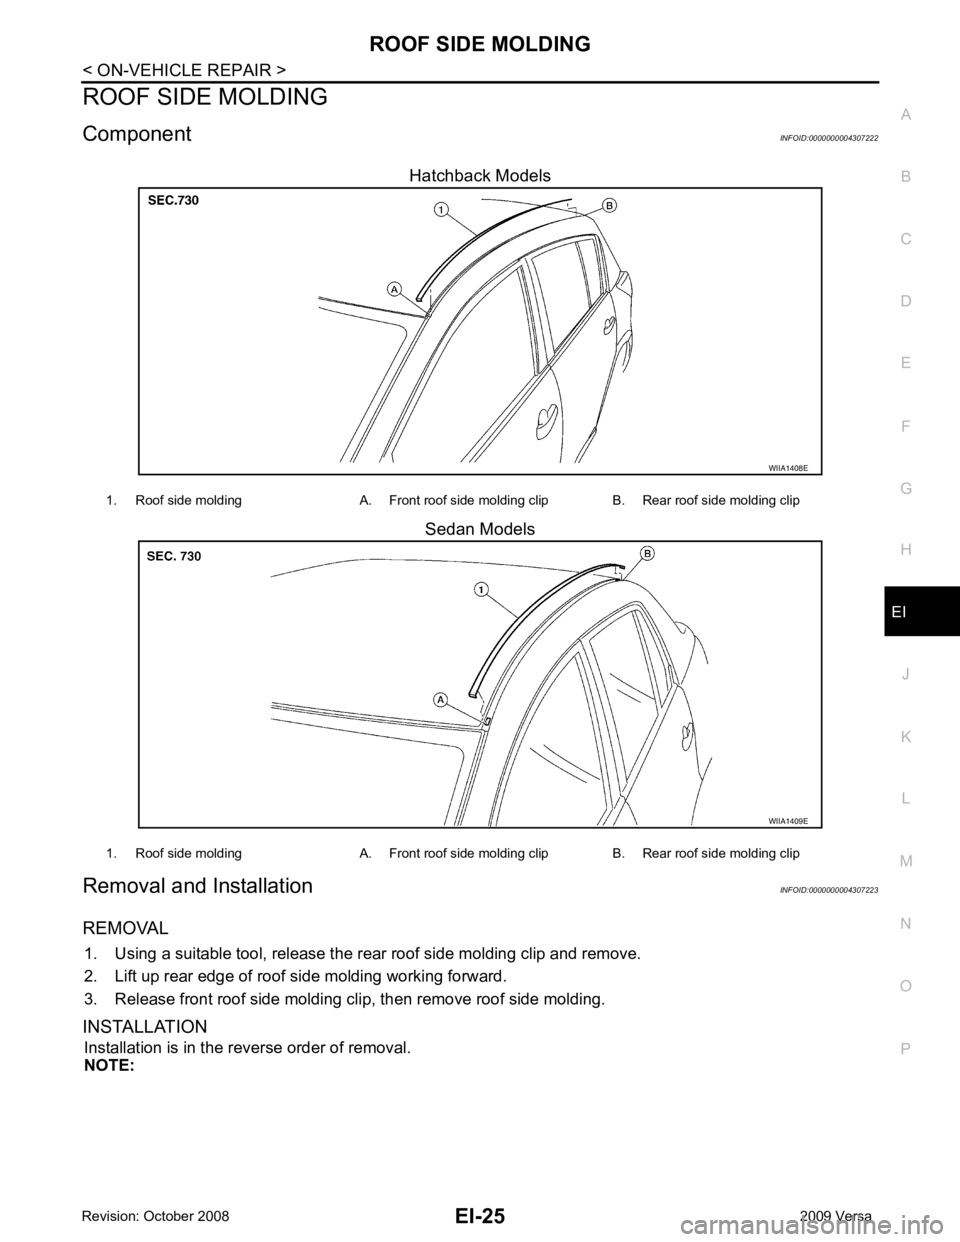
ROOF SIDE MOLDING
Component INFOID:0000000004307222
Hatchback Models
Sedan Models
Removal and Installation INFOID:0000000004307223
REMOVAL 1. Using a suitable tool, release the rear roof side molding clip and remove.
2. Lift up rear edge of roof side molding working forward.
3. Release front roof side molding clip, then remove roof side molding.
INSTALLATION Installation is in the reverse order of removal.
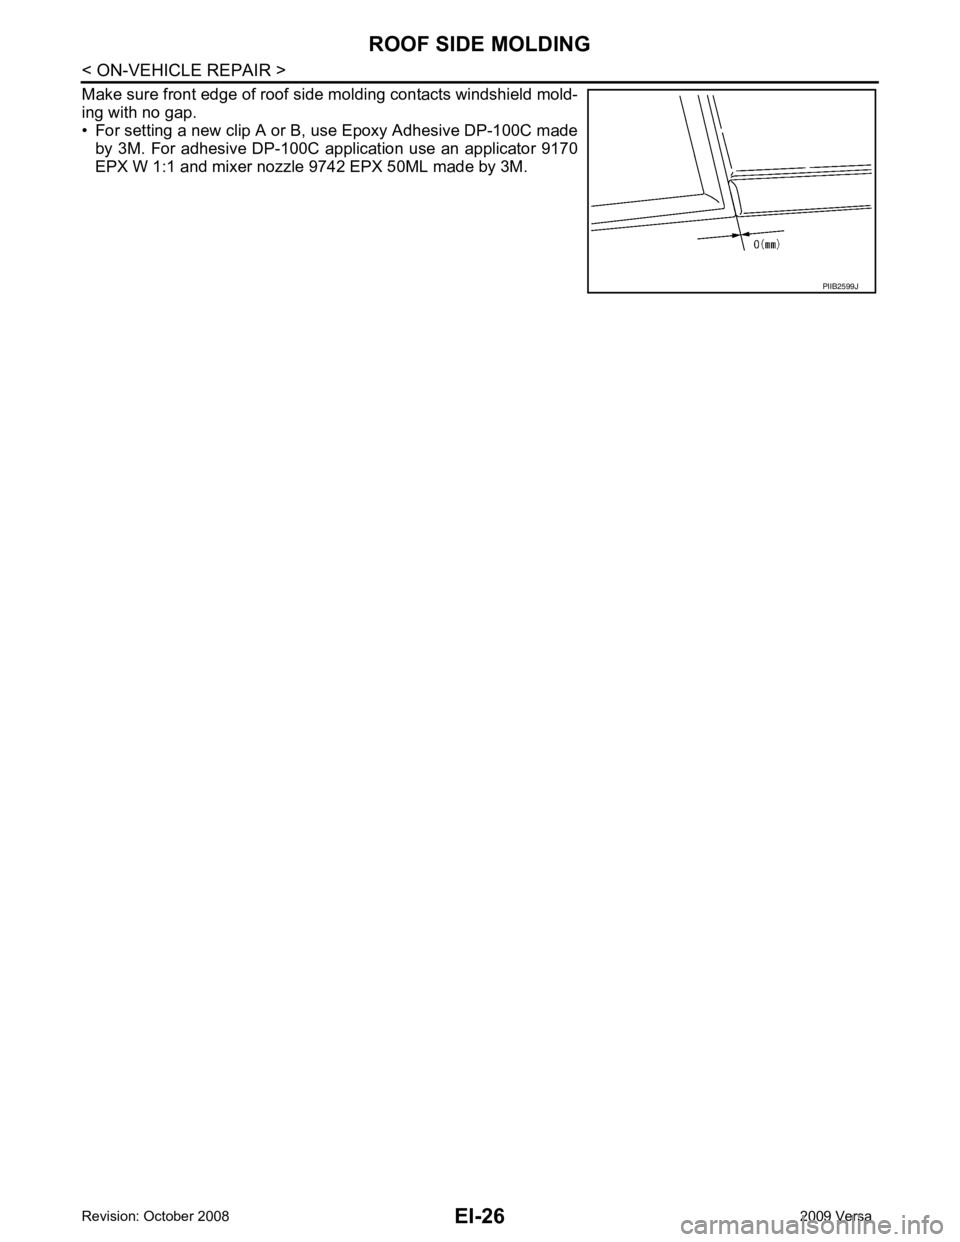
NOTE:
Page 2917 of 4331
Page 2918 of 4331
EI
N
O P
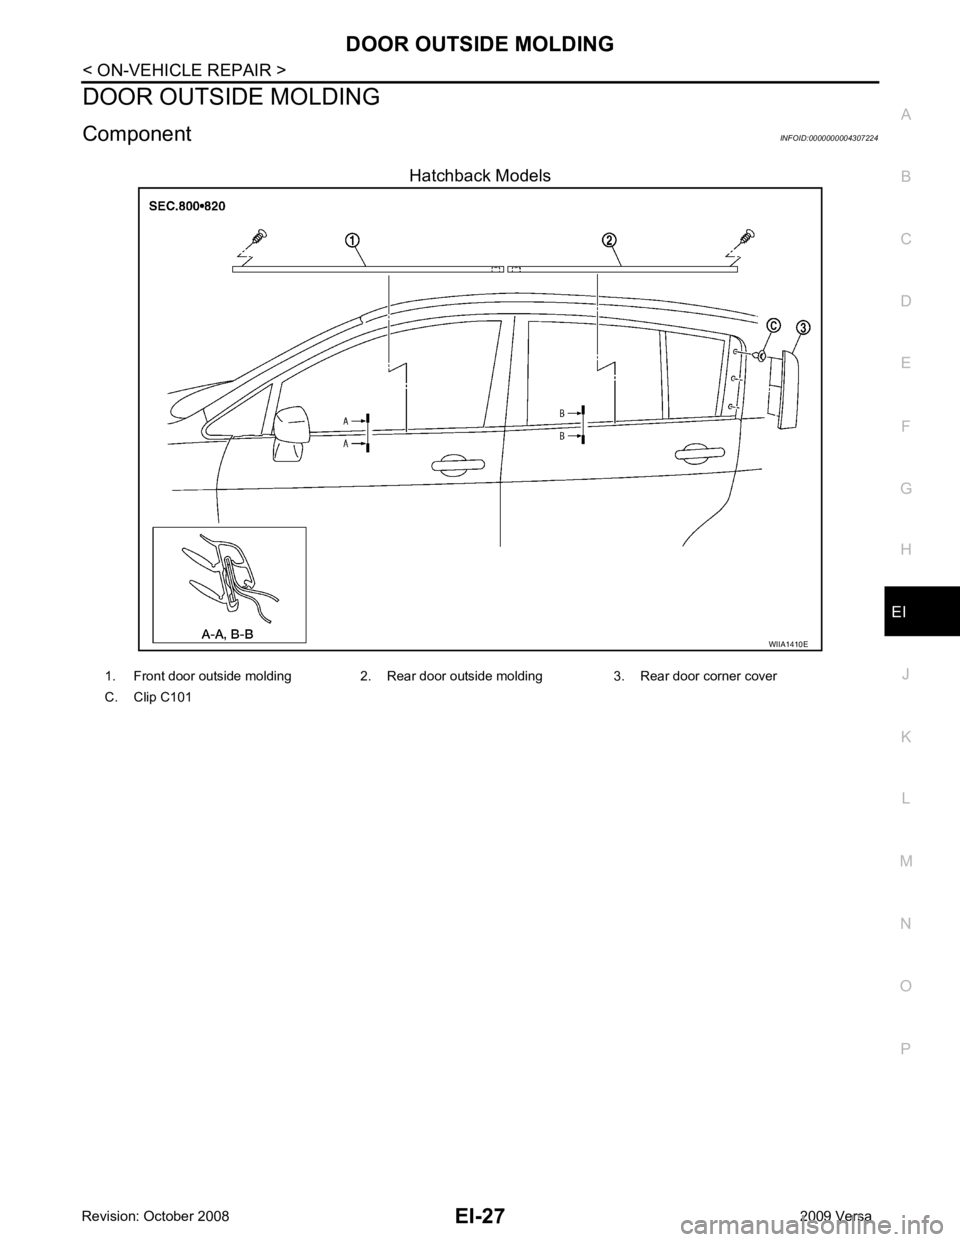
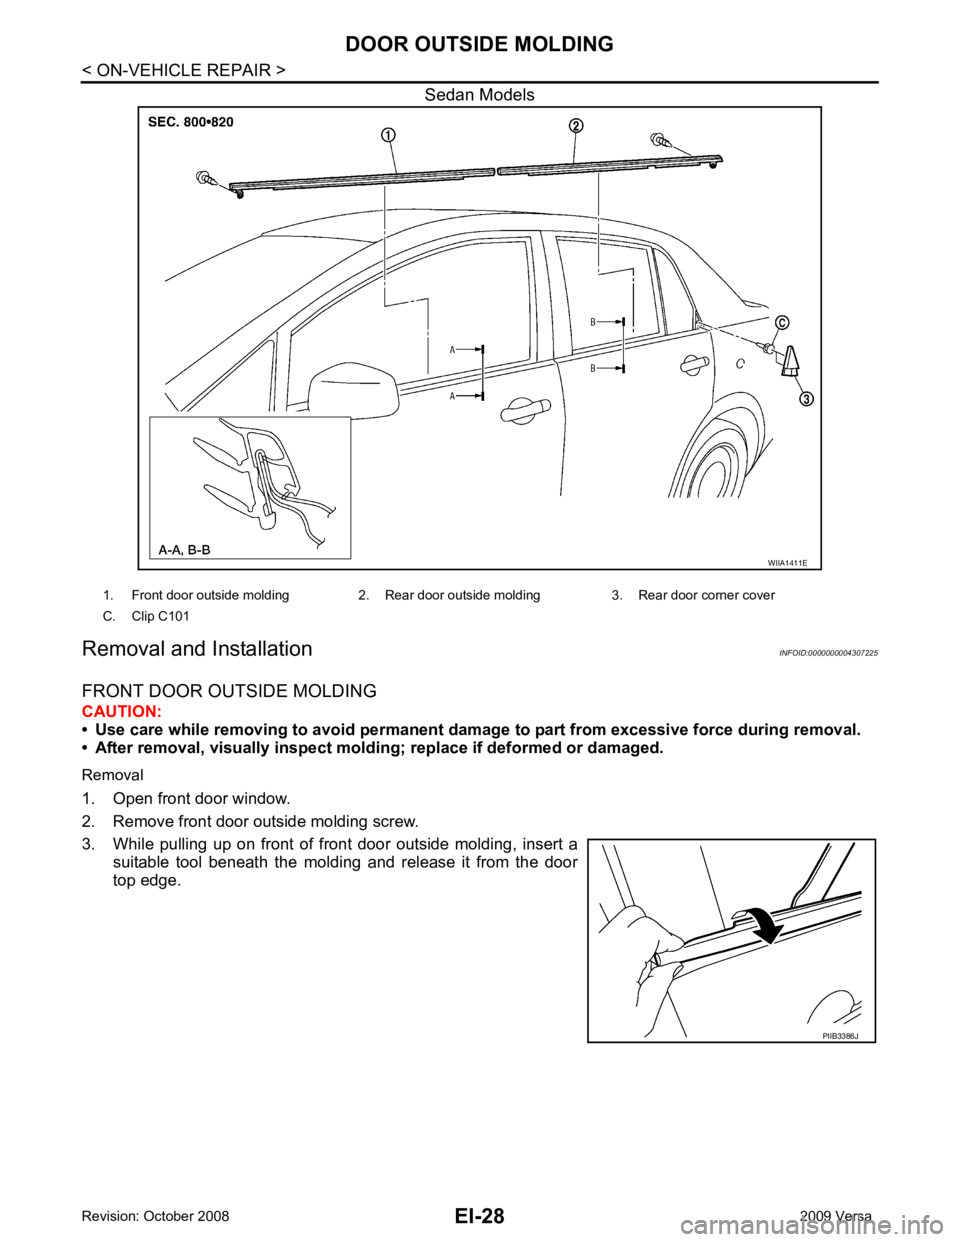
DOOR OUTSIDE MOLDING
Component INFOID:0000000004307224
Hatchback Models
Page 2919 of 4331
Page 2920 of 4331
EI
N
O P
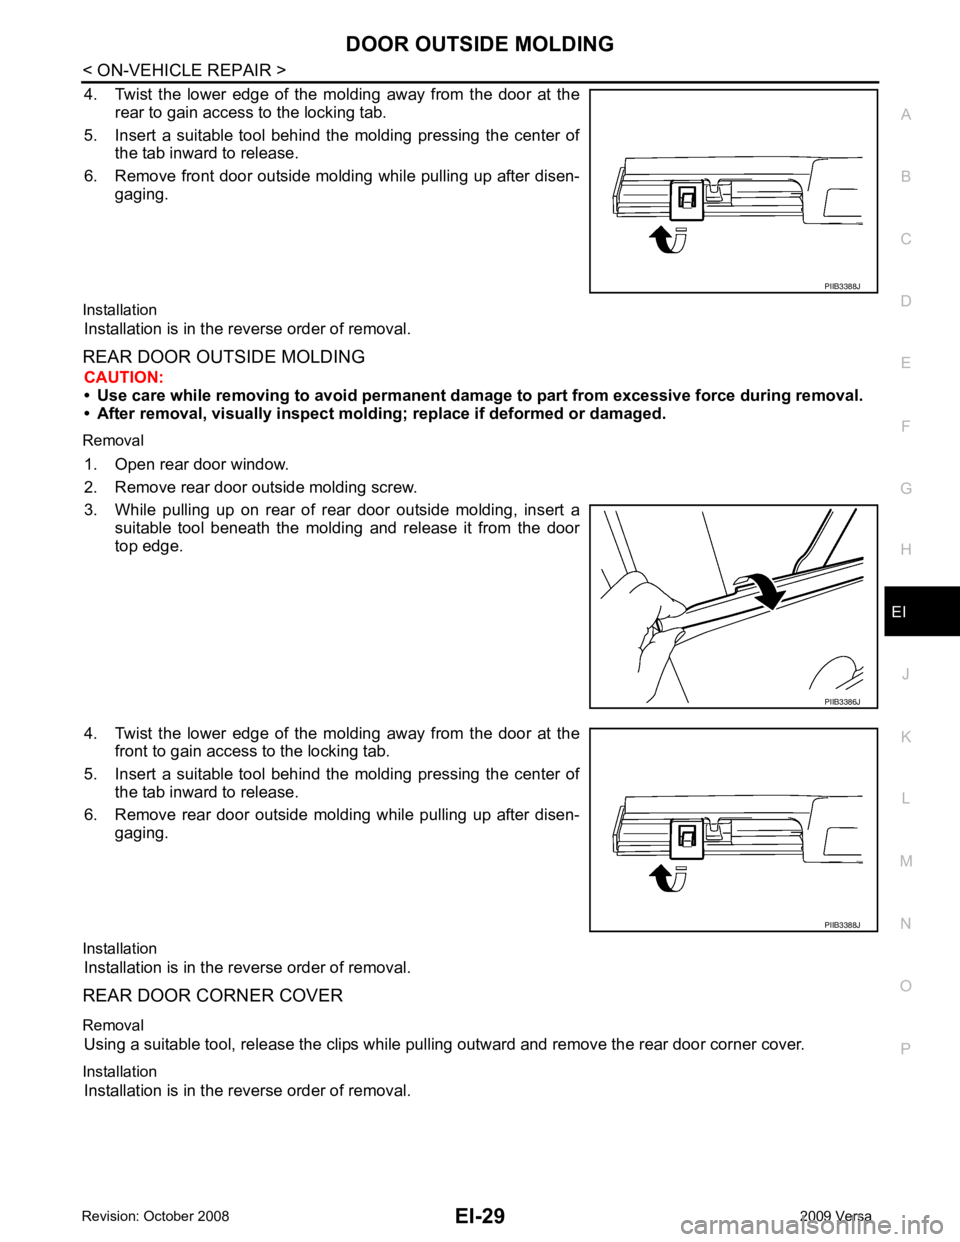
4. Twist the lower edge of the molding away from the door at the
rear to gain access to the locking tab.
5. Insert a suitable tool behind the molding pressing the center of the tab inward to release.
6. Remove front door outside molding while pulling up after disen- gaging.
Installation Installation is in the reverse order of removal.
REAR DOOR OUTSIDE MOLDING CAUTION:
• Use care while removing to avoid permanent da mage to part from excessive force during removal.
• After removal, visually inspect mold ing; replace if deformed or damaged.
Removal 1. Open rear door window.
2. Remove rear door outside molding screw.
3. While pulling up on rear of rear door outside molding, insert a suitable tool beneath the molding and release it from the door
top edge.
4. Twist the lower edge of the molding away from the door at the front to gain access to the locking tab.
5. Insert a suitable tool behind the molding pressing the center of the tab inward to release.
6. Remove rear door outside molding while pulling up after disen- gaging.
Installation Installation is in the reverse order of removal.
REAR DOOR CORNER COVER
Removal Using a suitable tool, release the clips while pulling outward and remove the rear door corner cover.
Installation Installation is in the reverse order of removal. PIIB3386J
Trending: length, tow, ignition, cruise control, height adjustment, warning lights, diagnostic menu
