NISSAN LATIO 2009 Service Repair Manual
Manufacturer: NISSAN, Model Year: 2009, Model line: LATIO, Model: NISSAN LATIO 2009Pages: 4331, PDF Size: 58.04 MB
Page 2951 of 4331
Page 2952 of 4331
![NISSAN LATIO 2009 Service Repair Manual PRECAUTIONS
EM-5
< PRECAUTION >
[HR16DE] C
D E
F
G H
I
J
K L
M A EM
NP
O
5. When the repair work is completed, return the ignition switch to the
″LOCK ″ position before connecting
t NISSAN LATIO 2009 Service Repair Manual PRECAUTIONS
EM-5
< PRECAUTION >
[HR16DE] C
D E
F
G H
I
J
K L
M A EM
NP
O
5. When the repair work is completed, return the ignition switch to the
″LOCK ″ position before connecting
t](/img/5/57359/w960_57359-2951.png)
PRECAUTIONS
EM-5
< PRECAUTION >
[HR16DE] C
D E
F
G H
I
J
K L
M A EM
NP
O
5. When the repair work is completed, return the ignition switch to the
″LOCK ″ position before connecting
the battery cables. (At this time, the steering lock mechanism will engage.)
6. Perform a self-diagnosis check of al l control units using CONSULT-III.
Precaution for Procedur e without Cowl Top Cover INFOID:0000000004784258
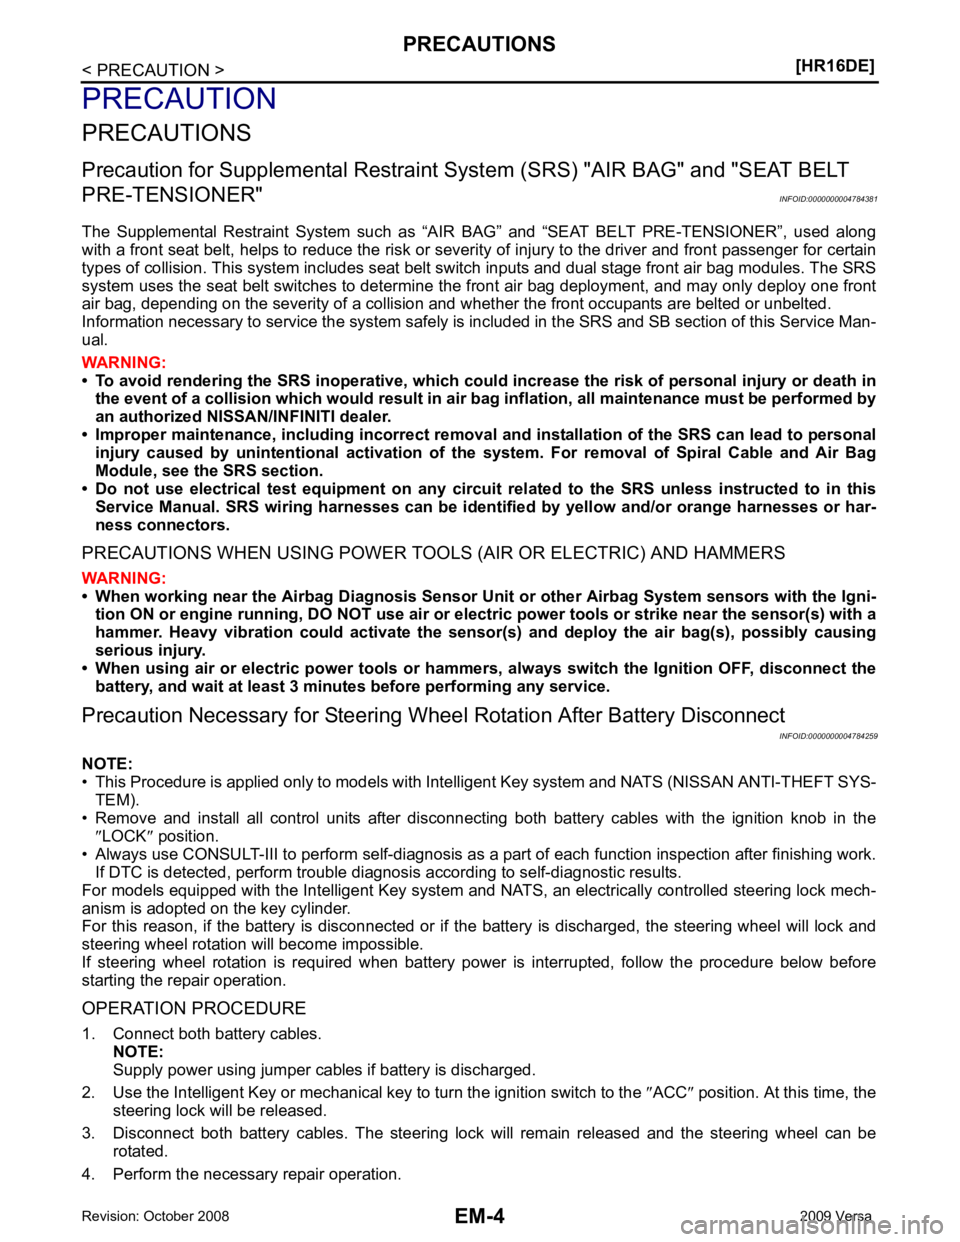
When performing the procedure after removing cowl top cover, cover
the lower end of windshield.
Precaution for Drain Coolant INFOID:0000000004784260
• Drain coolant when engine is cooled.
Precaution for Disco nnecting Fuel Piping INFOID:0000000004784261
• Before starting work, make sure no fire or spark producing items are in the work area.
• Release fuel pressure before disassembly.
• After disconnecting pipes, plug openings to stop fuel leakage.
Precaution for Removal and Disassembly INFOID:0000000004784262
• When instructed to use special service tools, use the spec ified tools. Always be careful to work safely, avoid
forceful or uninstructed operations.
• Exercise maximum care to avoid damage to mating or sliding surfaces.
• Cover openings of engine system with tape or the equiva lent, if necessary, to seal out foreign materials.
• Mark and arrange disassembly parts in an organized way for easy troubleshooting and assembly.
• When loosening nuts and bolts, as a basic rule, start with the one furthest outside, then the one diagonally opposite, and so on. If the order of loosening is specif ied, do exactly as specified. Power tools may be used
where noted in the step.
Precaution for Inspection, Repair and Replacement INFOID:0000000004784263
• Before repairing or replacing, thoroughly inspect parts. Inspect new replacement parts in the same way, and
replace if necessary.
Precaution for Assembly and Installation INFOID:0000000004784264
• Use torque wrench to tighten bolts or nuts to specification.
• When tightening nuts and bolts, as a basic rule, equally tighten in several different steps starting with the ones in center, then ones on inside and outside diagonally in this order. If the order of tightening is specified,
do exactly as specified.
• Replace with new gasket, packing, oil seal or O-ring.
• Thoroughly wash, clean, and air-blow each part. Carefully check oil or coolant passages for any restriction
and blockage.
• Avoid damaging sliding or mating surfaces. Completely remove foreign materials such as cloth lint or dust. Before assembly, oil sliding surfaces well.
• Release air within route after draining coolant.
• Before starting engine, apply fuel pressure to fuel lines with turning ignition switch ON (with engine stopped). Then make sure that there are no leaks at fuel line connections.
• After repairing, start engine and increase engine speed to check coolant, fuel, oil, and exhaust systems for leakage. PIIB3706J
Page 2953 of 4331
![NISSAN LATIO 2009 Service Repair Manual EM-6< PRECAUTION >
[HR16DE]
PRECAUTIONS
Parts Requiring Angular Tightening INFOID:0000000004784265
• Use an angle wrench for the final tightening of the following engine parts:
- Cylinder head bolt NISSAN LATIO 2009 Service Repair Manual EM-6< PRECAUTION >
[HR16DE]
PRECAUTIONS
Parts Requiring Angular Tightening INFOID:0000000004784265
• Use an angle wrench for the final tightening of the following engine parts:
- Cylinder head bolt](/img/5/57359/w960_57359-2952.png)
EM-6< PRECAUTION >
[HR16DE]
PRECAUTIONS
Parts Requiring Angular Tightening INFOID:0000000004784265
• Use an angle wrench for the final tightening of the following engine parts:
- Cylinder head bolts
- Camshaft sprocket (INT)
- Main bearing cap bolts
- Connecting rod cap nuts
- Crankshaft pulley bolt (No angle wrench is required as the bolt flange is provided with notches for angular
tightening)
• Do not use a torque value for final tightening.
• The torque value for these parts are for a preliminary step.
• Ensure thread and seat surfaces are clean and coated with engine oil.
Precaution for Liquid Gasket INFOID:0000000004784266
REMOVAL OF LIQUID GASKET SEALING
• After removing the bolts and nuts, separate the mating surface and remove the sealant using Tool.
CAUTION:
Be careful not to damage the mating surfaces.
• In areas where the cutter is difficult to use, use a plastic hammer to
lightly tap (1) the cutter where the RTV Silicone Sealant is applied.
Use a plastic hammer to slide the cutter (2) by tapping on the side.
CAUTION:
If for some unavoidable reason a tool such as a flat-bladed
screwdriver is used, be careful not to damage the mating sur-
faces.
LIQUID GASKET APPLICATION PROCEDURE
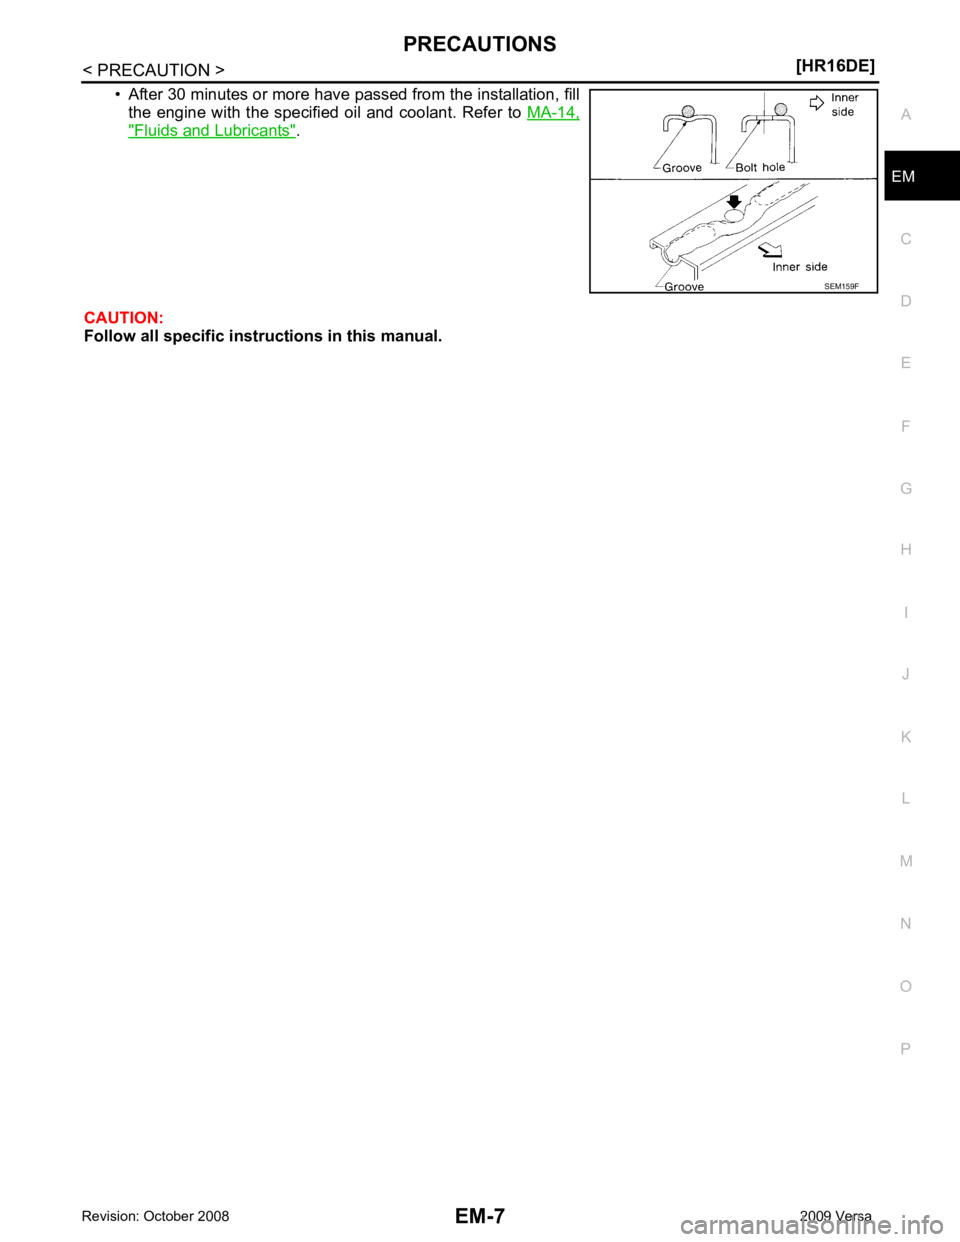
1. Using a scraper, remove the old Silicone RTV Sealant adhering to the gasket application surface and the mating surface.
• Remove the sealant completely from the groove of the gasket application surface, bolts, and bolt holes.
2. Thoroughly clean the gasket application surface and the mating surface and remove adhering moisture, grease and foreign
materials.
3. Attach the sealant t ube to the tube presser.
Use Genuine Silicone RTV Seal ant or equivalent. Refer to
GI-42, " Recommended Chemical
Product and Sealant " .
4. Apply the sealant without breaks to the specified location using Tool.
• If there is a groove for the s ealant application, apply the seal-
ant to the groove.
• As for the bolt holes, normally apply the sealant inside the holes. If specified, it should be applied outside the holes. Make
sure to read the text of this manual.
• Within five minutes of the seal ant application, install the mat-
ing component.
• If the sealant protrudes, wipe it off immediately.
• Do not retighten after the installation. Tool number : KV10112100 (BT-8653-A)
Tool number : KV10111100 (J-37228) WBIA0566E
PBIC0003E
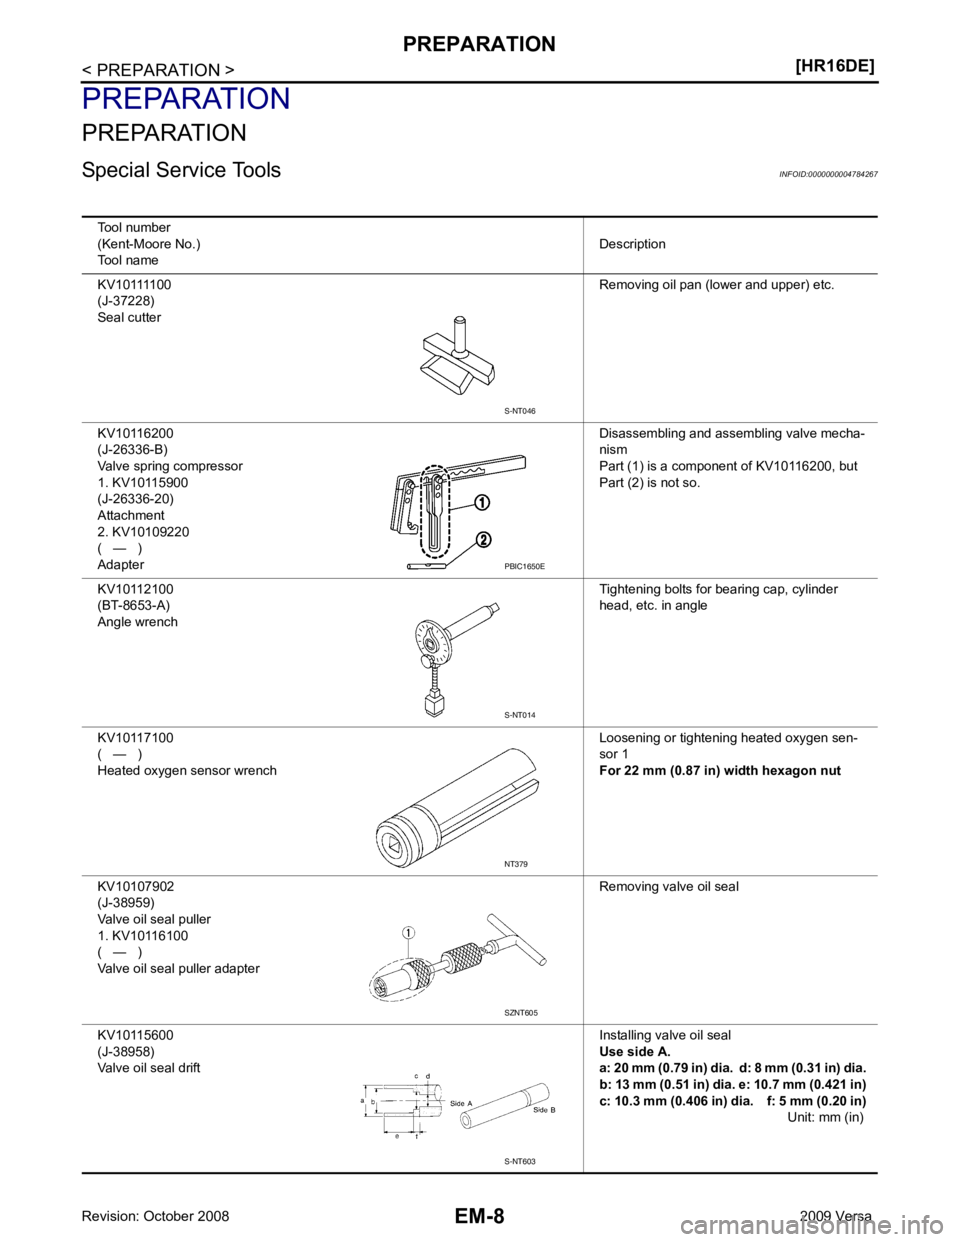
Tool number WS39930000 ( – )
WBIA0567E
Page 2954 of 4331
EM
NP
O
• After 30 minutes or more have passed from the installation, fill
the engine with the specified oil and coolant. Refer to MA-14," Fluids and Lubricants " .
CAUTION:
Follow all specific instruct ions in this manual.
Page 2955 of 4331
PBIC1650E
S-NT014
SZNT605
S-NT603
Page 2956 of 4331
EM
NP
O
Commercial Service Tools INFOID:0000000004784268
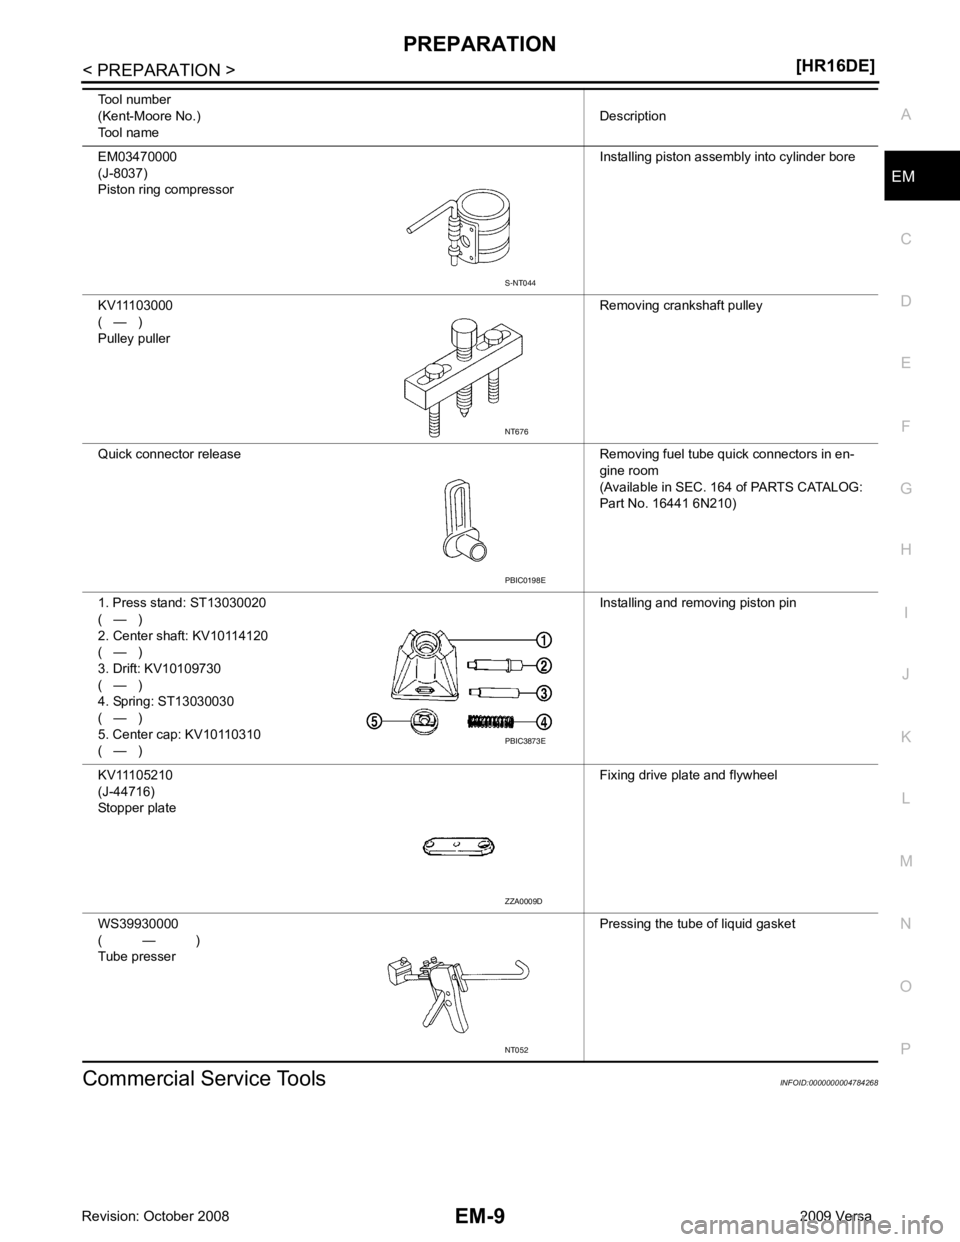
EM03470000
(J-8037)
Piston ring compressor Installing piston assembly into cylinder bore
KV11103000
( — )
Pulley puller Removing crankshaft pulley
Quick connector release Removing fuel tube quick connectors in en- gine room
(Available in SEC. 164 of PARTS CATALOG:
Part No. 16441 6N210)
1. Press stand: ST13030020
( — )
2. Center shaft: KV10114120
( — )
3. Drift: KV10109730
( — )
4. Spring: ST13030030
( — )
5. Center cap: KV10110310
( — ) Installing and removing piston pin
KV11105210
(J-44716)
Stopper plate Fixing drive plate and flywheel
WS39930000
( — )
Tube presser Pressing the tube of liquid gasket
Tool number
(Kent-Moore No.)
Tool name Description PBIC0198E
PBIC3873E
ZZA0009D
NT052
Page 2957 of 4331
![NISSAN LATIO 2009 Service Repair Manual EM-10< PREPARATION >
[HR16DE]
PREPARATION
Tool name Description
Power tool Loosening bolts and nuts
Spark plug wrench Removing and installing spark plug
Valve seat cutter set Finishing valve seat dime NISSAN LATIO 2009 Service Repair Manual EM-10< PREPARATION >
[HR16DE]
PREPARATION
Tool name Description
Power tool Loosening bolts and nuts
Spark plug wrench Removing and installing spark plug
Valve seat cutter set Finishing valve seat dime](/img/5/57359/w960_57359-2956.png)
EM-10< PREPARATION >
[HR16DE]
PREPARATION
Tool name Description
Power tool Loosening bolts and nuts
Spark plug wrench Removing and installing spark plug
Valve seat cutter set Finishing valve seat dimensions
Piston ring expander Removing and installing piston ring
Valve guide drift Removing and installing valve guide
Valve guide reamer (1): Reaming valve guide inner hole (2): Reaming hole for oversize valve guide
(J-43897-18)
(J-43897-12)
Oxygen sensor thread cleaner Reconditioning the exhaust system threads
before installing a new heated oxygen sensor
(Use with anti-seize lubricant shown below.)
a = 18 mm (0.71 in) dia. for zirconia heated
oxygen sensor
b = 12 mm (0.47 in) dia. for titania heated
oxygen sensor PBIC0190E
PBIC3874E
S-NT048
S-NT030
PBIC4012E
PBIC4013E
AEM488
Page 2958 of 4331
EM
NP
O
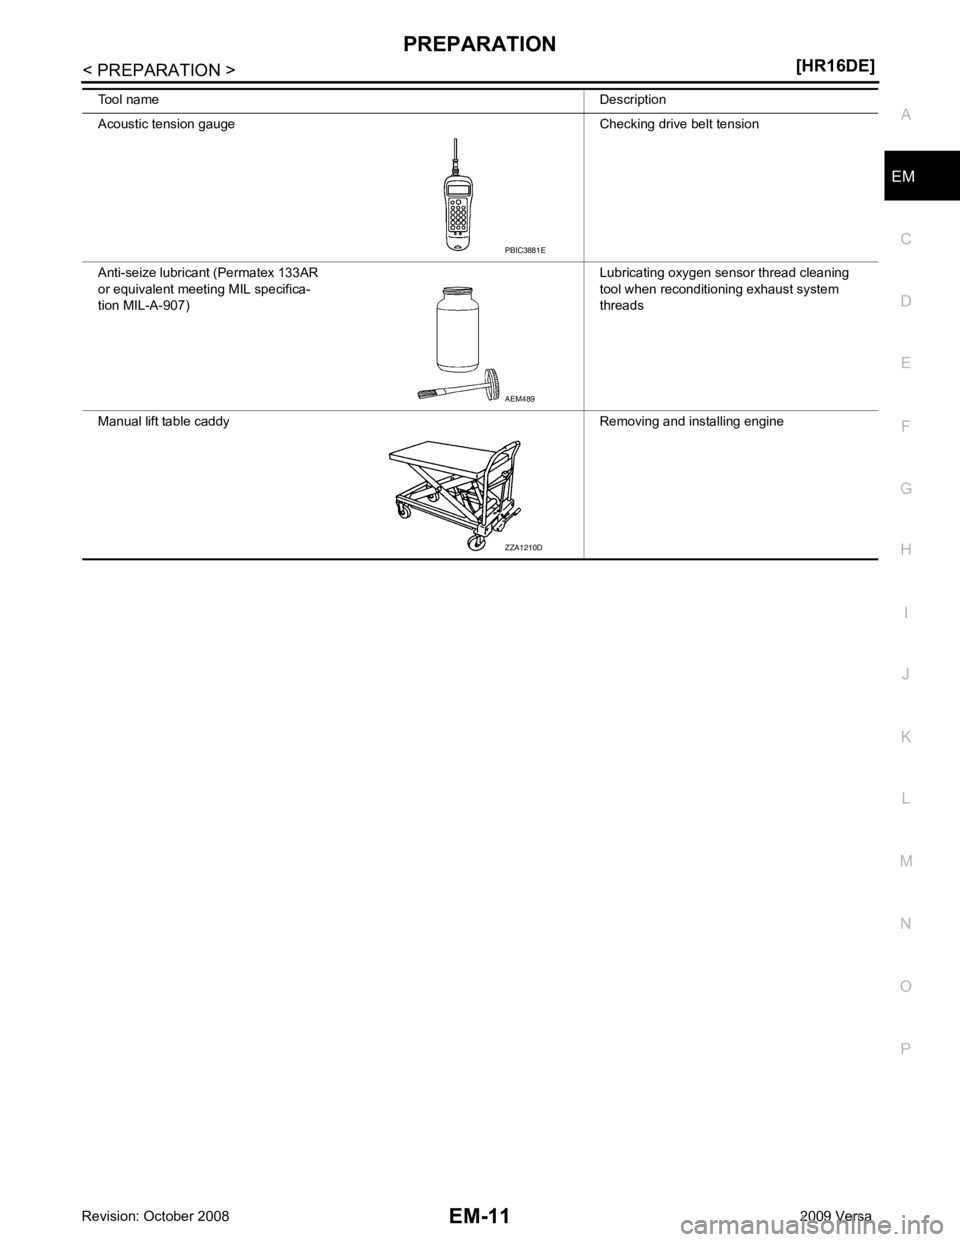
Acoustic tension gauge Checking drive belt tension
Anti-seize lubricant (Permatex 133AR
or equivalent meeting MIL specifica-
tion MIL-A-907) Lubricating oxygen sensor thread cleaning
tool when reconditioning exhaust system
threads
Manual lift table caddy Removing and installing engine
Tool name
Description AEM489
ZZA1210D
Page 2959 of 4331
Page 2960 of 4331
EM
NP
O
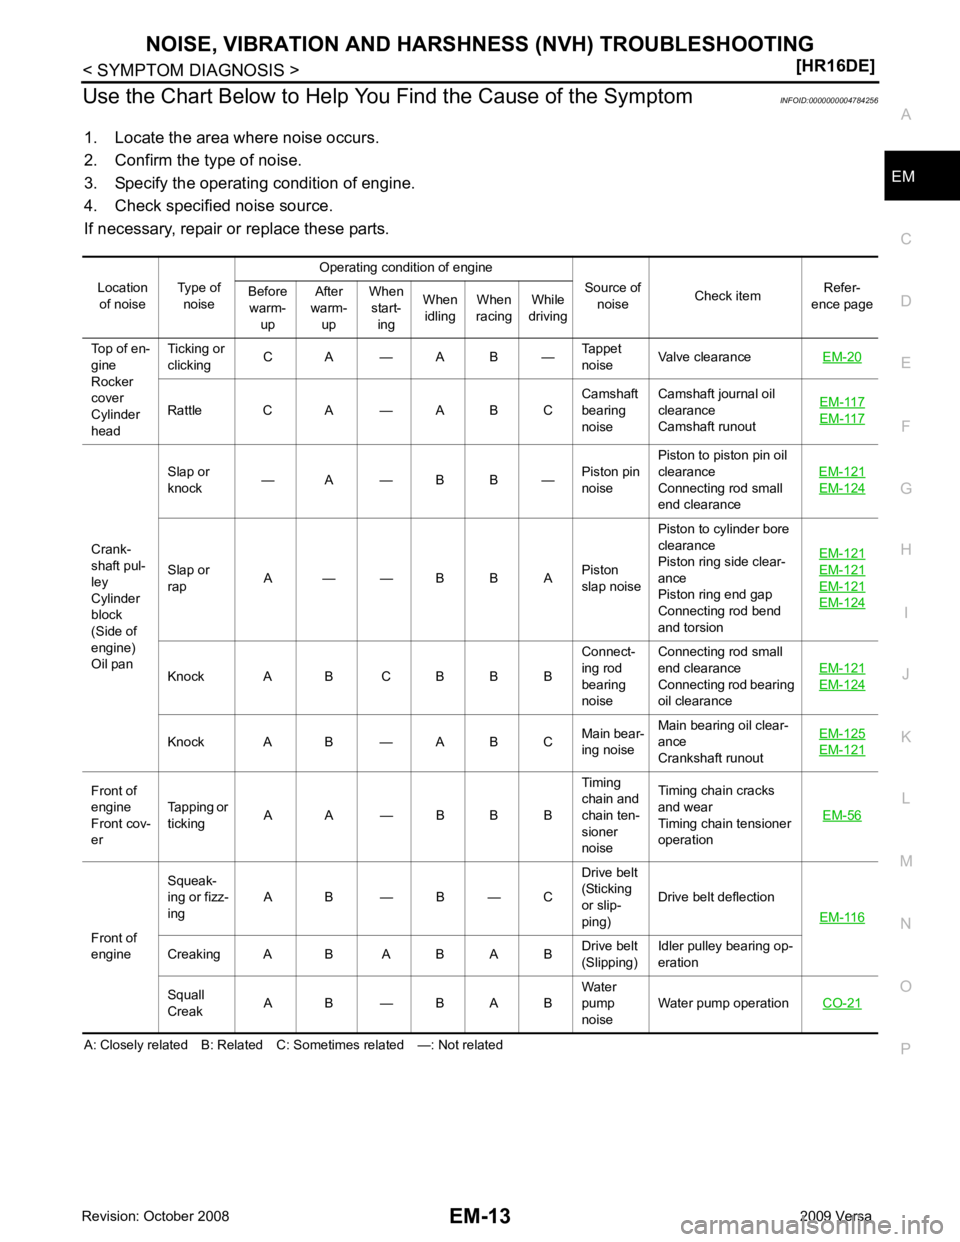
Use the Chart Below to Help You
Find the Cause of the Symptom INFOID:0000000004784256
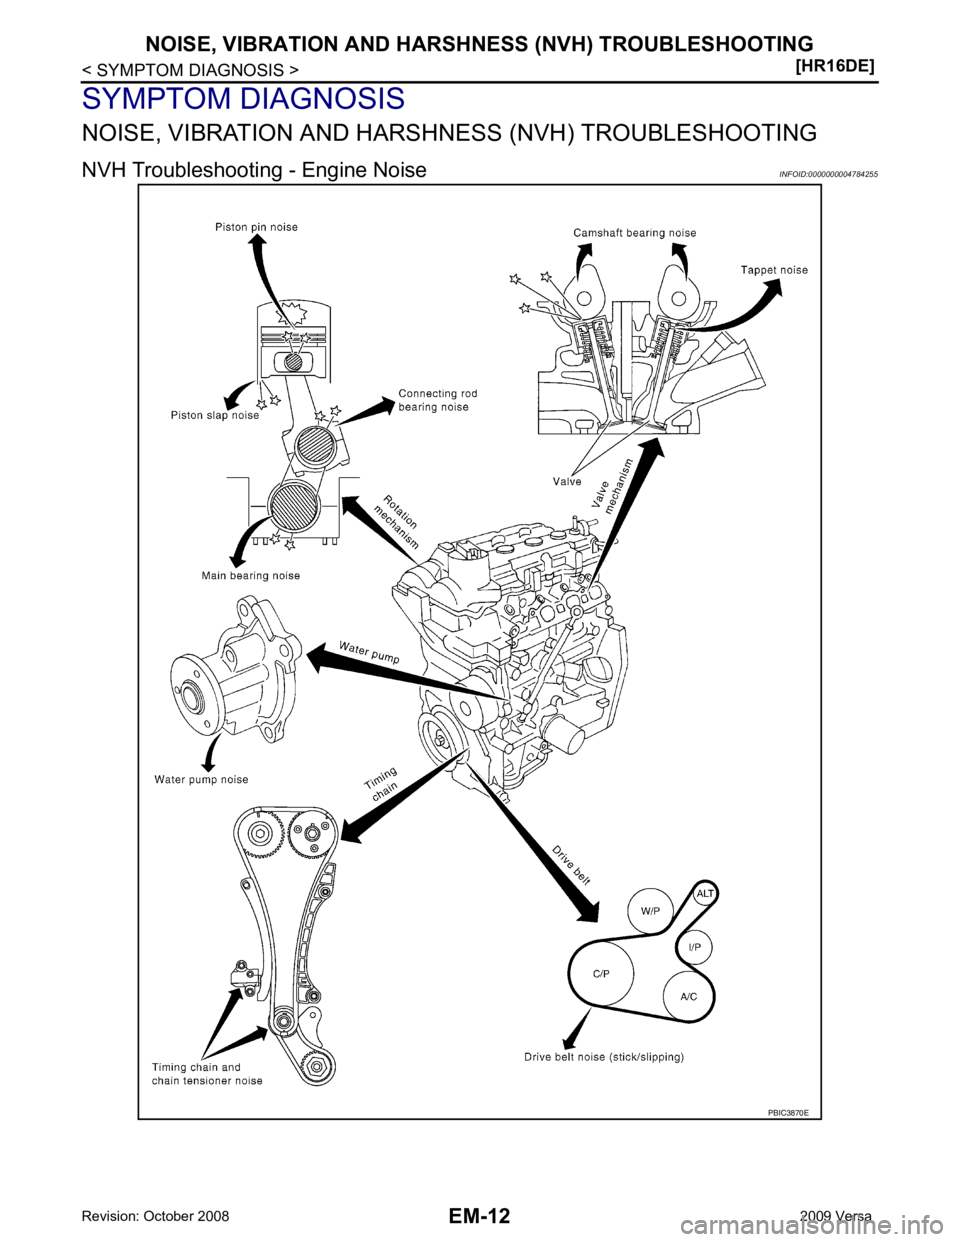
1. Locate the area where noise occurs.
2. Confirm the type of noise.
3. Specify the operating condition of engine.
4. Check specified noise source.
If necessary, repair or replace these parts.
A: Closely related B: Related C: Sometimes related —: Not related Location
of noise Type of
noise Operating condition of engine
Source of noise Check item Refer-
ence page
Before
warm- up After
warm- up When
start- ing When
idling When
racing While
driving
Top of en-
gine
Rocker
cover
Cylinder
head Ticking or
clicking C A — A B — Tappet
noise Valve clearance
EM-20 Rattle C A — A B C
Camshaft
bearing
noise Camshaft journal oil
clearance
Camshaft runout EM-117 EM-117
Crank-
shaft pul-
ley
Cylinder
block
(Side of
engine)
Oil pan Slap or
knock — A — B B —
Piston pin
noise Piston to piston pin oil
clearance
Connecting rod small
end clearance EM-121 EM-124
Slap or
rap A — — B B A
Piston
slap noise Piston to cylinder bore
clearance
Piston ring side clear-
ance
Piston ring end gap
Connecting rod bend
and torsion EM-121 EM-121
EM-121
EM-124
Knock A B C B B B
Connect-
ing rod
bearing
noise Connecting rod small
end clearance
Connecting rod bearing
oil clearance EM-121 EM-124
Knock A B — A B C
Main bear-
ing noise Main bearing oil clear-
ance
Crankshaft runout EM-125 EM-121
Front of
engine
Front cov-
er Tapping or
ticking A A — B B B Timing
chain and
chain ten-
sioner
noise Timing chain cracks
and wear
Timing chain tensioner
operation EM-56Front of
engine Squeak-
ing or fizz-
ing A B — B — C Drive belt
(Sticking
or slip-
ping) Drive belt deflection
EM-116 Creaking A B A B A B
Drive belt
(Slipping) Idler pulley bearing op-
eration
Squall
Creak A B — B A B Water
pump
noise Water pump operation
CO-21