NISSAN LATIO 2009 Service Repair Manual
Manufacturer: NISSAN, Model Year: 2009, Model line: LATIO, Model: NISSAN LATIO 2009Pages: 4331, PDF Size: 58.04 MB
Page 2941 of 4331
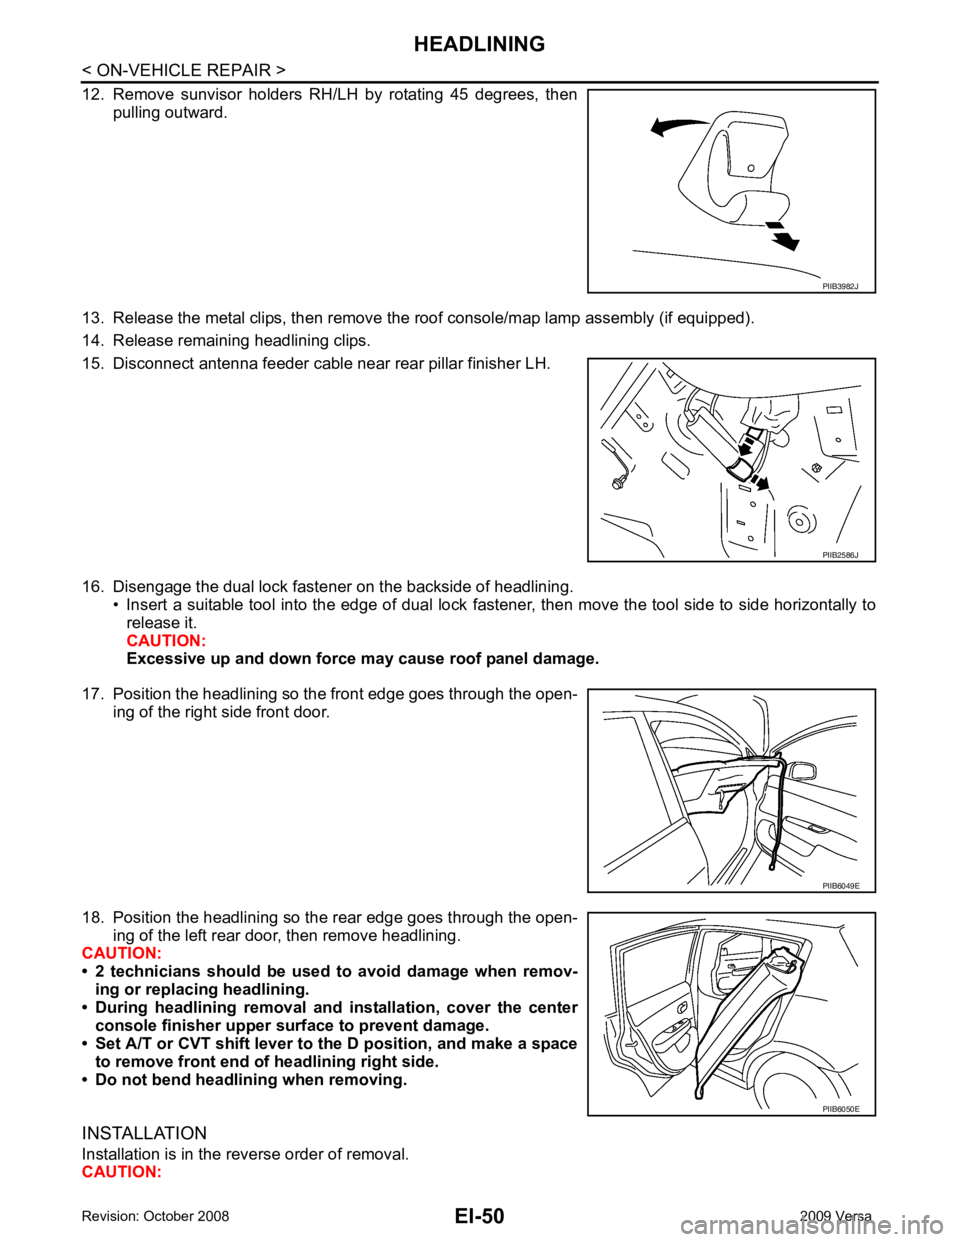
PIIB2586J
PIIB6050E
Page 2942 of 4331
HEADLINING
EI-51
< ON-VEHICLE REPAIR >
C
D E
F
G H
J
K L
M A
B EI
N
O P
Avoid headlining damage when
installing by inserting rear clips first during assembly.
Removal and Installation - Sedan INFOID:0000000004307237
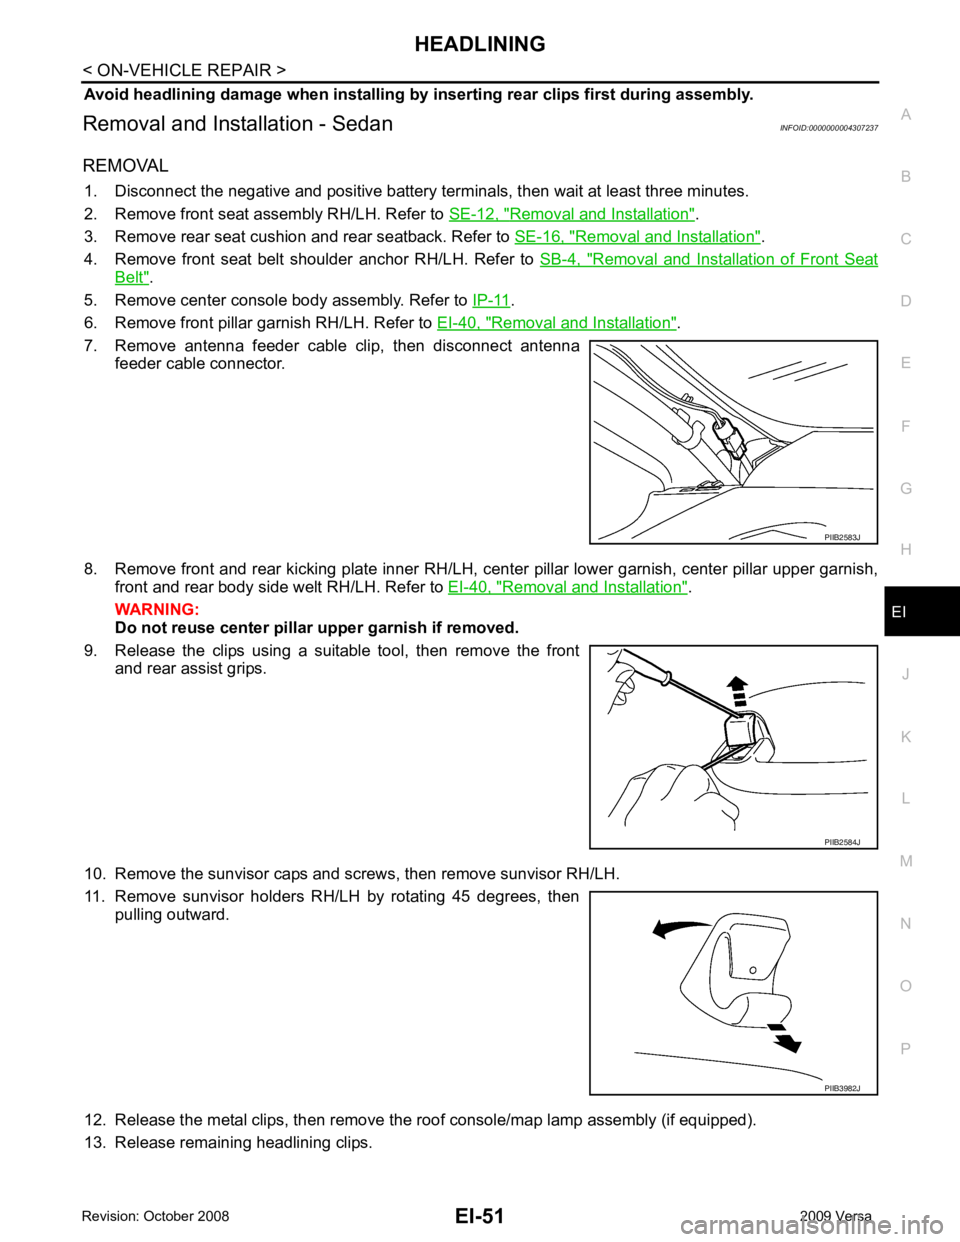
REMOVAL 1. Disconnect the negative and positive battery term inals, then wait at least three minutes.
2. Remove front seat assembly RH/LH. Refer to SE-12, " Removal and Installation " .
3. Remove rear seat cushion and rear seatback. Refer to SE-16, " Removal and Installation " .
4. Remove front seat belt shoulder anchor RH/LH. Refer to SB-4, " Removal and Installation of Front Seat
Belt " .
5. Remove center console body assembly. Refer to IP-11 .
6. Remove front pillar garnish RH/LH. Refer to EI-40, " Removal and Installation " .
7. Remove antenna feeder cable clip, then disconnect antenna feeder cable connector.
8. Remove front and rear kicking plate inner RH/LH, cent er pillar lower garnish, center pillar upper garnish,
front and rear body side welt RH/LH. Refer to EI-40, " Removal and Installation " .
WARNING:
Do not reuse center pillar upper garnish if removed.
9. Release the clips using a suitable tool, then remove the front and rear assist grips.
10. Remove the sunvisor caps and screws, then remove sunvisor RH/LH.
11. Remove sunvisor holders RH/LH by rotating 45 degrees, then pulling outward.
12. Release the metal clips, then remove the roof console/map lamp assembly (if equipped).
13. Release remaining headlining clips. PIIB2583J
PIIB2584J
PIIB3982J
Page 2943 of 4331
EI-52< ON-VEHICLE REPAIR >
HEADLINING
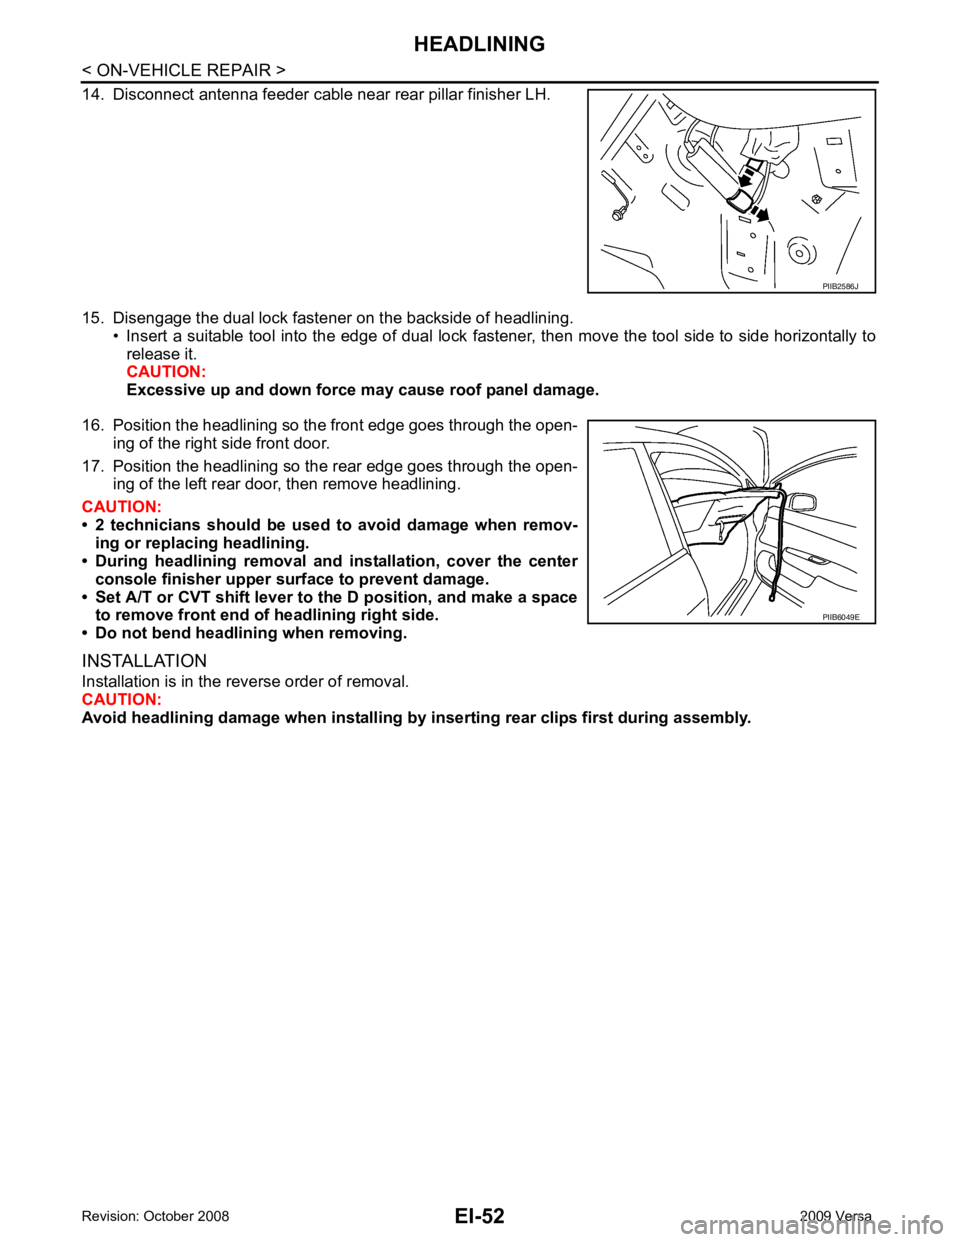
14. Disconnect antenna feeder cable near rear pillar finisher LH.
15. Disengage the dual lock fastener on the backside of headlining. • Insert a suitable tool into the edge of dual lock fastener, then move the tool side to side horizontally to
release it.
CAUTION:
Excessive up and down force may cause roof panel damage.
16. Position the headlining so the front edge goes through the open- ing of the right side front door.
17. Position the headlining so the rear edge goes through the open- ing of the left rear door, then remove headlining.
CAUTION:
• 2 technicians should be used to avoid damage when remov-
ing or replacing headlining.
• During headlining removal and installation, cover the center
console finisher upper surface to prevent damage.
• Set A/T or CVT shift lever to the D position, and make a space to remove front end of headlining right side.
• Do not bend headlining when removing.
INSTALLATION
Installation is in the reverse order of removal.
CAUTION:
Avoid headlining damage when installing by inserting rear clips first during assembly. PIIB2586J
PIIB6049E
Page 2944 of 4331
EI
N
O P
LUGGAGE FLOOR TRIM
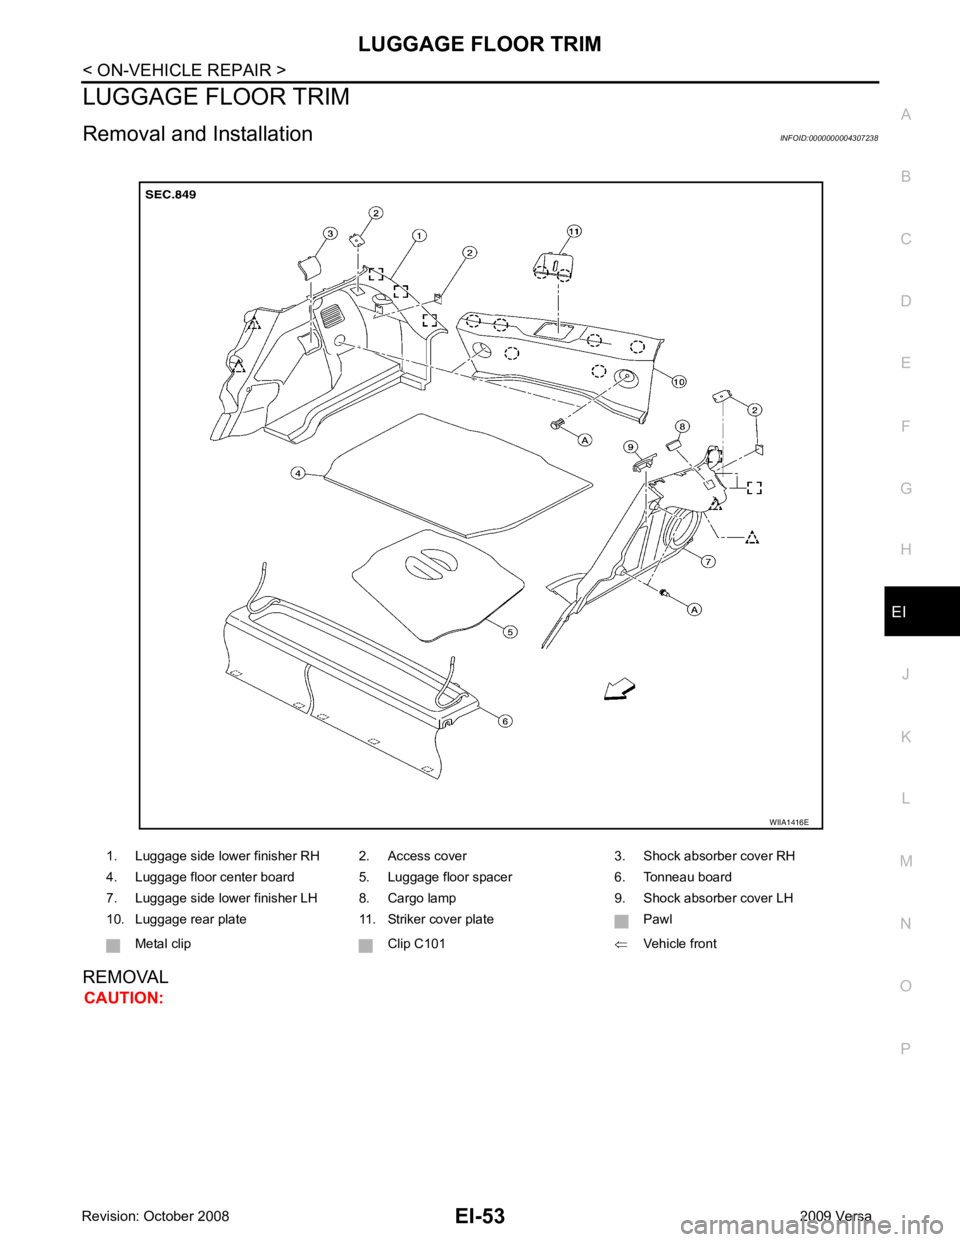
Removal and Installation INFOID:0000000004307238
REMOVAL CAUTION: 1. Luggage side lower finisher RH 2. Access cover 3. Shock absorber cover RH
4. Luggage floor center board 5. Luggage floor spacer 6. Tonneau board
7. Luggage side lower finisher LH 8. Cargo lamp 9. Shock absorber cover LH
10. Luggage rear plate 11. Striker cover plate Pawl
Metal clip Clip C101 ⇐Vehicle front
Page 2945 of 4331
EI-54< ON-VEHICLE REPAIR >
LUGGAGE FLOOR TRIM
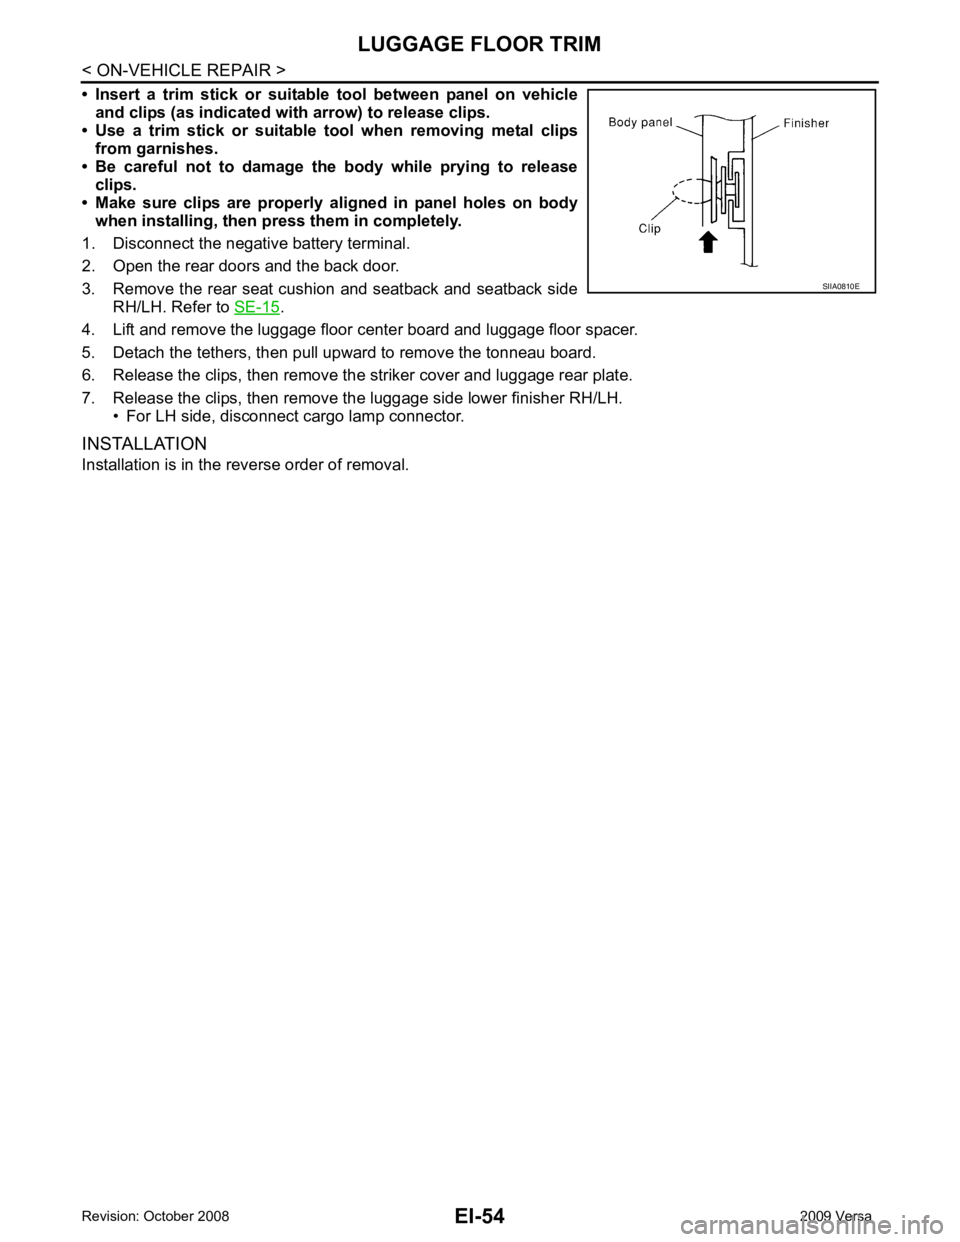
• Insert a trim stick or suitable tool between panel on vehicle
and clips (as indicated with arrow) to release clips.
• Use a trim stick or suitable tool when removing metal clips
from garnishes.
• Be careful not to damage the body while prying to release clips.
• Make sure clips are properly al igned in panel holes on body
when installing, then pr ess them in completely.
1. Disconnect the negative battery terminal.
2. Open the rear doors and the back door.
3. Remove the rear seat cushion and seatback and seatback side RH/LH. Refer to SE-15 .
4. Lift and remove the luggage floor center board and luggage floor spacer.
5. Detach the tethers, then pull upward to remove the tonneau board.
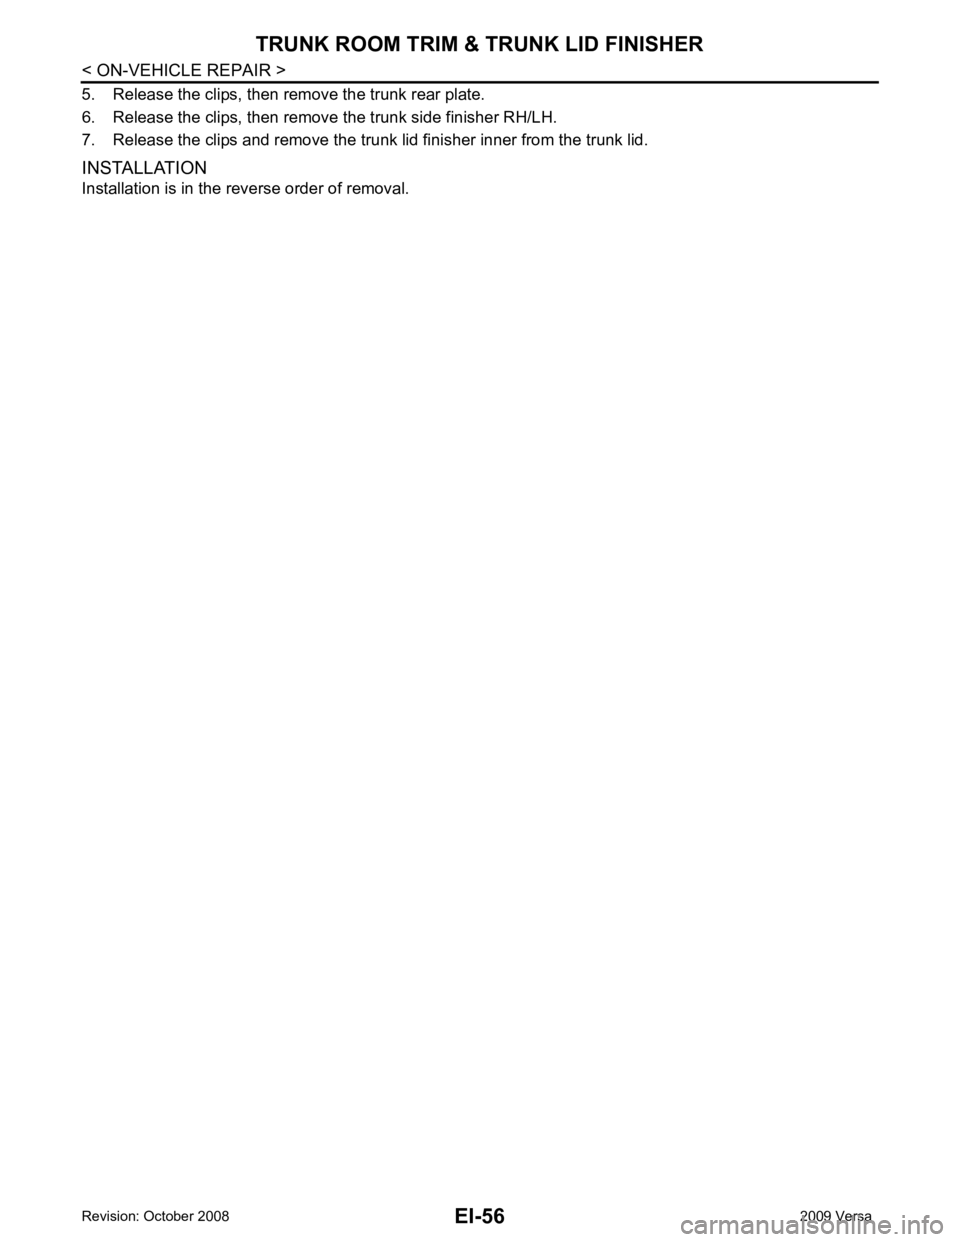
6. Release the clips, then remove the striker cover and luggage rear plate.
7. Release the clips, then remove the luggage side lower finisher RH/LH. • For LH side, disconnect cargo lamp connector.
INSTALLATION
Installation is in the reverse order of removal. SIIA0810E
Page 2946 of 4331
EI
N
O P
TRUNK ROOM TRIM & TRUNK LID FINISHER
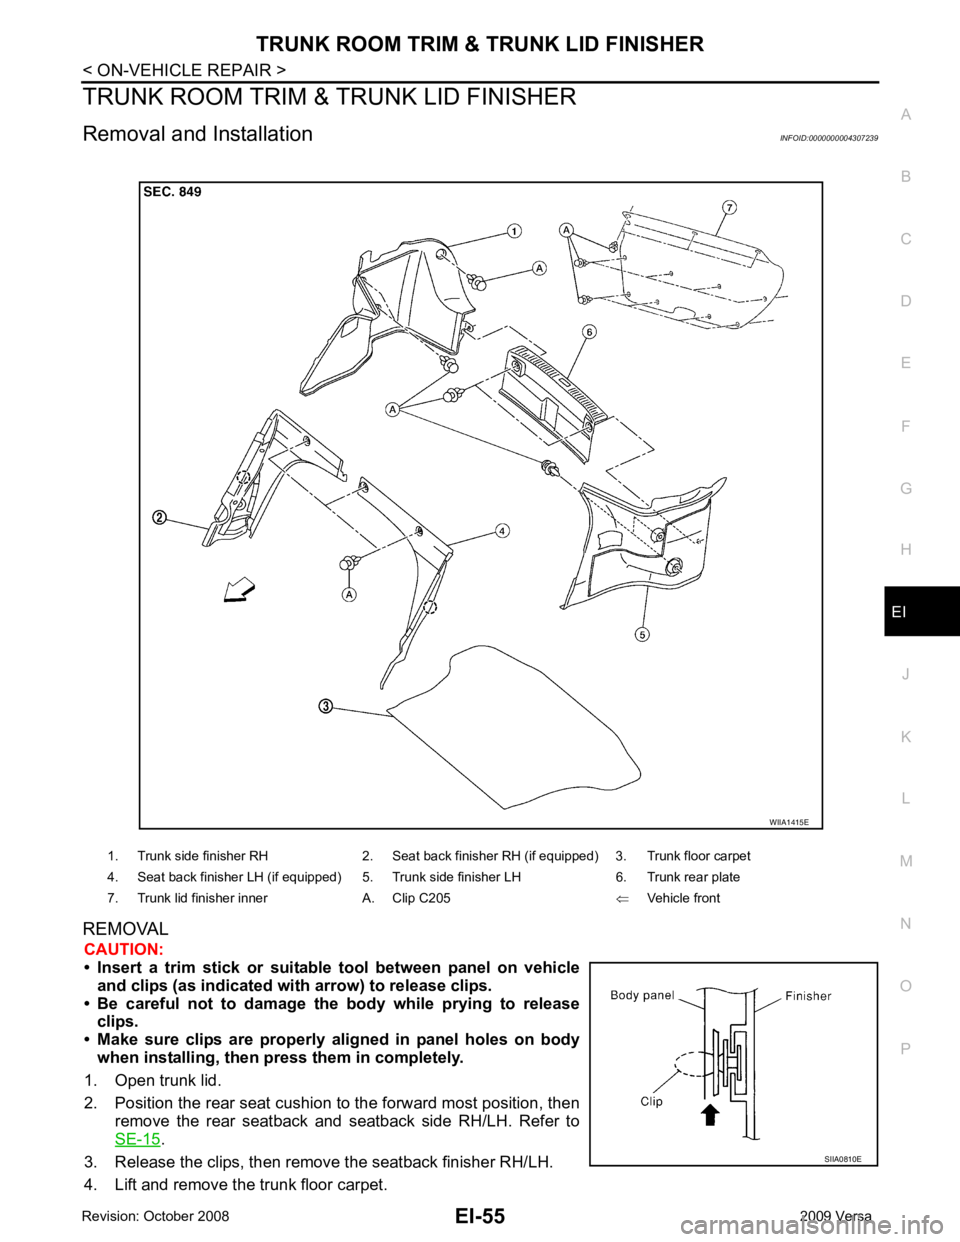
Removal and Installation INFOID:0000000004307239
REMOVAL CAUTION:
• Insert a trim stick or suitable tool between panel on vehicle
and clips (as indicated with arrow) to release clips.
• Be careful not to damage the body while prying to release clips.
• Make sure clips are properly al igned in panel holes on body
when installing, then press them in completely.
1. Open trunk lid.
2. Position the rear seat cushion to the forward most position, then remove the rear seatback and seatback side RH/LH. Refer to
SE-15 .
3. Release the clips, then remove the seatback finisher RH/LH.
4. Lift and remove the trunk floor carpet. 1. Trunk side finisher RH 2. Seat back finisher RH (if equipped) 3. Trunk floor carpet
4. Seat back finisher LH (if equipped) 5. Trunk side finisher LH 6. Trunk rear plate
7. Trunk lid finisher inner A. Clip C205 ⇐Vehicle front
Page 2947 of 4331
Page 2948 of 4331
EM
N
O P
CONTENTS
ENGINE MECHANICAL
HR16DE
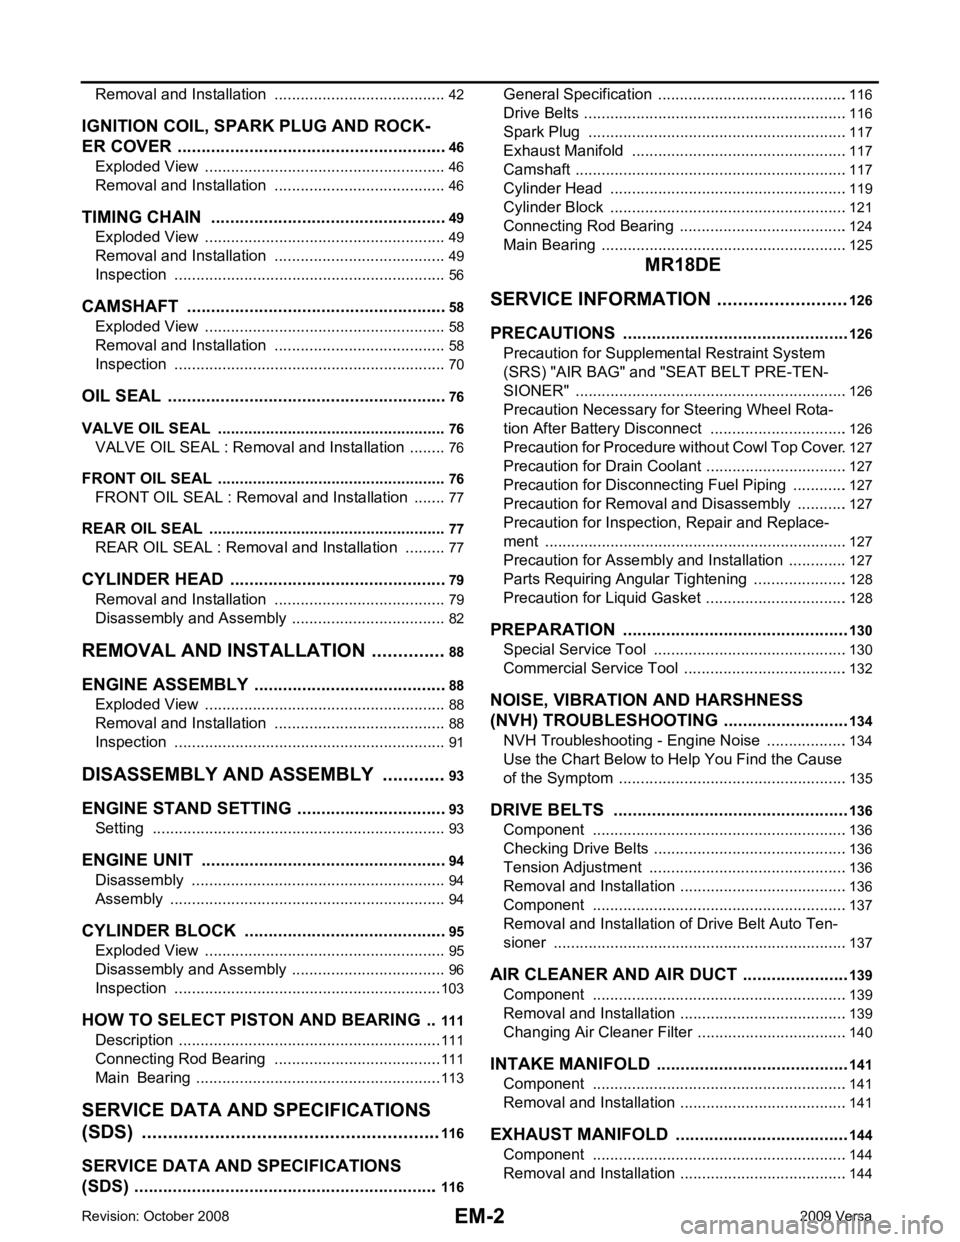
PRECAUTION ....... ........................................
4
PRECAUTIONS .............................................. .....4
Precaution for Supplemental Restraint System
(SRS) "AIR BAG" and "SEAT BELT PRE-TEN-
SIONER" ............................................................. ......
4
Precaution Necessary fo r Steering Wheel Rota-
tion After Battery Disconnect ............................... ......
4
Precaution for Procedure without Cowl Top Cover ......5
Precaution for Drain Cool ant .....................................5
Precaution for Disconnecting Fuel Piping ........... ......5
Precaution for Removal and Disassembly ................5
Precaution for Inspection, Repair and Replace-
ment .................................................................... ......
5
Precaution for Assembly and Installation ..................5
Parts Requiring Angular Tightening ..........................6
Precaution for Liquid Gasket ............................... ......6
PREPARATION .... ........................................8
PREPARATION .............................................. .....8
Special Service Tools .......................................... ......8
Commercial Service Tools .................................. ......9
SYMPTOM DIAGNOSIS ..... .........................12
NOISE, VIBRATION AND HARSHNESS
(NVH) TROUBLESHOOTING ........................ ....
12
NVH Troubleshooting - Engine Noise ................. ....12
Use the Chart Below to Help You Find the Cause
of the Symptom ................................................... ....
13
ON-VEHICLE MAINTENA NCE ....................14
DRIVE BELTS ................................................ ....14
Checking ............................................................. ....14
Tension Adjustment ............................................ ....14
Removal and Installation .........................................15
AIR CLEANER FILTER .................................. ....17 Removal and Installation .....................................
....17
SPARK PLUG ................................................... 18
Exploded View ..................................................... ....18
Removal and Installation ..................................... ....18
CAMSHAFT VALVE CLEARANCE .................. 20
Inspection and Adjustment .................................. ....20
COMPRESSION PRESSURE ........................... 23
Inspection ............................................................ ....23
ON-VEHICLE REPAIR ..... ............................24
DRIVE BELT IDLER PULLEY .......................... 24
Exploded View ..................................................... ....24
Removal and Installation ..................................... ....24
AIR CLEANER AND AIR DUCT ....................... 26
Exploded View ..................................................... ....26
Removal and Installation ..................................... ....26
Inspection ............................................................ ....27
INTAKE MANIFOLD ......................................... 28
Exploded View ..................................................... ....28
Removal and Installation ..................................... ....28
EXHAUST MANIFOLD ...................................... 31
Exploded View ..................................................... ....31
Removal and Installation ..................................... ....31
FUEL INJECTOR AND FUEL TUBE ................ 34
Exploded View ..................................................... ....34
Removal and Installation ..................................... ....34
Inspection ............................................................ ....38
OIL PAN (LOWER) ........................................... 39
Exploded View ..................................................... ....39
Removal and Installation ..................................... ....39
Inspection ............................................................ ....41
OIL PAN (UPPER) AND OIL STRAINER ......... 42
Component .......................................................... ....42
Page 2949 of 4331
Page 2950 of 4331
EM
A
N
O P
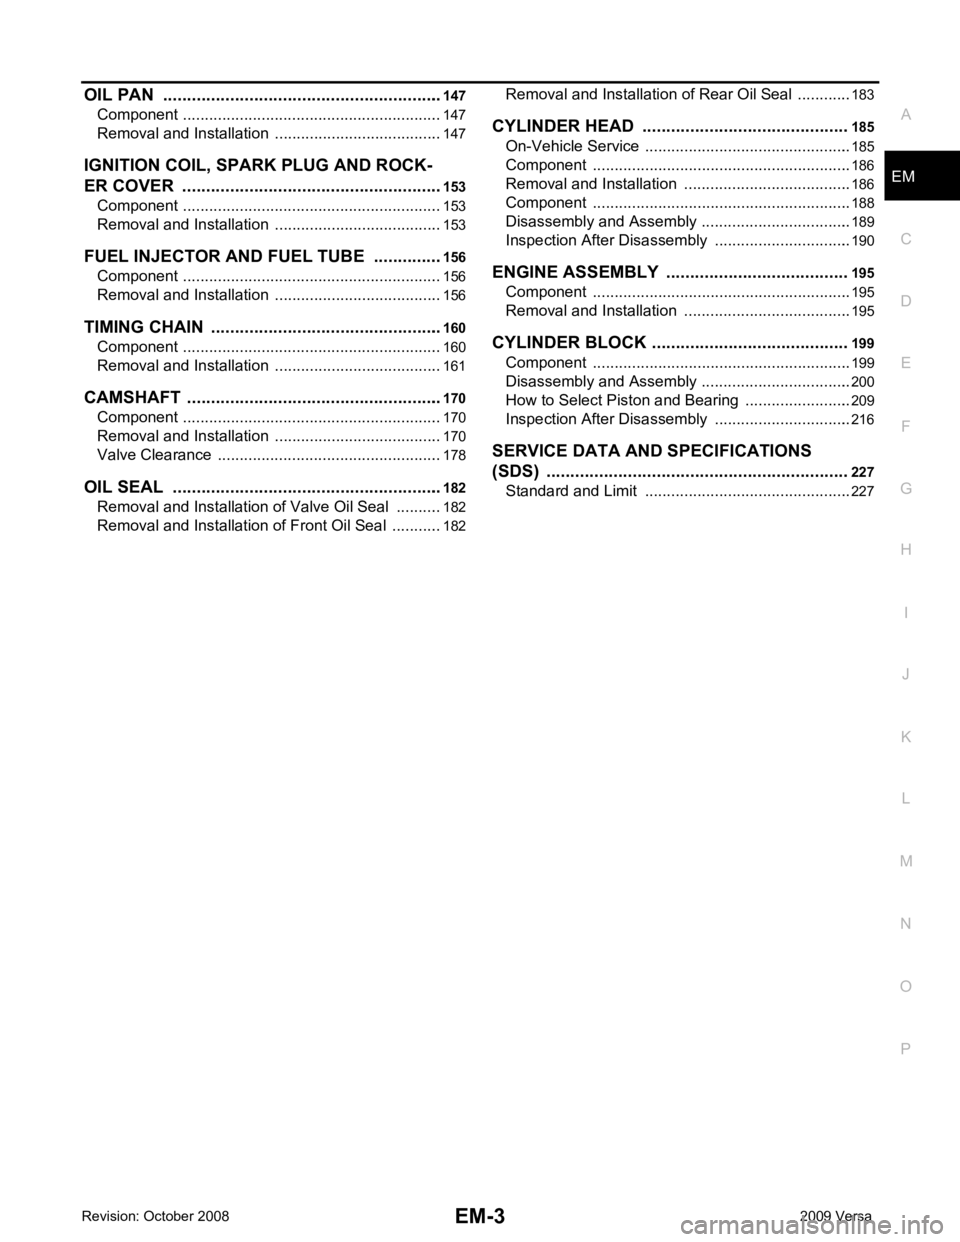
OIL PAN .........................................................
..147
Component .......................................................... ..147
Removal and Installation .......................................147
IGNITION COIL, SPARK PLUG AND ROCK-
ER COVER ..................................................... ..153
Component .......................................................... ..153
Removal and Installation .......................................153
FUEL INJECTOR AND FUEL TUBE ............. ..156
Component .......................................................... ..156
Removal and Installation .......................................156
TIMING CHAIN ............................................... ..160
Component .......................................................... ..160
Removal and Installation .......................................161
CAMSHAFT .................................................... ..170
Component .......................................................... ..170
Removal and Installation .......................................170
Valve Clearance .................................................. ..178
OIL SEAL ....................................................... ..182
Removal and Installation of Valve Oil Seal ......... ..182
Removal and Installation of Front Oil Seal .......... ..182 Removal and Installation of
Rear Oil Seal .............183
CYLINDER HEAD ........................................... 185
On-Vehicle Service .............................................. ..185
Component .......................................................... ..186
Removal and Installation ..................................... ..186
Component .......................................................... ..188
Disassembly and Assembly ................................. ..189
Inspection After Disassembly .............................. ..190
ENGINE ASSEMBL Y ...................................... 195
Component .......................................................... ..195
Removal and Installation ..................................... ..195
CYLINDER BLOCK ......................................... 199
Component .......................................................... ..199
Disassembly and Assembly ................................. ..200
How to Select Piston a nd Bearing ....................... ..209
Inspection After Disassembly .............................. ..216
SERVICE DATA AND SPECIFICATIONS
(SDS) ............................................................... 227
Standard and Limit .............................................. ..227