NISSAN PATHFINDER 2012 R52 / 4.G 06IT Navigation Manual
Manufacturer: NISSAN, Model Year: 2012, Model line: PATHFINDER, Model: NISSAN PATHFINDER 2012 R52 / 4.GPages: 235, PDF Size: 5.14 MB
Page 121 of 235
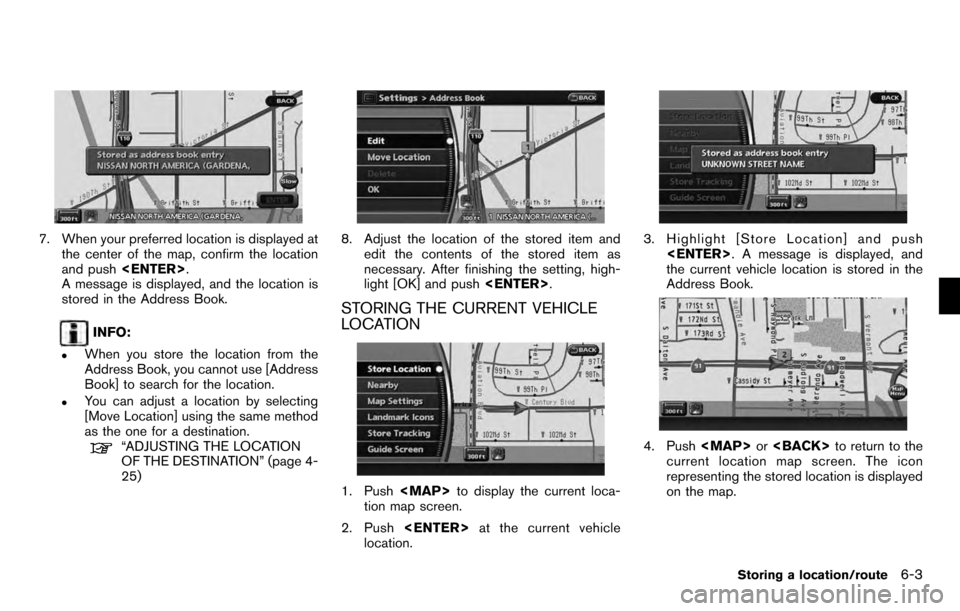
7. When your preferred location is displayed atthe center of the map, confirm the location
and push
A message is displayed, and the location is
stored in the Address Book.
INFO:
.When you store the location from the
Address Book, you cannot use [Address
Book] to search for the location.
.You can adjust a location by selecting
[Move Location] using the same method
as the one for a destination.
“ADJUSTING THE LOCATION
OF THE DESTINATION” (page 4-
25)
8. Adjust the location of the stored item and
edit the contents of the stored item as
necessary. After finishing the setting, high-
light [OK] and push
STORING THE CURRENT VEHICLE
LOCATION
1. Push
Page 122 of 235
INFO:
The location is stored in the first available
position number in the Address Book list.
Voice command
1. Push
switch.
2. After the tone sounds, speak a command.
To store a current location:
“Store Location” (Alternate command mode)
STORING A LOCATION BY MOVING
THE MAP
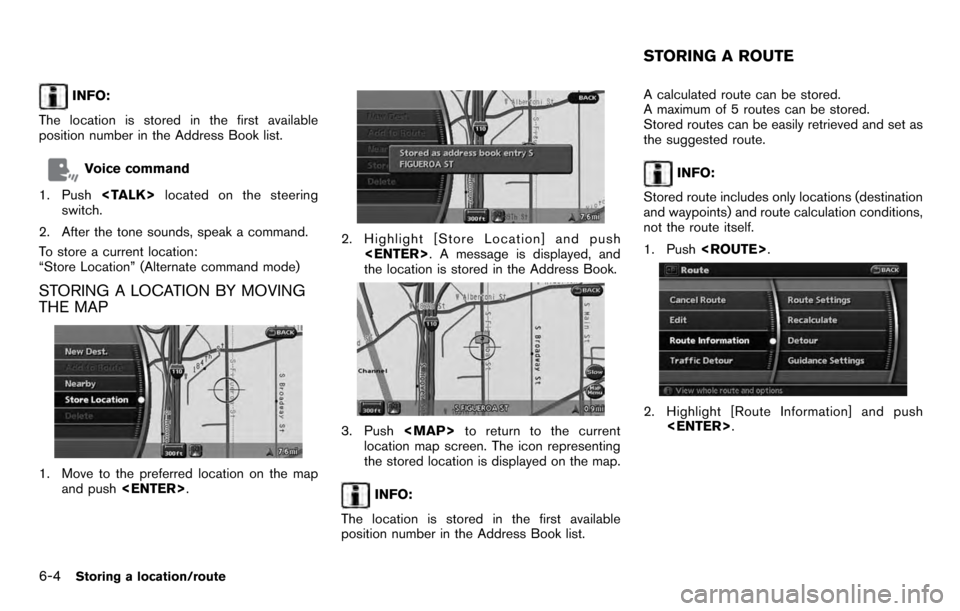
1. Move to the preferred location on the map and push
2. Highlight [Store Location] and push
the location is stored in the Address Book.
3. Push
location map screen. The icon representing
the stored location is displayed on the map.
INFO:
The location is stored in the first available
position number in the Address Book list. A calculated route can be stored.
A maximum of 5 routes can be stored.
Stored routes can be easily retrieved and set as
the suggested route.
INFO:
Stored route includes only locations (destination
and waypoints) and route calculation conditions,
not the route itself.
1. Push
2. Highlight [Route Information] and push
STORING A ROUTE
6-4Storing a location/route
Page 123 of 235
![NISSAN PATHFINDER 2012 R52 / 4.G 06IT Navigation Manual 3. Highlight [Store Route] and push<ENTER> .
4. A confirmation message is displayed. Con-
firm the contents of the message, highlight
[Yes] and push <ENTER>.
The current route is stored.
OTHER SETTING NISSAN PATHFINDER 2012 R52 / 4.G 06IT Navigation Manual 3. Highlight [Store Route] and push<ENTER> .
4. A confirmation message is displayed. Con-
firm the contents of the message, highlight
[Yes] and push <ENTER>.
The current route is stored.
OTHER SETTING](/img/5/280/w960_280-122.png)
3. Highlight [Store Route] and push
4. A confirmation message is displayed. Con-
firm the contents of the message, highlight
[Yes] and push
The current route is stored.
OTHER SETTINGS
You can also store a route using the following
procedure.
1) Push
2) Highlight [Navigation] and push
3) Highlight [Address Book] and push
4) Highlight [Stored Routes] and push
5) Highlight [None (Add New)] and push
6) A confirmation message is displayed. Con- firm the contents of the message, highlight
[Yes] and push
The current route is stored.
INFO:
. The route is stored in the first available
position number in the store current route
list.
. A maximum of 5 routes can be stored. When
5 routes are stored in the Address Book, a
new route cannot be stored until a route is
deleted.
“DELETING A STORED ITEM” (page
6-20)
. If you have not set any waypoints on the
route, the route cannot be stored.
Storing a location/route6-5
Page 124 of 235
You can store the route you have traveled up to
the current location. A maximum of 5 tracked
routes can be stored.
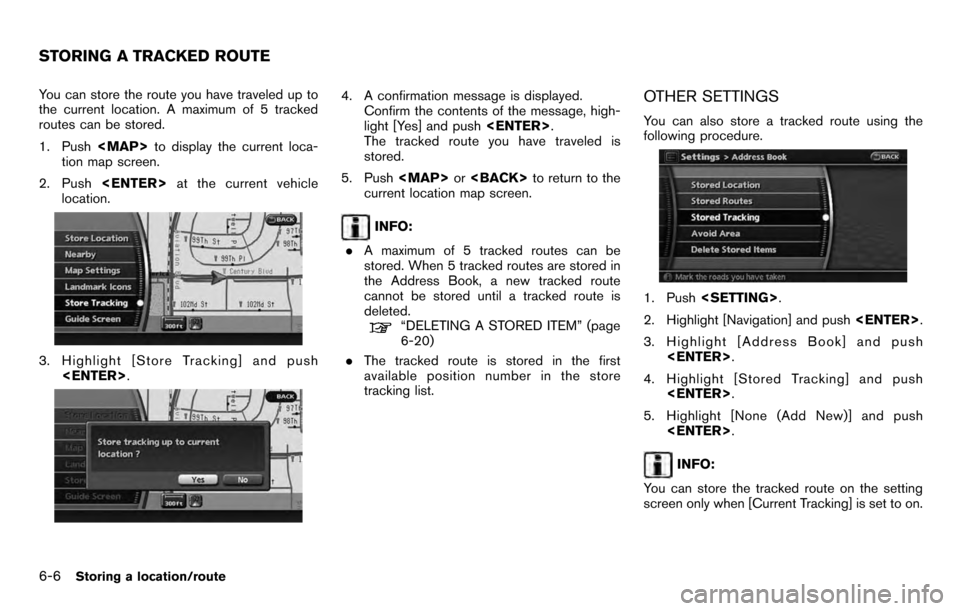
1. Push
tion map screen.
2. Push
location.
3. Highlight [Store Tracking] and push
4. A confirmation message is displayed.
Confirm the contents of the message, high-
light [Yes] and push
The tracked route you have traveled is
stored.
5. Push
current location map screen.
INFO:
. A maximum of 5 tracked routes can be
stored. When 5 tracked routes are stored in
the Address Book, a new tracked route
cannot be stored until a tracked route is
deleted.
“DELETING A STORED ITEM” (page
6-20)
. The tracked route is stored in the first
available position number in the store
tracking list.
OTHER SETTINGS
You can also store a tracked route using the
following procedure.
1. Push
2. Highlight [Navigation] and push
3. Highlight [Address Book] and push
4. Highlight [Stored Tracking] and push
5. Highlight [None (Add New)] and push
INFO:
You can store the tracked route on the setting
screen only when [Current Tracking] is set to on.
STORING A TRACKED ROUTE
6-6Storing a location/route
Page 125 of 235
An Avoid Area can be stored.
The Avoid Area is an area that you want to
exclude from a route, such as a road that is
always congested. Once you store Avoid Areas,
the system avoids those areas when calculating
a route. Up to 10 Avoid Areas can be stored.
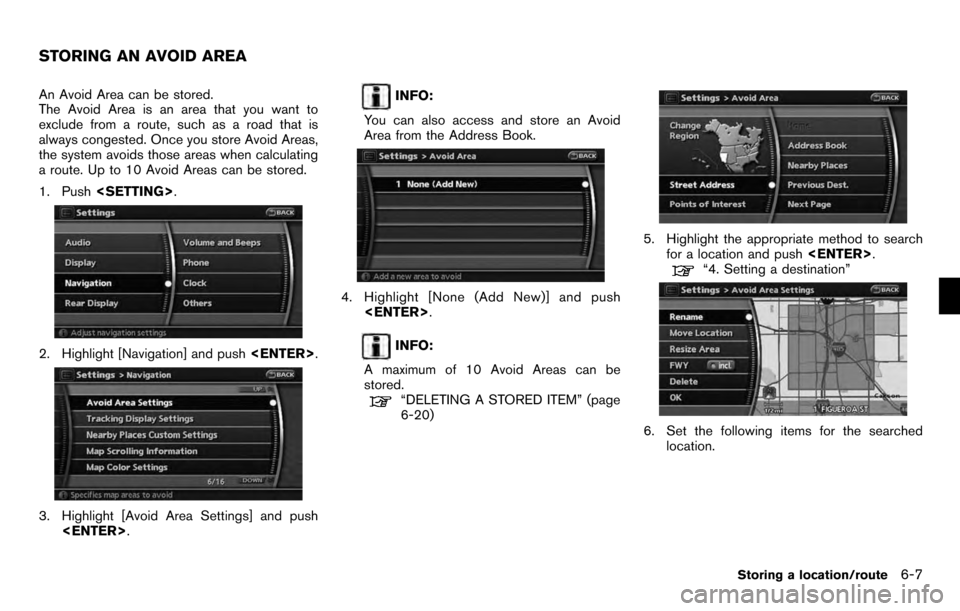
1. Push
2. Highlight [Navigation] and push
3. Highlight [Avoid Area Settings] and push
INFO:
You can also access and store an Avoid
Area from the Address Book.
4. Highlight [None (Add New)] and push
INFO:
A maximum of 10 Avoid Areas can be
stored.
“DELETING A STORED ITEM” (page
6-20)
5. Highlight the appropriate method to search for a location and push
“4. Setting a destination”
6. Set the following items for the searched
location.
STORING AN AVOID AREA
Storing a location/route6-7
Page 126 of 235
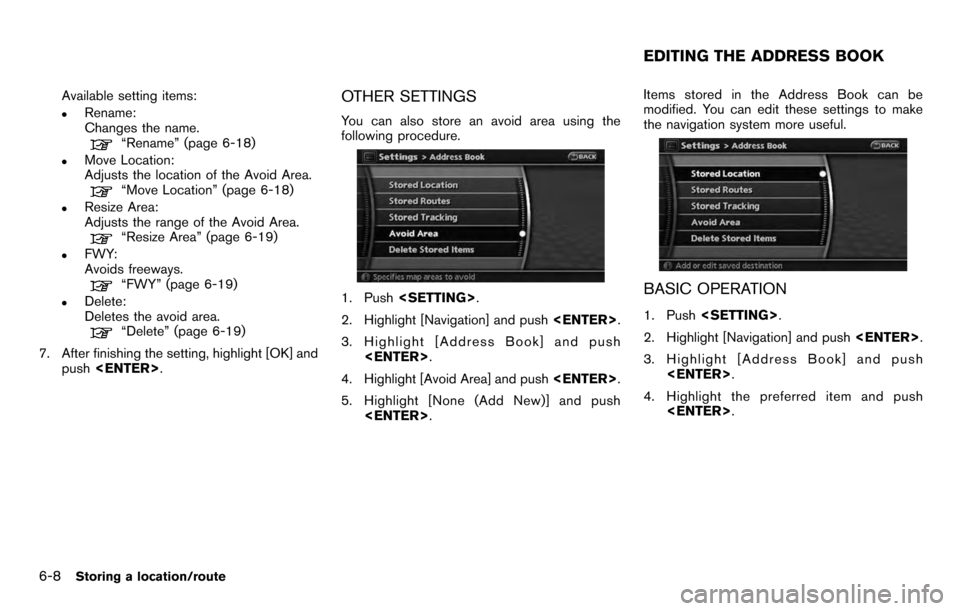
Available setting items:
.Rename:
Changes the name.
“Rename” (page 6-18)
.Move Location:
Adjusts the location of the Avoid Area.
“Move Location” (page 6-18)
.Resize Area:
Adjusts the range of the Avoid Area.
“Resize Area” (page 6-19)
.FWY:
Avoids freeways.
“FWY” (page 6-19)
.Delete:
Deletes the avoid area.
“Delete” (page 6-19)
7. After finishing the setting, highlight [OK] and push
OTHER SETTINGS
You can also store an avoid area using the
following procedure.
1. Push
2. Highlight [Navigation] and push
3. Highlight [Address Book] and push
4. Highlight [Avoid Area] and push
5. Highlight [None (Add New)] and push
modified. You can edit these settings to make
the navigation system more useful.BASIC OPERATION
1. Push
2. Highlight [Navigation] and push
3. Highlight [Address Book] and push
4. Highlight the preferred item and push
EDITING THE ADDRESS BOOK
6-8Storing a location/route
Page 127 of 235
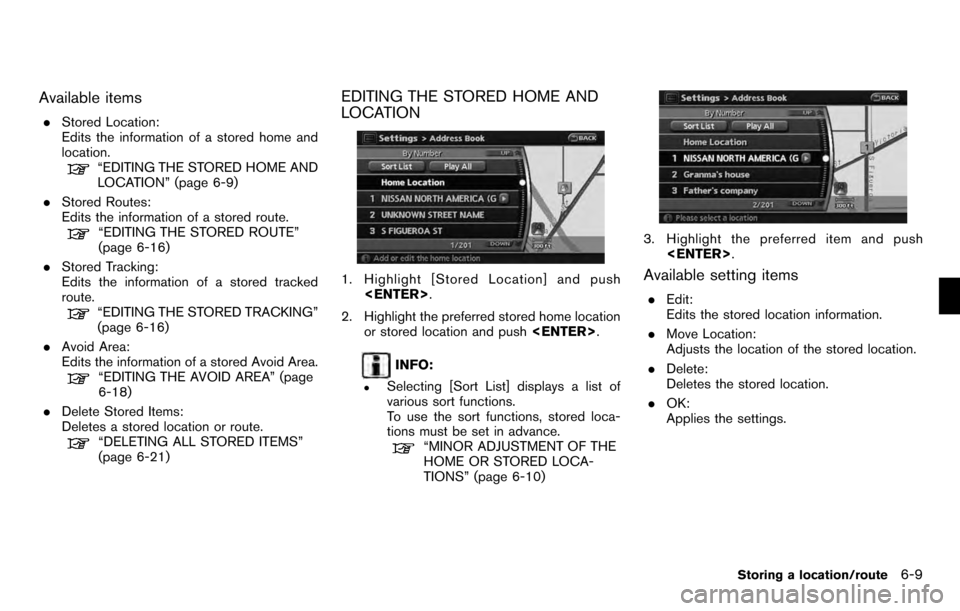
Available items
.Stored Location:
Edits the information of a stored home and
location.
“EDITING THE STORED HOME AND
LOCATION” (page 6-9)
. Stored Routes:
Edits the information of a stored route.
“EDITING THE STORED ROUTE”
(page 6-16)
. Stored Tracking:
Edits the information of a stored tracked
route.
“EDITING THE STORED TRACKING”
(page 6-16)
. Avoid Area:
Edits the information of a stored Avoid Area.
“EDITING THE AVOID AREA” (page
6-18)
. Delete Stored Items:
Deletes a stored location or route.
“DELETING ALL STORED ITEMS”
(page 6-21)
EDITING THE STORED HOME AND
LOCATION
1. Highlight [Stored Location] and push
2. Highlight the preferred stored home location or stored location and push
INFO:
.Selecting [Sort List] displays a list of
various sort functions.
To use the sort functions, stored loca-
tions must be set in advance.
“MINOR ADJUSTMENT OF THE
HOME OR STORED LOCA-
TIONS” (page 6-10)
3. Highlight the preferred item and push
Available setting items
.Edit:
Edits the stored location information.
. Move Location:
Adjusts the location of the stored location.
. Delete:
Deletes the stored location.
. OK:
Applies the settings.
Storing a location/route6-9
Page 128 of 235
![NISSAN PATHFINDER 2012 R52 / 4.G 06IT Navigation Manual MINOR ADJUSTMENT OF THE HOME
OR STORED LOCATIONS
When you select [Edit], you can edit the
following items of the home or stored location.. Show Icon on Map
. Name (only for stored locations)
. Icon
. NISSAN PATHFINDER 2012 R52 / 4.G 06IT Navigation Manual MINOR ADJUSTMENT OF THE HOME
OR STORED LOCATIONS
When you select [Edit], you can edit the
following items of the home or stored location.. Show Icon on Map
. Name (only for stored locations)
. Icon
.](/img/5/280/w960_280-127.png)
MINOR ADJUSTMENT OF THE HOME
OR STORED LOCATIONS
When you select [Edit], you can edit the
following items of the home or stored location.. Show Icon on Map
. Name (only for stored locations)
. Icon
. Sound
. Direction
. Distance
. Phone No.
. Group (only for stored locations)
. Entry Number (only for stored locations)
Show Icon on Map
Displays the home icon or the stored location
icon on the map.
1. Highlight [Edit] and push
3. The indicator illuminates when the item is set. Then the system displays the icon on
the map.
Name (only for stored locations)
Changes the name of a stored location.
1. Highlight [Edit] and push
2. Highlight [Name] and push
A character input screen is displayed.
3. Enter the preferred name for the stored
location.
“CHARACTER (letter and number)
INPUT SCREEN” (page 2-21)
4. Highlight [OK] and push
The name is stored.
Icon
Changes the icon of the home or stored location
to the preferred one. By changing the icons, you
can utilize the [By Icon] option of the sort
function more effectively.
1. Highlight [Edit] and push
2. Highlight [Icon] and push
A list of icons is displayed.
6-10Storing a location/route
Page 129 of 235
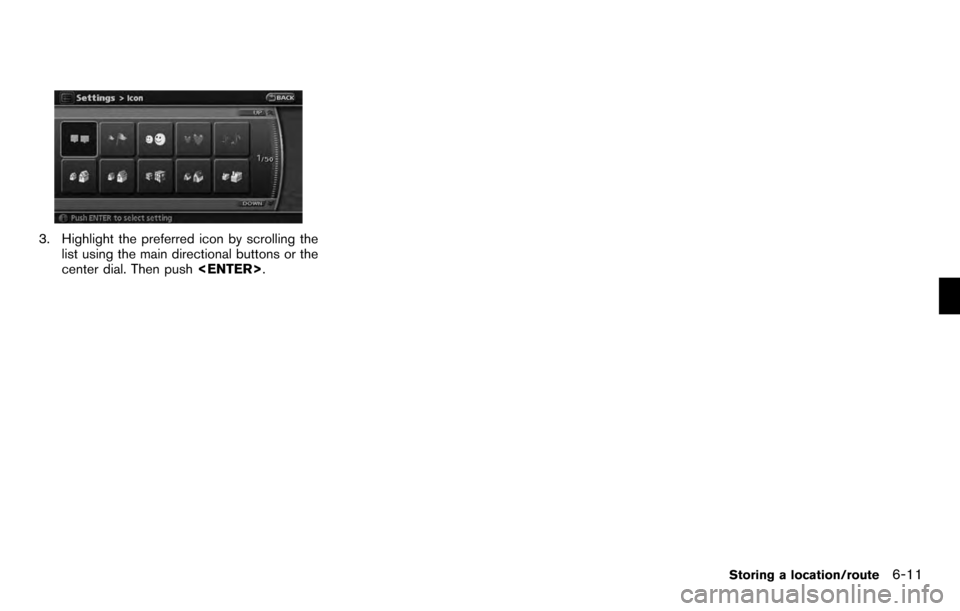
3. Highlight the preferred icon by scrolling thelist using the main directional buttons or the
center dial. Then push
Storing a location/route6-11
Page 130 of 235
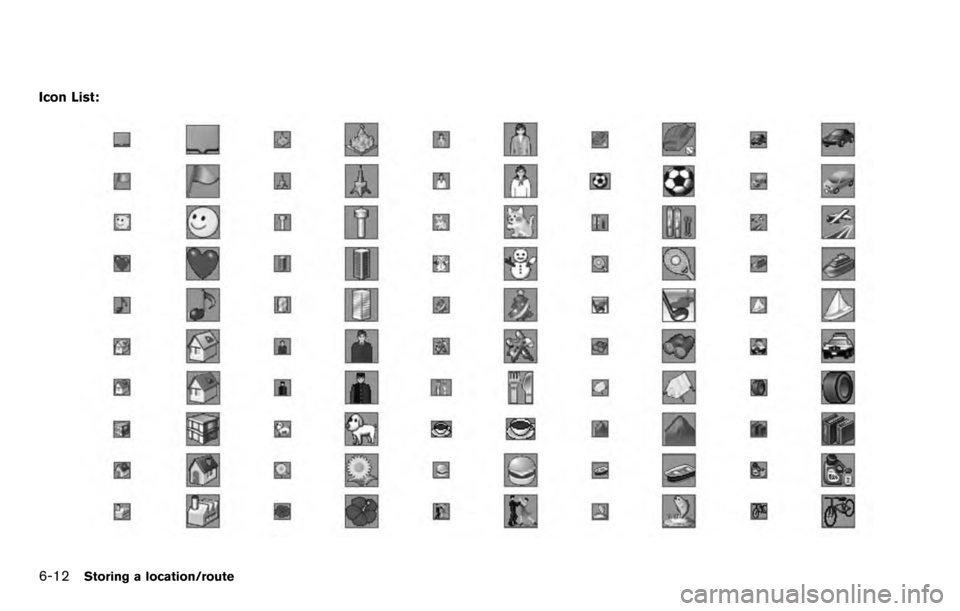
Icon List:
6-12Storing a location/route