ECO mode NISSAN ROGUE 2021 Owner´s Manual
[x] Cancel search | Manufacturer: NISSAN, Model Year: 2021, Model line: ROGUE, Model: NISSAN ROGUE 2021Pages: 556, PDF Size: 2.7 MB
Page 91 of 556
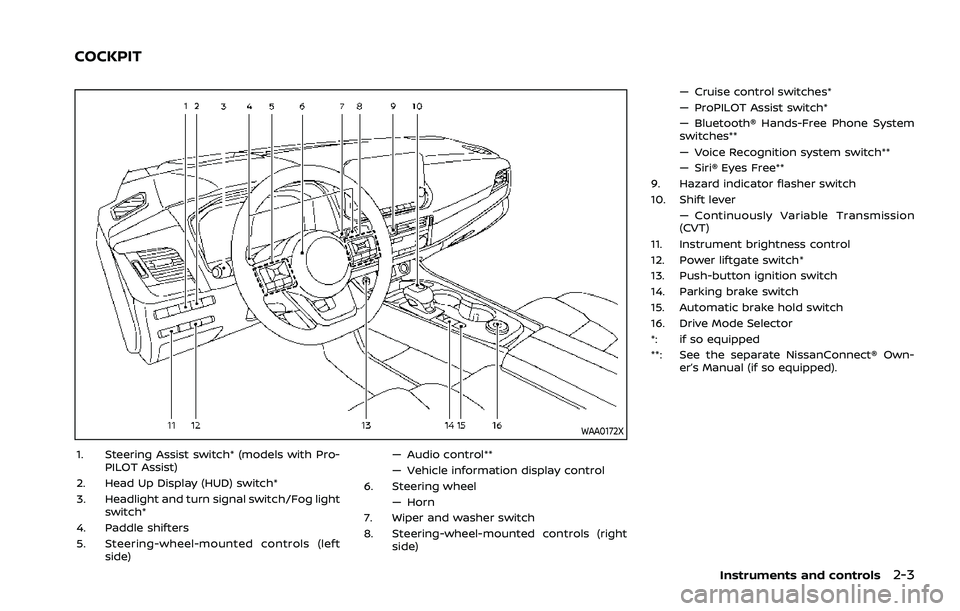
WAA0172X
1. Steering Assist switch* (models with Pro-PILOT Assist)
2. Head Up Display (HUD) switch*
3. Headlight and turn signal switch/Fog light switch*
4. Paddle shifters
5. Steering-wheel-mounted controls (left side) — Audio control**
— Vehicle information display control
6. Steering wheel
— Horn
7. Wiper and washer switch
8. Steering-wheel-mounted controls (right side) — Cruise control switches*
— ProPILOT Assist switch*
— Bluetooth® Hands-Free Phone System
switches**
— Voice Recognition system switch**
— Siri® Eyes Free**
9. Hazard indicator flasher switch
10. Shift lever — Continuously Variable Transmission
(CVT)
11. Instrument brightness control
12. Power liftgate switch*
13. Push-button ignition switch
14. Parking brake switch
15. Automatic brake hold switch
16. Drive Mode Selector
*: if so equipped
**: See the separate NissanConnect® Own- er’s Manual (if so equipped).
Instruments and controls2-3
COCKPIT
Page 96 of 556
2-8Instruments and controls
JVI1006XExample
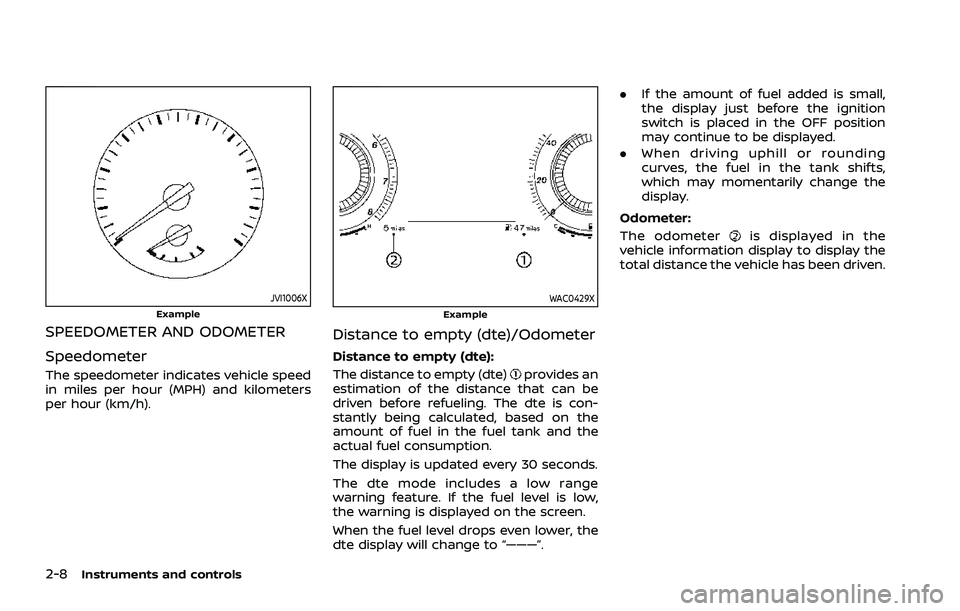
SPEEDOMETER AND ODOMETER
Speedometer
The speedometer indicates vehicle speed
in miles per hour (MPH) and kilometers
per hour (km/h).
WAC0429XExample
Distance to empty (dte)/Odometer
Distance to empty (dte):
The distance to empty (dte)
provides an
estimation of the distance that can be
driven before refueling. The dte is con-
stantly being calculated, based on the
amount of fuel in the fuel tank and the
actual fuel consumption.
The display is updated every 30 seconds.
The dte mode includes a low range
warning feature. If the fuel level is low,
the warning is displayed on the screen.
When the fuel level drops even lower, the
dte display will change to “———”. .
If the amount of fuel added is small,
the display just before the ignition
switch is placed in the OFF position
may continue to be displayed.
. When driving uphill or rounding
curves, the fuel in the tank shifts,
which may momentarily change the
display.
Odometer:
The odometer
is displayed in the
vehicle information display to display the
total distance the vehicle has been driven.
Page 98 of 556
2-10Instruments and controls
WAC0431XFull-screen model
JVI0640XAnalog model
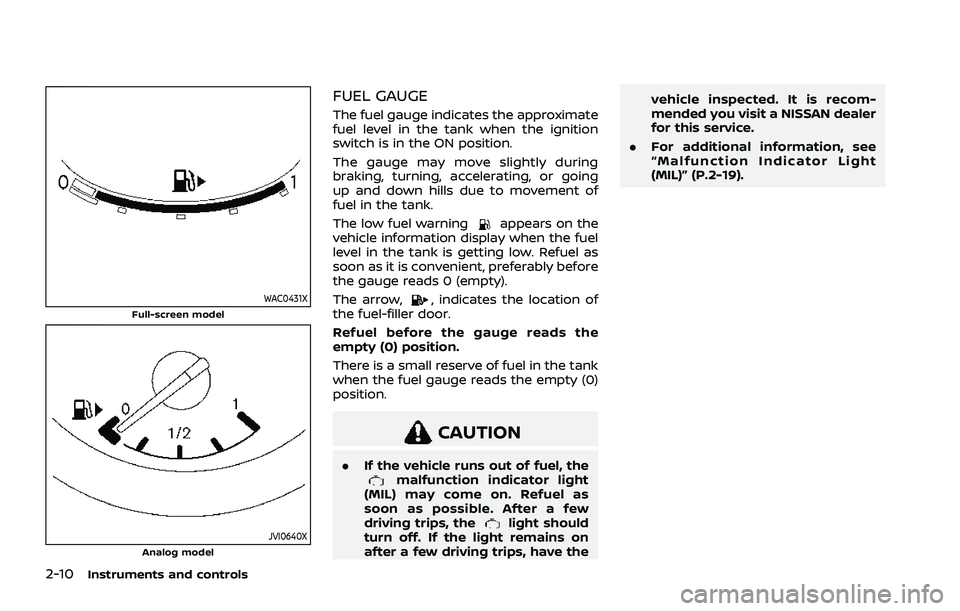
FUEL GAUGE
The fuel gauge indicates the approximate
fuel level in the tank when the ignition
switch is in the ON position.
The gauge may move slightly during
braking, turning, accelerating, or going
up and down hills due to movement of
fuel in the tank.
The low fuel warning
appears on the
vehicle information display when the fuel
level in the tank is getting low. Refuel as
soon as it is convenient, preferably before
the gauge reads 0 (empty).
The arrow,
, indicates the location of
the fuel-filler door.
Refuel before the gauge reads the
empty (0) position.
There is a small reserve of fuel in the tank
when the fuel gauge reads the empty (0)
position.
CAUTION
. If the vehicle runs out of fuel, themalfunction indicator light
(MIL) may come on. Refuel as
soon as possible. After a few
driving trips, the
light should
turn off. If the light remains on
after a few driving trips, have the vehicle inspected. It is recom-
mended you visit a NISSAN dealer
for this service.
. For additional information, see
“Malfunction Indicator Light
(MIL)” (P.2-19).
Page 99 of 556
WAC0566X
WAC0489X
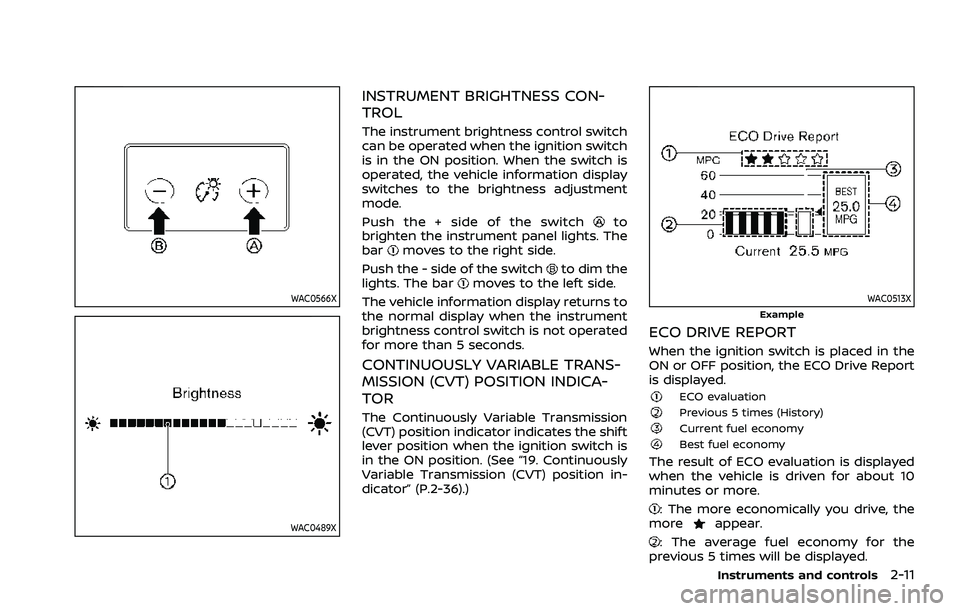
INSTRUMENT BRIGHTNESS CON-
TROL
The instrument brightness control switch
can be operated when the ignition switch
is in the ON position. When the switch is
operated, the vehicle information display
switches to the brightness adjustment
mode.
Push the + side of the switch
to
brighten the instrument panel lights. The
bar
moves to the right side.
Push the - side of the switch
to dim the
lights. The barmoves to the left side.
The vehicle information display returns to
the normal display when the instrument
brightness control switch is not operated
for more than 5 seconds.
CONTINUOUSLY VARIABLE TRANS-
MISSION (CVT) POSITION INDICA-
TOR
The Continuously Variable Transmission
(CVT) position indicator indicates the shift
lever position when the ignition switch is
in the ON position. (See “19. Continuously
Variable Transmission (CVT) position in-
dicator” (P.2-36).)
WAC0513XExample
ECO DRIVE REPORT
When the ignition switch is placed in the
ON or OFF position, the ECO Drive Report
is displayed.
ECO evaluationPrevious 5 times (History)Current fuel economyBest fuel economy
The result of ECO evaluation is displayed
when the vehicle is driven for about 10
minutes or more.
: The more economically you drive, the
moreappear.
: The average fuel economy for the
previous 5 times will be displayed.
Instruments and controls2-11
Page 108 of 556

2-20Instruments and controls
is recommended you visit a NISSAN
dealer for this service. You do not
need to have your vehicle towed to
the dealer.
. Malfunction indicator light blinking —
An engine misfire has been detected
which may damage the emission
control system.
To reduce or avoid emission control
system damage:
1) Do not drive at speeds above 45
MPH (72 km/h).
2) Avoid hard acceleration or decel- eration.
3) Avoid steep uphill grades.
4) If possible, reduce the amount of cargo being hauled or towed.
The malfunction indicator light may
stop blinking and remain on.
Have the vehicle inspected. It is re-
commended you visit a NISSAN dealer
for this service. You do not need to
have your vehicle towed to the dealer.
CAUTION
Continued vehicle operation without
having the emission control system
and/or CVT system checked and
repaired as necessary could lead to
poor driveability, reduced fuel econ- omy, and possible damage to the
emission control system.
Master warning light
When the ignition switch is in the ON
position, the master warning light illumi-
nates if a warning message appears in
the vehicle information display.
See “Vehicle information display” (P.2-22).
Rear Automatic Braking (RAB)
system OFF warning light
This light comes on when the ignition
switch is placed in the ON position. It
turns off after the engine is started.
This light illuminates when the RAB sys-
tem is turned off in the vehicle informa-
tion display.
If the light illuminates when the RAB
system is on, it may indicate that the
system is unavailable. For additional in-
formation, see “Rear Automatic Braking
(RAB)” (P.5-143).
Slip indicator light
When the ignition switch is in the ON
position, the slip indicator light illumi-
nates and then turns off.
The light will blink when the Vehicle
Dynamic Control (VDC) system or the
traction control system is operating, thus
alerting the driver that the vehicle is
nearing its traction limits. The road sur-
face may be slippery.
If the light illuminates while the VDC
system is on, this light alerts the driver
to the fact that the VDC system’s fail-safe
mode is operating, for example the VDC
system may not be functioning properly.
Have the system checked. It is recom-
mended you visit a NISSAN dealer for this
service. If a malfunction occurs in the
system, the VDC system function will be
canceled but the vehicle is still driveable.
For additional information, see “Vehicle
Dynamic Control (VDC) system” (P.5-157)
of this manual.
Vehicle Dynamic Control (VDC)
off indicator light
The light comes on when the VDC is
turned OFF. This indicates that the VDC
system and traction control system are
not operating.
Page 111 of 556
.Audio information
. Navigation - turn by turn
. Indicators and warnings
. Tire pressure information
. Other information
CHANGING THE METER SCREEN
VIEW (models with full-screen dis-
play)
For the model with full-screen display, the
meter screen view can be changed to
expand the vehicle information display
area. See “Changing the meter screen
view (models with full-screen display)”
(P.2-7) for how to change the view.
WAC0313X
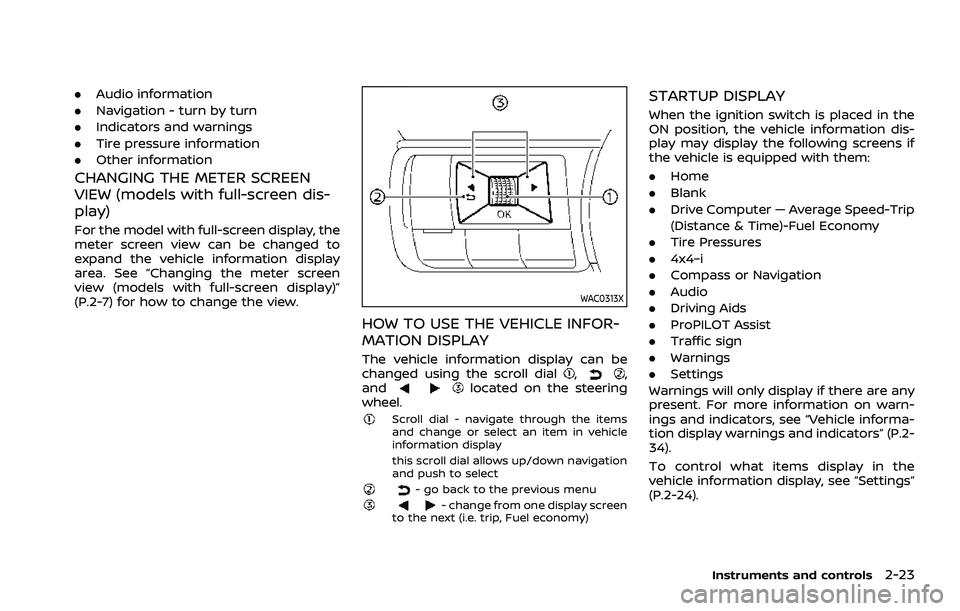
HOW TO USE THE VEHICLE INFOR-
MATION DISPLAY
The vehicle information display can be
changed using the scroll dial,,
andlocated on the steering
wheel.
Scroll dial - navigate through the items
and change or select an item in vehicle
information display
this scroll dial allows up/down navigation
and push to select
- go back to the previous menu- change from one display screen
to the next (i.e. trip, Fuel economy)
STARTUP DISPLAY
When the ignition switch is placed in the
ON position, the vehicle information dis-
play may display the following screens if
the vehicle is equipped with them:
. Home
. Blank
. Drive Computer — Average Speed-Trip
(Distance & Time)-Fuel Economy
. Tire Pressures
. 4x4–i
. Compass or Navigation
. Audio
. Driving Aids
. ProPILOT Assist
. Traffic sign
. Warnings
. Settings
Warnings will only display if there are any
present. For more information on warn-
ings and indicators, see “Vehicle informa-
tion display warnings and indicators” (P.2-
34).
To control what items display in the
vehicle information display, see “Settings”
(P.2-24).
Instruments and controls2-23
Page 112 of 556
2-24Instruments and controls
SETTINGS
The setting mode allows user to change
the information displayed in the vehicle
information display and some settings:
.VDC Setting
. Driver Assistance
. Personal Display (if so equipped)
. Head-Up Display (if so equipped)
. ECO Mode Setting
. TPMS Setting
. Clock
. Vehicle Settings
. Maintenance
. Customize Display
. Unit/Language
. Key-Linked Settings (if so equipped)
. Factory Reset
VDC Setting
To change the setting, use the scroll dialto select and push it.
. System
Allows user to turn the Vehicle Dy-
namic Control (VDC) system ON or
OFF. By default the VDC system will be
turned ON. If the VDC system is turned
off, the VDC OFF indicator light will
illuminate. NOTE:
The vehicle should be driven with the
Vehicle Dynamic Control (VDC) system
ON for most driving conditions. (See
“Vehicle Dynamic Control (VDC) system”
(P.5-157).)
Driver Assistance
To change the status, warnings or turn on
or off any of the systems/warnings dis-
played in the “Driver Assistance” menu,
use the scroll dial
to select and change
a menu item:
. Steering Assist (if so equipped)
. Lane
. Blind Spot
. Emergency Brake
. Speed Limit Sign (if so equipped)
. Speed Adjust by Route (if so equipped)
. Spd. Limit Assist (if so equipped)
. Parking Aids
. Cross Traffic Alert
. Driver Attention Alert
. Timer Alert
. Low Temp. Alert
Steering Assist (if so equipped):
. Allows user to turn the Steering Assist
ON/OFF.
(See “ProPILOT Assist” (P.5-84).) Lane:
. Warning(LDW)
Allows user to turn the Lane Depar-
ture Warning (LDW) system ON/OFF.
. Prevention(LDP)
Allows user to turn the Intelligent Lane
Intervention (I-LI) system ON/OFF.
(See “Lane Departure Warning (LDW)” (P.5-
46) and “Intelligent Lane Intervention (I-
LI)” (P.5-115).)
Blind Spot:
. Warning(BSW)
Allows user to turn the Blind Spot
Warning (BSW) system ON/OFF.
. Intervention(BSI) (if so equipped)
Allows user to turn the Intelligent
Blind Spot Intervention (I-BSI) system
ON/OFF.
(See “Blind Spot Warning (BSW)” (P.5-57)
and “Intelligent Blind Spot Intervention (I-
BSI)” (P.5-65).)
Emergency Brake:
. Front
Allows user to turn the Automatic
Emergency Braking (AEB) with pedes-
trian detection system and Intelligent
Forward Collision Warning (I-FCW) sys-
tem ON/OFF.
Page 114 of 556
2-26Instruments and controls
— Manual Reset2
— Auto Refuel
. Trip
— Manual Reset1
— Manual Reset2
— Auto Refuel
. Gear position
. Average speed
— Manual Reset1
— Manual Reset2
— Auto Refuel
Head-Up Display (if so equipped)
To change the status or turn on or off any
of the systems displayed in the “Head-Up
Display” menu, use the scroll dial
to
select and change a menu item:
. Brightness
. Height
. Rotation
. Contents selection
— Navigation (if so equipped)
— Driving Assist
— Speed Limit Sign
— Audio
— TEL/SMS
. Reset
(See “Head Up Display (HUD)” (P.2-47).)
ECO Mode Setting
This setting allows user to change the
ECO mode system settings.
To change the status or turn on or off any
of the systems displayed in the “ECO
Mode Settings” menu, use the scroll dial
to select and change a menu item:
. ECO Customize
— Cruise Control
. ECO Drive Assist
— ECO Indicator
— ECO Drive Report
. View History
To reset the View History:
1) Select “View History” using the
scroll dial
and push it.
2) Push the scroll dial
.
3) Select “Yes” by pushing the scroll dial
.
. Tire Pres ECO advice
Push the scroll dial
to turn the “Tire
Pres ECO advice” ON/OFF.
TPMS Setting
The following submenu appears.
Page 116 of 556
2-28Instruments and controls
Lighting:
The “Lighting” menu has the following
options:
.Welcome Headlight
The welcome lighting can be set to be
ON or OFF. Use the scroll dial
to turn
this feature ON or OFF.
. Auto Room Lamp
The interior light can be set to be ON
or OFF. Use the scroll dial
to turn
this feature ON or OFF.
. Accent Lighting (if so equipped)
The brightness of the Accent Lighting
can be adjusted. Use the scroll dial
to select the brightness.
. Auto Headlight
The sensitivity of the Intelligent Auto
Headlight can be adjusted. Use the
scroll dial
to select the required
sensitivity. The following options are
available:
— Turn on earliest
— Turn on earlier
— Turn on standard
— Turn on later
. Light Off Delay
The duration of the automatic head-
lights can be changed from 0 to 180
seconds. Use the scroll dial
to
change the duration. Locking:
The “Locking” menu has the following
options:
.
Ext. Door Switch (if so equipped)
When this item is turned on, the
request switch on the door is acti-
vated. Use the scroll dial
to activate
or deactivate this function.
. Selective Unlock (if so equipped)
When this item is turned on, and the
door handle request switch is pushed,
only the corresponding door is un-
locked. All the doors can be unlocked
if the door handle request switch is
pushed again within 1 minute. When
this item is turned to off, all the doors
will be unlocked when the door han-
dle request switch is pushed once. Use
the scroll dial
to activate or deacti-
vate this function.
. Auto Door Unlock
The “Auto Door Unlock” feature allows
user to customize the auto door
unlock options. Use the scroll dial
to change the mode.
— Shift to P
— IGN OFF
— OFF
. Horn beeps on lock (if so equipped)
When this item is turned on, the horn
will chirp and the hazard indicators will flash twice when locking the
vehicle with the Intelligent Key. Use
the scroll dial
to activate or deacti-
vate this function.
Wipers:
The “Wipers” menu has the following
options:
. Speed Dependent
The “Speed Dependent” feature can be
activated or deactivated. Use the
scroll dial
to turn this feature ON
or OFF.
. Reverse Link
The “Reverse Link” wiper feature can
be set to be ON or OFF. Use the scroll
dial
to turn this feature ON or OFF.
Driving Position (if so equipped):
. Exit Seat Slide
This allows user to turn the entry/exit
function ON or OFF. Use the scroll dial
to turn this function ON or OFF. (See
“Memory seat” (P.3-36).)
Rear Door Alert:
The “Rear Door Alert” feature allows user
to customize the Rear Door Alert options.
Use the scroll dial
to change the mode.
. Horn & Alert
When selected, the alert is displayed
and the horn sounds.
Page 122 of 556
2-34Instruments and controls
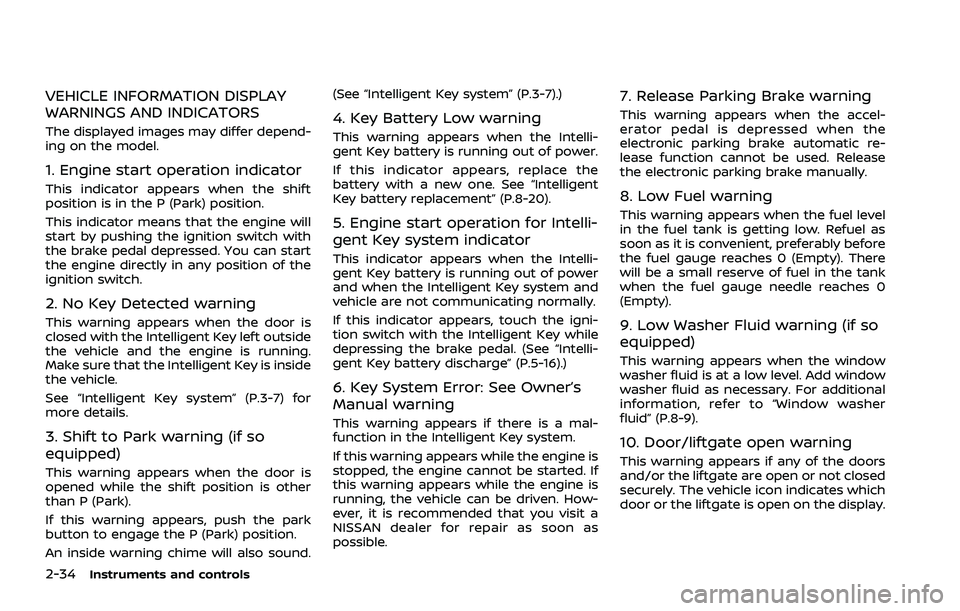
VEHICLE INFORMATION DISPLAY
WARNINGS AND INDICATORS
The displayed images may differ depend-
ing on the model.
1. Engine start operation indicator
This indicator appears when the shift
position is in the P (Park) position.
This indicator means that the engine will
start by pushing the ignition switch with
the brake pedal depressed. You can start
the engine directly in any position of the
ignition switch.
2. No Key Detected warning
This warning appears when the door is
closed with the Intelligent Key left outside
the vehicle and the engine is running.
Make sure that the Intelligent Key is inside
the vehicle.
See “Intelligent Key system” (P.3-7) for
more details.
3. Shift to Park warning (if so
equipped)
This warning appears when the door is
opened while the shift position is other
than P (Park).
If this warning appears, push the park
button to engage the P (Park) position.
An inside warning chime will also sound.(See “Intelligent Key system” (P.3-7).)
4. Key Battery Low warning
This warning appears when the Intelli-
gent Key battery is running out of power.
If this indicator appears, replace the
battery with a new one. See “Intelligent
Key battery replacement” (P.8-20).
5. Engine start operation for Intelli-
gent Key system indicator
This indicator appears when the Intelli-
gent Key battery is running out of power
and when the Intelligent Key system and
vehicle are not communicating normally.
If this indicator appears, touch the igni-
tion switch with the Intelligent Key while
depressing the brake pedal. (See “Intelli-
gent Key battery discharge” (P.5-16).)
6. Key System Error: See Owner’s
Manual warning
This warning appears if there is a mal-
function in the Intelligent Key system.
If this warning appears while the engine is
stopped, the engine cannot be started. If
this warning appears while the engine is
running, the vehicle can be driven. How-
ever, it is recommended that you visit a
NISSAN dealer for repair as soon as
possible.
7. Release Parking Brake warning
This warning appears when the accel-
erator pedal is depressed when the
electronic parking brake automatic re-
lease function cannot be used. Release
the electronic parking brake manually.
8. Low Fuel warning
This warning appears when the fuel level
in the fuel tank is getting low. Refuel as
soon as it is convenient, preferably before
the fuel gauge reaches 0 (Empty). There
will be a small reserve of fuel in the tank
when the fuel gauge needle reaches 0
(Empty).
9. Low Washer Fluid warning (if so
equipped)
This warning appears when the window
washer fluid is at a low level. Add window
washer fluid as necessary. For additional
information, refer to “Window washer
fluid” (P.8-9).
10. Door/liftgate open warning
This warning appears if any of the doors
and/or the liftgate are open or not closed
securely. The vehicle icon indicates which
door or the liftgate is open on the display.