OPEL ANTARA 2009 Owners Manual
Manufacturer: OPEL, Model Year: 2009, Model line: ANTARA, Model: OPEL ANTARA 2009Pages: 234, PDF Size: 3.01 MB
Page 131 of 234

Driving and operation131
Fuels, refuelling
Fuel consumption
Optional equipment (e.g. wide tyres,
towing equipment) increases the kerb
weight and, in some cases, also the
permissible Gross Vehicle Weight.
This in turn increases fuel consumption and
reduces the maximum speed of the vehicle.
When the vehicle is new, there is increased
friction between the engine and
transmission components lasting for
several thousand kilometres. This also
increases fuel consumption. Fuel for petrol engines
Commercially available high-quality fuels
are suitable (see page 217). Fuel quality
has a decisive influence on the power
output, driveability and life of the engine.
The additives contained in the fuel play an
important role in this
regard. You should
therefore use only high-quality fuels
containing additives.
Petrol with too low an octane number can
cause pinking. Opel cannot be held liable
for resulting damage.
Petrol with a higher octane number can
always be used.
A dispensing pump for leaded fuel cannot
be inserted in the fuel tank of a vehicle that
must be operated on unleaded fuel only.
Use of petrol with an octane rating of 95
will ensure economical driving Fuel for diesel engines
Diesel engines must be operated only on
commercially available diesel fuel meeting
the specifications of DIN EN 590.
Marine diesel fuel, fuel oils, diesel fuels,
which are entirely or partially plant based
such as rape seed oil or bio-diesel,
Aquazole and similar diesel-water
emulsions must not be used.
The flow and filterability of diesel fuels are
insufficient at low temperatures, as a result
of crystallized paraffins.
Diesel fuels with improved low-
temperature properties are therefore
available on the market during the winter
months. Make sure that you use winter fuel
before the start of the cold weather
season.
Use of diesel fuels with manufacturer-
guaranteed winter properties eliminates
the need for additives.
Page 132 of 234
Driving and operation132
Fuel filler cap
If replacing the fuel filler cap, be sure to use
the original fuel filler cap for your model, to
ensure full functionality.
Refuelling
Ensure suitable fuel is available before
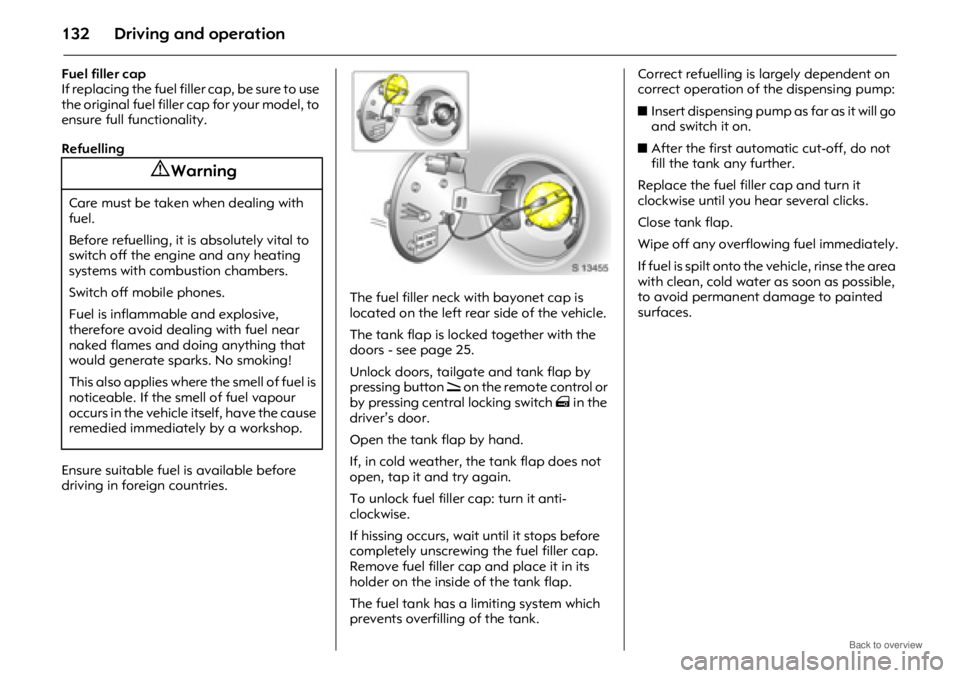
driving in foreign countries. The fuel filler neck with bayonet cap is
located on the left rear side of the vehicle.
The tank flap is locked together with the
doors - see page 25.
Unlock doors, tailgate and tank flap by
pressing button q
on the remote control or
by pressing central locking switch m in the
driver’s door.
Open the tank flap by hand.
If, in cold weather, the tank flap does not
open, tap it and try again.
To unlock fuel filler cap: turn it anti-
clockwise.
If hissing occurs, wait until it stops before
completely unscrewing the fuel filler cap.
Remove fuel filler cap and place it in its
holder on the inside of the tank flap.
The fuel tank has a limiting system which
prevents overfilling of the tank. Correct refuelling is largely dependent on
correct operation of the dispensing pump:
z
Insert dispensing pump as far as it will go
and switch it on.
z After the first automatic cut-off, do not
fill the tank any further.
Replace the fuel filler cap and turn it
clockwise until you hear several clicks.
Close tank flap.
Wipe off any overflowing fuel immediately.
If fuel is spilt onto the vehicle, rinse the area
with clean, cold water as soon as possible,
to avoid permanent damage to painted
surfaces.
9 Warning
Care must be taken when dealing with
fuel.
Before refuelling, it is absolutely vital to
switch off the engi ne and any heating
systems with combustion chambers.
Switch off mobile phones.
Fuel is inflammable and explosive,
therefore avoid dealing with fuel near
naked flames and doing anything that
would generate sparks. No smoking!
This also applies where the smell of fuel is
noticeable. If the smell of fuel vapour
occurs in the vehicle itself, have the cause
remedied immediately by a workshop.
Page 133 of 234
Driving and operation133
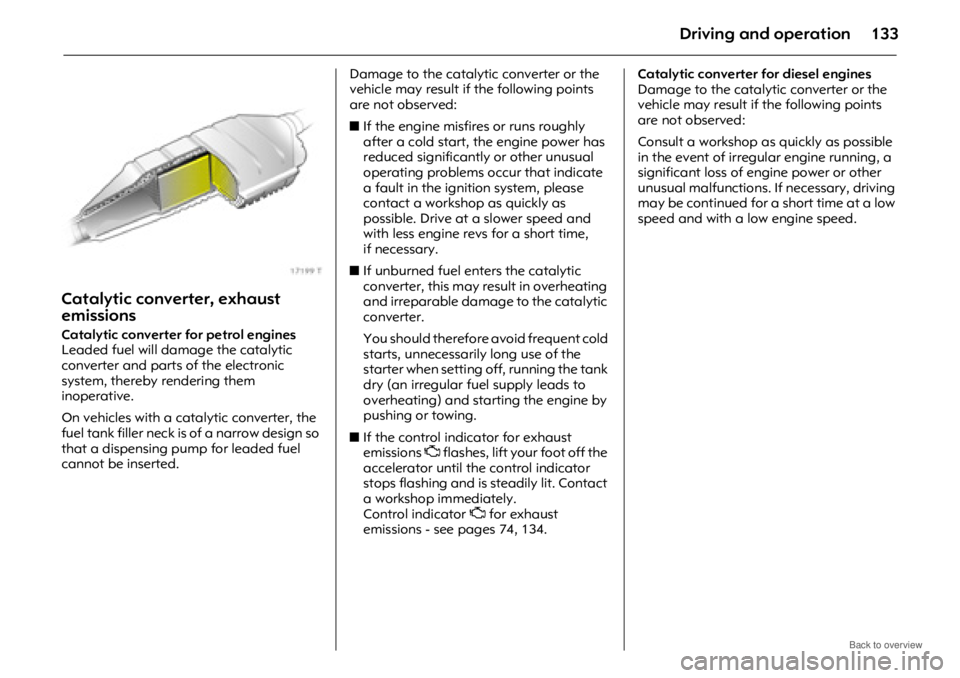
Catalytic converter, exhaust
emissions
Catalytic converter for petrol engines
Leaded fuel will damage the catalytic
converter and parts of the electronic
system, thereby rendering them
inoperative.
On vehicles with a catalytic converter, the
fuel tank filler neck is of a narrow design so
that a dispensing pump for leaded fuel
cannot be inserted. Damage to the catalytic converter or the
vehicle may result if the following points
are not observed:
z
If the engine misfires or runs roughly
after a cold start, the engine power has
reduced significantly or other unusual
operating problems occur that indicate
a fault in the ignition system, please
contact a workshop as quickly as
possible. Drive at a slower speed and
with less engine revs for a short time,
if necessary.
z If unburned fuel enters the catalytic
converter, this may re sult in overheating
and irreparable damage to the catalytic
converter.
You should therefore avoid frequent cold
starts, unnecessarily long use of the
starter when setting off, running the tank
dry (an irregular fuel supply leads to
overheating) and starting the engine by
pushing or towing.
z If the control indicator for exhaust
emissions Z flashes, lift your foot off the
accelerator until th e control indicator
stops flashing and is steadily lit. Contact
a workshop immediately.
Control indicator Z for exhaust
emissions - see pages 74, 134. Catalytic converter for diesel engines
Damage to the catalytic converter or the
vehicle may result if the following points
are not observed:
Consult a workshop as quickly as possible
in the event of irregular engine running, a
significant loss of engine power or other
unusual malfunctions. If necessary, driving
may be continued for a
short time at a low
speed and with a low engine speed.
Page 134 of 234
Driving and operation134
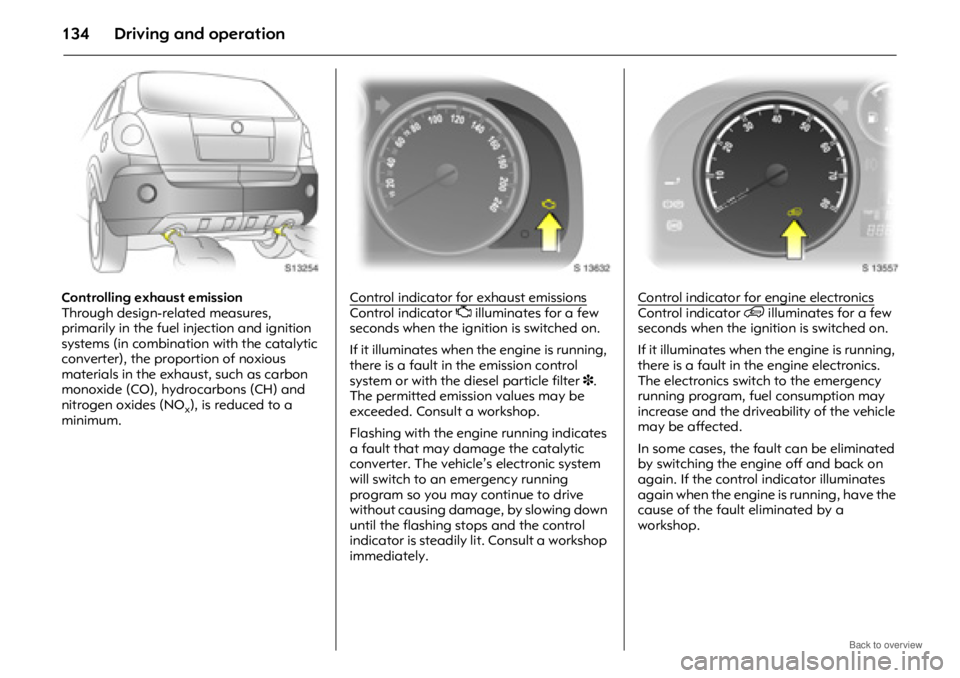
Controlling exhaust emission
Through design-related measures,
primarily in the fuel injection and ignition
systems (in combination with the catalytic
converter), the proportion of noxious
materials in the exhaust, such as carbon
monoxide (CO), hydrocarbons (CH) and
nitrogen oxides (NO
x), is reduced to a
minimum. Control indicator for exhaust emissions
Control indicator
Z illuminates for a few
seconds when the ignition is switched on.
If it illuminates when the engine is running,
there is a fault in the emission control
system or with the diesel particle filter 3.
The permitted emission values may be
exceeded. Consult a workshop.
Flashing with the engine running indicates
a fault that may damage the catalytic
converter. The vehicle’ s electronic system
will switch to an emergency running
program so you may continue to drive
without causing damage, by slowing down
until the flashing stops and the control
indicator is steadily lit. Consult a workshop
immediately. Control indicator for engine electronicsControl indicator
3 illuminates for a few
seconds when the ignition is switched on.
If it illuminates when the engine is running,
there is a fault in the engine electronics.
The electronics switch to the emergency
running program, fuel consumption may
increase and the driveability of the vehicle
may be affected.
In some cases, the fault can be eliminated
by switching the engi ne off and back on
again. If the control indicator illuminates
again when the engine is running, have the
cause of the fault eliminated by a
workshop.
Page 135 of 234

Driving and operation135
Exhaust gases
Do not run engine in enclosed spaces, e.g.
in a garage, or sit in a parked vehicle for an
extended period with the engine running.
Do not drive with tailgate open. If driving
with the tailgate open is necessary, set fan
to highest speed, close windows and
ensure air recirculation mode is off, to allow
entry of outside air.
If the underbody or rear of vehicle is
damaged or corroded, you notice a
change in the sound of the exhaust system,
or whenever you suspect exhaust gases are
penetrating the vehicle interior, consult a
workshop immediately.
When the vehicle is driven for the first time,
wax and oil on the exhaust system may
evaporate, producing smoke-like emissions
which should not be inhaled. Allow wax
and oil to evaporate while the vehicle is in
the open air. Diesel particle filter (DPF) 3
The diesel particle filter removes polluting
soot particles out of the exhaust.
The system contains a self-cleaning
function at certain intervals. The filter is
cleaned by burning the soot particles at
high temperature. This procedure runs
automatically under certain vehicle
conditions and can take up to 15 minutes,
during which time fuel consumption may
increase. The smell and the noise that
occur are normal.
The system cannot automatically clean
itself under certain vehicle conditions, such
as driving short distances.
If control indicator
I illuminates, you
should continue driving, and as soon as the
road and traffic situation permits it,
increase speed to more than 50 km/h
(30 mph) and diesel particle filter cleaning
will start.
Cleaning is quicker at faster speeds and
under load. The engine speed should not
drop below 2000 rpm. The control indicator
extinguishes as soon as cleaning is
complete.
We recommend that you do not turn the
ignition off during cleaning. Maintenance
Have all maintenance work carried out at
the intervals specified by Opel. We
recommend that you entrust this work to
your Opel Partner, who has proper
equipment and trained personnel
available. Electronic testing of systems
permits rapid diagnosis and remedy of
faults. This way, you can be certain that all
components of the vehicle’s electrical,
injection and ignition systems operate
correctly, that your ve
hicle has a low level
of pollutant emission and that the catalytic
converter system will have a long service
life.
You are thereby making an important
contribution towards keeping the air clean
and compliance with emissions legislation.
Checking and adjustment of the fuel-
injection and ignition systems is part of the
scope of a Service. For this reason, you
should have all maintenance work carried
out at the intervals specified in the chapter
"Service, Maintanance" on page 206.
9 Warning
Engine exhaust gases contain poisonous
carbon monoxide, which has no colour or
odour and can be lethal if inhaled.
If exhaust fumes penetrate the vehicle
interior, open the windows and consult a
workshop immediately.
Page 136 of 234
Driving and operation136
Drive control systems
Electronic Stability Control (ESC)
The Electronic Stability Control improves
driving stability when necessary,
independently of the type of road surface
and the tyre grip. It also prevents the drive
wheels from spinning.
The system monitors vehicle movements.
As soon as the vehicle starts to swerve
(understeers/oversteers), engine output is
reduced (the sound of the engine changes)
and individual wheels are specifically
braked. This considerably improves the
driving stability of the vehicle on snow and
ice and on wet or slippery road surfaces.
ESC is ready for operation after the ignition
is switched on and the ESC control
indicators
7, A and J illuminate then
extinguish after approx. 4 seconds. When the ESC comes into action, control
indicator
7 flashes in the instrument panel.
Some noise or vibration may be apparent.
The vehicle is now in a critical situation;
the ESC helps you to keep control of the
vehicle and reminds you to match your
speed to the road conditions.
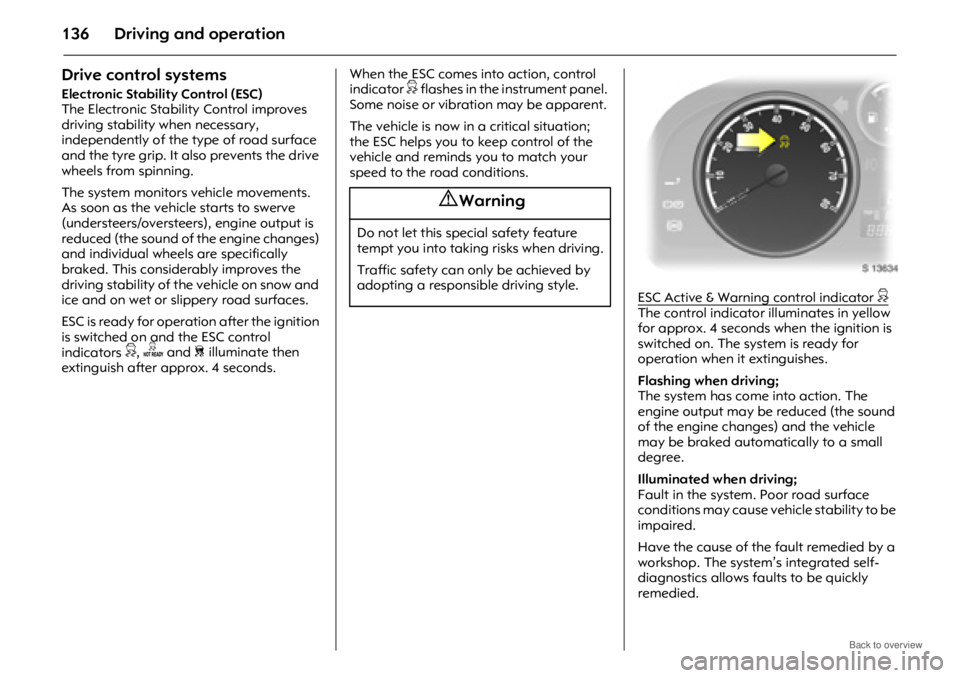
ESC A
ctive & Warning control indicator 7The control indicator illuminates in yellow
for approx. 4 seconds when the ignition is
switched on. The system is ready for
operation when it extinguishes.
Flashing when driving;
The system has come into action. The
engine output may be reduced (the sound
of the engine changes) and the vehicle
may be braked automatically to a small
degree.
Illuminated when driving;
Fault in the system. Poor road surface
conditions may cause vehicle stability to be
impaired.
Have the cause of the fault remedied by a
workshop. The system’s integrated self-
diagnostics allows faults to be quickly
remedied.
9 Warning
Do not let this special safety feature
tempt you into taking risks when driving.
Traffic safety can only be achieved by
adopting a responsible driving style.
Page 137 of 234
Driving and operation137
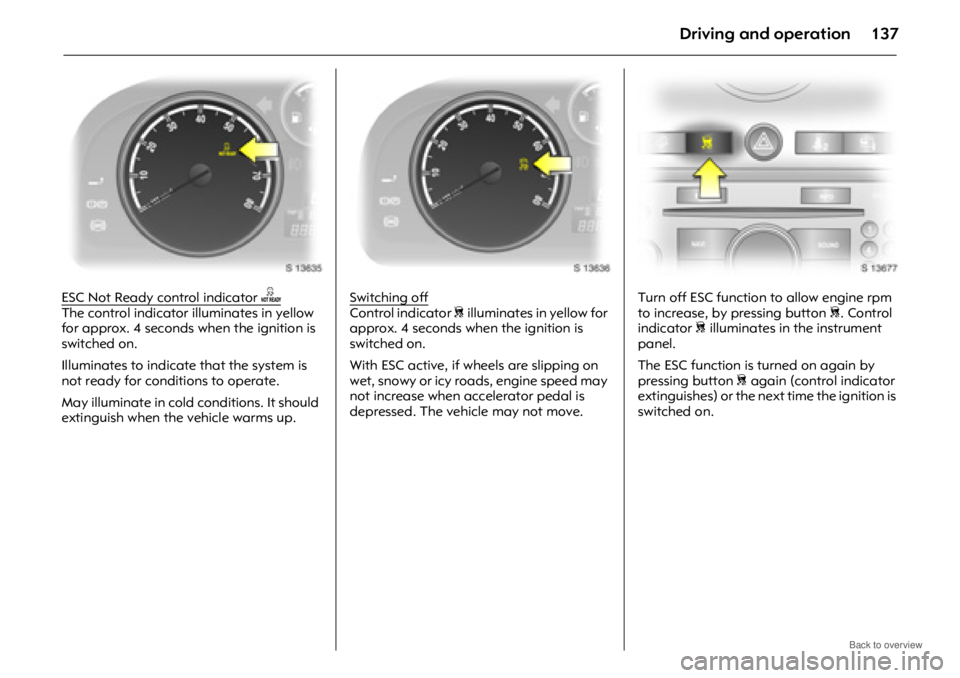
ESC Not Ready control indicator AThe control indicator illuminates in yellow
for approx. 4 seconds when the ignition is
switched on.
Illuminates to indicate that the system is
not ready for conditions to operate.
May illuminate in cold conditions. It should
extinguish when the vehicle warms up. Switching offControl indicator
J illuminates in yellow for
approx. 4 seconds when the ignition is
switched on.
With ESC active, if wheels are slipping on
wet, snowy or icy roads, engine speed may
not increase when accelerator pedal is
depressed. The vehicle may not move. Turn off ESC function to allow engine rpm
to increase, by pressing button
J. Control
indicator J illuminates in the instrument
panel.
The ESC function is turned on again by
pressing button J again (control indicator
extinguishes) or the next time the ignition is
switched on.
Page 138 of 234
Driving and operation138
Hydraulic Brake Assist (HBA)
When the ESC function comes into action
and recognises any emergency situations
requiring hard braking, it automatically
delivers increased braking pressure to the
wheels.
Active Rollover Protection (ARP)
If the vehicle moves in an unstable manner,
this function helps the vehicle maintain
normal stability.
Trailer Stability Assist (TSA) 3
TSA monitors vehicle movements when
towing a caravan or trailer. If the system
detects lurching movements, engine power
is reduced and the vehicle/trailer
combination is selectiv ely braked until the
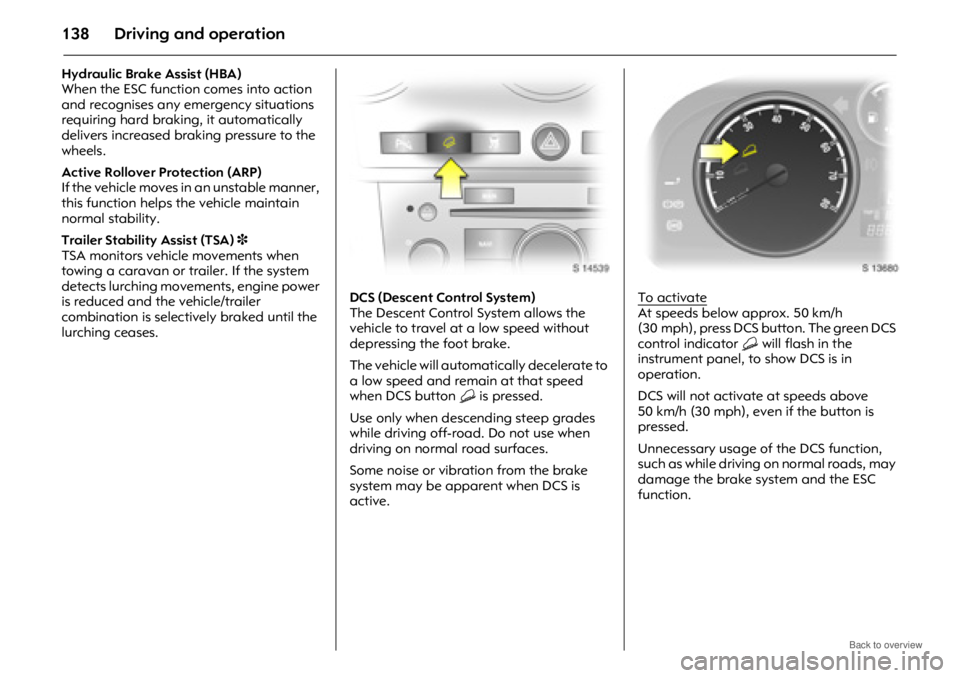
lurching ceases. DCS (Descent Control System)
The Descent Control System allows the
vehicle to travel at a low speed without
depressing the foot brake.
The vehicle will automatically decelerate to
a low speed and remain at that speed
when DCS button
5 is pressed.
Use only when descending steep grades
while driving off-road. Do not use when
driving on normal road surfaces.
Some noise or vibration from the brake
system may be apparent when DCS is
active. To activate
At speeds below approx. 50 km/h
(30 mph), press DCS button. The green DCS
control indicator
5 will flash in the
instrument panel, to show DCS is in
operation.
DCS will not activate at speeds above
50 km/h (30 mph), even if the button is
pressed.
Unnecessary usage of the DCS function,
such as while driving on normal roads, may
damage the brake system and the ESC
function.
Page 139 of 234
Driving and operation139
To deactivatePress DCS button again. The green DCS
control indicator 5 will extinguish.
Depressing the foot brake or accelerator
will also cause the DCS function to be
deactivated.
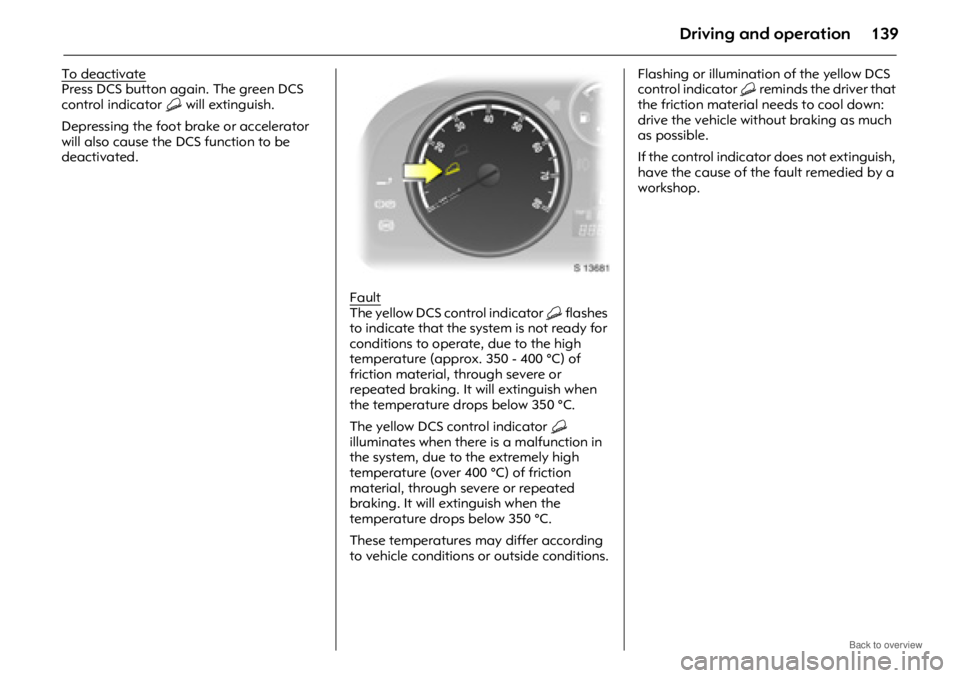
Fault
The yellow DCS control indicator 5 flashes
to indicate that the system is not ready for
conditions to operate, due to the high
temperature (approx. 350 - 400 °C) of
friction material, through severe or
repeated braking. It will extinguish when
the temperature dr ops below 350 °C.
The yellow DCS control indicator 5
illuminates when there is a malfunction in
the system, due to the extremely high
temperature (over 400 °C) of friction
material, through severe or repeated
braking. It will extinguish when the
temperature drops below 350 °C.
These temperatures may differ according
to vehicle conditions or outside conditions. Flashing or illumination of the yellow DCS
control indicator
5 reminds the driver that
the friction material needs to cool down:
drive the vehicle without braking as much
as possible.
If the control indicator does not extinguish,
have the cause of the fault remedied by a
workshop.
Page 140 of 234
Driving and operation140
Cruise control 3
Cruise control can store and maintain
speeds over approx. 30 km/h (20 mph).
Deviation from the stored speed may occur
when driving uphill or downhill.
For safety reasons, cruise control cannot
be activated until the foot brake has been
depressed once.
Cruise control is operated with buttons
d, c and e on the turn signal lever. Do not use cruise control if it is not
advisable to maintain a constant speed
(e.g. in situations presenting a danger to
yourself and other road users, in heavy
traffic or on winding, slippery or greasy
roads).
With automatic transmission, only use
cruise control while in
D.
When cruise control is active, reaction
times may be increased, due to the
different position of the feet.
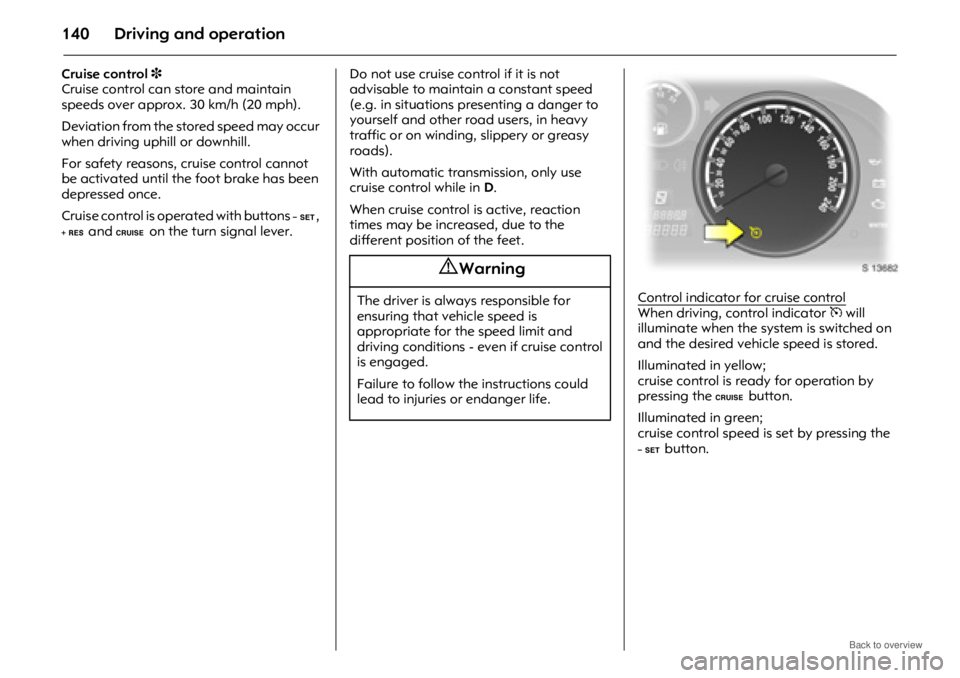
Control indicator for cruise control
When driving, control indicator m will
illuminate when the syst em is switched on
and the desired vehicle speed is stored.
Illuminated in yellow;
cruise control is ready for operation by
pressing the
ebutton.
Illuminated in green;
cruise control speed is set by pressing the
d button.
9 Warning
The driver is always responsible for
ensuring that vehicle speed is
appropriate for the speed limit and
driving conditions - even if cruise control
is engaged.
Failure to follow the instructions could
lead to injuries or endanger life.