OPEL COMBO 2010 Owners Manual
Manufacturer: OPEL, Model Year: 2010, Model line: COMBO, Model: OPEL COMBO 2010Pages: 212, PDF Size: 2.49 MB
Page 101 of 212
95
Climate control
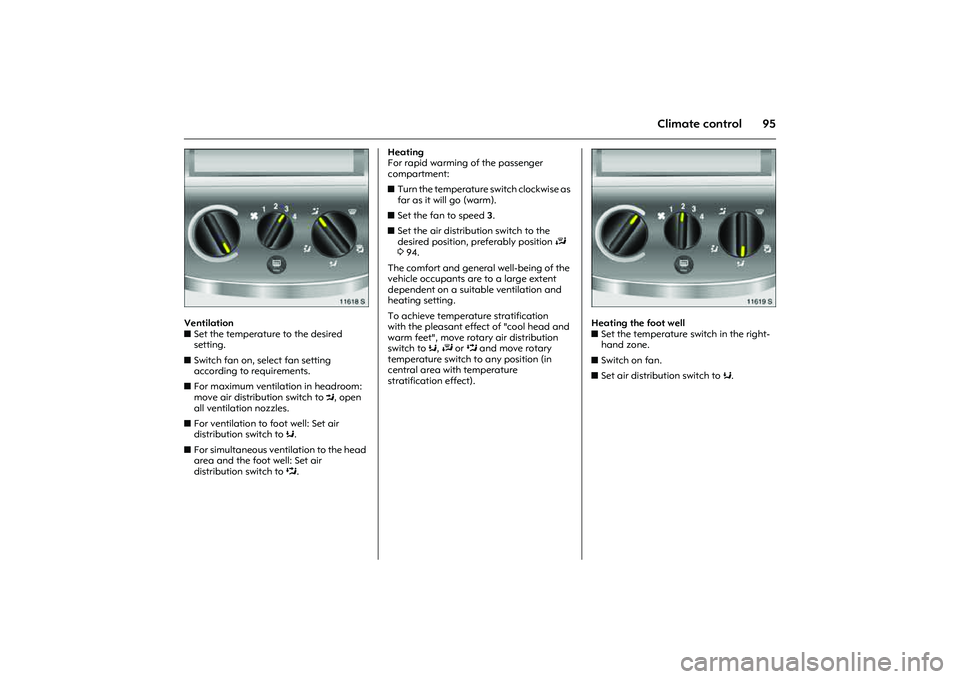
Picture no: 11618s.tif
Ventilation
zSet the temperature to the desired
setting.
zSwitch fan on, select fan setting
according to requirements.
zFor maximum ventilation in headroom:
move air distribution switch to M, open
all ventilation nozzles.
zFor ventilation to foot well: Set air
distribution switch to K.
zFor simultaneous ventilation to the head
area and the foot well: Set air
distribution switch to L. Heating
For rapid warming of the passenger
compartment:
zTurn the temperature switch clockwise as
far as it will go (warm).
zSet the fan to speed 3.
zSet the air distribution switch to the
desired position, preferably position J
394.
The comfort and general well-being of the
vehicle occupants are to a large extent
dependent on a suitable ventilation and
heating setting.
To achieve temperature stratification
with the pleasant effect of "cool head and
warm feet", move rotary air distribution
switch toK, J or L and move rotary
temperature switch to any position (in
central area with temperature
stratification effect).
Picture no: 11619s.tif
Heating the foot well
zSet the temperature switch in the right-
hand zone.
zSwitch on fan.
zSet air distribution switch to K.
Page 102 of 212
96 Climate control
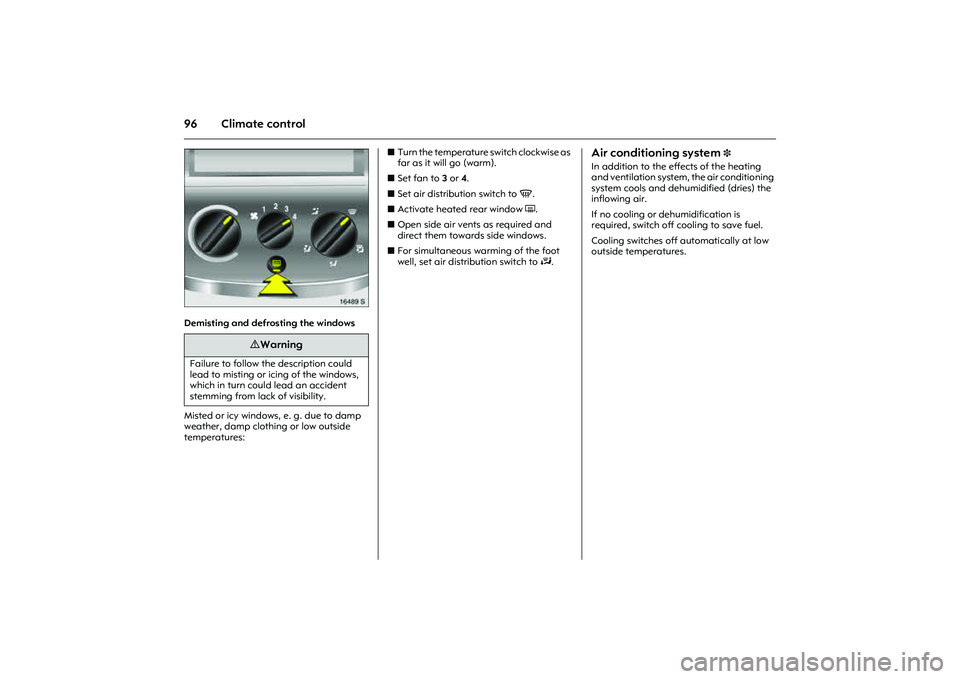
Picture no: 16489s.tif
Demisting and defrosting the windows
Misted or icy windows, e. g. due to damp
weather, damp clothing or low outside
temperatures:zTurn the temperature switch clockwise as
far as it will go (warm).
zSet fan to 3 or 4.
zSet air distribution switch to V.
zActivate heated rear window Ü.
zOpen side air vents as required and
direct them towards side windows.
zFor simultaneous warming of the foot
well, set air distribution switch to J.
Air conditioning system
3
In addition to the effects of the heating
and ventilation system, the air conditioning
system cools and dehumidified (dries) the
inflowing air.
If no cooling or dehumidification is
required, switch off cooling to save fuel.
Cooling switches off automatically at low
outside temperatures.
9 Warning
Failure to follow the description could
lead to misting or icing of the windows,
which in turn could lead an accident
stemming from lack of visibility.
Page 103 of 212
97
Climate control
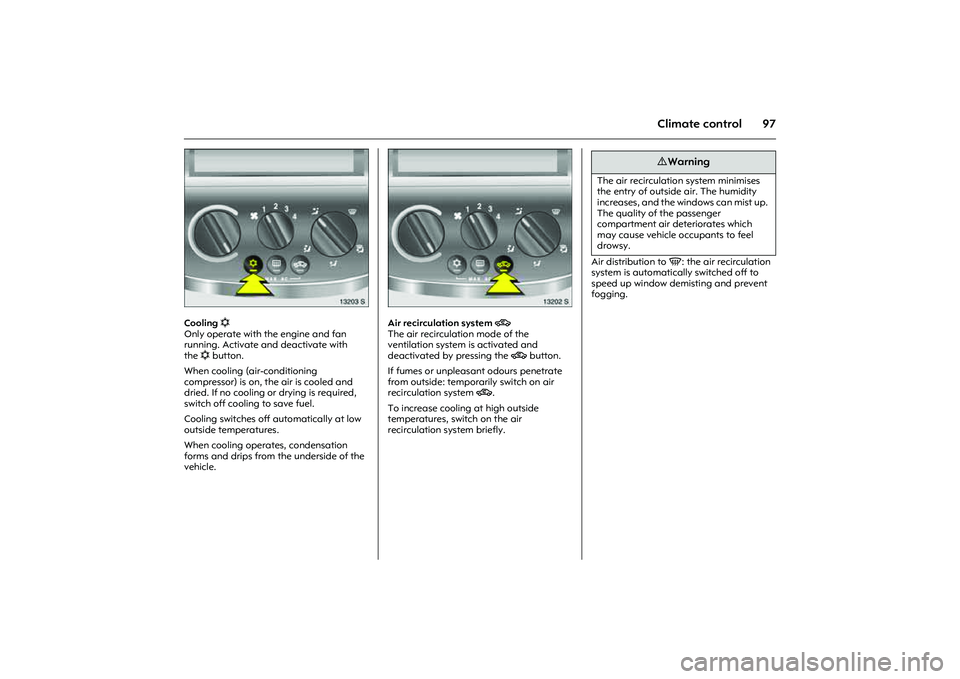
Picture no: 13203s.tif
Cooling n
Only operate with the engine and fan
running. Activate and deactivate with
then button.
When cooling (air-conditioning
compressor) is on, the air is cooled and
dried. If no cooling or drying is required,
switch off cooling to save fuel.
Cooling switches off automatically at low
outside temperatures.
When cooling operates, condensation
forms and drips from the underside of the
vehicle.
Picture no: 13202s.tif
Air recirculation system 4
The air recirculation mode of the
ventilation system is activated and
deactivated by pressing the 4 button.
If fumes or unpleasant odours penetrate
from outside: temporarily switch on air
recirculation system 4.
To increase cooling at high outside
temperatures, switch on the air
recirculation system briefly.Air distribution to V: the air recirculation
system is automatically switched off to
speed up window demisting and prevent
fogging.
9 Warning
The air recirculation system minimises
the entry of outside air. The humidity
increases, and the windows can mist up.
The quality of the passenger
compartment air deteriorates which
may cause vehicle occupants to feel
drowsy.
Page 104 of 212
98 Climate control
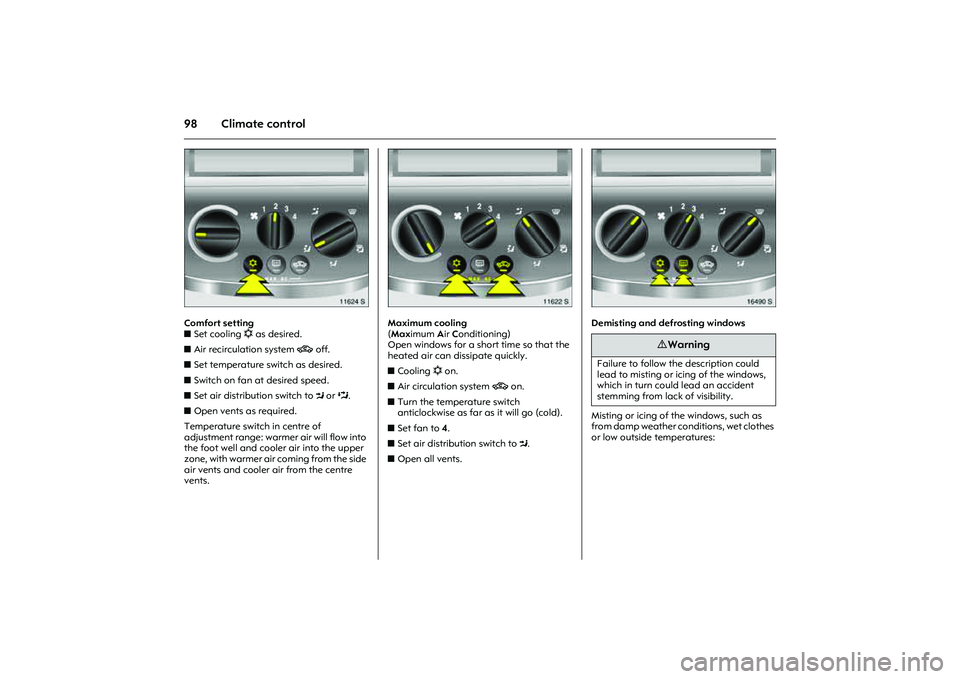
Picture no: 11624s.tif
Comfort setting
zSet cooling n as desired.
zAir recirculation system 4 off.
zSet temperature switch as desired.
zSwitch on fan at desired speed.
zSet air distribution switch to M or L.
zOpen vents as required.
Temperature switch in centre of
adjustment range: warmer air will flow into
the foot well and cooler air into the upper
zone, with warmer air coming from the side
air vents and cooler air from the centre
vents.
Picture no: 11622s.tif
Maximum cooling
(Maximum Air Conditioning)
Open windows for a short time so that the
heated air can dissipate quickly.
zCooling n on.
zAir circulation system 4 on.
zTurn the temperature switch
anticlockwise as far as it will go (cold).
zSet fan to 4.
zSet air distribution switch to M.
zOpen all vents.
Picture no: 16490s.tif
Demisting and defrosting windows
Misting or icing of the windows, such as
from damp weather conditions, wet clothes
or low outside temperatures:
9 Warning
Failure to follow the description could
lead to misting or icing of the windows,
which in turn could lead an accident
stemming from lack of visibility.
Page 105 of 212
99
Climate control
zCooling n on, the air conditioning
compressor automatically switches off in
low outdoor temperatures (ice
formation),
zTurn the temperature switch clockwise.
zSet fan to 3 or 4.
zAir distribution switch to V, air
recirculation system 4 switches off
automatically.
– or –
If there is still moisture in the system after
previous air conditioning operation, the
windows may mist up. To prevent this,
set air distribution to K before starting
engine and set to V approx. 5 seconds
after starting.
zActivate heated rear window Ü.
zOpen side air vents as required and
direct them towards side windows.
Picture no: 11615s.tif
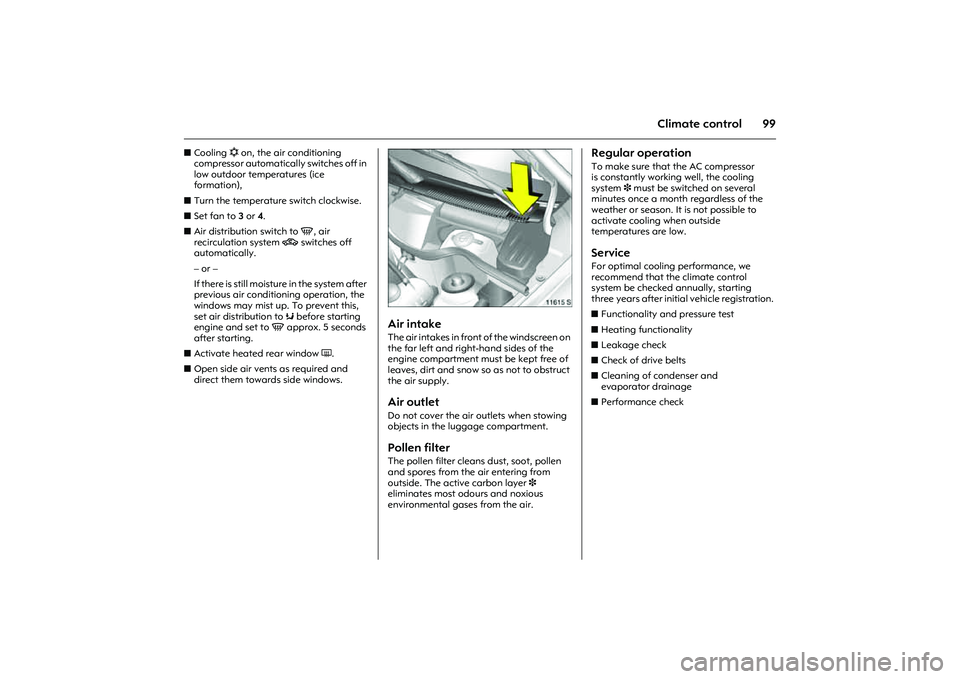
Air intake The air intakes in front of the windscreen on
the far left and right-hand sides of the
engine compartment must be kept free of
leaves, dirt and snow so as not to obstruct
the air supply. Air outletDo not cover the air outlets when stowing
objects in the luggage compartment. Pollen filter The pollen filter cleans dust, soot, pollen
and spores from the air entering from
outside. The active carbon layer 3
eliminates most odours and noxious
environmental gases from the air.
Regular operationTo make sure that the AC compressor
is constantly working well, the cooling
system3 must be switched on several
minutes once a month regardless of the
weather or season. It is not possible to
activate cooling when outside
temperatures are low. Service For optimal cooling performance, we
recommend that the climate control
system be checked annually, starting
three years after initial vehicle registration.
zFunctionality and pressure test
zHeating functionality
zLeakage check
zCheck of drive belts
zCleaning of condenser and
evaporator drainage
zPerformance check
Page 106 of 212
100 Driving and operationDriving and operation
Manual transmission
automated
3
The Easytronic transmission permits
manual (manual mode) or automatic gear
shifting (automatic mode), both with
automatic clutch control.
Picture no: 12478s.tif
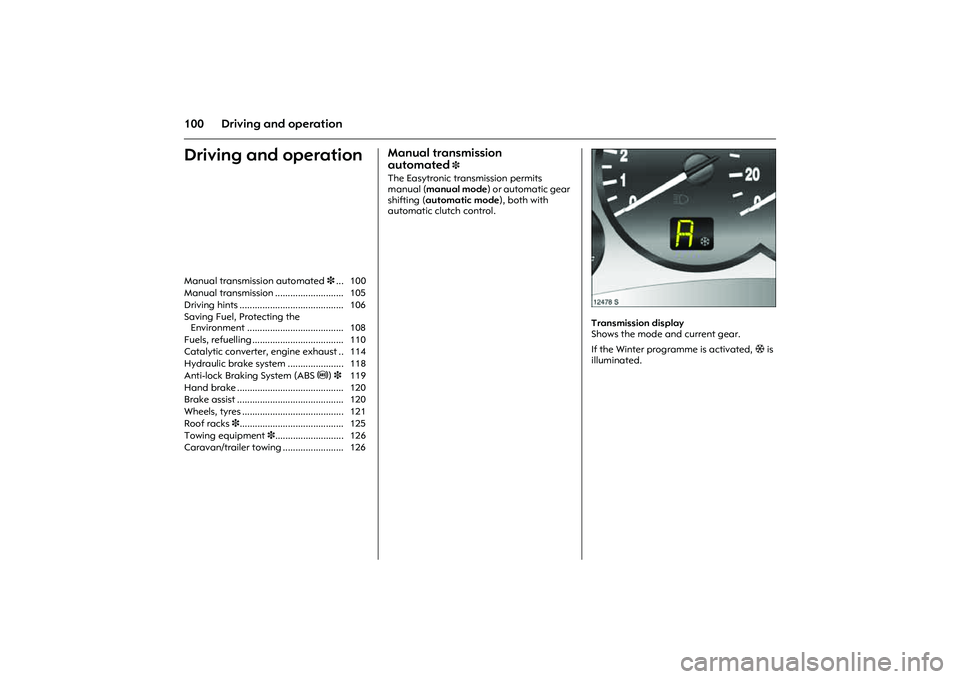
Transmission display
Shows the mode and current gear.
If the Winter programme is activated, T is
illuminated. Manual transmission automated3... 100
Manual transmission ........................... 105
Driving hints ......................................... 106
Saving Fuel, Protecting the
Environment ...................................... 108
Fuels, refuelling .................................... 110
Catalytic converter, engine exhaust .. 114
Hydraulic brake system ...................... 118
Anti-lock Braking System (ABSu)3 119
Hand brake .......................................... 120
Brake assist .......................................... 120
Wheels, tyres ........................................ 121
Roof racks 3......................................... 125
Towing equipment 3........................... 126
Caravan/trailer towing ........................ 126
Page 107 of 212
101
Driving and operation
Starting the engine
Briefly operate foot brake when starting
the engine. The engine can now be started
in position N and with the foot brake
operated. N appears in the gear display. If
the foot brake is not operated, "N" flashes
in the gear display and the engine cannot
be started.
If no brake lights are operational, the
engine will not start.
Picture no: 12466s.tif
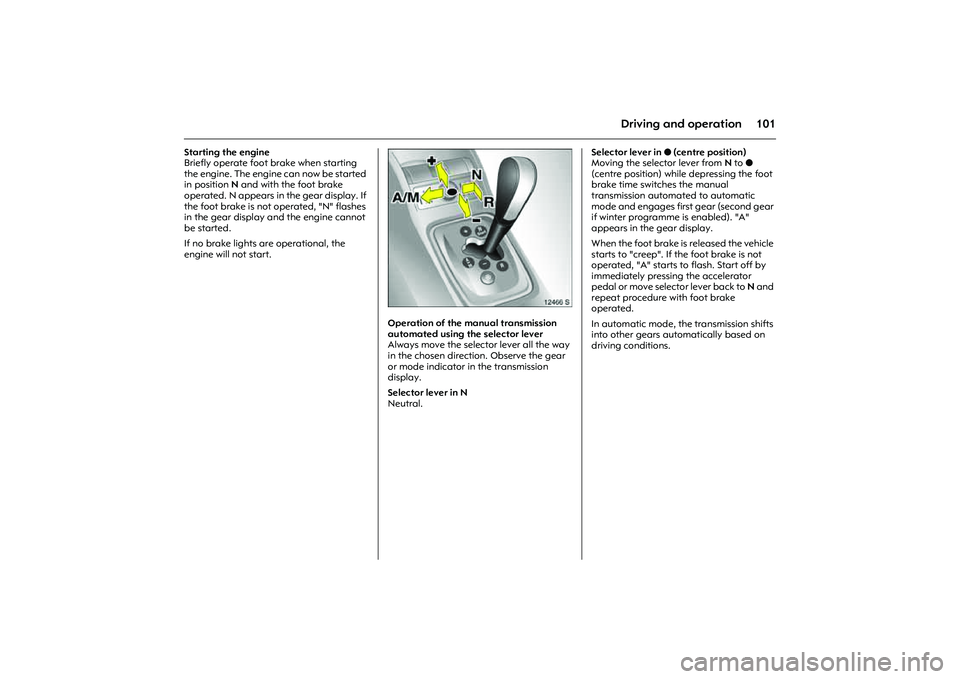
Operation of the manual transmission
automated using the selector lever
Always move the selector lever all the way
in the chosen direction. Observe the gear
or mode indicator in the transmission
display.
Selector lever in N
Neutral. Selector lever in o (centre position)
Moving the selector lever from N to o
(centre position) while depressing the foot
brake time switches the manual
transmission automated to automatic
mode and engages first gear (second gear
if winter programme is enabled). "A"
appears in the gear display.
When the foot brake is released the vehicle
starts to "creep". If the foot brake is not
operated, "A" starts to flash. Start off by
immediately pressing the accelerator
pedal or move selector lever back to N and
repeat procedure with foot brake
operated.
In automatic mode, the transmission shifts
into other gears automatically based on
driving conditions.
Page 108 of 212
102 Driving and operation
Picture no: 12466s.tif
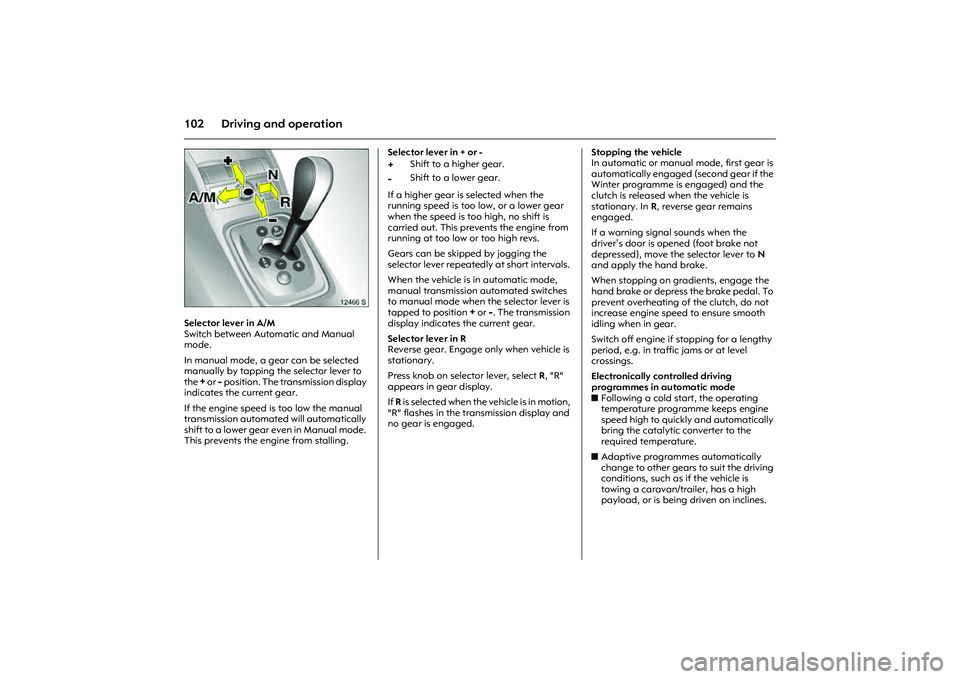
Selector lever in A/M
Switch between Automatic and Manual
mode.
In manual mode, a gear can be selected
manually by tapping the selector lever to
the
+ or
- position. The transmission display
indicates the current gear.
If the engine speed is too low the manual
transmission automated will automatically
shift to a lower gear even in Manual mode.
This prevents the engine from stalling. Selector lever in + or -
If a higher gear is selected when the
running speed is too low, or a lower gear
when the speed is too high, no shift is
carried out. This prevents the engine from
running at too low or too high revs.
Gears can be skipped by jogging the
selector lever repeatedly at short intervals.
When the vehicle is in automatic mode,
manual transmission automated switches
to manual mode when the selector lever is
tapped to position
+ or
-. The transmission
display indicates the current gear.
Selector lever in R
Reverse gear. Engage only when vehicle is
stationary.
Press knob on selector lever, select R, "R"
appears in gear display.
If R is selected when the vehicle is in motion,
"R" flashes in the transmission display and
no gear is engaged. Stopping the vehicle
In automatic or manual mode, first gear is
automatically engaged (second gear if the
Winter programme is engaged) and the
clutch is released when the vehicle is
stationary. In R, reverse gear remains
engaged.
If a warning signal sounds when the
driver’s door is opened (foot brake not
depressed), move the selector lever to N
and apply the hand brake.
When stopping on gradients, engage the
hand brake or depress the brake pedal. To
prevent overheating of the clutch, do not
increase engine speed to ensure smooth
idling when in gear.
Switch off engine if stopping for a lengthy
period, e.g. in traffic jams or at level
crossings.
Electronically controlled driving
programmes in automatic mode
zFollowing a cold start, the operating
temperature programme keeps engine
speed high to quickly and automatically
bring the catalytic converter to the
required temperature.
zAdaptive programmes automatically
change to other gears to suit the driving
conditions, such as if the vehicle is
towing a caravan/trailer, has a high
payload, or is being driven on inclines.
+
Shift to a higher gear.
-
Shift to a lower gear.
Page 109 of 212
103
Driving and operation
Picture no: 12479S.tif
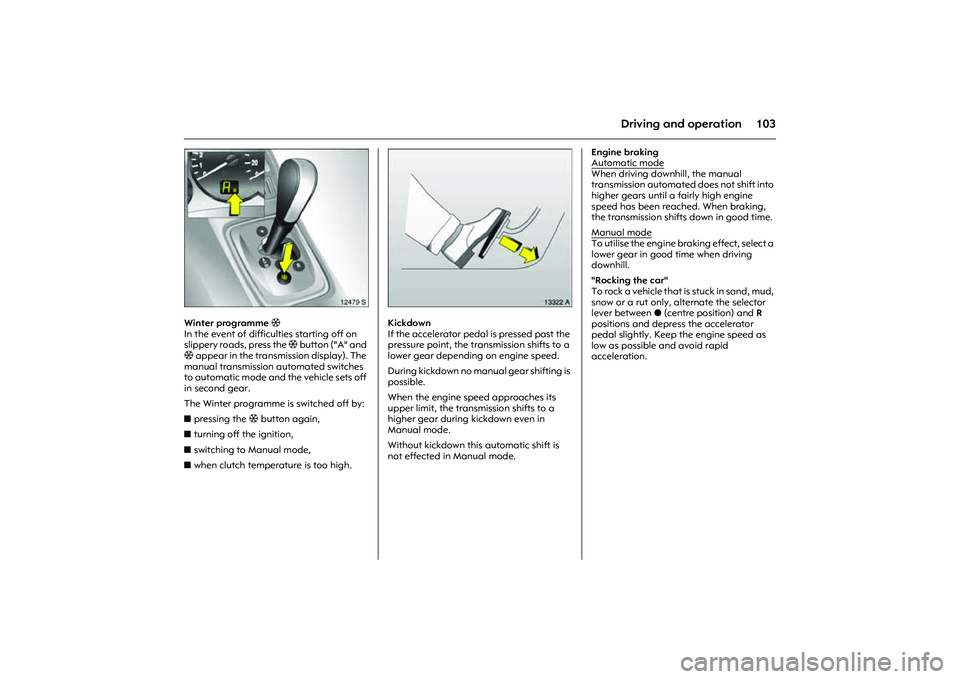
Winter programme T
In the event of difficulties starting off on
slippery roads, press the T b u t t o n ( " A " a n d
T appear in the transmission display). The
manual transmission automated switches
to automatic mode and the vehicle sets off
in second gear.
The Winter programme is switched off by:
zpressing the T button again,
zturning off the ignition,
zswitching to Manual mode,
zwhen clutch temperature is too high.
Picture no: 13322a.tif
Kickdown
If the accelerator pedal is pressed past the
pressure point, the transmission shifts to a
lower gear depending on engine speed.
During kickdown no manual gear shifting is
possible.
When the engine speed approaches its
upper limit, the transmission shifts to a
higher gear during kickdown even in
Manual mode.
Without kickdown this automatic shift is
not effected in Manual mode. Engine braking
Automatic mode
When driving downhill, the manual
transmission automated does not shift into
higher gears until a fairly high engine
speed has been reached. When braking,
the transmission shifts down in good time.
Manual modeTo utilise the engine braking effect, select a
lower gear in good time when driving
downhill.
"Rocking the car"
T o r o c k a v e h i c l e t h a t i s s t u c k i n s a n d , m u d ,
snow or a rut only, alternate the selector
lever between o (centre position) and R
positions and depress the accelerator
pedal slightly. Keep the engine speed as
low as possible and avoid rapid
acceleration.
Page 110 of 212
104 Driving and operation
Picture no: 14083j.tif
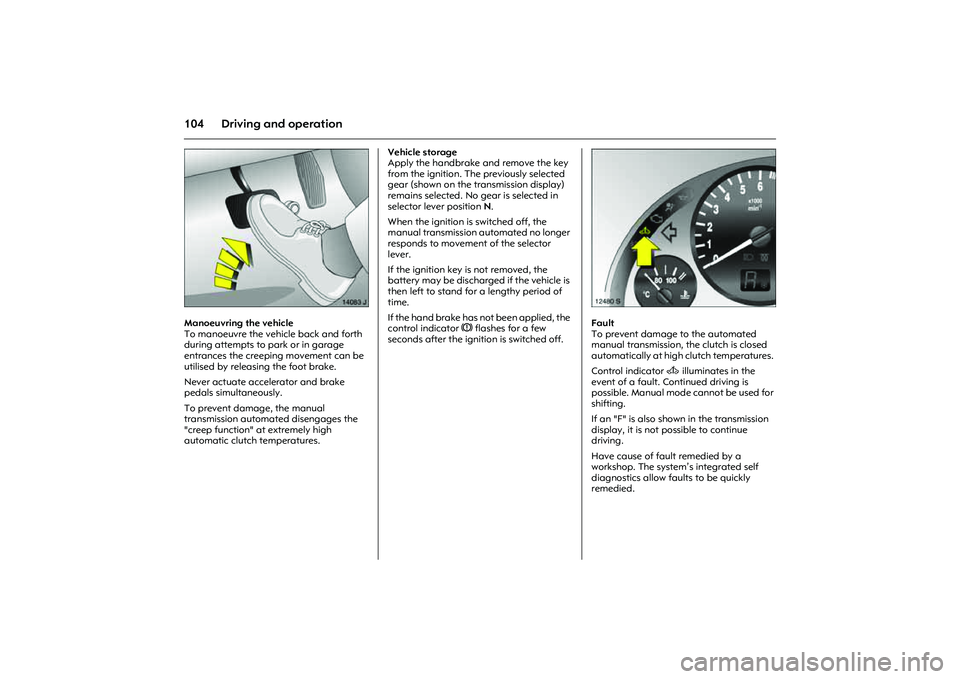
Manoeuvring the vehicle
To manoeuvre the vehicle back and forth
during attempts to park or in garage
entrances the creeping movement can be
utilised by releasing the foot brake.
Never actuate accelerator and brake
pedals simultaneously.
To prevent damage, the manual
transmission automated disengages the
"creep function" at extremely high
automatic clutch temperatures. Vehicle storage
Apply the handbrake and remove the key
from the ignition. The previously selected
gear (shown on the transmission display)
remains selected. No gear is selected in
selector lever position N.
When the ignition is switched off, the
manual transmission automated no longer
responds to movement of the selector
lever.
If the ignition key is not removed, the
battery may be discharged if the vehicle is
then left to stand for a lengthy period of
time.
If the hand brake has not been applied, the
control indicator R flashes for a few
seconds after the ignition is switched off.
Picture no: 12480s.tif
Fault
To prevent damage to the automated
manual transmission, the clutch is closed
automatically at high clutch temperatures.
Control indicator A illuminates in the
event of a fault. Continued driving is
possible. Manual mode cannot be used for
shifting.
If an "F" is also shown in the transmission
display, it is not possible to continue
driving.
Have cause of fault remedied by a
workshop. The system’s integrated self
diagnostics allow faults to be quickly
remedied.